172
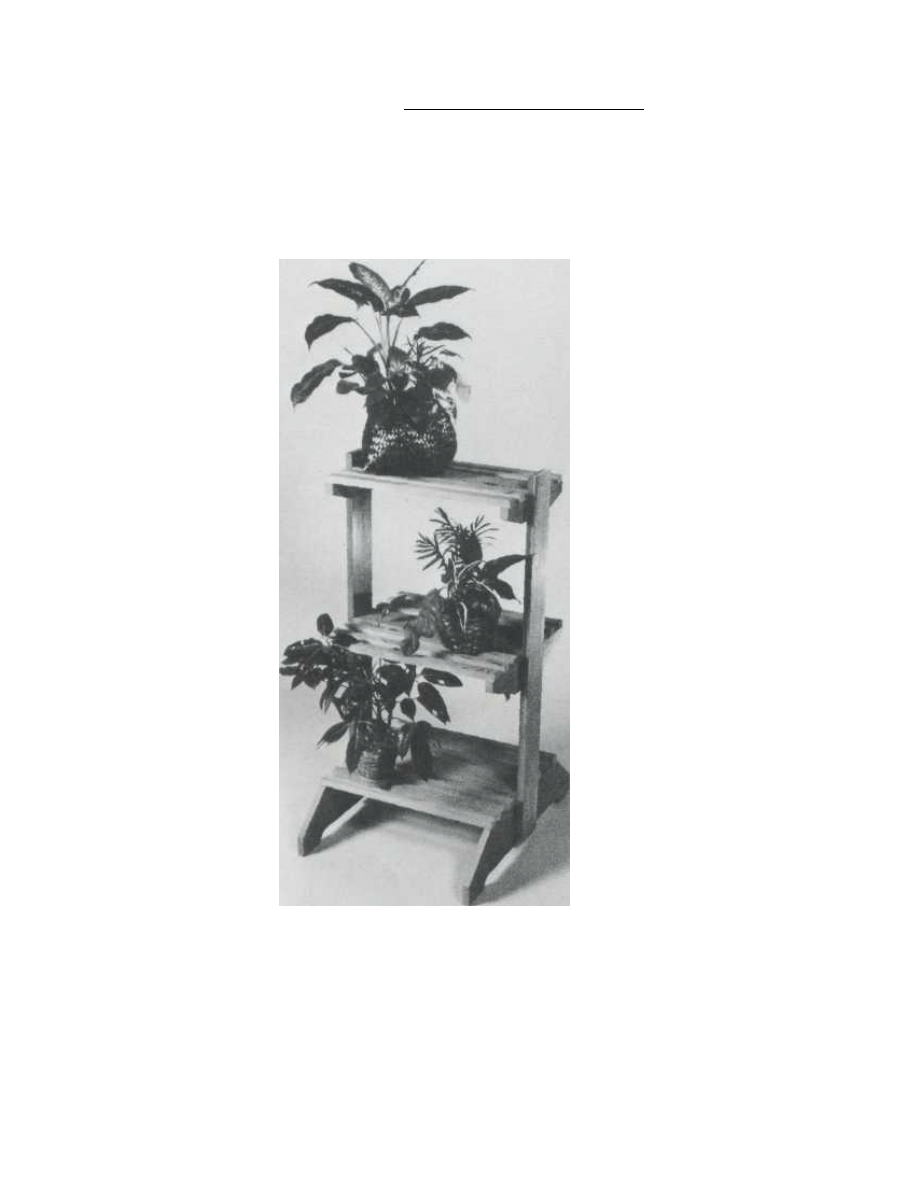
PLANT DISPLAY
Copyright 2004 Martian Auctions
791
Here's the perfect alternative to
crowding potted plants in your
window sills: the plant display.
This project has three shelves that
are slatted to allow more sunlight
to reach the plants on the lower
shelves.
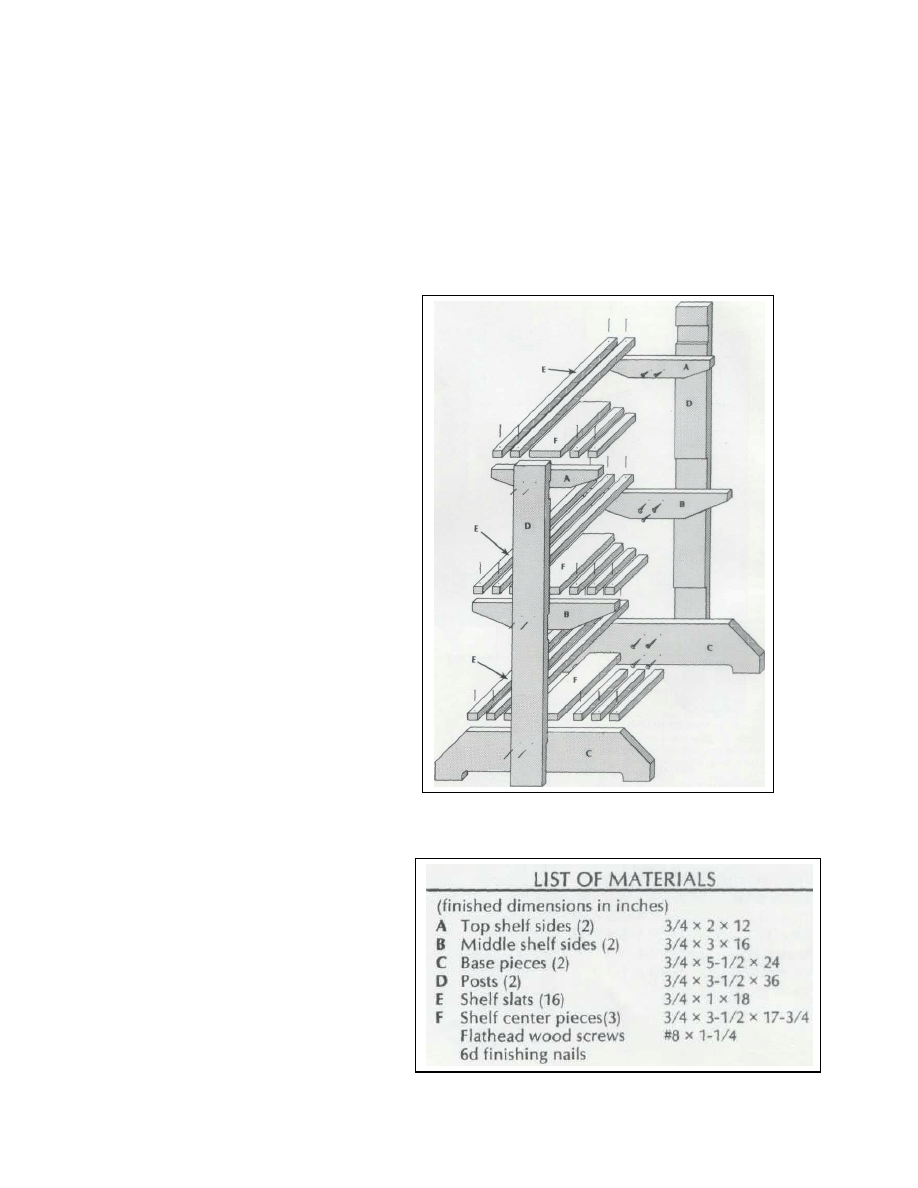
1. Begin with ten feet of 1 x 12
lumber. Use redwood, cedar, or
pressure-treated lumber if the dis
play is intended for outdoor use.
2. Cut all pieces to size on a table
saw.
3. Lay out and mark the various
angles on the ends of the top shelf
sides (A), middle shelf sides (B),
and the base pieces (C). Cut these
angles using a bandsaw and 1/4"
blade.
4. Using a router or a saw fitted
with dado blades, cut 1/8"-deep
dadoes and rabbets in the posts (D)
for the shelf sides and base pieces.
5.Dill screw holes in the shelf
sides and the base pieces, and cor
responding pilot holes in the posts
Drill pilot holes in the shelf slats (E)
and center pieces (F) to accommodate
6d finishing nails. (Use one of the nails
as a drill bit to assure that the
diameter of the pilot holes is drilled
accurately.) 6. Sand all of the pieces
smooth. The sawed edges should be
given an extra sanding, or be touched
up
with a hand plane, to make sure
they are sufficiently smooth. 7.
Attach the slats and shelf center
pieces to the sides with 6d finishing
nails. Attach the centers first, and
then install the slats at 1" intervals.
Set all nails below the surface and
fill the holes with wood putty that
matches the finish you plan to use.
8. Attach the shelves to the posts
using #8 x 1-1/4" flathead wood
screws.
9. Finish the plant display with poly-
urethane or some other water-
resistant finish if it is not made
of redwood, cedar, or pressure-
treated lumber.
Copyright 2004 Martian Auctions
792

Copyright 2004 Martian Auctions
793
Wyszukiwarka
Podobne podstrony:
PLANT EVOLUTION
4 Plant Structure, Growth and Development, before ppt
plant cloning
KB04 SMD DISPLAY
#07 Flue Gas Plant
No 004 CCS Demonstration Plant fully integrated into new unit 858 MW
Sansewieria gwinejska, wężownica łac Sansevieria trifasciata ang Snake plant
Ściągi, Angielski 4, air pollution zanieczyszczenie powietrza alternative energy energia alternatywn
fitopatologia, Microarrays are one of the new emerging methods in plant virology currently being dev
Heavy metal toxicity,effect on plant growth and metal uptake
Display A Z
easy500 Text display HLP EN
Display, Imager Troubleshooting
Topic 13 AHL Plants IB III Lecture 2 Plant Tissues and Organs
PLANT DIVISIONS
Adjustable Plant Shelves
więcej podobnych podstron