
Tutorial for Flat Herringbone, Herringbone Square Tube, &
Herringbone Circle Tube
This tutorial covers these 3 types of Herringbone stitch. I have included directions for
making the turn at the end of each row to hide your thread in the Flat Herringbone with
the permission of Ty Wolfe Designs. No other reproductions or copying are allowed
without written consent of designer. This Tutorial may not be used for teaching
purposes. The designer has made every effort to ensure the accuracy of the pattern. The
Designer, however, can not except responsibility for any human error that may occur
during the beading. If you have any questions or comments, Please feel free to email me
at
billiejsanchez@aol.com
.
Copyright © 2004 Billie J. Sanchez
Flat Herringbone Tutorial
This is a great stitch to use if you are looking to have a piece that has some texture to it. It
works great with Seed Beads or Delica's. Once you learn this stitch you can easily do a
Herringbone Square Tube or a Herringbone Round Tube.
You will need:
Seed or Delica beads of your choice
size 12 beading needle
thread (Nymo, Silamide, whatever you normaly would use)
scissors
Thread conditioner of your choice (beeswax, Thread Haven)
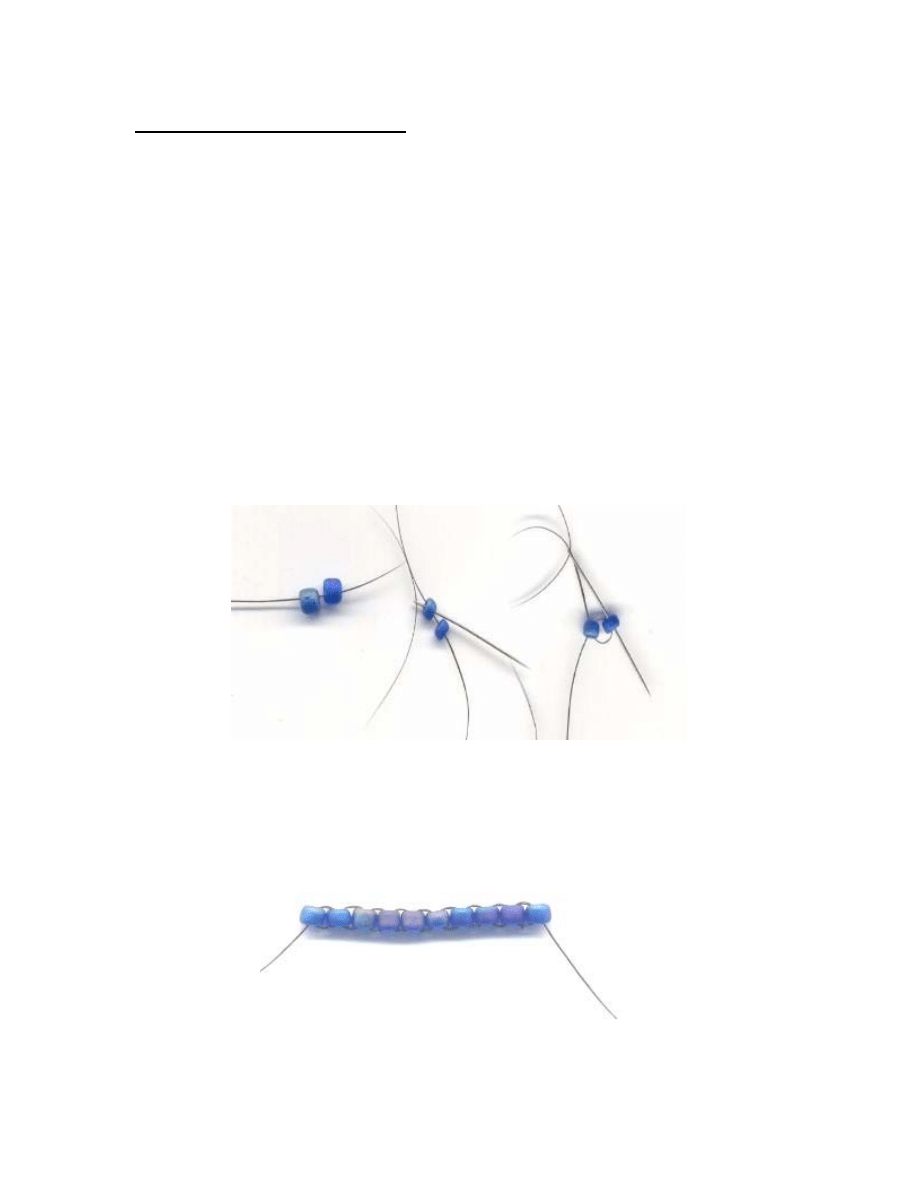
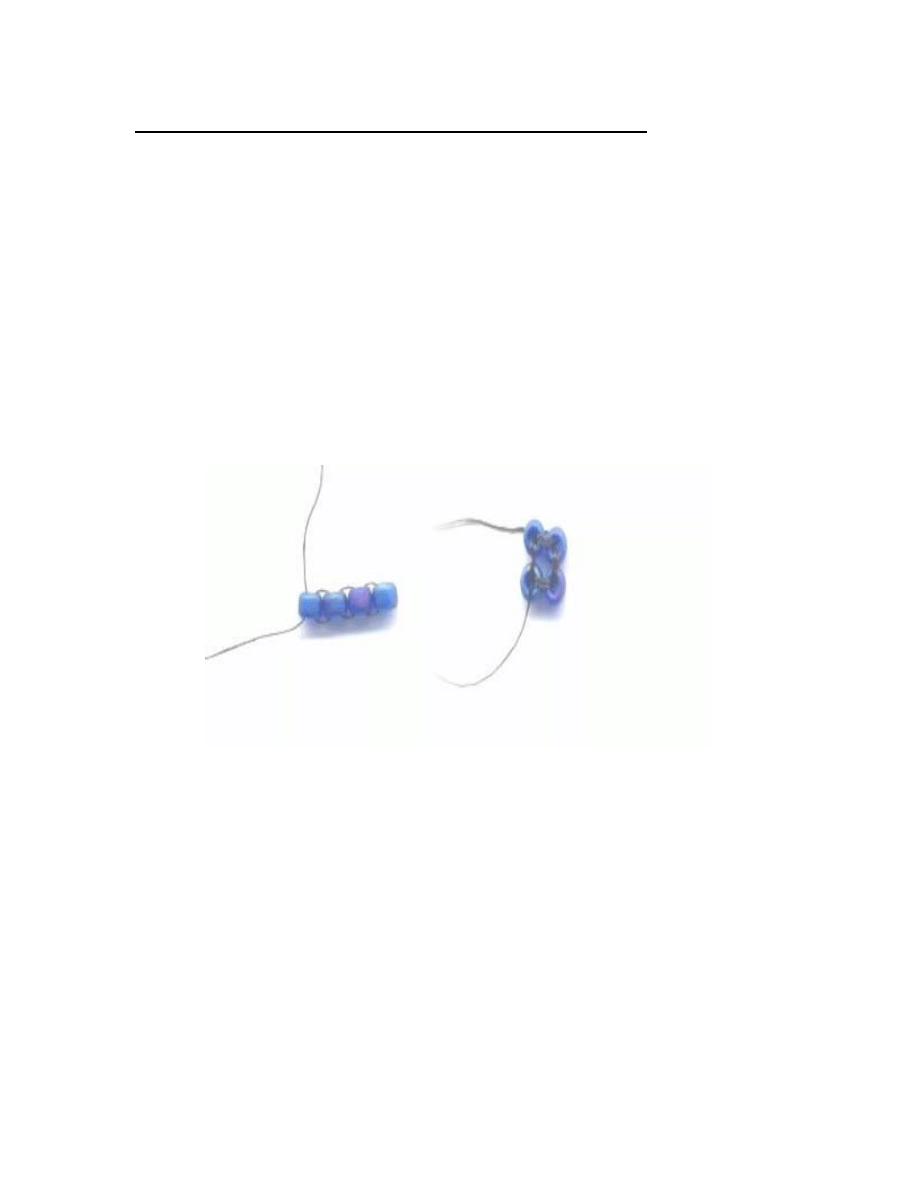
1) You are going to start your piece with the ladder stitch.
This is done by: Stringing 2 beads, Go back through the 1
st
bead string and then
through the second bead. You will then continue this until your piece is the length you
desire, always ending with an even number. Herringbone is worked in 2's.
This is a fairly easy stitch that works up fast. Here is what your row should
look like when you have reached your desired length. Mine is a row of 10.
Copyright © 2004 Billie J. Sanchez
2) You will now start your next row by picking up 2 beads and going down into the 2
nd
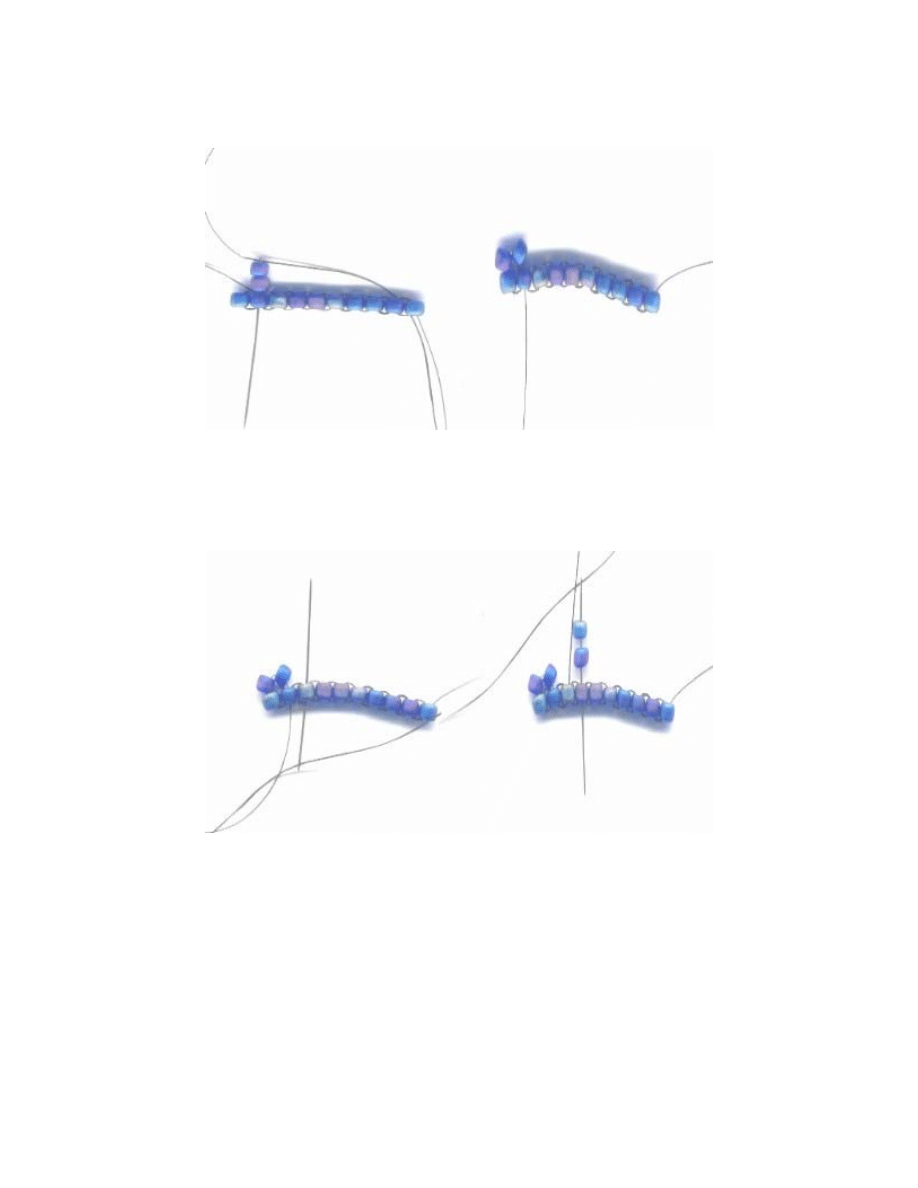
bead in the first row.
Your needle is now coming out of the bottom of the second bead. Go up
through the 3
rd
bead in the row, pick up 2 more beads and go down through
the 4
th
bead in the row.
Copyright © 2004 Billie J. Sanchez
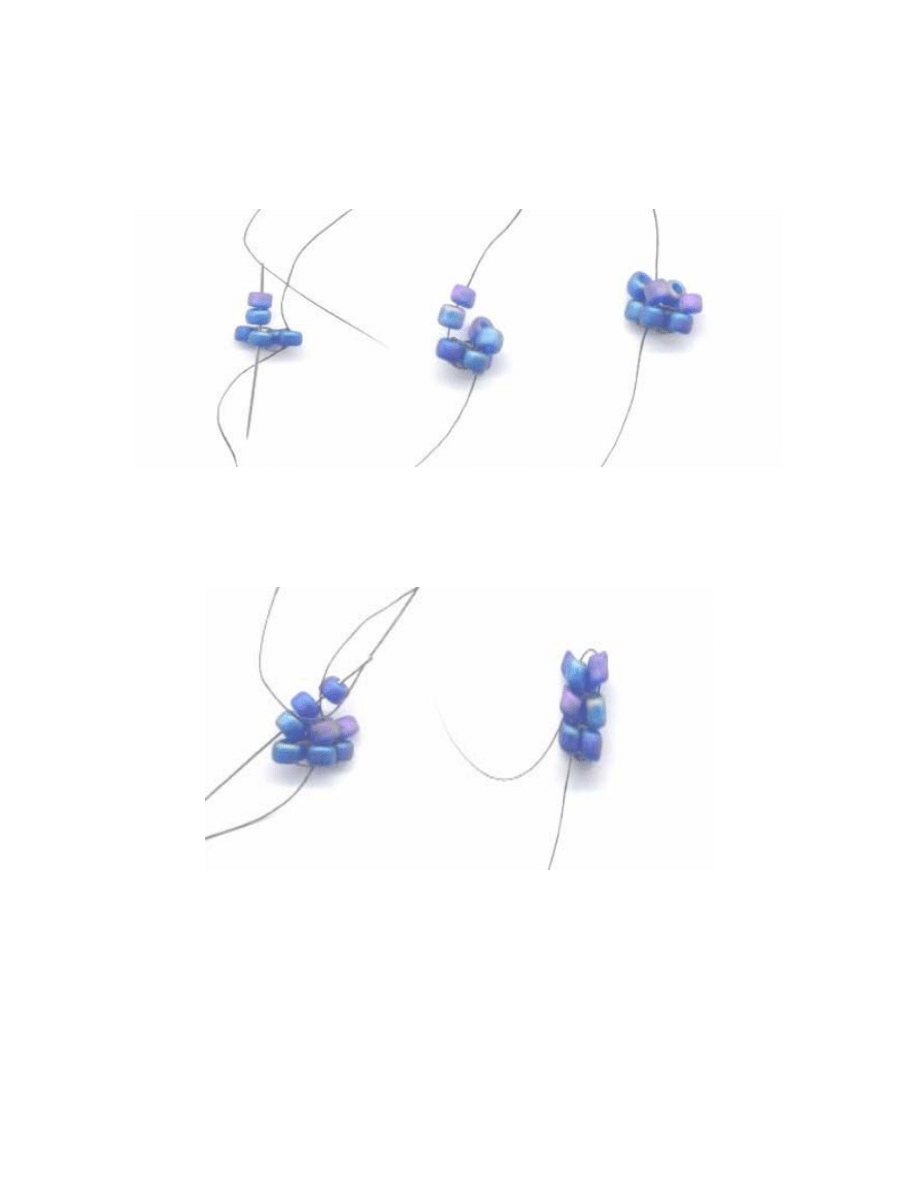
Continue until you reach the end of the row. You are now ready to do your
turn and start Row 3.
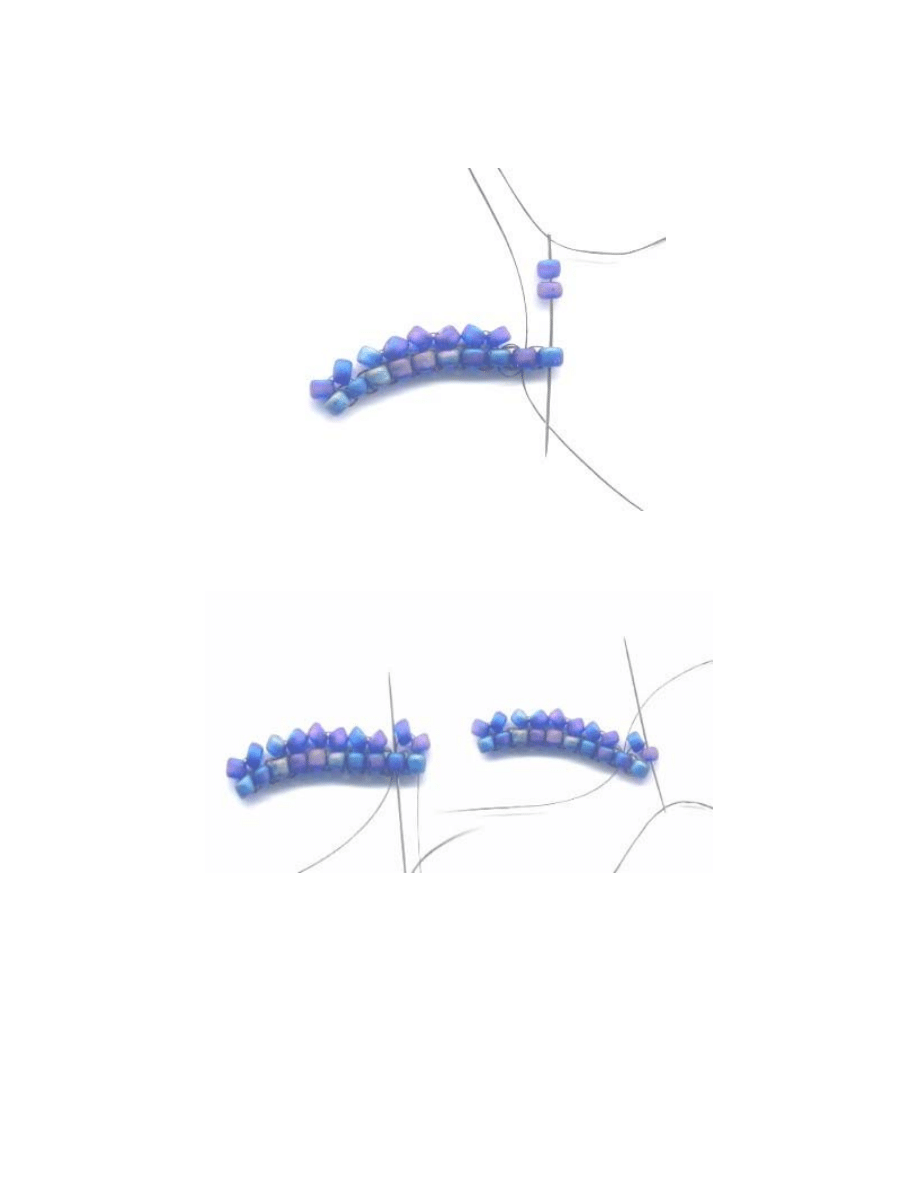
3) Your needle is now coming out of the bottom of the last bead in the row. To do the
turn you will go back up through the second to last bead in row 1, then go over and up
through the last bead in row 2.
Copyright © 2004 Billie J. Sanchez
4) Pick up two beads and go back down through the second bead in the row, and come
back up through the 3
rd
bead in the row. Continue until the row is done.
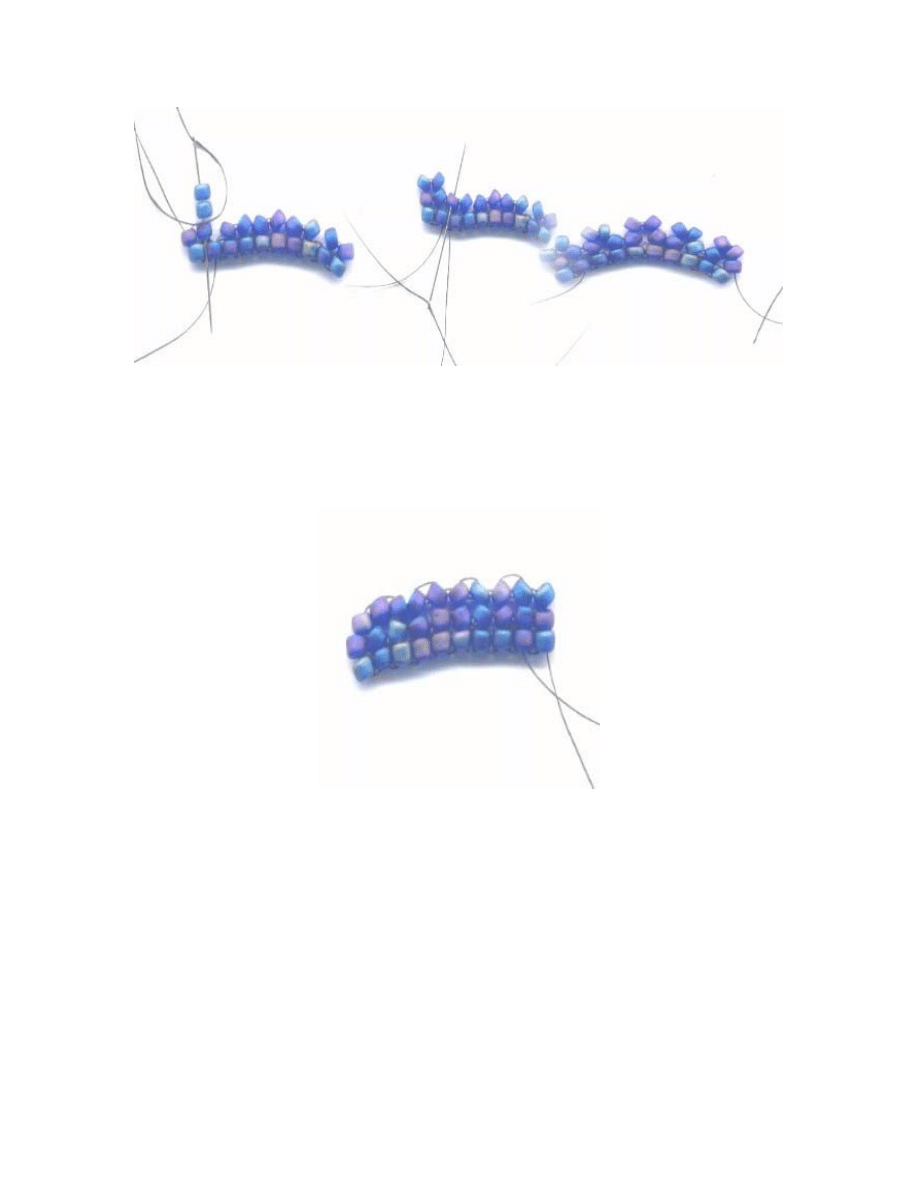
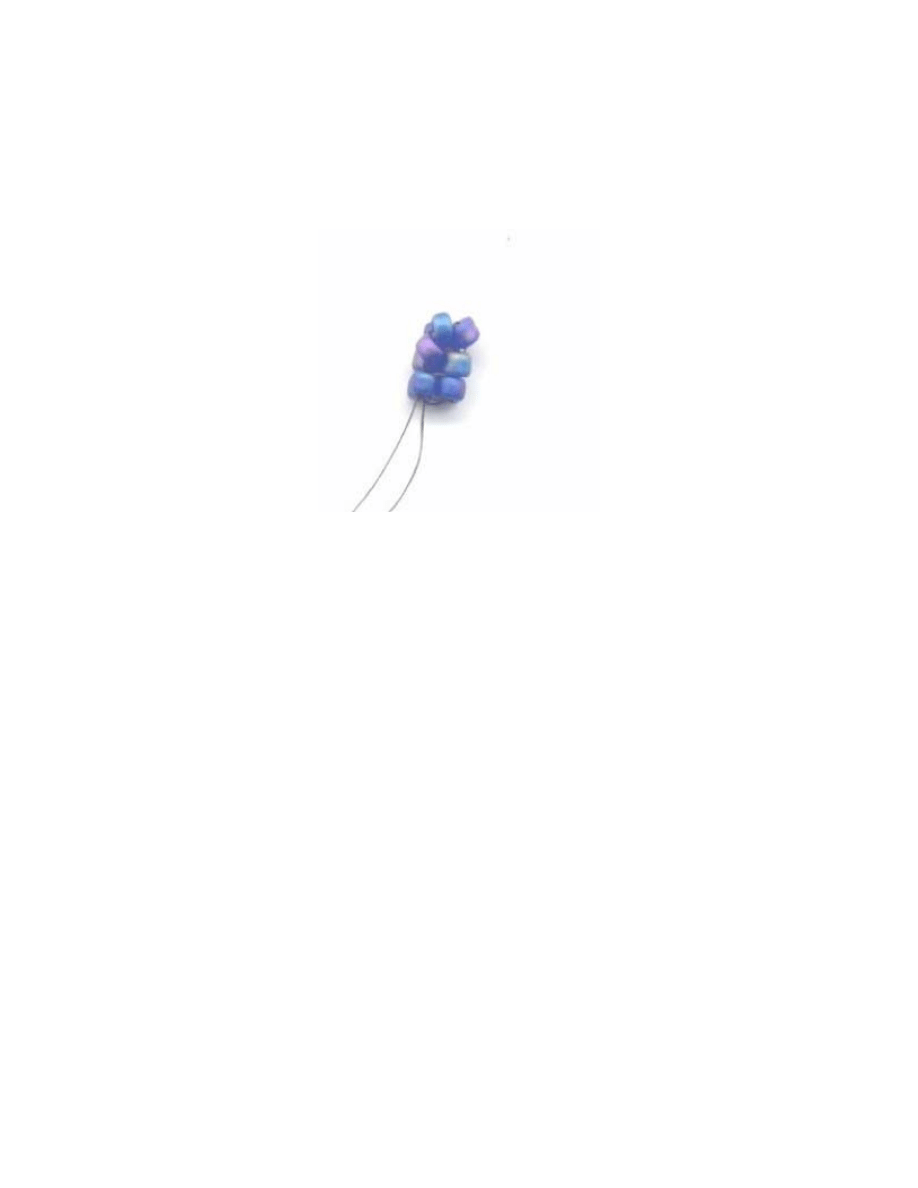
5) You will now do the turn as show in Step 3, and work Row 4 as discribed in Step 2.
Continue working each row with your turns at the end of each row until you have
finished your piece. To clean up your final row you can go back through the beads like
you were doing the Ladder stitch discribed in Step 1. This will give you a more
finished look when you are done.
6) Make sure to weave all tails back into your work and tie off securely. You now have a
piece done in Flat Herringbone.
Copyright © 2004 Billie J. Sanchez
Herringbone Square Tube/Circle Tube Directions
This is a great stitch to use for a unique necklace or strape on a piece. This is fairly easy
to do and works up fast. It works great with Seed Beads or Delicas. Once you have
managed this stitch you can easily do the Herringbone Round Tube.
You will need:
Seed or Delica beads of your choice
size 12 beading needle
thread (Nymo, Silamide, whatever you normaly would use)
scissors
Thread conditioner of your choice (beeswax, Thread Haven)
1)Start out with a base done in the Ladder Stitch 4 beads in length. You will then
go through the first bead in the row and then back through the last bead forming a
square of beads.
Copyright © 2004 Billie J. Sanchez
2)Your needle is now coming out the top of the last bead, you will pick up 2 beads
and go down through the next bead in the row. You will then come up through the
next bead in the row, Pick up two beads and go down through the next bead in the
row. You now have Row 2 done.
3)You will now come back up through the next bead and the one above it. Next Pick
up 2 beads and go down through the next bead. Come up through the next bead in the
row, pick up 2 beads and go down through the last bead.
Copyright © 2004 Billie J. Sanchez
4)You now have you first 3 rows finished, follow Step 3 until you have
reach the length you desire. To clean up your final row you can go back
through the beads like you were doing the Ladder stitch discribed in Step 1
of the Flat Herringbone Directions. This will give you a more finished
look when you are done.
5)Make sure to weave all tails back into your work and tie off securely. You now have
a piece done in Flat Herringbone.
************To make this into a Herringbone Circle Tube, increase your base row
(the one done in Ladder stitch) to 6 or more beads. Follow Steps 2 through 5 to get a
round shaped Herringbone Tube. This makes a great necklace or strap for a piece.******
Copyright © 2004 Billie J. Sanchez
Wyszukiwarka
Podobne podstrony:
Nebulosity Tutorial for Canon U Nieznany
Matlab Tutorial for Systems and Control Theory (MIT) (1999) WW
Stitch Alternate for Circular Herringbone
Silver s Dagger Tutorial for beginners
Non Programmer s Tutorial for Python 2 6
Eni Oken tutorial herringbone
Circular Flat Peyote Tutorial
Installing LAMP On Ubuntu For Newbies, HowtoForge Linux Howtos and Tutorials
ArcScan for ArcGIS Tutorial
2 PROGISP FOR VCDS Tutorial
Bradley M Kuhn Picking Up Perl A Tutorial Book for New Perl Programmers
Brick Stitch or Flat Peyote Graph Paper (for Oval Seed Beads)
więcej podobnych podstron