Circular Flat Peyote Instructions
by Kathleen Castell, copyright 2001
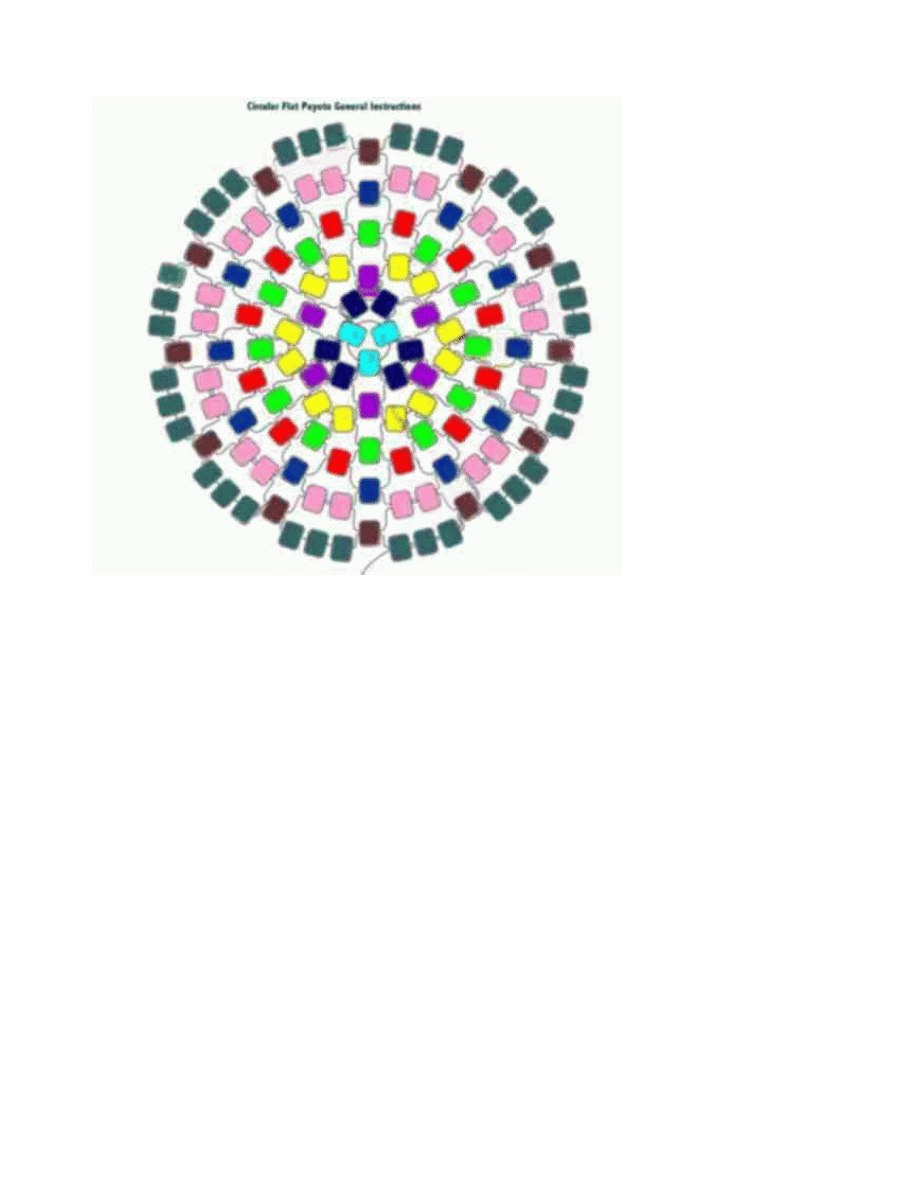
Basic Flat Circular Peyote Instructions
This stitch is worked form the center outward, increasing as you go to fill out the
rows and keep the finished piece flat. The increases need to be equally spaced.
It is a good idea to use contrasting beads (just two colors are okay) when you first
start out until you get comfortable with the stitch.
To bead the example above, start out by stringing 3 beads on to your needle and
sliding them toward the end of the thread, and leave a tail. Tie the beads into a circle,
using a good square knot, and pass your needle through the first bead.
For the next row, add
2
beads in each space. At the end of the row, pass your needle
through the first bead of the last row and the first two beads of the current row.
Each row will vary in the number of beads per stitch. As your piece gets wider, you
will need to increase the number of beads per row. For row three, you will add
1
bead
between each of the double sets of beads and the spaces in between the sets, for a
total of
6
beads on this row.
You may use whatever number of beads for your first ring. This stitch lends itself to
experimenting with some pretty geometrical designs. Enjoy.
Wyszukiwarka
Podobne podstrony:
Brick Stitch or Flat Peyote Graph Paper (for Oval Seed Beads)
Brick Stitch or Flat Peyote Graph Paper
Eni Oken tutorial Grey Rose Montee Circular Pendant
tutorial for flat herringbone
bugzilla tutorial[1]
freeRadius AD tutorial
Alignmaster tutorial by PAV1007 Nieznany
free sap tutorial on goods reciept
ms excel tutorial 2013
Joomla Template Tutorial
ALGORYTM, Tutoriale, Programowanie
8051 Tutorial uart
Pattern Peyote Little Mouse Amulet
B tutorial
Labview Tutorial
Obraz partycji (ghost2003) Tutorial
[LAB5]Tutorial do kartkówki
M2H Networking Tutorial Original
więcej podobnych podstron