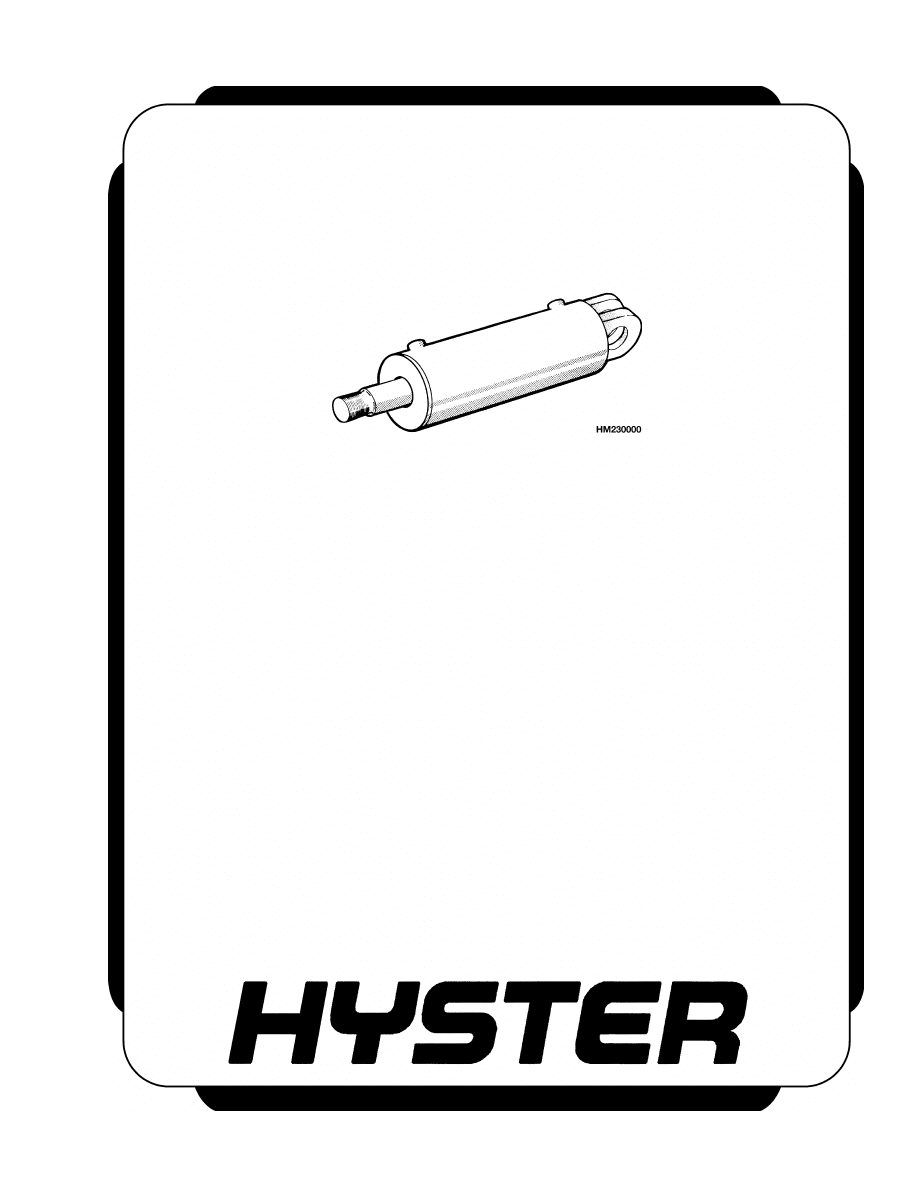
TILT CYLINDERS
S3.50-5.50XM (S70-120XM) [E004, F004]
PART NO. 1510469
2100 SRM 986

SAFETY PRECAUTIONS
MAINTENANCE AND REPAIR
• When lifting parts or assemblies, make sure all slings, chains, or cables are correctly
fastened, and that the load being lifted is balanced. Make sure the crane, cables, and
chains have the capacity to support the weight of the load.
• Do not lift heavy parts by hand, use a lifting mechanism.
• Wear safety glasses.
• DISCONNECT THE BATTERY CONNECTOR before doing any maintenance or repair
on electric lift trucks. Disconnect the battery ground cable on internal combustion lift
trucks.
• Always use correct blocks to prevent the unit from rolling or falling. See HOW TO PUT
THE LIFT TRUCK ON BLOCKS in the Operating Manual or the Periodic Mainte-
nance section.
• Keep the unit clean and the working area clean and orderly.
• Use the correct tools for the job.
• Keep the tools clean and in good condition.
• Always use HYSTER APPROVED parts when making repairs. Replacement parts
must meet or exceed the specifications of the original equipment manufacturer.
• Make sure all nuts, bolts, snap rings, and other fastening devices are removed before
using force to remove parts.
• Always fasten a DO NOT OPERATE tag to the controls of the unit when making repairs,
or if the unit needs repairs.
• Be sure to follow the WARNING and CAUTION notes in the instructions.
• Gasoline, Liquid Petroleum Gas (LPG), Compressed Natural Gas (CNG), and Diesel fuel
are flammable. Be sure to follow the necessary safety precautions when handling these
fuels and when working on these fuel systems.
• Batteries generate flammable gas when they are being charged. Keep fire and sparks
away from the area. Make sure the area is well ventilated.
NOTE: The following symbols and words indicate safety information in this
manual:
WARNING
Indicates a condition that can cause immediate death or injury!
CAUTION
Indicates a condition that can cause property damage!

Tilt Cylinders
Table of Contents
TABLE OF CONTENTS
General ...............................................................................................................................................................
Description .........................................................................................................................................................
Tilt Cylinder Repair ...........................................................................................................................................
Remove ...........................................................................................................................................................
Disassemble ...................................................................................................................................................
Clean ..............................................................................................................................................................
Inspect ............................................................................................................................................................
Assemble ........................................................................................................................................................
Install .............................................................................................................................................................
Tilt Cylinder Leak Check ..................................................................................................................................
Tilt Cylinder Stroke and Mast Tilt Angle Adjustment ....................................................................................
Tilt Cylinder Specifications ...............................................................................................................................
This section is for the following models:
S3.50-5.50XM (S70-120XM) [E004, F004]
©2004 HYSTER COMPANY
i

"THE
QUALITY
KEEPERS"
HYSTER
APPROVED
PARTS

2100 SRM 986
Tilt Cylinder Repair
General
This section contains a description and repair procedures for the tilt cylinders.
Description
The tilt cylinders are used to move the mast forward
and backward. When the cylinder rod is extended
(tilted forward), oil enters the tilt cylinder port be-
hind the piston. Oil pressure pushes the cylinder rod
out of the cylinder. Oil in front of the piston returns
to the hydraulic tank. When the cylinder rod is re-
tracted (tilted backward), oil enters the port in front
of the piston. Oil pressure pushes the cylinder rod
into the tilt cylinder. The oil behind the piston re-
turns to the hydraulic tank.
Tilt Cylinder Repair
REMOVE
WARNING
Before removing the tilt cylinder(s), tilt the
mast forward. Use a chain to hold the mast to
the frame and prevent the mast from moving
forward after the tilt cylinders have been re-
moved.
1.
Disconnect hydraulic lines at tilt cylinder. Install
caps on hydraulic lines and plugs in ports.
WARNING
Do not push anchor pins out of the rod end with
your fingers. Do not permit the tilt cylinders to
drop and become damaged.
2.
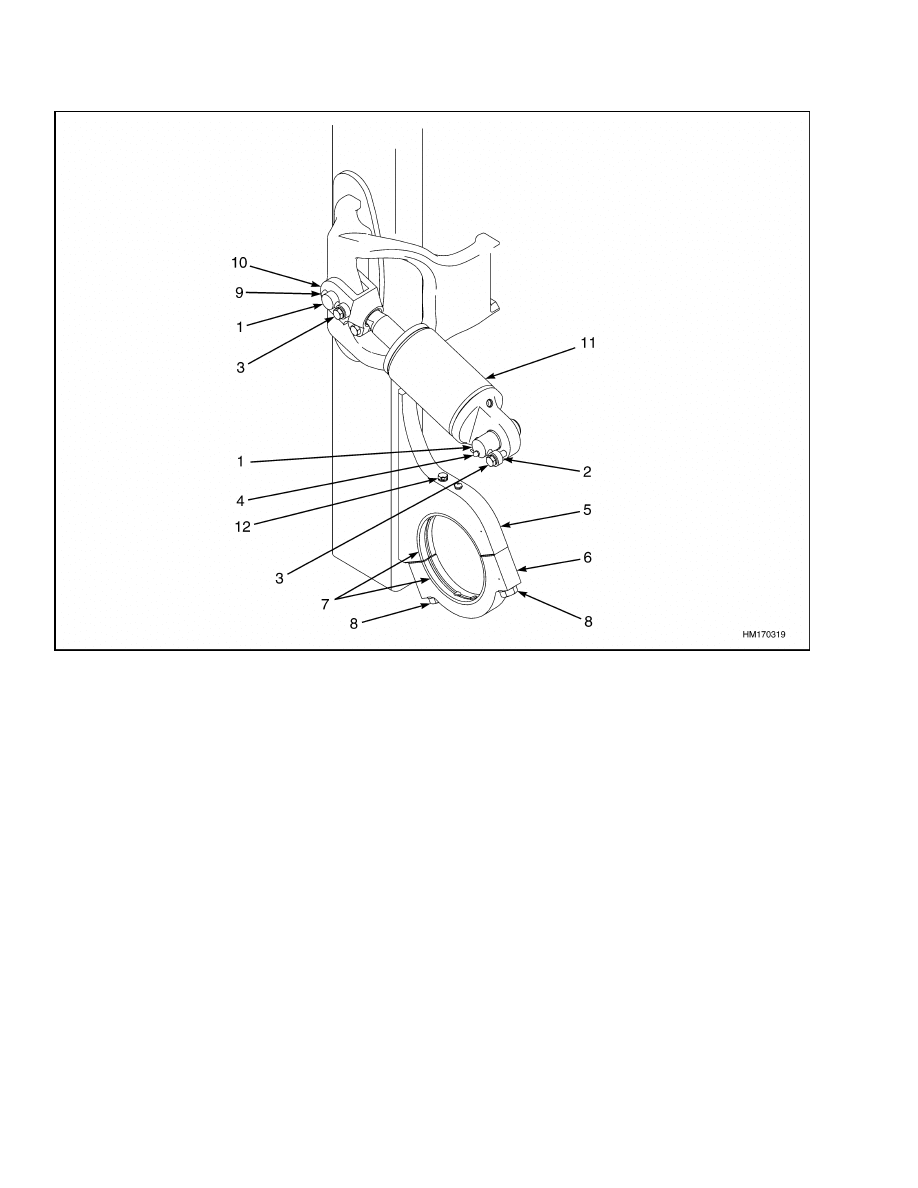
Remove anchor pin capscrews. Push tilt pin re-
tainers from rod end. Remove tilt pin. See Fig-
ure 1.
3.
Remove anchor pin capscrews. Push tilt pin re-
tainers from frame end. Remove tilt pin. Remove
tilt cylinder from frame.
DISASSEMBLE
1.
Place rod in vise with soft jaws and remove clevis.
See Figure 2. Remove gland from cylinder. Re-
move rod wiper, rod seal, and backup rings from
gland. Remove wear ring and O-ring from gland.
Discard rod seal and O-ring.
2.
Remove rod and piston from cylinder.
3.
If the piston is to be removed for replacement,
place rod in a vise with soft jaws. Remove and
discard prevailing torque lock nut.
4.
Remove and discard O-ring from rod. Remove
guide ring from piston.
5.
Remove and discard piston seal ring and O-ring
from piston.
CLEAN
WARNING
Cleaning solvents can be flammable and toxic
and can cause skin irritation.
When using
cleaning solvents, always follow the solvent
manufacturer’s recommended safety proce-
dures.
Compressed air can move particles so they
cause injury to the user or to other personnel.
Make sure the path of the compressed air is
away from all personnel. Wear protective gog-
gles or a face shield to prevent injury to the
eyes.
Clean all parts in solvent and dry with compressed
air.
INSPECT
Inspect all parts and replace any parts that are worn
or damaged.
1
Tilt Cylinder Repair
2100 SRM 986
1.
TILT PIN
2.
ANCHOR PIN CAPSCREWS
3.
CAPSCREW AND WASHER
4.
LUBE FITTINGS
5.
MAST MOUNTING HANGER
6.
MAST MOUNTING CAP
7.
MAST BUSHING
8.
MAST MOUNTING CAPSCREWS
9.
TILT PIN RETAINER
10. ROD END
11. TILT CYLINDER ASSEMBLY
12. CAPSCREW AND WASHER FOR CYLINDER
RESTRAINT BRACKET
Figure 1. Tilt Cylinder Removal
ASSEMBLE
NOTE: Always use new seals and O-rings. Make sure
all parts are clean. Apply packing lubricant to seals,
rings, and wipers prior to assembly.
1.
Install piston seal ring, O-ring, and guide ring
on piston. Install O-ring on rod. Install piston
on rod. See Figure 2.
NOTE: If the piston was not removed, retighten the
prevailing torque nut to 400 to 440 N•m (296 to
326 lbf ft).
2.
Put rod in vise with soft jaws. If lock nut was re-
moved, install new lock nut and tighten lock nut
on piston rod to 400 to 440 N•m (296 to 326 lbf ft).
Insert rod and piston into cylinder.
3.
Install rod seal, backup rings, wear ring, O-ring,
and rod wiper on gland.
4.
Put cylinder in vise with soft jaws. Slide gland
onto piston and fasten to cylinder. Tighten gland
to 400 to 500 N•m (295 to 369 lbf ft).
5.
Install clevis onto rod with capscrew, washer,
and nut. Tighten capscrew on rod to 90 N•m
(66 lbf ft).
2

2100 SRM 986
Tilt Cylinder Repair
INSTALL
NOTE: When installing the tilt cylinders, be sure
lube (grease) fittings face front of lift truck.
1.
Place tilt cylinder in lift truck frame. Install tilt
cylinder retainer pins, anchor pin capscrews, and
tilt pins. Tighten capscrews for anchor pins to
77 N•m (57 lbf ft). See Figure 1.
2.
Install tilt cylinder retainer pins, anchor pin cap-
screws, and tilt pins at mast mounts. Tighten
capscrews for anchor pins to 77 N•m (57 lbf ft).
3.
Connect hydraulic lines to tilt cylinders.
4.
Operate tilt cylinders. Check for correct opera-
tion and leakage. For leakage check procedures,
see Tilt Cylinder Leak Check in this section. To
adjust tilt cylinders, see the section Masts, De-
scription and Repairs 4000 SRM 736.
1.
CYLINDER SHELL
2.
ROD
3.
GLAND
4.
PISTON
5.
NUT
6.
O-RING
7.
WEAR RING
8.
WIPER RING
9.
PISTON SEAL
10. ROD SEAL
11. BACKUP RING
Figure 2. Tilt Cylinders Disassembly
3
Tilt Cylinder Specifications
2100 SRM 986
Tilt Cylinder Leak Check
WARNING
Never allow anyone under a raised carriage.
Do not put any part of your body in or through
the lift mechanism unless all parts of the mast
are completely lowered and the engine is
STOPPED.
Do not try to find hydraulic leaks by putting
your hand on hydraulic components under
pressure.
Hydraulic oil can be injected into
the body by the pressure.
1.
Put capacity load on forks.
Slowly tilt mast
forward. If mast continues to slowly tilt forward
when control valve is in NEUTRAL position,
there are leaks inside the hydraulic system.
2.
The maximum speed that the mast is allowed to
tilt forward when there are internal leaks in the
lift system is 16 mm (0.63 in.) per 10 minutes
(measured at the tilt cylinder). This maximum
speed is measured when the hydraulic oil is 30 C
(86 F). If the oil temperature is 60 C (140 F), the
maximum speed is 73 mm (2.9 in.) per 10 min-
utes.
3.
If the leak rate is greater than the specifications
listed in Step 2 or in Table 1, lower mast and
remove load from mast. Install valve between
port at front of tilt cylinder and hydraulic line.
Put load on forks again. Close valve. If mast tilts
slowly forward, cylinder seals are leaking.
4.
If mast does not move, open gate valve and check
movement again. If mast moves forward when
gate valve is open, check for leaks in hydraulic
lines and fittings. If no leaks are found, check
main control valve for damage.
5.
Remove load from forks.
Table 1. Leak Check Specifications
Hydraulic Oil
Temperature
Cylinder Stroke
C
F
mm/min
in/min
20
68
1.1
0.043
30
86
1.6
0.063
40
104
3.0
0.118
50
122
4.9
0.193
60
140
7.3
0.287
Tilt Cylinder Stroke and Mast Tilt Angle Adjustment
Adjust tilt cylinders as described in the section Mast Masts, Description and Repairs 4000 SRM 736.
Tilt Cylinder Specifications
Operating Conditions
Specification
Normal Operating Pressure
15.5 MPa (2250 psi)
Maximum Operating Pressure
20.6 MPa (3000 psi)
Rated Load Condition
117.8 kN (26,500 lbf)
Operating Temperature
29 to 93 C ( 20 to 250 F)
4


TECHNICAL PUBLICATIONS
2100 SRM 986
11/04 (9/03)(1/03)(11/01) Printed in United Kingdom
Document Outline
Wyszukiwarka
Podobne podstrony:
1466205 2100SRM0735 (11 2004) UK EN
1554636 8000SRM1080 (11 2004) UK EN
1554631 2000SRM1085 (03 2004) UK EN
1564283 1900SRM1107 (01 2004) UK EN
1452929 2200SRM0679 (11 2003) UK EN
1554635 8000SRM1079 (06 2004) UK EN
897506 4000SRM0521 (05 2004) UK EN
897480 1400SRM0499 (10 2004) UK EN
897067 1400SRM0285 (05 2004) UK EN
1565454 8000SRM1113 (06 2004) UK EN
1538373 2200SRM1065 (02 2004) UK EN
1510466 1800SRM0985 (05 2005) UK EN
897393 1800SRM0452 (02 2004) UK EN
1470232 1900SRM0783 (01 2004) UK EN
897493 1600SRM0512 (11 1995) UK EN
910460 1600SRM0258 (05 2004) UK EN
więcej podobnych podstron