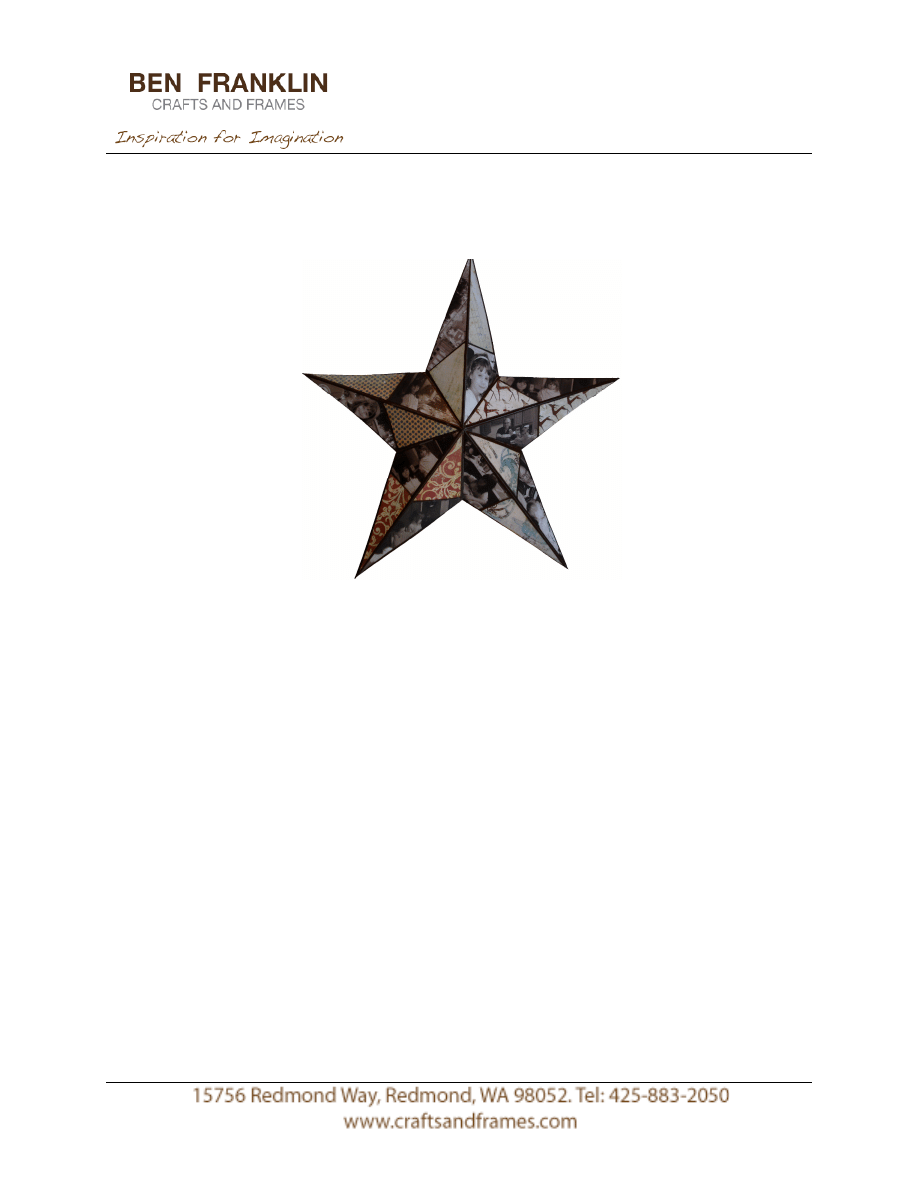
Decoupage Photo Star
Materials:
· Metal star
· 5 coordinating scrapbook papers
· 10 to 15 photos: it is best if the photos have been printed on text
weight paper (computer/copier weight) and printed in black and
white or sepia tones. Photos should be no smaller than 4x6.
· Decoupage medium (recommended: Royal Coat)
· Distress ink (optional)
· Template
· Piece of acetate or clear plastic
Instructions:
1. Either use the template provided (accurate for some 1 1/2 foot
stars) or create your own using one side of one point as your
pattern. Only one side is necessary as you can flip the template
over for the opposite side of the star point.
2. Using the template, cut10 pieces of scrapbook paper, matching
sides and papers to each point. You should have 5 pairs of paper
pieces.
Decoupage Tips:
· Apply the medium thoroughly, but be careful not to over apply
· Patience. Do not over work the papers. Lay in place, smooth and
leave alone. Paper fibers absorb liquids and stretch. Working them
too much causes them to stretch more, creating wrinkles and
bumps. If you notice your papers buckling, leave them alone and
many times as the medium dries, the papers return to their normal
shape. If the buckling does not seem to be going down after letting
the papers dry almost completely, add a little medium to wet the
paper and then push the wrinkle down and hold in place until it
sticks. If done with patience, it will usually dry flat.
· Always let coats of medium dry thoroughly, not just surface dry,
before applying the next coat
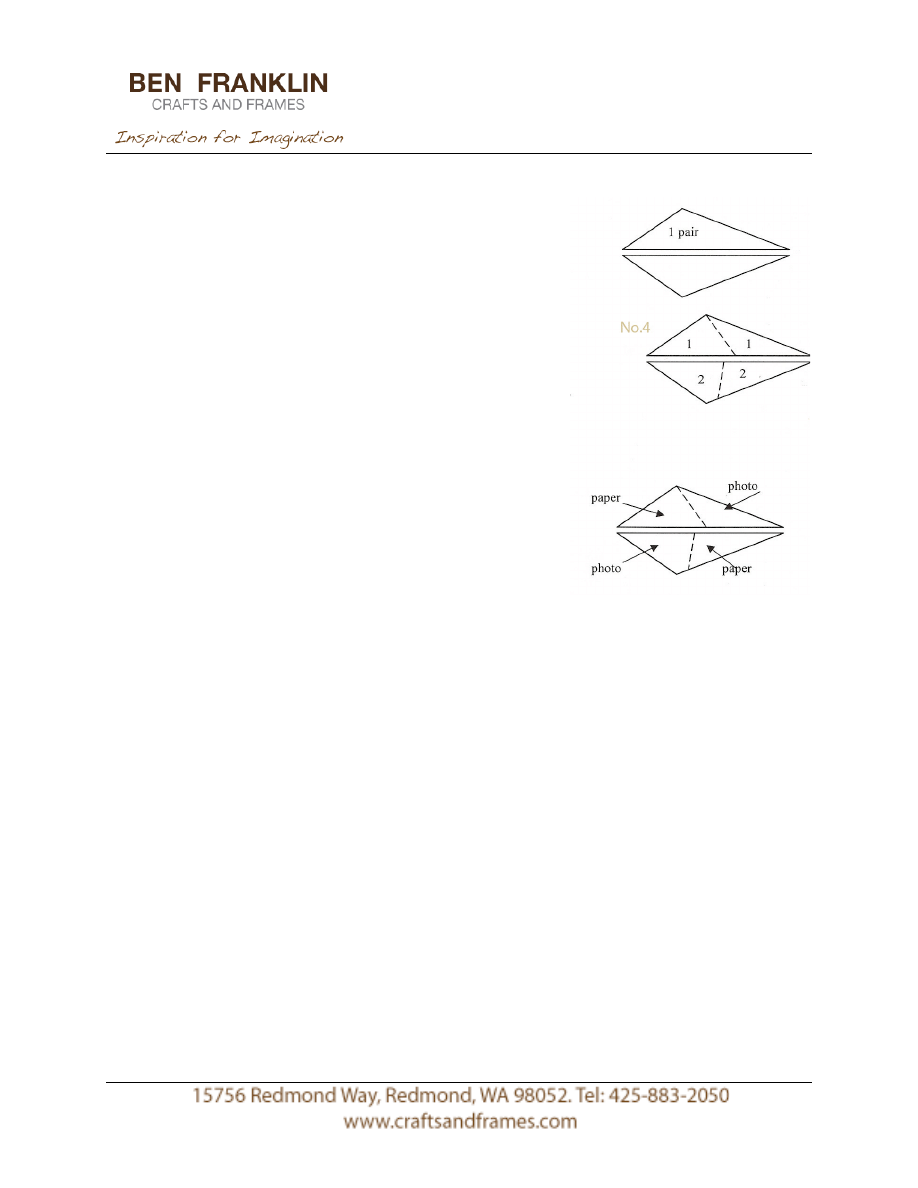
3. Use the template to cut 2 pieces of the
clear plastic.
4. Cut each plastic piece into two pieces
slightly asymmetrically. Label one set 1, and
the other 2.
5. Decide which part of each star point
section will be for paper and which part will
be for photos.
6. Using the clear template, cut the
scrapbook papers and the photos.
7. Distress the edges of the photos and
papers if desired.
8. Arrange the papers and photos on each
point as you like and label each piece to keep
the pieces in order. Label in any way that
works for you.
9. Using Royal Coat adhere the papers and photos to each point.
10. Let dry and apply a top coat. Add as many coats as you like but
be sure to let the Royal Coat dry thoroughly between each
application.

· A light sanding between coats adds to the depth and richness of the
finish.
· Royal Coat contains a high grade finish that cures completely (in
about four weeks) giving your piece a durable and water resistant
surface. Most decoupage mediums are simple watered down white
glues and contain either no finish or an ineffective one.
· Using a stiff bristly brush on your last coat will give the illusion of
paint stokes
Wyszukiwarka
Podobne podstrony:
crm star
Dawning Star Terraformer 07 Trains of Eos
Dawning Star Terraformer 01 Daybringer Prestige Class
Fringeworthy Star System Survey Form
Dawning Star Terraformer 10 Eotian Air Carriers
Dawning Star Terraformer 12 Invisibility Tech
Opis programu Photo Collage Platinum
041 Star system, czyli Filmowy Olimp
Corel PHOTO PAINT 12 cwiczenia
146do161 photo
mb star c3 self test manual
Dawning Star Red Truth Revealed
Monitor Gold Star GS 556
Dawning Star Seeing Red
Mitsubishi Space Star
Jak wykonać decoupage, cooooooooooooos
więcej podobnych podstron