
Parallels Software International, Inc.
Parallels Desktop for
Mac
Quick Start Guide
(c) 2005-2007

Copyright © 2005-2007 by Parallels Software International, Inc. All rights reserved.
Parallels and Parallels logo are registered trademarks, Compressor is a trademark of Parallels Software
International, Inc.
This product is based on a technology that is the subject matter of a number of pending patent applications.
Distribution of this work or derivative of this work in any form is prohibited unless prior written permission is
obtained from the copyright holder.
Microsoft, Windows, Windows Server, Windows NT, and MS-DOS are registered trademarks of Microsoft
Corporation.
Linux is a registered trademark of Linus Torvalds.
Mac and Mac OS are registered trademarks of Apple Computer, Inc.
Solaris is a registered trademark of Sun Microsystems, Inc.
VMware is a registered trademark of VMware, Inc.
All other marks and names mentioned herein may be trademarks of their respective owners.


4
C
H A P T E R
1
Preface
Congratulations on your installation of Parallels Desktop!
This short guide contains step-by-step instructions on express method of installing Windows XP
and Windows Vista operating systems onto virtual machines. Developed specially for new users
OS Installation Assistant will prompt you to fill out just a few input fields, to insert an
installation CD/DVD and then will perform unattended guest OS installation. When the
assistant completes its work, you'll have a ready-to-use virtual machine.
The guide also describes how to install the system if your Macintosh computer doesn't read a
disc with Windows XP or Vista installation.

Key Terms and Technologies
5
Key Terms and Technologies
In hope of making your experience as effortless as possible, we’ve designed Parallels Desktop to
be user-friendly, even for a computer “newbie.” This section highlights some of the terms you’ll
need to know as you work your way through this guide.
Virtual machine (VM):
The whole point of Parallels Desktop is simulating other computers
running inside your Macintosh computer. This computer within your Mac has its own hardware
(generic kind) and its own “screen" (rather large window), and an operating system must be
installed inside before you can actually use this "computer".
You may call it a PC simulator or an imitation PC. But in the computer industry, it is called a
virtual machine. When running, a virtual machine behaves as though it’s a PC with the
following components:
an Intel Pentium processor;
a generic motherboard compatible with Intel i815 chipset;
up to 1500 MB of memory;
monitor with VESA 3.0 support. After a new virtual machine is just created, its monitor
resolution will be either 640x480 or 1024x768 (VGA and SVGA). Later, you can resize the
window by dragging its right corner, and screen resolution will adjust accordingly;
a floppy drive (mapped to an image file);
up to four IDE disk drives. Each of them can be either a virtual hard drive (from 20 MB up
to 128 GB each, in the form of hard disk image file) or a CD/DVD-ROM drive (mapped to a
real drive or to an image file);
Ethernet network card compatible with RTL8029. Parallels Desktop supports several types
of networking. By default, the virtual machine shares whatever network connection your
Macintosh computer uses;
up to four serial (COM) ports (each mapped to a socket or to an output file);
up to three bi-directional parallel (LPT) ports (mapped to output files);
2-port USB 2.0 controller, 8-port USB 1.1 Controller
a standard PC keyboard;
a PS/2 scroll-wheel mouse.
Parallels Desktop lets you do tricks like these:
Simultaneously run multiple operating systems (OSes) and their applications on a single
Mac.
Create a number of virtual machines, each with a set of basic virtual hardware. Operating
systems and applications are isolated inside these virtual machines and share physical
hardware with the real computer.
Switch between operating systems without having to restart the Macintosh computer.
As a result, you can consolidate your computing environment, having all you need on one
machine, thus reducing hardware costs and increasing productivity.

Installing Parallels Desktop
6
Primary Operating System (Primary OS)
: This is the operating system that loads when you hit the
power button on your computer. In your case, it’s Mac OS X.
Guest Operating System (Guest OS)
: This is the reason you bought Parallels Desktop: it’s a
second, different operating system that you can run simultaneously with the primary OS. The
guest OS on your Macintosh computer might be Windows XP, or Linux, or any of many other
operating systems—and they all can be running simultaneously in different windows!
Hard Disk Image: Just as a virtual machine is an emulated PC, a hard disk image is an emulated
hard disk drive. In fact, it’s just a file on your real hard disk.
ISO Image:
A file that contains the entire contents of a CD-ROM or DVD, commonly used to
install a guest operating system in a VM.
Installing Parallels Desktop
FDD Image
: A file that contains the entire contents of a floppy disk, is used to install specific
guest operating systems, such as OS/2.
1 First of all, download the latest Parallels Desktop for Mac build available for the version
you bought; for this, visit the Parallels Download Center
http://www.parallels.com/en/download/. We recommend such updating, because Apple
rapidly releases new hardware and new versions of Mac OS X, and our developers try to
keep Parallels software up-to-date.
Installing Parallels Desktop
7
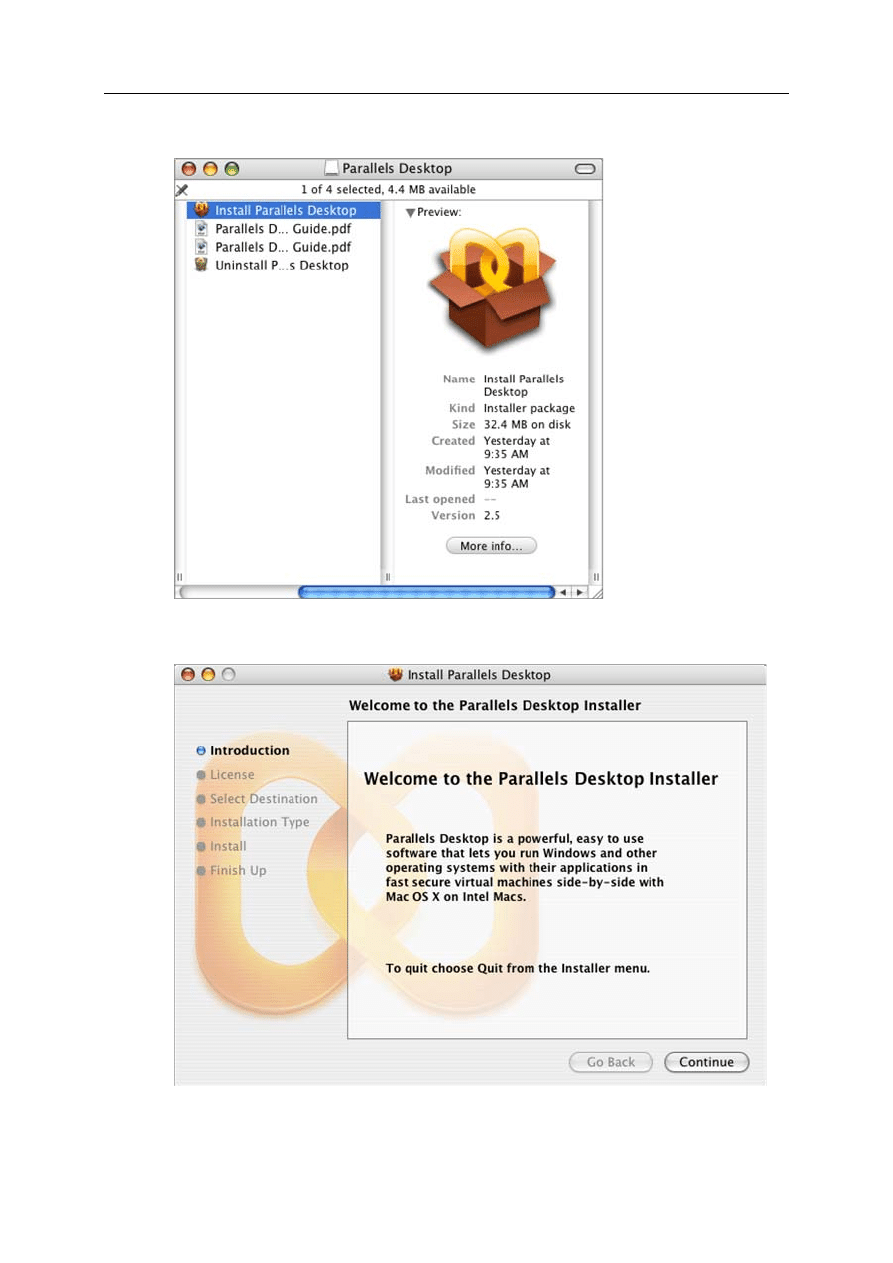
2 When the download is completed, you'll see Parallels Desktop Installer window.
3 Double-click the Install Parallels Desktop option to start installation.
4 In the Welcome screen click the Continue button.
Installing Parallels Desktop
8
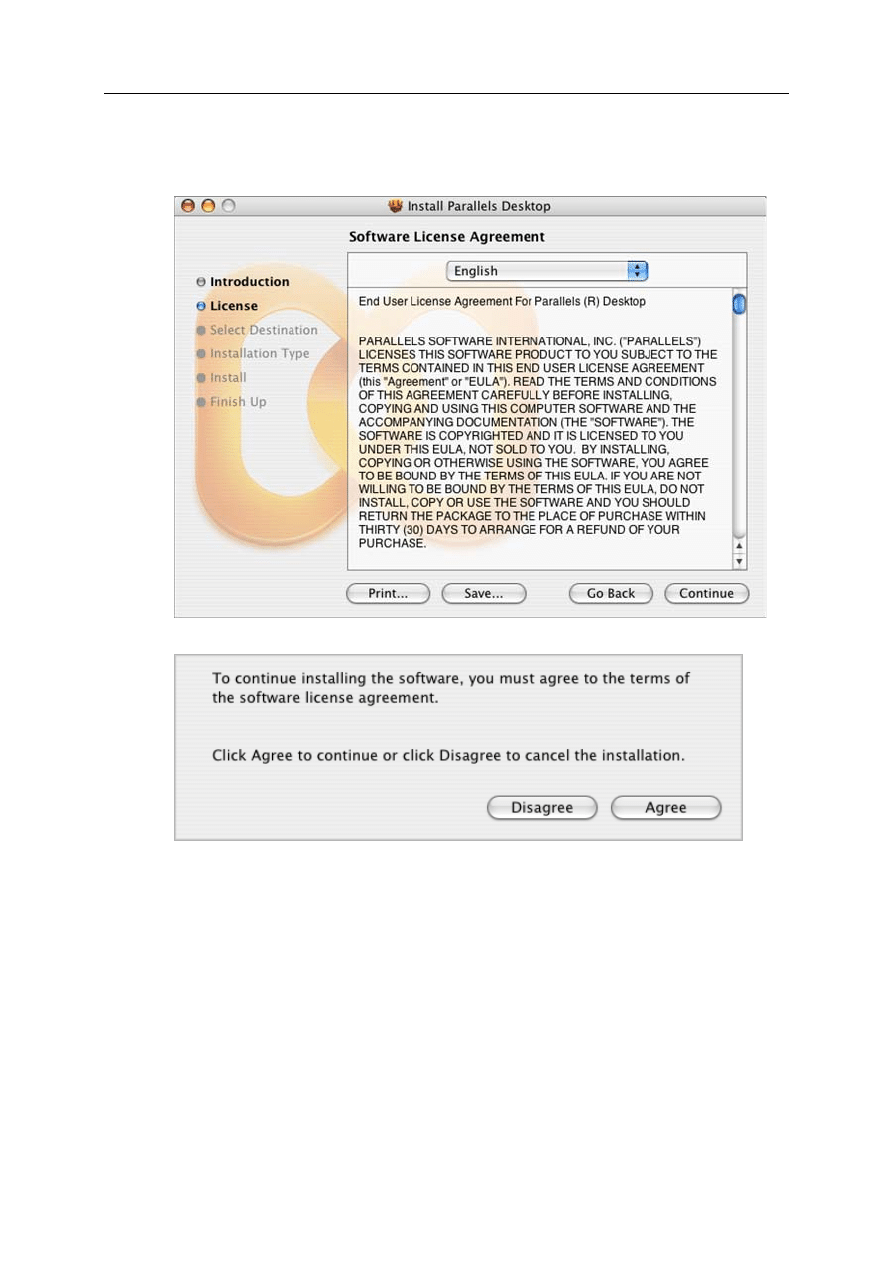
5 In the Software License Agreement screen use the scroll bar to read the entire agreement. We
recommend printing the license agreement for your records using the Print button or saving
it for future reading using the Save button. When you are ready, click the Continue button.
In the pop-up dialog, click the Agree button to continue installing.
Installing Parallels Desktop
9
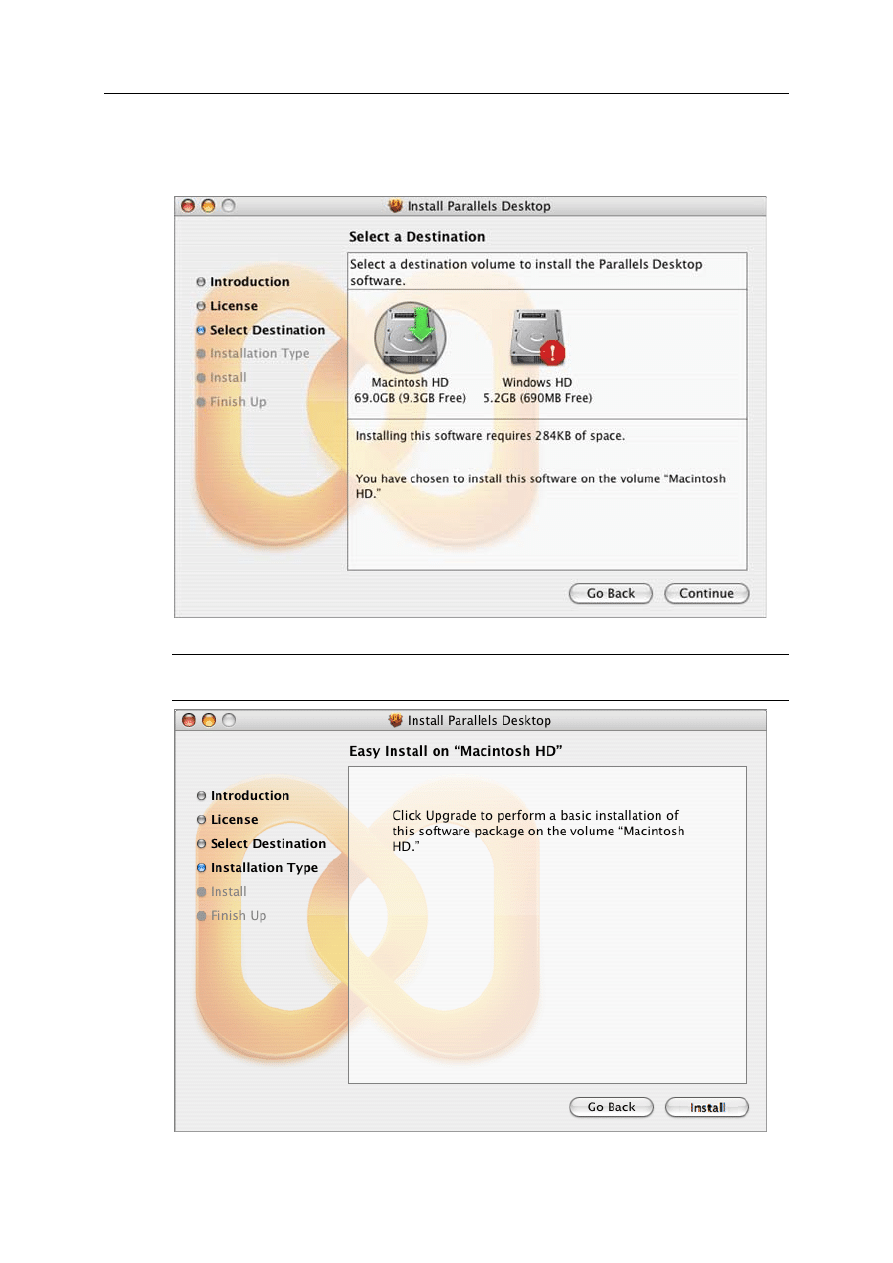
6 Next you'll see the Select a Destination screen. Currently, you can install Parallels Desktop
only on the boot volume, the same disk with Mac OS X, so select this disk. Other disks (if
actually you have more than one) will be disabled for selection. Click Continue.
Click Install to start the Parallels Desktop installation.
Note: Of course, you can return to the previous steps by clicking the Go Back button at any
time.
Installing Parallels Desktop
10
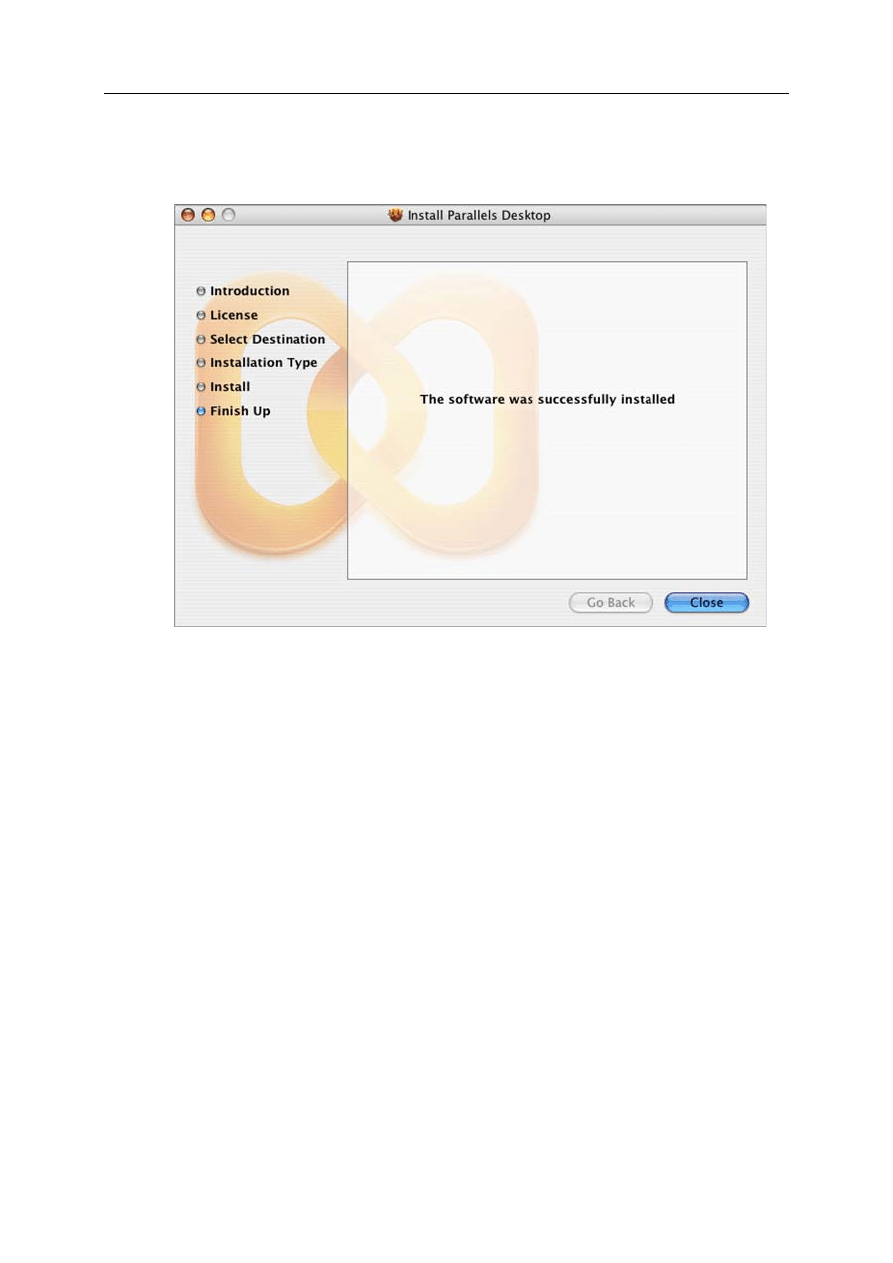
7 Installation progress is shown in the Installing Parallels Desktop window.
8 When Parallels Desktop is installed, the Installer informs you that the installation was
successful. To complete the installation, click Close. Yes, it was that easy!

Starting Parallels Desktop
11
Starting Parallels Desktop
To start Parallels Desktop:
In the
Finder
, open your
Applications
folder, and then double-click the orange Parallels icon
.
If you want to add Parallels Desktop alias to the Dock, just drag its icon from any Finder
window and drop it on the Dock; you'll be able to open the application at any time by clicking
its docked orange icon. (To remove Parallels Desktop icon from the Dock, just drag it off the
Dock.)
When started, Parallels Desktop is browsing the file system trying to find virtual machines on
your Macintosh computer. If no virtual machines were found, Parallels Desktop opens OS
Installation Assistant that can help you create a virtual machine and install operating system
inside it, for more details see Express Installation of Windows XP or Vista (page 13).
If Parallels Desktop finds any already existing virtual machine/machines on your Mac, it
displays them on the VM Catalog dialog so that you can select any and open it.
Warning. But you have to activate your copy of the Parallels Desktop first. Otherwise, you
cannot start a virtual machine and cannot install any operating system on it.
12
C
H A P T E R
2
Activating Parallels Desktop
To activate Parallels Desktop, follow these easy steps:
1 In the
Finder
, open your
Applications
folder, and then double-click the orange Parallels icon
.
2 Click
Parallels Desktop
in menu and select
Activate Product
.
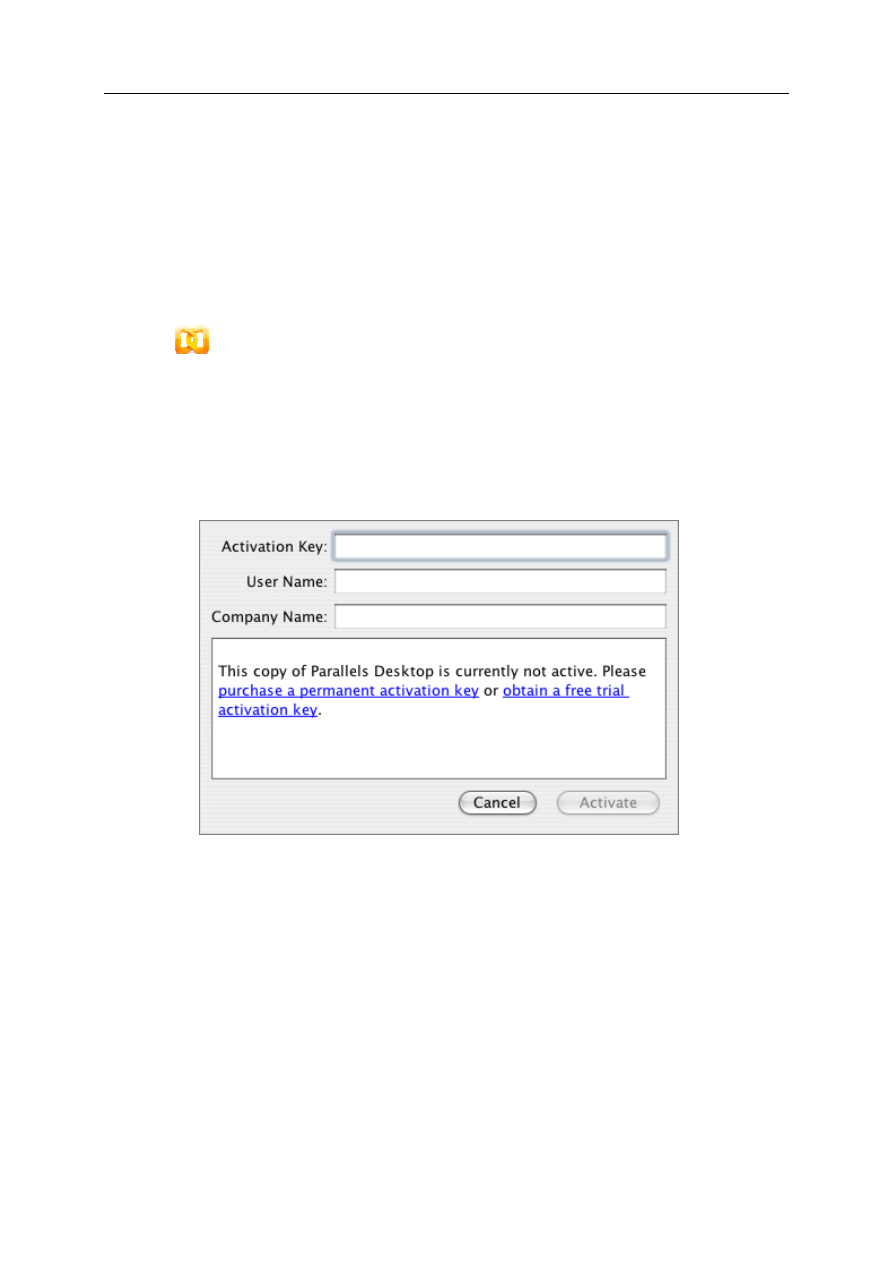
3 In the
Activate Product
window, fill in the following fields:
In the
Activation Key
field type the activation key you've got. When you fill in this field,
the
Activate
button becomes enabled.
Specify your name and name of your company in the
User Name
and
Company Name
fields. Both of these fields are optional.
Click the
Activate
button. If you have entered a valid activation key, the following confirmation
message will be displayed: "Parallels Desktop has been activated
successfully. Thank you!
”
Now, you can create virtual machines, install operating system, install favorite applications, -
congratulations!
13
C
H A P T E R
3
Express Installation of Windows XP or
Vista
After activating Parallels Desktop, you can create your first virtual machine.
In this chapter we describe the express method of creating a ready-to-use virtual machine.
Express mode is available only for two operating systems: Windows XP and Windows Vista.
This mode really will help you install operating system with no hassle at all.
1 Now you are ready to create a new virtual machine. Have an installation disc with the full
version (not OEM version) of Windows XP or Vista ready or insert it into the CD/DVD-
ROM drive. If you have an ISO image file instead of installation disc, you can use it. See
General Notes on Using Installation Media below.
2 Start Parallels Desktop by clicking orange Parallels icon
in the Dock.
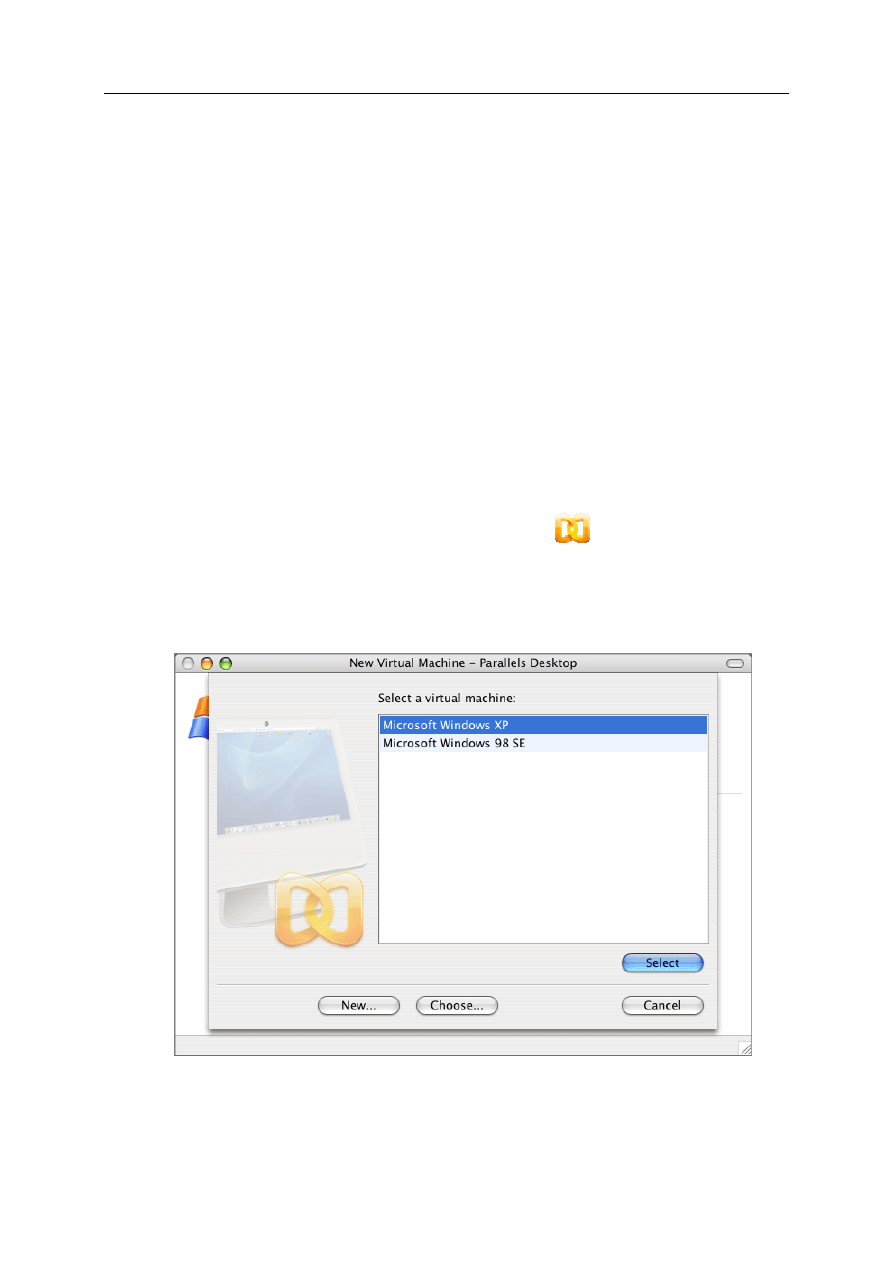
3 Parallels Desktop main window appears. If Parallels Desktop didn't find any virtual machine
on your Macintosh computer, you will see the first dialog of the OS Installation Assistant.
If Parallels Desktop finds any already existing virtual machine/machines on your computer,
it displays them on the Catalog dialog so that you can select any and open it.
If you see the Catalog dialog, select the New button to start OS Installation Assistant.
Express Installation of Windows XP or Vista
14
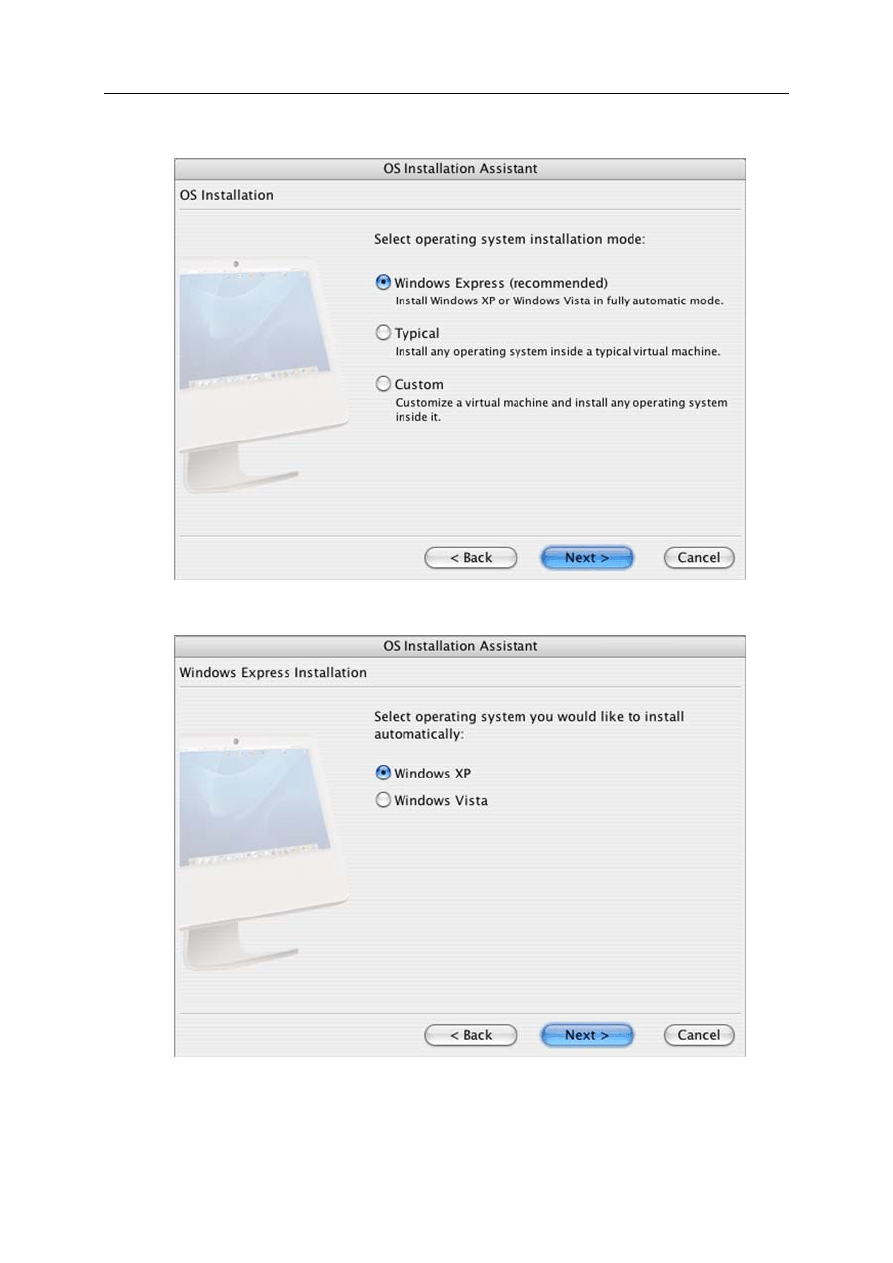
4 Select the Windows Express option and click Next to continue.
5 Now, you have to select one of the Windows guest operating systems for which you have an
installation disc or its ISO image file.
Express Installation of Windows XP or Vista
15
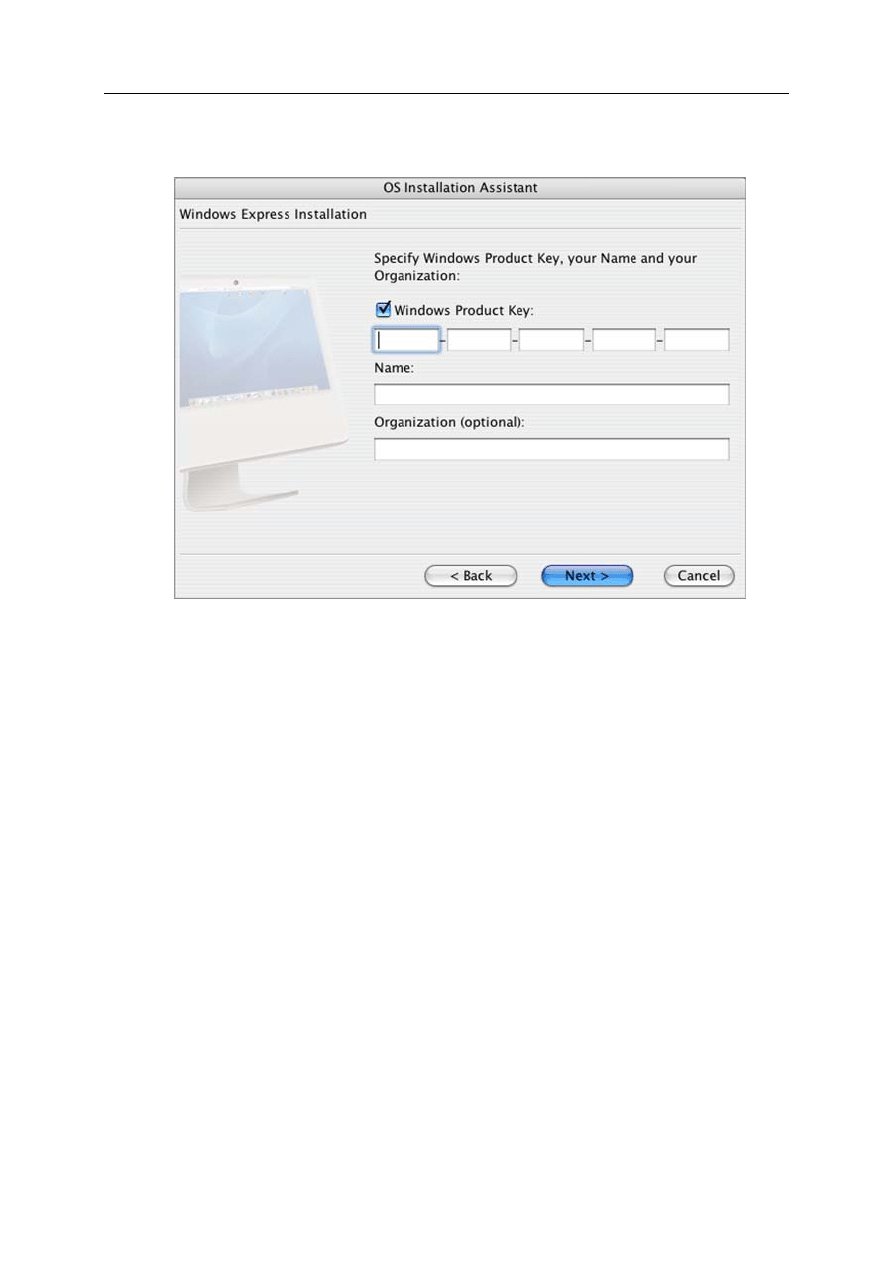
6 In the next dialog, fill in several fields for the information required during operating system
installation.
Type the product key for your Windows in the Windows Product Key input field.
Enter your name to be used by Windows installation.
Type your company name in the Organization input field. This information is optional.
Express Installation of Windows XP or Vista
16
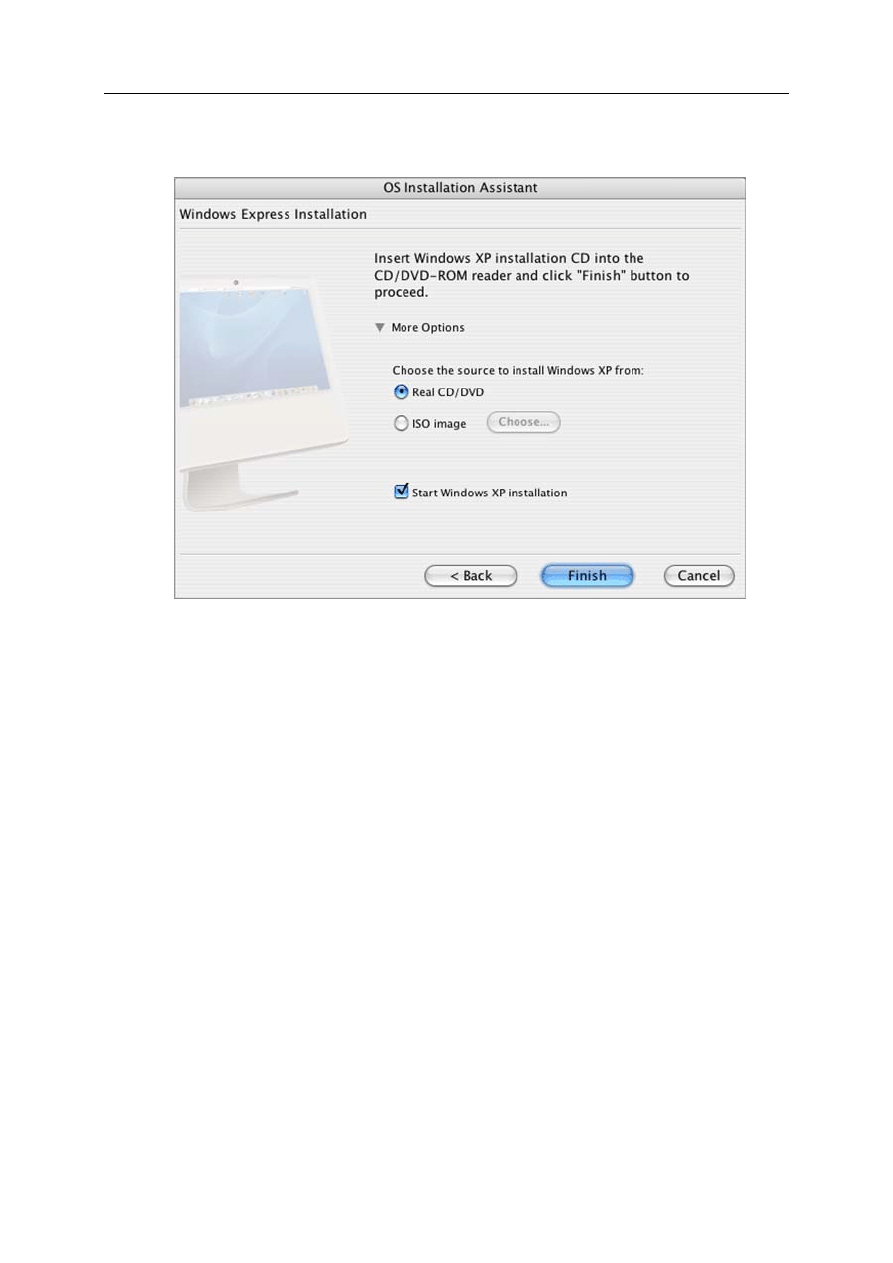
7 Now, if you haven't done it yet, insert the installation disc of the selected Windows OS into
the CD/DVD-ROM drive of your Macintosh computer.
If you want to use an ISO image of installation disc:
click More Options to open other options and select the ISO image option.
The Choose button becomes enabled, click it to locate the ISO image file.
Click Finish.
8 You may leave Parallels Desktop for a while. It will create a new virtual machine for you
and install the guest OS in unattended mode. Moreover, it will install Parallels Tools when
the OS installation is complete. During unattended installation, the assistant uses some
reasonable default options and the information provided by you: Windows product key,
name and organization/company name.
9 When installation is completed, eject the installation disc or disconnect the ISO image of
installation disc.
10 To make the keyboard and mouse available in virtual machine, just click inside the virtual
machine window (guest OS window). To release the keyboard and mouse input for Mac OS
X, just click anywhere outside the guest OS window or press Ctrl+Alt or
Ctrl+Option(Alt
).

Express Installation of Windows XP or Vista
17
If you installed Windows XP, to protect your new Windows XP virtual machine, select in the
menu: Actions -> Install Kaspersky Internet Security.
Ejecting CD/DVD Disc
To eject the installation CD/DVD from its drive on your Macintosh computer while working in
Windows operating system you may try the following:
In Explorer, right-click or Ctrl-click the CD/DVD disc icon in My Computer window, and
select the Eject command from the context menu.
In any guest OS press the Eject key on your keyboard (the triangle with the line
underneath), if such key is present on your keyboard.
Disconnecting ISO Image
At the bottom of Parallels Desktop window, on the status bar find the CD/DVD-ROM icon
. Right-click it to open the shortcut menu.
From the menu select the Default CD/DVD-ROM option.
Changing Password
Installing either of Windows, the assistant creates an administrator account with a blank
password. When the assistant completes its work, we recommend that you change the password
in order to protect the safety of your data.
To change the administrator password in Windows XP Professional:
Click the Windows Start menu, then select Settings->Control Panel->Administrative Tools-
>Computer Management.
In the Computer Management window, open System Tools->Local Users and Groups->Users.
Right-click the Administrator account and select Set Password from the context menu.
To change the administrator password in Windows Vista:
Click the Start menu, then select Control Panel->User Accounts and Family Safety->Change
your Windows password.
To change password in other versions of Windows, please refer to the operating system online
on-line help or documentation.
General Notes on Using Installation Discs
Sometimes, Macintosh computer cannot read a disc with Windows XP or Vista installation. In
this case you will see the black screen on your virtual machine monitor and the following
message appears: No boot device is available. Don't worry! You can work around
this problem. The installation still can be performed, not from the disc, but from the ISO image
of this disc. Close or minimize Parallels Desktop window, while you will be creating an image
of that disc. It is better to create it on other computer.
To create an .iso image of CD/DVD
CD/DVD disc images can be made using the Parallels Image Tool installed along with Parallels
Desktop.

Express Installation of Windows XP or Vista
18
To start the Parallels Image Tool:
1 Click on the Finder.
2 Select Applications.
3 On the list of available applications find the Parallels folder, click it to open.
4 Double-click the Image Tool icon.
5 Parallels Image Tool assistant will guide you through a few simple steps of disc image
creating.
For more detailed description of the procedure, please open Help -> Parallels Desktop Help ->
Parallels Desktop Help -> Using Parallels Image Tool in the Parallels Desktop application menu.

19
C
H A P T E R
4
Running Virtual Machine
Now, that you created a virtual machine and installed one of Windows operating system inside
it, you have to know how to control the virtual machine. Parallels Desktop controls are located
on the toolbar (by default, it is hidden, to open it click the oval button in the upper right corner
of Parallels Desktop window) and in the application menu.
Stopping the Virtual Machine
To stop your virtual machine, always shut down a guest operating system by using "the shut
down" command (such as Start -> Shut Down or Start -> Turn off Computer in Windows). It is
STRONGLY RECOMMENDED that you do so to ensure safety of your data. Only if you are
unable to stop the guest OS this way, you may stop the machine by using Parallels Desktop
controls:
by clicking the Stop Virtual Machine
button.
by selecting Actions -> Stop from the Parallels Desktop application menu.
The virtual machine will be stopped immediately.
If you need to restart Macintosh computer, you may pause the virtual machine by clicking the
Pause Virtual Machine button
; it suspends virtual machine, saves its state at the moment the
button is clicked. Later, you can start it again.
Starting the Virtual Machine
When you click the Parallels Desktop yellow icon, Parallels Desktop starts and displays the VM
Catalog (virtual machine catalog ). Select the virtual machine in the list and click the Select
button.
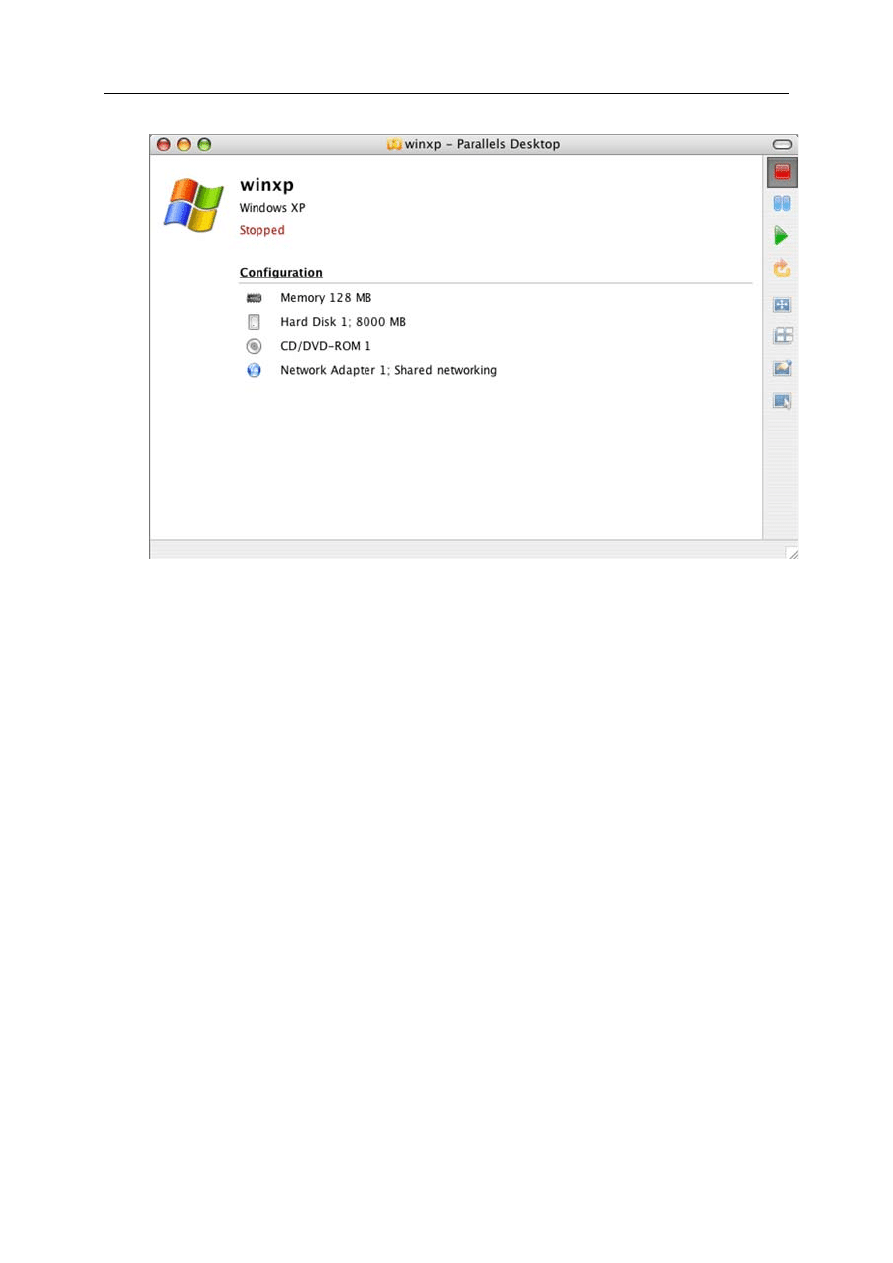
Parallels Desktop opens the Configuration Page of the virtual machine like on the picture below.
On this page you can see what virtual hardware your virtual machine has. Clicking any link on
this page opens Configuration Editor which can be used to add or remove hardware or to view or
configure devices options.
Running Virtual Machine
20

Running Virtual Machine
21
To start the virtual machine click the Start button
or select Actions -> Start Virtual Machine
from the menu. You will see how the guest operating system is booting.
Running Modes
The lower four buttons in the toolbar control the display mode of Parallels Desktop windows.
When virtual machine is stopped, only Configuration Page is available. When the virtual
machine is running, you can switch the guest OS window between four display modes:
- Guest OS window button, switches the Parallels Desktop window from the
Configuration Page to OS Window view.
- Full Screen button; switches the virtual machine to the full screen, so that no Mac OS
X controls are present on the screen. To view the menu and Mac OS X Dock while in full
screen, press Ctrl+Option(Alt). After that you can switch to other display mode.
- VM Configuration button; switches the Parallels Desktop window to Configuration
Page view. You can see the list of virtual hardware that the virtual machine has. Links to
Configuration Editor are disabled when the virtual machine is running.
- Coherence button; switches Parallels Desktop window to Coherence, so that you see
Windows application windows directly on Mac's desktop, not on the virtual machine
window. This is just the trick of display mode! After closing the Windows application you
will have to shut down the guest operating system. Coherence is available only for Windows
2000/XP/2003/Vista operating systems.
The display modes are available on the View menu too.
Some Helpful Tips
To learn where your virtual machine is located Command-click the Parallels Desktop title
bar, and you will see the complete path to it.
To create an alias to particular virtual machine in the Dock or on the desktop, while
pressing the Cmd+Option(Alt) keys, drag the Parallels icon from the title bar to the
desktop or to the Dock. The alias is an orange Parallels icon with the guest OS logo.
Clicking this alias starts the guest OS automatically.
To move files between the virtual machine and Mac OS X use drag-and-drop technique.
Use Coherence mode to work with a Windows application as with another Mac OS X
application on Mac's desktop.
To place your favorite Windows applications icons in the Dock see how-to instructions:
select in the Help menu: Parallels Desktop Help -> Running a Virtual Machine -> Starting
Favorite Windows Applications from Mac OS X.
If your virtual machine is started up immediately when you click its alias, to open
Configuration Page do one of the following: while pressing the Cmd key, double-click the
virtual machine alias; or start Parallels Desktop, while pressing the Cmd key on VM
Catalog, highlight the desired virtual machine and click the Select button.
Press the Option(Alt)+Return(Enter) key combo to switch to Full screen and
back.
Press Ctrl+Option(Alt)+Shift to switch to Coherence and back. Use Cmd+Tab
keys to switch between running Mac OS X and Windows applications.

Running Virtual Machine
22
To set up animation on switching to Full screen, Coherence, or on startup use options on the
Animations tab. For this, click in the menu: Parallels Desktop -> Preferences ->Animation tab.

23
C
H A P T E R
5
What to Do Next
If your Macintosh computer was connected to the Internet, the virtual machine you've just
created will be connected too - it will share whatever network connection your Mac uses. By
default, virtual machine gets the Shared Networking (NAT) option turned on.
The next thing you probably would like to do is setting up shared folders (folders in your Mac
OS that are also visible to a virtual machine). For this, we recommend that you read the Using
Shared Folders topic in Help->Parallels Desktop Help-> Managing Virtual Machines from the
menu.
Then you can install your favorite Windows applications. For software installation you may use:
CD/DVD-ROMs;
ISO images of CD/DVD-ROMs made with Parallels Image Tools (or third-party imaging
product on other computer if your Macintosh computer cannot read the original discs); use
the menu to connect or disconnect ISO images from CD/DVD-ROM drive or drag and drop
the ISO image file onto the CD/DVD icon on the status bar to replace the one already
connected;
installation files placed into shared folders;
local network or the Internet if your computer is connected to it.
Enjoy using your virtual machines!
Document Outline
- Preface
- Key Terms and Technologies
- Installing Parallels Desktop
- Starting Parallels Desktop
- Activating Parallels Desktop
- Express Installation of Windows XP or Vista
- Running Virtual Machine
- What to Do Next
Wyszukiwarka
Podobne podstrony:
Parallels Desktop for Mac Quick Start Guide
Quick Start Guide
Smart Box NVR Series Quick Start Guide V1 0 0
Quick Start Guide
50064982 MD80210 quick start guide PL
PAP4055DUO V1 0 Quick Start Guide PL
AF104114261 en us quick start guide store and share documents
OUTLOOK 2016 QUICK START GUIDE
Quick Start Guide
quick start guide v2 1
Ultimate Comment Scraper Quick Start Guide
Calibre Quick Start Guide John Schember
A Quick Start Guide to Monitor Profiling with Lprof
PAP4020DUO V1 0 Quick Start Guide PL
AF104114265 en us quick start guide lists
Nokia 5800 XpressMusic Quick Start Guide pl
Logitech M310 quick start guide
RAZR 06 Quick Start Guide
więcej podobnych podstron