I
nstalling Deck Posts & Beams
OVERVIEW
Introduction
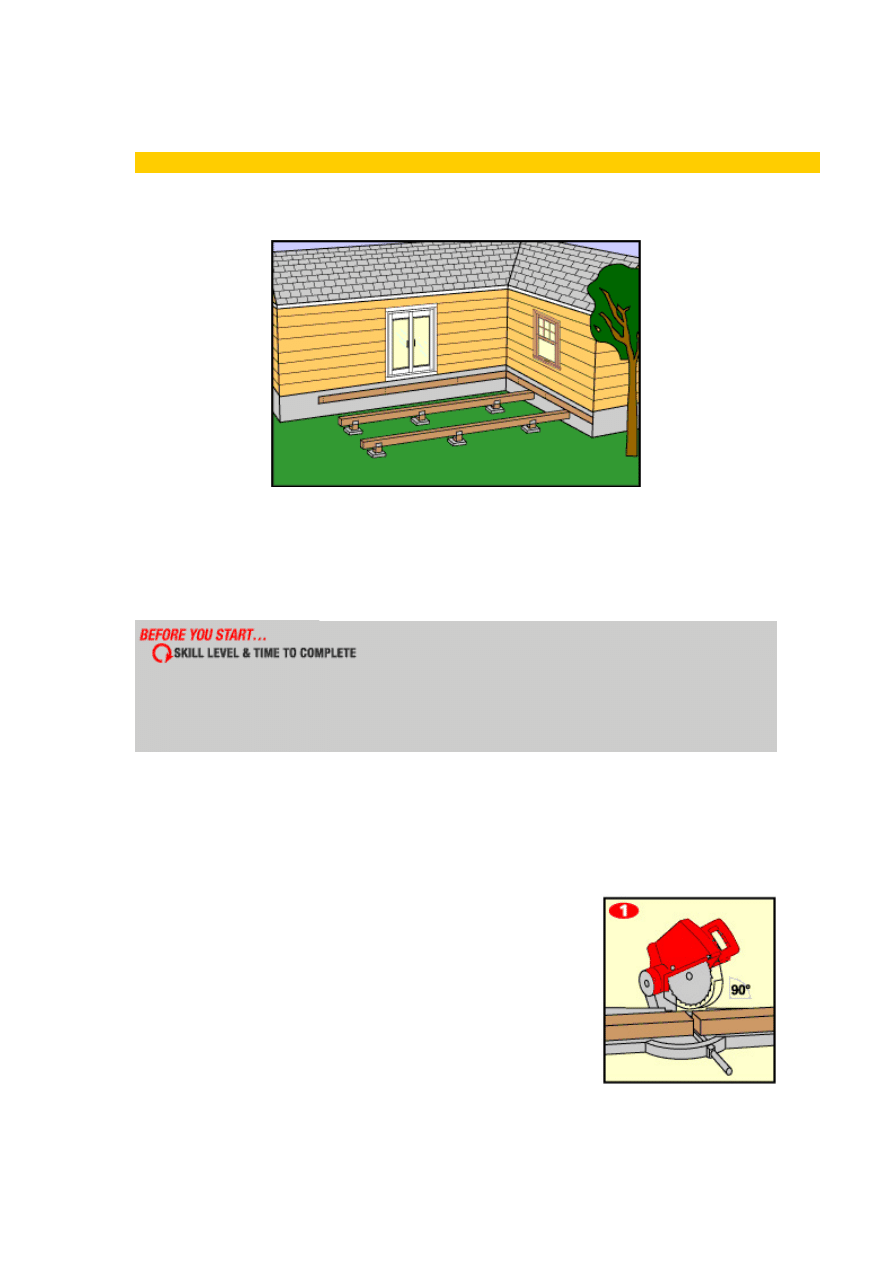
Before you begin framing your deck, you should have the ledger installed along the house and the concrete pads
poured. These create the various supporting elements for your deck. Next to the house, the deck joists will be
attached directly to the ledger. Meanwhile, the concrete pads hold up the posts, which support the girders (or
beams) that the support the deck joists opposite of the ledger.
Time to complete this project depends on the size of the deck and the level of help available, the times listed
here are for two people on a 10'x 30' deck with the house defining two sides of the deck.
• Beginner - 2 to 3 days
• Intermediate - 1 to 2 days
• Advanced - about 1 day
STEPS
1.
Refer to your deck plans and determine the height of each post. Add at least
6" to the length of each and mark the appropriate dimension on each post.
Cut the posts at the marks using a miter saw or circular saw.

2.
Place the posts in the piers on top of the appropriate concrete pad. Using
pieces of 1" or 2" thick wood, put 2 braces on each post at 90 degrees from
each other. Drive a stake into the ground and screw the tail of the brace to
the stake. Then use a level to make sure the post is perfectly plumb and
screw the two braces to each post. Make sure the braces are below the area
where you will be installing the deck beam.
3.
Screw each post to its pier using a screw gun.
4.
With the posts now in position, you need to determine the position of the top
of the joists on each post. To do this, take a long straight 2" x 4" and rest it
on the top of the ledger. Place a level on top of the 2" x 4". Hold the board
level and then lower the board ½" for every 6' of distance between the
ledger and the post. This is to provide a slight slope for water runoff away
from the house. Mark the post at the bottom of the 2" x 4"board.
5.
From the mark on each post, measure down the height of a joist and the
height of the beam. Then use a square to mark all 4 sides of the post. This
will be your cut line.
6.
Cut each post to its marked height. Use a reciprocating saw and cut squarely
across the lower mark on each post.
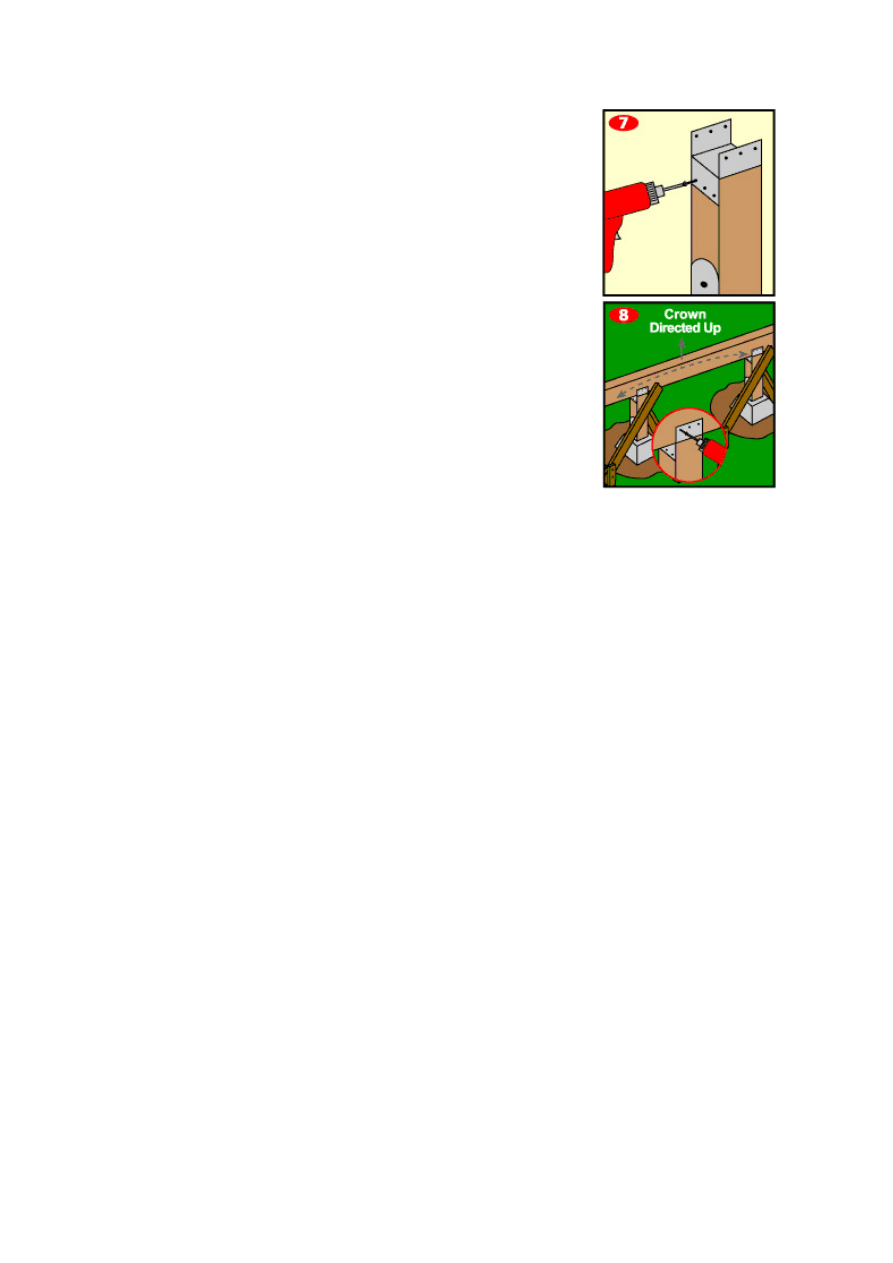
7.
Install the post cap brackets on top of each post. Use the appropriates screw
or lag bolts to securely anchor the brackets in place.
8.
Measure and cut to length girders to length. Eyeball each girder to determine
which way it crowns. Place each girder in position on top of the posts with
the crown of the girder directed upwards. Screw the girders into place
through the post cap brackets with screws and a screw gun.
SHOP LIST
Materials Needed
•
4" x 4" Posts
•
4" x 6" Girders
•
Brace boards
•
Wood stakes
•
Post cap brackets
•
Angle brackets
•
Lag bolts
•
Washers
•
Screws
•
Silicone caulk
Tools Needed
•
Miter saw
•
Circular saw
•
Square
•
Level
•
Screw gun
•
Plumb bob
•
Reciprocating Saw
•
Tape measure
Wyszukiwarka
Podobne podstrony:
Installing Deck Joists instalowanie belek
Installing Deck Stairs schodki
Informatyka dla gimnazjum Zeszyt Ćwiczeń Instalacja stacji roboczej z podstawowym oprogramowaniem
Laboratorium Instalacji I Oświetlenia, Pomiary natężenia oświetlenia i luminancji v2, Celem ćwiczeni
fijewski,instalacje wodno kanalizacyjne, Zasady montażu rurociągów i podstawowych urządzeń
07 Podstawowe instalacje
Podstawowe rodzaje instalacji elektrycznych-4ka, Instalacje elektryczne
Instalacja serwera na linux - instrukcja, Linux, Linux - podstawy
ASEUT 2015 2016 MGR S1 PODSTAWOWE OBIEKTY REGULACJI W INSTALACJACH HYDRAULICZNYCH UCZ W1
Podstawowe zasady projektowania i montażu instalacji nawadniających(1), architekt
PODSTAWY PROJEKTOWANIA INSTALACJI ZBIORCZYCH TV, Anteny
6A. Instalacje elektryczne. Zabezpiecznia przetężeniowe, Podstawy Elektroenergetyki
Podstawowy schemat instalacji w domku jednorodzinnym
Podstawy projekt wentylacji strona tytułowa i spis treści, BUDOWNICTWO, Instalacje budowlane
więcej podobnych podstron