Page 1
Disassembly of the
Auto Take-Up Reel Unit
This sheet describes how to disassemble the Auto Take-Up Reel option for the EPSON Stylus Pro 9000.
1.
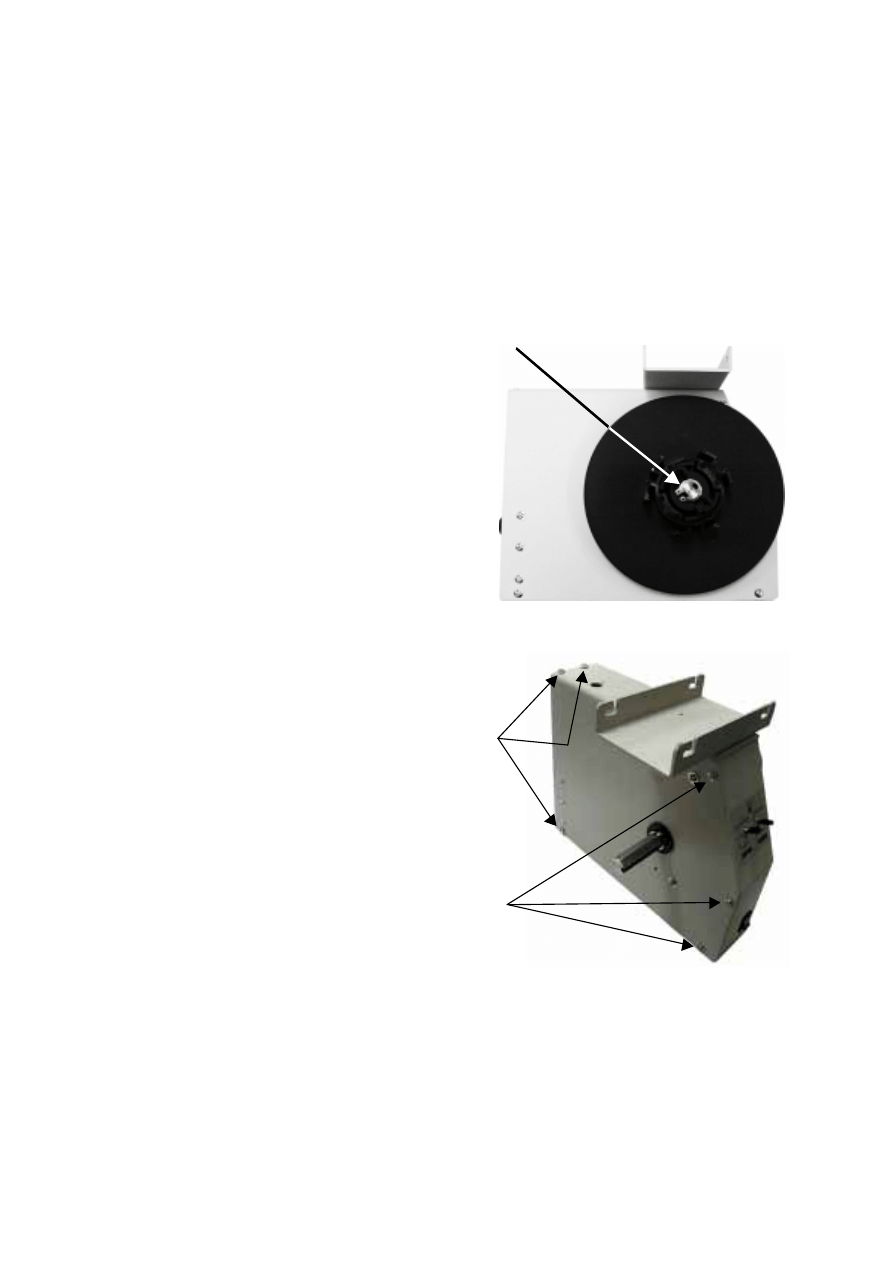
Removing the Core Holder
•
Remove the C-ring securing the Core Holder
shaft.
•
Remove the Core Holder from the shaft.
2.
Removing the Cover
•
Remove the six screws securing the
cover.
•
Remove the cover.
Screws
Screws
Page 2
3.
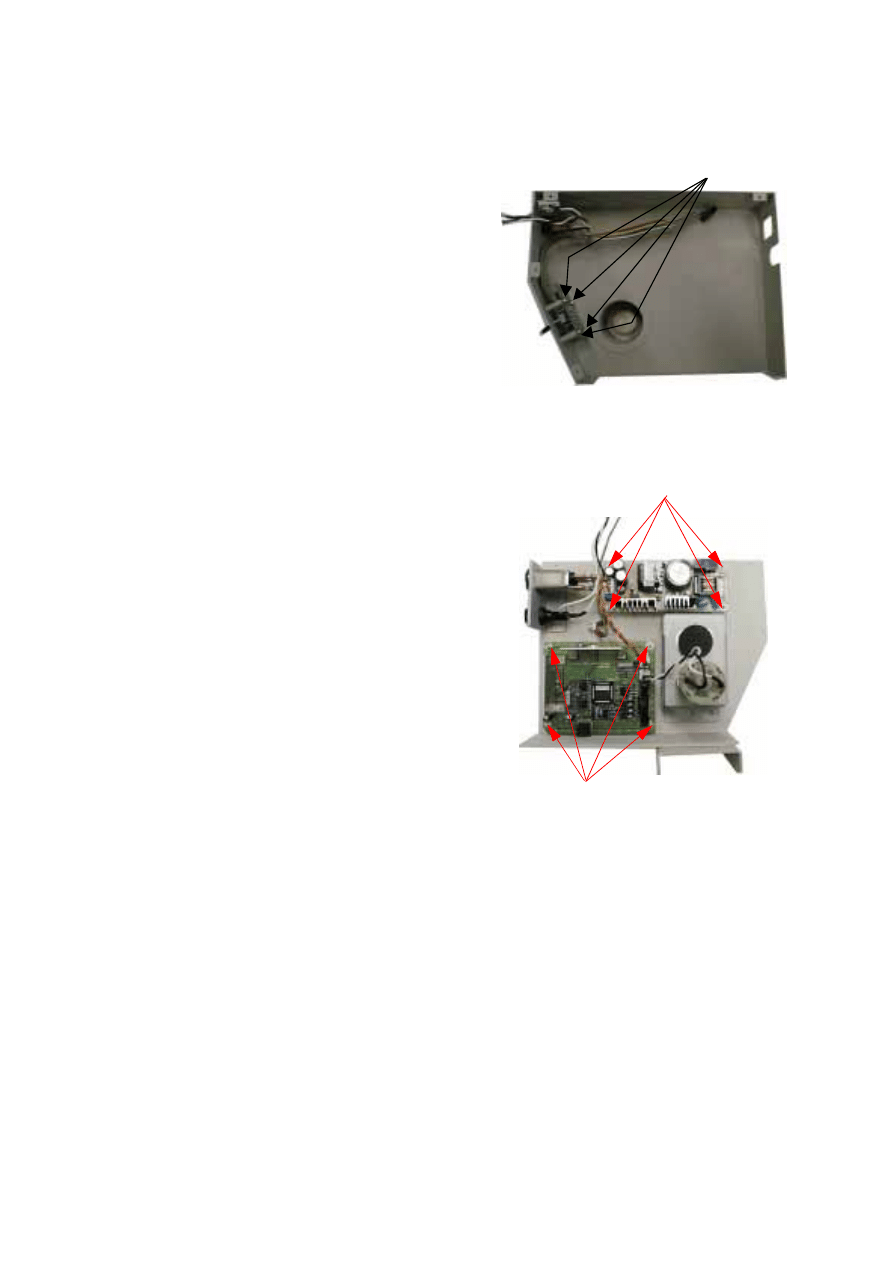
Removing the Control Panel
•
Remove the four screws securing the control
panel from the inside.
•
Remove the control panel.
4.
Removing the Power Supply Board
•
Disconnect the connector from the board.
•
Remove the four screws securing the board.
•
Remove the board.
5.
Removing the Main Board
•
Remove the connector from the board.
•
Remove the four screws securing the board.
•
Remove the board.
Screws
Power Supply
Board Screws
Main Board Screws
Page 3
6.
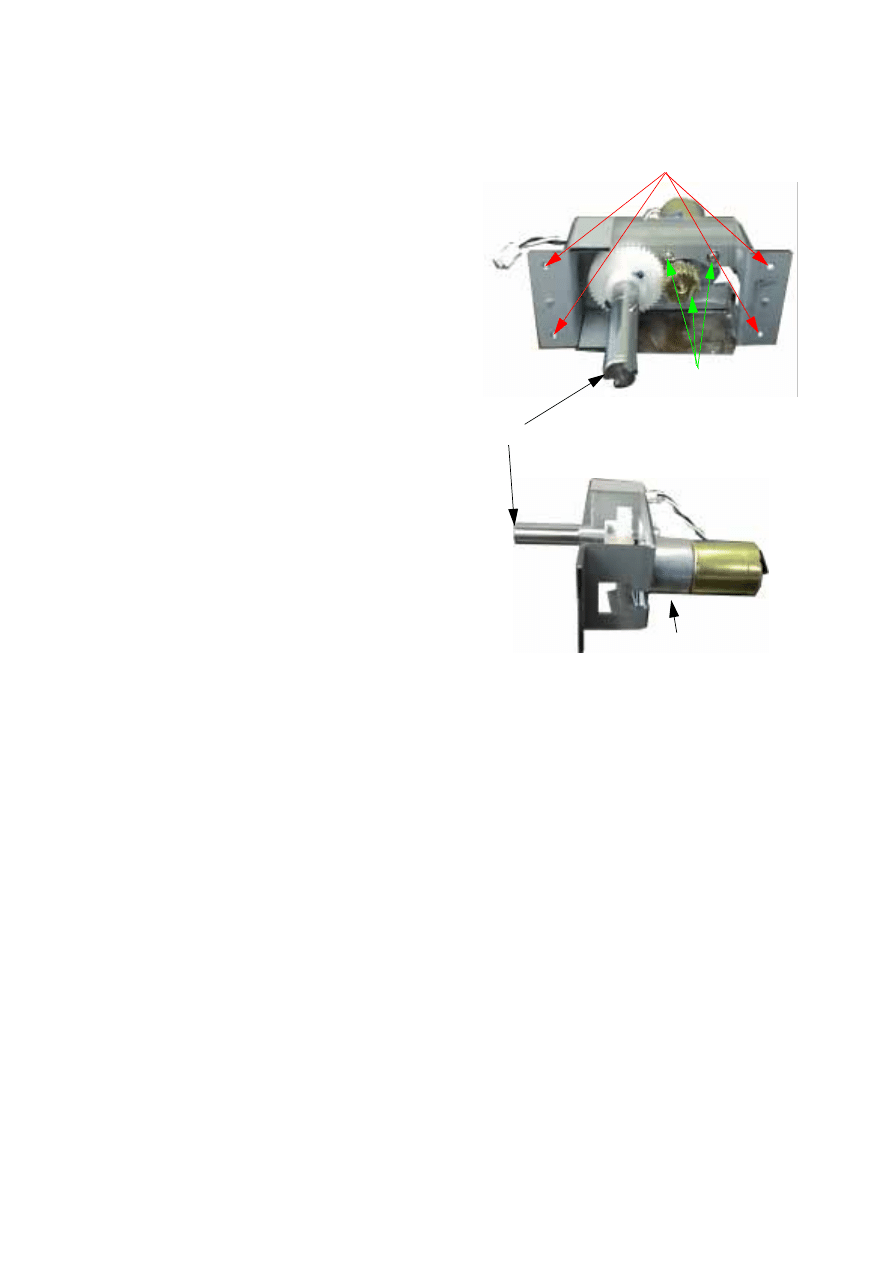
Removing the Motor
•
Remove the Power Supply Board
•
Disconnect the power connector.
•
Remove the C-ring from the shaft.
•
Remove the four screws securing the motor
frame to the cover.
•
Remove the motor frame.
•
Remove the three screws securing the motor to
the motor frame.
•
Slide the motor sideways to remove it.
Frame Screws
Motor Screws
From the
front
From the
side
C-ring
Slide
Document Outline
Wyszukiwarka
Podobne podstrony:
Epson Stylus Pro XL Service Manual
Kartridże atramentowe Epson Stylus C 80
Epson Stylus Color 460 Service Manual
Kartridże atramentowe Epson Stylus C 64
Epson Stylus Color 440, 640, 740 (2)
key pro m8 auto key programmer update token instruction
DRUKARKA EPSON STYLUS MODELE C79 D78
Kartridże atramentowe Epson Stylus C60
Epson Stylus Photo 700 (2)
Epson Stylus Scan 2000 Exploded Diagram
Epson Stylus Color 440, 640, 740
Resetter EPSON STYLUS COLOR 460
Epson Stylus Scan 2500 Exploded Diagram
więcej podobnych podstron