
Headspace Checks On
AK-47/74 Type Rifles
What to expect from your headspace gauges
Hopefully, I will be able to tell you what to expect from your headspace gauges. First and foremost I am
not an “EXPERT”. There will always be people that know more or less than I. You will have to
remember that AK’s are “NOT” manufactured to the close tolerances that U.S. made AR-15’s, M-14’s or
bolt action rifles are. Knowing this will allow acceptance of tolerances that would not be acceptable from
U.S. manufactured firearms. I’m not going to get into manufacturing processes, which is better, SAAMI
or CIP or any really heavy handed technical stuff. Also, I not a professional photographer so please bare
with the pictures.
First, let’s define Bolt Lockup and Full Bolt Rotation.
Bolt Lockup (Picture #1) is when the bolt moves the maximum distance when being closed by the bolt
carrier. This is what happens when you pull the bolt carrier back to charge the rifle and let it go to feed a
round into the chamber. In another words, this is the normal operational sequence of the bolt and bolt
carrier working together.
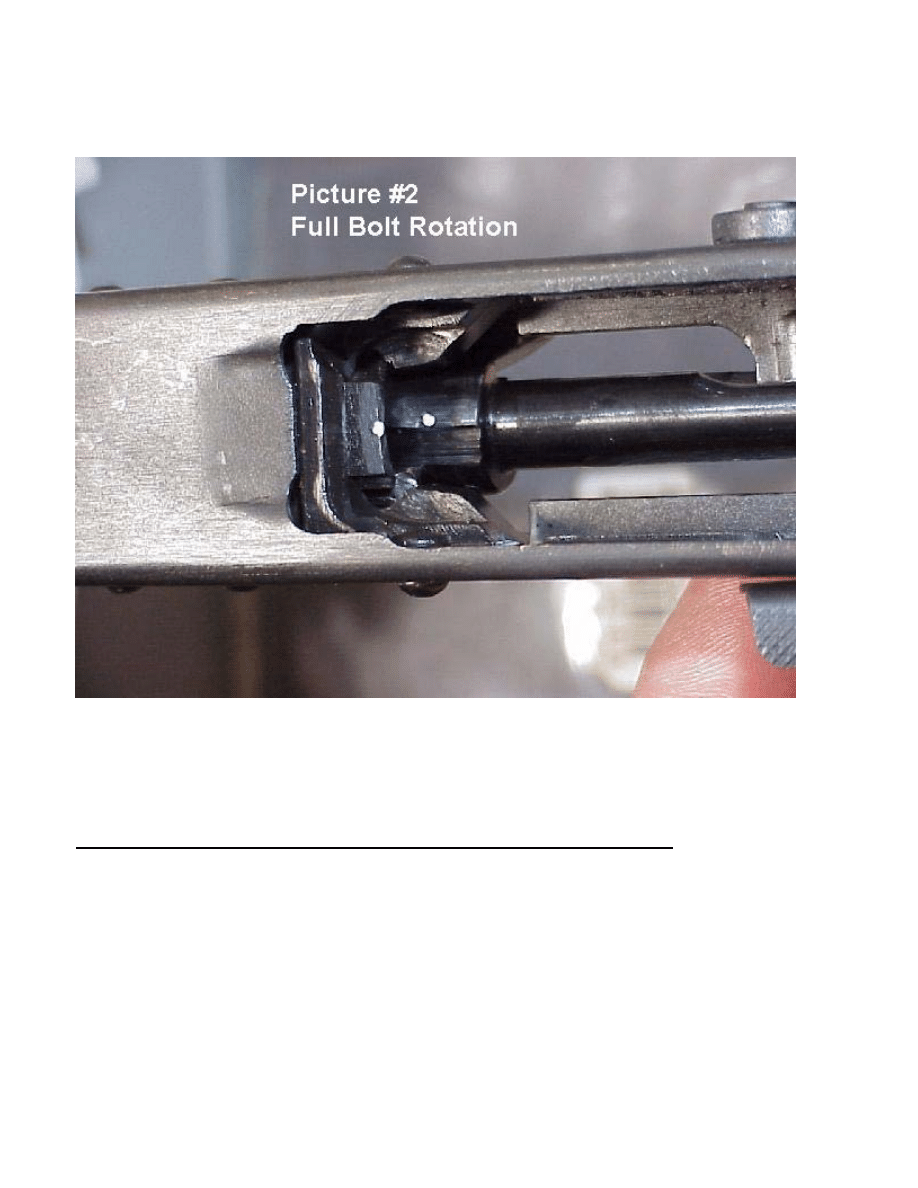
Full Bolt Rotation (Picture #2) is when you insert the bolt into the front trunnion and rotate it till it
stops.
These are two and independent dimensions/operations. Also they will give you different indications of
bolt movement. Since were interested in headspace checking only, Full Bolt Rotation will NOT be
addressed.
Setting up to check the headspace on the AK47/74 type rifles
First and foremost the firearm must be safe. Remove the magazine, pull the bolt carrier to the rear and
inspect the chamber to ensure that the chamber is empty. Working tip, these operations are much
easier with the recoil spring removed. With the bolt carrier in it’s most forward position, check to see
where the bolt has stopped in relationship to the front trunnion. I make a reference mark on the front
trunnion and the bolt (Picture #1). You are now setup to check headspace.
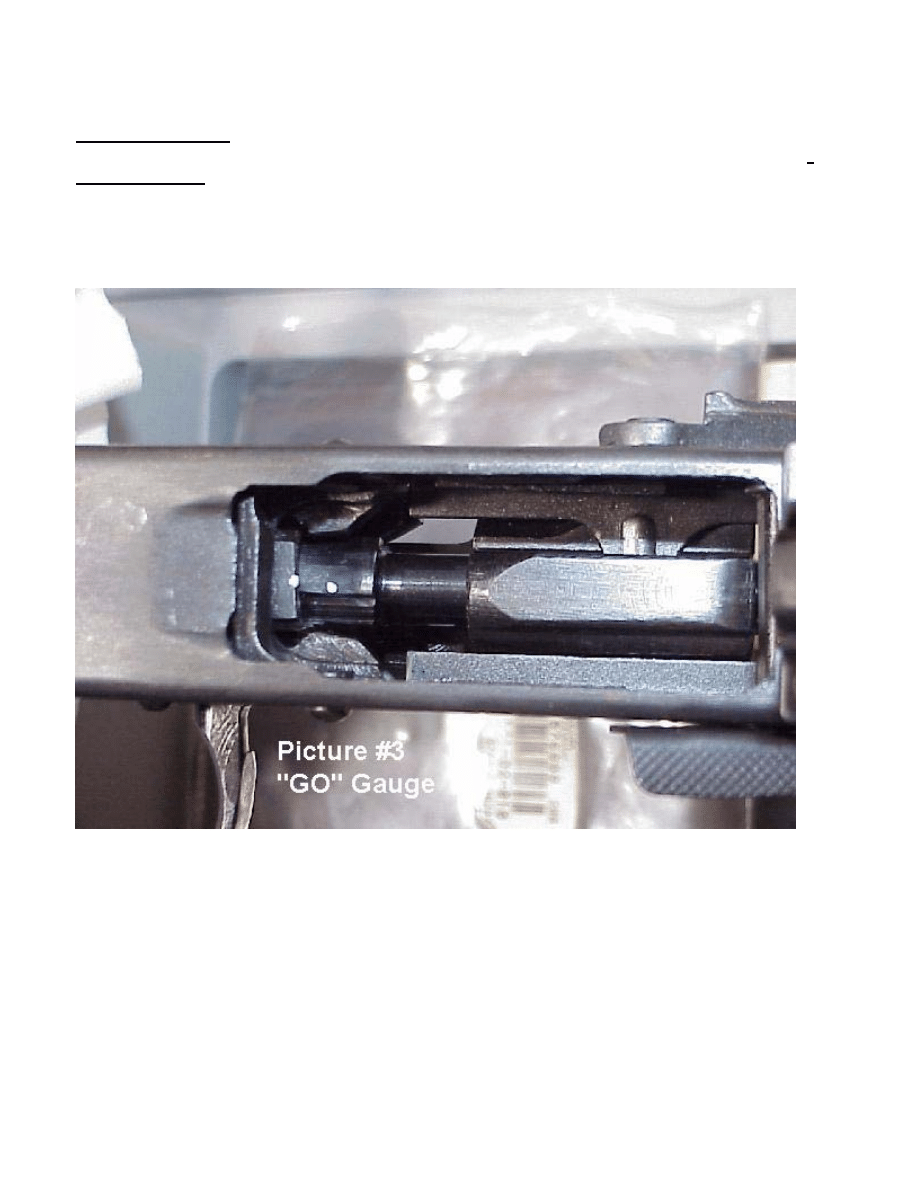
“GO” Gauge…
Pull the bolt carrier to the rear just enough so that the bolt has does not engage the
ejector. Slide the “GO” gauge into the bolt head recess (it can be held by the extractor), then slowly (I
MEAN SLOWLY) allow the carrier to move forward to chamber the “GO” gauge. When the carrier has
stopped moving, check the reference points mentioned in “Setting Up”. They should match, indicating
that the rifle has passed the “GO” check (Picture #3). But remember that were talking about an AK-47/74
type rifle so there might be just a very, very small difference in the two reference marks. Pull the bolt
carrier back and remove the “GO” gauge from the bolt.

“NOGO” Gauge…
Pull the bolt carrier back as stated above and insert the “NOGO” gauge. Again
slowly move the bolt carrier forward until it stops. The bolt reference marks should not align (Picture
#4). At this time the “NOGO” check has been completed. If the reference marks align it means that the
chamber is getting close to the maximum allowable size set by the manufacturer. If this is the case you
have two (2) options.
Option 1:
Obtain a “Field” headspace gauge to accomplish the same check as stated above to ensure
that the reference marks will not align. This gauge indicates the maximum “SAFE” chamber dimension.
Option 2:
Replace the barrel assembly.
I personally feel that if the bolt aligns with the reference marks when using
the “NOGO” gauge the firearm is not safe for use. A new barrel is cheaper
than a new face.
Wyszukiwarka
Podobne podstrony:
AK 47
Munitions Firearms Blueprint AK 47 Assault Rifle Receiver
budowa Ak 47 Assault Rifle Receiver
AK 47
ZPKB wyk ady AK
I rok AK Matematyka 2013 2014 (1)
WYKúAD 6, AK, pasemko, PROJEKTOWANIE KONSERWATORSKIE, Skumulowane wszytskie wyklady z Hoff 1 7, Skum
7, AK, pasemko, Opracowania na obronę, z roku
Czynności łączne do strzelania szkolnego nr 1 z kbk AK, UZBROJENIE
AK KARTA PRACY 2015 16 T 6 morf pędu
AK D Lab 1
AK lab6 (2)
2014 Reforma Narodowych Sił Rezerwowych utworzenie AK
Harcerska Poczta Polowa w Powstaniu Warszawskim polsihresistance ak org
AK KARTA PRACY 2015 16 T 11 zarodek, owoce
przyczyny przestępczości teorie kryminologiczne, referat JK AK
AK KARTA PRACY 2015 16 T 8 Liść
więcej podobnych podstron