
Procedure to remove and replace 12v
battery
Preliminary information
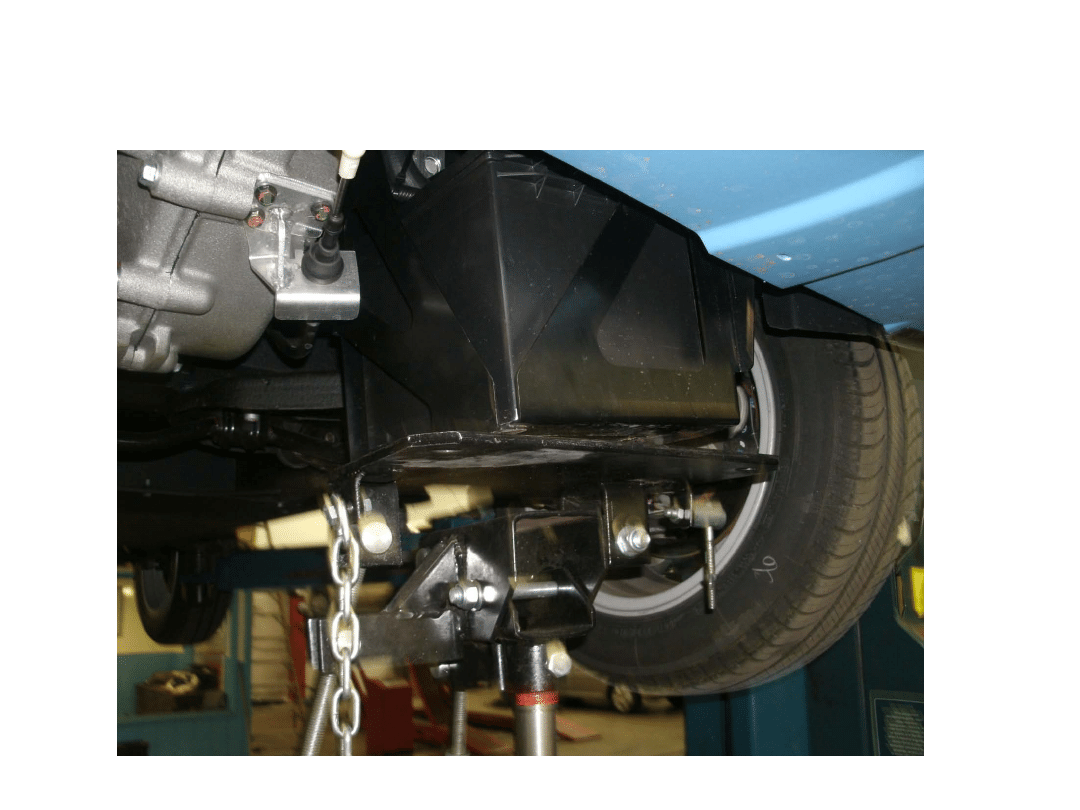
The 12v battery is located in lower-front drivers side of vehicle and can only
be accessed from underneath. It will be necessary to lift front of vehicle up
off the ground by hoist or hydraulic jack to gain access to the 12v battery. Use
insulated tools if possible.
1.
Insure vehicle is turned off and key is out off ignition prior to battery removal.
2.
Use a drop light under vehicle to help in assisting and locating the 2 – 13mm nuts and one 13mm bolt,
to be removed from the bracket securing the battery to the frame.
3.
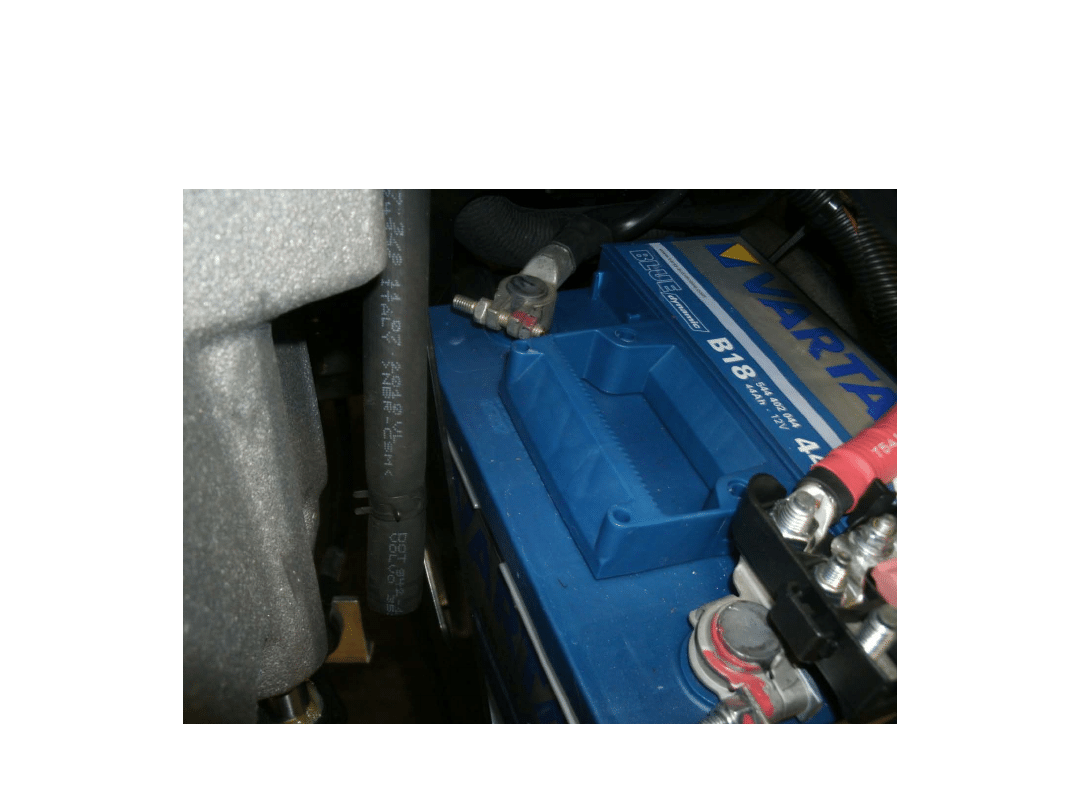
After vehicle is in the air, remove negative battery cable first with a 10mm socket on a ¼ in. drive ratchet
or a 10mm gear wrench. Next remove the positive cable with the same tools. Note: You will not be able
to see these connections on the top of the battery, so you will have to go up on top of battery and work
with one hand.
4.
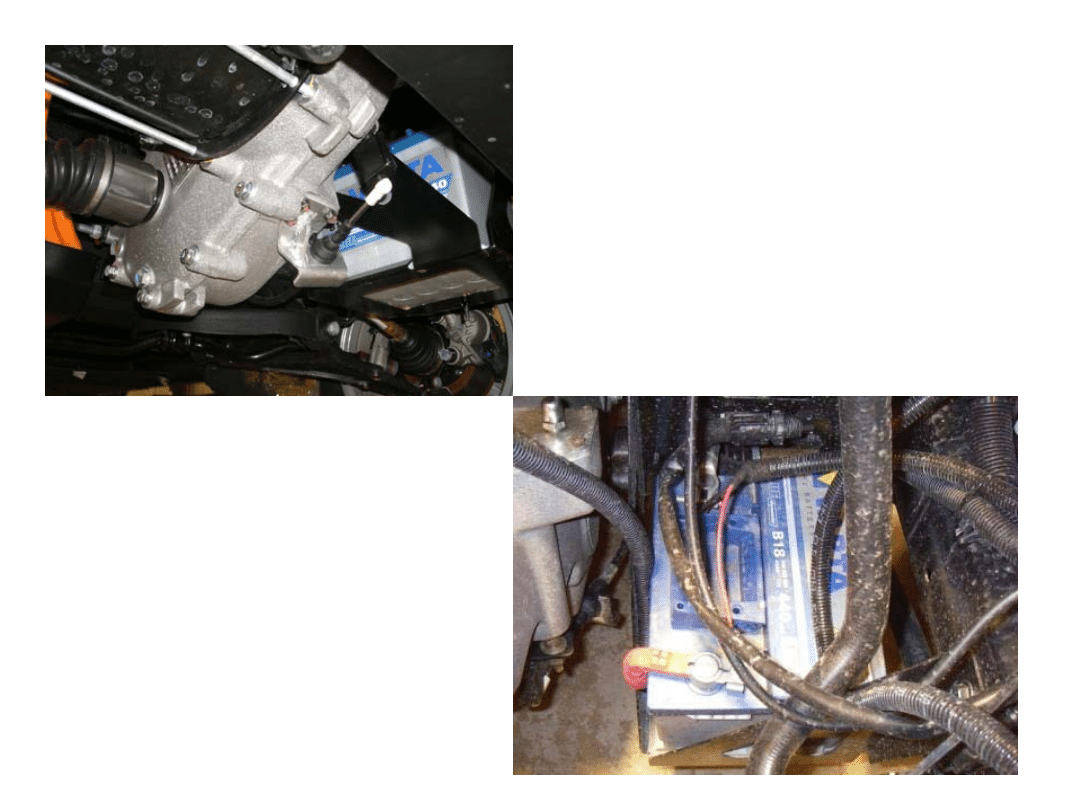
Use pivoting extensions to remove 13mm bolt holding front bracket arm to frame (see photos)
5.
Reaching up above battery, locate and remove the other 2 13mm nuts that are holding the back of
battery bracket to the studs on the frame.
6.
After replacing battery in the carrier bracket, reinstall battery in vehicle using the reverse procedure.
Note: Observe the location of the ground strap that runs across the stud on the rear of frame. The
bracket must mount on the inside of the ground strap.
Document Outline
Wyszukiwarka
Podobne podstrony:
Attribution of Hand Bones to Sex and Population Groups
Introduction to Lagrangian and Hamiltonian Mechanics BRIZARD, A J
Pappas; Routledge Philosophy Guidebook to Plato and the Republic
Kydland, Prescott Time to Build and Aggregate Fluctuations
PBO SDO6 F01 Reviewing records to contract and agreement
Alternator Check and Replacement
Fixing to plasterboard and plasterboard fixings
Introduction to CPLD and FPGA Design
Introduction to Mechatronics and Measurement Systems
From Local Color to Realism and Naturalism (1) Stowe, Twain and others
Introduction to Prana and Pranic Healing – Experience of Breath and Energy (Pran
Luther The Marketing Plan How to Prepare and Implement It
From local colour to realism and naturalism
Berklee College to Audition and Interview?rican Musicians
Plane, train or bicycle Which is the?st way to travel and why
How to create and develop brand value
ECP Alchemy of the Heart How to Give and Receive More Love [OCR]
Zizek From politics to Biopolitics and back
więcej podobnych podstron