Welcome to our guide to painting interior walls.
In this section we will take you through the whole process including the
preparation through to the final coat.
Painting is one of the easiest and most rewarding DIY tasks around the home,
you can transform a room with the minimum amount of work and time.
We will assume you have decorated/painted the ceiling and any woodwork. If not,
and you are intending to then it is advisable to complete these tasks first, please
see our guides:
• Papering a ceiling
• Painting a ceiling
Doing the tasks which apply in this order will make the job easier.
To complete this task you will need the following items:
• Suitable interior paint
• small brush (cutting in)
• Large brush and kettle or Roller and
Tray
• Filler (if required)
• Dust Sheets
• Fine Sand paper (if required)
• Sugar soap (or similar)
When working at heights always ensure that the structure is safe and
secure. Never stretch out, always get down and re-position the scaffold.
Preparing the walls for painting
If your walls need stripping before painting then please see our guide to removing
wallpaper.
If you have a radiator that needs removing the please see our guide to removing a
radiator.
First remove curtains and fixtures, place all furnishings in the middle of the room and
cover with dustsheets. Remove any loose floor coverings and use dustsheets to
protect any other floor covering from paint splashes and dust.
Wash down the wall with sugarsoap or a suitable detergent to remove all dust and
debris.
Inspect the wall surfaces for cracks, holes and any loose
plaster.
For small cracks use a suitable fine filler, for larger cracks
and holes use a more suitable filler (see manufacturer's
instructions).
To check for any loose plaster, tap the wall around any
suspect areas and remove any loose flaky plaster.
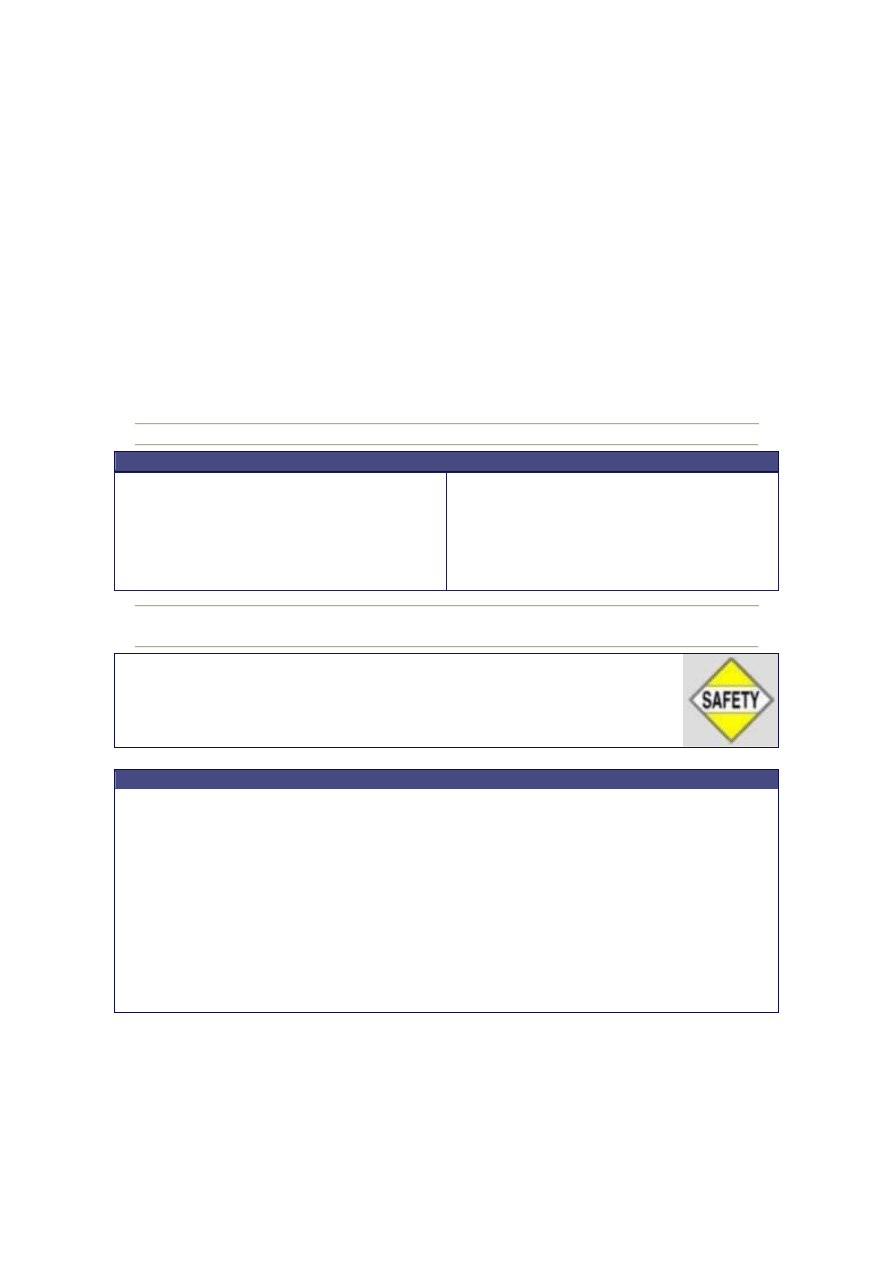
When filling try and leave a nice smooth finish, it is better
to leave the filled area slightly proud of the surrounding
area and then sand down with a fine sandpaper until flush.
Fig 1.1
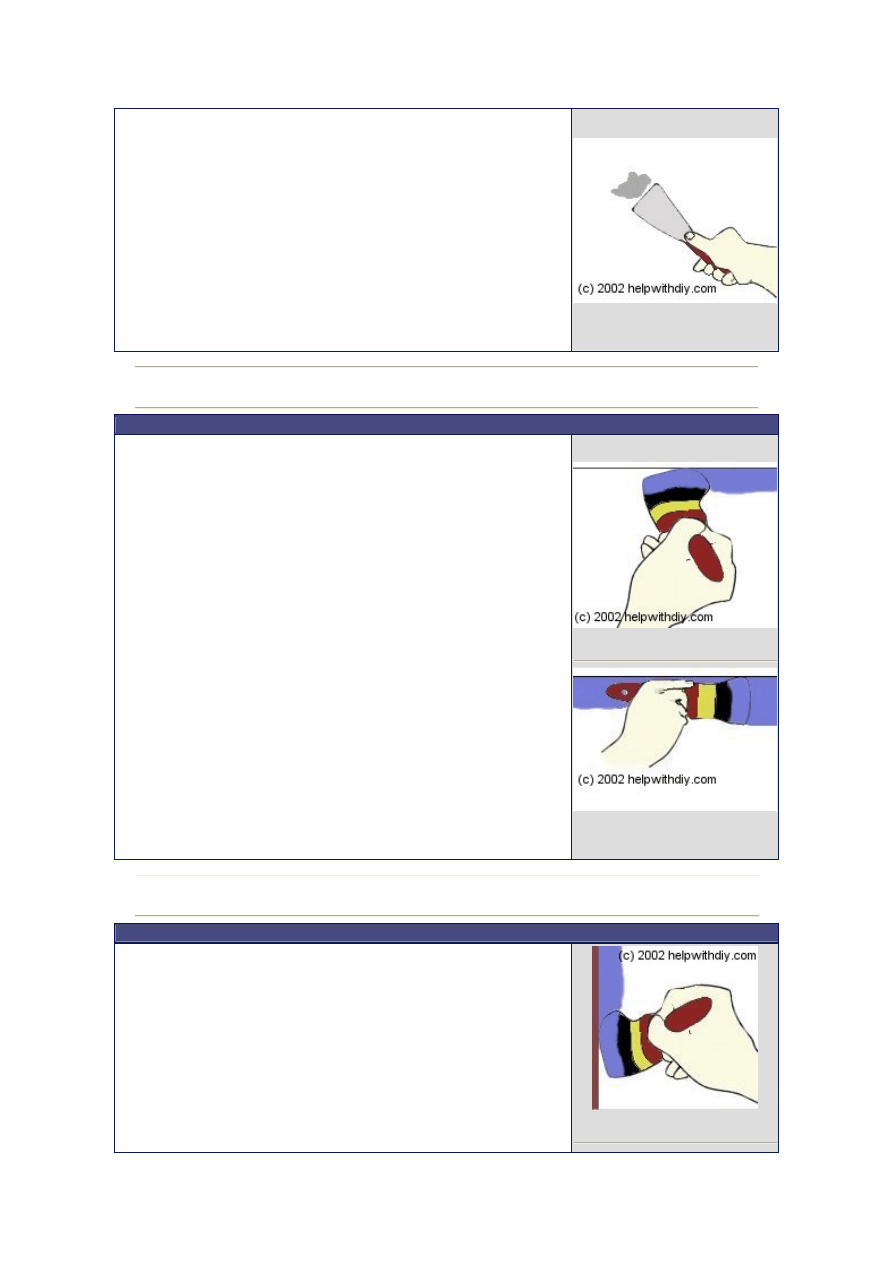
Cutting in to the ceiling
Note: To give the best finish only cut in one wall at a time,
paint that wall, then start on the next.
The next step is to cut in around the ceiling, skirting,
corners, light switches, sockets and any doors/windows.
To cut in to the ceiling use the brush as shown in Fig 1.2
paint along the top of the wall keeping the edge of the
brush tight to the ceiling, use firm steady strokes to give
yourself a nice straight edge.
Then turn the brush and hold as shown in Fig 1.3 and go
over the paint again with a steady stroke to smooth the
previous coat, this time there is no need to get too close to
the ceiling but close enough to smooth the paint out nicely.
You can use this technique to cut in around the horizontal
runs of any windows, doors, sockets and light switches.
To cut in to the skirting boards use a similar technique
holding the brush at a 90 degree angle to the skirting
board, then turn the brush and go over the paint again to
smooth the coat.
Fig 1.2
Fig 1.3
Cutting in around windows and doors
To cut in around the vertical runs of doors and windows is
the technique used above but this time hold the brush as
shown in Fig 1.4 keeping tight into the corner with the
edge of the brush.
Then using the brush as shown in Fig 1.5 go over the paint
again with a firm steady stroke to smooth the previous
coat, again there is no need to get too close to the corner,
just enough to smooth the paint out nicely at the edge.
You can use this technique to cut in around the vertical
Fig 1.4
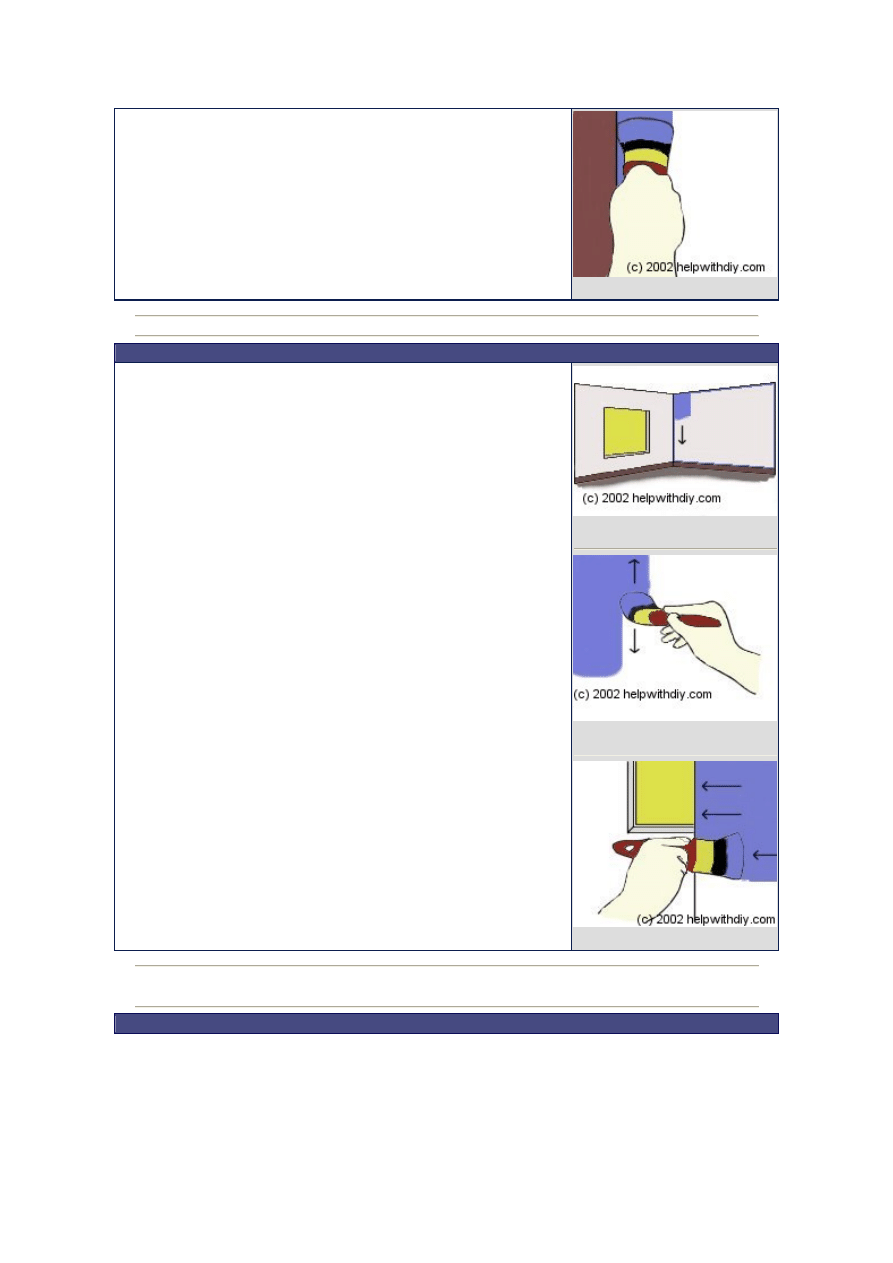
runs of any windows, doors, sockets and light switches.
Fig 1.5
Applying the first coat - Using a brush
When painting interior walls paint from top to bottom
working away from windows as in Fig 1.6.
Using a brush
Use the biggest brush you feel comfortable with, this will
allow you to cover a greater area quicker and therefore
lessen the chance of the paint drying out too quickly at any
edges.
If you are using a paint kettle (recommended) then fill the
kettle so it is half the depth of the bristles on your brush,
this will help avoid overloading the brush.
Use the brush as shown in Fig 1.7 making a nice smooth
vertical action with your wrist, paint one section at a time
ensuring to keep any wet edges fresh as this will improve
the finish.
With corners always paint outwards over the edge as
shown in Fig 1.8 this will reduce the chances of any paint
collecting at the edge and forming runs.
Try to ensure you catch any runs in the paint as they
happen, if you find a run that has already dried out too
much to smooth with the brush then you will need to sand
it down with fine sandpaper, and then recoat.
Apply the second coat in the same way.
Fig 1.6
Fig 1.7
Fig 1.8
Applying the first coat - Using a roller
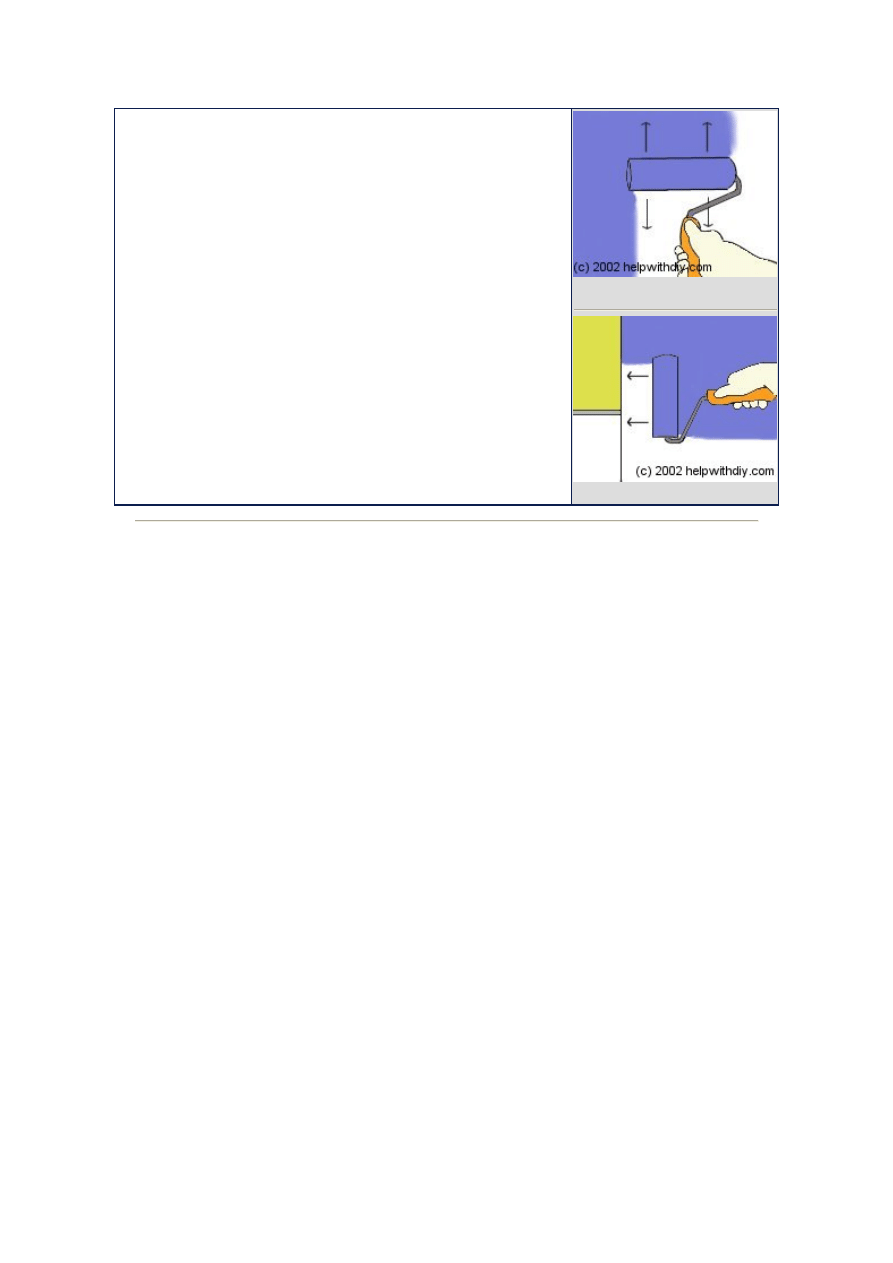
Using a roller - short pile
Fill the roller tray to a depth so that the paint doesn't rise
above the pile of the roller, this will help to avoid
overloading the roller.
Place the roller into the paint and then roll it back and forth
over the top section of the tray to distribute the paint
evenly around the pile.
With your roller use smooth vertical actions (see Fig 1.9)
to give an even coat, ensuring to keep the wet edges fresh
as do each section of the wall, finish each section with
smooth strokes in one direction (down or up) this will
improve the finish.
When painting to an edge always roll to the edge as shown
in Fig 2.0 this will help avoid a build up of paint on the
edge.
Apply the second coat in the same way.
Fig 1.9
Fig 2.0
Wyszukiwarka
Podobne podstrony:
Painting interior panel doors
Interior Painting
Interior painting
Interior Painting 2
Fly Model 030 B17G interiors some custom parts
Pope Tells EU Nations to Tear Down Migrant Walls
M000411 B Eng Propulsor painting instructions
20 body interio and exterior
36 interimRPTfinal
19 Ursachenerklärung von Fehlern ( Kontrastivhypothese, Identitäts Hypothese, Interimsprachen Hypoth
Paintings and One Qaradawi
http, poczta interia pl poczta attachment fid=1&mid=5&mpid=3&f=Curie1
Empire of the Petal Throne Legions of the Petal Throne Painting Guide
Good and Ruined Walls #1
Luftwaffe Hangar, hangar walls
więcej podobnych podstron