Digital
The
Book
Photography
The step-by-step secrets for how to
make your photos look like the pros’!
Scott Kelby

The Digital Photography
Book, volume 3 Team
TECHNICAL EDITORS
Kim Doty
Cindy Snyder
EDITORIAL CONSULTANT
Brad Moore
CREATIVE DIRECTOR
Felix Nelson
TRAFFIC DIRECTOR
Kim Gabriel
PRODUCTION MANAGER
Dave Damstra
GRAPHIC DESIGN
Jessica Maldonado
COVER DESIGNED BY
Jessica Maldonado
STUDIO AND
PRODUCTION SHOTS
Brad Moore
Rafael “RC” Concepcion
The Digital Photography Book, volume 3
PUBLISHED BY
Peachpit Press
Copyright ©2010 by Scott Kelby
FIRST EDITION: July 2009
All rights reserved. No part of this book may be reproduced or
transmitted in any form or by any means, electronic or mechanical,
including photocopying, recording, or by any information storage
and retrieval system, without written permission from the publisher,
except for the inclusion of brief quotations in a review.
Composed in Myriad Pro (Adobe Systems Incorporated) and Lucida
Grande (Bigelow & Holmes Inc.) by Kelby Media Group.
Trademarks
All terms mentioned in this book that are known to be trademarks
or service marks have been appropriately capitalized. Peachpit Press
cannot attest to the accuracy of this infor mation. Use of a term in
the book should not be regarded as aff ecting the validity of any
trademark or service mark.
Photoshop, Elements, and Lightroom are registered trademarks
of Adobe Systems Incorporated. Nikon is a registered trademark of
Nikon Corporation. Canon is a registered trademark of Canon Inc.
Warning and Disclaimer
This book is designed to provide information about digital photog-
raphy. Every eff ort has been made to make this book as complete
and as accurate as possible, but no warranty of fi tness is implied.
The information is provided on an as-is basis. The author and
Peachpit Press shall have neither the liability nor responsibility
to any person or entity with respect to any loss or damages
arising from the information contained in this book or from the
use of the discs or programs that may accompany it.
THIS PRODUCT IS NOT ENDORSED OR SPONSORED BY ADOBE
SYSTEMS INCORPORATED, PUBLISHER OF ADOBE PHOTOSHOP,
PHOTOSHOP ELEMENTS, AND PHOTOSHOP LIGHTROOM.
ISBN 10:
0-321-61765-7
ISBN 13: 978-0-321-61765-1
9 8 7 6 5 4 3 2 1
Printed and bound in the United States of America

For my in-house editor Kim Doty.
One of the best things that ever
happened to my books is you.

iv
A c k n o w l e d g m e n t s
A
lthough only one name appears on the spine of this book, it takes a team of dedicated
and talented people to pull a project like this together. I’m not only delighted to be
working with them, but I also get the honor and privilege of thanking them here.
To my amazing wife Kalebra: This year we’re celebrating our 20th wedding anniversary,
and I’m more in love, more crazy about you, and more thrilled that you’re my wife than ever.
Besides being a world-class mother, a gourmet chef, an artist, a singer, and a brilliant busi-
nesswoman, you’re just about the coolest person I’ve ever known. I still can’t believe that
you chose me, and I’ll spend the rest of my life working to make sure you always feel you
made the right choice. I love you, sweetheart.
To my wonderful, crazy, fun-filled, little buddy Jordan: If there’s any kid on the planet
who knows how much their dad loves them, and how proud their dad is of them, it’s you
little buddy (even though, now that you’re 12, I’m not supposed to call you “little buddy”
anymore. Well, at least not in front of your friends). You were wired at the factory to be an
incredibly fun, hilarious, creative, positive, sensitive, super-bright, yet totally crazy kid, and
I love it. But I have to admit, as much fun as I have at our nightly Halo 3 battles on Xbox LIVE,
last week when I dragged my amp and guitar up to your room, you sat down at your drums,
and we jammed on an extended version of Bon Jovi’s “You Give Love a Bad Name,” I knew
at that moment that if it was possible to have become a luckier dad than I already was, it
just happened. Dude (I mean, son), you rock!
To my beautiful “big girl” Kira: You’re totally blessed with your mom’s outer beauty, and
also something that’s even more important: her inner beauty, warmth, compassion, smarts,
and charm, which will translate into the loving, fun- and adventure-filled, thrilling, drive-it-
like-you-stole-it kind of life so many people dream of. You were born with a smile on your lips,
a song in your heart, and a dad that is totally wrapped around your finger.
To my big brother Jeff: A lot of younger brothers look up to their older brothers because,
well…they’re older. But I look up to you because you’ve been much more than a brother to
me. It’s like you’ve been my “other dad” in the way you always looked out for me, gave me
wise and thoughtful council, and always put me first—just like Dad put us first. Your boundless
generosity, kindness, positive attitude, and humility have been an inspiration to me my entire
life, and I’m just so honored to be your brother and lifelong friend.
To my best buddy Dave Moser: Do you know how great it is to get to work every day
with your best buddy? I do. It’s awesome. Thanks my friend—you are the best.
To my in-house team at Kelby Media Group: I am incredibly blessed to go to work each
day with a group of uniquely dedicated, self-motivated, and incredibly creative people—people
who mean much more to me than just employees, and everything they do says they feel the
same way. My humble thanks to you all for allowing me to work with the very best every day.
To my editor Kim Doty: What can I say—this book is dedicated to you! Writing books is
never easy, but you make my job so much easier by keeping me on track and organized, and
for staying absolutely calm and positive in the face of every storm. One of the luckiest things
that has ever happened to my books is that you came along to edit them, and I’m very hon-
ored and grateful to have you making my books so much better than what I turned in.
To Jessica Maldonado: You are, hands-down, the Diva of Design, and I owe much of the
success of my books to the wonderful look and feel you give them. What you do brings my
books to life, and helps them reach a wider audience than they ever would have, and I’m so
thrilled that you’re the person that works these miracles for us (signed, your biggest fan!).

v
To Cindy Snyder: A big, big thanks for helping tech and copyedit all the tips in the book
and, as always, for catching lots of little things that others would have missed.
To Dave Damstra: You give my books such a spot-on, clean, to-the-point look, and although
I don’t know how you do it, I sure am glad that you do!
To my friend and longtime Creative Director Felix Nelson: We love you. We all do. We
always have. We always will. You’re Felix. There’s only one.
To my Executive Assistant and general Wonder Woman Kathy Siler: You are one of
the most important people in the building, not only for all the wonderful things you do for
me, but for all the things you do for our entire business. Thanks for always looking out for
me, for keeping me focused, and for making sure I have the time I need to write books,
do seminars, and still have time with my family. You don’t have an easy job, but you make
it look easy.
To my photography assistant and digital tech Brad Moore: I don’t know how I would
have gotten through this book without your help, your work in the studio (shooting so many
of the product shots), your advice and input, and your patience. You’ve only been here a short
time and you’re already having a big impact. I’m so grateful to have someone of your talent
and character on our team.
To my buddy RC Concepcion: My personal thanks for reprising your gig from volume 2,
and stepping in to help get the studio shots done for this volume. You are the Swiss Army knife
of digital imaging and design.
To Kim Gabriel: You continue to be the unsung hero behind the scenes, and I’m sure I don’t
say this enough, but thank you so much for everything you do to make this all come together.
To my dear friend and business partner Jean A. Kendra: Thanks for putting up with me
all these years, and for your support for all my crazy ideas. It really means a lot.
To my editor at Peachpit Press, Ted Waitt: Do you know what a joy it is to work on a photo
book with an editor who’s also a passionate and creative photographer? It makes a huge
difference. You get it. You get me. I get you. It’s a beautiful thing.
To my publisher Nancy Aldrich-Ruenzel, Scott Cowlin, Sarah Jane Todd, and the incredibly
dedicated team at Peachpit Press: It’s a real honor to get to work with people who really just
want to make great books.
To all the talented and gifted photographers who’ve taught me so much over the years:
Moose Peterson, Vincent Versace, Bill Fortney, David Ziser, Jim DiVitale, Helene Glassman,
Joe McNally, Anne Cahill, George Lepp, Kevin Ames, Eddie Tapp, and Jay Maisel, my sincere
and heartfelt thanks for sharing your passion, ideas, and techniques with me and my students.
To my mentors John Graden, Jack Lee, Dave Gales, Judy Farmer, and Douglas Poole:
Your wisdom and whip-cracking have helped me immeasurably throughout my life, and I will
always be in your debt, and grateful for your friendship and guidance.
Most importantly, I want to thank God, and His son Jesus Christ, for leading me to the
woman of my dreams, for blessing us with such amazing children, for allowing me to make a
living doing something I truly love, for always being there when I need Him, for blessing me
with a wonderful, fulfilling, and happy life, and such a warm, loving family to share it with.

vi
Scott Kelby's 7-Point System for Adobe Photoshop CS3
The Digital Photography Book, vols. 1 & 2
The Photoshop Elements Book for Digital Photographers
The Adobe Photoshop Lightroom Book for Digital Photographers
The Photoshop Book for Digital Photographers
The Photoshop Channels Book
Photoshop Down & Dirty Tricks
Photoshop Killer Tips
Photoshop Classic Effects
The iPod Book
InDesign Killer Tips
Mac OS X Leopard Killer Tips
The iPhone Book
O t h e r B o o k s B y S c o t t K e l b y

vii
A b o u t t h e
A u t h o r
Scott is Editor, Publisher, and co-founder of Photoshop User magazine,
Editor-in-Chief of Layers magazine (the how-to magazine for everything
Adobe), and is the co-host of the weekly video podcasts DTown TV
(the weekly show for Nikon dSLR shooters) and Photoshop User TV.
He is President of the National Association of Photo shop Professionals
(NAPP), the trade association for Adobe® Photoshop® users, and he's
President of the software training, education, and publishing firm
Kelby Media Group.
Scott is a photographer, designer, and award-winning author of more
than 50 books, including The Digital Photography Book, volumes 1
and 2, The Adobe Photoshop Book for Digital Photographers, Photo-
shop Down & Dirty Tricks, The Adobe Photoshop Lightroom Book for
Digital Photographers, Photoshop Classic Effects, The iPod Book, and
The iPhone Book.
For five years straight, Scott has been honored with the distinction of
being the world’s #1 best-selling author of all computer and technology
books, across all categories. His books have been translated into dozens
of different languages, including Chinese, Russian, Spanish, Korean,
Polish, Taiwanese, French, German, Italian, Japanese, Dutch, Swedish,
Turkish, and Portuguese, among others, and he is a recipient of the
prestigious Benjamin Franklin Award.
Scott is Training Director for the Adobe Photoshop Seminar Tour, and
Conference Technical Chair for the Photoshop World Conference & Expo.
He’s featured in a series of training DVDs and online courses, and has
been training photographers and Adobe Photoshop users since 1993.
For more information on Scott and his photography, visit his daily
blog at www.scottkelby.com
Scott Kelby

Using Flash Like a Pro, Part 2
Picking Right Up Where the Last Book Left Off
9 Things You’ll Wish You Had Known…
That Was Only 6. Here Are the Last 3
Soft Light on Location (the Budget Way)
Controlling Softness with an Umbrella
Get More Control Using a Portable Softbox
What Your Flash’s Groups Are For
What Your Flash’s Channels Are For
Using a Transmitter to Fire Your Flash
How to See If All Your Flashes Will Really Fire
Shorten the Time Between Flashes
Recycle Faster with an External Battery Pack
Typical Power Settings for Your Flash
Firing a Second Flash in Another Room
Getting the Ring Flash Look Using Small Flash
What If Your Flash at Full Power Isn’t Enough?
Lowering the Power of Your Pop-Up Flash
When Not to Use a Diff usion Dome
The Pro Trick for Better-Looking People Shots
Two Other Gels You Really Need
Tips for Lighting Your Background with Flash
Using That Little Flash Stand in the Box
Where You Focus Aff ects Your Flash Exposure
The Paid-Gig Flash Insurance Policy
How High to Position Your Flash
Which Side Should Your Flash Go On?
In Volume 2, We Built It From Scratch. Now, Let’s Pimp It!
The Easy Way to a Pure White Background
Strobes with Built-In Wireless Rock!
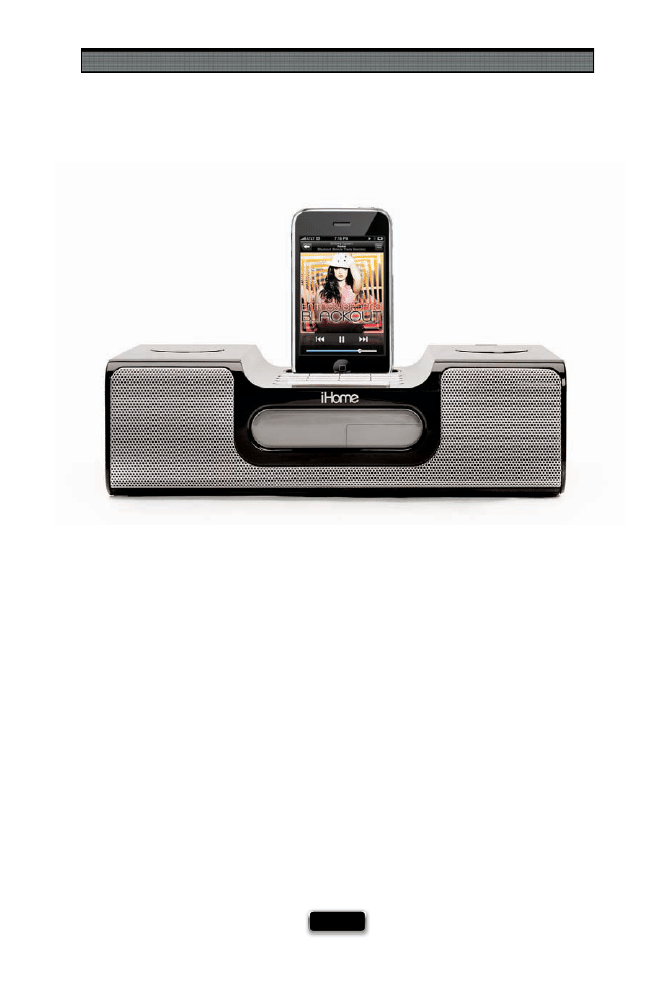
You’ve Got to Have Music During the Shoot
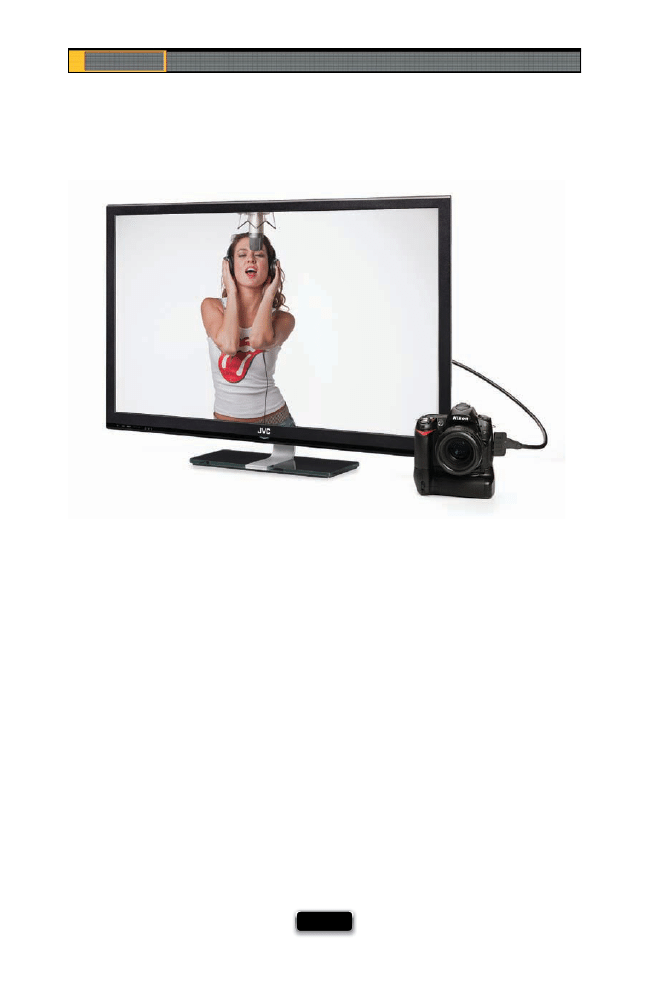
Shooting Tethered Directly to a TV Monitor
Table of Contents
viii

Getting Your Laptop Nearby for Tethering
The Most Useful Inexpensive Accessories
Why You’ll Love Rolling Light Stands
One Background, Three Diff erent Looks
Catch Lights and Why You Want Them
Refl ectors: When to Use Silver or White
Using a Gray Card to Nail Your Color
Don’t Light Your Whole Subject Evenly
The Diff erence Between Main and Fill Light
Avoiding the Flash Sync Speed Black Bar
Which Lens to Use, When, and Why
When to Use an Ultra-Wide Zoom Lens
When to Use a Super-Telephoto Lens
Using a Teleconverter to Get Even Closer
Using Filters with Your Lenses
When to Use the Manual Focus Ring
Lens Vignetting and How to Remove It
Why Some Lenses Have Two f-Stops
(Like f/3.5–5.6)
When to Use an “All-in-One” Zoom
What Makes It a Portrait Lens?
Fixed-Length Prime Lenses vs. Zooms
Shooting at Your Lens’ Sharpest Aperture
But My Friend Has That Lens and He Shoots...
Table of Contents
ix

How to Get Them to Look Like You’ve
How to Create Real Refl ections
Mirrors for Those Hard-to-Light Places
The Advantage of Shooting Inside a Tent
Mixing Daylight and Studio Lights
Enhancing Highlights and Shadows in Post
Special Wire for Hanging Products
The Advantage of Using Strip Banks
A Dramatic Background for Products
More Tips for Creating Stunning Scenic Images
Make a Packing List So You
Don’t Forget Anything
Getting the Star Filter Eff ect
Try Getting Creative with White Balance
Let Great Light Be Your Subject
The Three Keys to Landscape Photography
Look for Clouds to Hold the Color
How to Shoot Underwater, Part 1
How to Shoot Underwater, Part 2
It’s What You Leave Out of the Frame
Shoot at the Lowest ISO Possible
Not Sure What to Shoot? Try This!
Using a Graduated Neutral Density Filter
What to Do with Your HDR Shots
Scout Your Dawn Shoot Location
Table of Contents
x

Use Backlighting to Your Advantage
Why You Should Shoot Panos Vertically
Getting More Vibrant Landscapes
Yet Even More Tips to Make People
If They Look Uncomfortable,
Hand Them a Prop
The Advantage of Having Your Subject Sit
Shooting a ¾-View? Pick a Spot to Look At
Get Everything Set Before They Arrive
Super-Shallow Depth of Field for Portraits
Using a Trifl ector for Portraits
Using Scrims for Shooting in Direct Sun
They Don’t Always Need to Be Smiling
Put Multiple Photos Together to Tell a Story
Get Out From Behind the Camera for Kids
How to Get Professional Results From
Auto ISO Lets You Always Freeze the Action
Using the Extra Focus Buttons on Long Glass
Shooting Night Games with Super-High ISO
The Advantage of Shooting From the End Zone
The Two Most Popular Sports Shots
Once You’ve Got the Shot, Move On!
Having Your Focus Auto-Track the Action
Freezing Motion Doesn’t Always Look Good
Leveraging Daylight to Light Your Players
Table of Contents
xi
Isolate Your Subject for More Impact
Using a Second Camera Body? Get an R-Strap
Full-Frame vs. Standard Digital Chip
Don’t Have “Long Glass?” Rent It for the Week!
Another Reason to Keep Shooting After the Play
You Don’t Have to Drag Around a Camera Bag
Start Shooting Right Before the Game
Pro Tips for Getting Better Photos
Tricks of the Trade for Making
Using Live View to Set Your White Balance
Shooting Time-Lapse Photography (Canon)
Shooting Time-Lapse Photography (Nikon)
Do You Really Need to Read Your Histogram?
Shooting in Tricky Low-Light Situations
Shooting Night Scenes Like Cityscapes
How My Camera Is Usually Set Up
What I Pack for a Landscape Shoot
What I Pack for a Sports Shoot
What I Pack for a Location Portrait Shoot
What I Pack for a Travel Shoot
What I Pack for a Wedding Shoot
White Balance vs. Color Correction
How Many Great Shots to Expect
From a Shoot
If Your Camera Shoots Video....
Table of Contents
xii

Can You Trust Your Camera’s LCD Monitor?
Resetting Your Camera to the Factory Defaults
When to Shoot JPEG; When to Shoot RAW
Shortcut for Formatting Your Memory Card
Make Sure You Have the Latest Firmware
Don’t Get Burned by Shooting
Without a Memory Card
You Need to Copyright Your Photos
Back Up Twice Before Formatting
How You Press the Shutter Button Matters!
Tuck in Your Elbows for Sharper Shots
Don’t Let the Small Screen Fool You!
Avoiding the Memory Card Moment of Doubt
Shoot Multiple Shots in Low-Light Situations
The High-Speed Memory Card Myth
Do This Before You Close Your Camera Bag
Why You Should Download Your User Manual
The Photoshop Trick for Finding Dust Spots
Table of Contents
xiii

SHUTTER SPEED: 1/10
SEC
F-STOP:
F
/3.5
ISO: 800
FOCAL LENGTH: 18
MM
PHOTOGRAPHER:
SCOTT
KELBY

I know what you’re thinking: “If this is Part 2, where is Part 1?”
Well, Part 1 is actually Chapter One back in volume 2. “Wait a darn
minute—you’re pulling that old ‘bait and switch’ scam, right?” No,
a bait-and-switch scam is where you see an advertisement for a washer
and dryer for a really low price (the bait), but then you go to the store and
they tell you it’s sold out, and then they try to talk you into buying a more
expensive washer and dryer that they have in stock (that’s the switch).
My scam is totally diff erent: (1) This book isn’t about washers or dryers,
and (2) I didn’t off er a cheaper book, and then try to trick you into buying a
more expensive book. Instead, my scam is called a “jump back,” where I’m
trying to get you to buy more books. Here’s how it works: You’ve already
bought volume 3 (the book you’re holding in your hands right now), but
on the fi rst page of the book (this page), you realize that you should have
bought volume 2 fi rst, because it had a chapter with the most essential
stuff about wireless fl ash. That way, you’d be ready for the stuff in this
chapter, which is what people who read volume 2 told me they wanted to
learn about next. So now, you have to “jump back” in your car (get it?)
and head to the bookstore to buy volume 2. But, then, once you’re home
and you start reading volume 2, you soon realize that I assume if you’re
reading volume 2 that you have already read volume 1, so I skip over stuff
that I fi gure you already learned in volume 1. Now you have to “jump back”
in the car again and go buy volume 1, as well. It’s a classic jump-back scam,
but of course I would never admit that, especially here in the book. The
whole thing is like the hit TV show Lost. If you didn’t start watching it until
Season 3, you’d realize it was aptly named.
Using Flash Like
a Pro, Part 2
Picking Right Up Where
the Last Book Left Off
[ 1 ]
Chapter 1
The Digital Photography Book
[ 2 ]
9 Things You·ll Wish You Had Known…
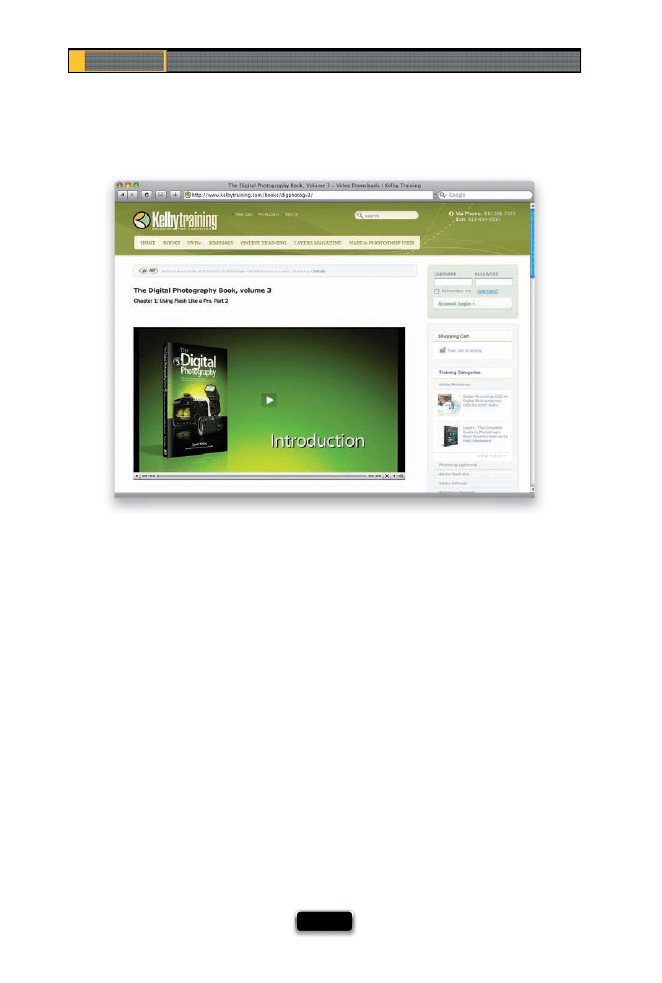
(1) You don’t have to read this part.
That’s because I created a video that explains how
to get the most out of this book. It’s really short and to the point, but I promise you
it will make using and learning from this book much more enjoyable (plus, then you
can skip reading this section, because the video covers it all). You can fi nd the video at
www.kelbytraining.com/books/digphotogv3.
(2) Here’s how this book works:
Basically, it’s you and me together at a shoot, and I’m
giving you the same tips, the same advice, and sharing the same techniques I’ve learned
over the years from some of the top working pros. But when I’m with a friend, I skip all
the technical stuff . So, for example, if you turned to me and said, “Hey Scott, I want the
light to look really soft and fl attering. How far back should I put this softbox?” I wouldn’t
give you a lecture about lighting ratios or fl ash modifi ers. In real life, I’d just turn to you
and say, “Move it in as close as you can to your subject, without it actually showing up
in the shot. The closer you get, the softer and more wrapping the light gets.” I’d tell you
short, and right to the point. Like that. So that’s what I do here.
(3) This picks up right where volume 2 left off ,
and this stuff in this book is what people
who bought volume 2 told me they wanted to learn next. So, for example, in the chapter
on wireless fl ash, I don’t show you how to set up your fl ash to be wireless, because all
that type of stuff was already covered in the fl ash chapter in volume 2. Instead, it picks
up right after that, with all new stuff . Now, should you have volumes 1 and 2 before…
Using Flash Like a Pro, Part 2
[ 3 ]
…you read this book? It’s not absolutely necessary, but it certainly wouldn’t bother
me one bit if you did (like how I phrased that? A very subtle, soft-sell approach. Com-
pelling, but yet not overbearing). All joking aside, if you’re into off -camera fl ash or studio
lighting, it is helpful to have read at least volume 2, because those chapters in this book
fi gure you already learned the basics in volume 2.
(4) Sometimes you have to buy stuff .
This is not a book to sell you stuff , but before you
move forward, understand that to get pro results, sometimes you have to use some
accessories that the pros use. I don’t get a kickback or promo fee from any companies
whose products I recommend. I’m just giving you the exact same advice I’d give a friend.
(5) Where do I fi nd all this stuff ?
Since I didn’t want to fi ll the book with a bunch of Web
links (especially since webpages can change without notice), I put together a special
page for you at my site with a link to any of the gear I mention here in the book. You can
fi nd this gear page at www.kelbytraining.com/books/vol3gear.
(6) The intro page at the beginning of each chapter
is just designed to give you a quick
mental break, and honestly, they have little to do with the chapter. In fact, they have little
to do with anything, but writing these off -the-wall chapter intros is kind of a tradition of
mine (I do this in all my books), so if you’re one of those really “serious” types, please, I’m
begging you—skip them, because they’ll just get on your nerves.
Chapter 1
The Digital Photography Book
[ 4 ]
That Was Only 6. Here Are the Last 3
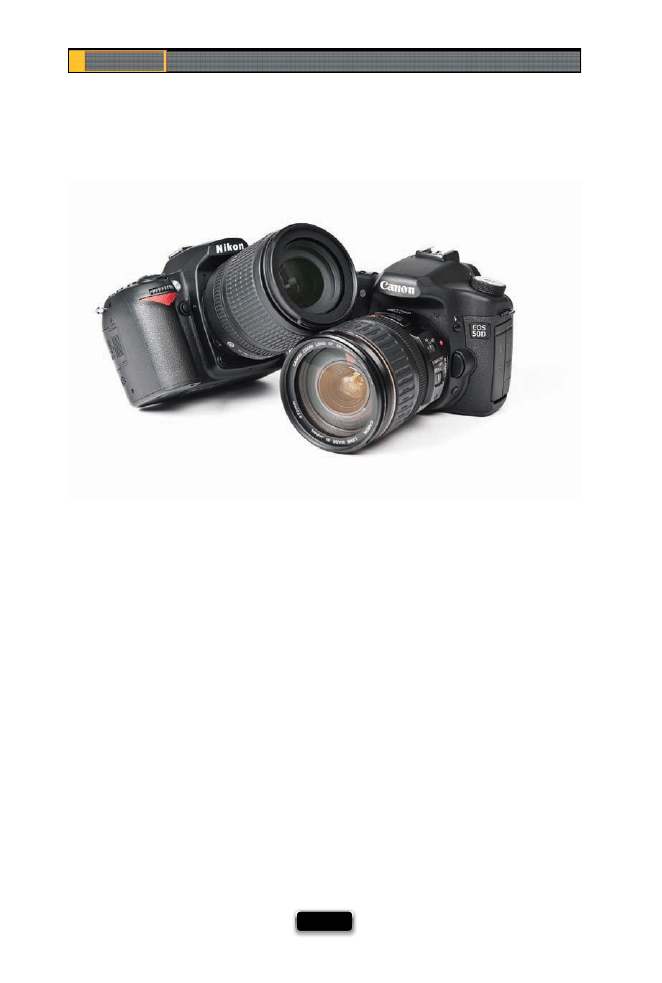
(7) If you’re shooting with a Sony or Olympus or a Sigma digital camera, don’t let it
throw you
that a Nikon or Canon camera is pictured. Since most people are
shooting with a Nikon or Canon, I usually show one or the other, but don’t sweat it if
you’re not—most of the techniques in this book apply to any digital SLR camera, and
many of the point-and-shoot digital cameras, as well.
(8) There are extra tips at the bottom of a lot of pages—
sometimes they relate to
the technique on that particular page, and sometimes I just had a tip and needed to
fi t it somewhere, so I put it on that page. So, you should probably at least take a quick
glance anytime you see a tip box on the bottom of a page—ya know, just in case.
(9) Keep this in mind: This is a “show me how to do it” book.
I’m telling you these
tips just like I’d tell a shooting buddy, and that means oftentimes it’s just which but-
ton to push, which setting to change, where to put the light, and not a whole lot of
reasons why. I fi gure that once you start getting amazing results from your camera,
you’ll go out and buy one of those “tell me all about it” digital camera or lighting
books. I do truly hope this book ignites your passion for photography by helping
you get the kind of results you always hoped you’d get from your digital photogra-
phy. Now, pack up your gear, it’s time to head out for our fi rst shoot.
Using Flash Like a Pro, Part 2
[ 5 ]
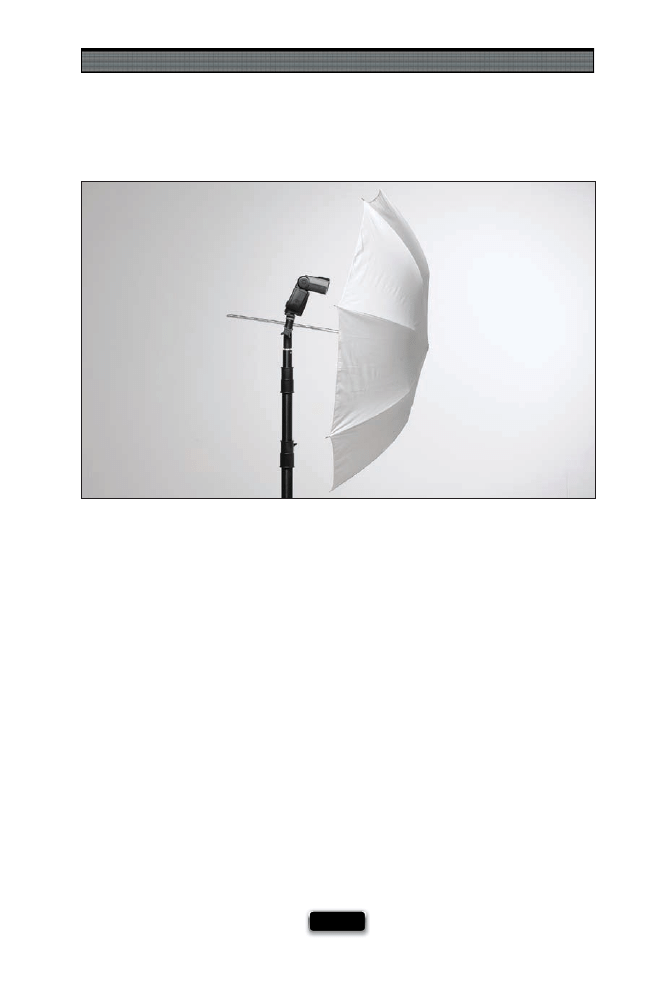
Soft Light on Location (the Budget Way)
Back in The Digital Photography Book, volume 2, I went into great detail about how impor-
tant it is to diff use and soften the light from your small fl ash, so you get professional looking
results. Although I usually have you fi ring through diff users, here’s another way to get the
job done, which is particularly handy for people shooting without an assistant or anyone
who can help wrangle the gear during the shoot: use a shoot-through umbrella setup. Now,
before I get into this, I want to say up front that I just fl at-out don’t like refl ective umbrellas,
where you aim the umbrella and fl ash away from your subject, then the light from your fl ash
hits the inside of the umbrella and travels back toward your subject like a lighting grenade.
Yeech! However, in this case, you’re actually aiming the fl ash at your subject, and you’re using
a special translucent shoot-through umbrella that’s designed to let you fi re your small fl ash
directly through it and right at your subject, giving you a much more concentrated beam
than a refl ective umbrella does. The advantages are: (1) you can get softer wraparound light
with it because you can put the umbrella very close to your subject, (2) it’s an umbrella, so it’s
very compact, (3) you can control how large your light source actually is (see the next page),
and (4) it’s incredibly inexpensive for a pro setup (yes, a lot of working pros use a similar
setup). To make this all work, you need three things (besides your fl ash unit, of course): a
shoot-through umbrella (I use a Westcott 43" Optical White Satin Collapsible shoot-through
umbrella, which sells for around $20); a tilting umbrella bracket, with a fl ash shoe to support
the fl ash and a slot for the umbrella to slide through (I use a LumoPro LP633 Umbrella Swivel
with Flash Shoe Adapter which sells for around $18); and a lightweight light stand (I use a
Manfrotto lightweight 6'2" Nano Stand—around $60). So, the whole setup is just under $100.
Chapter 1
The Digital Photography Book
[ 6 ]
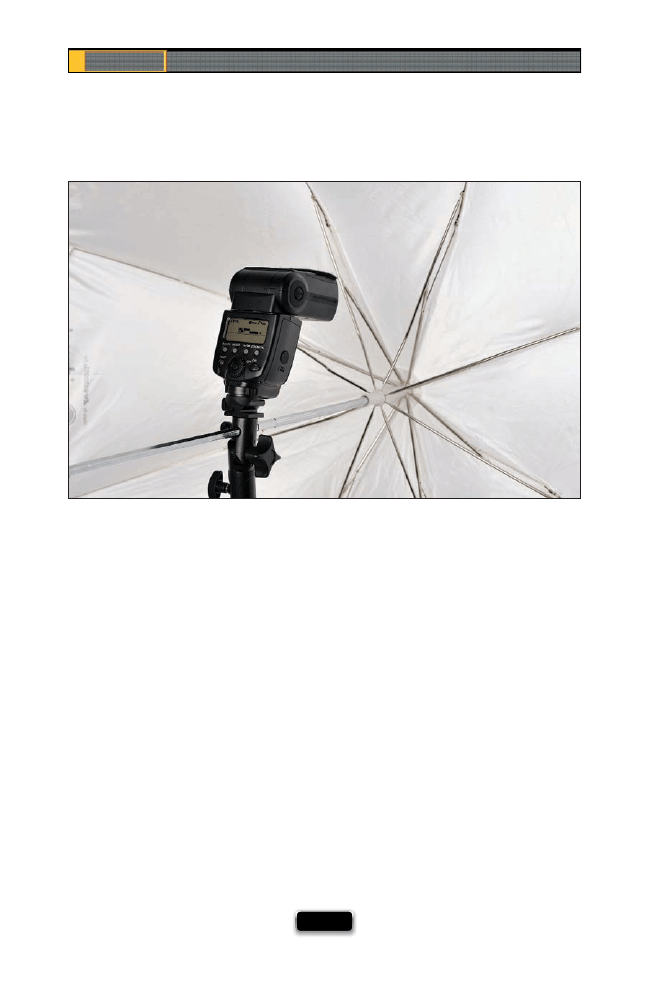
Controlling Softness with an Umbrella
If you’re using a shoot-through umbrella, you have to decide how soft you want the light
to be that comes through that umbrella. Well, this is partially controlled by how far
back you place the flash from the inside of the umbrella. I usually want really soft
light for shooting things like brides, and portraits of families, etc., so I slide the umbrella
out around two feet from the fl ash. That way, the light from the fl ash fi lls as much of
the umbrella as possible, making my light source bigger, which makes my light softer
(remember that from volume 2? The bigger the light source, the softer the light?). If you
want sharper, edgier light, you know what to do—slide the umbrella in the adapter, so
it’s much closer to the fl ash. Now the fl ash has much less room to spread, and your light
will be smaller, more direct, and less soft.
Using Flash Like a Pro, Part 2
[ 7 ]
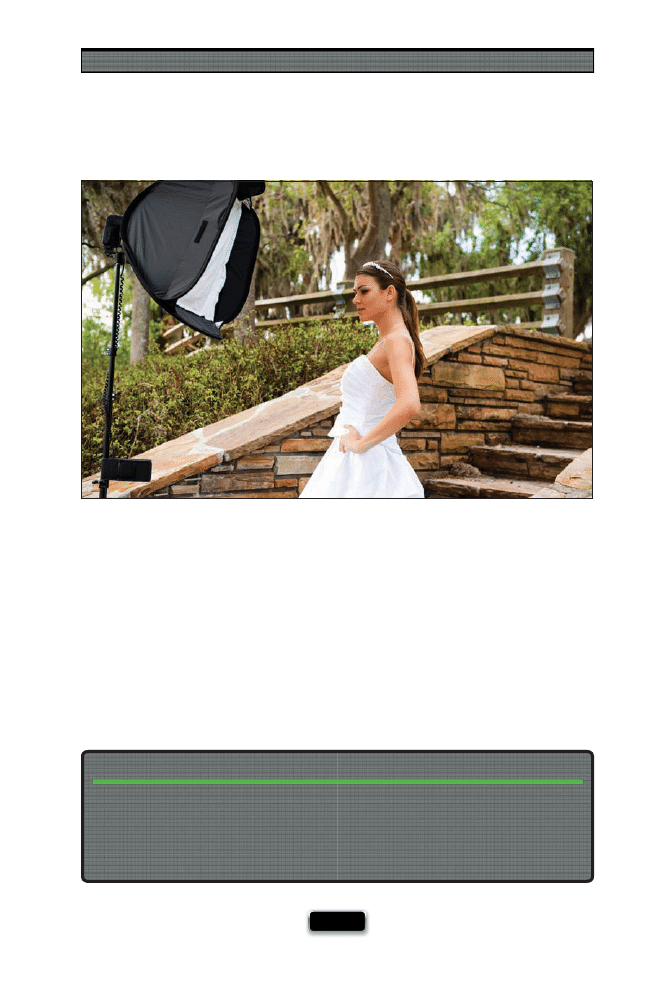
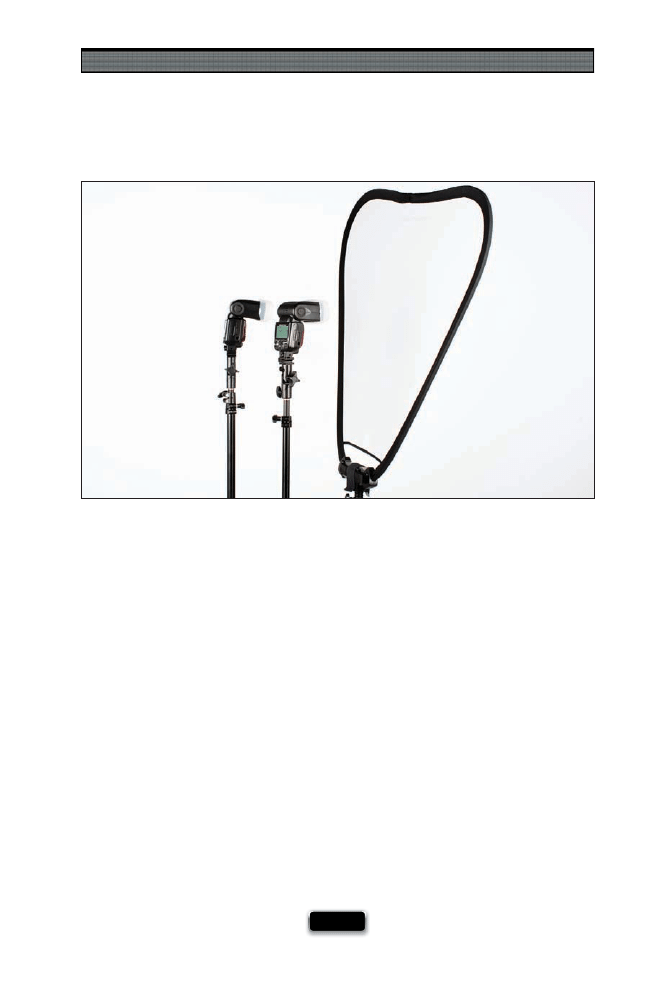
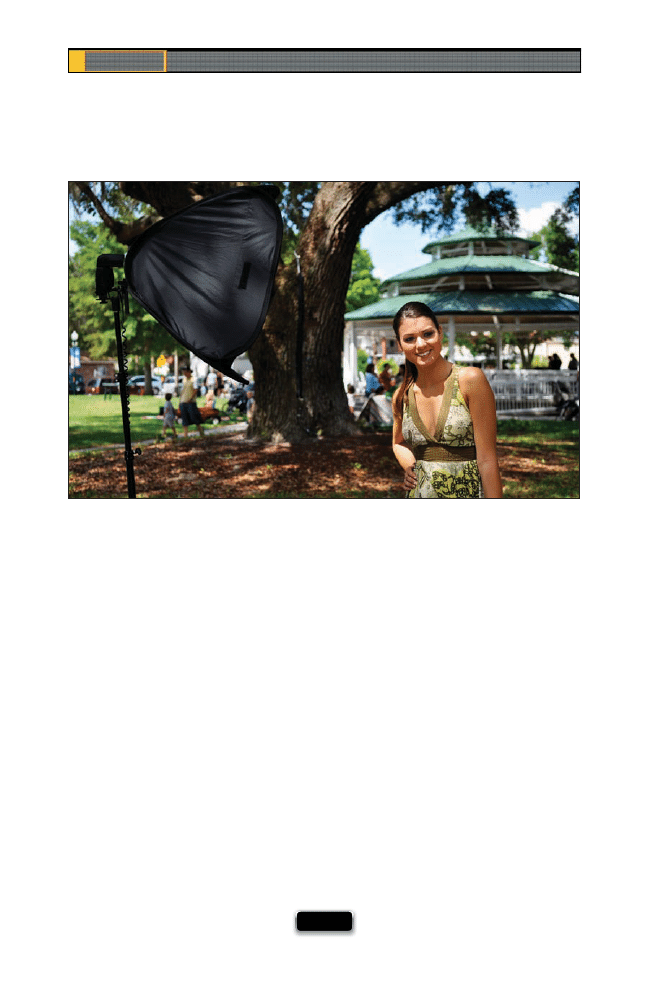
Get More Control Using a Portable Softbox
If you’ve got a few more bucks to spend, then you can move up to a small softbox
designed for off-camera flash. I think there are two big advantages to using this
over a shoot-through umbrella: (1) The light is more contained and directional than with a
shoot-through umbrella, so it’s easier to get more dramatic light, since it only goes where
you aim it. (2) They don’t seem to blow over as easy when using them outdoors. This is bigger
than it sounds, because umbrellas catch the wind like you can’t believe, and even the slightest
wind can send the whole thing (umbrella, stand, and your fl ash) crashing over. The small-fl ash
softbox I use is the Lastolite Ezybox. I like that it’s so small and portable—it collapses down to
a small round shape (like a refl ector)—and it sets up without having to use steel rods, so it only
takes two minutes. Plus, I love the quality of its soft, directional light. There are diff erent sizes,
but I use the 24x24" size.
You don’t have to use a light stand to hold your fl ash and Ezybox. You can have a friend
(or a bridesmaid, or an assistant, etc.) hold them using a special accessory, which is a small
(24" tall), lightweight, hand-held stand with a handle on the bottom that lets your Ezybox
pretty much go anywhere your friend can go, turning your friend into what has become
known in fl ash circles as a VAL (the acronym for a voice-activated light stand).
Hand-Holding an Ezybox
Chapter 1
The Digital Photography Book
[ 8 ]
What Your Flash·s Groups Are For
If you want to control your wireless fl ashes independently of each other, then you need
groups. For example, let’s say that you have one fl ash off to the left of your subject, and
one fl ash behind the subject lighting a white seamless background. You’d want to be able
to control the power of each fl ash individually, so if the background fl ash is too bright, you
can turn it down without having the front fl ash power down, as well. You do that by assign-
ing one fl ash to Group A, then the other fl ash (the background fl ash) to Group B. Now you
can control the power of each one individually, without disturbing the other. Also, you can
have more than one fl ash in each group. So, if you have two fl ashes on the background
(one lighting the left side; one lighting the right), and you put them both on Group B, they
would move up/down in power together, but your front fl ash (which is still on Group A)
would be unaff ected. Sweet! You assign a fl ash to a particular group right on the fl ash unit itself.
Using Flash Like a Pro, Part 2
[ 9 ]
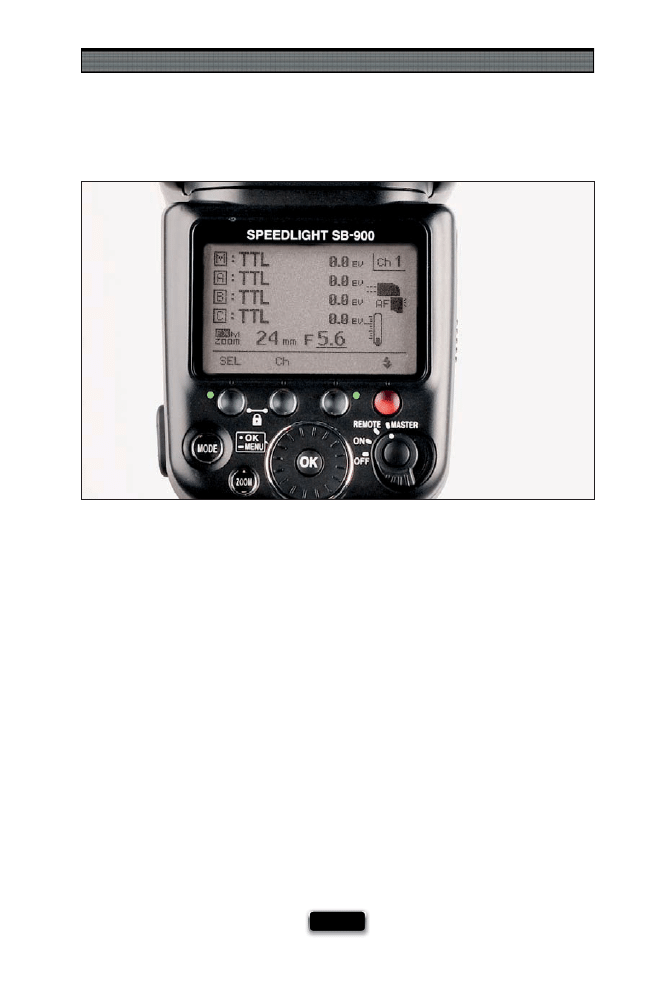
What Your Flash·s Channels Are For
As long as you’re by yourself, just you and your fl ash, things are good. But what happens
if you’re hired to shoot an event, like a wedding for example, and you have a second (or
third) photographer shooting along with you (it’s more and more common to have a
second shooter at a wedding—especially weddings in Texas, where the ceremony is
held on a grassy knoll. Sorry, that was lame)? The problem you’d probably face is that
sometimes the second shooter’s camera would trigger and fi re your fl ash (and vice versa).
That’s why your fl ash has diff erent channels. At the beginning of the wedding, you’d set
your fl ash to Channel 1, and you’d tell your second shooter to set their fl ash to Channel 2.
That way, your camera will only trigger your fl ash, and theirs will only trigger their fl ash. By
the way, you have to set the channel in two places: (1) on the wireless fl ash unit itself, and
(2) on whatever you’re using to trigger your fl ash. For example, if you’re shooting Nikon
and the second shooter is using their camera’s built-in Commander unit to control their
wireless fl ash, you’d need to have them set their Commander to Channel 2. If you’re shoot-
ing Canon, then you’re probably using another fl ash mounted on your camera’s hot shoe
as your master fl ash, and in that case, you’d set that fl ash to Channel 2. If all of this “master”
and “wireless” stuff sounds confusing, then you now know why I said you really need to
read volume 2 of this book fi rst, because it covers all the basics of wireless fl ash. Then all
this would make more sense (and it would sell another book, which isn’t a bad thing).
Chapter 1
The Digital Photography Book
[ 10 ]
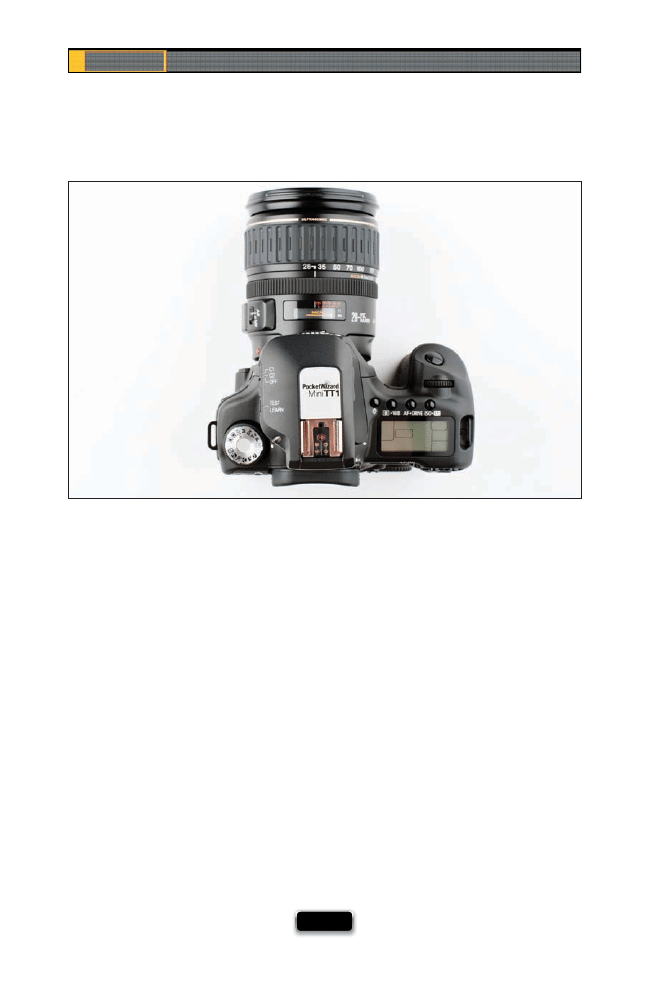
Using a Transmitter to Fire Your Flash
Back in volume 2 of this book, I showed you how to set up your small hot-shoe fl ash,
so that your off-camera flash can be wireless, which is very cool (and makes your
fl ash really usable). But there is a downside to using the built-in wireless system, and
that is that the fl ashes have to be in the line of sight of whichever fl ash is your master
fl ash (so, for example, if you’re triggering your wireless fl ashes using the pop-up fl ash
from your camera, the light sensor on the side of each of the wireless fl ashes has to
be in the line of sight of the master fl ash [the pop-up fl ash], so they can sense the little
light-pulse it emits as a signal for wireless fl ashes to fi re. If they can’t clearly see that
light pulse, they won’t fi re). That’s why many working pros use a dedicated wireless
transmitter and receiver for fi ring their fl ashes—that way, the fl ashes fi re 100% of the
time, whether they can see the fl ash on your camera or not, because now the wire-
less transmitter is doing the fi ring for you. PocketWizard (longtime maker of wireless
gear for studio work) has come up with a special wireless system for small off -camera
fl ash called the MiniTT1™ Radio Slave Transmitter, which fi ts right on your camera’s
hot shoe, and then your master fl ash goes on top of that. Of course, the downside to
this is you need to buy a transmitter unit, and then a receiver unit for each fl ash, but
then your fl ash-fi ring troubles simply go away.
Using Flash Like a Pro, Part 2
[ 11 ]
How to See If All Your Flashes Will Really Fire
Let’s say you’ve got four diff erent fl ashes, and each one is assigned to a diff erent group
(just for the sake of this example, let’s say we’re shooting a studio portrait, and the main
fl ash up front is on Group A, a hair light is assigned to Group B, and two background
fl ashes are assigned to Group C). How can you tell if they’re all going to fi re? You can run
a test! Just press the red test fi ring button on the back of your master fl ash unit, and
each group will fi re its fl ashes, in order, one after another, so you can see that they all
work. (Note: It fi res Group A’s fl ashes fi rst, then Group B’s, and then the two background
fl ashes on Group C last.) You’ll visually see each one fl ash. If one doesn’t fi re, then you’ll
need to do some troubleshooting (make sure the non-fi ring fl ash is actually turned on,
make sure it’s assigned to the right group, make sure its sensor is seeing the fl ash from
the master fl ash, etc.).
Chapter 1
The Digital Photography Book
[ 12 ]
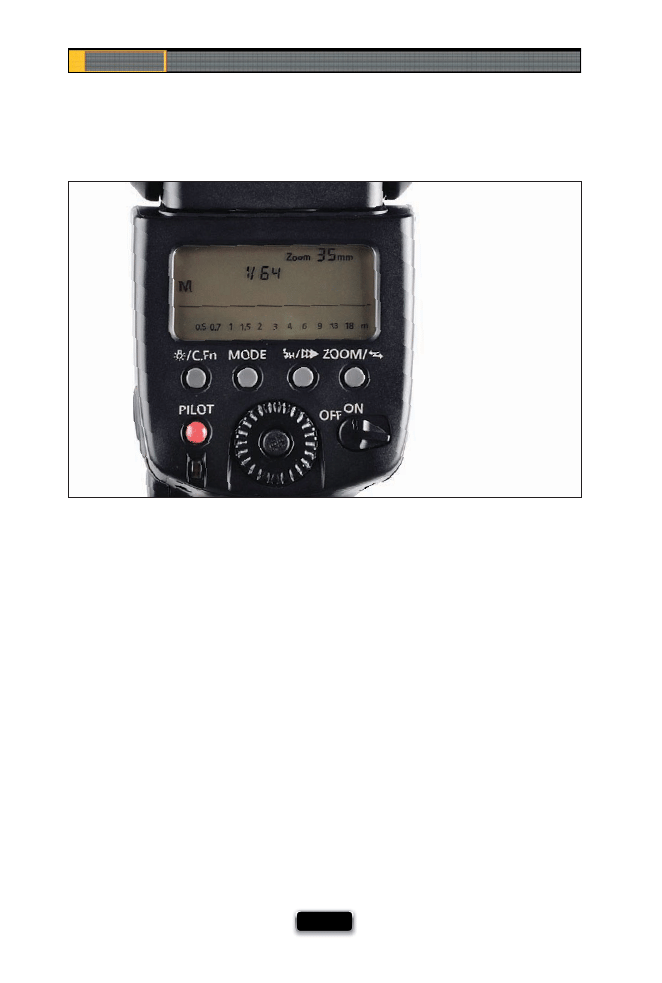
Shorten the Time Between Flashes
Each time your fl ash fi res, since it’s battery powered, it has to recycle before you can fi re it
again. When you fi rst pop a fresh set of batteries into your fl ash, the recycle time is about
as fast as it’s going to get—probably just a few seconds between fl ashes. However, the
more times your fl ash fi res, the more your batteries wear down, and pretty soon a few
seconds between fl ashes turns into fi ve seconds, then 10 seconds, then 12 seconds, and
then it just feels like an eternity, and you know it’s time to change batteries. However,
there’s another way to shorten the recycle time, and that is to lower the power of your
fl ash. That’s right—the lower the power, the faster the fl ash will recycle. Of course, lower-
ing the power of your fl ash will make your subject look darker, because now there’s less
light from your fl ash falling on your subject, so you’ll have to adjust your f-stop so your
image looks good. For example, if you’re shooting at 1/64 power at f/5.6, you’ll need to
change your f-stop to at least f/4, if not f/2.8, to brighten the overall exposure, and make
your fl ash balance out again.

Using Flash Like a Pro, Part 2
[ 13 ]
Recycle Faster with an External Battery Pack
If you’re doing some serious location fl ash work (like a wedding, on-location fashion shoot,
etc.), or anything where you need the shortest possible recycle time with the longest
battery life, then try using an external battery pack, like Nikon’s SD-9 for the SB-900 (which
holds eight AA batteries), or Canon’s Compact Battery Pack CP-E4 (which also holds eight
AA batteries). What these do is reassign how the batteries inside your fl ash work. Usually,
those four batteries inside run both the recycling and all the software requirements of the
fl ash unit. When you attach one of these external battery packs, it assigns all the recycling
duties to those eight AA batteries, so you get longer battery life and much faster recycling
times. Use one of these once, and you’ll never be without one again.
Chapter 1
The Digital Photography Book
[ 14 ]
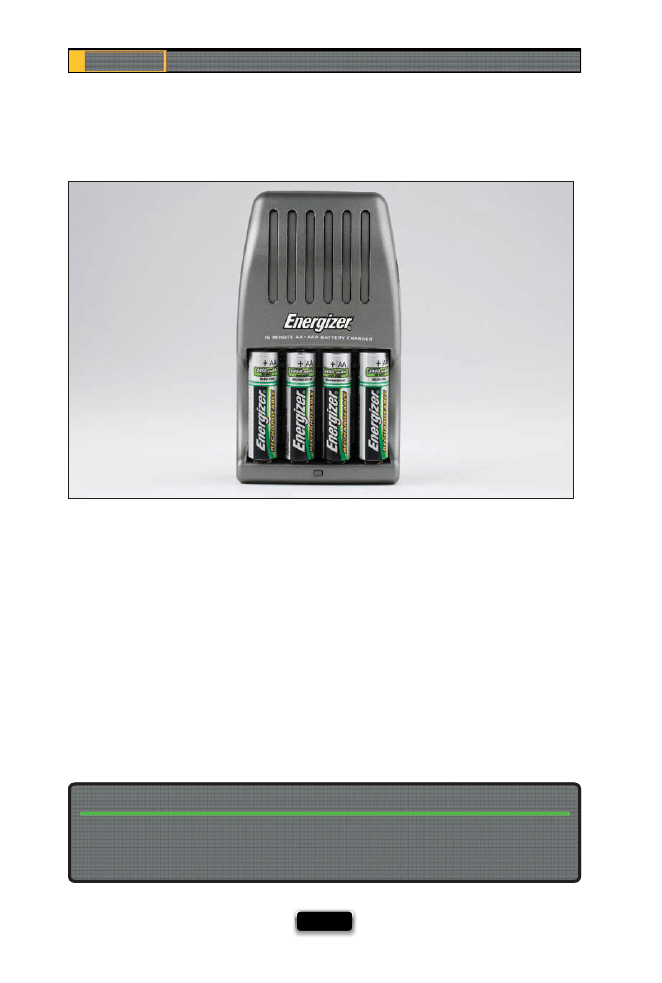
If you use off -camera fl ash a lot, you’re going to be going through a lot of batter-
ies, and you’ll probably want to get rechargeable ones, so you don’t go broke buying
batteries all the time. But beyond that, there’s another advantage to using recharge-
able batteries (which I learned from David Hobby of Strobist.com fame), as long as
you buy nickel-metal hydride (NiMH) batteries. Because of their lower voltage, they
recycle much faster (in fl ashes, anyway) than regular alkaline AA batteries. Plus, you
can recharge a set of four in about 15 minutes (in fact, Energizer sells what they call
their 15-Minute Charger for nickel-metal hydride batteries). I would buy two sets of
AA nickel-metal hydrides—one set in the flash, and another set as your backup
on location. If you need to switch to the backup set, you could always throw the
first set in the charger, so they’ll be ready if you need ‘em again (and if that’s the
case, you’re really poppin’ a lot of fl ashes!).
Nickel-metal hydride batteries discharge around 10% of their battery life per week if they’re
just sitting around doing nothing, so don’t charge up your batteries until you need ‘em
for a job—that way they’ll be at full capacity.
Charge ‘em Right Before You Use ‘em
Using Flash Like a Pro, Part 2
[ 15 ]
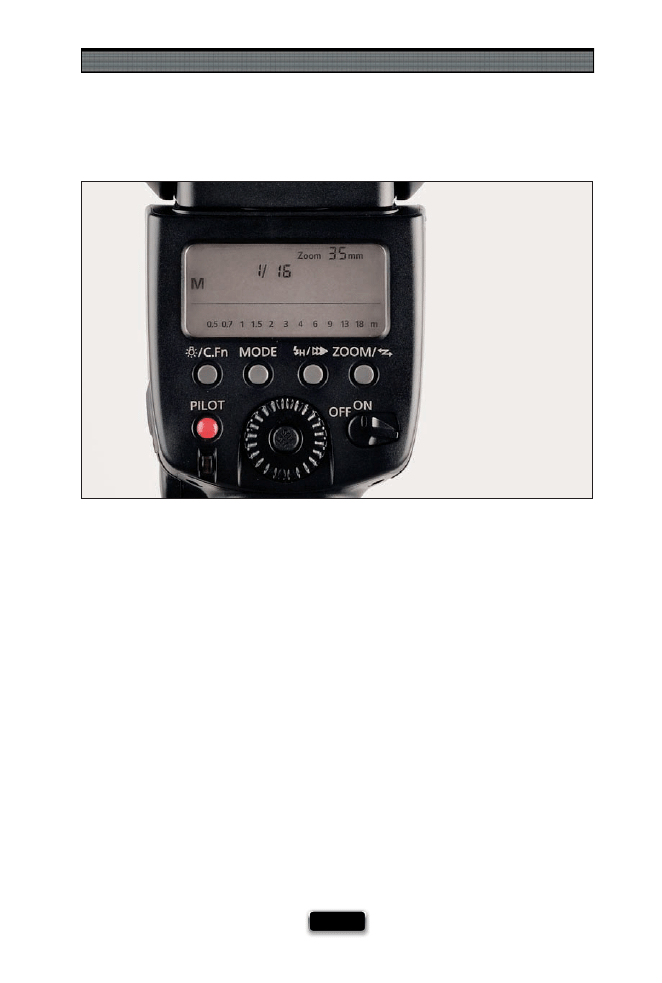
Typical Power Settings for Your Flash
If you’re using your fl ash indoors, or outdoors in anything other than bright daylight,
you’ll be running your fl ash 99% of the time at less than half-power. In fact, you’ll prob-
ably be often running it at 25% power (I’m sometimes at 1/8 or 1/16 power during a
typical shoot). Why so low? Because the idea is to balance the light from your fl ash
with the existing light already in the room (or already available outside), so you usually
want just a little bit of fl ash (or your fl ash will look like fl ash). The goal is to make your
fl ash look like natural light, so your power setting will probably stay real darn low.
Chapter 1
The Digital Photography Book
[ 16 ]
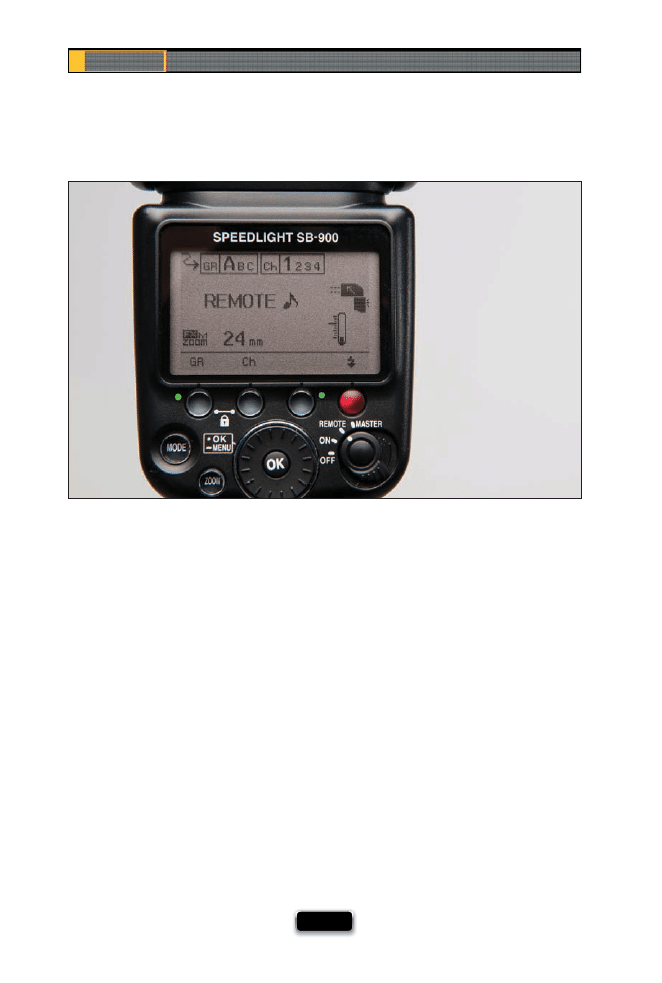
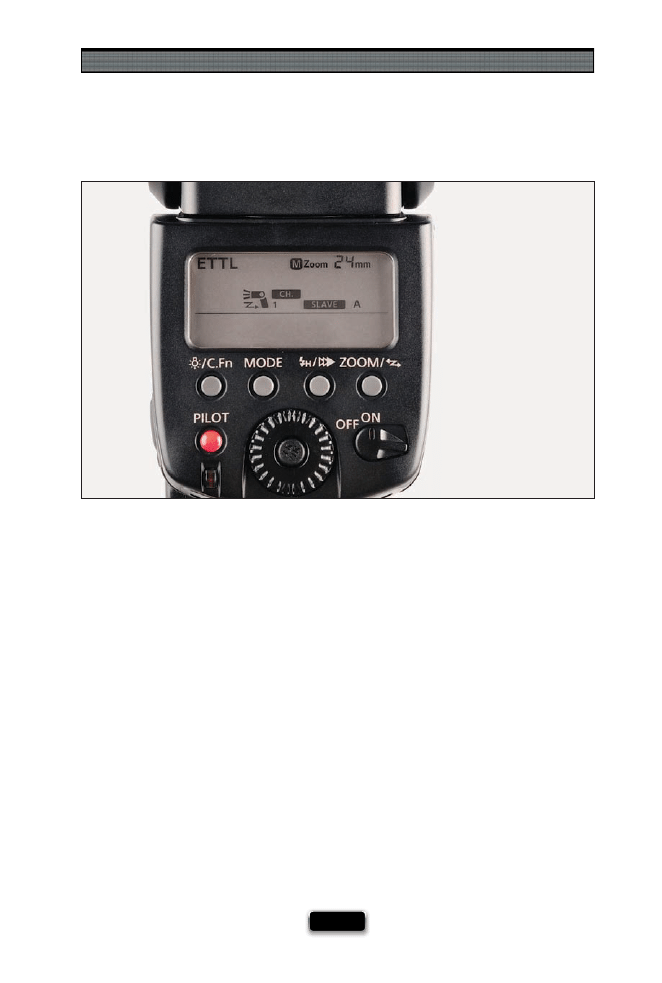
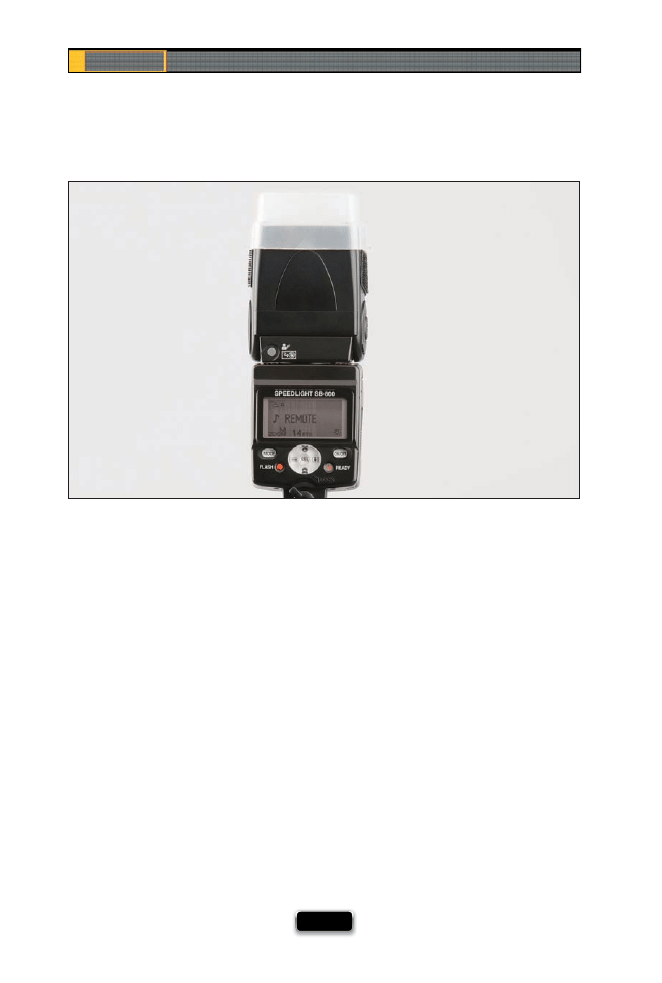
Firing a Second Flash in Another Room
Let’s say you’re shooting the interior of a home and lighting it with off -camera fl ash.
Nothing looks worse than seeing an adjoining room (maybe the dining room in the
background) looking all dark, so you put a second fl ash in there and aim it at the ceil-
ing to light that room. So far so good. Now, of course, in that dining room you don’t
want to actually see the fl ash unit itself, so you hide it from view, right? Here comes
the problem: these fl ashes work on “line of sight” (meaning your second fl ash has to
have an unobstructed view of the master fl ash. If it doesn’t, it won’t fi re). So, here’s
the trick to get around that: you set your fl ash to Remote (or Slave) mode (depending
of which brand of fl ash you own), and then it doesn’t have to be in the line of sight
anymore—if it detects even a tiny hint of light from the fl ash in the main room, that
puppy fi res! Keep this in mind the next time you need to hide a second fl ash, or put it
where the whole line-of-sight thing won’t work.

Using Flash Like a Pro, Part 2
[ 17 ]
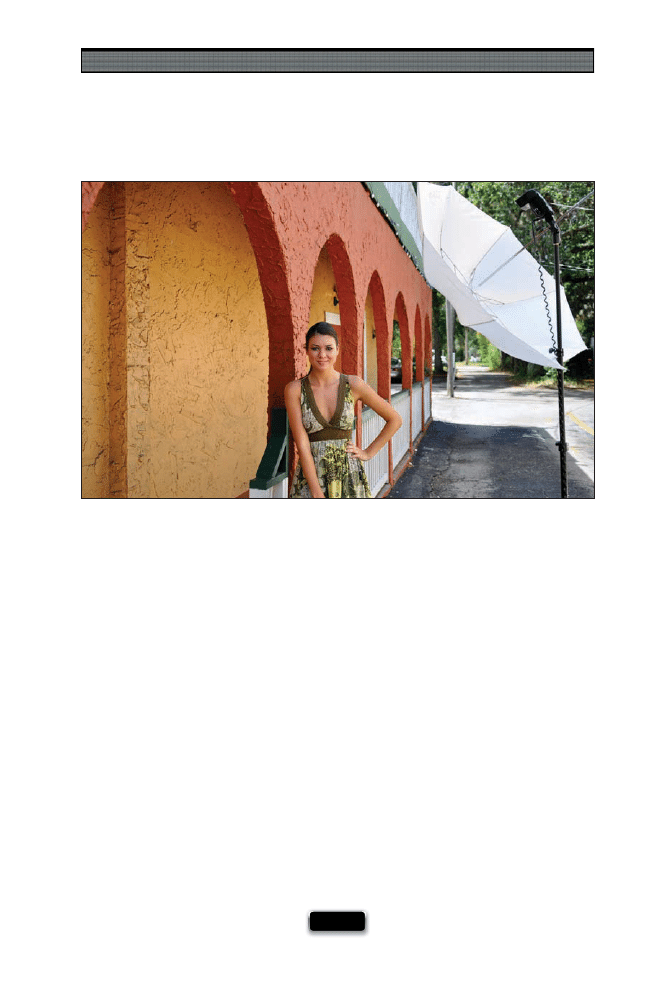
This technique is very popular with wedding photographers who shoot outdoors. It
uses your fl ash on your subject, who is in broad daylight. They call this “overpowering
the sun,” but what you’re really going to do is set your exposure for a regular daylight shot,
then intentionally underexpose the shot by a stop or two, so the photo looks a little dark.
Then, you’ll turn on your fl ash, and let it light your subject instead of the sun, which pro-
duces a very commercial look. So, fi rst switch your camera to program mode, then hold
the shutter button halfway down and look at the settings your camera chose to properly
expose this daylight shot. Let’s say it’s 1/80 of a second at f/11. Switch to manual mode, and
dial in 1/80 of a second at f/11. Now, to make the scene darker (underexposed), you’d just
change the f-stop to f/16. Take a test shot and see if it’s dark enough. If not, drop it down
to f/22 and make another test shot. Once it’s obviously underexposed, now you turn on
your fl ash, and use it to light your subject. Outdoors, I usually start at full power, and if
it looks too bright, I try lowering the power of my fl ash a bit and then take another test
shot. Keep lowering the fl ash power until the image looks balanced (like the shot above,
taken in the middle of the afternoon in direct sunlight).
SCO
TT KELBY
SCO
TT KELBY

Chapter 1
The Digital Photography Book
[ 18 ]
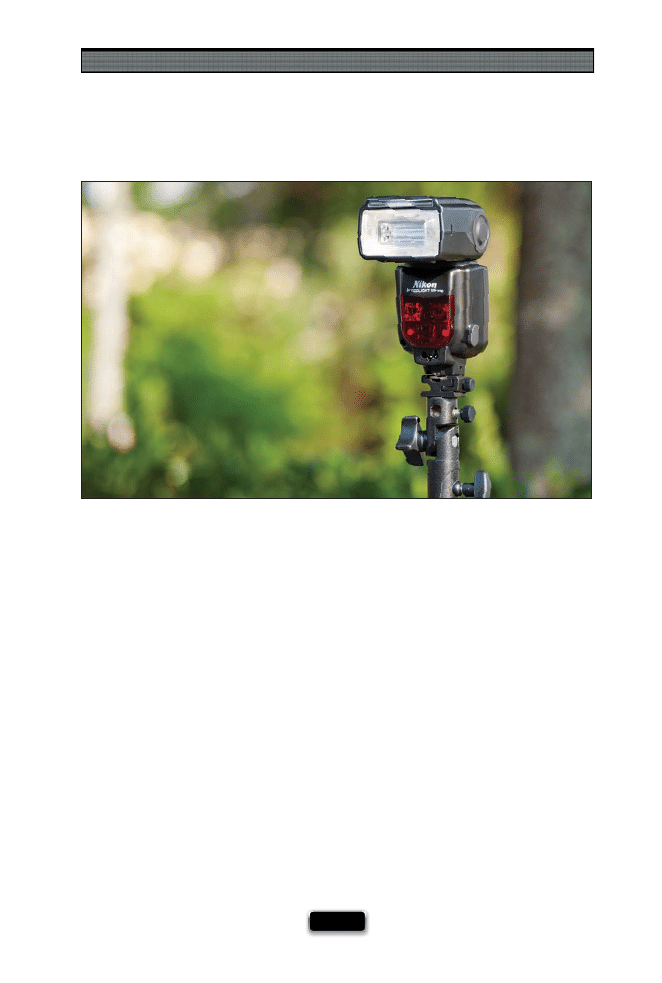
Getting the Ring Flash Look Using
Small Flash
It’s one of those looks you either love or you just can’t stand (with its fl at, bright look
and hard-edged shadow behind the subject), and you’re probably better off if you don’t
like it, because ring fl ashes are big, bulky, and fairly expensive. However, there is a ring
fl ash adapter that fi ts over your off -camera fl ash that does a surprisingly good job of
giving you the ring fl ash look (which has become incredibly popular in high-end fash-
ion photography these days) without the ring fl ash price, weight, or size. It’s called the
Ray Flash—it slides right over your fl ash head, and your lens extends through the center
of the fl ash (as seen above). It basically redirects the light from your existing fl ash into a
ring shape and it’s really lightweight and doesn’t require batteries or anything else.
I did fi nd a reasonably priced real ring fl ash from AlienBees that attaches to your camera,
and while it is bulkier, heavier, and more expensive than the Ray Flash ring fl ash adapter
shown above, it’s not as bulky, heavy, or expensive as any of the other real ring fl ashes
I’ve seen. I cover it on page 47 in Chapter 2.
If You Long for a Real Ring Flash...
Using Flash Like a Pro, Part 2
[ 19 ]
What If Your Flash at Full Power Isn·t Enough?
If you’re lighting your subject, and your fl ash is at full power, but it’s just not bright
enough to do what you want it to do, just add another fl ash. That’s right—pop another
fl ash up there, right beside your other fl ash, but just make sure you put them both on
the same group (so they’d both be assigned to Group A, or both assigned to Group B),
so they both fi re at the same time. Just like turning on another light in your home adds
more light, adding another fl ash adds more light, too! By the way, adding another fl ash
doesn’t double your light output, it just adds about an extra stop of light. To add another
stop of light, just add another two fl ashes, and so on.
Chapter 1
The Digital Photography Book
[ 20 ]
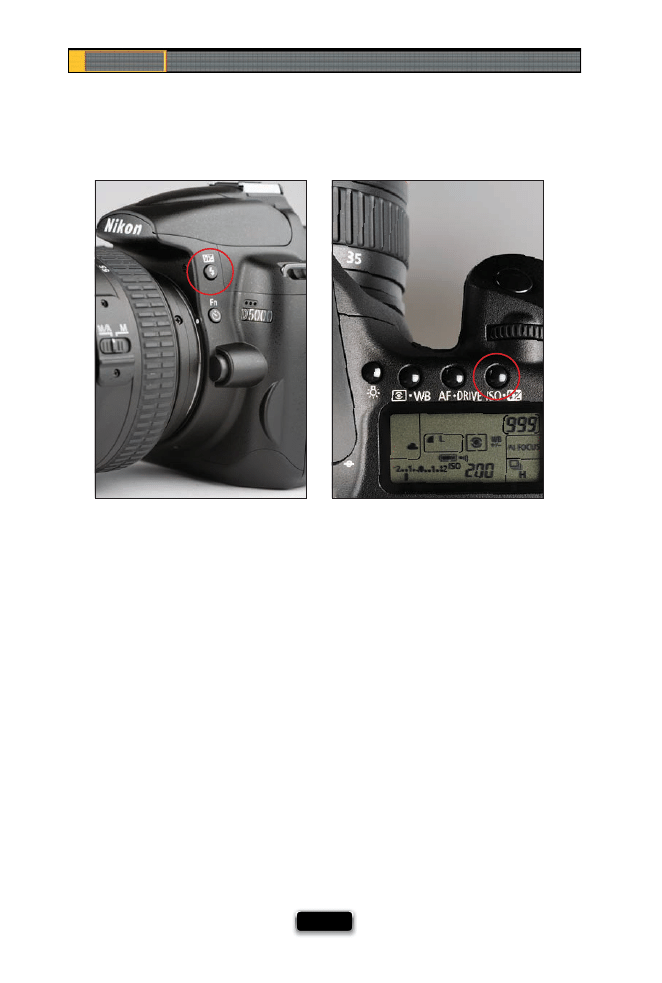
Lowering the Power of Your Pop-Up Flash
Some photographers use their camera’s built-in pop-up fl ash as a fi ll fl ash when they’re
not trying to fully light the person they’re shooting with fl ash, and they just want a little
bit of fl ash to help fi ll in the shadows. The problem is your camera doesn’t always know
that you only want a little fi ll, and it usually sends more fl ash than you actually want, and
the photo looks, well…it looks like you used a pop-up fl ash. However, most cameras
actually have a setting that lets you lower the power of your pop-up fl ash, so if you try
the ol‘ fi ll fl ash route and fi nd that it looks more like regular fl ash, you can dial down
the power of your pop-up and try again. On Nikon cameras, you do this by holding down
the fl ash mode button (the one on the front side of your camera, right by the lens—it has
a lightning bolt on it), then looking at the control panel on top, and turning the sub-
command dial in front so you see a negative number. On Canon cameras, you press the
ISO/fl ash exposure compensation button, look at the top LCD or viewfi nder, and turn
the quick control dial until you see a negative number. Then take a test shot, look at the
results, and see if you need to lower the power some more.
Nikon
Canon
Using Flash Like a Pro, Part 2
[ 21 ]
When Not to Use a Diӽ usion Dome
I leave my diff usion dome on my fl ash almost all the time (I’m usually looking to spread
the light and make it softer), but there are a few instances where you don’t want that
dome on, and it’s not just when you want hard, edgy light. For example, if your fl ash
is far away from your subject, take the dome off , because when you’re back that far, it
will drain your batteries much faster, and since the light is far back, it’s going to spread
and soften a bit anyway. Another time you’d want to remove the dome is when you’re
outdoors using it as fi ll fl ash.
Chapter 1
The Digital Photography Book
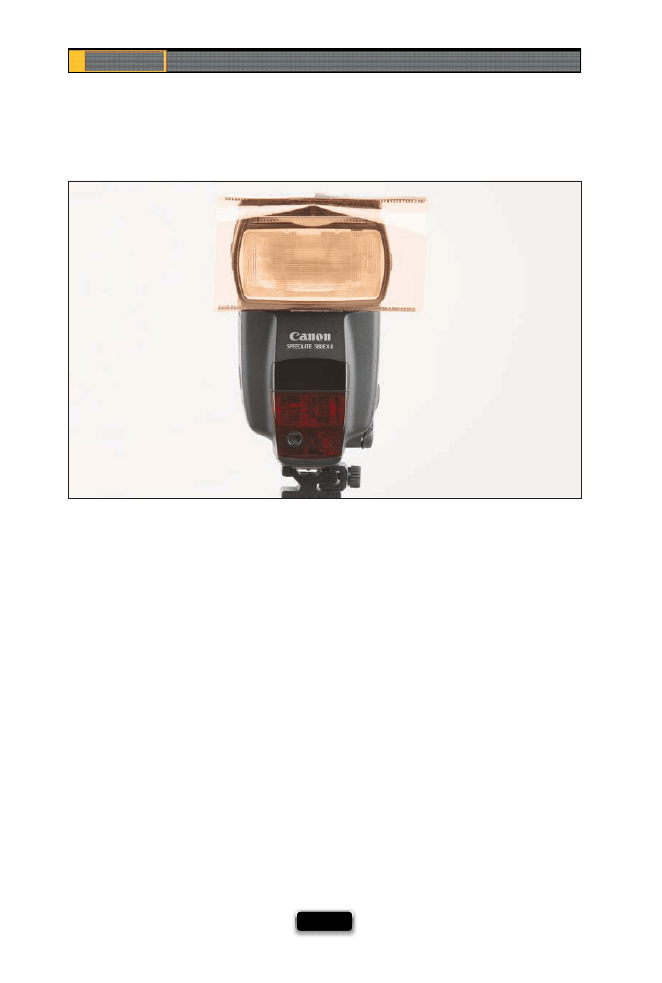
[ 22 ]
The Pro Trick for Better-Looking People Shots
One inside tip a lot of big pros use when they’re shooting portraits with small off -camera
fl ash is to put a very light orange gel over the fl ash. It doesn’t matter what time of day
it is, that orange gel is over the front of their fl ash. The type of gel is called a ¼-cut of
CTO (Color Temperature Orange). If you shoot people, I’d keep this on there all the time
for better, more natural-looking color from your fl ash shots.
Using Flash Like a Pro, Part 2
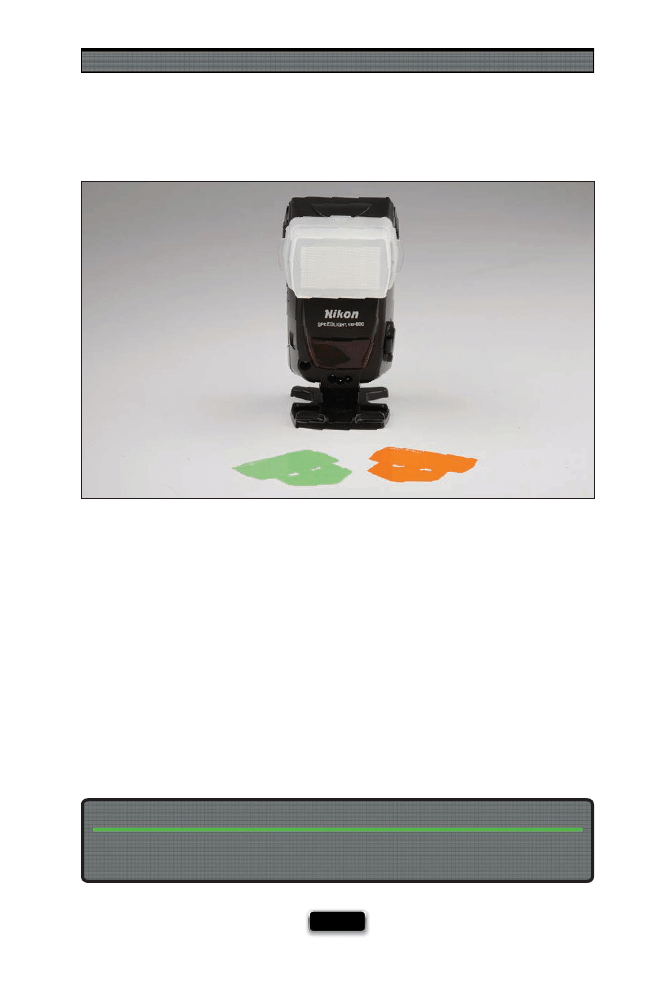
[ 23 ]
If you bought a Nikon SB-800, or the SB-900, both come with a set of gels (including the
orange and green) right in the box.
You May Not Have to Buy These Gels
Two Other Gels You Really Need
If you want natural-looking color from your fl ash (in other words, you want the light
from your fl ash to blend in with the light already in the room), there are two colors of
gels you’re going to need to keep with you, which you put over your fl ash head: (1) an
orange gel, for when you’re shooting indoors under regular lighting (usually incandes-
cent lighting), and (2) a green gel, for when you’re shooting in an offi
ce or building
under fl uorescent lights.
Chapter 1
The Digital Photography Book
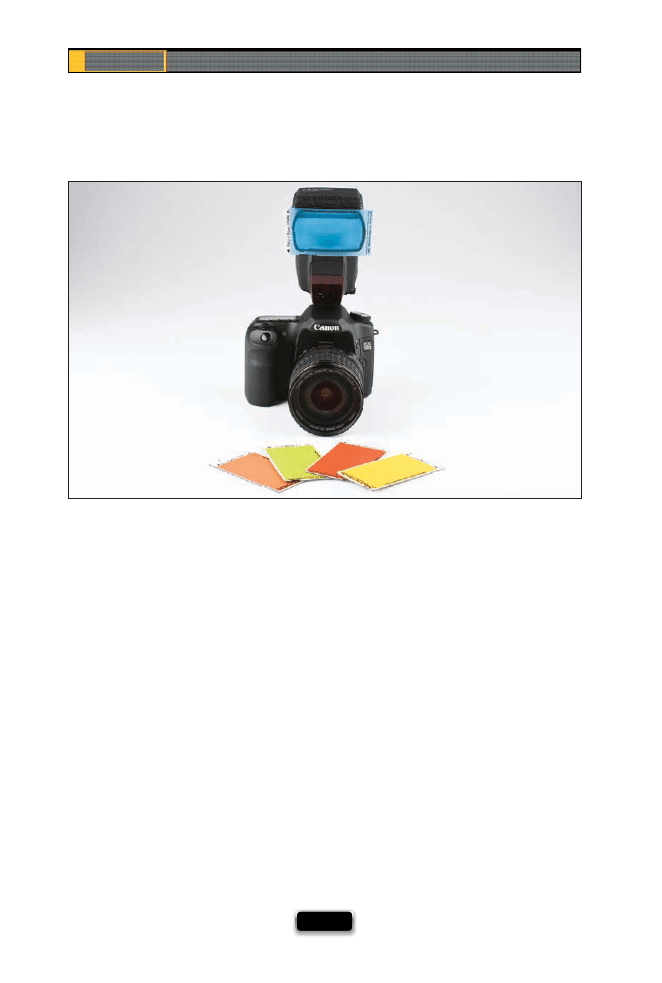
[ 24 ]
Gels, for some reason, seem to freak people out who are new to off -camera fl ash, and
even mentioning gels in a live session brings up a host of questions like, “Where do I get
them? How do I know if I’m getting the right ones? What colors should I get? How and
where do I attach them to my fl ash? Do I need to cut them down to size?” Well, I guess
a company named Midsouth Photographic Specialties heard this so many times, they
fi nally went out and created a set of gels for off -camera fl ashes in the most requested
colors, pre-cut to size, and ready to go. They’re called Sticky Filters—just slap ‘em on and
you’re set!
Using Flash Like a Pro, Part 2
[ 25 ]
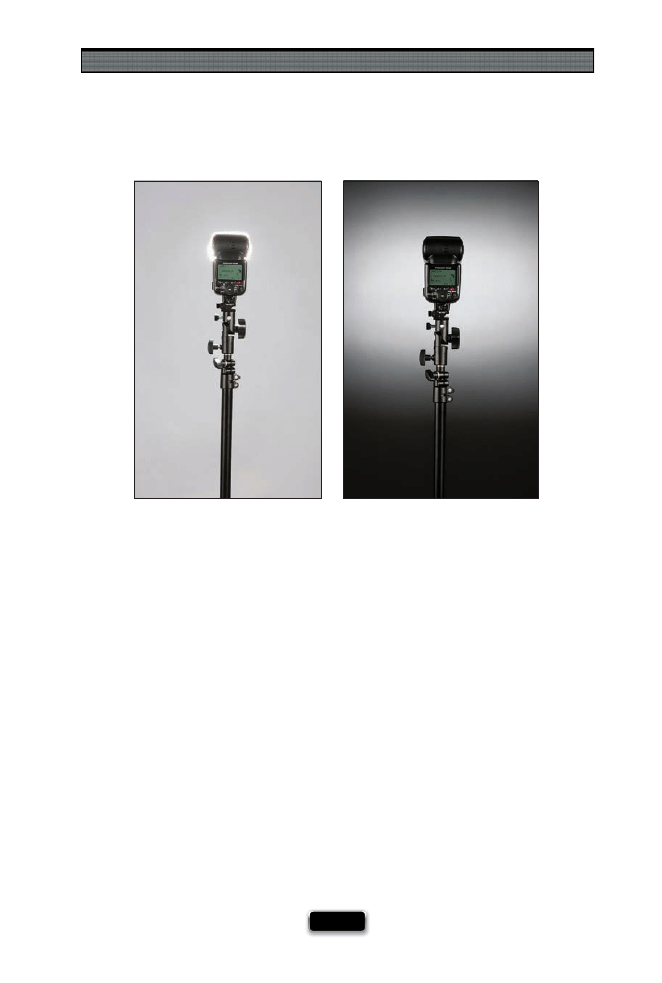
Tips for Lighting Your Background with Flash
Here’s a simple little rule that will help you when using your small off -camera fl ash to
light a background wall or seamless background behind your subject. If you want to
light the entire background fairly evenly, put your diff usion dome cap on the fl ash.
This spreads the light out wide, and makes it appear smoother and more even (as
shown here on the left). Then, back the fl ash itself away from the wall—the farther it
is away, the more the light will spread. If, instead, you want a more defi ned “spotlight”
look behind your subject, just move the fl ash in closer to the wall behind them and
remove the diff usion dome (as shown here on the right).
Chapter 1
The Digital Photography Book
[ 26 ]
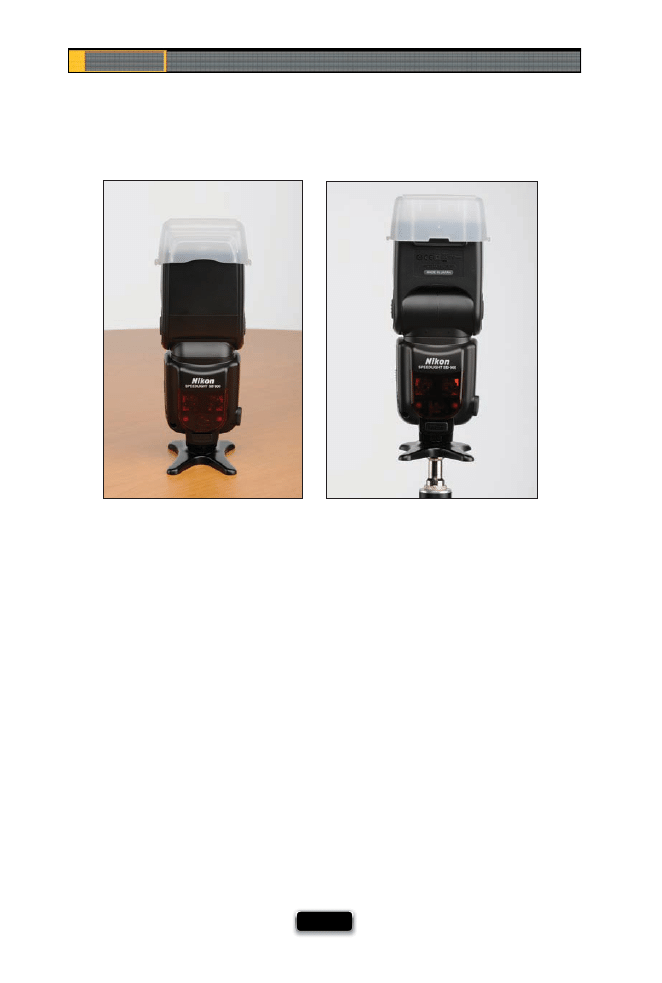
Using That Little Flash Stand in the Box
If you buy a Nikon or Canon fl ash, take a look inside the box it came in and you’ll fi nd
a little black plastic stand (I call it a “foot,” but Nikon calls it a “Speedlight stand” and
Canon calls theirs a “mini stand”). Anyway, your fl ash slides right into this little stand,
and now you can put your fl ash on the fl oor behind your subject, or on a table, and it
stands right up. It’s like a free mini-light-stand. However, it has a feature a lot of folks
miss: the bottom is threaded, so you can screw it directly onto either a tripod, or a
standard light stand, and it will hold your fl ash up higher. Hey, it saves you from hav-
ing to buy a special adapter just to hold up your fl ash (though if you mount your fl ash
on a stand a lot, and need a little more control [like tilt], then I’d use my tip from back
in volume 2 and buy a Manfrotto Justin Spring Clamp with Flash Shoe for around $57,
and then you can mount a fl ash just about anywhere).
Using Flash Like a Pro, Part 2
[ 27 ]
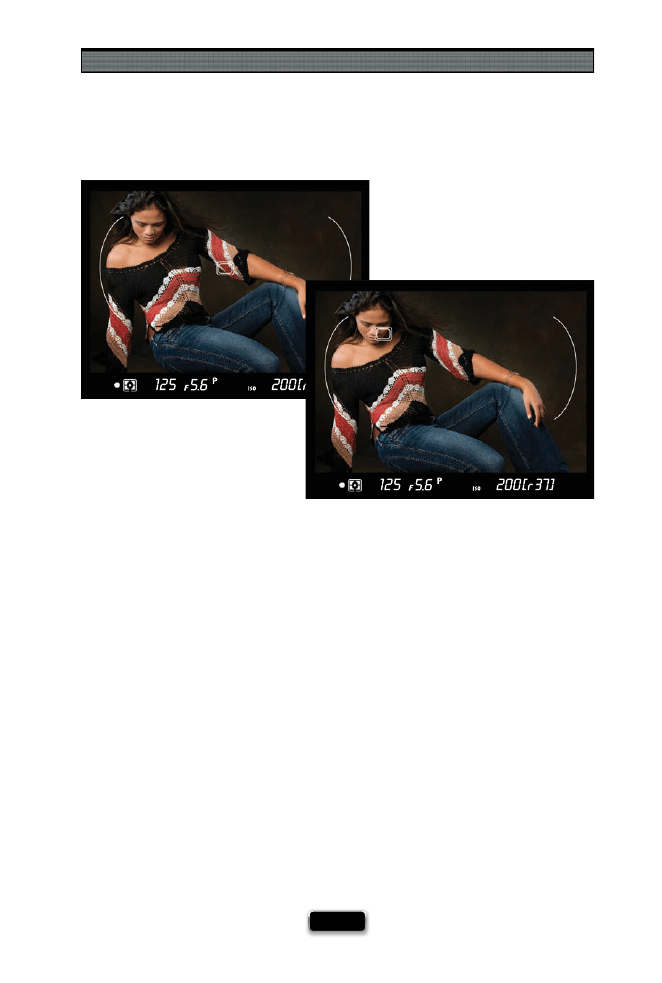
Where You Focus Aӽ ects Your Flash Exposure
Today’s small off -camera fl ashes do such a great job, partially because they adjust their
power output based on the exposure for the shot (Canon calls this TTL for through-the-
lens metering and Nikon calls this i-TTL for intelligent-through-the-lens metering, but
they mean the same thing). So, why do you care? Well, your fl ash is going to help make
the exposure based on exactly what you focus on in the photo. So, if you focus on your
subject, it’s going to try to give you a proper exposure for your subject, and vary the
amount of fl ash power based on making your subject look good. However, if you focus
on something else, like the background behind your subject, your fl ash is going to try
to light that area instead. This is why, when using small off -camera fl ash, you need to
make sure you’re careful about focusing on the area you want to look best. If you do,
your fl ash results will look that much better.
SCO
TT KELBY
Chapter 1
The Digital Photography Book
[ 28 ]
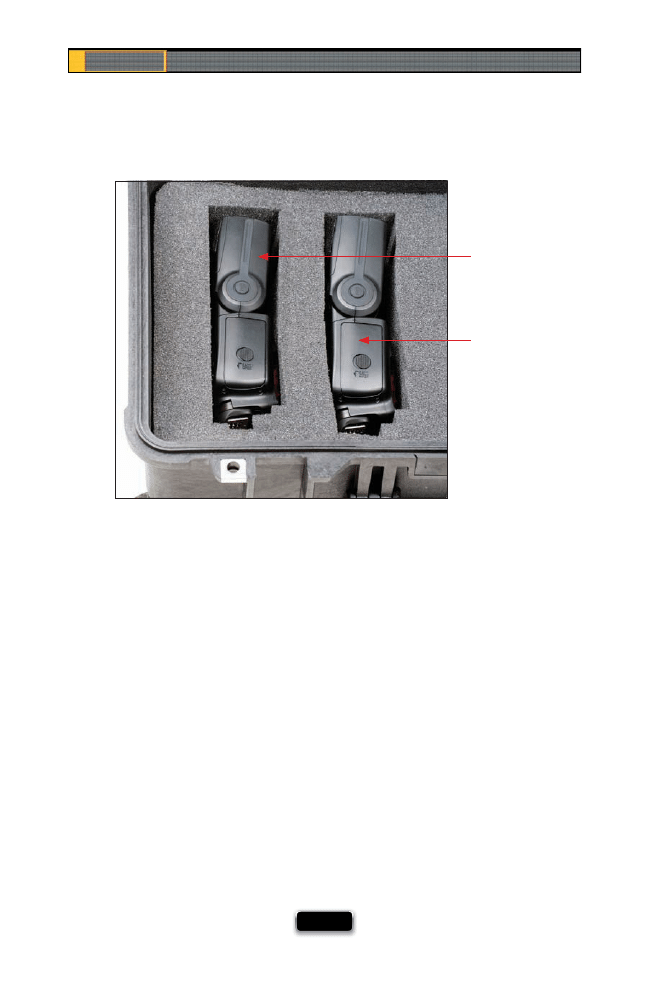
The Paid-Gig Flash Insurance Policy
If you’re hired to do a paid gig (like a wedding, or a portrait session, etc.), you want to
make darn sure you have a backup fl ash, because if, for whatever reason, your fi rst fl ash
dies (you drop it, the wind knocks your fl ash over and it dies, there’s some weird problem
with the fl ash unit itself, etc.), at least you can grab the backup. That’s not the tip, though.
Having a backup for a paying job is an absolute necessity. Here’s the tip: make sure the
fl ash you use as a backup is the same make and model as your main fl ash. That way, if you
suddenly have to switch fl ashes in the middle of the shoot, you’re not trying to fi gure out
how it works, or what the settings should be for a fl ash that doesn’t have the same power
output, or anything else that might freak you out (in front of the client), because you’re
not used to working with that model of fl ash. If you use the same make and model as
your backup, and then you swap out fl ashes, it’s just business as usual.
Main Flash
Backup
Flash
Using Flash Like a Pro, Part 2
[ 29 ]
How High to Position Your Flash
So, you’ve got your wireless fl ash all set up, your fl ash is on a light stand (or a friend is
holding the fl ash for you), and now you’re wondering, “How high up do I put this thing
and where do I aim it?” Here’s a simple way to think about it: position the fl ash where
the sun would be. The sun is usually up in the sky, aiming down at us here on earth, so
put your fl ash up high on a light stand, and angle it so it’s aiming down at your subject.
If you’re inside, pretend there’s no roof. You can see the resulting image from this shoot
on the book’s website at www.kelbytraining.com/books/digphotogv3.
Chapter 1
The Digital Photography Book
[ 30 ]
Which Side Should Your Flash Go On?
I once heard a famous portrait photographer say he always positions his light on his
left side, because back in his days as a news photographer, he used to hold his fl ash in
his outstretched left hand, so he could hold the camera and press the shutter button
with his right hand. He’s so used to seeing his light from the left, that now, even in
the studio, he puts his studio strobe on the left side. I usually light subjects from the
left side, too (but I have no idea why—I guess I’m just used to it that way). However, if
I’m on location and can’t light from the left side, I just move the light to the right side.
Not everything to do with lighting has to be complicated. (See page 220 for the fi nal
image and recipe for the shoot shown here.)

This page intentionally left blank
SHUTTER SPEED: 1/200
SEC
F-STOP:
F
/8
ISO: 200
FOCAL LENGTH: 116
MM
PHOTOGRAPHER:
SCOTT
KELBY

Back in volume 2, I showed you how, using just a simple, thin
piece of plastic that fi ts easily in your wallet, you can completely
and fully outfi t a one-light studio from scratch. Well, after I wrote
that chapter, people who read it wrote me and asked some really thought-
provoking and soul-searching questions like, “What if we want to use two
lights?” or “What if we want to add a second light?” and even “What if we
have one light, but think we might need another?” I’m not gonna lie to you.
I was pretty freaked out. I thought we covered so much in volume 2 that
there was no way anyone would want to learn more, so when I originally
wrote the outline for this book, volume 3, not only did I not have a chapter
on more studio techniques, I specifi cally didn’t mention the word studio,
or techniques, or use any words with either an “s” or “t” in them, just in case.
But then I realized writing a book without an “s” or “t” in it would preclude
me from using my fi rst name, and if that happened, I wouldn’t be able to
refer to myself in the third person (like, “Scott doesn’t want to share more
studio techniques” or “Scott made bail”). So, I really had to revisit the whole
concept with a fresh set of eyes, and once I did, I realized that not only
would I have to include a studio chapter that picks up where volume 2
left off , but I would actually have to rebuild my original studio from scratch,
because after volume 2 was complete, and the chapter was done, I built
a huge bonfi re and destroyed all my gear. That’s how “done” I thought I was
with studio techniques, but apparently, that’s not the case. Scott doesn’t like
to have to rebuild everything. Scott doesn’t like to pull out the thin piece of
plastic from his wallet. Scott needs a second job.
In Volume 2, We Built It From
Scratch. Now, Let’s Pimp It!
[ 33 ]
Chapter 2
The Digital Photography Book
[ 34 ]
The Easy Way to a Pure White Background
If you’re preparing for a studio shoot, take two minutes now and make a shot list—
a written list of the types of images you want to create during the shoot. List everything
from the lighting setups you want to use, to the poses you want to try, to any props you
want to incorporate. When you have a plan, your chances for success go way up!
Increase Your Chances of Success With A Shot List
Getting a solid white background (ideal for shooting kids or fashion) can be challenging,
because you’ll usually need two lights to light it evenly, and you have to worry about balanc-
ing the light so there’s not a “hot spot,” where one side looks brighter. That’s why I switched to
using Lastolite’s HiLite Illuminated Background. Now I have perfect, solid white backgrounds
every time (even on location). The HiLite is collapsible, and when you pop it up, you just put
a single fl ash head inside, on either side (or both), and aim it toward the back wall. Then, low-
er the power of your fl ash to around ¼-power. Now when you fi re your strobe, the light hits
the back of the HiLite and evenly spreads out for perfect coverage. There are slots for lights
on both sides, but I’ve used it with one strobe, and it works perfectly—just remember to
keep a refl ector on the front of your strobe, so it doesn’t get too hot. Plus, you can take it
on location easily, because it folds up like a large refl ector. It takes about three minutes to set
up, and is lightweight enough to hold in one hand. To see the fi nal image from this shoot, go
to www.kelbytraining.com/books/digphotogv3.
Using Your Studio Like a Pro
[ 35 ]
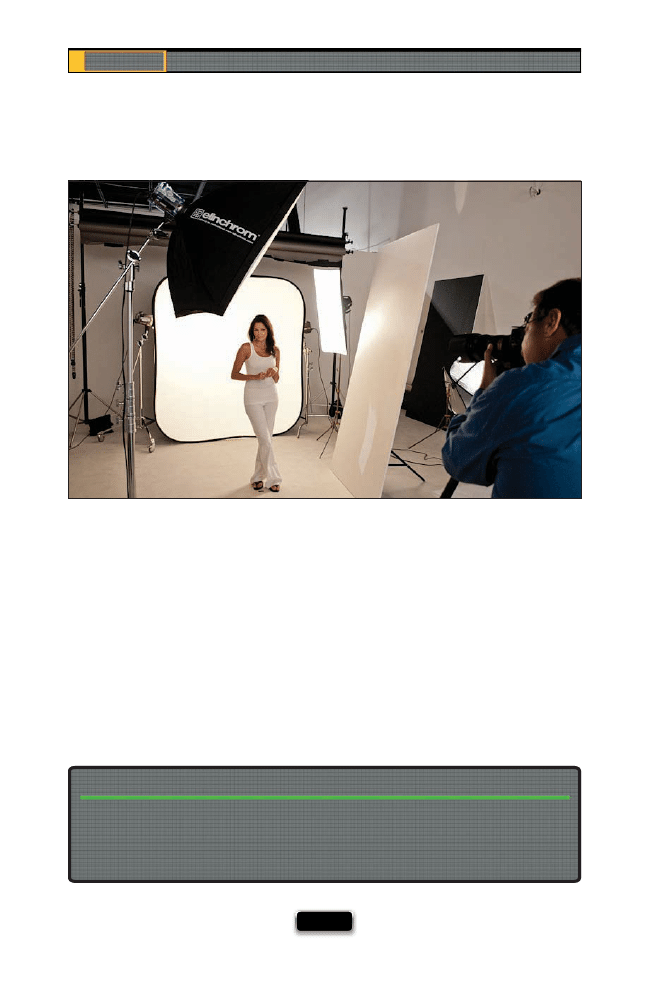
Strobes with Built-In Wireless Rock!
As you can see from the previous page, I’m always looking for an easy way to do…
well…pretty much everything (after all, the simpler it is, the more time you can spend
shooting, right?). Well, Elinchrom’s new BXRi strobes come with a Skyport EL wireless
trigger built right in—all you need is the transmitter that slides into the hot shoe on the
top of your camera. Besides the fact that the wireless capability is built right into the
strobes, there’s something I think is even more helpful: you can now control the power
of all your strobes from right at your camera using the transmitter. That means if you
have a strobe as a hair light up on a boom, and it’s too bright, you can just turn down
the power while you’re right there at your camera—no pulling the boom stand down
(or climbing up on a ladder) to change the power on the back of the strobe. It controls
up to four diff erent groups of strobes, so you can have one assigned to your main light,
one to a hair light, and one to a background light, and control them all without ever
leaving your camera. I know—pretty sweet. You can get a kit from B&H Photo with two
of the 500-watt BXRi strobes, two 26" softboxes, two light stands, two cases, and the
wireless transmitter you need to make it all wireless, and the whole thing is around
$1,550, which I think is a steal for this quality of a rig (I have one myself ).

Chapter 2
The Digital Photography Book
[ 36 ]
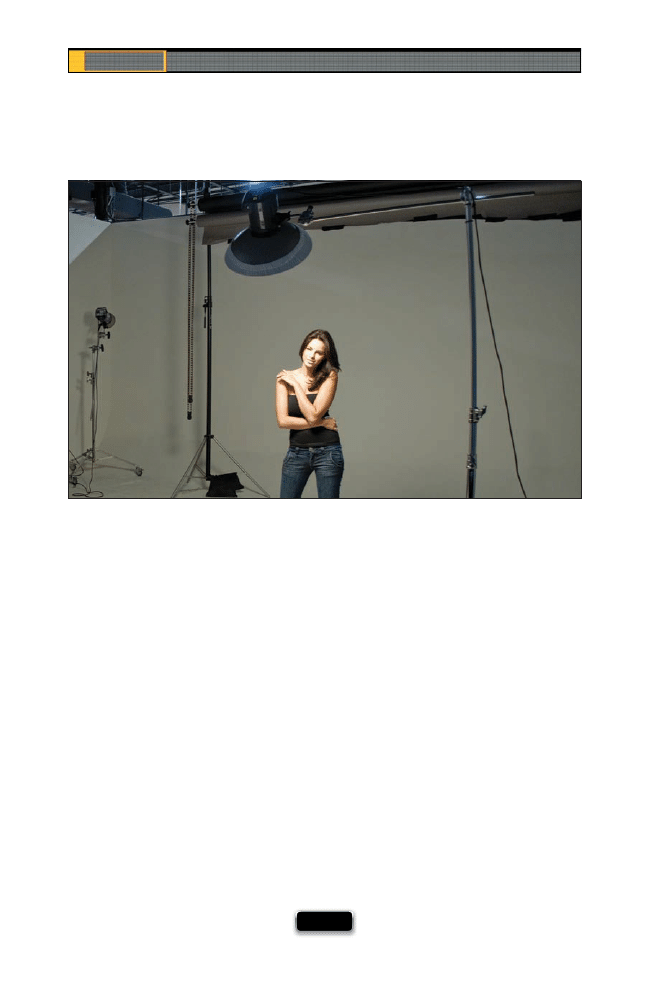
If you’re shooting in the studio a lot, it won’t be long before you get bored with shooting
on white, gray, and black seamless paper, and the easy way to leverage those is to create
your own sets (don’t worry—it’s much easier than you’d think). Notice I didn’t say “build
your own sets” (that’s too much work). So, to make this work, you’ll need to: (1) Go to your
local Salvation Army, Goodwill, or thrift store (or keep an eye out at garage sales) for things
like room dividers with shutters, large frames, coff ee tables, an old couch, lamps on stands,
basically just “stuff ” to go in the background. It really doesn’t matter that much what it
is because of #2 and #3. Now, (2) you need to create some depth between your white,
gray, or black seamless and your subject, then put your set pieces in between them (so it
goes: seamless, a few feet of empty space, then your set pieces, a few more feet, then your
subject—to see the setup for the shot on the right above, go to www.kelbytraining.com/
books/digphotogv3). Then (and this is key), (3) you need to shoot at a pretty wide open
aperture like f/4, or f/2.8, so the background elements are thrown so far out of focus that
you can’t tell if your shot was taken in a large mansion, or in a bedroom, or in a studio. I’m
consistently amazed at how well just putting a few simple things in the background can
look when you follow rules #2 and #3. Also, if you fi nd anything you can hang off a boom
stand—so it looks like it’s hanging from a ceiling in the background—that will help sell the
eff ect big time. Remember, what makes this work is the depth between your background,
your set pieces, and your subject, and the very shallow depth of fi eld. You’ll be amazed at
the results.
SCO
T
T
KE
L
B
Y
Using Your Studio Like a Pro
[ 37 ]
Ask any pro who shoots people for a living, and they’ll tell you that they have music on
during the shoot. Having that music playing in the background goes a long way toward
making the people you’re shooting more relaxed and comfortable, which usually trans-
lates into better looking images (if they’re relaxed and having fun, the photos will look that
way, too). All you need is an iPod (or any other portable media player)—go download
some songs, get a small iPod-compatible speaker, and you’re set. Now, here’s the thing: for
this really to make a diff erence, don’t just play your favorite music (that will only make you
feel relaxed and comfortable), you want to play your subject’s favorite type of music.
The type that will have them on the set saying, “Oh man, I love this song!” For this book,
I shot with a number of professional male and female models, and I’d always ask them
what type of music they liked. Sadly, they never choose old school funk or ’80s big hair rock,
or I would have had them covered. Instead, they wanted the same music they listen to at
home and in their car: R&B, hip hop, rock, rap, and alternative. So, I called another photogra-
pher I know (my buddy, Terry White) who always has great music playing during his shoots,
and I asked him where he got his music. Well, no surprise, he had one of his models pick it
out, and he said, almost without exception, he gets raves from models in the studio about
his musical taste. He made an iTunes iMix of his collection for me to download, and he
was nice enough to let me share that iMix with you. Just go to www.kelbytraining.com/
books/digphotogv3 and click on the link, which will launch iTunes and take you to that
playlist, where you can buy one or all of the songs with just a click.
Chapter 2
The Digital Photography Book
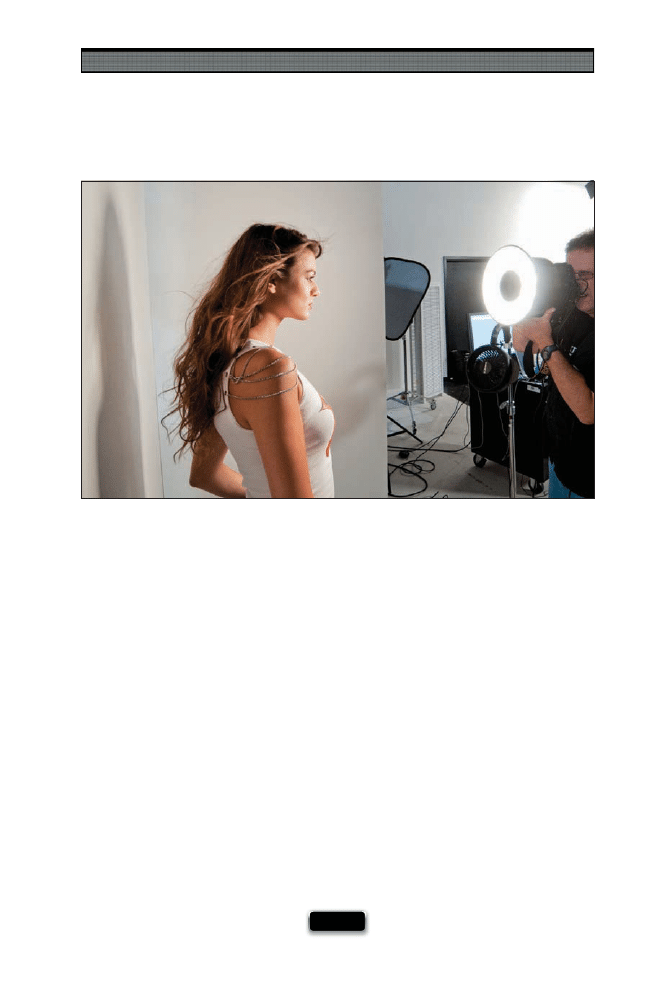
[ 38 ]
If you want a look that isn’t as soft as one with a softbox, but isn’t as hard-edged as a
bare-bulb strobe, you should try a beauty dish. The light it produces is kind of in between
the two, giving you more punchy contrast without getting too harsh or edgy. A beauty dish
attaches to the front of your strobe (like a softbox), but it looks more like a giant metal
refl ector. The light it produces has more “kick,” which creates a very nice look for close-up
face and headshots (because of the way it defi nes the face and skin tones), and it’s great for
anything you want to have that beauty look you see so often in makeup and beauty
product print ads. You can also get a “sock” for your beauty dish, which covers the front to
give you a little softer look. When you use the dish, it’s usually positioned directly in front of
your subject, up high, and tilted down at them at a 45° angle (as shown here). You have to
kind of shoot under it. You may also want to put a refl ector fl at at your subject’s chest level
to fi ll in the shadows under their eyes (see page 50). Also, depending on which brand
you buy (I use a 17" Elinchrom beauty dish), you’ll probably have to choose between a
white dish interior and a silver one. I chose the white because it’s a little softer (the silver
is more refl ective and contrasty).
Using Your Studio Like a Pro
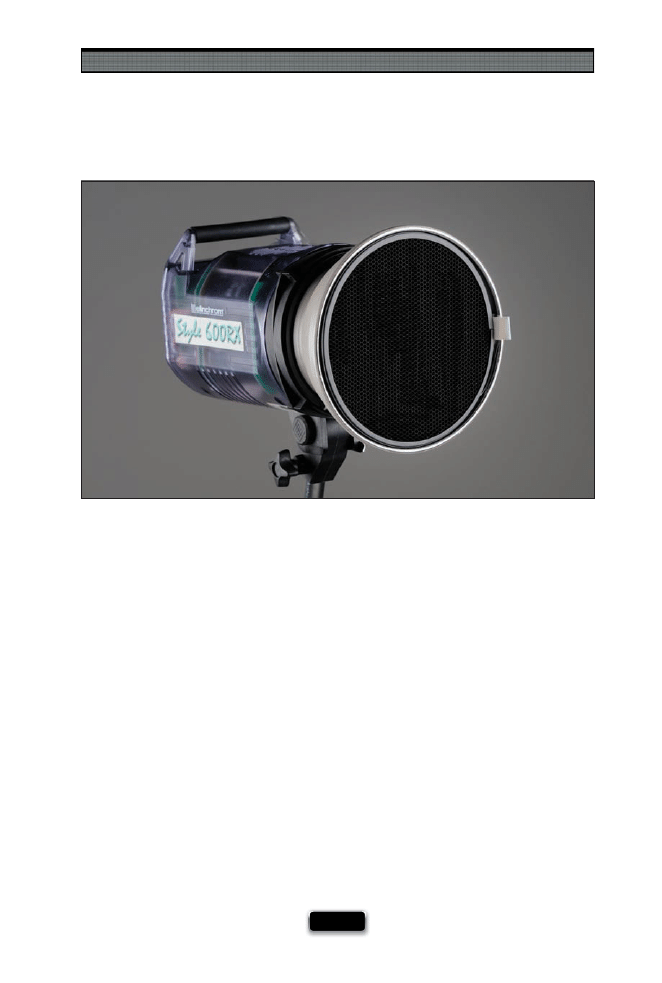
[ 39 ]
If you took your softbox off your strobe, the light from the fl ash bulb would pretty
much just go everywhere. That’s one of the reasons we use softboxes in the fi rst place—
to help us put the light where we want it and greatly soften it, of course, but softboxes
are, by nature, soft. That’s where grid spots come in. These attach right over your strobe’s
refl ector (the kind I use actually snap right into the refl ector), and they have a metal
honeycomb pattern that gives you a narrow, focused beam for very dramatic eff ects
(the light will be hard-edged, because there’s no softbox—it’s a bare bulb with a metal
refl ector and a grid spot). Right now, you see these grid spots used big time as back-
edge lights in portraits (in fact, I’m not sure you can fi nd a magazine editorial-style cover
shot in the past year that doesn’t use at least one, if not two, rear grid spots, putting a
white highlight on either side of the subject). These come in diff erent degrees (like a
10° grid, a 20°, and so on), and the lower the number, the tighter the beam (I usually use
a 20° or 30° grid). There’s not much to using them. You just snap them into place and
that’s it—your beam is greatly narrowed. Put one on either side of your subject, aim
them at the sides of their face, then use a strobe up front to put some fi ll light into their
face, and—voilá—you’ve got the look. Well, there is a little more to it—make sure you
see the last chapter of the book for more on this look—but it all starts with a grid spot.
Chapter 2
The Digital Photography Book
[ 40 ]
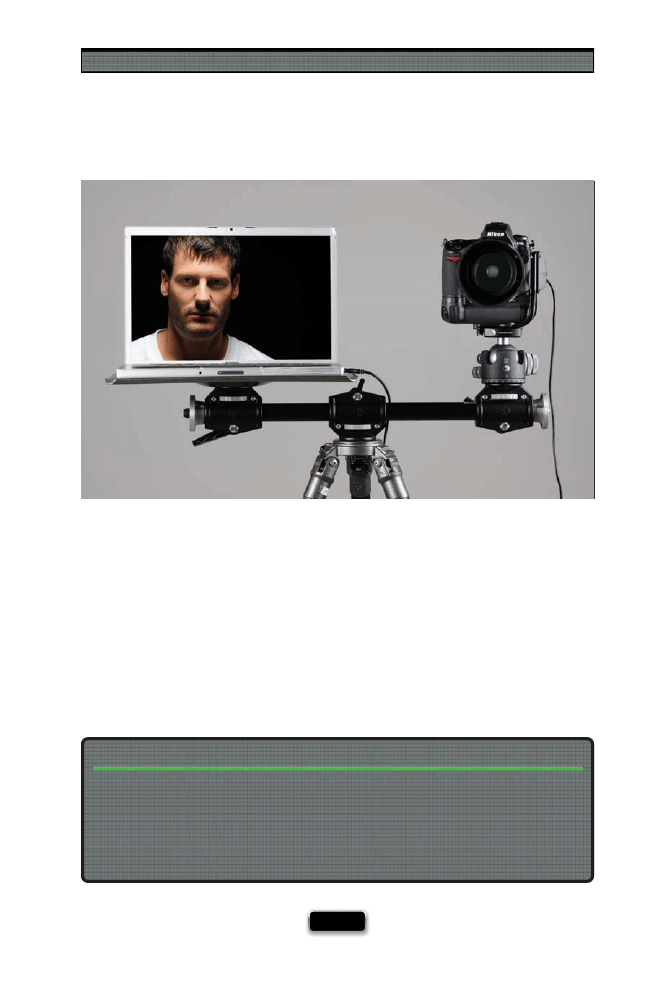
Shooting Tethered Directly to a TV Monitor
If you want to see a much larger view of what you would normally see on the tiny LCD
on the back of your camera, try tethering your camera to a television monitor. Most
newer dSLRs have some sort of video output (the newer, high-end Canon and Nikon
bodies even have HDMI outputs), so you can take the video cable from your camera, go
straight to the input on the television monitor, and see your LCD at a huge size. This
is diff erent than tethering your camera to a desktop computer or a laptop, because
the images are still being burned onto your memory card (rather than being imported
into a computer), and with this type of tethering, the TV monitor does actually take
the place of, and do all the same functions as, your camera’s LCD screen. So, you can see
highlight warnings, see your camera’s settings, and everything you would normally see
on your camera’s LCD, but now you see it huge! I can’t tell you how helpful it is to see
your images at this large a size, because you can see exactly what the light looks like,
you can see exactly how sharp your images are, you’ll catch mistakes you’d miss looking
at a 2.5" or 3" LCD, and your subjects will love being able to see themselves at this size.
I fi nd it really gets them excited when they like what they see onscreen, and that turns
into much better images all around. So, what do you need to make this happen (besides
the TV, of course)? You’ll need whichever cable your particular camera uses as a video out
(many dSLRs come with this cable right in the box). That’s all it takes.
SCO
TT KELBY AND JVC
Using Your Studio Like a Pro
[ 41 ]
Getting Your Laptop Nearby for Tethering
Here’s something to keep an eye out for: when you open your image on a large-screen com-
puter monitor (24" or larger) and view it at 100%, chances are it’s not going to look tack sharp,
but keep in mind that you’re seeing it at a “larger than life” size. Zoom out until the size you
see onscreen is approximately the physical size you plan to print the image. If you plan to print
the image at a large poster size, make sure you back up at least six feet from the monitor to
see the image at the same view everybody else views large images.
Judging Your Image Quality Onscreen
If you decide you want to tether directly to your laptop, where your images are downloaded
into your computer, so you can sort and tweak them as you shoot (I showed how to do this
in volume 2), then having your laptop in a convenient spot is real a time saver, and this rig
(shown above) is about the easiest and most stable way to get there. It’s a metal platform
called the Gitzo G-065 Monitor Platform, which screws right into a standard tripod, and it’s just
the right size for a 15" laptop. If you often shoot using a tripod, then you can have this one
tripod do double-duty by adding a Manfrotto 131DD Tripod Accessory Arm for Four Heads.
This is a horizontal bar that screws onto your tripod, then you can attach the Gitzo Monitor
Platform with your laptop on one end, and on the other end, you can put the ballhead
that would normally be alone on your tripod. This way, one tripod holds them both, and
they’re right there together. Pretty sweet!
SCO
TT KELBY
Chapter 2
The Digital Photography Book
[ 42 ]
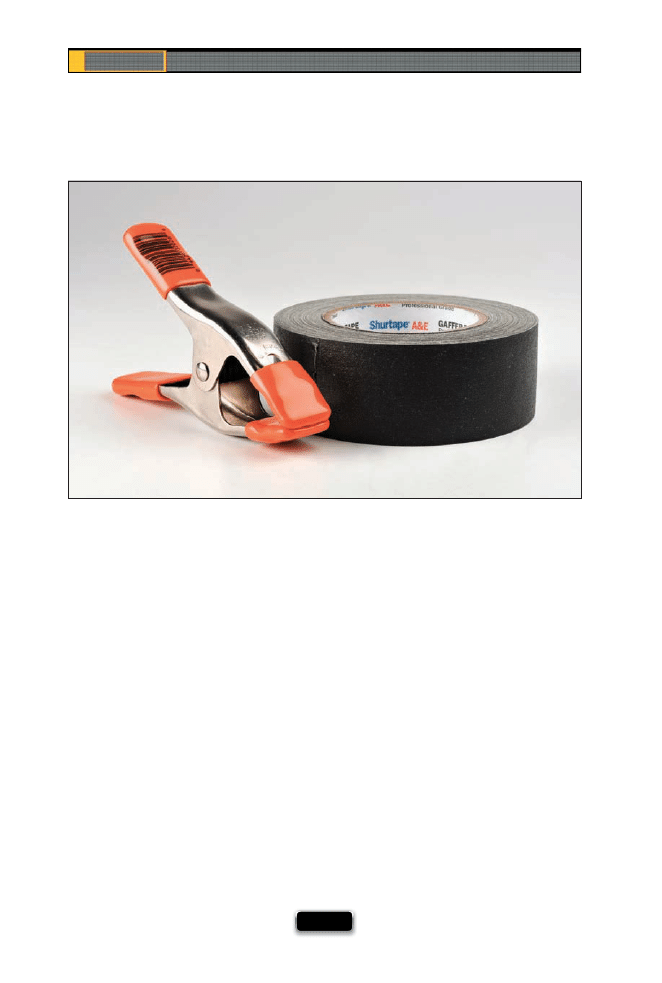
If you don’t have a roll of gaff er’s tape in your studio, put down this book, go online, and or-
der a few rolls right now. Not duct tape. Not electrical tape. Gaff er’s tape! It’s one of those
things that once you have it, you’ll wonder how you got through a shoot without it (ask any
studio photographer). You’ll use it for everything from holding grid spots in place, to fi xing a
gap in a softbox, to keeping things together when doing product shots, to...I could go on
and on. The other thing you need about six, or so, of are A-clamps. They’re another one of those
things that should be in every studio, and you’ll use them for everything from hanging things
from a boom stand, to pinning back clothing on your subject to get rid of wrinkles (which
is why you need small ones and large ones). You’ll fi nd these at your local hardware store (or
go online) and you’ll fi nd a hundred uses for them. Keep these two inexpensive acces-
sories around, and you’ll keep from pulling your hair out—and it’ll keep the shoot moving
ahead (instead of coming to a halt while you run to the store).
Using Your Studio Like a Pro
[ 43 ]
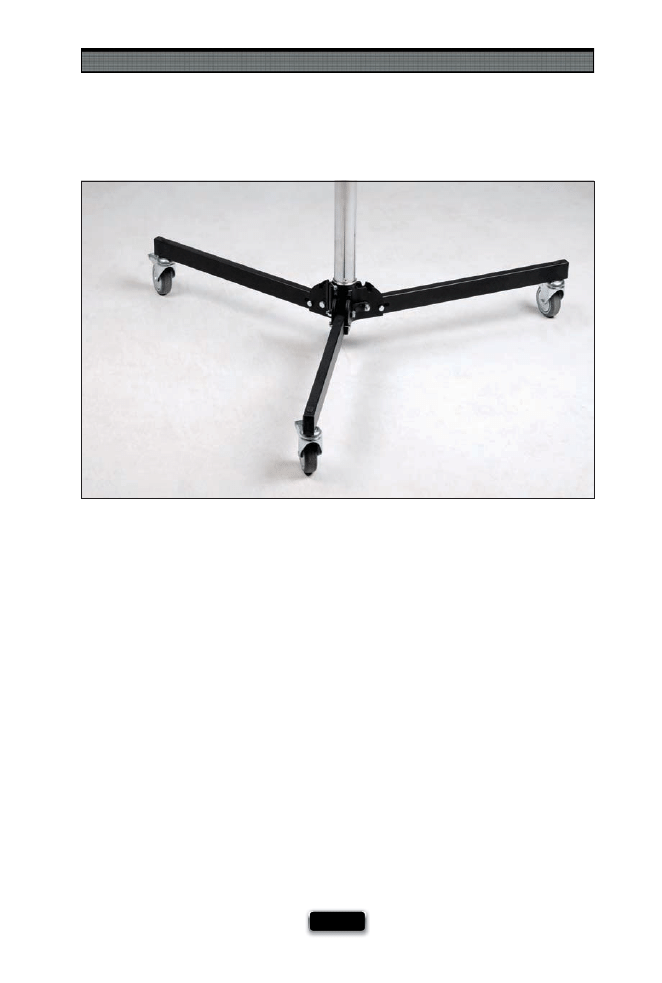
At some point, you’re going to wind up buying light stands for your studio, so here’s a
bit of advice that will make life in your studio much easier: buy light stands with wheels.
There are two big reasons you’ll want to do this: One is pretty obvious—you’ll be moving
your lights a lot, and it’s much faster and easier to roll them around than pick them up
and move them. Plus, I’ve found (and I’ve seen fi rsthand with other photographers) that
you’re more likely to move your lights, and experiment, if they’re on wheels. The second
advantage is safety. Lights are top-heavy, and all the weight—the strobe, the softbox, and
any accessories—is at the top of the stand. When you pick one up to move it, it’s easier to
bang it into something, or lose balance and topple the whole rig over, than you’d imagine
(believe me—I’ve seen it). Whatever it costs you for wheels, you’ll make back quickly by
avoiding repair bills, potential injuries on the set, and visits to the chiropractor.
Chapter 2
The Digital Photography Book
[ 44 ]
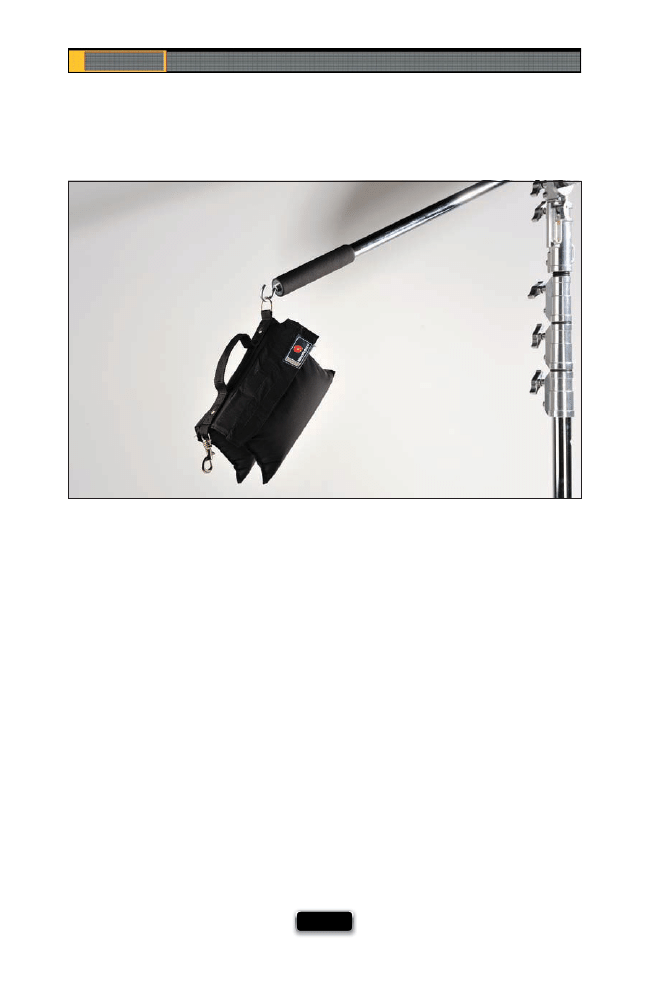
I don’t care how sturdy a boom stand you buy, one day (probably soon), it’s going to
go crashing over. The best-case scenario is that it just breaks your strobe’s bulb, or
the strobe itself, or maybe just tears your softbox. The worst-case scenario is that it
falls on your subject, your client, a makeup artist, or a friend. It’s not a matter of if it
happens—it’s like a hard drive crash—it’s a matter of when it happens. That’s why you ab-
solutely need to have some sandbags, and to use them religiously when you’ve got any-
thing on a boom or if you take anything outside on a shoot (where the wind can blow
it over). B&H Photo sells empty sandbags—when they arrive you just fi ll them with
sand (you can also fi nd some pre-fi lled bags, but prepare to pay for shipping them).
You can fi nd them at your local hardware store, as well. Once you get them, put them
on the legs of your boom stand to balance the weight, or hang them off the boom
arm to add a counterweight (as shown above), or both, and take a big worry off
your big worry list. Another thing to watch out for: be careful when removing your
sandbags, because if the weight of them is keeping the boom from tipping over, when
you remove the sandbag, your boom could topple right over. So, just keep an eye
(or a hand) on things when you’re taking them off .
Using Your Studio Like a Pro
[ 45 ]
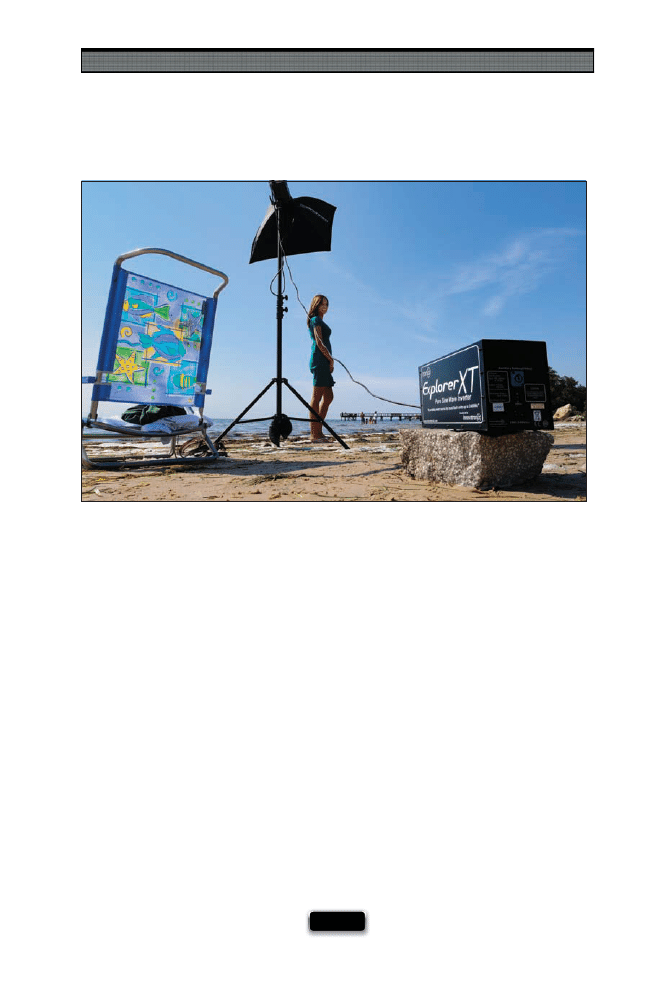
A monolight (also sometimes called a monoblock) is just a regular studio strobe that
you plug right into a wall socket like a regular lamp. If you want to take studio strobes
out on location, instead you use a battery pack and special strobe heads made to run
off batteries (for example, I use an Elinchrom Ranger kit, which is a battery pack and
strobe head). The advantage of something like a Ranger kit is you can take your studio
lighting outdoors (to the beach, in the desert, out on a boat, etc.), but the disadvantage
is you have to use special “made for the battery” strobe heads. However, now more and
more companies are selling battery packs that let you plug your regular studio strobes
right into them (for example, I’ve been using a battery pack called an Explorer XT, from
Innovatronix, that lets me plug in up to two of my regular studio strobes, and it was
fairly aff ordable compared to dedicated packs—around less than half the price). So,
instead of having to buy strobe heads and a battery pack, if you already own studio
strobes, all you have to buy is the battery pack. Sweet!
Chapter 2
The Digital Photography Book
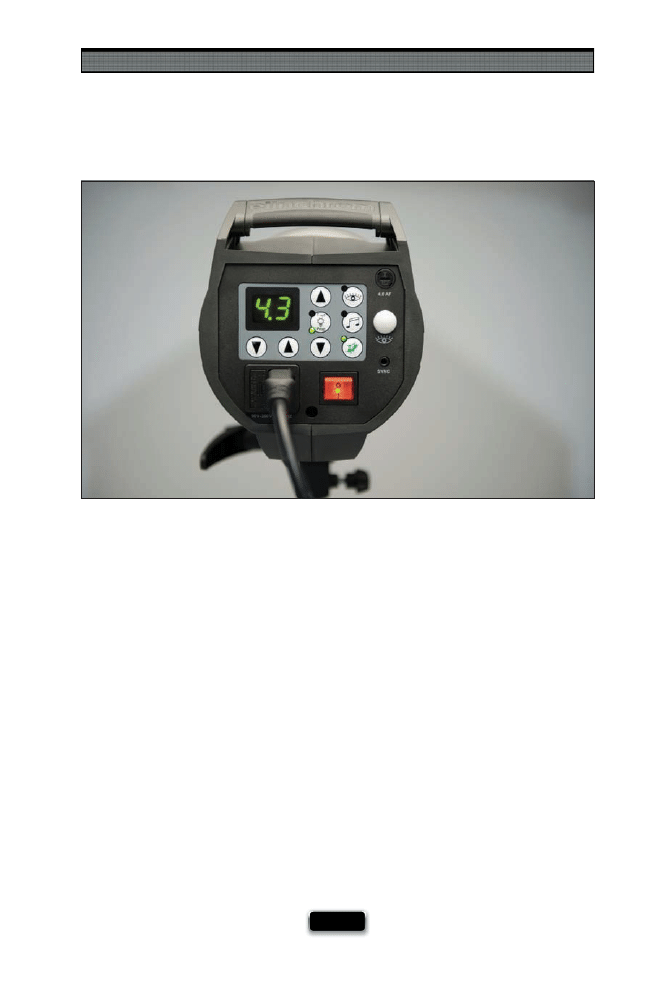
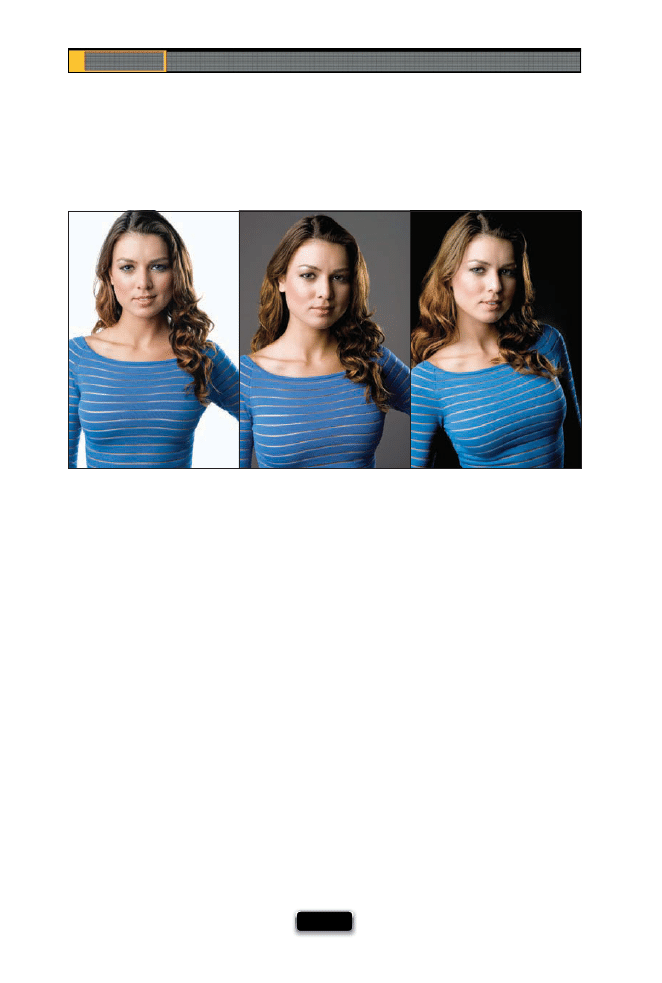
[ 46 ]
One nice thing about buying a white seamless background is, depending on how you
light it (and what shutter speed you use), you can get three diff erent looks. Here’s how:
(1) To have a white background, you have to light it, so position a light (or ideally one on
each side) down low, aiming up a bit to light the background. That gives you white.
(2) To have a gray background, just turn the background light(s) off . White paper needs
light not to look gray, so when you turn those lights off , it gives you gray—your second
color from the same white background.
(3) To get a black background, leave the lights off , and increase your shutter speed to as
high as your camera will allow (your maximum sync speed), which is probably 1/200 or
1/250 of a second. This makes your background go even darker—to at least a very dark
gray or a solid black—just by changing the shutter speed. What you’re essentially doing
is, by raising the shutter speed, you’re eliminating any light already in the room (called
“ambient light”).
One Background, Three Diӽ erent Looks
SCO
T
T
KE
L
B
Y
Using Your Studio Like a Pro
[ 47 ]
The hot look right now for fashion photography is to use a ring fl ash, which is a series
of small fl ashes that form a circle around your lens, and give a very fl at look with a
fairly hard shadow behind your subject. In the chapter on fl ash (Chapter 1), I showed
an adapter you put on your small off -camera fl ash to imitate a ring fl ash look, because
ring fl ashes can be pretty expensive. However, I found one that’s reasonably priced for
someone who’s not going to be making their living as a fashion photographer, but some-
times wants that fl at, ring fl ash look. It’s the AlienBees ABR800, and it’s not terribly heavy
(as ring fl ashes go—they are fairly bulky and heavy by nature), but works surprisingly
well considering its $399 price tag (you can spend over $1,000 on a ring fl ash pretty eas-
ily). You can check out page 223 for a photo taken with the AlienBees ring fl ash, so you
can see the type of look you can expect from one.
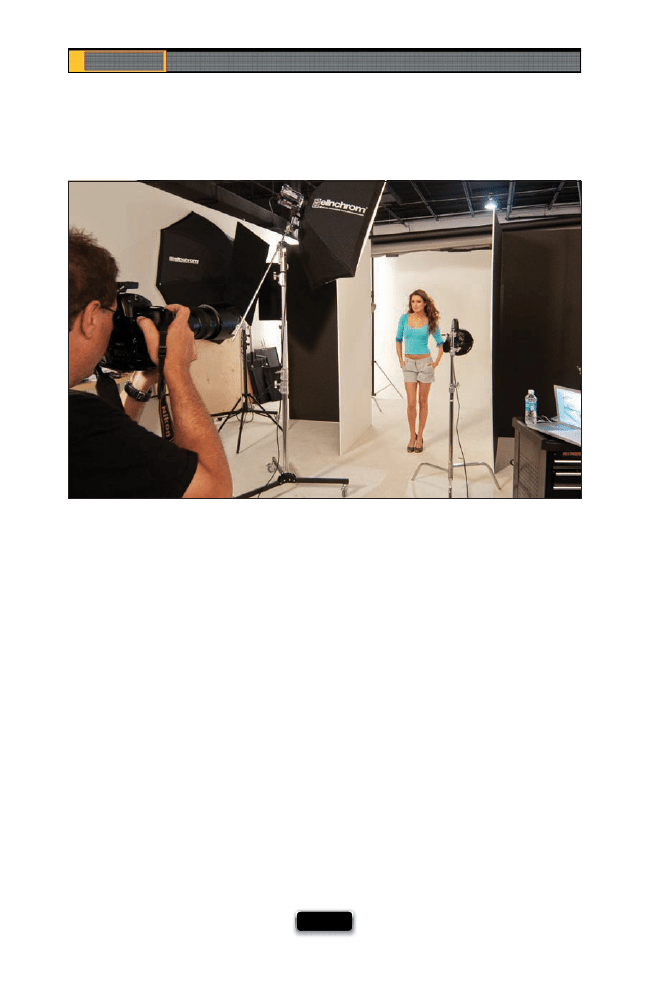
Chapter 2
The Digital Photography Book
[ 48 ]
If you’re shooting fashion, you’re probably going to be shooting a lot of ¾-length and full-
length shots, and if that’s the case, you’ll probably want to get some V-fl ats (these are
actually large foam core sheets that are approximately eight feet tall by three or four feet
wide, and you can usually fi nd them with one side black and one side white). You’ll use the
white side as a giant full-body refl ector, placed either directly to the side of your subject (on
the opposite side of your main light), or in front and little bit to the side, leaning back a bit
to throw some light back toward your subject. The reason these are called V-fl ats is because
you take two of them, form a large V-shape, and tape them together on the seam. That way,
you can stand them up and position them where you need them, without having to use a
stand of any kind. Also, since one side is black, you can use the black side as a fl ag (to keep
background lights aiming forward at your subject from spilling through to the camera and
creating lens fl are), or you can face the black side toward your subject, which subtracts light
from the scene and gives a dramatic edge to your subject. To see the resulting image from
the shoot above, go to the book’s website at www.kelbytraining.com/books/digphotogv3.
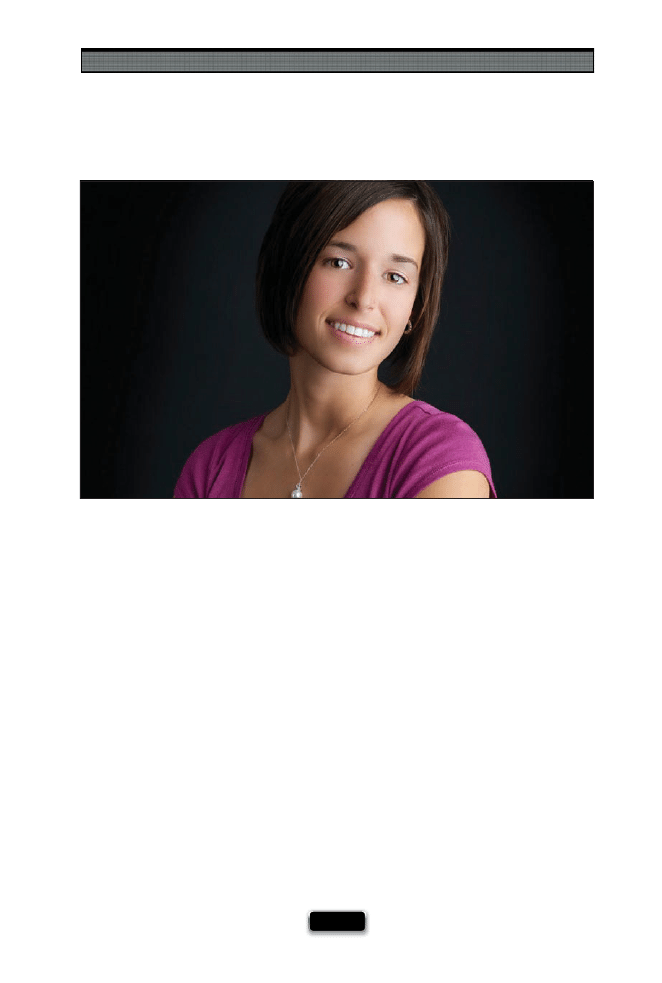
Using Your Studio Like a Pro
[ 49 ]
You know that refl ection of your softboxes that appears in your subject’s eyes? Those are
called catch lights, and you want them. Badly. Without them, your subject’s eyes won’t
have any sparkle to them and will look like dead, lifeless pools of despair (okay, that’s
pushing it a bit, but you get the idea). So, don’t freak out, or as I’ve had people suggest in
emails to me, try to remove them in Photoshop. Instead, make sure they’re there,
because they’re supposed to be there. Now, that being said, the next time you see another
studio photographer’s work, take a good close look at the subject’s eyes and you can usually
not only tell which type of softbox they used (square, round, an umbrella, an octago-
nal softbox, a beauty dish, etc.), but you’ll also be able to see the position of the light (if
they had it right in front, over to the side, etc.). And, if you see another catch light at
the bottom of the eye, you’ll know the photographer used a refl ector positioned down
low to put some light back into the eyes. It’s kind of a mini-lighting lesson each time
you take a close look.
Catch Lights and Why You Want Them
SCO
TT KELBY
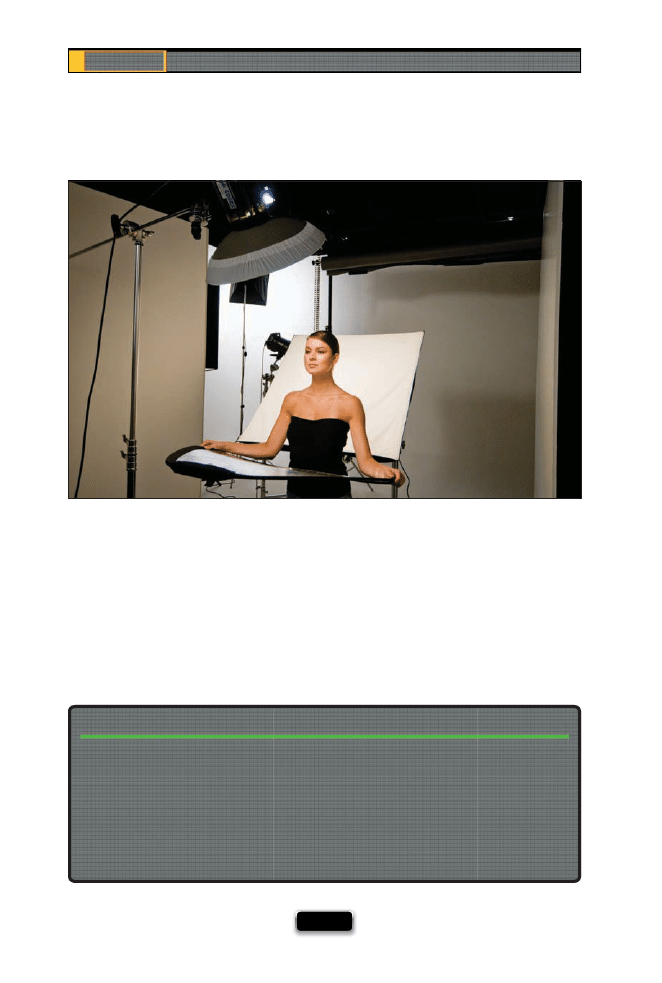
Chapter 2
The Digital Photography Book
[ 50 ]
Refl ectors come in diff erent colors, but probably the most popular are white, silver, and
gold (although gold is usually used outdoors, because adding warm yellow light in with
white studio lights usually looks kinda weird). So, that leaves silver and white—which
do you use when? Here’s the general thinking on this: Silver refl ects much more light, so
you’ll use silver when you position the refl ector back away from your subject. If you need
to get a refl ector right up close, that’s when I’d use white, because it doesn’t refl ect nearly
as much light as silver. (See page 231 for the fi nal image from this shoot.)
Refl ectors: When to Use Silver or White
If your subject wears glasses, seeing a refl ection of the softboxes in their glasses is not
uncommon, but you don’t want such a strong refl ection that it interferes with or covers
their eyes. If that’s the case, just move the main light to the side until the refl ection goes
away (it’s easier than you’d think, because you’ll see the modeling light refl ecting in their
glasses). However, what’s important is that the glare is gone from the angle where your
camera is set up, not from where you’re standing moving the light. So this will go quicker
if you have a friend or assistant move the light while you stand at the camera and tell them,
“keep going…keep going…” until you see that the refl ection is gone.
Reducing Glare in Glasses
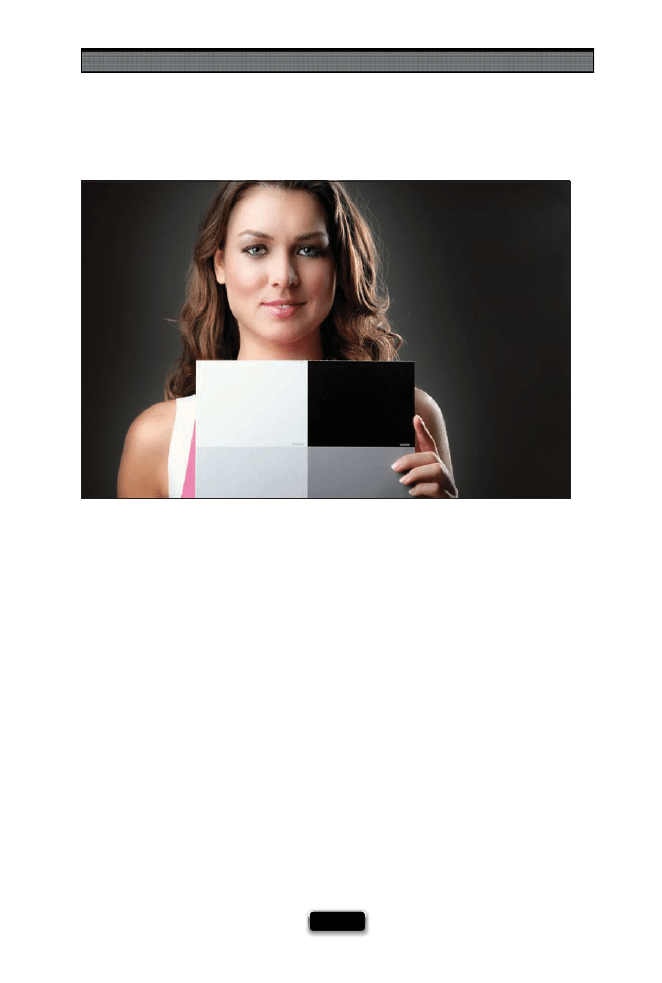
Using Your Studio Like a Pro
[ 51 ]
If you’re going to be post-processing your images using a program like Photoshop, or
Photoshop Elements, here’s a trick that will make the color correction process absolutely
painless, and nearly automatic. Once you get your lighting in place, have your subject
hold up a gray card target that has medium gray, light gray, black, and white on it (the
one shown here is a target that comes free with my book, The Adobe Photoshop Book
for Digital Photographers), then take a shot with it clearly in the frame. That’s it—you
need just one shot with the subject holding the card. Now, when you open your photos
in Photoshop (or Elements), open the Levels dialog, click on the gray Eyedropper that
lives in the dialog, and click it on the medium gray color swatch. Then click the black
Eyedropper on the black swatch, the white Eyedropper on the white swatch, and that’s
it—you’ve color corrected that photo. Now you can open any other photo taken in that
same lighting setup, and press Command-Option-L (PC: Ctrl-Alt-L) to apply that exact
same color correction to this new photo. You can also use this same card for adjusting just
the white balance of a RAW photo. Open that same photo in Photoshop’s Camera Raw (or
Photoshop Lightroom’s Develop module) and get the White Balance tool from the Tool-
box (or the Basic panel), then click it once on the light gray color swatch, and now your
white balance is set. You can now apply that same white balance to all your RAW photos
by copying-and-pasting just that white balance setting to as many photos as you want at
once. A huge time saver.
Using a Gray Card to Nail Your Color
SCO
TT KELBY
Chapter 2
The Digital Photography Book
[ 52 ]
The fi rst two things the human eye naturally focuses on in a photo are the brightest part
and the sharpest part of the photo. Keep this in mind when you’re shooting in the studio
or on location (even with small off -camera fl ash), because if you light your entire subject
evenly, you won’t be directing your viewers to look where you want them to, which in
most portraits is the subject’s face. For a more professional look, you want their face to be
perfectly lit, and then the light should fade away as it moves down their body. How much
it fades away is up to you (it can fade to black if you want, but again, that’s your call), but
when looking at your photo, it should be clear by the lighting where you want people
viewing your image to look. One way you can control the light is to position it so it doesn’t
light all of your subject evenly, or to use a fabric grid, so the light doesn’t spill everywhere,
or even to use something to block the light from lighting the person’s whole body evenly.
I use a black fl ag (a 24x36" cloth fl ag) and position it under the light (usually on a boom
stand), so the light is mostly concentrated on my subject’s face. It doesn’t have to block
all of it—unless I want the person’s body to fade to black—it just has to cut down the
amount of light that falls on the rest of them. Take a look at your favorite portrait photogra-
phers, and you’ll see this lighting technique used again and again to create interest, focus,
and even drama in their images.
Don·t Light Your Whole Subject Evenly
SCO
TT KELBY

Using Your Studio Like a Pro
[ 53 ]
When working with more than one fl ash, you’ve probably heard the terms main light
(also called key light) and fi ll light. Here’s what those mean: Whichever fl ash you choose to
do most of the lighting of your subject is the main light. It’s as simple as that. If you use
another light that is not on the background, or on the subject’s hair, and the fl ash isn’t
as bright as your main light, that’s the fi ll light. The fi ll light is usually used to add just
a little extra light to your scene. For example, let’s say you’re doing a profi le shot of your
subject. The profi le light goes to their side, and a little behind them. Most of the light ap-
pears to come from behind and just a little bit of light falls on the side of their face that
faces the camera. But what if it still looks a little too dark? Well, that’s when you might
add another fl ash in front (I’d put it opposite the fl ash behind them), but you’d lower
the power of this fl ash way, way down, so just a little bit of light appears—just enough
to fi ll in those shadows (to see the setup shot for this, go to www.kelbytraining.com/
books/digphotogv3). That’s a fi ll light, and now you know the diff erence between the
main light and a fi ll light.
The Diӽ erence Between Main and Fill Light
SCO
TT KELBY
Chapter 2
The Digital Photography Book
[ 54 ]
Avoiding the Flash Sync Speed Black Bar
If you’re shooting in the studio, or with an off -camera fl ash, and you start seeing a black
bar, or black gradient, across the bottom or either side of your photo, that’s because
you’re shooting at too high a shutter speed for your camera to sync with your fl ash.
Generally, the fl ash sync speed (the maximum shutter speed your camera will sync with
a fl ash) is either 1/200 or 1/250 of a second (depending on the make and model of your
camera). So, if you see that dreaded black bar, just lower your shutter speed to 1/250 of
a second or slower, and that should take care of it.
SCO
TT KELBY

This page intentionally left blank
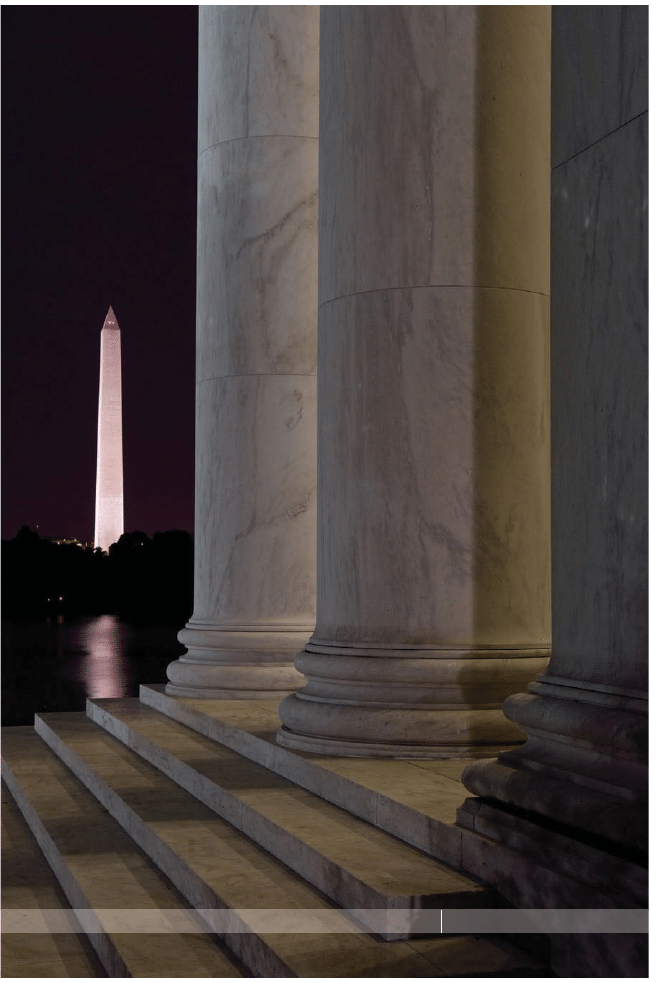
SHUTTER SPEED: 2.5
SEC
F-STOP:
F
/8
ISO: 100
FOCAL LENGTH: 31
MM
PHOTOGRAPHER:
SCOTT
KELBY

One of the questions I get asked most is, “Which lens should
I buy next?” Of course, I have to ask a question of my own
before I can answer that question, and that is, “How stable is
your marriage?” I ask that because if you have a really stable marriage—
one that’s based on trust, caring, compassion, and a healthy fear of
handguns—it’s entirely possible that it can endure having one of you
become a serious photographer. Otherwise, I refuse to answer the lens
question, because having a serious photographer in the family is going
to seriously test the strength of your marriage. For example, there will
come a day when you’ll be faced with the decision of whether to get
that new super-sharp, fast f/2.8 lens or to stay married. That’s because,
in most marriages, one spouse controls the funds, and it should never
be the spouse that’s into photography, because there will come a day,
mark my words, where you’ll be holding your mortgage payment book
in one hand and the B&H Photo catalog in the other, and you’re going
to be faced with a moral dilemma that will test the very mettle of your
commitment to your spouse, family, and friends. You’ll start to ask
yourself crazy questions like, “How would we do living on the streets?”
and “Would our friends sneak us food?” and “I wonder if they’ll throw in
a free polarizing lens?” These are not the kinds of questions you want
to be asking yourself at this stage of your life (by the way, the more
expensive the lens, the more free stuff you should try to get thrown in).
Anyway, if one day you’re faced with one of these really tough decisions,
I’ll give you the same advice I gave my own daughter, “Honey, you can
always fi nd another husband, but a great sale on some really fast glass
only comes along once in a lifetime.” (I didn’t say those exact words, but
it was defi nitely implied.)
Which Lens to Use, When,
and Why
[ 57 ]
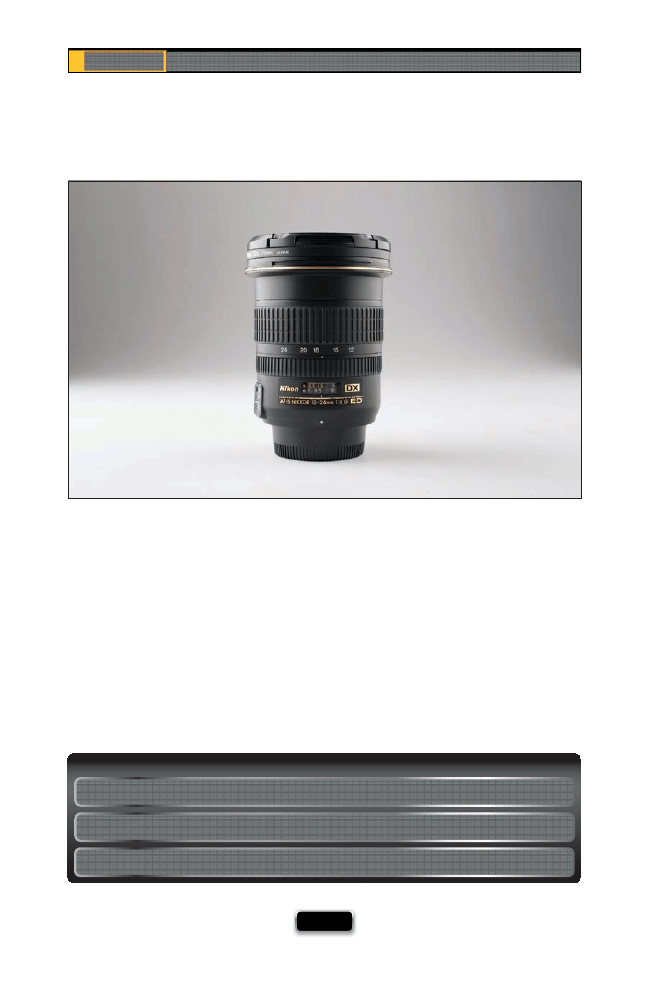
Chapter 3
The Digital Photography Book
[ 58 ]
A regular wide-angle lens (as opposed to a “super wide”) is around 24mm to 35mm,
and it’s just about a must if you’re shooting landscapes, because the wide aspect takes
in more of the scene (think of how much more wide-screen video takes in—it’s kind of
like that). Wide angle is also very popular for shooting environmental portraits (the type
of images you see in magazines when they’re doing a feature on a celebrity, politician,
or a business exec, where the portrait takes in a lot of their surroundings). For example,
if you’re shooting a fi reman in the fi re station, with wide angle, you include a little, or
a lot, of a fi re truck in the shot, as well. They’re also great anytime you want to create
a view of something—just get in real close and things get interesting. You can buy
wide-angle zooms (which are what I prefer) that zoom from wide-angle to normal (like
a 24–70mm), or even a super-wide zoom that goes from 12–24mm. I GRAB THIS LENS
FIRST WHEN...I’m going to shoot landscapes using a non-full-frame camera body.
Scott·s Gear Finder
Wide-Angle AF Nikkor 24mm f/2.8D Autofocus Lens (around $360)
Canon Wide-Angle EF 24mm f/2.8 Autofocus Lens (around $310)
Sigma 28mm f/1.8 Lens (around $380) [for Nikon, Canon, and others]

The Truth About Lenses
[ 59 ]
These are well named, because they give you an incredibly wide, almost circular view
(and the lens itself bulges out like a fi sh’s eye, but honestly I don’t know if the lens was
named for how the lens looks, or for how the photo it takes looks). This is defi nitely a
special-eff ects lens that you want to use occasionally, because the fi sheye look can get
old fast if you use it too much. However, in the right circumstance, it looks really fasci-
nating (try holding it up high over your head when you’re in a crowd, or at dinner in a
restaurant, and shooting straight down). One thing about fi sheye lenses is that they do
distort the horizon line quite a bit. For the minimum amount of distortion, try to keep
the lens level in front of you, but if you want more creative looks, then all bets are off —
just have fun with it. I GRAB THIS LENS FIRST WHEN…I’m going to be in a crowd, when
I’m shooting up high in a sports stadium and want to take the whole thing in, or when
I’m shooting skyscrapers and want to get them all.
Scott·s Gear Finder
Nikkor AF 10.5mm f/2.8 Fisheye Lens (around $700)
Canon EF 15mm f/2.8 Fisheye Lens (around $660)
Sigma 10mm f/2.8 Fisheye Lens (around $700) [for Nikon, Canon, and others]
©IST
OCKPHO
T
O/ERICK NGUYEN
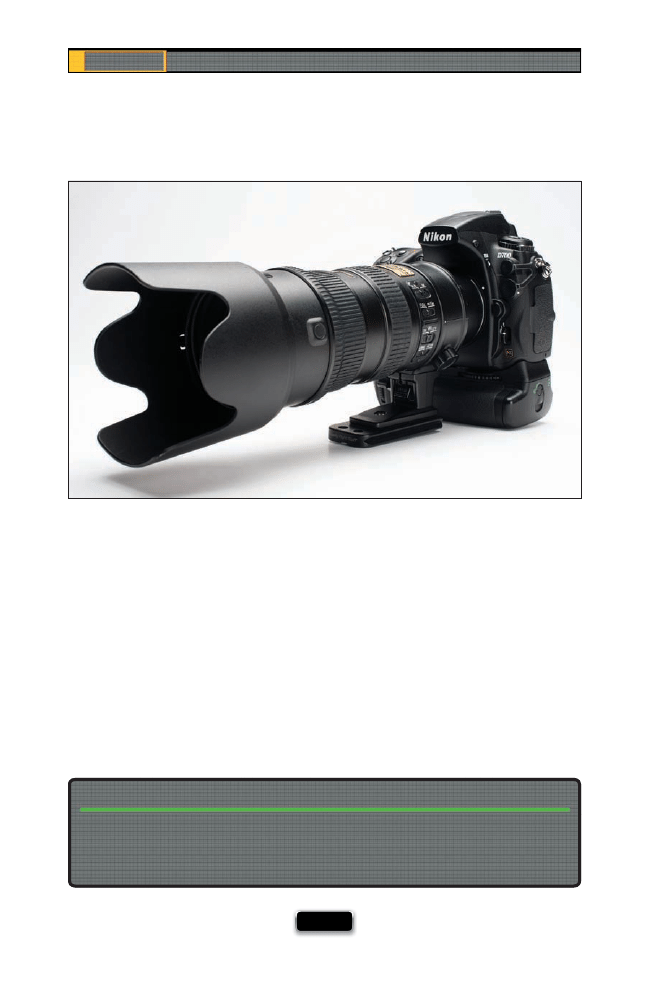
Chapter 3
The Digital Photography Book
[ 60 ]
When you want to get up close and in tight, this is the ticket. Now, you could just get a
telephoto lens (one where the length is fi xed, like a 200mm telephoto), and not a tele-
photo zoom (where you can zoom in from one length, like 80mm, all the way through
to a really close view, like 300mm), but then if you hold the camera up and you’re either
too close, or too far away, your only option is to physically move up close, or back up.
With a telephoto zoom, you can simply zoom in tighter, or zoom out if you’re too close,
which makes all the diff erence in how you’ll compose your shots. I use telephoto zooms
for everything from portraits to sporting events to architectural shots (I prefer to zoom
in and focus on an interesting aspect or individual part of the building, rather than
trying to show the whole thing at once). I GRAB THIS LENS FIRST WHEN...I’m shooting
portraits or sports.
The next time you’re in a creative rut, try going out shooting and use just one lens the
entire day (or if all you have is a zoom lens, try picking one end of the zoom [wide] or the
other [telephoto] and shoot at that one focal length the whole day). Not having the lens
you need for a particular shot forces you to get creative.
Jump Start Your Creativity By Using Just One Lens
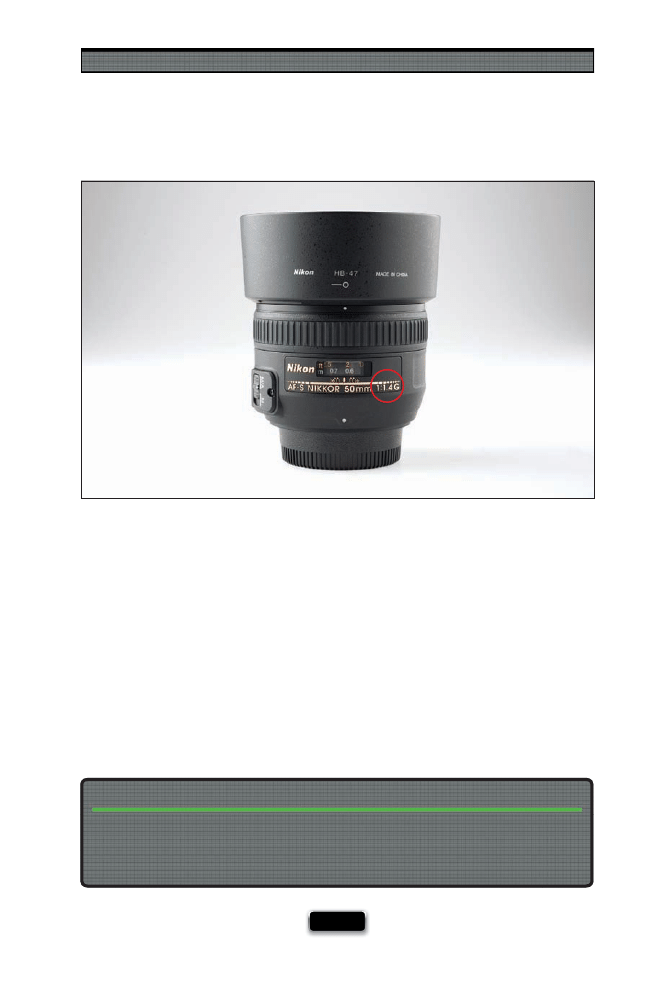
The Truth About Lenses
[ 61 ]
If you want to shoot indoors without using fl ash (like in a church, museum, theater, or
anywhere fl ash and/or tripods aren’t allowed), then you need a really fast lens (which just
means a lens whose f-stop goes to a very low number, like f/1.8 or, better yet, f/1.4. The
lower the number, the lower light you’ll be able to shoot in without using a tripod). Here’s
why this is so crucial: when you shoot in a dark place, the only way your camera can make
a photograph is to slow down your shutter speed, so more light makes its way into your
camera. That’s not a problem if your camera is mounted on a tripod, because it’s perfectly
still, however, if you’re hand-holding your camera (which is going to be the case in almost
every church, museum, etc.), and your shutter speed falls below 1/60 of a second, you’re
going to have photos that look okay on the back of your camera, but when you open them
later on your computer, or have them printed, they will be incredibly blurry and basically
unusable. So, by setting your camera to f/1.8 or f/1.4, you’ll be able to hand-hold in lots of
places and have sharp, clear images where normally they’d be blurry as heck. In this case,
less (a lower number) is more. I GRAB THIS LENS FIRST WHEN...I’m shooting a wedding.
You can use the same technique sharpshooters (with rifl es) use to minimize any movement
while fi ring—they hold their breath. That’s right. When hand-holding, some pro photog-
raphers only shoot after they exhale (or they take a deep breath and hold it, then shoot).
This minimizes body movement, which minimizes camera shake.
If You’re Really Serious About Getting Sharper Images, Try This Trick!
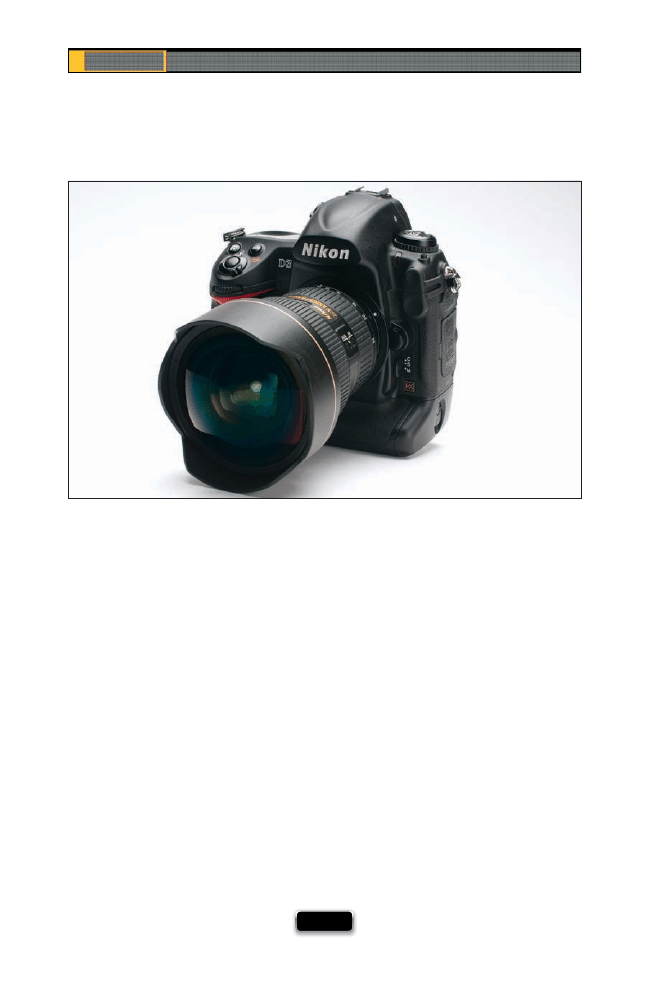
Chapter 3
The Digital Photography Book
[ 62 ]
Although you see this lens used in creative ways for everything from portraits to travel
photography, this is really a lens born for landscape photography. In fact, it’s so wide it
may be the ultimate lens for landscape photography (if you’re a DVD or Blu-ray movie
buff , think of a super-wide-angle lens like anamorphic wide screen). These lenses go as
low as 12mm, and my favorite is my 14–24mm f/2.8 lens. If you fi nd a lens below 12mm
(like an 11mm, or 10.5mm), it usually means that it’s a fi sheye lens (see page 59), so I
would stay away from that for most serious landscape work. Now, if you have a dSLR
with a full-frame sensor, and you use a wide-angle zoom that’s made for full-frame sen-
sors (like a Nikkor 14–24mm f/2.8), it will capture a much wider image than it would if
you used that same lens on any regular dSLR that isn’t full frame (see page 72 for more
on full-frame vs. regular), or if you used a regular lens on a non-full-frame camera. (This
is where full-frame cameras really shine—when you want to go wide. In fact, when it
comes to lenses, wide-angle is probably where you see the biggest improvement, be-
cause you get a really, really wide view with full-frame cameras.) I GRAB THIS LENS FIRST
WHEN...I’m shooting landscapes.
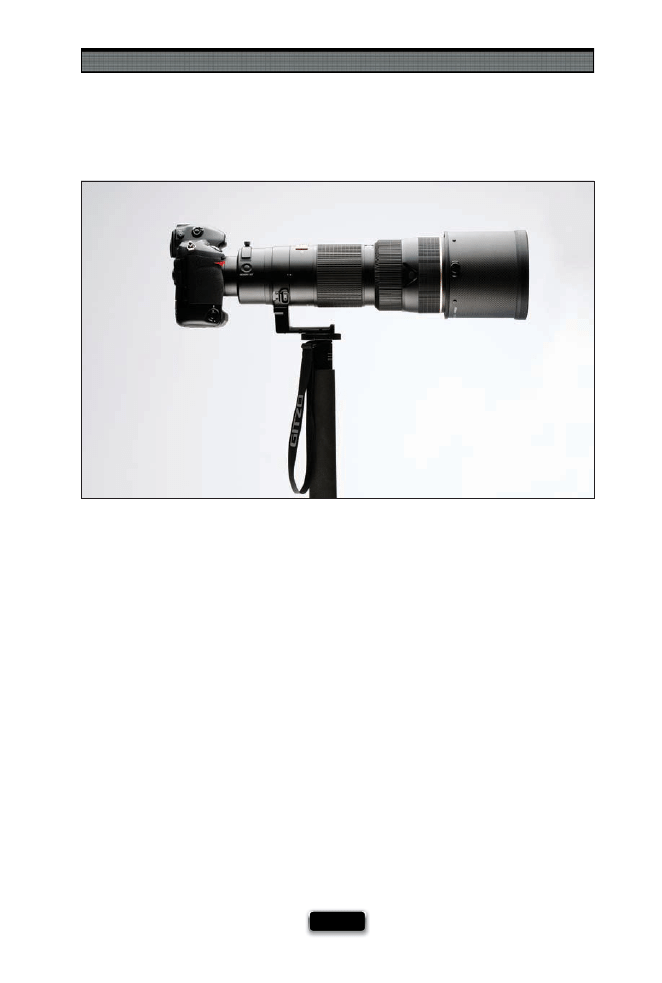
The Truth About Lenses
[ 63 ]
We call this “the long glass” (because the lens barrel itself is often very long), and it’s
designed to get you in really tight on whatever you’re shooting. Typical focal lengths for
these lenses would be from around 300mm up to around 600mm (or higher). They are
mostly used for sports photography, aerial photography, and for shooting wildlife and
birds. You can buy fi xed focal lengths (like a Canon 400mm f/5.6), but they also make
super-telephoto zoom lenses, as well (I use a Nikkor 200–400mm f/4 zoom myself ). If you
want a lens that will shoot in lower light (like an f/4 or an f/2.8), it can get really pricey (for
example, the Canon 500mm f/4 lens runs around $5,800)—they’re so expensive because
the very low f-stop lets you shoot in lower light, like a night game, and still freeze motion.
However, if you generally shoot sports in the middle of the day, in nice bright sunlight,
then you can get away with buying a less expensive super-telephoto lens (like the Canon
zoom telephoto EF 100–400mm f/4.5–5.6 for around $1,460). Also, if you buy a long lens,
you’re usually going to need a monopod to support it (your monopod screws into a hole
on a bracket on the lens, and your camera is supported by being attached to the lens. It
works much better than it sounds). I GRAB THIS LENS FIRST WHEN...I’m shooting sports.
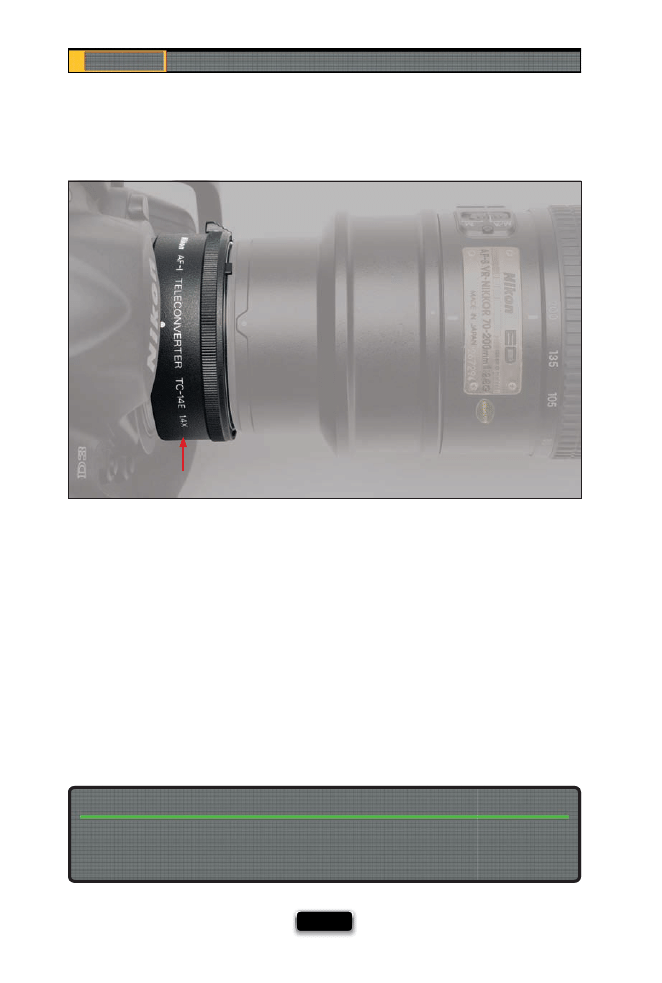
Chapter 3
The Digital Photography Book
[ 64 ]
I talked briefl y about teleconverters back in volume 1, because they’re such a handy
and relatively inexpensive way to get you in tighter to the action. What these do is
zoom your whole lens in a little closer, usually either 1.4x closer, 1.7x closer, or even 2x
closer (though I only recommend the 1.4x teleconverter, because the quality doesn’t
change noticeably like it does with a 1.7x or 2x extender). As long as you buy a quality
teleconverter (both Nikon and Canon make very good ones), there’s only one potential
downside, and that is you lose around one stop of light for a 1.4x (more for higher ones).
So, if the lowest number your lens would go was f/2.8, when you add a teleconverter,
now the lowest number is f/4. I say potential downside, because if you shoot in broad
daylight, losing a stop of light isn’t a big problem for you. But, if you shoot under sta-
dium lighting at night, then it’s a problem, because you can’t aff ord to lose that stop of
light—it might mean the diff erence between sharp shots and blurry movement. I GRAB
A TELECONVERTER FIRST WHEN...I’m shooting sports or wildlife in bright daylight.
Using a Teleconverter to Get Even Closer
Before you buy a teleconverter, make sure it works with your lens—not every lens will work
with a teleconverter. Look on the order page for the teleconverter and it will usually list the
lenses that it either will or won’t work with.
Teleconverters Don’t Work with Every Lens
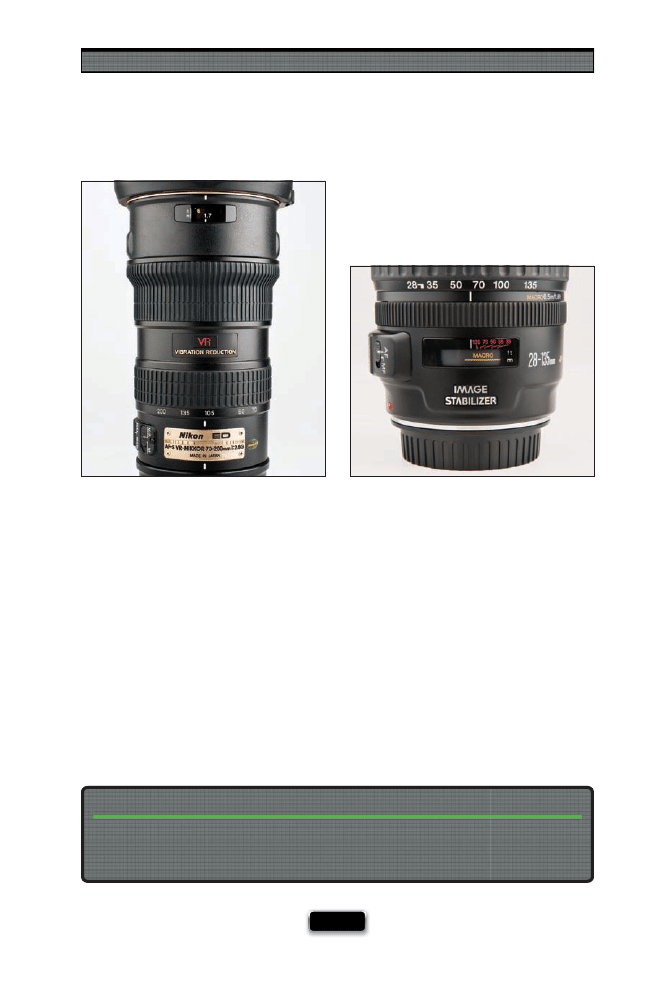
The Truth About Lenses
[ 65 ]
Lens manufacturers know that people have a hard time hand-holding their cameras in
low-light situations, so they started adding features that automatically help keep the lenses
from moving, so you get sharper shots in low light. Nikon calls their brand of this “anti-
movement” technology VR, for Vibration Reduction, and Canon calls theirs IS, for Image
Stabilization. They’re both well-named, because that’s what they do—they hold your lens
steady for you, so you get sharper shots, but it really only makes a diff erence when you are
shooting at a slow shutter speed (you’ll get no improvement when you’re shooting in broad
daylight, because your shutter speed will be so fast [which freezes any motion], that there’s
no reason for VR or IS to kick in). What VR and IS do is let you hand-hold in lower light situa-
tions, so if you wind up shooting a lot in churches, museums, theaters, and other low-light
locations, you should probably keep an eye out for VR or IS lenses (they usually cost a little
more). Also, you won’t often fi nd this feature in already very fast lenses, like an f/1.8 or f/1.4.
One more thing: if you’re shooting on a tripod, you should turn VR or IS off (there’s a switch
on the lens) to reduce any shake caused by the VR or IS searching for movement.
If you’re a Nikon shooter, your VR lens may have a setting called Active, and that only needs
to be turned on when what you’re standing on is moving (if you’re shooting from a boat,
or a moving car, or a suspension bridge, etc.).
Using Active VR for Nikon Users
Nikon
Canon
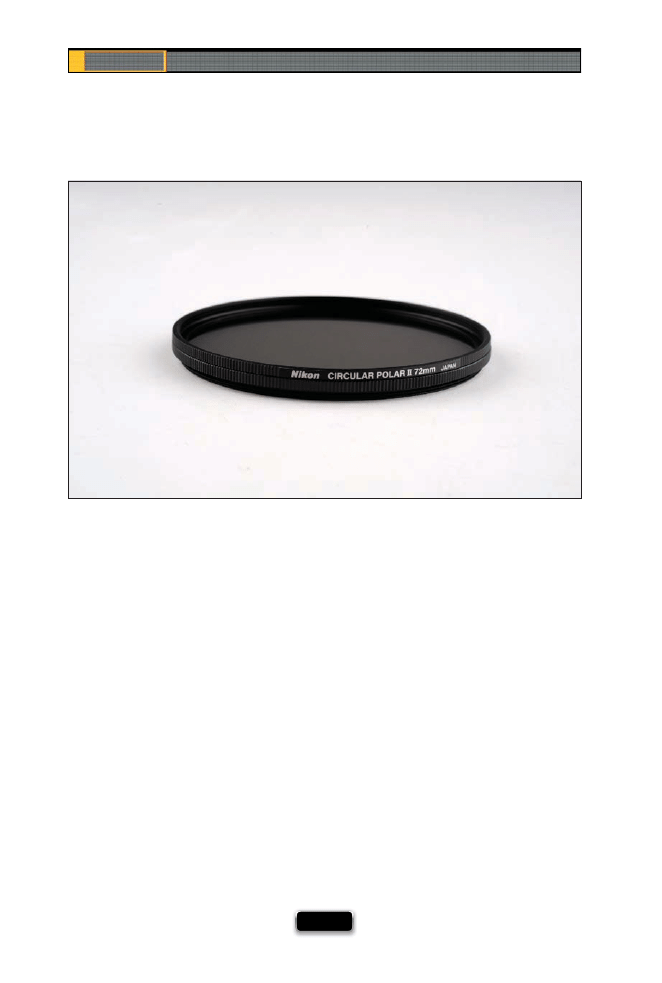
Chapter 3
The Digital Photography Book
[ 66 ]
There are literally hundreds of diff erent fi lters you can slap on the end of your lens to either
fi x a problem (like to help you capture something your camera can’t expose properly for)
or create a look, but I only own three fi lters, and one of them I don’t really use as a fi lter
(more on that in a moment). They are:
(1) A Neutral Density Gradient Filter. This is mainly for people shooting landscapes, and it
fi xes a problem that happens when you expose for your foreground in a landscape shot
and the sky gets totally washed out. You put this in front of your lens, and it darkens just
the sky, so the sky looks right and the ground in front of you looks right (see Chapter 5
for more on this fi lter).
(2) A Circular Polarizer (shown above). Another landscape fi lter, and one no landscape
photographer should be without. While it’s designed to greatly reduce refl ections in things
like lakes and streams, which it does brilliantly, most folks use it to darken the sky. It’s like
putting a pair of sunglasses over your lens. The world looks less annoyingly bright.
(3) A UV Filter. Technically, this fi lters out unwanted UV rays from your lens, but what we all
use it for is to protect our lens from getting scratches on it. Putting this fi lter on puts a thin
piece of glass between your lens and anything that would scratch, or worse yet, break it.
They’re very cheap, so if one breaks or gets scratches, you just replace it. Life goes on. Get a
scratch on one of your lenses, and they’ll hear you weeping six blocks away. I buy a UV fi lter
for every lens I own.
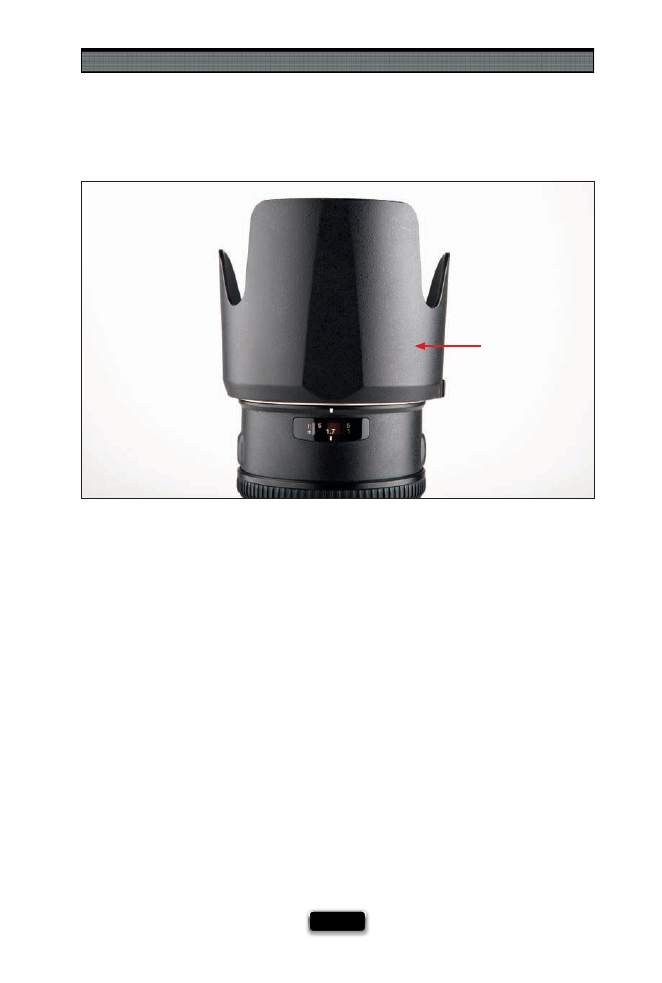
The Truth About Lenses
[ 67 ]
Besides making your lens look longer and “more professional,” a lens hood serves two
very important roles (one advertised, one not as much). The fi rst is that the lens hood
helps keep lens fl are from the sun, or from a fl ash, from getting to your lens and wash-
ing out your photos. Most good quality lenses these days come with a lens hood that is
specifi cally engineered to work with that particular lens. The other, less publicized, use
is to protect your lens from getting scratched or broken while it’s slung over your shoul-
der as you walk around. I can’t tell you how many times I’ve banged my lens against a
chair, the end of a table, even a wall when coming around a corner, but all I ever hear is
the sound of plastic, and it bouncing right off . If I didn’t have a lens hood, I’m certain I
would have had a number of scratched or broken lenses, but so far—not a one. I keep
my lens hood on all the time. Besides, they look cool (don’t tell anyone I said that). By
the way, you can turn your lens hood around, facing back toward you, when storing it
in your camera bag, or when it’s not in use. I GRAB A LENS HOOD...anytime one comes
with my lens, and I keep it on always.
Lens Hood

Chapter 3
The Digital Photography Book
[ 68 ]
This is the lens you pull out when you want to shoot something really, really close up.
Ever see those photos of bees really close up, or fl owers, or ladybugs? That’s macro.
Dedicated macro lenses just do that one thing, but they do it really, really well. There
are a few things you need to know about macro lenses:
(1) They have an amazingly shallow depth of fi eld. So shallow that you can be shoot-
ing a fl ower, and the petal in the front will be sharp and in focus, and a petal on the
other side of the fl ower will be so out of focus you can barely make out what it is. That
shallow depth of fi eld is one of the things that I love about macro lenses, but it’s also a
challenge when you’re trying to get more things in focus (try shooting at f/22 to get as
much in focus as possible. Also, try keeping your lens horizontal and not angling the
lens up or down when you shoot for a little more depth).
(2) Any little movement or vibration will mean an out-of-focus photo, so I defi nitely
recommend shooting on a tripod if at all possible. Using a cable release of some sort,
so you don’t actually have to touch the camera (possible vibration maker), will also
help (see volume 1 for more on cable releases).
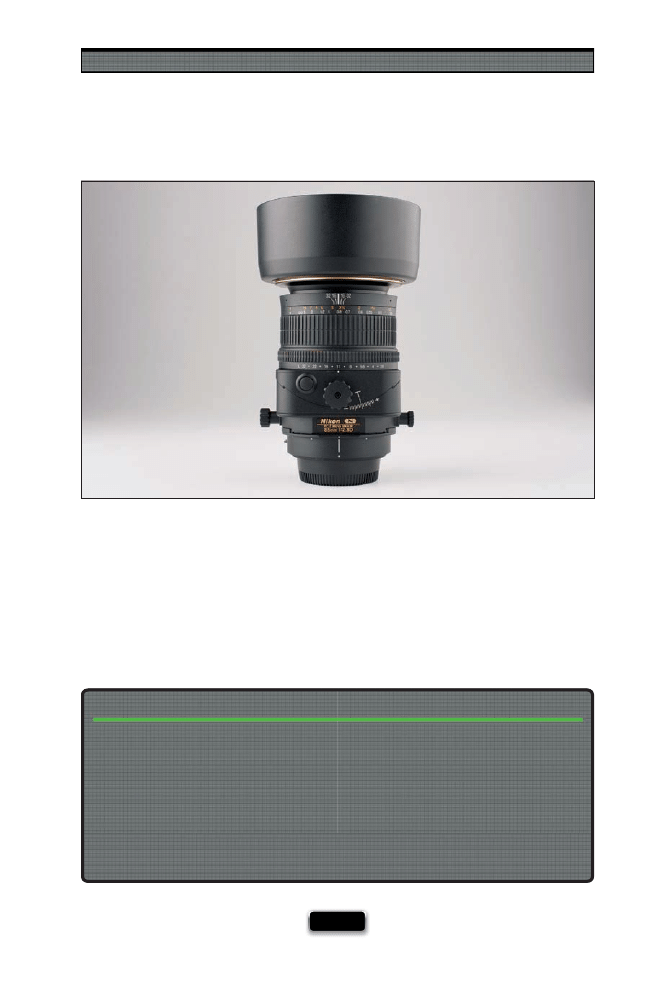
The Truth About Lenses
[ 69 ]
This is a specialty lens if there ever was one! This is used primarily for shooting architec-
ture, because you can shift part of the lens itself to keep your buildings from looking
distorted as they climb upward. Serious architectural photographers swear by these,
and many won’t shoot architecture without them. Of course, like any specialty lens—
they’re not cheap.
The fi lter you buy has to fi t your particular size lens (some lenses are larger around in di-
ameter than others, so you have to make sure the fi lter you order is the same size diameter
[measured in millimeters] as your lens). For example, my 18–200mm lens takes a 72mm
fi lter, but my 70–200mm lens takes a 77mm fi lter. Want a great way to quickly fi nd out the
right size? Go to B&H Photo’s website (www.bhphotovideo.com), fi nd your lens, and you’ll
see a bunch of fi lter accessories listed below it. They will display the size used for that lens.
Also, if you bought one fi lter and want to use it on a slightly diff erent sized lens, you can
sometimes buy a step-up or step-down ring adapter that will let you do that, and it will
still work just fi ne.
If You Buy a Filter, Make Sure It’s the Right Size for Your Lens
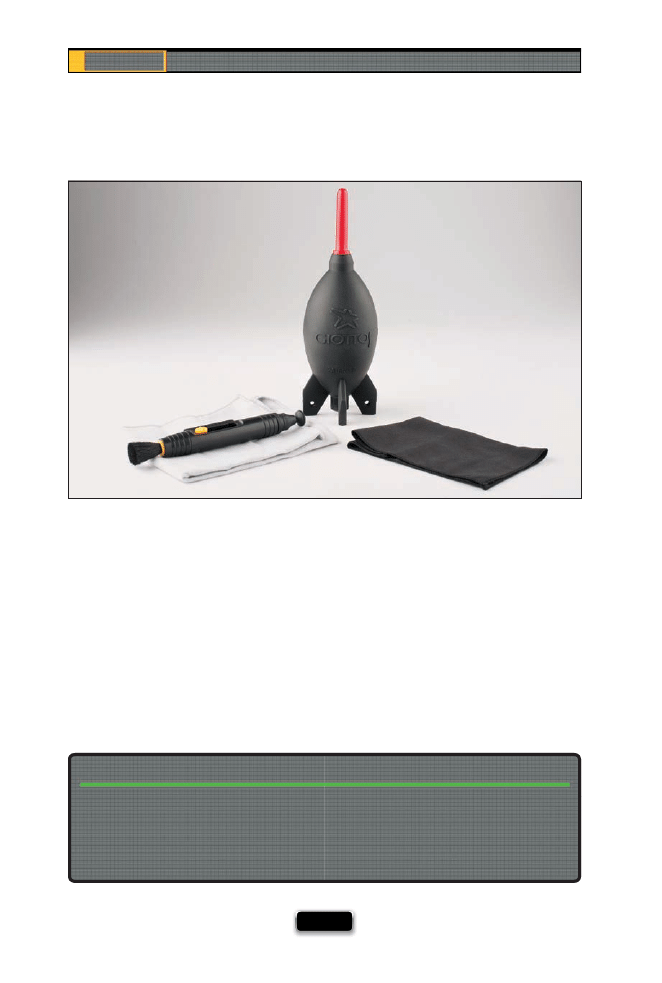
Chapter 3
The Digital Photography Book
[ 70 ]
If you get some dust, a smudge, dirt, etc., on your lens, something really bad is going
to happen—that dust, or smudge, etc., is going to appear on every single photo you
take with that lens. All of them. Every one! That’s why it’s important to clean your lenses
before you go shooting for the day, and anytime you see a little “junk” on your lens.
Most of the time, you can use a simple lens cleaning cloth, but before you do that, it’s
best to fi rst start by blowing any junk off the face of your lens (you can do that by just
blowing with your mouth, but ideally you’d use a little hand-squeeze blower bulb),
and then once any visible specks and dirt are blown away, you can clean the lens with
the lens cloth by gently rubbing in a circular motion. You can get a lens cleaning kit for
around $15, which includes a blower, a cleaning cloth, and particularly helpful is one
that includes a LensPen, which has a little fi ne brush on one end, and a special cleaning
tip on the other end. It works wonders.
When you buy a long lens, they usually come with a special bracket on the bottom that
lets you attach a monopod, but there’s something else you’ll love about these brackets
that’s not apparent at fi rst: unscrew one little knob and you can instantly rotate your
camera to a vertical shooting position, while the lens stays put. This lets you switch from
shooting wide to shooting tall in all of two seconds.
Long Lenses Usually Come with Lens Collars
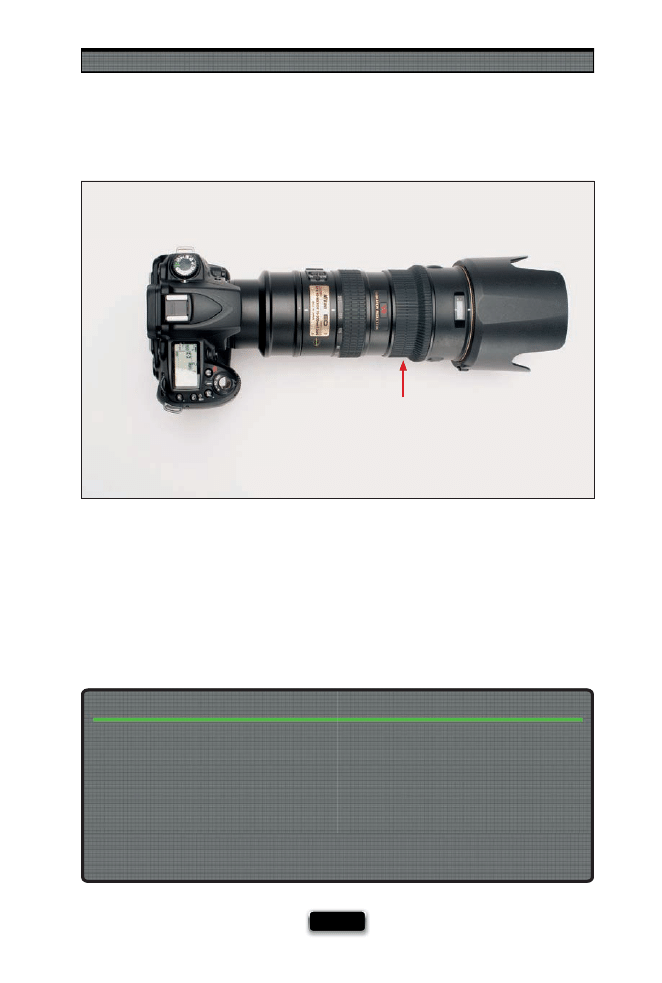
The Truth About Lenses
[ 71 ]
Most lenses let you turn off the autofocus feature and manually focus your lens, but a
lot of today’s lenses actually let you do both: start by letting autofocus set your initial
focus, but then override it and tweak your focus using the manual focus ring (usually
found at the far end of the lens). There are photographers who do this every time
(start with autofocus and then tweak it), but most (like myself ) just rely on today’s ex-
cellent autofocus capabilities to do the work for them. If you want to tweak the focus
yourself using the manual focus ring, just let autofocus do its thing fi rst, and lock onto
your subject before you start tweaking the manual focus ring.
When to Use the Manual Focus Ring
Over the years, I’ve run into so many photographers who have spent a ton on really fast
lenses (like f/2.8 and f/4 lenses—usually the faster the lens, the more they cost), yet they
either primarily, or only, shoot in the studio. This is just pretty much tossing money down
the drain, because they probably rarely, if ever, shoot at f/2.8 or f/4 because they’re not
shooting in low-light situations (after all, they’re in a studio—if they want things to be
brighter, they just increase the power of their strobes). I guess the moral of this story is: if
you don’t shoot in low-light situations, you don’t need expensive, really fast glass. Save your
money for other studio gear and accessories (see, you thought I was just going to say, “Save
your money,” but I had already allocated your savings to other fun stuff , like studio strobes).
Buying a Really Fast Lens for Studio Work
Manual Focus Ring
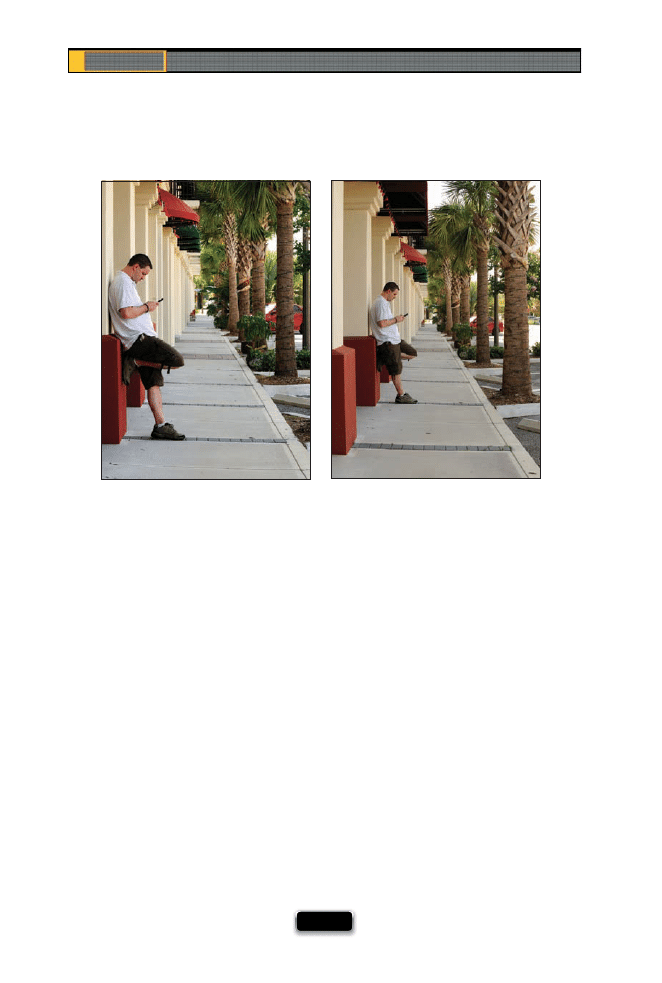
Chapter 3
The Digital Photography Book
[ 72 ]
You’ve probably heard by now that most digital cameras (and dSLRs) have a zoom factor.
What that means is that the number of millimeters you read listed on the lens used with a
digital camera is diff erent than what you used to get with a traditional 35mm fi lm camera.
For example, if you put an 85mm traditional lens on a digital camera, it’s not really 85mm.
On a Nikon, the lens is zoomed in by a factor of 1.5, so your 85mm lens is really giving you
the results of a 127mm lens. On Canon cameras, it’s zoomed in by 1.6, so an 85mm lens
is really more like a 135mm lens. This drives photographers who have moved from fi lm
cameras to digital cameras a little nuts, because to them, an 85mm should be an 85mm,
but that’s just the way it’s always been. However, now the big buzz is around full-frame
cameras, and what that means is that with full-frame cameras, an 85mm is an 85mm once
again. There is no zoom factor, no multiplication—the lens is fi nally really what it says it is.
Ahhhh, but there’s a gotcha! (Isn’t there always?) If you put a lens that was made for a stan-
dard digital camera (and most digital lenses are just that) on a full-frame camera, it zooms
it (basically, it crops your photo down to the zoomed dimensions). What that means to
you and me is if you buy a full-frame digital camera, you won’t get the advantage of a full-
frame camera (at least when it comes to lenses), unless you buy lenses that are specially
made for full-frame cameras. Now, that being said, some of the higher end, more expensive
lenses do work fi ne with full-frame cameras and they don’t crop down the image. So, how
do you know which ones do and which ones don’t? I put together a partial list for Nikon
and Canon users at www.kelbytraining.com/books/digphotogv3.
Zoomed
Full-Frame
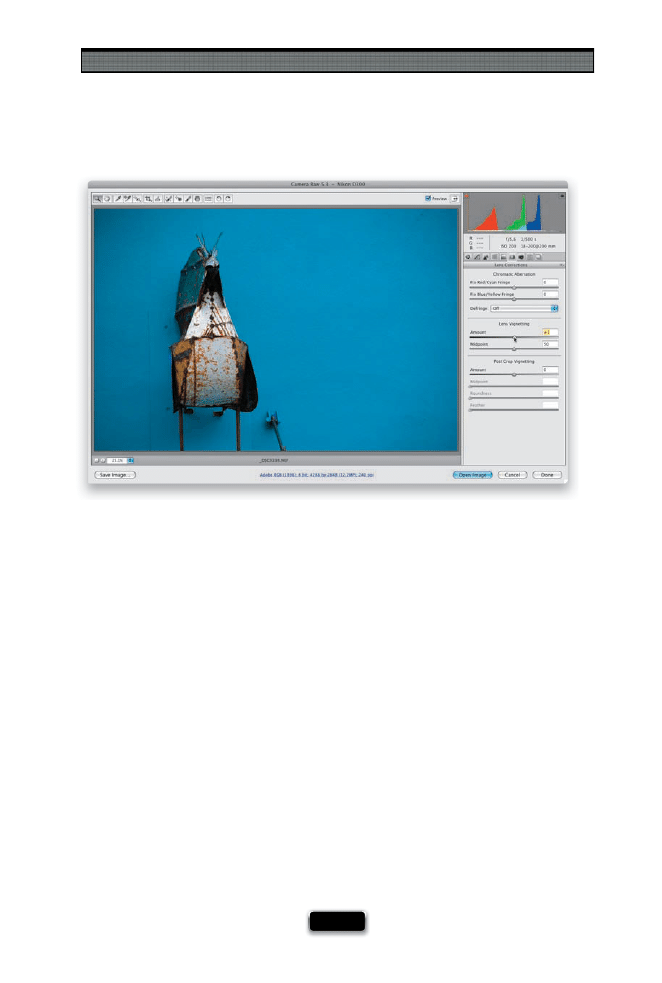
The Truth About Lenses
[ 73 ]
Have you ever taken a shot, and then when you look at the shot on your computer, you
notice that the corners of your image seem darker than the rest of the photo? It’s a fairly
common thing, especially with some wide-angle lenses and some of the less expensive
lenses. This is called “edge vignetting,” and it is a problem caused by the lens itself that
winds up on your photos. Luckily, you can remove edge vignetting (also known as lens
vignetting) in most image editing programs, like Photoshop, Photoshop Lightroom, Pho-
toshop Elements, etc. For example, in Photoshop’s or Elements’ Camera Raw window, you
can click on the Lens Corrections tab and you’ll see a section for removing lens vignett-
ing. Drag the Amount slider to the right to lighten up the corners. The Midpoint slider
below it determines how far into the photo the lightening extends, so if it’s just right
up in the corners, you can drag the slider quite a bit to the left. If the darkening extends
pretty far out into your photo, then you’d drag to the right. In just a few seconds, your
vignetting problem is gone! If you use Lightroom, you have the exact same controls,
which work exactly the same way, in the Develop module. Just scroll down to the Vignettes
panel. If all this sounds a bit confusing, don’t worry—I made a quick little video just for
you to show you what edge vignetting is and how to remove it. You can fi nd it at www.
kelbytraining.com/books/digphotogv3.
Lens Vignetting and How to Remove It
SCO
TT KELBY
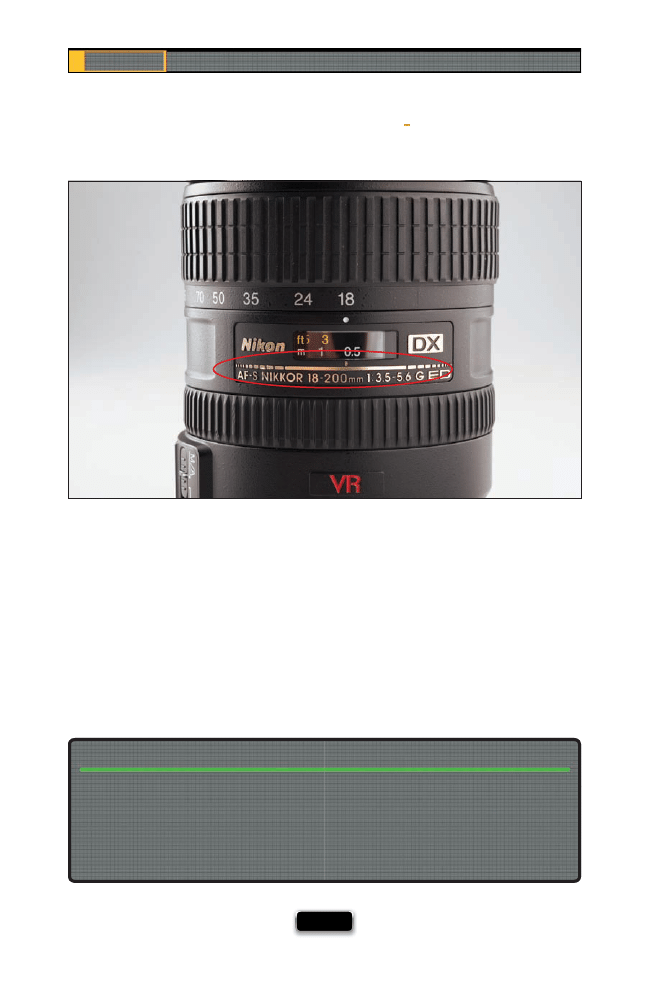
Chapter 3
The Digital Photography Book
[ 74 ]
When you see a zoom lens that has two diff erent f-stops, what that means is that at the short-
er range (let’s say it’s an 18–200mm lens, so we’d be talking about when you’re at 18mm), the
f-stop can go as low as f/3.5, but when you zoom it out to 200mm, the fastest it can go is f/5.6.
When you’re in between the two, the f-stop will gradually increase (so at 100mm, you might
be at f/4). What this tells you is two things: (1) If you shoot at the wide-angle end (18mm), you’ll
be able to shoot in much lower light than you can zoomed in at 200mm (the lower the f-stop
of the lens, the darker light you can hand-hold your camera in and still get sharp photos). This
also means (2) that this is a less-expensive lens. Really “good glass” (as it’s called) has a constant
aperture (the same f-stop all the way through the zoom range), so the lens would be at, say
f/2.8, whether you’re out at wide angle or zoomed in tight (for example, Nikon’s 70–200 f/2.8
VR lens can shoot at f/2.8 whether you’re zoomed out at 70mm or zoomed in tight at 200mm).
Why Some Lenses Have Two f Stops
(Like f/3.5-5.6)
Each time you use autofocus, your lens searches everything it sees, from a few inches in
front of you to miles in the distance, and then it locks on what it thinks you’re aiming at.
This takes just a second or two, but if what you’re shooting is really far away (you’re shoot-
ing sports or a bird up in a tree), you can switch your lens from Full focus to Limit, which
tells it not to even try to focus on anything closer than around eight feet away. That way it
focuses even faster, so you don’t miss the shot.
When You Need to Focus Really Fast, Turn the Focus Limit Switch On
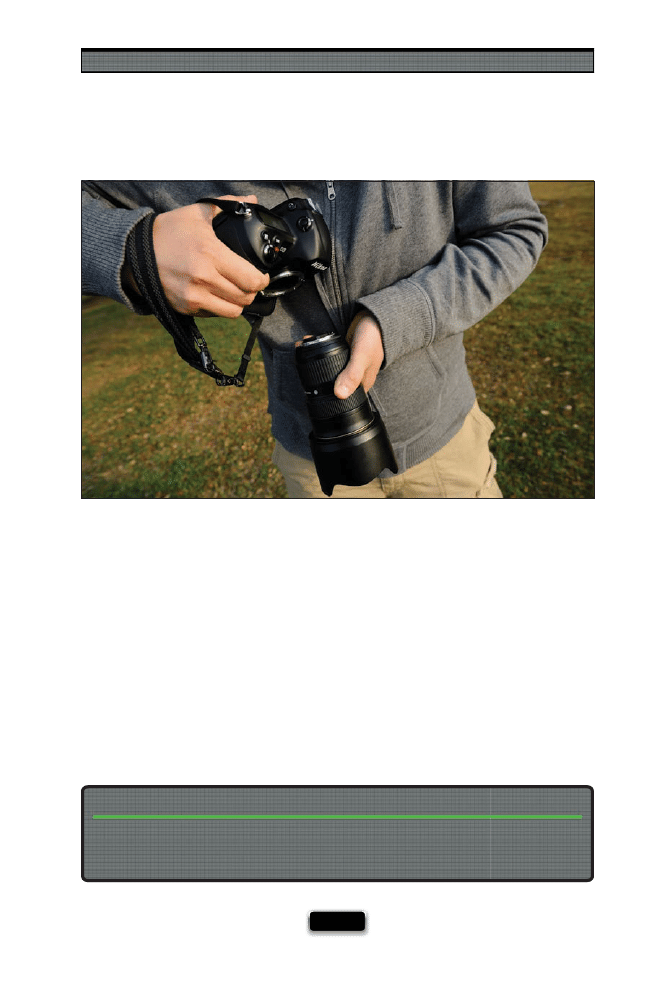
The Truth About Lenses
[ 75 ]
If you have more than one lens, you’ll probably be changing lenses in the fi eld quite a bit,
and if so, there are just a couple of things you should know. The fi rst is that you generally
don’t have to turn the camera off to change lenses. Although you’ll read some purists
online who claim having the sensor still charged will attract dust and blah, blah, blah, I
don’t know any pros who actually turn their camera off to change lenses. However,
when you do change your lens, to keep dust from actually falling into your camera itself,
don’t leave the open body of the camera facing straight up. That’s just askin’ for it. You’re
better off tilting the body down toward the ground. Also, if you’re in a dusty or windy
environment (let’s say you’re shooting in Arizona’s Antelope Canyon slots, where dust is
constantly trickling down from the above), don’t change lenses at all—wait until you’re
in a clear area fi rst, and then do it. And, ideally, you don’t want to leave your camera body
uncovered for long (again, to keep out dust), so don’t take fi ve minutes changing lenses—
take one off , and pop on the other. You don’t have to rush (you don’t want to risk drop-
ping anything), but don’t dilly-dally either. (There’s a term you don’t hear every day.)
First, check to see that you didn’t turn off the autofocus on your lens, but if it’s on, try this:
just remove the lens, and then put it right back on again (called “reseating the lens”). This
little trick has worked for me time and time again.
What to Do If Your Autofocus Suddenly Stops Working
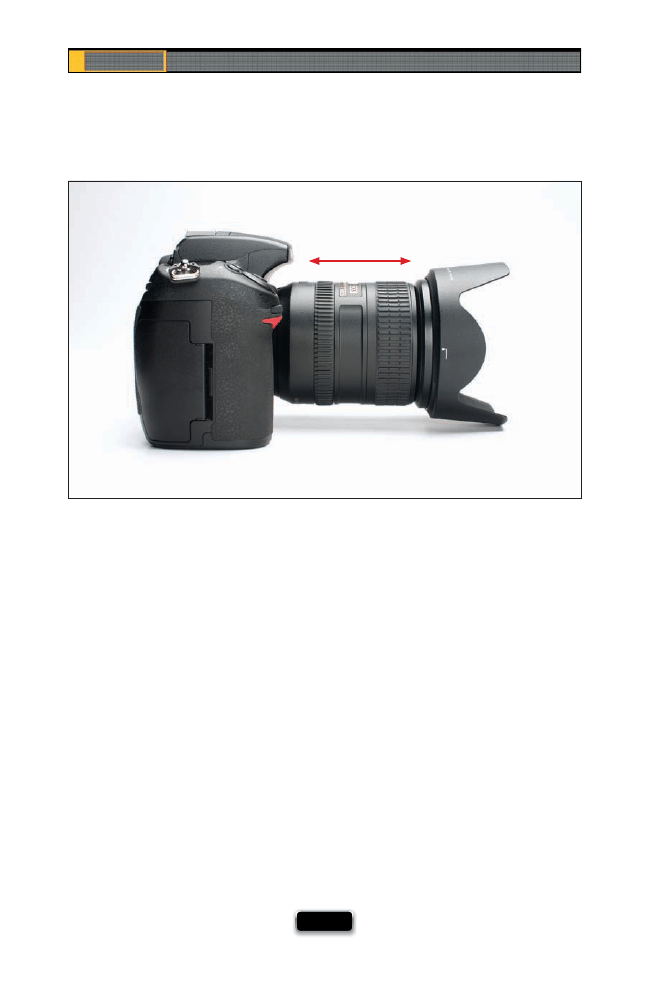
Chapter 3
The Digital Photography Book
[ 76 ]
The most popular Nikon and Canon lenses are their 18–200mm zooms, because they
do it all. They go all the way from a nice wide angle to a tight telephoto and you never
have to change lenses at all. Best of all, they’re compact, pretty lightweight, and relatively
inexpensive compared to some of the more expensive zooms with a smaller range. These
are ideal lenses for travel photography (where you don’t want to lug a camera bag around
with you all day), or for photo walks, for city shooting, and even for landscapes you’ll be
shooting on a tripod. I have one of these 18–200mm lenses and, honestly, I love mine
dearly. Now, you will see some photographers in forums online saying that these lenses
are basically beneath them, because they’re not as sharp as they could be, or they’re
not as rugged as the more expensive lenses, etc. Don’t let that throw you. I don’t know a
single photographer that actually has one of these that doesn’t love it, mostly because
when it’s on your camera, you’re never going to say, “Oh, I missed that shot because
I didn’t have the right lens,” because it does it all in one lens. As for quality, I have a 30x40"
print of a photo I took with that lens while on vacation, framed, and hanging in my home.
Everybody loves it, and it looks perfectly sharp and crisp all the way through. I GRAB THIS
LENS FIRST WHEN...I’m going on vacation.
When to Use an “All-in-One” Zoom
18–200mm
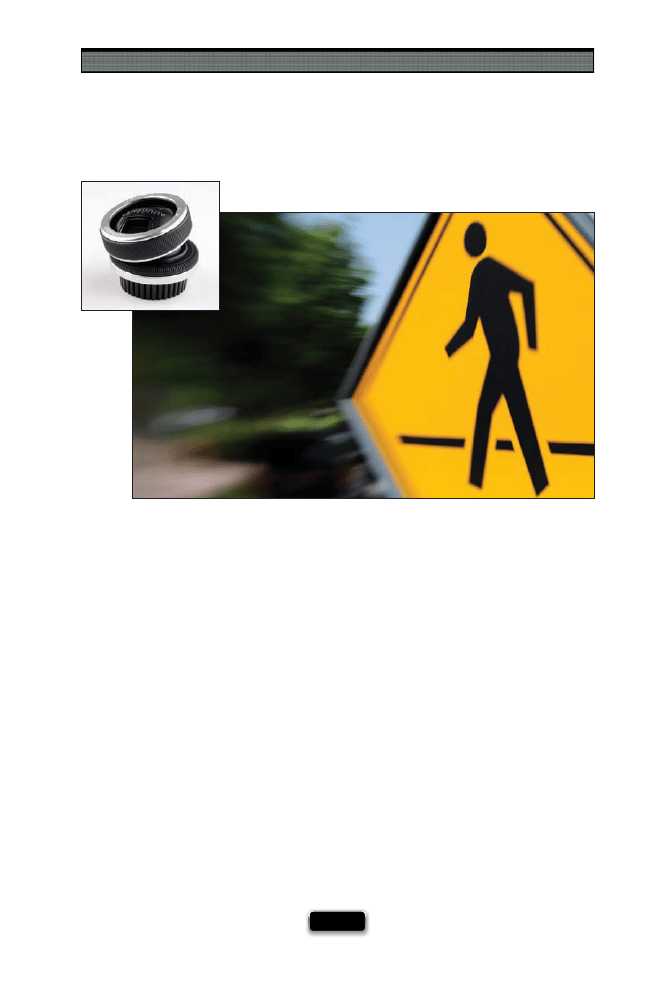
The Truth About Lenses
[ 77 ]
Before I tell you about this lens, I have to warn you: people get hooked on Lensbaby
lenses, and I can’t tell you how many times a photographer friend I’ve known has bought
a Lensbaby and then won’t take it off their camera. They shoot everything, from the birth
of their child to a space shuttle launch, with it, because these lenses (which you focus
and aim with your thumbs and forefi ngers) are just plain addictive. So, you know that go-
ing in. Lensbaby lenses give you one small area of your photo that is sharp and in focus,
and then all the other areas around that sharp area quickly go way out of focus and
blurry, which results in a look that can have a lot of energy, movement and excitement
to it. Of course, the look is only part of it, because what really gets people hooked on
it is that whole “move it yourself” thing. It just feels like you’re really “making a picture,”
rather than just taking a picture. I GRAB THIS LENS FIRST WHEN...I’m in the mood to shoot
something really creative.
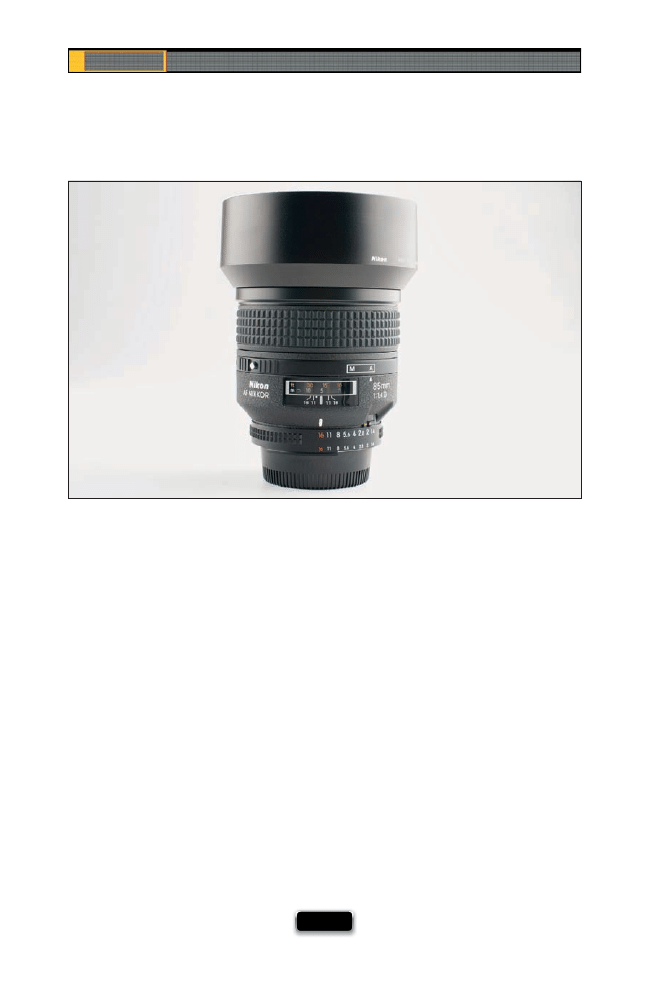
Chapter 3
The Digital Photography Book
[ 78 ]
There are certain lenses that have been referred to as portrait lenses, and I always get
asked, “What’s a good portrait lens?” That’s a good question, and one that doesn’t (like
many things with lenses) have a single defi nitive answer. I would say that generally a
portrait lens would be a fi xed-length lens (so it doesn’t zoom) that is between 85mm
and 105mm. But, here’s the problem (and where a lot of the mental fuzziness comes in):
Back on page 72, I talked about the zoom factor and full-frame cameras. So, an 85mm
fi xed-length lens on a regular non-full-frame digital camera is actually more like a
120mm lens, right? See what I mean? That being said, you may remember that back in
volume 2 I talked about how much better portraits look when shot with a longer lens
because of the compression longer lenses give, which looks more fl attering to the face
(I showed a side-by-side comparison in the book). That’s why you’ll see so many fashion
and portrait photographers shooting with 70–200mm lenses, and they’re frequently out
at the 200mm range for head or head-and-shoulders shots (especially if the model has
dandruff . Sorry—I couldn’t resist). I have shot with 85mm lenses on full-frame cameras,
but I didn’t like the look as well as I do an 85mm on a regular digital camera, so for my
style, I like the 120mm range better. If you use a telephoto zoom, you can try both and
see what you like. My point is you don’t have to buy a portrait lens (whatever that means
to you) to take pro portraits. Today’s zooms do a beautiful job, and as long as you’re over
100mm, I think you’ll be pleased with the results.
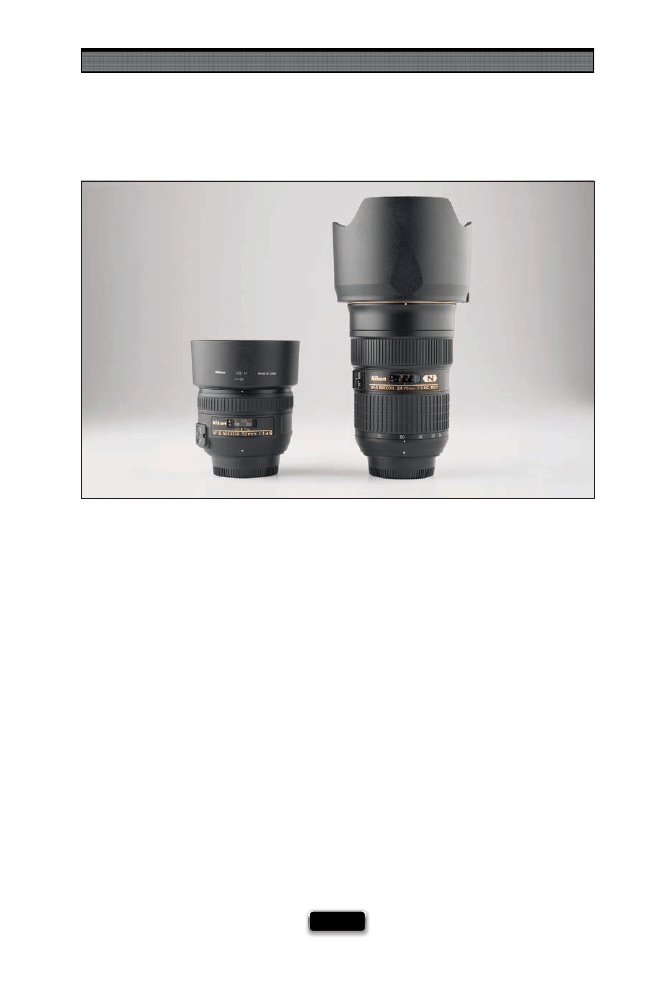
The Truth About Lenses
[ 79 ]
You have to realize one thing about lenses—people get really “techie” about lenses, and
they are a source of constant debate in online forums, where people get really conde-
scending about which lenses they will or won’t use. One current debate is prime lenses
vs. zoom lenses. There are people who swear that fi xed-length lenses (lenses that don’t
zoom—they are one particular length, and that’s it—and are more commonly called
a “prime lens”) are visibly sharper than zoom lenses. I truly believe that at one point in
time, this was absolutely the case. Zoom lenses were lesser quality, and primes were
sharper (and generally they did, and still do, let you focus up closer). But I personally
don’t think that’s the case with today’s higher-quality zoom lenses (not just any zoom,
but a high-quality zoom, like one that’s f/2.8 all the way through). I think there are but
a handful of photographers who, with the naked eye, can tell whether you took a par-
ticular shot with a zoom lens or a prime lens. I think it’s more of a perceived diff erence,
not an actual diff erence, but again, this is what creates these drawn out debates. This
is going to send people who want to believe there’s a big diff erence into a rage, but I’ve
talked directly with manufacturers who make both the prime and zoom lenses them-
selves, and they’ve told me, point blank, that with today’s higher-quality zoom lenses,
there is no visible sharpness diff erence between zooms and primes. That being said, I do
own two prime lenses. They are both very sharp. So are my good zooms. Either way, this
isn’t something to get hung up on. It’s just a lens. Not a religion.
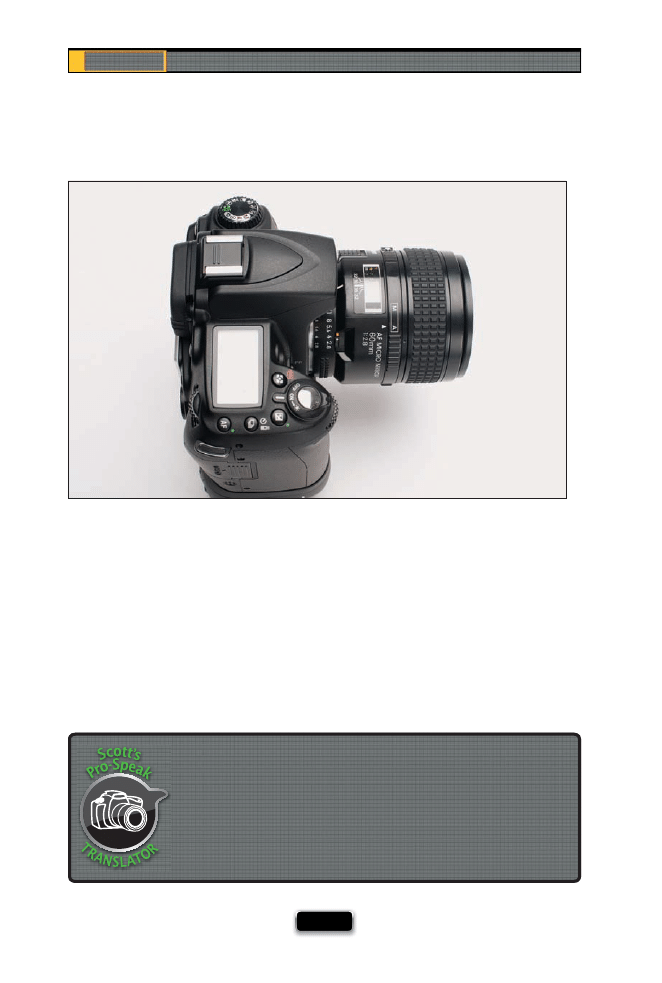
Chapter 3
The Digital Photography Book
[ 80 ]
I mentioned this in volume 1, in the chapter on getting really sharp photos, but I
couldn’t do a chapter on lenses and not include this really important technique. In
short, each lens has a sweet spot—a particular aperture where the lens takes the
sharpest image it can take. Where is that sweet spot? Usually, it’s two stops above the
lowest number your lens can go. So, for example, if you have an f/2.8 lens, then its
sweet spot would be two stops above that, at f/5.6. Will your photo look sharper at
f/5.6 than it will wide open at f/2.8? Yup.
Shooting at Your Lens· Sharpest Aperture
When talking about lenses, if you hear the term “wide open,” that means
that you’re shooting at the smallest number on your lens, like f/2.8 or f/4.
Of course, you could just say, “I was shooting at f/4,” but it doesn’t sound
nearly as cool as saying, “I was shooting wide open at f/4.” Hey, you’re
snickering now, but wait until you’re at one of those at-home lens parties,
and you casually drop a “wide open” in there. You’ll see the hostess drop
her lens hood.
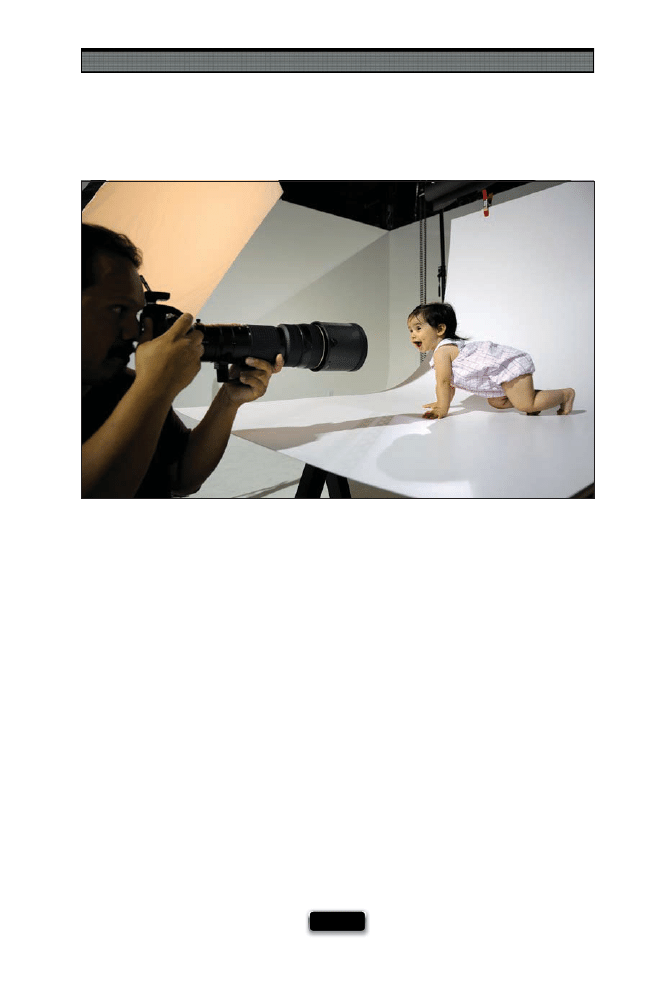
The Truth About Lenses
[ 81 ]
It’s bound to happen. You’re going to have a friend who’s a serious photographer, and
you’ll hear that he’s using a fi sheye lens to shoot executive portraits or a 400mm super-
telephoto lens to shoot baby photos. Then you’re going to say, “But Scott said fi sheyes
aren’t for portraits, and you should use a portrait lens for babies!” Here’s the thing: if
you buy any one of those lenses, you’re going to try it out on other stuff . In fact, you
should—it’s your lens and you should try it on as many things as you’d like. That’s half
the fun of it. You may fi nd yourself enjoying taking fi sheye shots in a courtroom, and
tilt-shift lens shots of your kid’s high school graduation. In fact, your tilt-shift lens may
become your go-to lens for shooting graduations, and there’s nothing wrong with that.
What I hoped to do in this chapter is send you in the right direction and give you a start-
ing point for what type of lens is commonly used for what, but because it’s a lens, it will
take a photo of anything you aim it at when you press the shutter button. So, don’t feel
bad (or feel it’s wrong) if you use a lens that’s commonly used for one thing on some-
thing completely opposite. There’s a name for doing stuff like that: creativity. Have fun
with it, and don’t get put aside by all the lens bullies. It’s your lens. Fire away!

SHUTTER SPEED: 1/1000
SEC
F-STOP:
F
/4.8
ISO: 200
FOCAL LENGTH: 50
MM
PHOTOGRAPHER:
SCOTT
KELBY

The fi rst time you look at this chapter, you might think to your-
self, “Why would I need to know how to make a great photo of
a product?” There are tons of reasons (shooting products is
surprisingly fun), but the most obvious might be having a great product shot
is critical if you’re selling stuff on eBay.com. Now, you might be thinking, “But
I’m not selling any stuff on eBay,” and if you just said that, that tells me one
thing—that this is the fi rst chapter of the book that you turned to, because
although this book wasn’t designed to make you want to buy new stuff , the
sad truth is, to get the same results the pros get, sometimes you have to buy
stuff (sometimes it’s an accessory, or a light, or a fi lter, etc.). The stuff might
not cost a lot, but still, it’s stuff you have to buy. Okay, so if it’s stuff you have
to buy, some of it will probably be replacing stuff you already have, right?
For example, if you bought a digital camera “kit” (where you got a camera
body and a lens together), then when you read the chapter on lenses, you’re
undoubtedly going to see a lens you’re going to want. But then you’ll think
to yourself, “I don’t really need that lens. The lens I have is fi ne.” But the more
you think about it, the more you start to think, “If I sold my old lens, and
some other camera gear I don’t use anymore, I could probably buy that new
lens,” and then you fi gure that the easiest way to sell your old stuff is to sell
it on eBay (which was practically invented for photographers), and so now
you think, “I need to do a product shot,” and it’s at that moment that you
realize you’ve been sucked into the whole photography equipment merry-
go-round. Once you’re on it, it’s easier to come off drug addiction, because
they actually have rehab centers for drug dependency, but there is no rehab
clinic for photographers, which is why the best thing you can do is just skip
this chapter and get on with your life. See? I care.
How to Get Them to Look Like
You’ve Always Wanted ThemTo
[ 83 ]
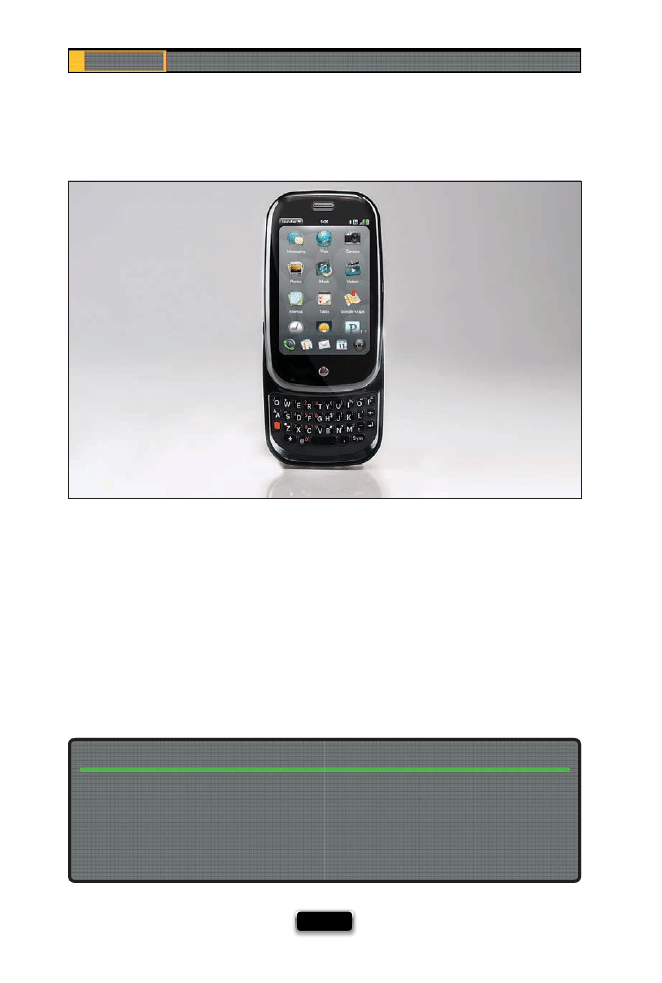
Chapter 4
The Digital Photography Book
[ 84 ]
How to Create Real Refl ections
In professional product photography, you’ll often see a refl ection appear below the product,
and while you can add these refl ections after the fact in Photoshop, it’s easier to just have
real refl ections (plus, depending on the angle of the product, the job of creating fake
refl ections in Photoshop can range anywhere from quick and easy to a real pain in the
%*$#, so you’re better off doing it right up front). The easy way to get those refl ections
is to shoot your product on some plexiglass (either clear or white frosted). Just put a
rectangular sheet of plexi right over your background (you can pick up these small sheets
of plexiglass at your local Home Depot or Lowe’s for around $15) and it does the rest. Plus,
plexiglass is handy for all sorts of other stuff (you’ll see it used again in a couple of pages,
and another in Chapter 10. To see a production setup using plexiglass, go to page 93).
If you need to fake a refl ection, here’s how it’s done: Make a selection around your product,
then press Command-J (PC: Ctrl-J) to put that product up on its own separate layer. Go
under the Edit menu, under Transform, and choose Flip Vertical. This turns your product
upside down. Now press-and-hold the Shift key, and drag your product straight downward
until the two “bottoms” touch, then in the Layers panel, lower the opacity of this layer to
around 20%. That’s it!
Faking Reflections in Adobe Photoshop
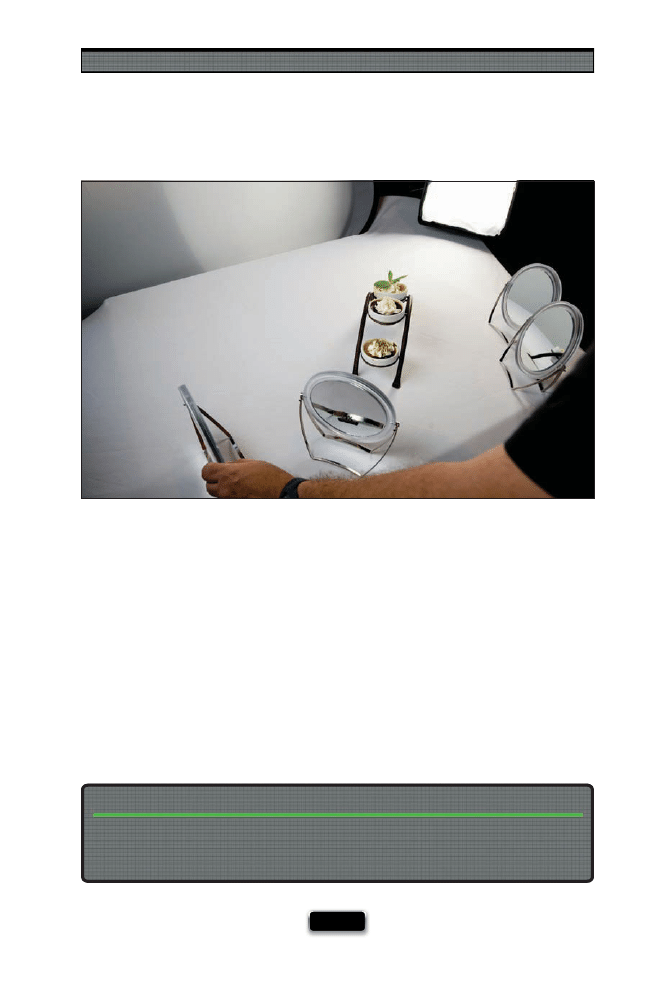
Shooting Products Like a Pro
[ 85 ]
Mirrors for Those Hard-to-Light Places
When you’re shooting products, it’s very important to make sure the product is really well
lit, and sometimes it’s hard to get into little nooks and crannies with your light, which is
why you’ll love this trick: buy a few little tabletop mirrors (the kind they sell at the local
pharmacy or Walmart, but make sure they tilt). Position a couple of these right outside
your frame, aim them directly at the area you need to light, and they will refl ect your stu-
dio light into those areas (if you’re using continuous light for your product photography,
like I talk about on page 88, then you’ll be able to use these mirrors like little spotlights—
as you tilt the mirror back and forth, you’ll see a small beam of light that you can aim right
where you want it. The fi rst time you see this, you’ll be amazed. If you’re using strobes, it’s
a little trickier, but what you can do is turn up the power on your modeling lights and then
use that light to aim the mirrors. Just know that when you fi re your strobe, the amount
of light you’re putting into those shadow areas will be much brighter). The great thing
about these mirrors is they’re inexpensive, lightweight, and small enough to throw in your
camera bag or lighting gear case.
Make sure you don’t buy too large a mirror, because you don’t want to have to shoot around
them, so keep them no larger than four inches around. Also, if you choose a mirror with
a magnifi er on one side, you’ll have two diff erent looks for your light.
Buying Your Little Mirrors
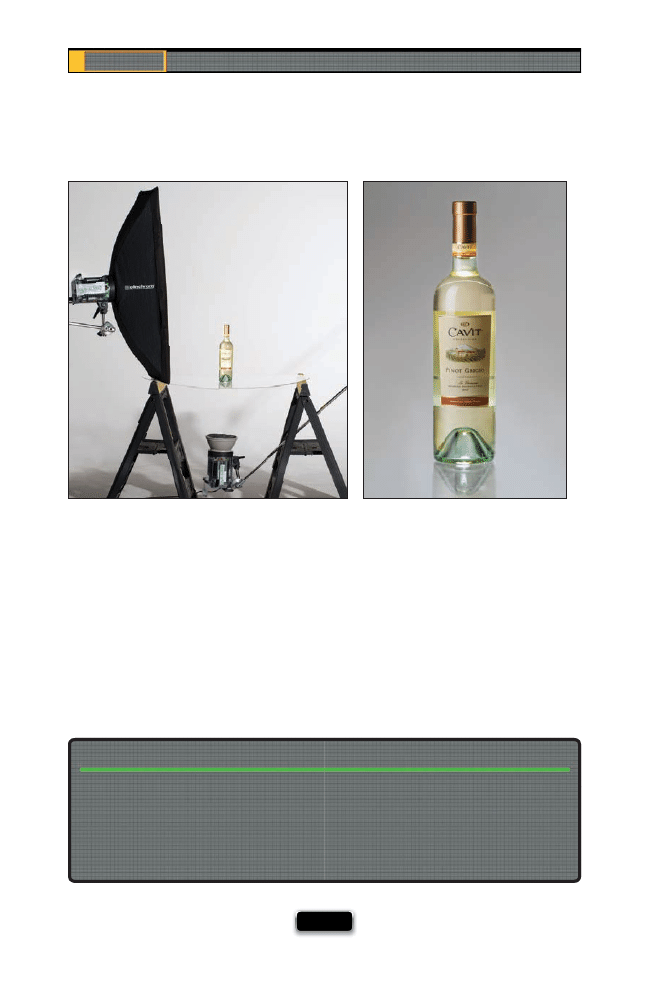
Chapter 4
The Digital Photography Book
[ 86 ]
A really popular technique for lighting products is to include a light coming from below
the product. You see this look fairly often in product photography, and if you’re shooting
a product that has see-through areas (like glass), it really looks great. Okay, so you’re
probably wondering how you get that light through the table to your product. Plexi-
glass! Instead of setting your product on a white background (and then putting the
plexiglass on top of it), you remove the white background, and use your plexiglass as the
tabletop (if you’re going to be doing this often, make sure you buy thicker plexi from the
hardware store). Just suspend the plexiglass between two light stands (or even between
two sawhorses or two chair backs), and then position a light directly under the plexi-
glass—on the fl oor—aiming upward through it.
When you’re lighting from underneath, you really don’t want your light to spill out every-
where—you want it concentrated straight upward. One way to help with that is to use a
grid spot attachment (see page 39), which focuses your beam, but a lot of folks will just put
foam core or black fl ags around all four sides of the light, so the light doesn’t spill out. I’ve
even seen DIY projects where you put the strobe on a short stand inside a cardboard box,
and then you cut a little door out so you can reach in and adjust your strobe.
Concentrating Your Below-Product Light
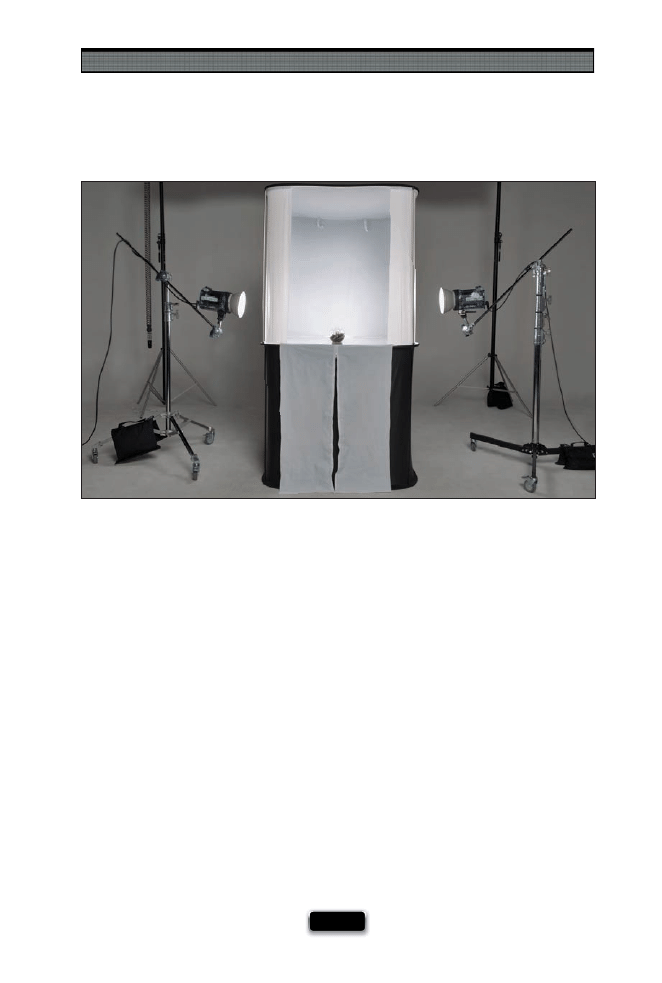
Shooting Products Like a Pro
[ 87 ]
The Advantage of Shooting Inside a Tent
Product tents have become more popular than ever, because they allow you to easily
wrap balanced soft light right around the product, while avoiding lots of nasty shadow
problems you’re likely to run into using multiple lights. Shadows are really a problem
and soft light is a problem, so having a self-contained tent like this makes shooting the
products crazy easy. The idea behind these is you put a light on both sides or either side
of the tent (and perhaps one light below, aiming straight up, if you buy one that includes
that feature, like the Studio Cubelite from Lastolite, shown above), and then the front of
this is open for you to shoot. The light bounces around inside this box in a very wonderful
way that lights the living daylights out of your product, and you come away with some
surprisingly good results without having to be a master of lighting. If you’re going to be
doing a lot of this, and especially if you’re trying to shoot things like watches or jewelry,
you should defi nitely consider buying a light tent.
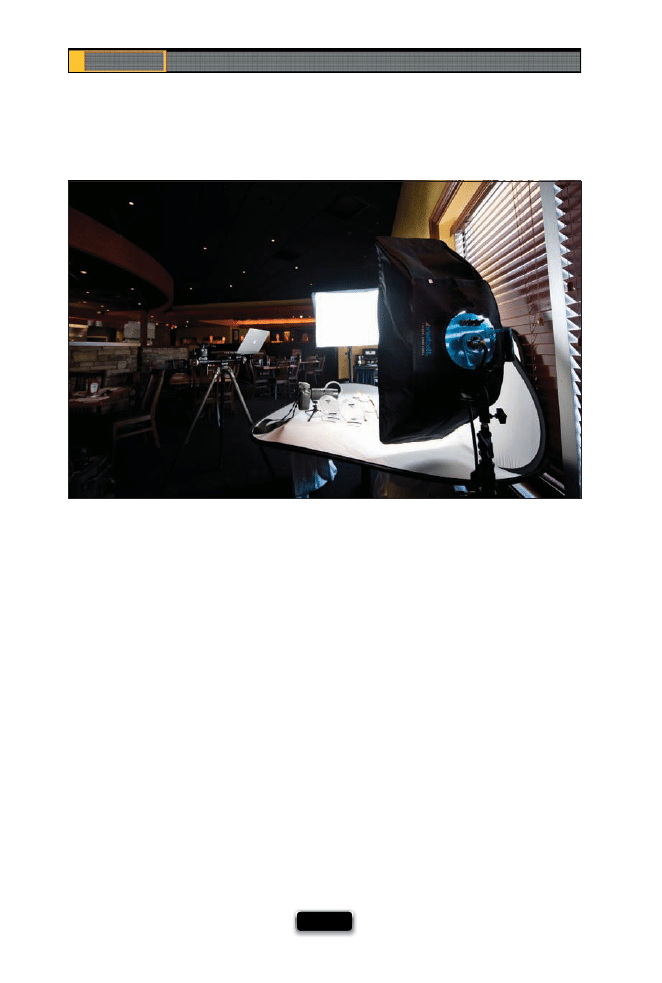
Chapter 4
The Digital Photography Book
[ 88 ]
Although I’ve used strobes many times over the years for product photography, today
when I need to shoot a product, I usually use continuous lights like the Westcott TD5
Spiderlite. These aren’t fl ashes, these are lights that stay on all the time, and they give
bright daylight-balanced light, but because they use fl uorescent bulbs, they don’t get
hot, so you can even use them to light food (as I did in the restaurant shoot above).
These work incredibly well for product photography, because you can see exactly what
you’re going to get—there’s no shooting a few shots, and then tweaking the lights,
and shooting again, and tweaking the lights, because exactly what you see is what you
get. Outside of the fact that they stay on all the time, they’re just like strobes, and have
all the similar accessories, like softboxes in every size (including strip banks), and fabric
grids, and all the other stuff , but since they’re always on, you don’t have to worry about
a wireless trigger or fl ash cables. I always recommend these to my friends, and every-
body I’ve recommended them to has fallen in love with them. You can pick up a one-
light kit (which includes the fi xture, a softbox, tilt bracket, and light stand—bulbs need
to be ordered separately) from B&H Photo for around $530. You can also get the fi xture
on its own (for around $280), but again, the bulbs need to be ordered separately.
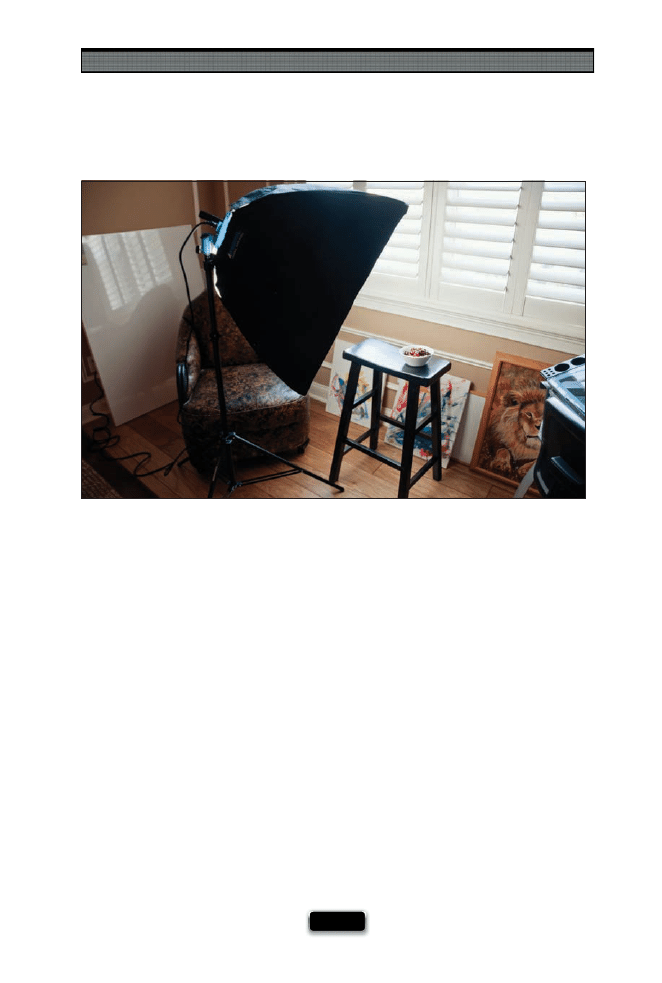
Shooting Products Like a Pro
[ 89 ]
Mixing Daylight and Studio Lights
If you’ve got a lot of space with a lot of natural light, you can shoot just using the
natural light, but the problem is going to be getting light to wrap all the way around
your product. That’s why adding one light, and mixing that with your natural light, can
make a big diff erence. I do this a lot when shooting food, or wine bottles, where I use
the natural light for the backlighting (so it’s really the main light) and then I use a West-
cott Spiderlite continuous light for a fi ll light in front (after all, if the light is coming
from behind my product, the front of the product will be kind of a silhouette. Bringing
a little light in from the front makes all the diff erence in the world). The advantage of
the Spiderlite is that it’s daylight-balanced, and mixes really well with natural daylight.
(To see the fi nal image from this shoot, just go to the book’s companion website at
www.kelbytraining.com/books/digphotogv3.)
SCO
TT KELBY
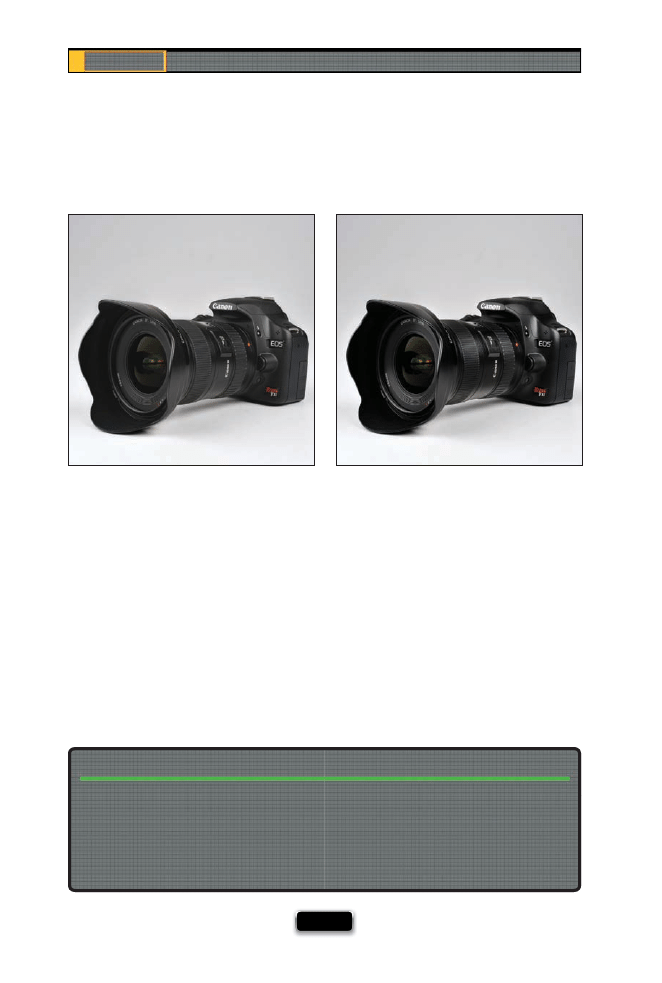
Chapter 4
The Digital Photography Book
[ 90 ]
Enhancing Highlights and Shadows in Post
Although we always strive to get as much right in the camera as possible, product pho-
tography is one area where it usually pays to do a little tweaking in Photoshop after the fact
(called “post-processing” or just “post” by people who can only use one word at a time). When
I shoot a product, what I’m looking to do in Photoshop (besides removing any specks, dust,
or other little junk on the background or the product itself ) is to enhance the highlights
(the brightest areas of the product) and the shadows (the darker areas). Basically, I make the
highlights brighter and more obvious, and the shadow areas a bit darker and richer. Once
you see the diff erence this makes, you’ll want to be doing some “post” yourself. I did a little
video for you (you can fi nd it on the book’s companion website at www.kelbytraining.com/
books/digphotogv3) to show you exactly how the Photoshop post-processing was done for
most of the product shots used here in the book. I think you’ll be surprised at both how easy
it is, and what an impact it has on the fi nished image.
Even though we shoot in RAW format, once you open and edit your photos in a program
like Photoshop, at some point, you’re going to have a duplicate of the same image (for up-
loading to a lab, or archiving, etc.), and that’s when you have to decide which fi le format to
save your images in. I choose JPEG mode with a quality setting of 10 (out of a possible 12)
for all my fi nal images (I think a setting of 10 gives an ideal balance between maintaining
great quality and still compressing the fi le size quite a bit).
What File Format to Save Your Photos In
Before
After
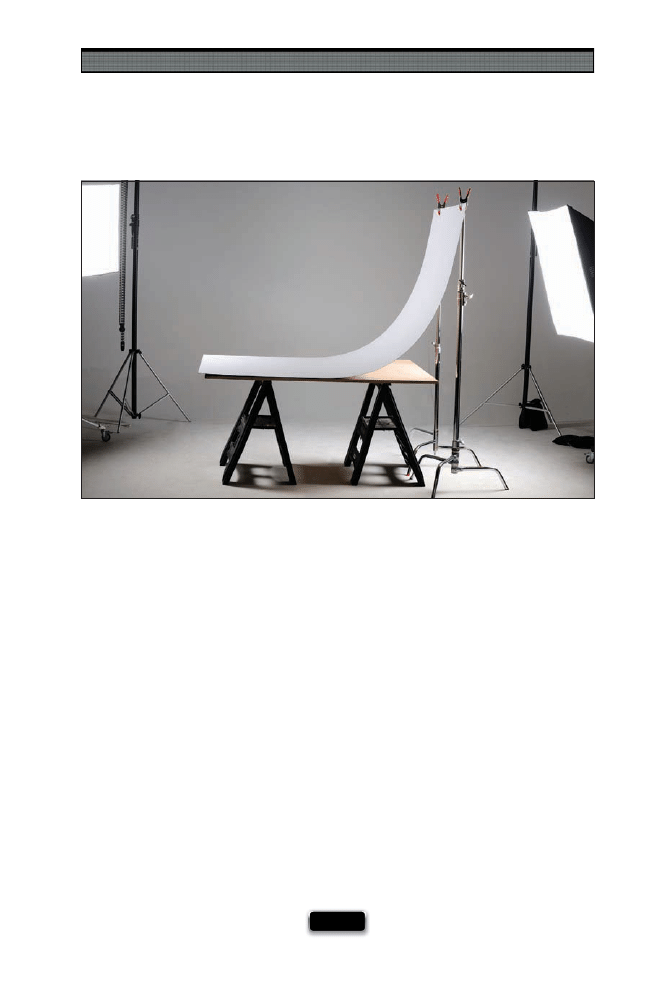
Shooting Products Like a Pro
[ 91 ]
If you’re looking for a great surface to shoot your product shots on, look no further than
your local hardware store for a large panel of white formica. This stuff works great for a
number of reasons: (1) When you put a product on white formica, its surface is already
a little refl ective, so it automatically gives your product a little bit of a natural refl ec-
tion (not a sharp mirror refl ection like acrylic, but kind of a subtle satin-like refl ection).
(2) It’s very easy to keep clean—you can just wipe it lightly with a damp cloth—so you
don’t have to replace it often, like you do with white seamless paper, and (3) because
it bends pretty easily, you can lie one end fl at on a table, and then attach the other end
to a couple of inexpensive light stands with some A-clamps (see page 42 for more on
A-clamps), and this gives you a smooth, seamless curve behind your product, which
makes it perfect for product photography. A full 8x4' sheet costs about $45–50 at my
local hardware store, and believe it, it’s worth every penny.

Chapter 4
The Digital Photography Book
[ 92 ]
Special Wire for Hanging Products
Invisible thread. It’s not just for repairing your clothes—this incredibly sturdy stuff can
be used to suspend products in midair so you can shoot them (well, of course, it de-
pends on the weight of the product. It’s not going to hold a car battery, if that’s what
you’re thinking). Just put a boom stand arm up high—just high enough so you can’t
see it in your viewfi nder—then tie one end of the invisible thread to the boom, the
other end to your product, and fi re away. Now, you can also use fi shing line if you can’t
get hold of some invisible thread, and while it’s pretty unobtrusive, you’re probably
going to have to remove that line later in Photoshop. That’s what I used in the shot you
see above, and I did a video clip on how I removed the fi shing line using Adobe Pho-
toshop (the clip actually aired on Photoshop User TV, a weekly video podcast I’ve been
co-hosting for the past few years), and you can see that clip on the book’s companion
website at www.kelbytraining.com/books/digphotogv3.
SCO
T
T
KE
L
B
Y
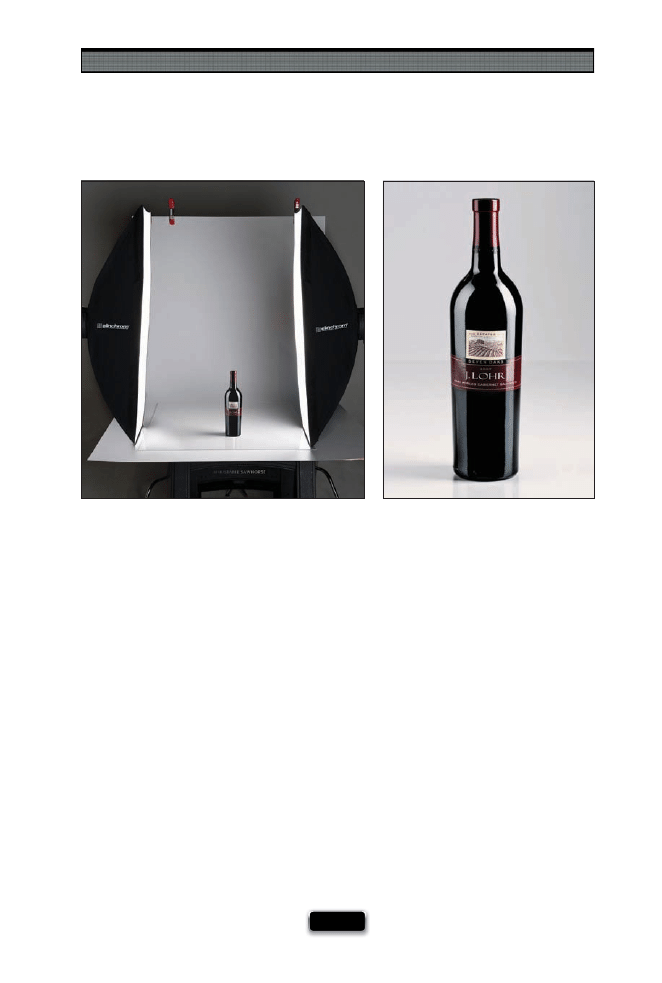
Shooting Products Like a Pro
[ 93 ]
The Advantage of Using Strip Banks
Have you ever seen a product shot of a wine bottle, or a piece of electronics, and
refl ected in the product you see a tall, thin, soft, rectangular refl ection? Maybe even
two of them? These wonderful highlight refl ections are most likely from one of the
mainstays of a lot of pro product shooters—a strip bank (also sometimes called a strip
light). These are actually just tall, thin, rectangular softboxes (picture a softbox that’s
just 18" wide, but around 36" long), and they are very popular in product photogra-
phy because of those wonderful tall refl ections they create in products that refl ect.
(It’s tough shooting products that are refl ective, because you can see a refl ection of
everything in the product itself—even sometimes the photographer—so be careful
when you’re shooting refl ective products.) You can buy strip banks for strobes, or
even for the Westcott Spiderlite TD5 that I use for product photography, and the nice
thing about them is that you can use them tall (vertically), or turn them on their side
and use them horizontally for a really wide, wrapping light.

Chapter 4
The Digital Photography Book
[ 94 ]
While you’ll fi nd portrait photographers using white refl ectors a lot in the studio (usu-
ally to refl ect or bounce light from the main light into the side of the face that’s in the
shadows), when it comes to product photography, more often than not, you’ll fi nd
the pros using a large sheet of foam core instead. Form core tends to have a little more
sheen to it than most refl ectors and refl ects more light. Plus, because you can cut a
sheet of form core (found at most craft stores or offi
ce supply stores) down to pretty
much any size you need, you can make these small enough to sit right on your product
table and get right up close to your product (but just out of your viewfi nder’s frame).

Shooting Products Like a Pro
[ 95 ]
A Dramatic Background for Products
If you want to go for a dramatic look for your product shots, try this: go to your local
home supply mega hardware store and buy a single tile of black granite. This stuff is
incredibly refl ective and just sitting your product on it makes it scream, “Shoot me!” It
looks like this stuff was made for product shots, and yet it’s fairly inexpensive (well, at
least for one tile it is). Get as large a tile as they have in stock, but since it’s unlikely to
be very large, you’ll use this for smaller items that you want to have a dark, dramatic
look. Try this the next time you want to go a totally diff erent direction from the stan-
dard white background that you see so often for products shots.
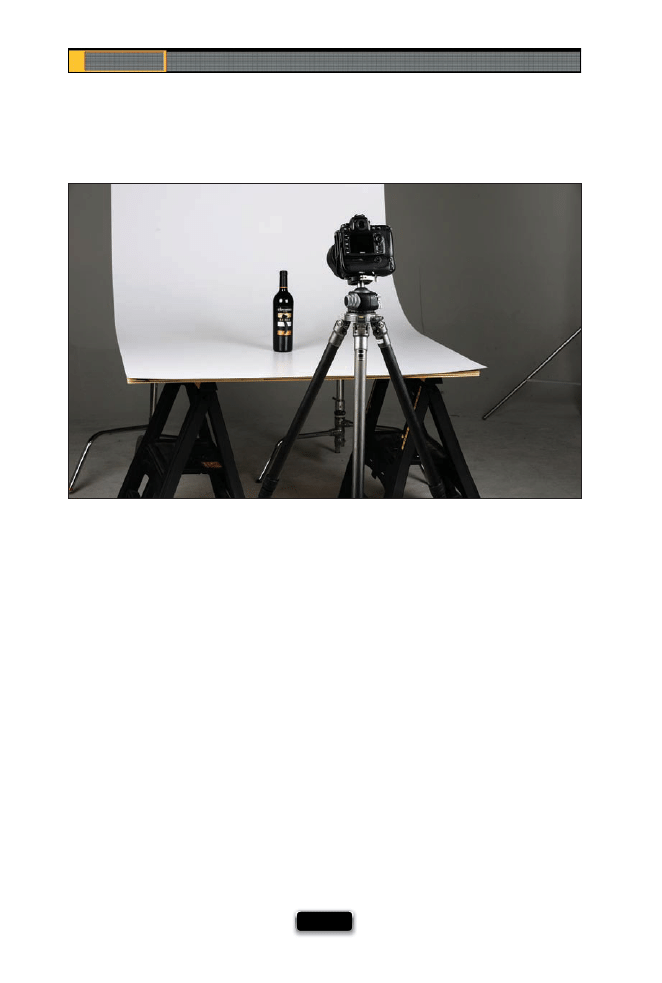
Chapter 4
The Digital Photography Book
[ 96 ]
Product shots are one of those things that if they’re not absolutely tack sharp, they
just don’t work, and that’s why the pros use a tripod every time. Having that super-
sharp focus is critical and, although I will hand-hold when shooting people (if I’m using
studio strobes or fl ash to freeze any movement), when it comes to product shots, my
camera goes right on a tripod and stays there. If you’re looking for a way to take your
product shots to the next level, this is absolutely the fi rst step.
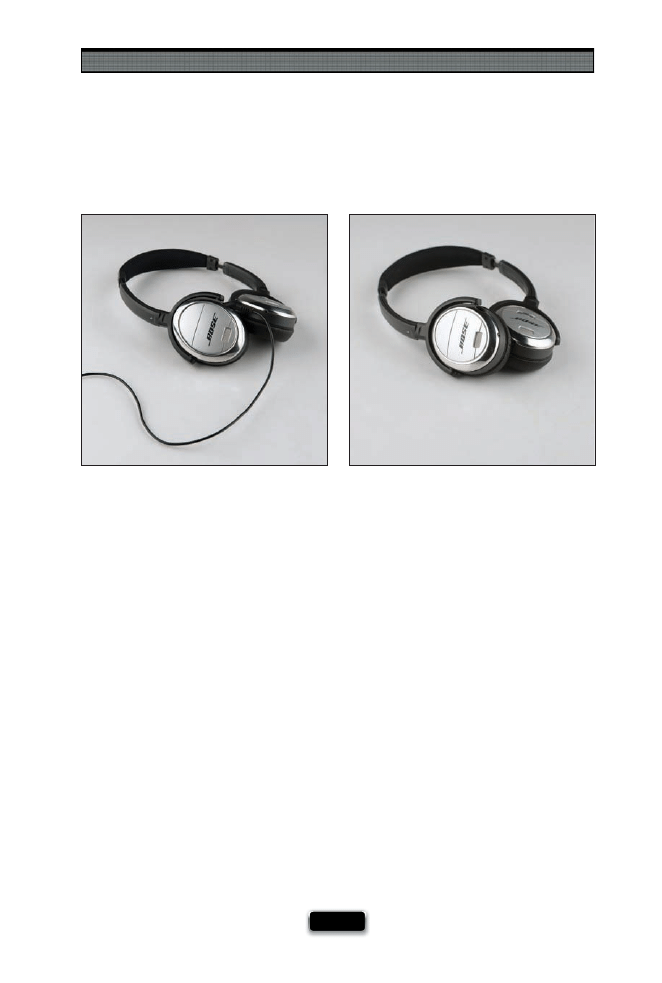
Shooting Products Like a Pro
[ 97 ]
If you take a look at most professional product shots, you’ll fi nd that they go to great
lengths to hide anything that would distract you from the presentation of the product,
even if it’s a part of the product itself. Perfect example? Headphones. You know and I know
that there’s a cord on headphones that plugs into our laptops, or our iPods, but in ads you
rarely, if ever, see the cord—you just see the headphones (earbuds are an exception, but
without the cords, they look like a couple of white peas). The photographer goes out of
their way to hide things like cords, or cables, or anything else that would detract or take
away from the product (like a camera strap on a camera. If you see Canons or Nikons, or,
well....almost anybody’s shot of their latest camera, you won’t see a camera strap in the
shot, even though in real life every dSLR we buy has one attached). Keep this in mind, and
you’ll wind up with cleaner looking shots. So, if you’re shooting something with a cord
that unplugs (like the headphones above), just unplug the cord and move it out of the
image (as seen in the photo on the right). Otherwise, you’ll have to remove the distract-
ing object in Photoshop. I did a video for you on how to do this, and you can fi nd it on
the book’s website at www.kelbytraining.com/books/digphotogv3.

Chapter 4
The Digital Photography Book
[ 98 ]
Before you shoot anything—clean it fi rst. This is one of those things that, if you don’t do
it, I promise it will take you ten times longer to fi x it in Photoshop than the 15 seconds it
would have taken you to do it right in the studio. I can’t tell you how many times in the
past I’ve skipped this step, and I don’t really notice all the fi ngerprints and little smudges,
and specks of dust on the product until I actually open the shot later in Photoshop, and
then I have to spend 10 minutes trying to retouch it all away. It’s been so bad on a couple
of occasions, that I actually went back, wiped down the product, and then reshot from
scratch. You only have to do that a few times to learn the lesson—clean it thoroughly
before you start shooting and save yourself a bunch of headaches after the shoot.

This page intentionally left blank
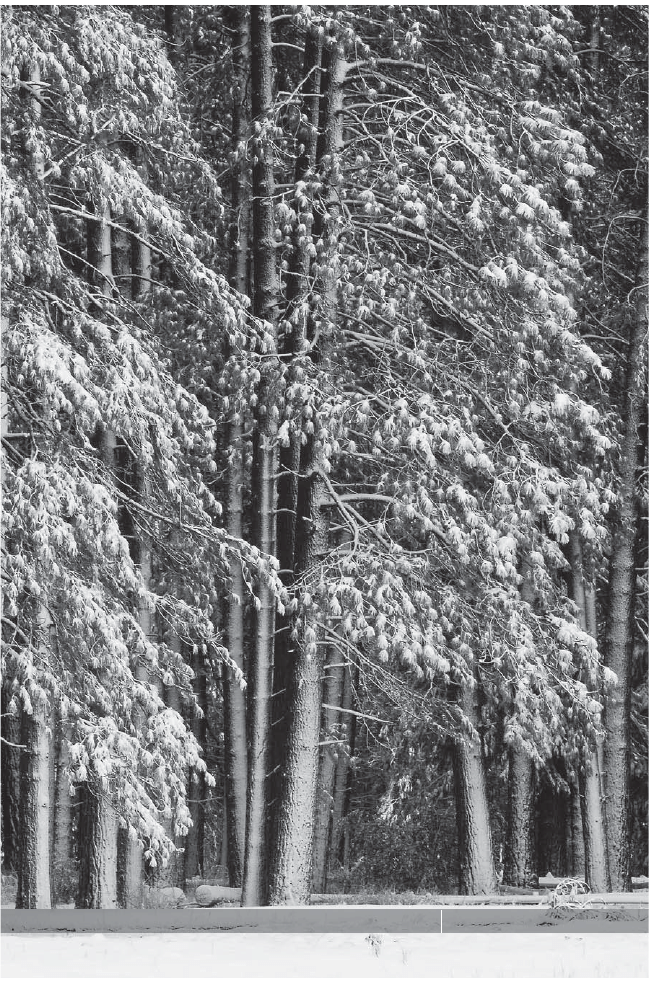
SHUTTER SPEED: 0.5
SEC
F-STOP:
F
/22
ISO: 100 FOCAL LENGTH: 200
MM
PHOTOGRAPHER:
SCOTT
KELBY

If you’re starting to see a pattern here, it’s only because there’s
a pattern here. That pattern is what I talked about in the brief
introduction to this book, which is this book “picks up right
where volume 2 left off .” Okay, if that’s the case, then why isn’t this chapter
named “Shoot Landscapes Like a Pro, Part 2” like back in Chapter 1, Part 2?
That’s because not all of the tips in this chapter are about shooting
landscapes. (That’s why, Mr. Snoop Smarty Smart!) Hey, it’s not my fault—
you created these questions yourself. (Did not. Did too!) Anyway, this
chapter is about getting better results from shooting outdoors, and luckily
for us, it’s easier to get better looking images outside because so many of
the problems that we run into inside (like mall security) don’t exist outside.
Also, light is easier to fi nd outside. I can’t tell you how many times I’ve been
walking down the street, I look down, and there’s a perfectly good fl ash
unit just lying there on the sidewalk. Okay, that’s an exaggeration (it’s only
happened three or four times), but since the sun is usually found outside,
our job is well-defi ned—we have to learn ways to control the sun to our
advantage. For example, if you’re handy with fabric and a readily available
commercial grade lathe, you’ll be able to assemble a rudimentary diff usion
panel that’s large enough to evenly illuminate a tour bus. This comes in
incredibly handy if you get a call from a tour bus company wanting you to
shoot a cover shot for their new fall catalog. However, if you get a call from
a fl orist instead, I have to be honest with you, I’m not sure how much use
you’re going to get out of that 23x23' frame-mounted diff usion grid, but
you know what they say, that’s why God invented eBay. Anyway, no matter
whether you’re shooting buses outside or fl owers, this chapter will fully and
completely avoid both of those individual topics.
More Tips for Creating
Stunning Scenic Images
[ 101 ]

Chapter 5
The Digital Photography Book
[ 102 ]
There is nothing worse than getting out on location for a landscape shoot, or arriving
in a foreign country where you hope to do some travel photography, and fi nding out
that you forgot an important piece of gear. I’ve done it a dozen times. Well, at least I
used to, until I started making separate gear packing lists for my landscape and travel
photography trips (to see what I pack, go to Chapter 8). It doesn’t have to be anything
fancy, but pay particular attention to the little things you might forget, like a cleaning
cloth, spare batteries, a polarizing fi lter, a cable release, etc. You’re probably not going
to forget your camera body (if you do, maybe improving your photography shouldn’t
be your biggest concern), so focus on those little things that you’d really miss once
you’re out on the shoot. One good way to do that is to mentally picture arriving on the
scene, and put together your gear in your mind. At some point, you’ll mentally reach
into your bag for something that’s not there. Add it to the list right then.
Shooting Outdoors Like a Pro
[ 103 ]
Showing movement is an easy way to add excitement to your photos, and it’s easy to
capture. The secret to showing movement is lowering your shutter speed. For example,
in the shot shown above, in New York’s Grand Central Station, two things have to hap-
pen for you to see the blur of people moving: (1) the station itself needs to stay sharp
and crisp, so you shoot on a tripod; and (2) you use a long shutter speed, so when the
shutter opens and people are walking, their movement is captured. If you’re in kind of
a dark setting (like the shot above), you can shoot in aperture priority mode, choose a
safe all-around f-stop (like f/8), and press the shutter button. The shutter will stay open
a second or two and everybody will be blurry. It’s harder to get this movement eff ect
in the middle of the day, because your shutter wants to stay open such a short time.
So, what do photographers do? Probably the most popular trick is to use a screw-on
darkening fi lter, like a neutral density fi lter (like those made by Singh-Ray Filters) to
darken what your camera sees, so your shutter stays open longer.
SCO
TT KELBY
Chapter 5
The Digital Photography Book
[ 104 ]
There are special lens fi lters you can buy that can turn bright lights captured in your
dusk and nighttime images into starbrights. However, if you don’t want to spring for
the fi lter, you can get a similar eff ect right in-camera by just choosing an f-stop with
the highest number you can, like f/22. This alone will usually give you that multi-point
star eff ect without having to spend a dime.
Getting the Star Filter Eӽ ect
SCO
TT KELBY
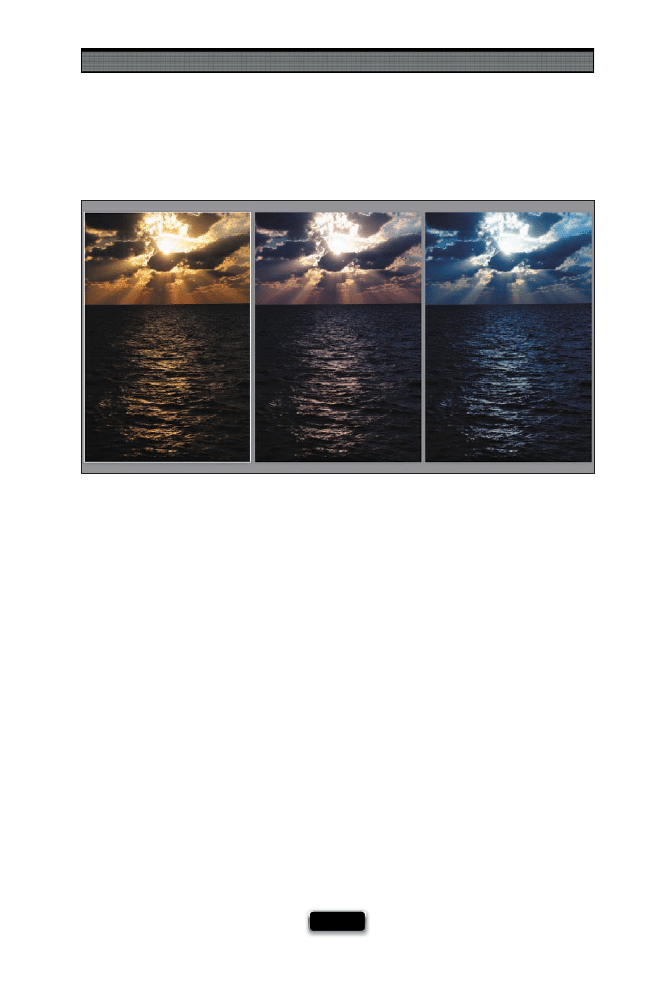
Shooting Outdoors Like a Pro
[ 105 ]
There are two ways to look at white balance: One is “proper” white balance, where
the white balance is appropriate to the lighting situation you’re shooting in. So, if you’re
shooting in the shade, and you’ve chosen a Shade setting for your white balance, your
color looks normal and accurate. Then there’s “creative” white balance (one of my favorites),
where you choose a particular white balance because it will make the photo look the way
you want it. For example, if you’re up for a dawn landscape shoot, and it’s a pretty fl at look-
ing, boring morning (lightwise), you could try changing your white balance to Tungsten,
and now everything looks blue. That alone could turn a really boring daybreak into a very
cool morning shoot. At dusk, changing your white balance to Shade suddenly makes
everything very warm, like you had a much more exciting sunset than you did. In the
example shown here, the image on the left was shot with the Auto white balance, the cen-
ter one was changed to Fluorescent, and the one on the right was set to Tungsten. These
aren’t accurate white balances, they are you being creative in the camera by making the
scene cooler (more blue) or warmer (more yellow) because regular white balance, while
accurate, looks so…I dunno…regular. Give it a try the next time you’re on location and the
light doesn’t cooperate.
Try Getting Creative with White Balance
SCO
TT KELBY

Chapter 5
The Digital Photography Book
[ 106 ]
Every once in a while, you get an amazing subject in front of you, and there just happens
to be beautiful, amazing light on it. The problem is that this only happens every once in a
while. However, beautiful light happens all around us, so instead of waiting for your sub-
ject to be bathed in beautiful light, start looking for beautiful light, and then once you
fi nd it, start looking for a subject that’s in and around that light. Places I look for beautiful
light are usually places with natural light, so when traveling, keep an eye out for great
light in places like markets, little alleyways, old abandoned buildings, workshops, small
churches, anywhere with skylights, or any building with really dirty windows (which
create soft, diff used light). Outside, you can fi nd great light around sunrise or sunset, but
beyond that, keep an eye out for great light right after a rain storm. Sometimes, where
the sun breaks through the clouds, you can have beautiful light appear, even if it’s just for
a few minutes. In short, when you come across some beautiful light, start looking for a
subject, because just about whatever you shoot in it is going to be beautiful.
Let Great Light Be Your Subject
SCO
TT KELBY
Shooting Outdoors Like a Pro
[ 107 ]
If you’re on vacation shooting friends, family, or locals, keep this in mind: avoid tak-
ing shots where something bright is near your subject (a bright beam of sunlight, or
an area lit brightly by the sun, while your subject is in the shade, etc.). By nature, the
eye is drawn immediately to that bright spot fi rst, not to your subject (in the image
shown here, the bright wall on the right side of the image draws your eye away from
the subjects on the bridge). So, when you see a bright area near your subject, change
the position you’re shooting from (move left or right) and compose that bright area
right out of your shot.
SCO
TT KELBY
If you’re shooting a travel photo, and you really want to emphasize the charm of the scene,
try to compose the shot so you don't see modern day objects. For example, nothing kills
that charming shot of the boat in the misty harbor like a 250-horsepower Evinrude motor
hanging off the back. Look for a boat in the harbor that looks timeless, and try to exclude
other boats around it that have modern looking engines, or radar dishes, or other modern
day accessories to capture that charming look. Same thing in the city—exclude the new
pay phone, mailbox, garbage can, posters, etc.
Compose to Hide Modern-Day Objects
Chapter 5
The Digital Photography Book
[ 108 ]
Successful landscape photography is made up of three things: (1) having the right
equipment and knowing how to use it, (2) doing your homework and scouting your
locations in advance, so when the light is great, you’re in the right place at the right
time, and (3) sheer unadulterated luck. Sadly, #3 plays a bigger role than you’d think,
and here’s why: You get up crazy early and get out to your location. You get your gear
set up, and it’s all ready to go. You know your equipment inside and out, and you’re
comfortable with your exposure, composition, and the whole nine yards. Then it starts
pouring rain. Or a thick fog rolls in. Or it’s perfectly clear, and it’s just a blah sunrise with
no clouds in the sky—it wasn’t a majestic morning, it was dark one minute and then,
a few minutes later, it got bright. Blah. It happens all the time. You’re at the mercy of
Mother Nature and dumb luck. It’s a total roll of the dice whether you’re going to get a
spectacular sunrise or a murky mess, but you can tilt the odds in your favor big time by
following one simple rule: return to that same location more than once. That’s right, if
you know it’s a great location, and you were there on a blah morning, go back the next
morning, and the next. If you’re persistent, you’re going to be there one morning when
the light is just magical, the cloud pattern is just right, and you see colors you didn’t
know existed. You’ll be there when the water in the lake is like glass, and the dawn light
couldn’t be more stunning. I’ve been on location on a few dawn shoots just like that.
But just a few. More often than not, it’s blah. So what do I do? I go back. The more I go
back, the greater my chances are that I’ll be there on a morning I’ll talk about for years.
The Three Keys to Landscape Photography
SCO
TT KELBY

Shooting Outdoors Like a Pro
[ 109 ]
When it comes to shooting landscapes at sunrise or sunset, clouds are usually your
friends. Not a blanket of clouds, mind you, but scattered clouds. The reason is you
need something to hold the color in the sky. You need something for nature’s gradi-
ents of color, that happen right around sunset, to play off of, and that something is
clouds. If you’ve ever witnessed an empty, cloudless sky at sunset or sunrise, you know
how lifeless they can be, so don’t let a weather report that’s calling for clouds the next
day scare you off from your shoot. Sometimes, it’s those clouds that turn the ordinary
into the extraordinary.
Look for Clouds to Hold the Color
SCO
TT KELBY
In the studio, we try to manage shadows—make them softer, smoother, or we even make
them disappear altogether—but outside the studio, the shadows themselves make great
subjects. So, make the shadows the subject—long shadows, hard shadows, distorted
shadows. You can also let intentional shadows add to your location shots by putting objects
between the light and a wall behind or beside your subject. This popular trick can add a
lot of interest when you’re shooting a blank, empty wall.
Shoot Shadows
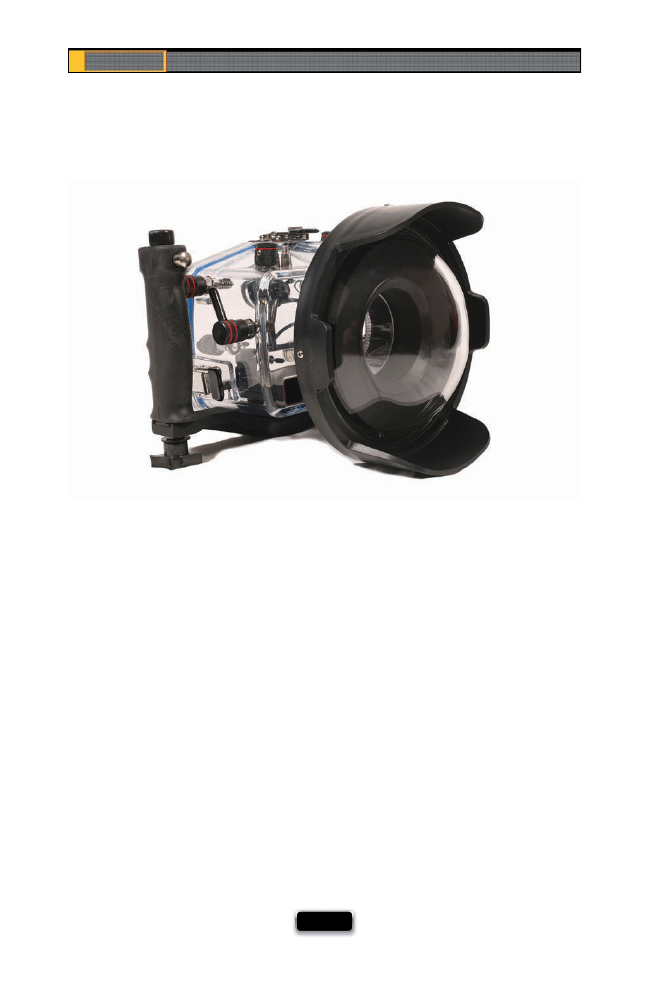
Chapter 5
The Digital Photography Book
[ 110 ]
If you’re a travel photographer, you’re probably doing a lot of your photography while
you’re on vacation, and if you’re on vacation in a tropical place, at some point you’re
going to go snorkeling or diving, and at that point you’ll be wondering, “How can I get
shots of this coral reef?” It’s easier than you’d think, but there are two parts to the equa-
tion: The fi rst part is getting a waterproof housing for your camera, but before we go
any further, when I say “your camera,” I mean that small point-and-shoot camera that
you also take with you when you’re on vacation. The reason I say this is that underwater
housings for dSLR cameras (shown here) often cost more than the camera (with a good
lens) itself. I’m not exaggerating—it’s amazing what they cost. So, unless you plan on
making a career of underwater photography, take your point-and-shoot, and buy an
underwater housing for somewhere around $150. In fact, it would be much, much
cheaper for you to buy a brand new high-end point-and-shoot (like the excellent Canon
G10) and an underwater housing for it, than it would to buy just about any housing for
your existing dSLR. I can’t explain it, but sadly, that’s the way it is. So, the fi rst part of this
is to buy your housing, and resign yourself to the fact that you’re not taking your dSLR
underwater, unless you’re just incredibly loose with money. Part 2 is on the next page.
How to Shoot Underwater, Part 1
©IST
OCKPHO
T
O/BR
Y
AN F
A
UST
Shooting Outdoors Like a Pro
[ 111 ]
Once you’ve got your underwater housing, there are a couple of challenges you’re go-
ing to face. First, there are things underwater that want to eat you. But that aside, one
of your biggest issues will be light, or really the lack thereof. Ideally, when shooting in
deeper water, having a fl ash or other light source is the only way to get good color in
your photo. If you’re shooting near the surface, you’ll probably be able to keep a fairly
low ISO, but once you start going down 30–40 feet, take a look at your shutter speed and
you’ll shudder (sorry, that was lame). The light down at this depth is low, and if you start
getting shutter speeds of 1/30, 1/15, or below, what you’re going to get is a bunch of in-
credibly blurry photos, but sadly, you won’t know that until they’re on your computer (or
you’ve made prints), because (say it with me now, everybody) everything looks in focus
on your tiny LCD screen. So, if you’re buying a point-and-shoot for underwater photog-
raphy, try to fi nd one that has fairly low noise at higher ISO. Your other problem is going
to be color casts, and a general murkiness or haze over your photos. The good news is
that Photoshop can usually fi x this automatically. I’m not a big fan of “Auto” settings in
Photoshop, but this is one case where it works surprisingly well. Go under Photoshop’s
(or Photoshop Elements’) Image menu, under Adjustments, and choose Auto Levels. That
alone will usually do the trick.
How to Shoot Underwater, Part 2
©IST
OCKPHO
T
O/T
AMMY PELUSO
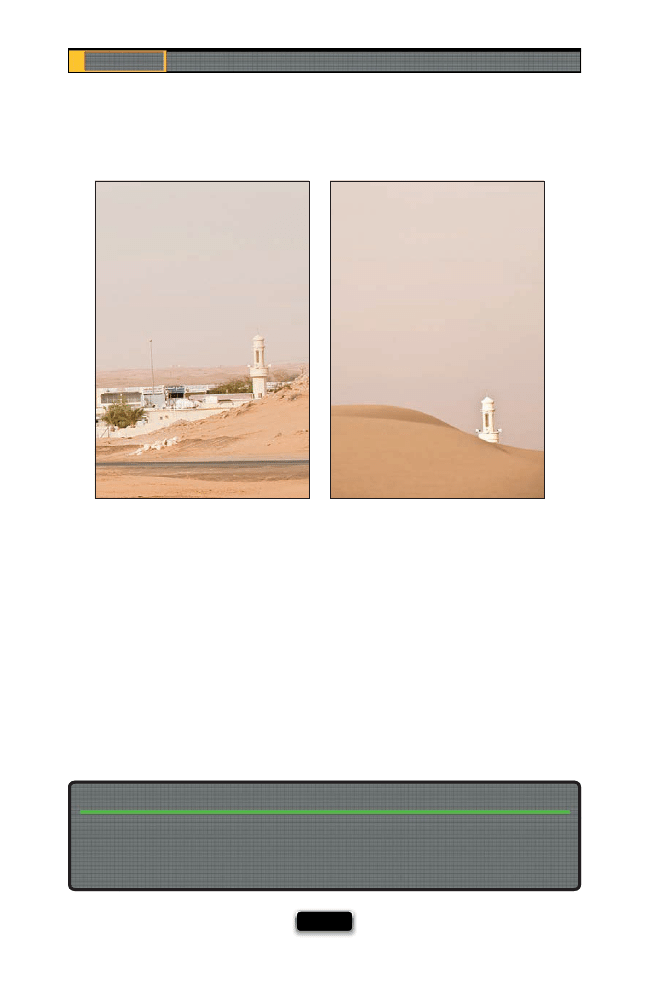
Chapter 5
The Digital Photography Book
[ 112 ]
I learned a great lesson one day from talking with David duChemin, a gifted travel and
editorial photographer. I was in love with a photo he had taken of an old man sweeping
inside an entryway, right in front of the Taj Mahal. It seemed like it must have been taken
at dawn, because there was literally no one there but him, so I asked David how he got so
lucky to be there when virtually no one else was there. He told me that actually there were
tourists everywhere, and if he had shot a little wider I would have seen hundreds of people
on either side of him. What he had done was make a conscious decision about what to
leave out of his shot. He framed the shot so just that one man was in his frame, and it made
it look like he and that man were the only two people there that day. In the example here,
these two shots were taken seconds apart and the only diff erence is the framing. The shot
on the left was taken from a standing position and you could see the gift shop, road, and
other distracting stuff . Now, all I had to do to hide that stuff was kneel down behind the
small sand dune in front of me and frame the shot so that only the tower was visible. The
lesson: It’s not always what you put in your frame—it’s sometimes what you leave out.
It·s What You Leave Out of the Frame
Here’s another creative idea: shoot the refl ections you fi nd in puddles. I don’t mean shoot
a downtown with puddles in the foreground where you see a refl ection, I mean shoot the
puddles themselves. If you’re in a city, there’s something refl ecting in those puddles—fi nd
the angle that looks best, and shoot it. Ya never know what you’ll come up with.
Shoot the Reflections in Puddles
SCO
TT KELBY
SCO
TT KELBY
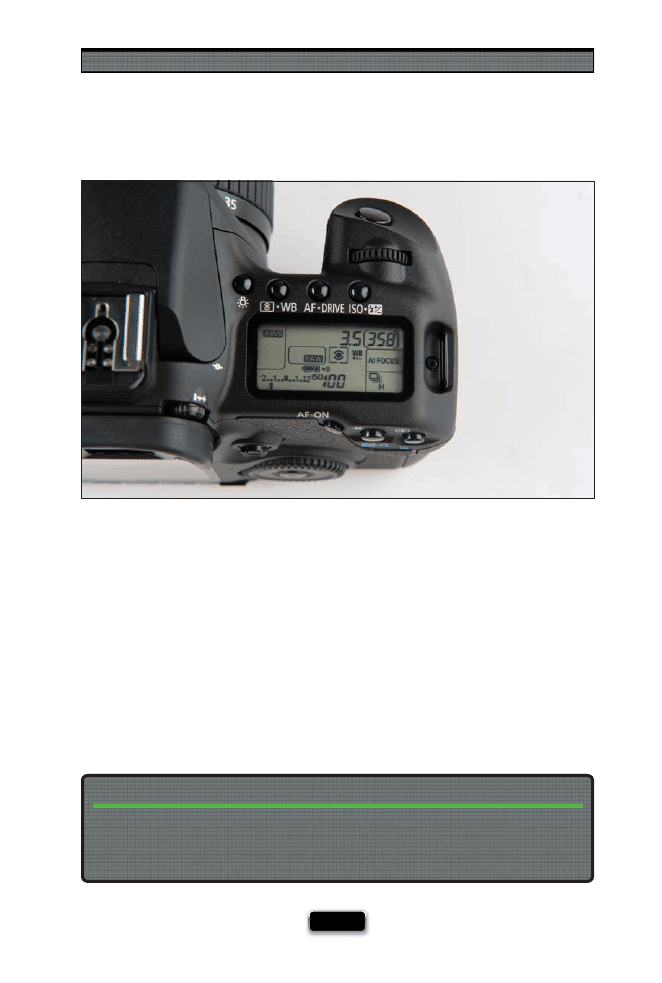
Shooting Outdoors Like a Pro
[ 113 ]
If you’re shooting landscapes, you’re probably shooting at around dusk and around
dawn, and if that’s the case, you’re probably shooting on a tripod, and if that’s the case
(see how I’m stringing this whole case together?), then you need to be shooting at the
lowest ISO your camera will allow (usually ISO 200 on most Nikon dSLRs, or ISO 100 on
Canons). The reason why is you’ll get the sharpest, most noise-free, best quality images
at your lowest ISO, and because you’re on a tripod, you don’t need to raise your ISO
above that sweet spot (remember, raising your ISO is usually for hand-holding in low
light; you’re not hand-holding, you’re on a tripod, so go for the ultimate in quality).
Shoot at the Lowest ISO Possible
If you shot at 400 or 800 ISO, chances are when you open that photo on your computer,
you’re going to see some noise (depending on how well your camera handles noise, you’ll
either see a little or a lot), but don’t let that throw you—even though you see some noise
onscreen, a lot of times that noise will disappear when you actually print the image.
The Noise You See Onscreen Sometimes Goes Away

Chapter 5
The Digital Photography Book
[ 114 ]
If you’ve ever arrived in a city while on vacation and you don’t have any idea where or
what to shoot, your fi rst stop should be a local gift shop to look at their postcards. If
you see any interesting locations, it will usually tell you the name of them on the back
of the postcard, or you can show the postcard to the shopkeeper and ask them where
it’s located. Okay, so why not just buy the postcard and head for the bar? Because we’re
photographers, that’s why. Plus, we might be able to come back with some better im-
ages than the ones on the postcards they’re selling (in fact, maybe next year they’ll be
selling your shots as their postcards, and hopefully, they’re doing so with your permis-
sion and a commission).
Not Sure What to Shoot? Try This!
A very popular subject to shoot, especially for travel photographers, is texture—anything
from fl aking paint on the wall of an old building, to the grain on the wood table at a café.
Texture is everywhere, and can have great dimension if the light hitting it is from the side,
because side lighting will enhance the texture as the shadows add interest and depth. Keep
an eye out for texture when you’re roaming city streets.
Shoot Texture as Your Subject
©IST
OCKPHO
T
O/FERRAN
TRAITE SOLER AND SCO
TT KELBY
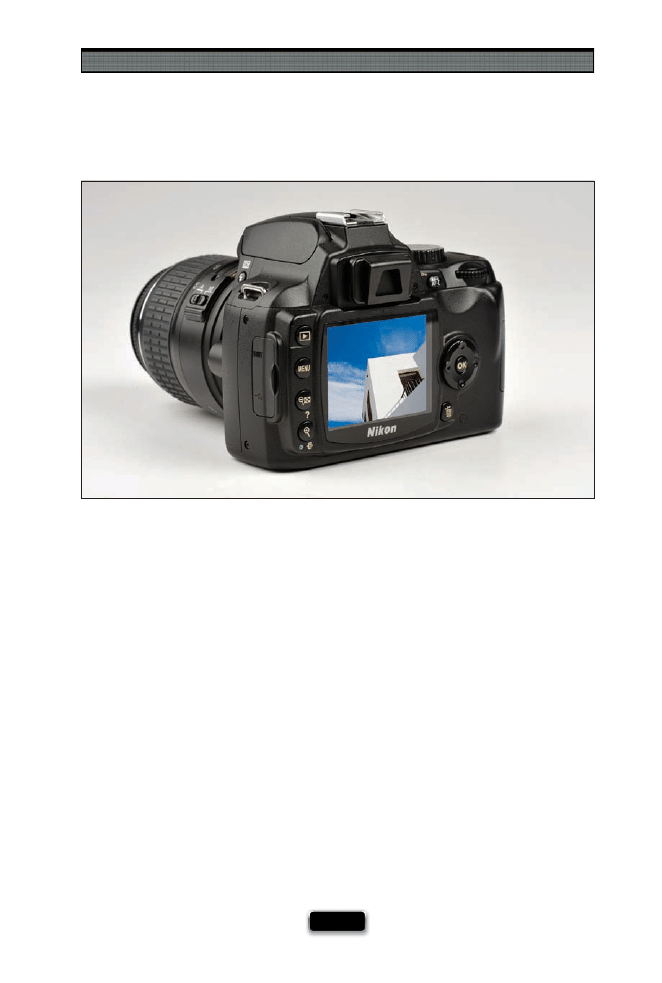
Shooting Outdoors Like a Pro
[ 115 ]
Here’s a great tip I picked up, from renown wildlife and outdoor photographer Moose
Peterson, for getting better exposure in your landscape photos when you’re using a
cable release to fi re your camera (you use a cable release to minimize any camera shake
that’s caused by your fi nger pressing the shutter button). The problem is this: since you’re
using a cable release, your eye isn’t right up to the viewfi nder like it normally would be,
so you’re not blocking the light from coming in through the viewfi nder and messing
with your exposure. The solution is to cover your viewfi nder. Some cameras, like Nikon’s
D3 and D3x, have a built-in viewfi nder door you can close—the switch is to the left of the
eyepiece itself—but most other Nikon dSLRs come with the DK-5 eyepiece cap (shown
above) that snaps into place to keep light out of your viewfi nder in cases like this. By the
way, you can test to see if light is getting in through the viewfi nder and aff ecting your ex-
posure by covering and uncovering the viewfi nder with your hand. If you see the shutter
speed change at all, then light is getting in. If you don’t have that little door, Moose rec-
ommends hanging your lens cap over the viewfi nder to block the light. If you’re a Canon
shooter, most Canon dSLRs come with an eyepiece cover that covers the viewfi nder and
keeps outside light from aff ecting your exposure.
SCO
T
T
KE
L
B
Y
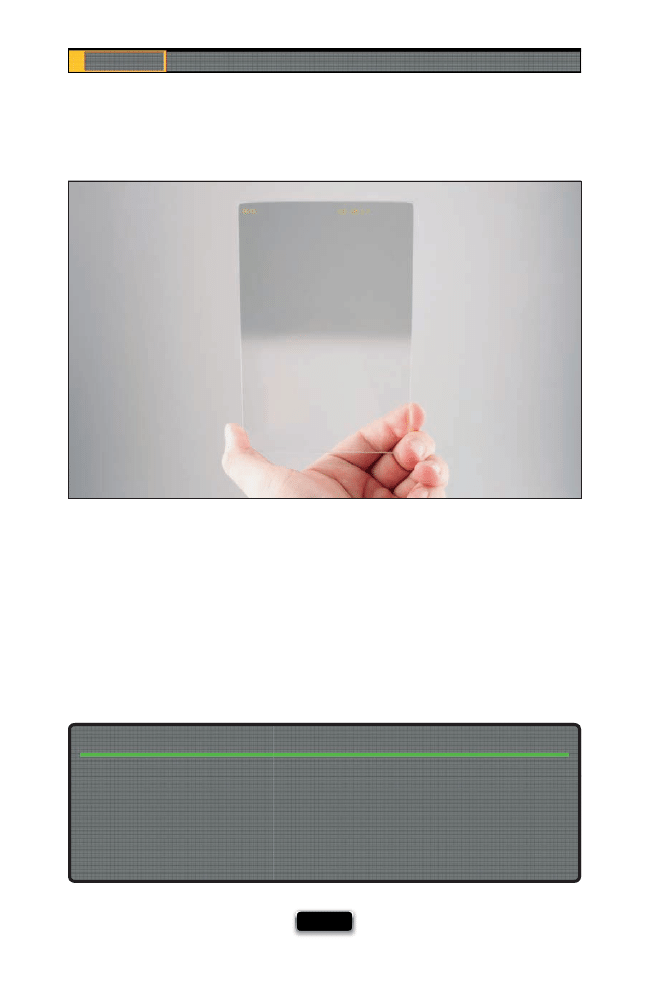
Chapter 5
The Digital Photography Book
[ 116 ]
If the polarizing fi lter is the most important fi lter for landscape photographers, then a
graduated neutral density fi lter has to be the second most important. This fi lter is designed
to help you do something your camera can’t usually do on its own, and that is expose for
the foreground without overexposing the sky. That’s why this fi lter has become so popu-
lar—it darkens the sky, but it’s how it does it that really creates a pleasing eff ect. This fi lter is
graduated, so it’s darkest at the top of the sky, and then it graduates down to full transpar-
ency (like a gradient), so the ground doesn’t get darkened at all. The one I use is actually
rectangular plastic, and I simply hold it up in front of my lens then take the shot. I don’t use
a lot of fi lters, in fact just a few (go to Chapter 3 to see the other ones l use), but this is one
that makes a really big diff erence, and that’s why it’s with me on every landscape shoot.
Using a Graduated Neutral Density Filter
We shoot pretty much everything from a standing position. So, everything looks just like it
would to anyone walking by that same spot. Try something from a diff erent perspective—a
view people wouldn’t normally see. Get down low—really, really low. If you go down on
one knee, you see things from a young child’s perspective. Sit on the fl oor, and you’ve got
a toddler’s point of view. But if you really want to take it to the next level, lie on the fl oor
and shoot, showing a perspective normally seen by squirrels (it gives you some idea why
they’re so nervous all the time).
Get Down Low
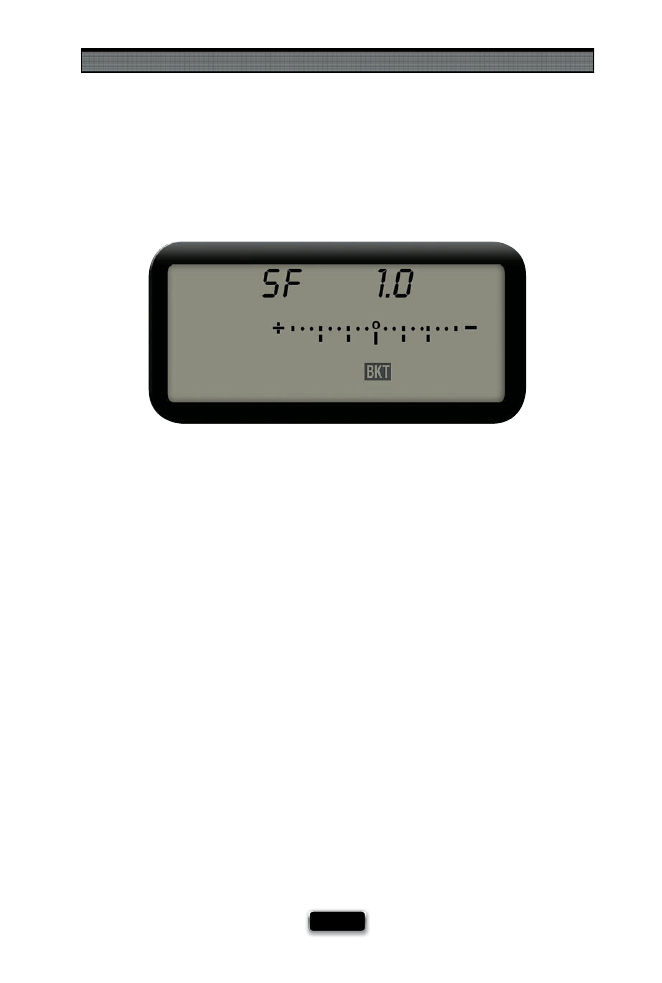
Shooting Outdoors Like a Pro
[ 117 ]
If you want to create HDR (High Dynamic Range) images (where you shoot multiple im-
ages, then combine and tone map them into a single image with a range of tones beyond
what your camera alone can capture), here are some tips to make the shooting part easier.
The fi rst tip for HDR success is to shoot with your camera on a tripod (your software tweak-
ing later will be a lot easier). Next, you’ll need to set up your camera to shoot in aperture
priority mode, then set your camera to take automatic bracketed exposures. Here’s how:
Nikon: Press-and-hold the function (Fn) button on the bottom front of your camera (if
you have a D300, D700, D3, or D3x), then move the main command dial on the back of
your camera until you see bracketing turned on in your top LCD. Choose fi ve bracketed
shots (so it takes one regular exposure, then one brighter, one way brighter, one darker,
and one way darker). Now switch your camera to continuous high-speed release mode,
then hold down the shutter button until your camera takes all fi ve shots for you.
Canon: Press-and-hold the Mode and AF•Drive buttons to turn on auto exposure
bracketing (set the number of shots to 5 in the Custom Functions menu, so it takes one
regular exposure, then one brighter, one way brighter, one darker, and one way darker).
Now switch your camera to shoot in burst mode, then hold down the shutter button
until your camera takes all fi ve shots for you.
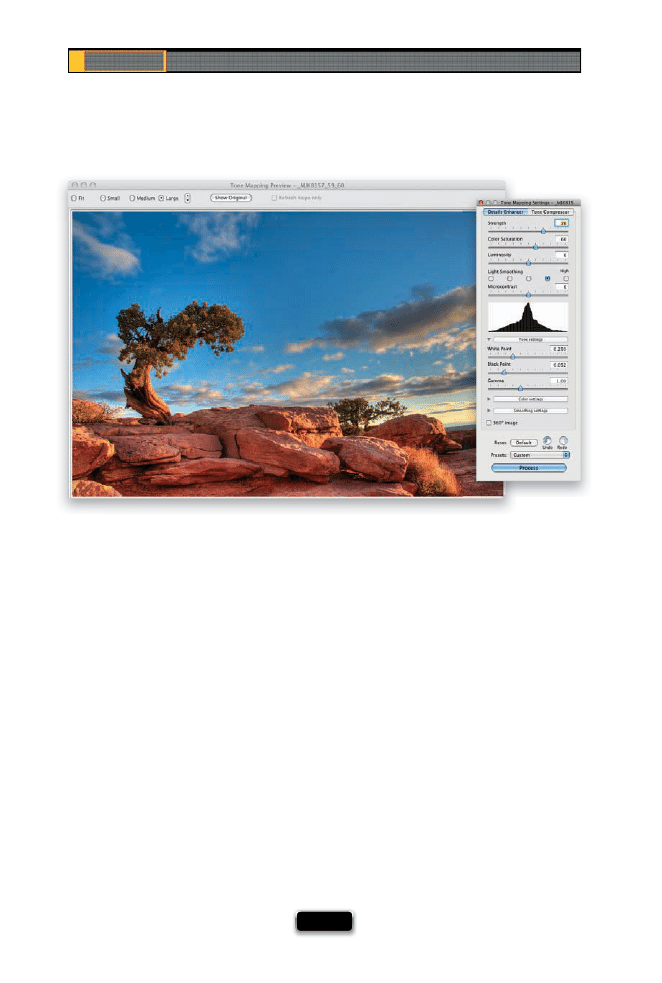
Chapter 5
The Digital Photography Book
[ 118 ]
Shooting the bracketed shots is only one part of the equation, because all you’ve got is
fi ve shots, and four of them are either overexposed or underexposed. So, what you need
now is a program to combine these into a single HDR image, which is what our goal is. The
program that’s the most widely used is called Photomatix Pro (from HDRsoft.com), and it
runs $99. You can also download a fully working demo version for a Mac or PC (the trial
never expires, but it does apply a watermark to your images). You open your fi ve images
in Photomatix Pro, and it does all the combining and tone mapping for you. I recorded a
video tutorial just for you to show you how to use Photomatix Pro to create your fi rst HDR
image, and you can fi nd it at www.kelbytraining.com/books/digphotogv3.
What to Do with Your HDR Shots
MA
TT KLOSK
O
WSKI
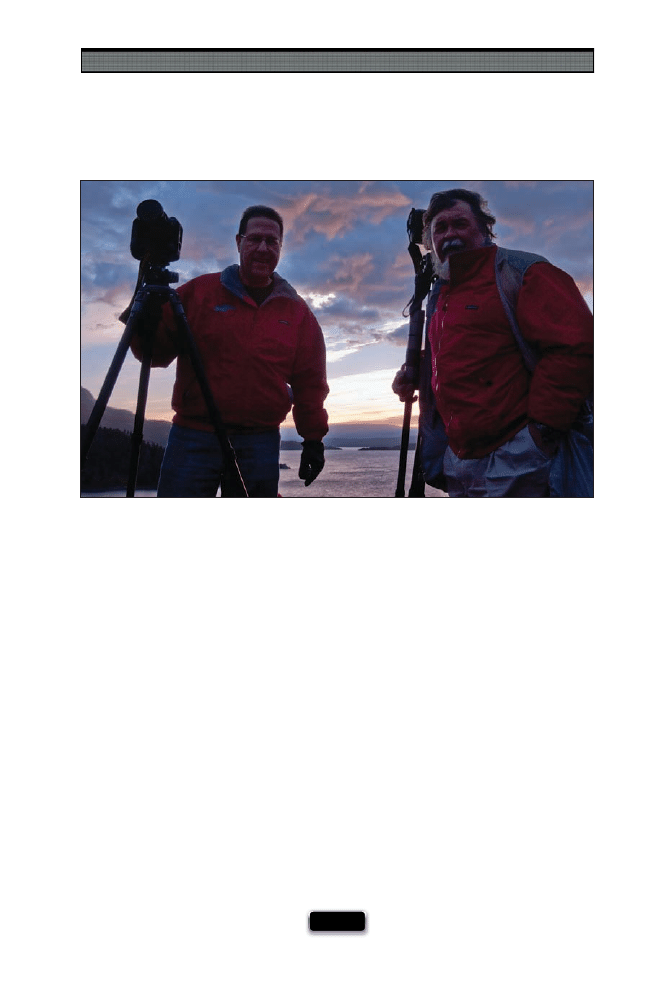
Shooting Outdoors Like a Pro
[ 119 ]
I’ll never forget the fi rst time I shot at Big Sur, along California’s coast near Monterey and
Carmel, a number of years ago. It was a mess. I had been in town earlier that day, but
didn’t think to go scout out a good shooting location, and the next morning, well before
dawn, we headed out to the coast, where we found ourselves driving around in the dark
trying to fi gure out where a good place to shoot was, but of course, we couldn’t see any-
thing—it was pitch black. Out of desperation, we pulled off at a “scenic” overlook (well,
that’s what the sign said anyway), and we set up our gear, waiting for sunrise, and then
as the sun came up, I proceeded to capture some of the most unremarkable, bland, and
forgettable images ever taken of Big Sur. In the dark, not surprisingly, we picked a totally
blah spot. If I had done my homework and scouted a location, I would have at least had a
shot of something really special. A lesson learned. Since then, I go out of my way to fi nd a
great shooting location fi rst, and if I can, I take a test shot, even if it’s during terrible light.
That way, if the shot looks decent in bad light, all I have to do is come back and try for
that same shot in great light. It’s a recipe for success, and this little bit of homework up
front will put you in the best position for something magical to happen.
Scout Your Dawn Shoot Location
BARNEY STREIT
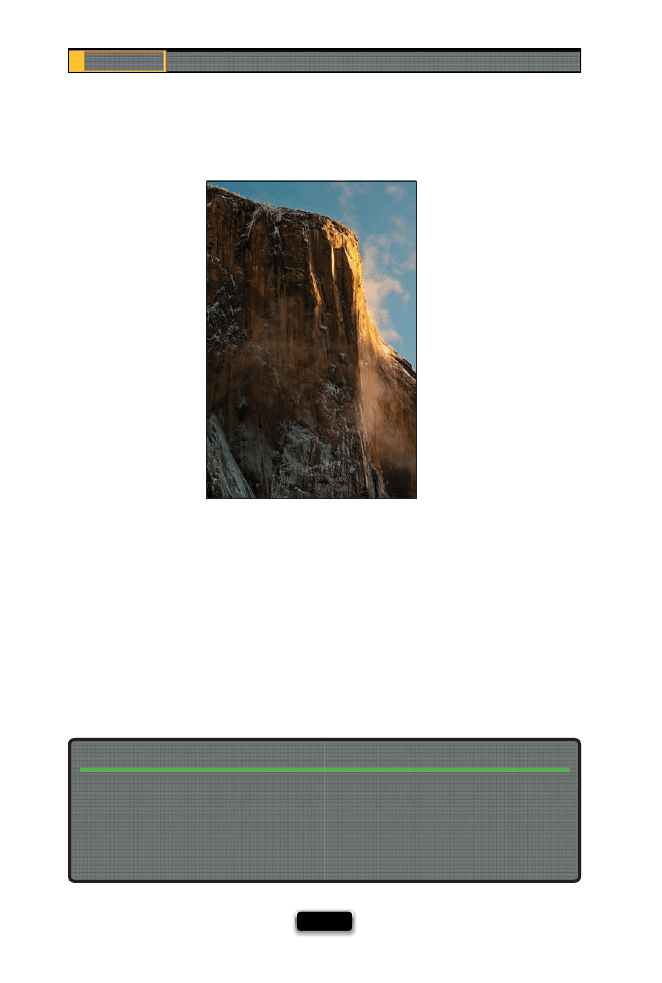
Chapter 5
The Digital Photography Book
[ 120 ]
If you’re into shooting landscapes, you’re into shooting wide angle, and that totally makes
sense, because most landscape photographers want to take in as much of a beautiful,
sweeping landscape as possible. But the next time you’re out in the fi eld, try something dif-
ferent—take out a long telephoto lens and capture a totally diff erent side of your location.
Sometimes you can uncover amazing photo opportunities that are just outside the reach
of your wide-angle lens. It lets you bring a totally diff erent perspective to your landscape
photography, and opens the door to a new way of shooting outdoors that you just might
fall in love with. Give it a try the next time you’re out shooting—you might be surprised at
what’s waiting just 100mm or so away.
SCO
TT KELBY
I got this idea from my buddy and commercial photographer Joe Glyda, who gives himself
specifi c shooting assignments for a specifi c amount of time. For example, he’ll give himself
a one-hour assignment in a downtown area to shoot nothing but things that are round. Or
square. I’m constantly amazed at what he comes up with, and you’ll be amazed at how a
well-defi ned assignment like this will bring out your creativity. Just remember, no cheat-
ing—you have to give yourself the assignment before you arrive at the shooting locale.
Shoot Shapes (Circles, Squares)
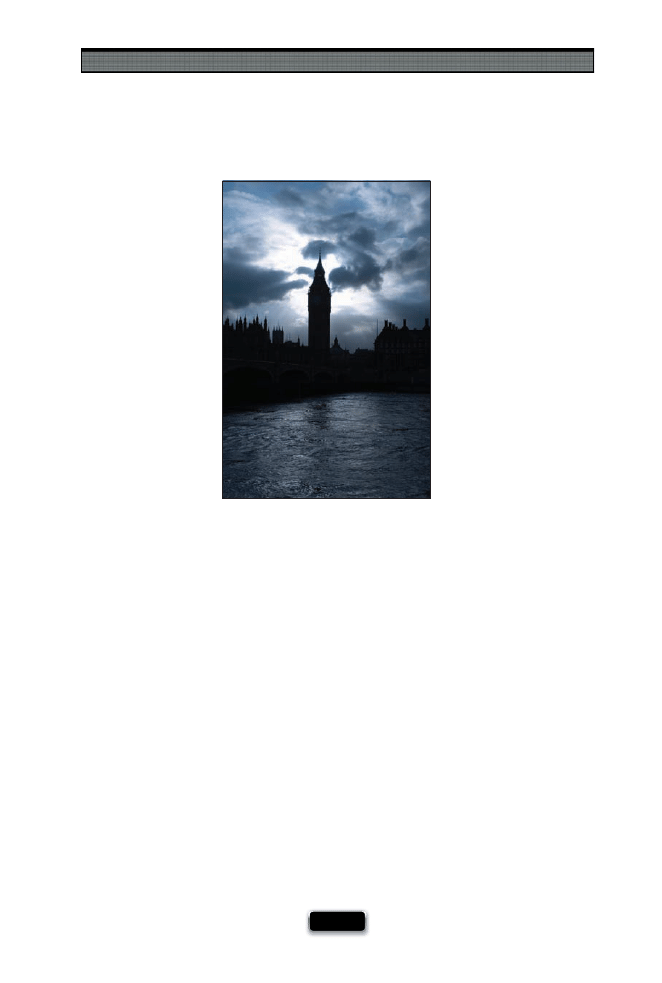
Shooting Outdoors Like a Pro
[ 121 ]
Although we often avoid backlighting when shooting travel portraits (unless we have a
fi ll fl ash, of course), when it comes to shooting landscape photography, you can get some
amazingly dramatic images when the sunlight is aiming right at you (rather than over your
shoulder). You can even sometimes compose the shot with the sun right in the shot itself,
and if you’re shooting at a high f-stop number (like f/22), the sun will even get little light
fl ares and starbursts that can look really captivating. Now, because you’re shooting right
into the sun, it can be a little trickier to come away with a killer shot, so don’t be disap-
pointed if, the fi rst time out, you don’t come home with something to frame for your wall.
It takes a bit of practice—trial and error—to fi nd the right exposure, and how to frame the
shot so the sun actually isn’t in every photo (just the backlighting eff ect), but believe me,
when you nail it, you’ll know.
Use Backlighting to Your Advantage
SCO
TT KELBY
Chapter 5
The Digital Photography Book
[ 122 ]
As I mentioned in volume 1, the two best times of the day to shoot landscapes are dawn
and dusk, and if you choose to shoot at either one of these (and I hope you do), make
sure you get to your shooting location plenty early. Earlier than you’d think. I can’t tell you
how many times I’ve seen photographers scrambling to get their gear out of the car, then
they lug all their stuff out to the location, huffi
ng and puffi
ng, and all the while, those few
minutes of incredible light are nearly gone, and you’ve never seen more stressed out, frus-
trated, and downright angry photographers than when that happens. Look, if you’re getting
up at 5:00 a.m. to catch sunrise nearby, instead get up at 4:45 a.m. and be on location, all set
up, ready, composed, and relaxed, so you can not only get the shot, but you can enjoy the
experience, too.
If you’re heading out to shoot a popular landscape destination, like the Arches National
Park in Utah, keep in mind that the shooting locations you hike out to fi ll up very fast. So
fast, that if you don’t get there two hours before dawn, you might not get a place to set
up your tripod at all. If you do get a spot, it may be behind 50 other photographers. These
prime locations just don’t have enough space, and the ideal shooting spot can sometimes
only accommodate a handful of photographers, so if you plan a trip to shoot there, also
plan to get there crazy early and be one of those handful with the ideal shooting position.
Shooting a Popular Landscape Destination? The Good Spots Go First!
©
IS
T
O
C
K
P
H
O
TO
/S
K
IP O
’D
O
N
N
E
L
L
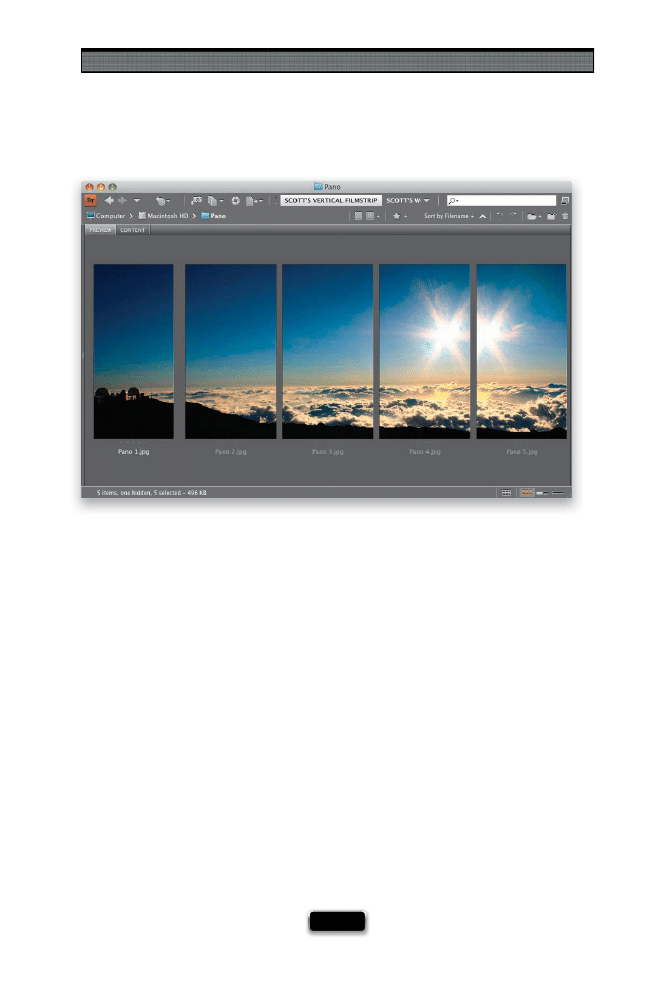
Shooting Outdoors Like a Pro
[ 123 ]
If you have Photoshop (at least version CS3 or higher), you absolutely should be shoot-
ing panoramas, because Photoshop will automatically stitch your individual images into
a wide (or tall) panoramic image for you, and it does an absolutely amazing job. These
days, you don’t even have to pull a bunch of fancy tricks in the camera (you can even
hand-hold your panos), you just have to follow one simple rule: make sure each photo
overlaps by around 20%. Photoshop needs that overlap to do its thing. However, here’s
a tip that will keep you from having to crop off mountaintops or crop away something
interesting in the foreground. Once Photoshop creates your pano, you’ll always have to
crop the photo a little bit because of the way it assembles your pano. Now, here’s the
tip: shoot your panos vertically. That way, when you crop your photo, you won’t have to
shear off the tip of a mountain, or part of a beautiful refl ecting lake, because there will
be a little “breathing room” left above your mountain range to crop in and still keep your
mountains intact. Of course, if you compose so there’s 1/16 of an inch above the tallest
peak, the shooting vertical thing won’t help, so I guess it’s really two tips: shoot your pa-
nos in vertical orientation, and compositionally, leave a little breathing room above your
subject in case you have to crop.
Why You Should Shoot Panos Vertically
SCO
TT KELBY
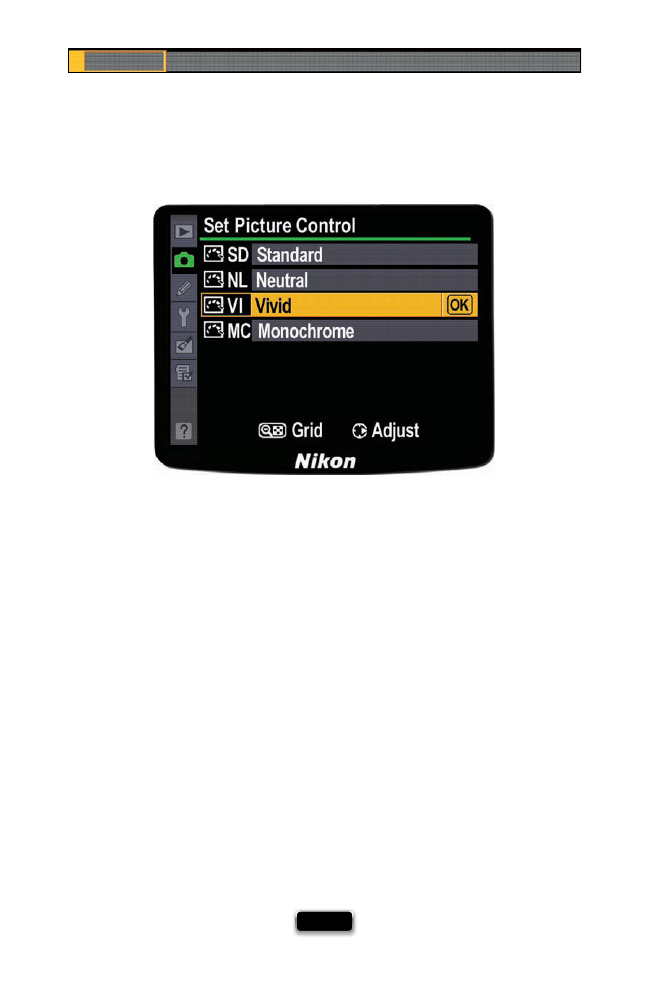
Chapter 5
The Digital Photography Book
[ 124 ]
For years, traditional fi lm photographers who shot landscapes used to be hooked on
a brand of Fuji fi lm called Velvia, because that fi lm had a very vibrant, color-saturated
look that landscape photographers just love. So much so that some simply wouldn’t
shoot without it. Today, with many digital cameras, we have something similar (which
makes your images look more vibrant) right in the camera, but you can only take advan-
tage of it if you’re shooting in JPEG format. Nikon calls these “picture controls” and Canon
calls them “picture styles,” but they both do a similar thing: make your colors more vibrant.
Here’s how to turn this on:
Nikon: Go to the Shooting menu, and choose Set Picture Control. In the Set Picture Control
menu, choose Vivid, then select OK to give you more vivid landscape photos when
shooting in JPEG.
Canon: Go to the menus, to the Shooting menu, and choose Picture Style. Then choose
Landscape to give you more vivid landscape photos when shooting in JPEG.
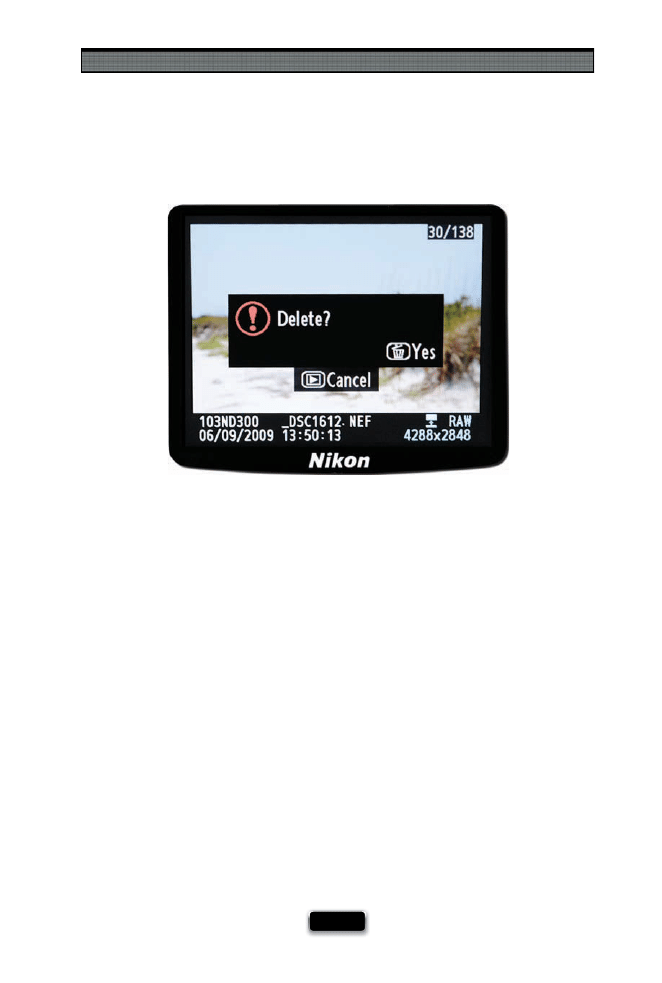
Shooting Outdoors Like a Pro
[ 125 ]
When I’m shooting travel photography, I make it a point to edit as I go—if I take a shot
and see that it’s blurry, or way overexposed, or just messed up in general, I delete it right
there on the spot (after all, if I can see it’s blurry or really bad on that tiny screen on the
back of my camera, when I see it at full size it will be beyond unusable). There’s no sense
in carrying around these shots, which are just taking up space on your memory card, and
soon they’ll be just taking up space on your computer, when either way, they’re destined
to be deleted. So, why not save time, save space, and up the number of “keepers” from your
shoot by deleting the obviously bad shots now? I usually do this in between shoots, so if
I stop at a café for a snack, I’ll take a look through the images I’ve captured, and delete the
obviously really bad shots. There are some people who are hesitant to do this, because
they’re afraid that some blurry, overexposed shot is going to be “the one!” That’s certainly
never happened to me. I’ve seen shots that would have been great if they hadn’t been
blurry, or soft, or improperly exposed, but I’ve never used one of those for anything. You
won’t either. It’ll just make you sigh and think, “Man, if that had only been in focus!”

SHUTTER SPEED: 1/200
SEC
F-STOP:
F
/8
ISO: 200
FOCAL LENGTH: 200
MM
PHOTOGRAPHER:
SCOTT
KELBY

How can there possibly be yet even more tips about how to make
people look their very best? It’s easy: have you ever looked at
people? I mean, really looked at them. Up close. It’s scary. I’m not
talking about me or you, mind you. Other people. Let’s take your average
guy, for example. If he’s above the age of 12 or so, most likely he has hair
coming out of his nose, his ears, his underarms, and it’s growing like ivy on his
arms, legs—just about anywhere you wouldn’t actually want hair growing.
These are just the places you can see. I know. Gross. Anyway, what are we,
as photographers, to do about shooting these grotesque human fur balls?
We fi nd ways to light them, using either natural light, studio light, or some
twisted combination of the two, so that they’re somewhat bearable to look
at, as long we don’t look very closely. This applies to all men, with the possible
exception of George Clooney. Now, when I look at George Clooney, I see kind
of a well-groomed, decent looking guy, but the women I know, including
those who are photographers, see something entirely diff erent in him.
They don’t see the hairy mass I described previously. They have the same
reaction to him that they have to chocolate cake. They lose complete control
of their faculties. So, based on this (my conclusions are strictly based on my
own personal observations, and not scientifi c data, though I’ve never met a
female scientist that didn’t fi nd George Clooney irresistible in a chocolate-
molten-lava-cake kind of way), I decided to conduct an experiment. I went
to my local bakery, had the woman who owns the bakery choose the
hands-down yummiest chocolate cake she sells, and then I used a series
of A-clamps and gaff er’s tape to affi
x this to the head of my assistant Brad
to see if this would bring about the “Clooney reaction,” despite his having
no Clooney-like resemblance. Well, it worked better than I had expected,
and within two weeks he wound up marrying a supermodel from Prague,
who to this day refers to herself as Mrs. Clooney. True story.
Yet Even More Tips to Make
People Look Their Very Best
[ 127 ]
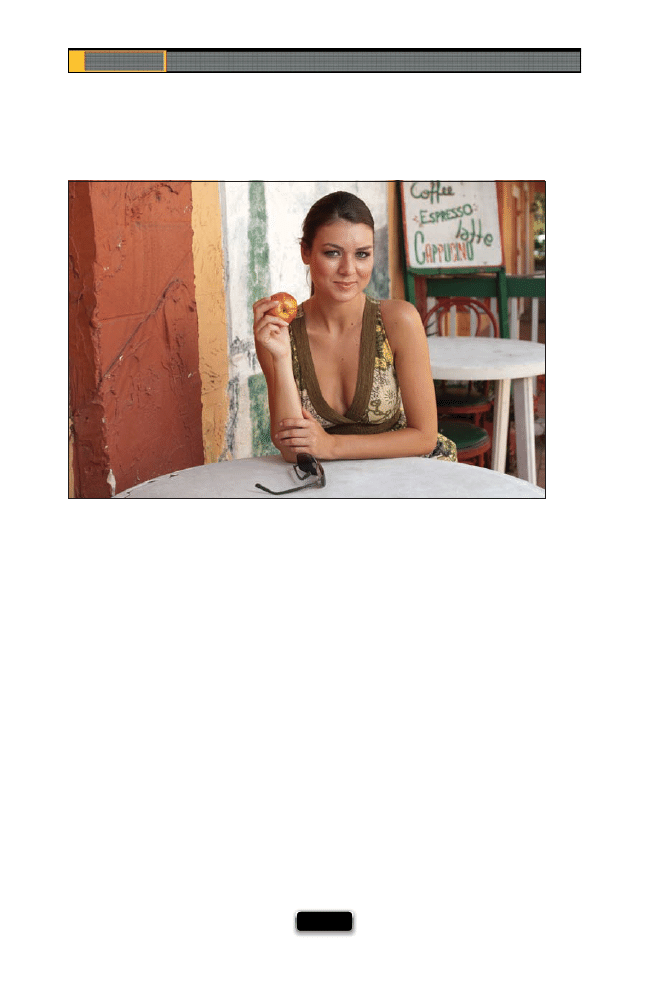
Chapter 6
The Digital Photography Book
[ 128 ]
One of the things that makes some people so uncomfortable in front of the camera is
that they don’t know what to do with their hands—no matter what they do with them,
they feel like they look dumb. If you can see that’s the case with one of your subjects,
give them something to hold (like a prop), and you’ll instantly see their comfort level go
up, and that will translate into more natural-looking photos. If you can give them a prop
that they can relate to, all the better. (For example, if they’re an artist, have them pick
up a handful of paintbrushes. Shooting a nutritionist? Have her take a bite of an apple.
Okay, it doesn’t have to be quite as obvious as that, but you get the idea.) Once they
have something in their hands they feel comfortable with, not only will they feel more
comfortable, but your photos will have added visual interest, as well.
If They Look Uncomfortable,
Hand Them a Prop
SCO
T
T
KE
L
B
Y
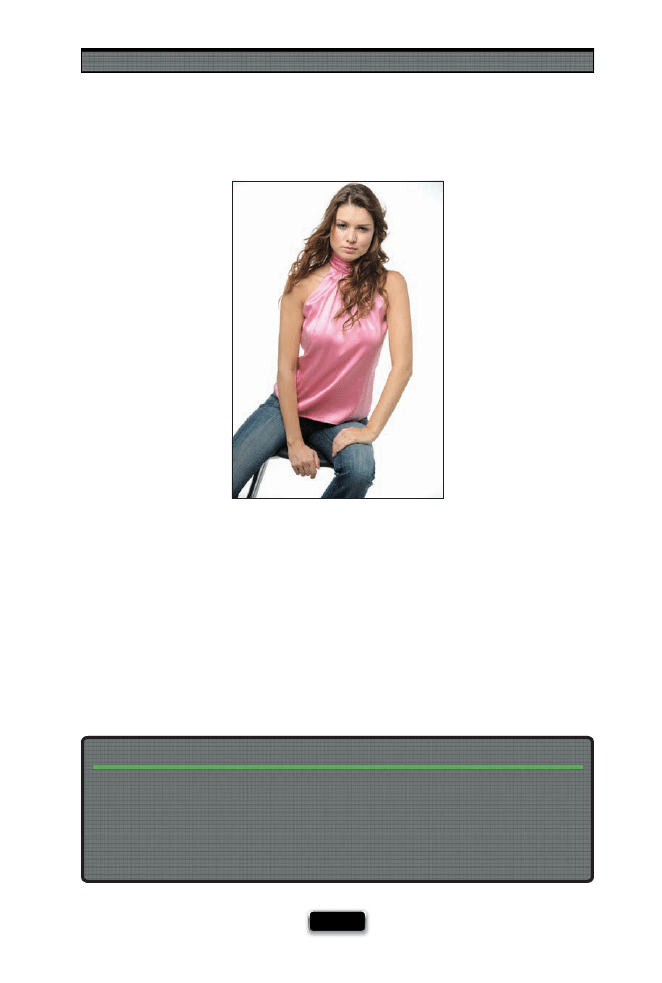
Shooting People Like a Pro
[ 129 ]
Another situation where your subject will often feel awkward or uncomfortable is when
they’re standing. They feel so vulnerable just standing there alone in an empty space,
and that’s why some photographers choose to have their subjects sit down. Although
you’ll have to shoot from a lower position (which might make you a little uncomfortable),
most people will be much more comfortable sitting vs. standing. Also, if you see your
subject is still really uncomfortable, try putting a small table (like a posing table, for example)
in front of them. Putting something in front of them like that will help them feel less vulner-
able (think of how often public speakers like to hide behind a podium when giving
their presentation—it’s a comfort thing). Next time you’re in one of those situations
where you can tell your subject feels really awkward, have ‘em take a seat and you’ll
usually see a world of diff erence.
The Advantage of Having Your Subject Sit
You can have your subject sit on just a regular ol’ chair, but if you want a chair specifi cally
for photography (one without a back or arms), you can buy a posing stool, which is an
adjustable-height stool that swivels, and they’re pretty unobtrusive (which is good, as its
job is to not draw attention to itself, and keep the focus on the subject). You can also buy
an adjustable-height posing table, as well (B&H Photo sells them separately, or you can buy
them together in a kit).
Use a Posing Stool
SCO
T
T
KE
L
B
Y
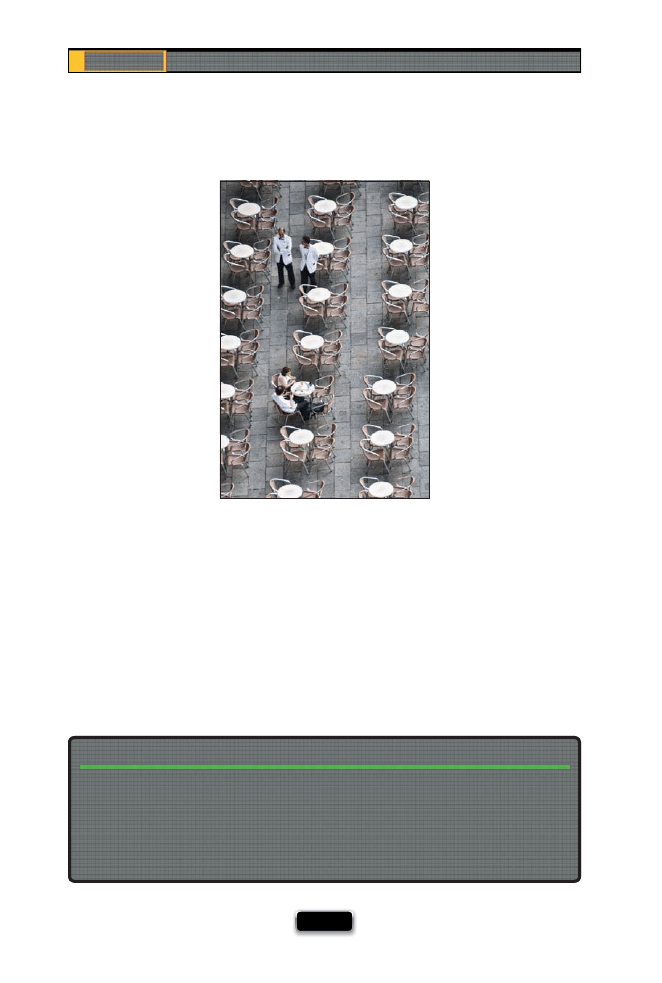
Chapter 6
The Digital Photography Book
[ 130 ]
Another perspective we don’t get to see very often is a very high perspective, and by
that I mean shooting down from a second fl oor walkway or shooting straight down on
boats going under a bridge. These high vantage points off er a view we don’t see every
day (even though we may walk across a second fl oor walkway that’s open to the lower
level, we don’t often see images taken from that vantage point). These work great for
everything from shooting the bride encircled by her bridesmaids to shooting down on
diners at an outdoor cafe. The shot above was taken straight down from my hotel room
window while on vacation. Next time you want a totally diff erent perspective on things,
and don’t feel like getting your pants dirty from sitting down, look up and see if there’s
a higher angle you could be shooting from.
Having your subject prop one of their legs up on a box does two things: (1) it helps their
overall lines, improving their overall look, and (2) it usually makes them feel a little more
comfortable (now that they’re not just standing there). Many photographers use this trick
whether their subject is sitting or standing. It doesn’t have to be a very high box (in fact, it
shouldn’t be); it can just be six or eight inches tall—enough to give your subject that little
extra something.
Have Them Get a Leg Up!
SCO
TT KELBY
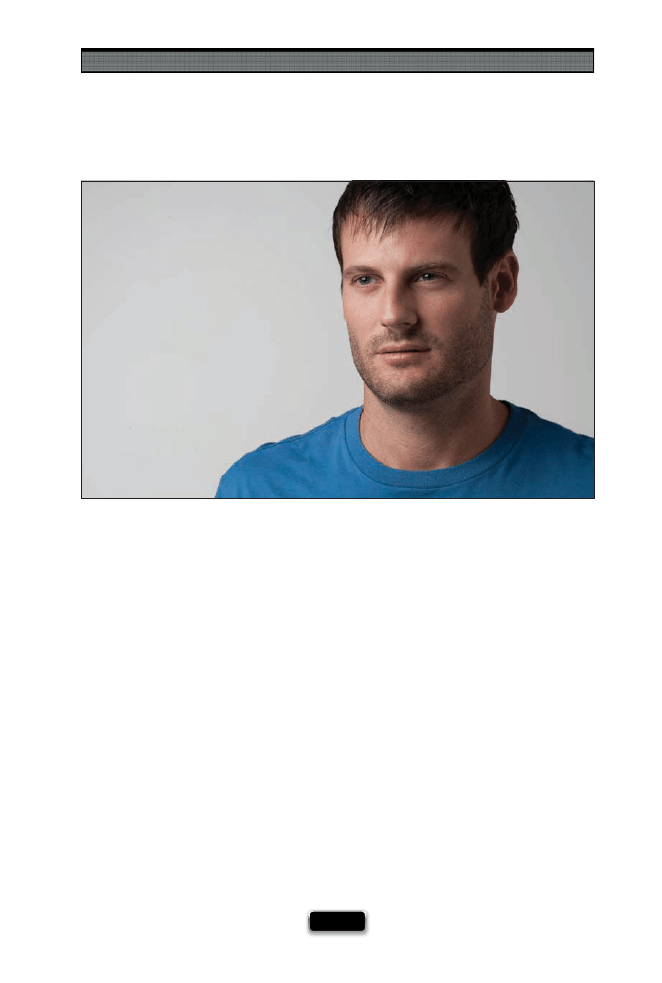
Shooting People Like a Pro
[ 131 ]
Shooting a ¾-View? Pick a Spot to Look At
One of the three most popular positions for formal portraits is the ¾-view, which shows
about three-quarters of your subject’s face—they’re looking away from the camera at
around a 45° angle (as if they’re looking at something off to the side of where the photog-
rapher is standing, and because their head is turned slightly like this, you see both eyes,
but you don’t see the ear on the other side of their head). But this tip isn’t how to pose
a
¾-view, it’s about how to get a more realistic-looking ¾-view without seeing too much
of the whites of your subject’s eye (if you get too much of the whites of the eyes, it looks
kind of weird. Okay, it looks kind of creepy). The trick is: don’t just have your subject look
off to the left or right—choose a particular object in the room that they should focus on
each time they do the
¾-view. Once you give your subject a spot to look at, take a test
shot and see if you can see their irises clearly and there’s not too much of the whites of
the eyes showing. If you do see lots of white, they’re looking too far away—have them
turn their head a little more toward the camera and focus on a diff erent object in the
room (if there’s nothing for them to focus on, put an extra light stand where you want
them to look, and raise the top of the stand to where you want their eyes to go). Also,
this picking-a-spot-for-the-
¾-view technique is particularly helpful when working with
professional models, because they’ll be hitting a number of diff erent poses during the
shoot. If you give them a spot to look at each time they go for that
¾-view, they’ll hit
that same spot every time.
SCO
T
T
KE
L
B
Y
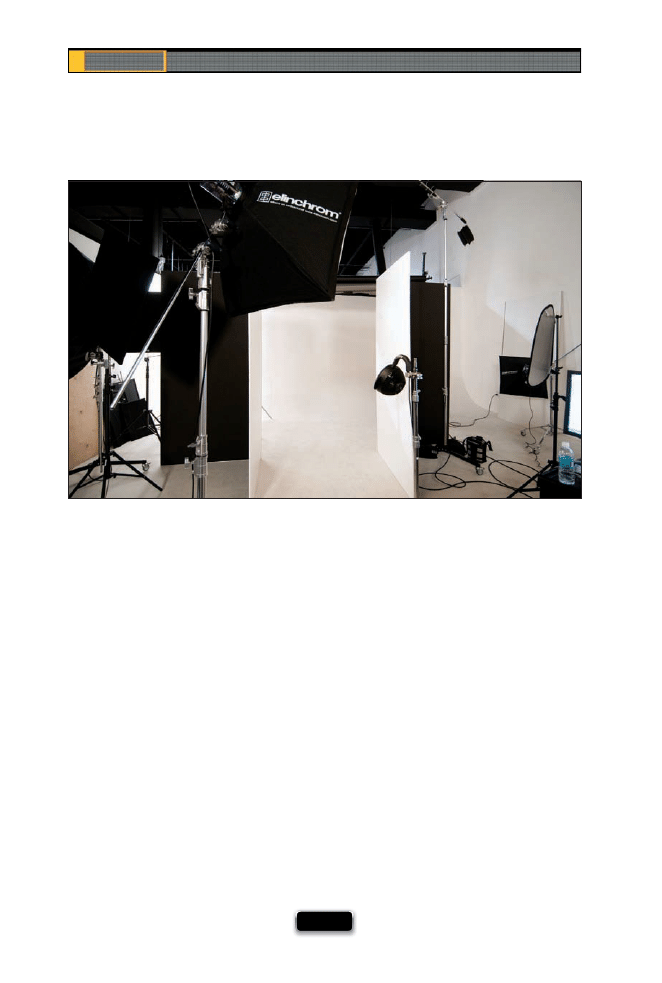
Chapter 6
The Digital Photography Book
[ 132 ]
If you’re doing a studio shoot, you want to keep your subject as comfortable and relaxed
as possible, and one way to do that is to not keep them waiting around—have everything
set up, tested, and ready when they get there. You shouldn’t be in the middle of setting
up the lights, or adjusting your camera gear, or anything else when your subject arrives
for the shoot. Have everything ready (test all the lighting—not only to make sure it works,
but have it set up approximately where you want it, and have your exposure pretty well set)
when they walk in the door. Don’t have your subject sitting there for 20 minutes while you
try to get the lighting right, or while you’re trying to get your camera settings right.
Besides looking unprofessional to your subject, they’re going to be uncomfortable sitting
there and not posing while you’re testing everything (I have a subject who can’t help but
smile and pose, even when I’m just testing the lights, and then when it’s time to actually
start smiling, they’ve been doing it for 20 minutes already—they’re “smiled out”). So, to
increase your chances of success, to keep your subject relaxed, and to conduct your shoot
like a pro, have everything ready when they walk in the door.
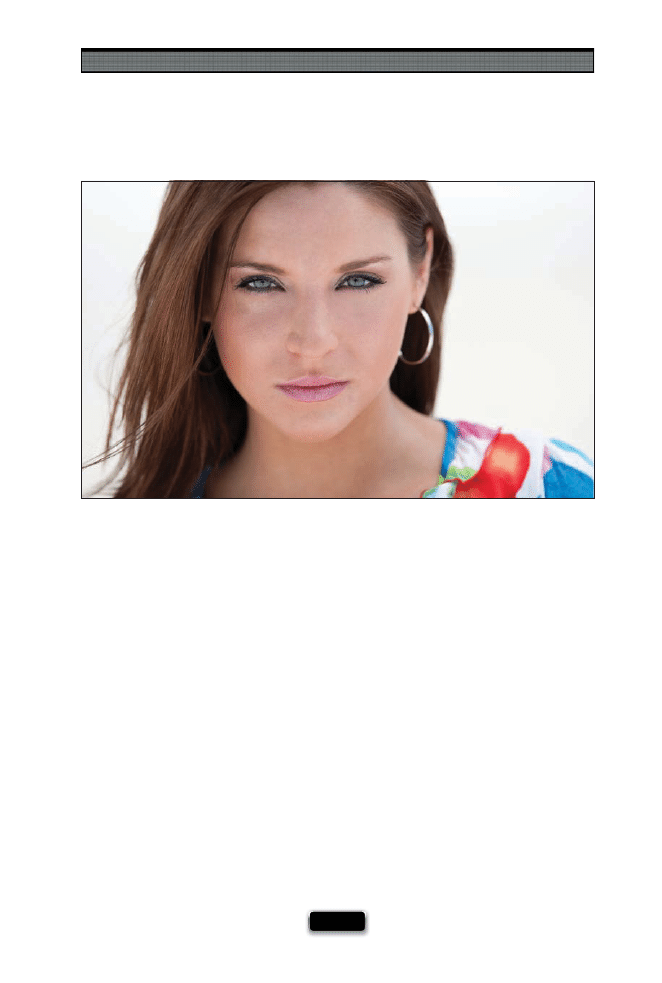
Shooting People Like a Pro
[ 133 ]
Right now, one of the most popular looks for casual and location portraits is to use a very,
very shallow depth of fi eld, so everything is pretty much way out of focus except your
subject. You get this look in two steps: (1) You have to have a lens that will allow you to
shoot at a very low-numbered f-stop (like f/1.8 or f/1.4), so most folks use a fi xed focal
length lens (like a 50mm lens—it’s not a zoom lens, it just shoots at a fi xed length of 50mm,
but that’s okay, that’s the depth we’re going for), because they’re not too terribly expensive
(usually less than $100). And, (2) for a location portrait, to be able to shoot outdoors at such
a wide-open f-stop, you have to shoot when it’s really overcast, you’re totally in dark shade
(like in an alley), or it’s nearly sunset. If not, shooting at that low of an f-stop number will
totally overexpose your photos, and they’ll be so bright they’ll be unusable. So, pull this
technique out of your bag on those cloudy, overcast, gray days—go to a downtown loca-
tion, and do your best to compose so you don’t see the sky. Also, make sure you’re careful
about your focus, because if you’re off by even a little, they’ll be out of focus. Focus directly
on your subject’s eyes, and understand that everything behind their eyes (like the back of
their head or their earrings, as in the shot above) will either be a little, or a lot, out of focus.
Super-Shallow Depth of Field for Portraits
SCO
T
T
KE
L
B
Y
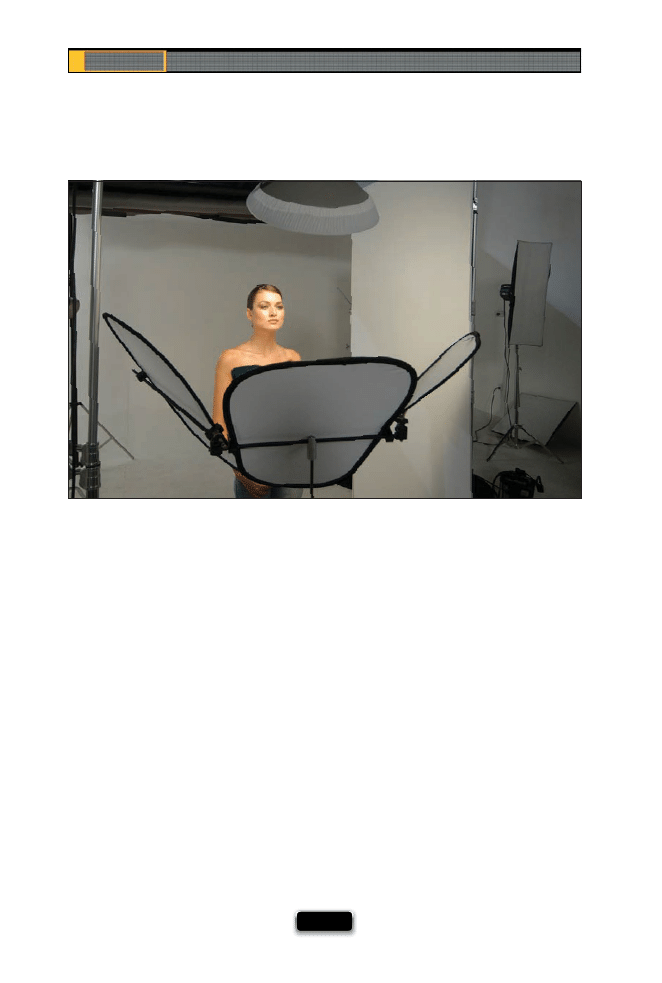
Chapter 6
The Digital Photography Book
[ 134 ]
Using a Triflector for Portraits
Another handy piece of gear for shooting fashion and beauty style portraits is a
trifl ector, and what this is, is three small refl ectors that mount on one thin horizontal
bar. They’re hinged so you can aim them right where you want them and create some
amazing wraparound light (well, refl ected light—they’re refl ecting light from a light
positioned above your subject). Because you have three of these aimable refl ectors,
you can not only just refl ect light on the center of your subject’s face, you can aim the
side refl ectors up to put refl ected light onto the sides of your subject’s face, giving you
a bright, clean look (which is why these have become so popular with beauty and
fashion photographers). Another nice bonus of using these trifl ectors is the great catch
lights they create in your subject’s eyes. There are a number of companies that now
make these and I’ve tried a few diff erent ones, but the one I regularly use is the Trilite
from Lastolite, with silver refl ectors on one side and white on the other (I like how light-
weight it is, and how easy it is to set up, but it doesn’t feel cheap and chintzy).
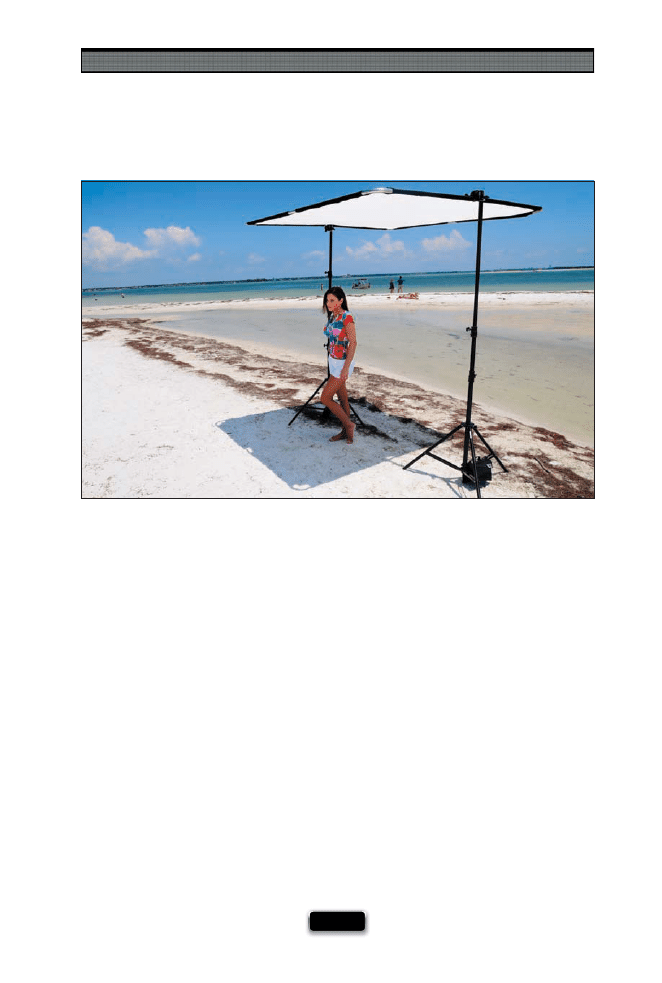
Shooting People Like a Pro
[ 135 ]
If you’ve ever wondered how the pros get those amazing portraits out in direct sunlight,
like at the beach, or out in the middle of the day in a fi eld, here’s the trick: they don’t.
They’re not shooting in direct daylight, because what you can’t see, just outside the frame,
is a large scrim positioned a few feet above the subject that diff uses and softens the light.
Think of it kind of like a giant softbox that spreads the light from the sun. What’s nice
about scrims is they’re very lightweight and portable (it’s just fabric wrapped around, or
attached to, a collapsible frame), and they’re not crazy expensive (you can get a pretty
decent-sized one, like 78x78" with frame and fabric, for around $375). Once you get your
scrim, you’re going to need to have a way to support it, because it has to go between the
sun and your subject (they’re usually put either directly over your subject, like a roof, or
behind or beside them at a 45° angle). These are really lightweight, so you can have an
assistant (or a couple of friends) support your scrim frame, or you can support them with
light stands. If you go the stand route, you’ll need to buy two little brackets that fi t on top
of your light stands to hold and tilt the frame, so don’t forget to get those, too. Also, you’ll
probably want to bring a refl ector, and maybe even a fl ash, depending on how late in
the day you’ll be shooting.

Chapter 6
The Digital Photography Book
[ 136 ]
Besides just shooting in a really bright, direct sun environment (see the previous page
for dealing with that), shooting at the beach presents its own set of challenges that
you’ll want to consider before doing a beach shoot. The fi rst is sand—the natural enemy
of camera gear. It doesn’t take much wind for that fi ne sand to start blowing around, so
if you’re out on location and need to change your lens, your best bet is to go back to
your car and change lenses there, or bring a changing bag that you can stick your camera
body and lenses inside of to do the quick switch-a-roo. Also, once your shoot is done
and you’re back in the studio, don’t forget to clean the outside of your camera and
your lenses, especially if you were shooting near salt water. Outside of that, don’t forget
to bring the non-camera things like bottled water for everyone on the shoot, a fresh
change of clothes (and towels) if you’re going to be shooting in the water at all, and
(I know this probably goes without saying, but I’m going to say it anyway) bring sun-
screen and reapply it often.

Shooting People Like a Pro
[ 137 ]
There are many famous photographers who specialize in capturing images of people on
the street as they wander around, capturing real life as it happens around them. Unfortu-
nately, these days people are much more aware, and wary, of people taking their photo
on the street than ever, but I learned a couple of great tricks from a day I spent wandering
the streets of New York City, with living legend Jay Maisel, that can really make a diff erence.
The fi rst was to shoot with a small lens. It can be a zoom lens, but the smaller and less
obtrusive the better. Jay pointed out that with shooting on the street, the longer the lens
you use, the higher the anxiety (and potential anger) of the people you’ll be shooting. With
a long lens on your camera, you go from being just another tourist on the street to what
they might consider paparazzi, and then things can get ugly. Besides just shooting with
a small zoom or fi xed focal length lens, Jay told me to “leave the lens hood off ,” because
anything that makes the rig look more pro means more resistance. Another tip was to not
look people in the eye when you see the shot you want—don’t lock eyes with your subject,
just take the shot, and if they look right at you, just smile and move on. Now, of course we
were shooting in New York City, where paparazzi are prevalent and people may be more
guarded. In most other cities, and in foreign countries, I’ve found that a nice smile goes
a long way and most folks will actually let you take their picture. If you show them the
picture on the back of your camera, then they’ll usually let you take a whole bunch of
shots. The main thing is to respect everybody. If they don’t want their photo taken, and
they make that known by a facial expression (or a hand gesture, ahem), don’t take it.

Chapter 6
The Digital Photography Book
[ 138 ]
If you’re shooting a subject for any commercial use, whether it’s a friend or a professional
model, make sure you get a signed model release from your subject while they’re still in
the studio. This release gives you, the photographer, the right to use their likeness in com-
mercial projects like ads, brochures, websites, and promotions, or to resell their images for
use in stock photography. You need your subject’s written permission on a release to use
their photos in this way, because without it you could open yourself up to lawsuits and an
embarrassing situation with your client. So, you can avoid all that by getting one signed.
Professional models are used to signing model releases (after all, what good would it be
if you hired a professional model for a job, and then they wouldn’t let you use the pictures
for anything?), so that won’t generally be a problem whatsoever, and there’s no need to
feel uncomfortable asking them to sign one. If the subject is a friend or co-worker, just
let them know up front that you’ll need them to sign a release giving you permission to
use their image, and you shouldn’t have a problem (I’ve never had someone I hired or
set up an actual shoot with refuse to sign a release). So now that you know you need a
release, where do you get one? You can fi nd dozens of free downloadable releases online
(just Google “model release”), or you can visit either the Professional Photographers of
America (go to ppa.com and search for “model release”) or visit the American Society of
Media Photographers (ASMP) at http://asmp.org/commerce/legal/releases/ for a great
article on releases. The laws regarding releases vary from state to state, and country to
country, but having a signed release sure beats not having one.

Shooting People Like a Pro
[ 139 ]
If we’re shooting a portrait, it’s our tendency to make sure our subjects are smiling in
every shot (after all, you want them to look like they’re happy and having a good time,
right?). Smiles are great, and we defi nitely want those shots, but make sure you work
some “real” shots in there, too. We’re not always smiling in real life, and when we’re
smiling for a portrait, it’s often a posed smile, so you’re not capturing a real genuine
emotion—you’re capturing a fake smile that we’ve all been doing since we were little
kids. If you want to capture portraits that have more depth, more emotion, and more
realism, include some shots where your subject isn’t smiling (as shown above). If you
want your portraits to be more real, this is a great way to open that door.
They Don·t Always Need to Be Smiling
Another thing we’re programmed to do is always have our subjects facing the camera.
While it’s true that having your subject’s eyes as the main focal point of an image adds
interest, some of the most dramatic and captivating portraits ever taken have the subject
looking elsewhere. Keep this in mind the next time you’re shooting a location portrait,
and you might be pleasantly surprised at what you’ll come up with.
They Don’t All Have to Look at the Camera
SCO
TT KELBY
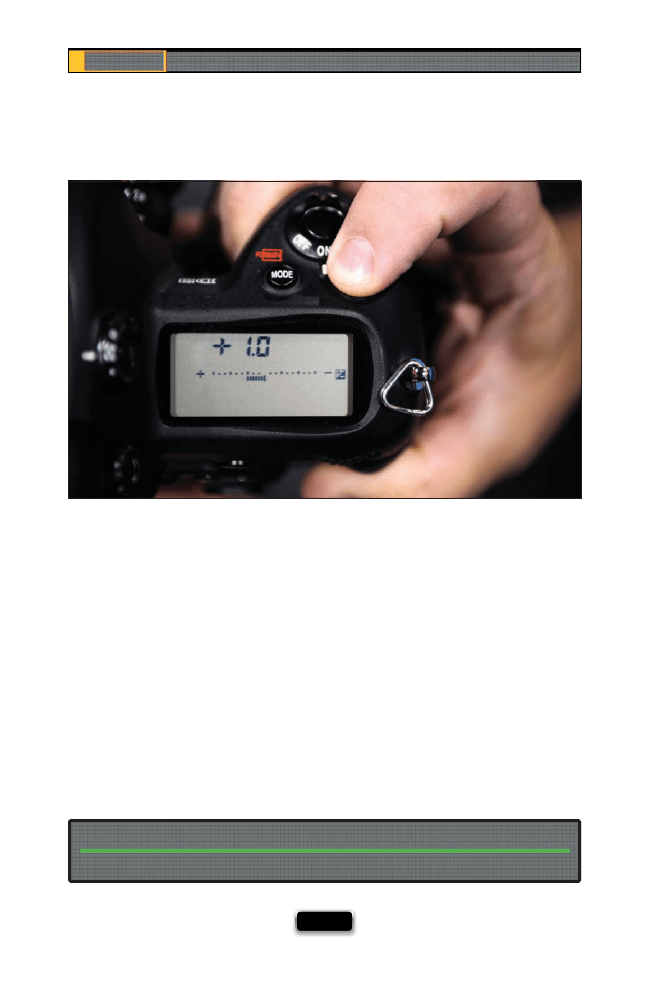
Chapter 6
The Digital Photography Book
[ 140 ]
Here’s a diff erent look to try: overexpose on purpose. This is great when you want a really
bright look for portraits, because it hides detail and gives everything kind of a dreamy,
morning-light look to it. Here’s how you set this up: go ahead and take a regular shot (let
your camera set your exposure), then add some positive exposure compensation, which
means you’re basically telling the camera, “Okay, I see you picked the right exposure for this
photo, but I want to override your choice and make it even brighter.” On Nikons, you’d do
that by holding the exposure compensation button (the +/– button on top of the camera,
right behind the shutter button), then rotating the command dial on the back of the camera
until you can see +1 in the control panel on the top of the camera (meaning you just made
the exposure one stop brighter than the camera thought it should be). On Canon cameras,
fi rst make sure the power switch is set in the top position (above On), then hold the shutter
button halfway down, look at the LCD panel on top, and turn the quick control dial to the
right to increase the amount of exposure compensation until it reads +1. Now, take a shot
and see how the image looks on the LCD monitor on the back of your camera. If it doesn’t
look bright enough, try increasing the exposure compensation amount and take another
test shot (and so on), until it has that dreamy, morning, window light look.
Exposure compensation works in all the standard modes except manual mode.
This Doesn’t Work in Manual Mode
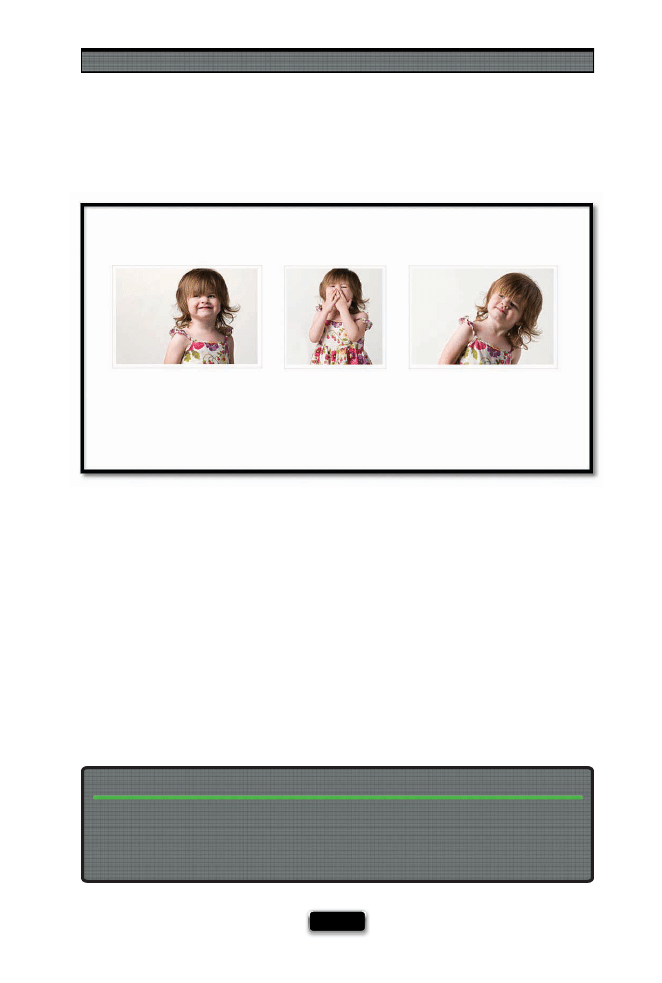
Shooting People Like a Pro
[ 141 ]
If you really want to capture a child’s personality (and like me, you’re not a big fan of the
stiff , posed shots), then keep fi ring while your child is goofi ng around on the set. Then,
take some of the best ones and put three or fi ve together as a series in one frame, like
the example shown above. By grouping a set of photos together like this, it instantly
goes from a still frame to a story, and I can tell you from experience, clients (parents)
just love it!
Put Multiple Photos Together to Tell a Story
Newborn babies generally have very fl at faces, and that’s one reason why it’s so hard to
get great photos of newborns. The trick is to make their faces look rounder by positioning
the baby, or your lighting, so one side of their face is in the shadows. That helps give
some depth and dimension, and keeps their face from looking too fl at.
The Trick to Shooting Newborns and Having Their Faces Not Look So Flat
SCO
T
T
KE
L
B
Y
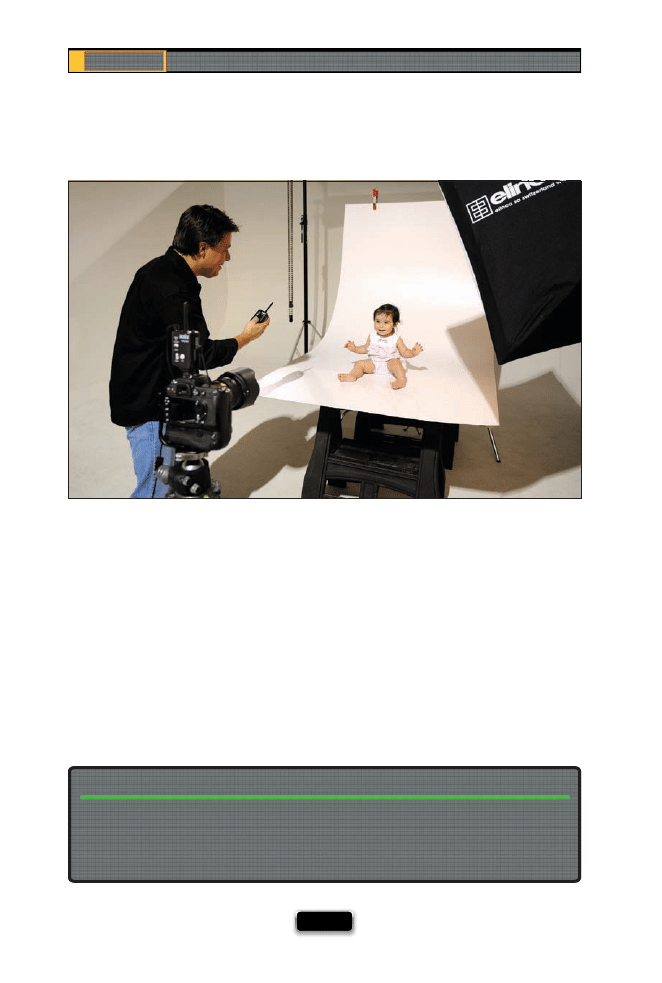
Chapter 6
The Digital Photography Book
[ 142 ]
I learned a great trick from Jack Resnicki, a friend who shoots high-end commercial
shots of children for print ads and displays in stores (and he’s one of the absolute best
out there). What Jack does is put the camera in position on a tripod, then rather than
being stuck back behind the camera (and putting something between the child and
the photographer), he comes right out in front, down on the fl oor, to get the child
engaged. Now you can totally interact with the child, and focus on getting reactions
and emotions that are usually so hard to create when your head is buried in the back of
a camera. To make this happen, all you need is a wireless shutter release (B&H Photo
carries these for all the major brands), and now it’s just you and your subject—and
you both can focus on the fun that makes such memorable shots.
Get Out From Behind the Camera for Kids
If mom, dad, and grandma are all on the set, they will all try, simultaneously, to get the
baby to look at the camera. The problem is that they’re usually standing in diff erent areas
behind you, so the baby is looking all over the place. Choose one person to be the “attention
getter,” and have them stand behind and to one side of the camera.
Only Have One Person Focus the Child’s Attention on the Camera
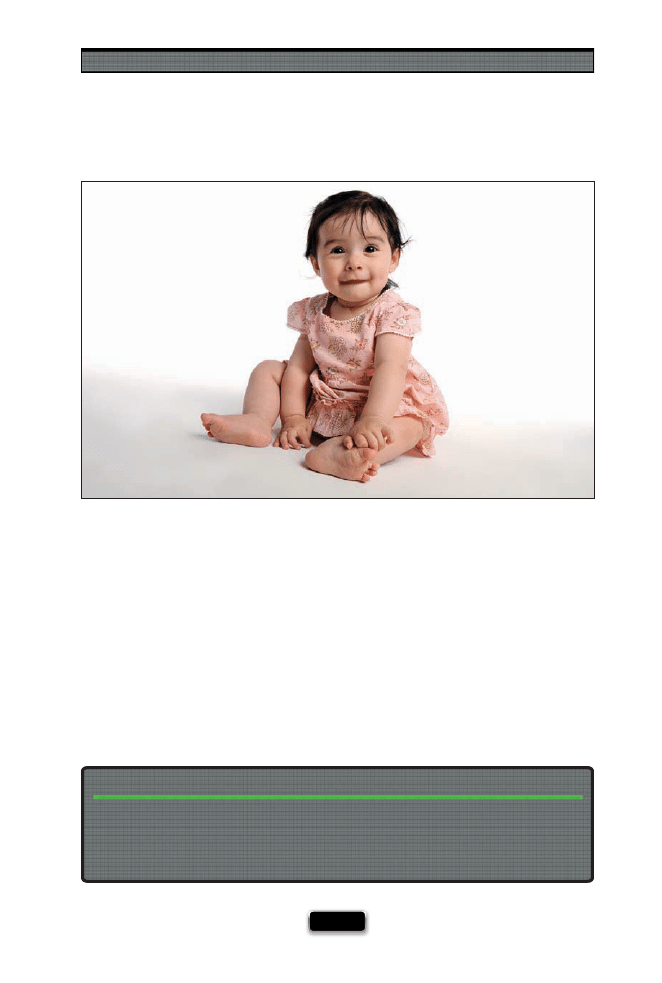
Shooting People Like a Pro
[ 143 ]
If you’re unhappy with your shots of kids, it may be because you’re shooting them like
most people do—from a standing position, so basically you’re shooting down at them.
The problem with this is that, on an average day, that’s how we see most children, with
us in a standing position looking down at them, and if we photograph them from the
same viewpoint, that’s how the photos are going to look—average. The trick is to shoot
from their level—get down on one knee, or sit (or even lay) on the fl oor, to capture them
from a viewpoint we normally don’t see, which honestly changes everything. It’s one of
the easiest things you can do that will have the greatest impact on your images.
If adults get intimidated and shy in front of a camera, imagine how intimidating a studio
(with all the lights and stands, etc.) is to a child. To make them relaxed, make it fun by
using the same trick you do with adults—give them an interesting or unusual toy or
stuff ed animal to get their mind off the camera and on the fun.
The “Hand Them a Prop” Trick Works Even Better with Kids
SCO
T
T
KE
L
B
Y
SHUTTER SPEED: 1/4000
SEC
F-STOP:
F
/4
ISO: 400
FOCAL LENGTH: 200
MM
PHOTOGRAPHER:
SCOTT
KELBY

Shooting sports, especially if you have a family member who is
one of the participants, is one of the most rewarding, thrilling,
exciting, frustrating, maddening, emotionally draining, cuss-word
emoting, expensive, laborious, and downright fun things you can do as a
photographer. I rank it right up there with accidentally submerging your
unprotected camera in saltwater—it’s kind of like that. Now, I say this
from experience, because these days I spend a good amount of my time
shooting professional sports—everything from motorsports to American
pro football, from horse racing to baseball—and let me tell you, it’s one royal
pain in the @$$! So, why do I do it? Because it’s a blast! Wait, I just said it’s
a pain. It is a pain. Just ask any sports shooter. The day after a serious shoot,
you’re hobbling around like you were actually playing the game instead of
just shooting it, but at the same time, there’s just nothing like the thrill of
shooting sports. Well, it’s not all a thrill, there’s a lot of what we call “hurry
up and wait,” because in all sports, there are lots of times where nothing is
happening (like timeouts, penalties, breaks between periods or quarters,
TV time outs, halftime, someone’s hurt on the fi eld, etc.), and you’re just
standing there talking to other sports photographers who are, by and
large, kinda cranky, because it’s in those downtime moments when they
realize how much they’ve spent on the equipment required to really shoot
sporting events right, and each time they pause to think about it, they die
a little inside, because they know they could be driving nice cars, or living
in comfortable homes, or they could have sent their kids to a great school,
but instead, here they are waiting for the timeout to end, and then they
turn to liquor to deaden the pain of a life spent on the road, and before
you know it they’re writing a volume 3 of their book, when all they really
want is a hug, a decent monopod, and a bottle of ibuprofen.
How to Get Professional Results
From Your Next Sports Shoot
[ 145 ]

Chapter 7
The Digital Photography Book
[ 146 ]
Auto ISO Lets You Always Freeze the Action
If you’re shooting a sport where you need to freeze the action (like football, basketball,
baseball, etc.), then you need to make sure you’re shooting at a shutter speed that freezes
action—around 1/1000 of a second. That’s easy to do in broad daylight shooting at a wide
open aperture like f/2.8 or f/4 like we would normally do with sports, but if it gets cloudy, or
the light changes, or it gets later in the day, you run the risk of your shutter speed falling
below 1/1000 and coming home with a bunch of blurry sports shots. That’s why you’ll fall
in love with the Auto ISO feature, which makes sure you never fall below a certain shut-
ter speed, because it will automatically increase the ISO without any input from you. What’s
especially slick about this is it won’t just jump from 200 ISO to 400 ISO, it’ll only move ex-
actly as much as it needs, so it might go from 200 ISO to 273 ISO (something you couldn’t
even choose on your camera if you wanted to, right?). On Nikon cameras, you turn this
on by going to the Shooting menu and choosing ISO Sensitivity Settings. Then you enter
the Minimum Shutter Speed you want to maintain (I use 1/1000 of a second), and turn the
ISO Sensitivity Auto Control on. Now, you get sharp shots every time, no matter how the
light changes on the fi eld. On Canon cameras, you need to set the ISO speed to A by look-
ing at the LCD panel and turning the main dial on top of your camera.
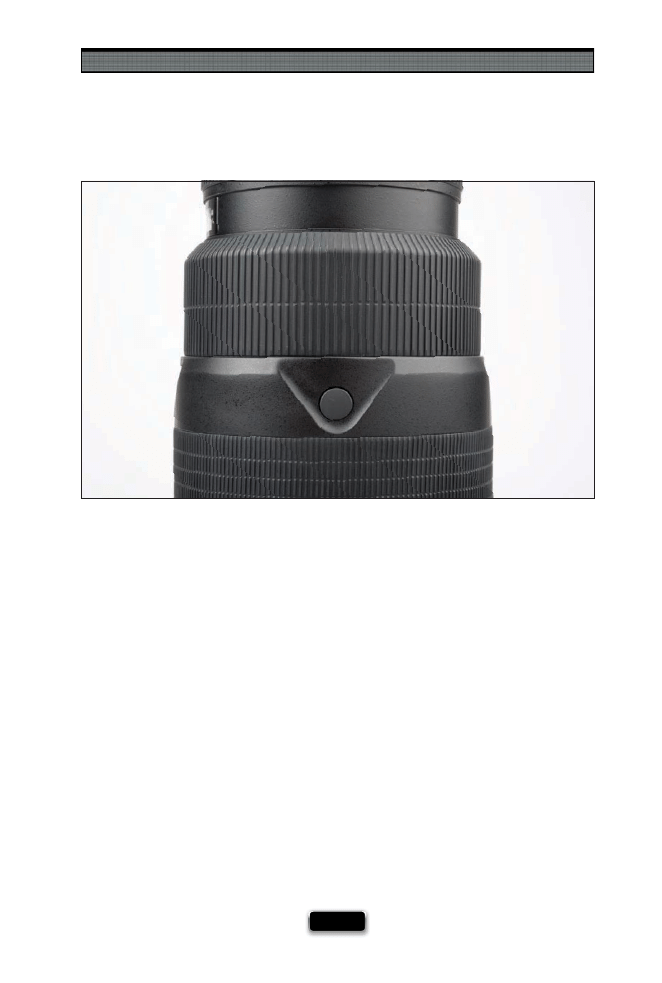
Shooting Sports Like a Pro
[ 147 ]
Using the Extra Focus Buttons on Long Glass
If you’re shooting sports with some “long glass” (200mm and on up), on most of these
lenses you’ll fi nd a second (or multiple) focus button(s) right on the barrel of the lens,
down toward the end. These let you use the hand that is steadying the lens to lock in
your focus, so when the play happens, you can just press the shutter button quickly.
However, there’s a little known feature that, when coupled with back focusing, can really
make a huge diff erence in “getting the shot.” We’ll use baseball as an example. Let’s say
there’s a runner on fi rst, so the play is going to be at second base. Go ahead and focus on
second base itself, then turn on the Memory Set button on your long glass (if your lens
has a memory lock). Now turn on your camera’s back focus (AE Lock) feature, so instead of
focusing when you press the shutter button, it focuses when you press the AE Lock but-
ton on the back of your camera. Then, swing your camera over to the batter, and press the
back autofocus (AE Lock) button to focus on him. When he swings, go ahead and get the
shot by pressing the shutter button (you can shoot fast because you don’t have to wait for
the autofocus to kick in—you already focused with the back autofocus [AE Lock] button).
If he gets the hit, swing immediately over to second base, then with your other hand on
the barrel, press the second focus button on the barrel of the lens, and it remembers the
focus you locked in for second base, so all you have to do is wait for the runner and press
the shutter button. Both areas, home plate and second base, will be in perfect focus, and
you’re right there, ready to capture the action.

Chapter 7
The Digital Photography Book
[ 148 ]
One of the most surprising things that new sports photographers learn is just how dark
a playing fi eld is at night. It may look bright from the stands, but for your camera, you
might as well be shooting in a museum, because you have to maintain a high enough
shutter speed to freeze the action (as I mentioned earlier, a good rule of thumb is 1/1000
of a second). So how big a problem is this? To give you an example, when shooting a
Chicago Bears night game at Solider Field in Chicago, I had to shoot at 4000 ISO most
of the night to get anywhere near 1/1000 of a second. From the stands, and even when
down on the sidelines, it looks incredibly bright, until you look through your viewfi nder
and see the shutter speed. So, if it’s that dim at Solider Field, you can imagine the chal-
lenge of shooting a high school football game. That’s the reason why cameras capable
of shooting at higher ISOs with minimal noise have become so popular (cameras like
Canon’s Mark III, and Nikon’s D700 and D3, have such minimal noise that I’ll often shoot
at 6400 ISO and the noise is barely noticeable). If you try to shoot at high ISOs like that
with lower-end cameras, the noise will be so distracting that you won’t get the results
you’re after. I hate to tell you to rush out and buy an expensive high-ISO camera, but like
I said in volume 1 of this book, shooting sports is expensive, so if you’re going to do it,
you’d better take a second job to pay for your gear.
Shooting Sports Like a Pro
[ 149 ]
The Advantage of Shooting From the End Zone
If you shoot football, you’ll probably spend most of your time shooting from the sidelines,
and if that’s the case, you’ll probably spend a lot of your time pulling your hair out as refs,
game offi
cials with the fi rst down markers, and TV camera crews (including the guy holding
the big parabolic mic dish) all walk into your shots, and block you from getting “the shot.”
That’s why you’ll see a lot of pros jockeying for space in the end zone and the corners of
the end zone—they usually have a clear, unobstructed line of sight, and they’re right
in position if someone breaks loose to “take it to the house” (as shown above in this shot
I took from the end zone of an Ohio State vs. Michigan game). The only “gotcha” is that
if possession changes, you have to decide if you want to go to the opposite end zone,
where the plays are now going towards (see, there’s always a gotcha!).
SCO
TT KELBY
Chapter 7
The Digital Photography Book
[ 150 ]
The “Holy Grail” for any serious sports photographer would be to have their work
published in Sports Illustrated magazine. All the best shooters are there, the images are
amazing, and getting to shoot for SI, as you’d expect, isn’t easy (which is maybe why
every sports photographer dreams of doing it). But what kind of images does a maga-
zine like Sports Illustrated run the most? I was teaching a class on shooting football and
I wanted to answer that question for my class, so I did a little research and I can tell you
that, based on that research, they run two types of images: (1) Action images, where
the ball (if there is one) is in the frame with the athlete (so if it’s a shot of a quarterback
or running back, they’re holding the ball, or if it’s the receiver, he’s catching the ball,
etc.). (2) Celebrations. Occasionally, it’s an editorial shot of an athlete who just suff ered
a crushing defeat, but usually it’s one or more players celebrating after a big win—
it’s Tiger Woods pumping his fi st, a hockey team with their sticks in the air, a soccer
player cheering on his knees, two football players bumping chests in midair. Almost
invariably, those are the two types of shots that make it into SI. Also, they’re usually in
tight on the players, so you can see their facial expressions and the emotions of the
game. So, how does this help you? Well, after all these years, you can imagine that Sports
Illustrated has fi gured out exactly which types of sports photos people want to see, right?
Right! Now you know which two types of shots you want to be sure to capture the next
time you’re shooting a game. Remember, if the ball’s not in the shot or the players aren’t
celebrating, it doesn’t make it into the magazine. There’s a reason.
The Two Most Popular Sports Shots
SCO
TT KELBY
SCO
TT KELBY
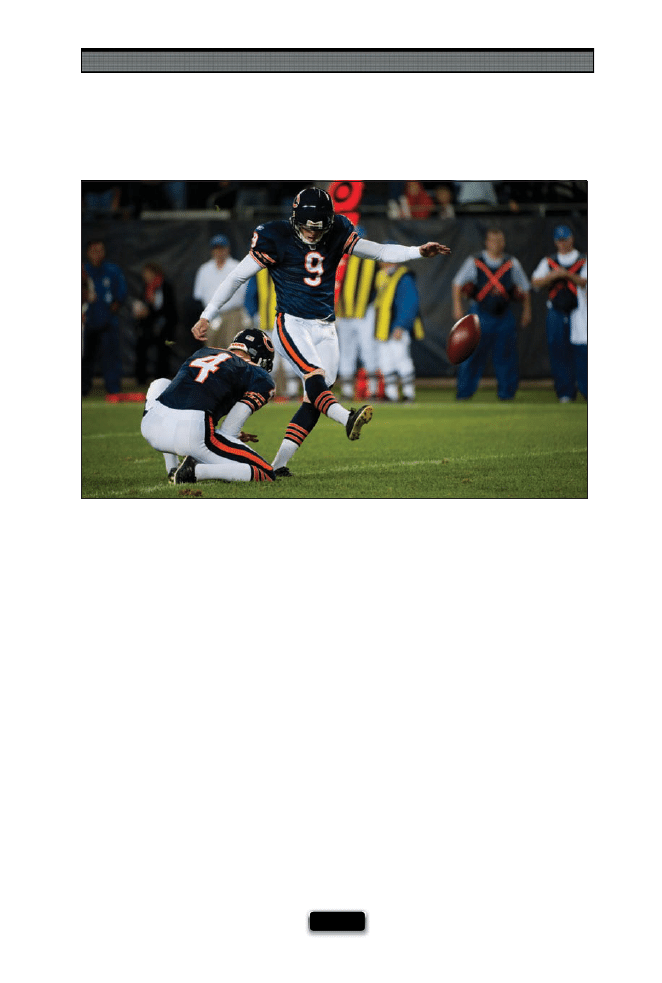
Shooting Sports Like a Pro
[ 151 ]
Once You·ve Got the Shot, Move On!
If you’re shooting a game where you’re not covering it on assignment, and you don’t
have a family member actually in the game, here’s something to keep in mind: Let’s
say you’re shooting football. Once you’ve got that great shot of the quarterback, where
he’s posed in the perfect position, and the ball has just left his hand for a perfect spiral
pass, and you framed it just right, and you know you nailed it, or that shot of the kicker
going for the extra point, and the ball has just left his foot, but it’s still in the frame
(as shown here)...move on. Don’t keep shooting them doing those moves for the rest
of the day expecting something diff erent. I’ve seen so many times where a friend will
shoot a game, and they’ll have 200 shots of the quarterback doing essentially the same
move. Sometimes they’ve nailed it in the fi rst round of shots, but they stay on him the rest
of the day, shooting literally hundreds of shots. Instead, once you’ve got “the shot” of
that player (the receiver leaping to catch that ball over his head, with the corner’s hands
trying hopelessly to defl ect it), you’ve got it. You got the shot. Move on to capturing another
aspect of the game, another player in another position, or just stick to where the action is.
When you get back, you won’t just have “the shot.” You’ll have “the shots!”
SCO
TT KELBY
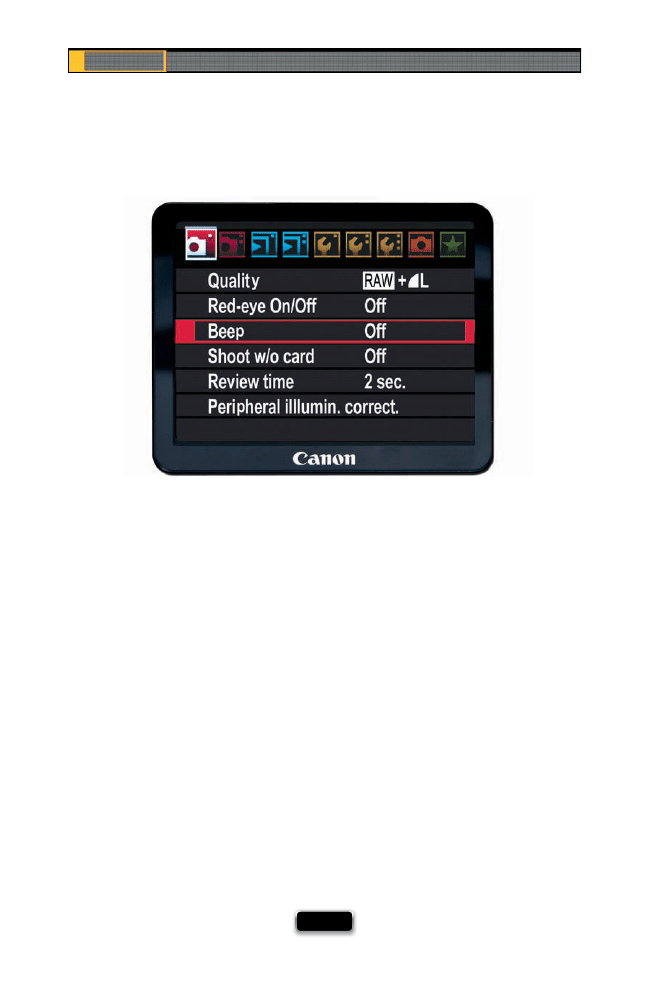
Chapter 7
The Digital Photography Book
[ 152 ]
There are certain sports, like tennis or golf, where being quiet and unobtrusive is the
name of the game for a photographer (yes, they sometimes will yell at you if you bring any
undue attention to yourself), and one simple thing you can do so you don’t stick out is to
turn off your camera’s autofocus beep—that little audible beep that lets you know your
autofocus has locked on. Instead, turn that off , then just look in the viewfi nder for the
visible signal that your focus has locked on (on Nikon cameras, it’s the Focus Indicator—
the solid round circle on the bottom-left side of the viewfi nder. On Canon cameras, it’s
called the Focus Confi rmation Light, and it’s found at the bottom right of the viewfi nder).
That way, the only sound they’ll hear is your shutter. To turn off the beep on a Nikon
camera, go to the Custom Setting menu, under Shooting/Display, choose Beep, and set
it to Off . On Canon cameras, go under the Shooting 1 menu, choose Beep, and set it to
Off , as shown above.
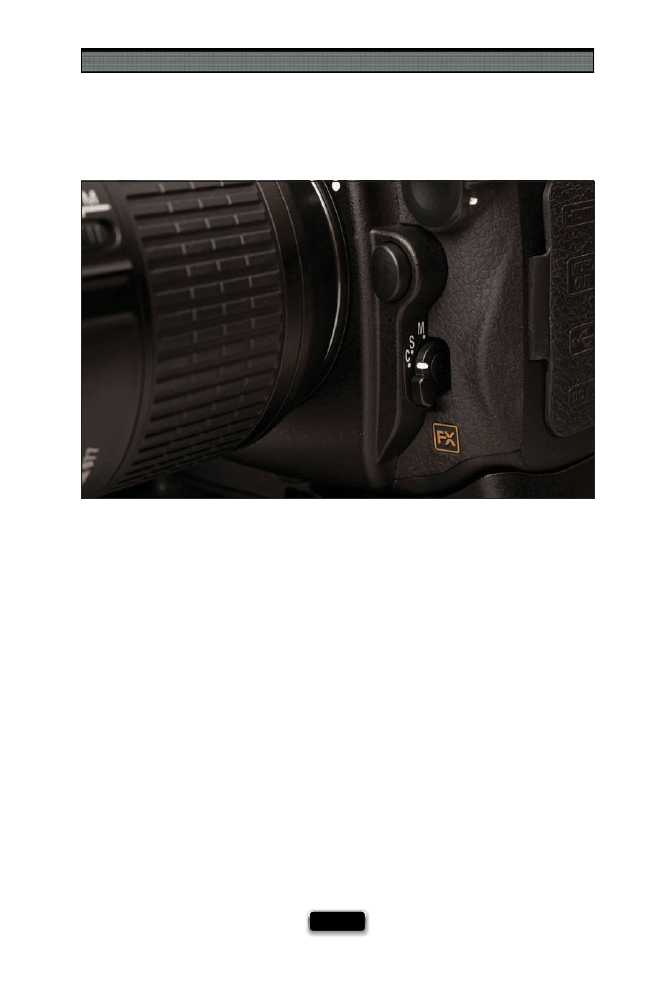
Shooting Sports Like a Pro
[ 153 ]
Having Your Focus Auto-Track the Action
If you’re going to be shooting sports, there’s a focus setting on your camera that you’re
going to want to change to help you track the action and stay in focus. Switch from the
default focus, which is for non-moving objects, to a focus mode that tries to automatically
track a moving object if it moves out of the focus area. On Nikon cameras, you’d switch
from Single-Servo mode to Continuous-Servo focus mode, and you do that right on the
front of the camera itself—it’s that little switch on the front, right under the lens, marked
M, S, and C. You want C (for Continuous-Servo). On Canon cameras, it’s called AI Servo AF,
and you turn it on by pressing the AF•Drive button on the top of the camera, and then
turning the main dial until you see AI Servo in the top LCD panel.
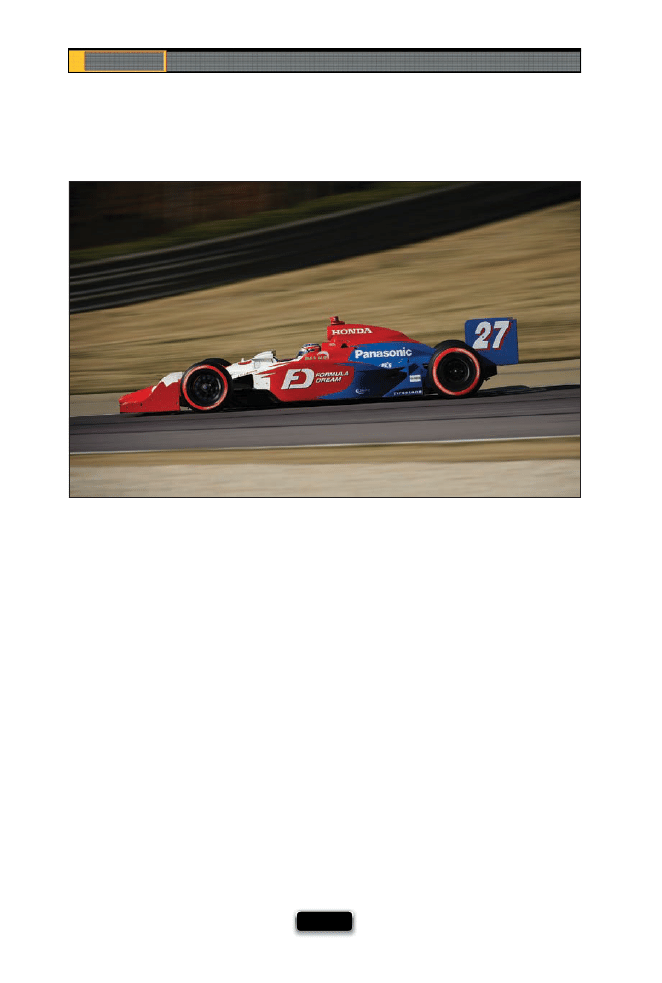
Chapter 7
The Digital Photography Book
[ 154 ]
If you’re shooting a sport like car racing, bike racing, or even an air show, freezing the ac-
tion doesn’t always look right. Take car racing, for example. If you completely freeze the
action, you won’t see the wheels of the car spinning—they’ll be frozen like the car was
parked on the track, rather than racing around it. Same thing with the wheels on a bike
or motorcycle, or the propellers on a stunt plane—they’ll all look like they’re standing
still. The way around this is to lower your shutter speed to around 1/250 to 1/360 of a
second, and follow along with the moving object (called panning). That way, the shutter
speed will be slow enough to show the wheels (or prop) spinning, and you’ll get the
sense of motion and speed that would be missing otherwise.
Freezing Motion Doesn·t Always Look Good
SCO
TT KELBY

Shooting Sports Like a Pro
[ 155 ]
If you’re shooting your kid’s game, here’s a tip to help you get more professional-looking
images: try to set up the shot so instead of seeing a fence (very common), or cars in
the parking lot, or the road near the fi eld, you see the crowd (or the other parents, or the
other players) in the background. This will look especially good if you’re shooting wide
open (using the lowest number f-stop your lens will allow, like f/2.8 or f/4), which puts
the background out of focus.
SCO
TT KELBY
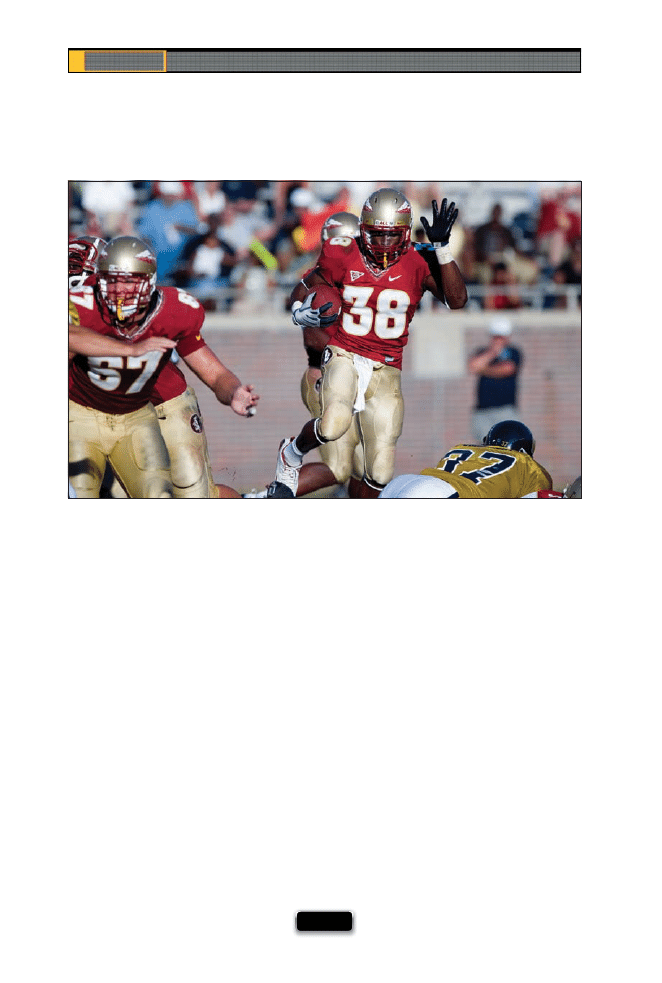
Chapter 7
The Digital Photography Book
[ 156 ]
If you’re shooting a game during the day, try to remember to position yourself so the sun
is over your shoulder while you’re shooting. That way, the players will be lit by the sun,
and you’ll be able to see their facial expressions. If not, they’ll be mostly in the shadows,
which is especially bad if they’re wearing batting or football helmets. You might have to
shoot from the opposite side of the fi eld (which may well be the opposing team’s side),
but at the end of the day, you’ll be able to clearly see all the players, and the emotions
that make up the game.
Leveraging Daylight to Light Your Players
SCO
TT KELBY
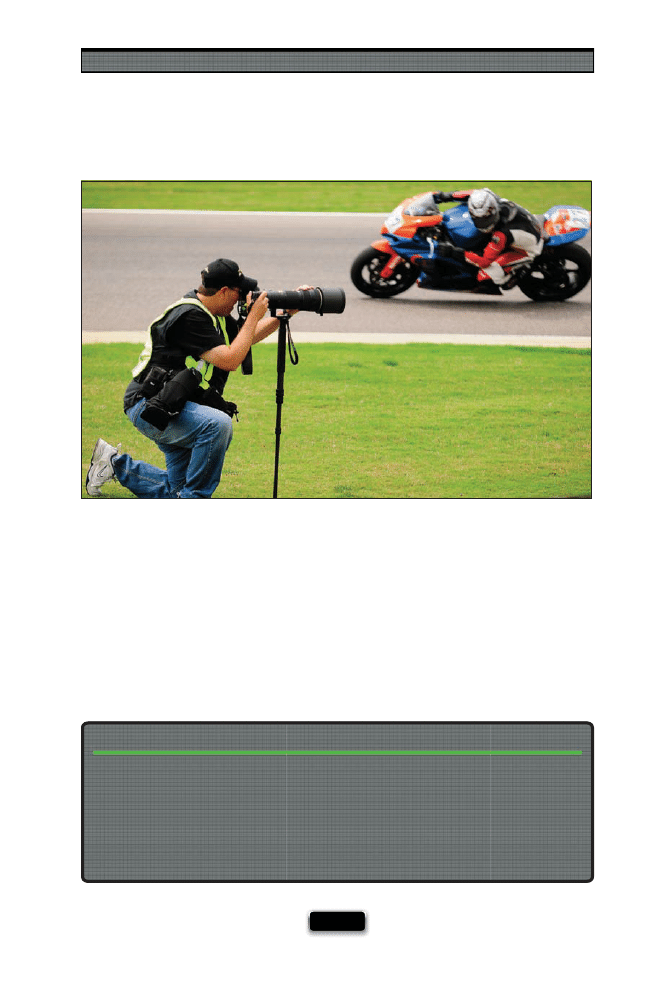
Shooting Sports Like a Pro
[ 157 ]
The next time you see a sporting event, take a look at the photographers shooting the
event, and one thing you’ll see again and again is that pros are often shooting down
on one knee so they get a lower, and better, perspective for their shots. This goes for
everything from motor racing to football—that lower perspective gives you the feeling
of being right there, and helps to make the athletes (or their cars) look “bigger than life.”
Mike Olivella, a pro-sports photographer, turned me on to one of his tricks for saving his
knees when shooting at a low perspective: buy some gel-fi lled knee pads from the local
home improvement store. I fi nally did that a year or so ago, and once I tried them, all I
could think was “why did I wait so long?” They’re inexpensive, very durable, and every
time I wear them, at some point another sports photographer down on his knees looks at
me, and through their grimace, says, “I’ve got to get some of those.” Check out page 166
where I’ve got them on.
Save Your Knees (You’ll Thank Me Later)
MA
TT KLOSK
O
WSKI

Chapter 7
The Digital Photography Book
[ 158 ]
If you want your sports photos to have more impact, here’s another tip to help: try to iso-
late your subject. There are two ways to do this, the fi rst being simply to frame your shots
so that only one or two people appear in the shot (if at all possible). When you get crowds
of people in the shot, it’s hard for the viewer to tell which person you want them to look
at. The last thing you want to do is to make the viewer start searching your photo—try-
ing to fi nd the ball, or the puck. Look for those opportunities to shoot a player in a team
sport all by themselves on the fi eld, but during a moment of action. If you’re shooting
something like soccer or football, you can have more than one player in the frame, but try
to make sure your composition makes it instantly clear which player they’re supposed
to look at, at fi rst glance. The second method is to use a wide-open aperture (f/2.8 or f/4)
to put everything in the background out of focus. F/11 is death for sports shots, and even
an NFL game can look like a high school game without that shallow depth of fi eld you’re
used to seeing from the pro shooters. Keep the idea of isolation in mind, and you’ll have
shots with much more impact your next time out.
Isolate Your Subject for More Impact
SCO
TT KELBY

Shooting Sports Like a Pro
[ 159 ]
There’s nothing more disappointing for a sports photographer than to have to shoot
from the grandstands, and one of the main reasons why is that you’ll come away with
shots that are very similar to what everybody else in the stands saw that day. You’re not
bringing anything to them that they couldn’t see with their own eyes. That’s why it’s so
important to get in really, really tight when you’re shooting sports. That way, you’re bring-
ing them something that they can’t see with their naked eyes. You’re bringing the emotion,
the story of the game (not just the score), you’re showing the sweat, the anger, the joy, and
real things that make sports what it is—not just far off shots of faceless people running
around in uniforms. That’s why people react so positively to really close-up shots—you’re
showing them something they don’t usually see. It’s not just the ordinary view. We don’t
get that close to the athletes during a game, and seeing this new side of the game is
fascinating to the viewer. You’re revealing another side of the game by sharing this emotion.
That’s why we try so hard to get really great access to shoot sporting events. The great
shots don’t usually come from the stands (unless you’ve got a really, really long lens, and
sadly most major stadiums, at least here in the U.S., are really cracking down on fans
bringing pro camera gear to professional sporting events. Many stadiums now have a
4" rule—no lenses longer than 4").
SCO
TT KELBY
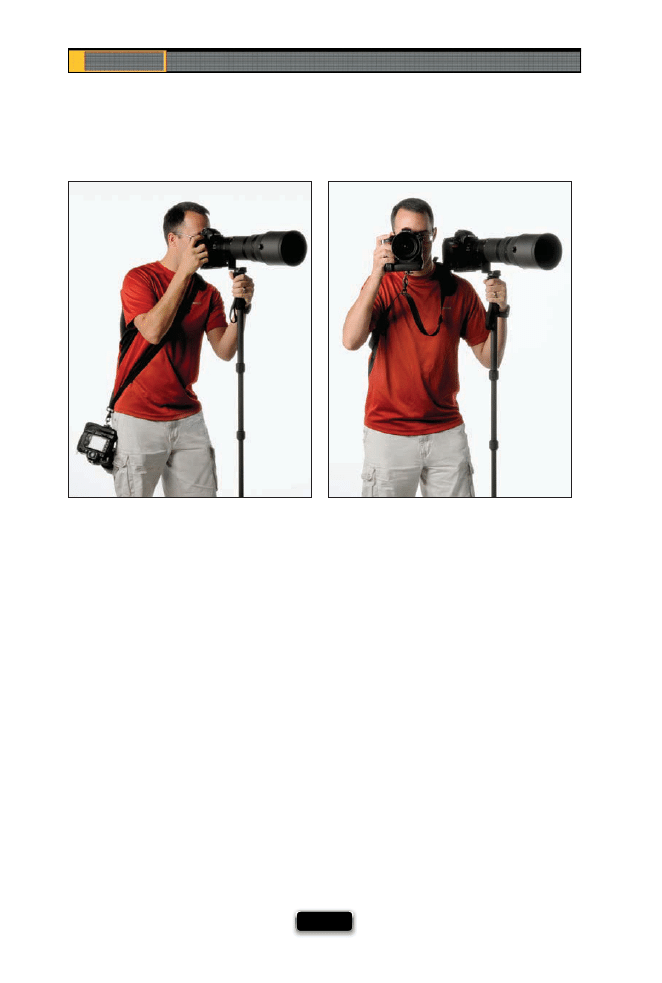
Chapter 7
The Digital Photography Book
[ 160 ]
Last year, I was turned on to BlackRapid’s R-Strap, which for sports photographers using
two camera bodies is a dream come true. (By the way, many pro sports shooters carry two
full camera rigs during the event: one with a really long lens, and a second body with a
short telephoto or wide-angle for when the action gets really close.) What I love about
the R-Strap is that it straps across your chest, and it screws into the bottom of your cam-
era, so your camera kind of hangs there like a gun in a holster (except there’s no holster).
When you need to take a quick shot with your second body (“quick” being the operative
word here), you just reach your hand down to your side, and it falls right into place on
your camera—you just pull your camera up to your face, and it slides right along the
strap, giving you a fast, comfortable way to get the shot. When you’re done, you just put
it back down by your side. Being able to reach down and have my second body ready
to shoot in a split second is a sports shooter’s dream—I wouldn’t want to shoot a sports
event without it. You can watch a video demo of the R-Strap at www.blackrapid.com.
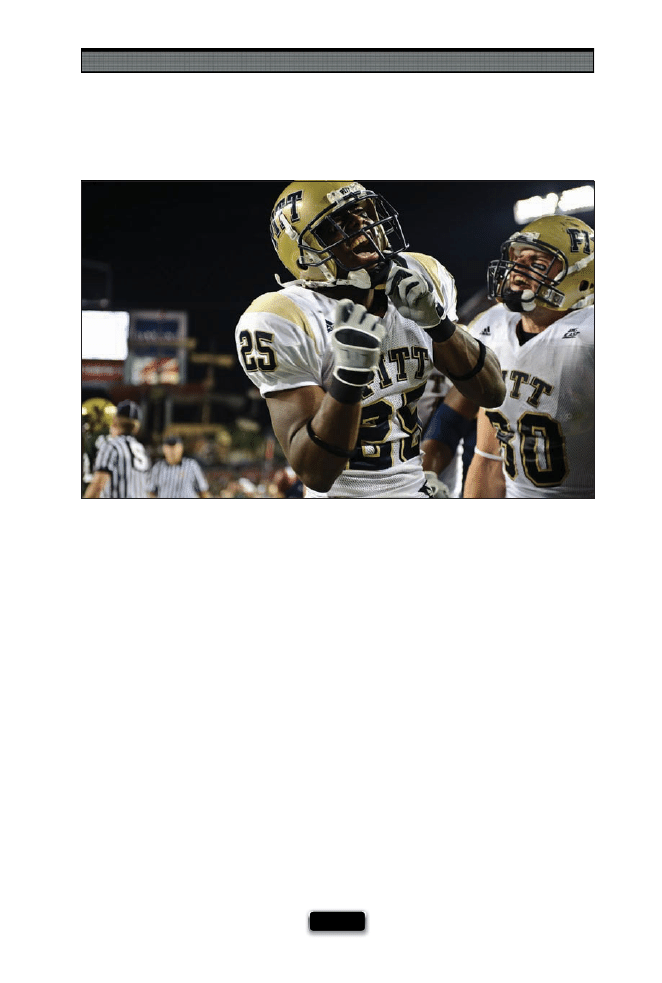
Shooting Sports Like a Pro
[ 161 ]
It’s our natural reaction to put down the camera when the play is over, but that is pre-
cisely when you want to keep shooting—this is when you get to tell a story with your
images. Imagine capturing the look on a quarterback’s face when he realizes he’s thrown
an interception, or when a soccer player is given a red card. How about a coach when
they’re given what they think is a bad call. That’s when the emotion pours out, and if you
stop shooting at the end of the play, you’ll miss some of the most dramatic, emotional,
and even moving, moments in a game—the shots that tell a story.
SCO
TT KELBY
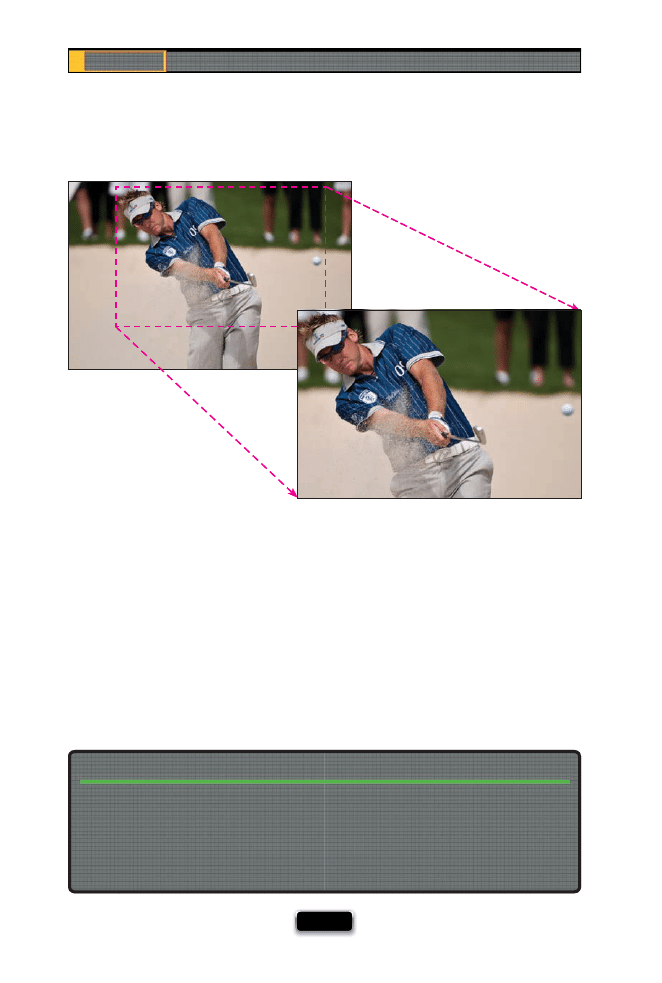
Chapter 7
The Digital Photography Book
[ 162 ]
Right now, full-frame sensor cameras are getting all the buzz, but for shooting sports, you
might want to consider hanging onto that standard-crop sensor digital camera. Here’s why:
because of the zoom factor regular-crop sensor digital cameras have, they will get you much
closer to the action. For example, a cropped-frame dSLR, like a Nikon D300, will get you 50%
closer to the action, or for Canon shooters, an EOS 50D will get you 60% closer than the
same lens on a full-frame camera. Here’s how that works out: If you put a full-frame 200mm
lens on a camera (like a Canon 5D Mark II), you get a real 200mm lens. But put that same
200mm lens on a Canon 50D, and it essentially becomes a 320mm lens. Add a 1.4x tele-
converter on that 50D with that same lens, and now you’ve got nearly a 450mm lens (for the
price of a 200mm lens). Landscape photographers make out like bandits with full-frame
cameras, because the full-frame sensor lets their wide-angle lenses get much wider. But
when it comes to sports, the “old school” 1.5x and 1.6x cropped sensor is very attractive.
Full-Frame vs. Standard Digital Chip
When I talk about this topic, invariably someone asks, “Why don’t you use the Nikon D3’s
built-in high-speed (Auto DX) crop, which switches you to the same cropped-sensor fram-
ing as a D300?” It’s because using that feature cuts you down from 12-megapixel images to
6-megapixel images, and for sports, you sometimes need to be able to crop in tight after
the fact (in Photoshop), and still have enough megapixels to make a high-resolution print,
so it’s not really an ideal option.
High-Speed Crop on a D3 or D700 Is Not the Same!
Standard-Crop Sensor
SCO
T
T
KE
L
B
Y
Full-Frame Sensor

Shooting Sports Like a Pro
[ 163 ]
Don·t Have “Long Glass?” Rent It for the Week!
If you have a special game or assignment coming up, and you don’t have long enough
glass to shoot the game the way you want to, then just rent it. I’ve done exactly that on a
few diff erent occasions from a company called LensProToGo.com. They have all the long
glass for both Canon and Nikon shooters (they rent camera bodies, as well), and they
ship directly to you overnight. What most people are surprised to fi nd is how reasonably
priced they are. For example, to rent a lens like a Nikon 300mm f/2.8 (a great, fast lens
for shooting sports) for an entire week is just $230. If that seems like a lot, the alternative
is buying that lens. B&H Photo has it in stock (as of this writing) for $4,899.95. So, even
though you might not want to rent all the time, when you have a really important game,
or a big assignment, they’re a great resource (I’ve rented lenses from them a number of
times, and they’ve always been great—never a problem once).

Chapter 7
The Digital Photography Book
[ 164 ]
You’ll be there at the game, and you’ll see a player getting ready to dash down the fi eld,
and you’ve got a really great angle on them, and so you take the shot. As good as it might
have looked in the viewfi nder right then, when you open that photo later in Photoshop
or Lightroom, you’re going to look at that photo and wonder, “What was I thinking?” Don’t
shoot football players in the huddle or standing around. Don’t shoot the runner standing
with one foot on fi rst base. Don’t shoot the outfi elder waiting for a pop fl y—wait until
the ball is there. Shoot the action, because when you start looking at your photos later,
you’re going to hate the shots that don’t have it.
SCO
TT KELBY
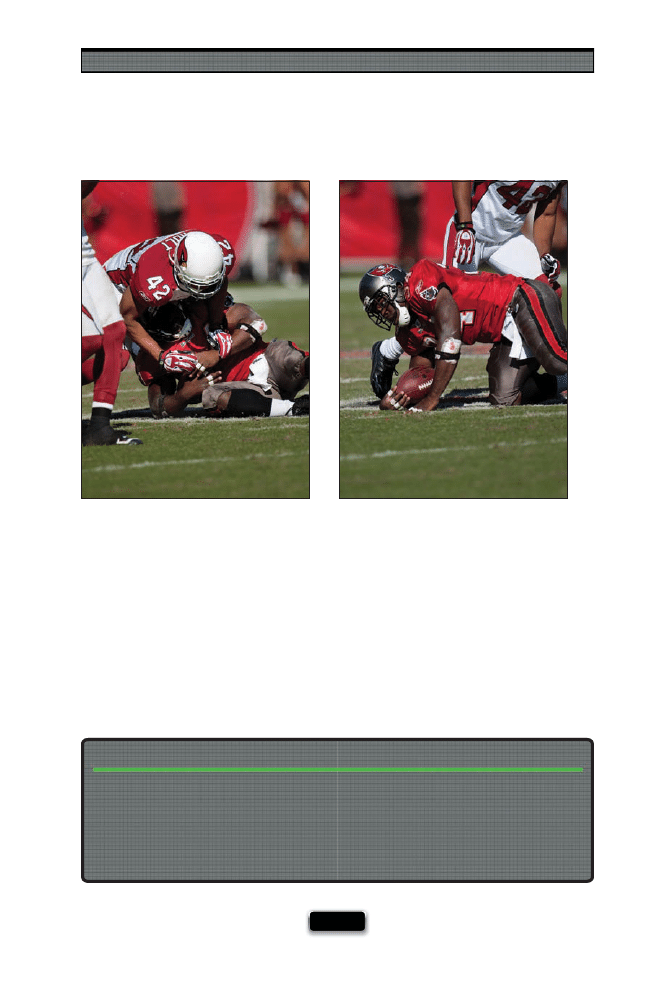
Shooting Sports Like a Pro
[ 165 ]
Another Reason to Keep Shooting After the Play
If you’re shooting a team sport like football, it’s easy to have the player you just shot
carrying the ball, lost in a big pile of jerseys. Who was that player? Was it #22 or #37? If
you keep shooting for a few moments after the play is whistled dead, you’ll be able to
see who fi nally comes up with the ball, and you’ll have a reference photo with their
number on it, so you can fi gure out later who the ball carrier on that play actually was.
In the example shown here, when the player started getting up (shown on the right),
I could see his number on the top of his shoulder pad (#34).
SCO
TT KELBY
SCO
TT KELBY
You can get more frames per second with certain Nikon cameras (like the D300 or D700) by
adding a battery grip. Adding one (and using the proper battery confi guration) increases
your fps rate, sometimes pretty signifi cantly. For example, adding a battery grip to a Nikon
D700 increases the fps from fi ve frames per second to eight frames per second. That’s a
60% increase in frame rate (not to mention that with a battery grip, you now have a shutter
button on top for shooting vertical, which believe me, makes all the diff erence in the world).
Add a Battery Grip for More Frames Per Second

Chapter 7
The Digital Photography Book
[ 166 ]
With all the gear you’ll be carrying around to shoot a sporting event, the last thing you
want to have to do is lug around your camera bag. Worse yet, if you do bring it with you,
you have to keep a close eye on it all day, because while you’ve got your eye in the view-
fi nder, someone else could have their eye on your expensive gear. You get the shot, they
get your other camera and lenses. That’s one reason why a couple of years ago I switched
to Think Tank Photo’s Modular belt system, where my spare lenses, accessories, memory
cards, water bottle, and even my cell phone are all just inches away, because they’re
right there wrapped around me, attached to a belt. Their system does an amazing job
of distributing the weight, and like most sports shooters who use these (and there are a
lot) will tell you, you completely forget you have it on. When you buy one of these, you
can choose which types of lens pouches you want (they have sizes to fi t all your regular
lenses), which types of accessory pouches you want, and basically you just customize
this belt system to your gear and your needs. I don’t know a single sports shooter who
has bought one of these that doesn’t swear by it. Go to www.thinktankphoto.com to see
what it’s all about.
You Don·t Have to Drag Around a Camera Bag
BILL SMITH
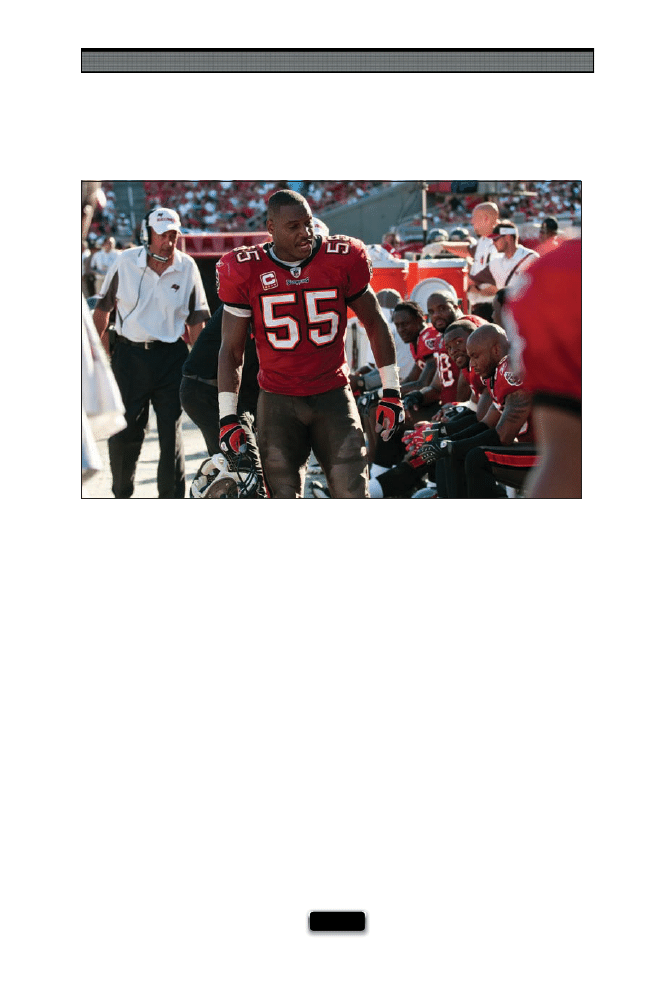
Shooting Sports Like a Pro
[ 167 ]
Start Shooting Right Before the Game
Right before a big game, the energy level is really high, and diff erent athletes deal with
this rush/stress/excitement in diff erent ways. Some are all pumped up, and they’re trying
to fi re up the other players, and some are very serious and quiet at moments like this, as
they mentally prepare for the battle. This time, just a few minutes before the game, is
a great time to catch some very emotional images right along the sidelines, or in the
tunnel, or outside the locker room. Keep an eye out for capturing the diff erent personalities
and how they’re reacting to what’s about to happen, and you might come away with
some killer shots before the opening whistle even blows.
SCO
TT KELBY

SHUTTER SPEED: 1/125
SEC
F-STOP:
F
/4.5
ISO: 200
FOCAL LENGTH: 46
MM
PHOTOGRAPHER:
SCOTT
KELBY

Each of the other chapters in this book teaches you techniques
that are pretty specifi c to a particular type of photography (like
portraits, or shooting in the studio, etc.), but I wanted to once
again include a collection of techniques that is just simply about getting
better shots. At the end of the day, that’s all we really want, right? We just
want to take better photos. It’s why we all work so hard to learn how to use
our cameras—not so we can play around in the menus all day, it’s because
we know that once we really know the camera inside and out, then we
can focus on getting the shots (and not the technology behind it all). Now,
I know what you’re probably thinking, “Scott, this all makes perfect sense,
except for one thing: I’m reading this in one of the chapter introductions,
and traditionally this is a part of the book that’s not widely known for
contributing to the chapter that lies ahead. What gives?” Well, here’s the
thing: my statement above would all make perfect sense if the chapter that
follows was actually about making your photos look better, but sadly, it’s not.
What follows is actually a 22-page excerpt from my doctoral dissertation on
neo-classical psychology patterns, which includes a non-apologetic look at
man’s inability to reconcile events from his pre-post-natal experiences and
how those events have aff ected his non-verbal communication skills in the
post-modern workplace. The reason I’m sharing this excerpt with you here
is because I feel it deserves a wider audience than just my professor, who
incidentally did not agree with several of the conclusions put forth in my
well-documented, thoroughly researched, and fl awlessly executed paper,
which is why he will be referred to throughout the upcoming chapter as
simply “Professor Big Poopie Head.” Now, if you’re thinking, “Dr. Kelby, I didn’t
know you had earned a doctorate,” just remember this one underlying rule:
I’m lying.
Pro Tips for Getting
Better Photos
Tricks of the Trade for Making
All Your Shots Look Better
[ 169 ]
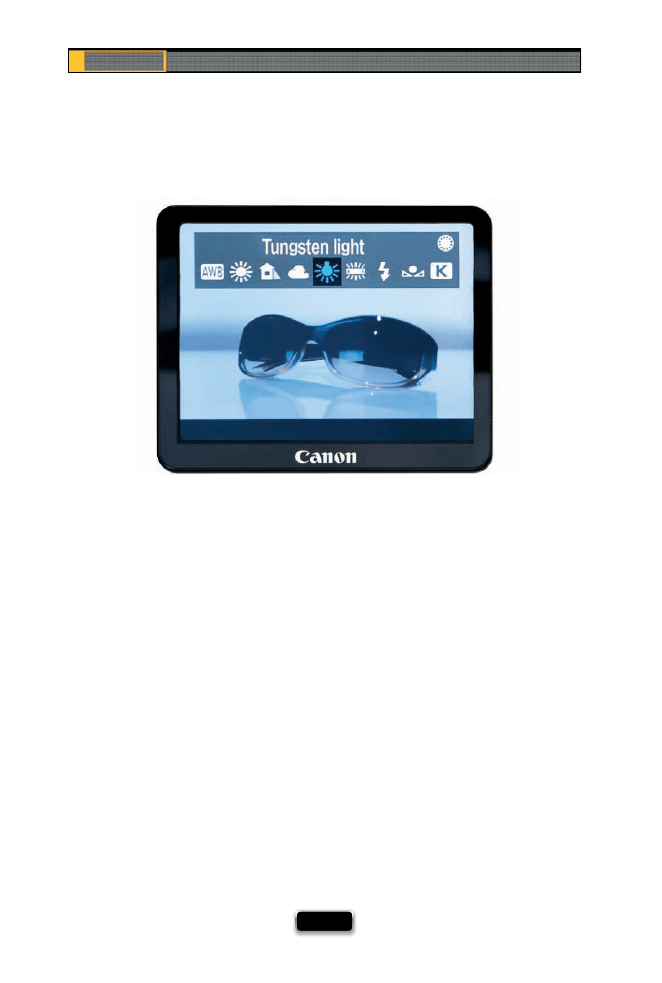
Chapter 8
The Digital Photography Book
[ 170 ]
Using Live View to Set Your White Balance
There is a very cool new feature in some of the latest Nikon and Canon dSLRs that lets you
use the LCD monitor on the back of the camera as a viewfi nder, so you can compose and
shoot your image using just it (just like a point-and-shoot camera). Now, it may not sound
that appealing, but check this out: on some of these newer cameras, when you’re view-
ing the scene on your LCD, you can actually toggle through the diff erent white balance
settings and see right then and there how each white balance setting is going to look
for that particular scene. This makes dialing in a great looking white balance absolutely
simple—just scroll through the list, and when you see one that looks good, stop. Try it
once, and you’ll use it again and again (especially easy when you’re on a tripod).

Pro Tips for Getting Better Photos
[ 171 ]
Most folks keep their camera’s metering set at the default, which is evaluative metering
(on Canons) or matrix metering (on Nikons) and that just means it kind of looks at the en-
tire frame and it tries to create an exposure that works for the entire image. These modes,
on today’s cameras, do a pretty amazing job most of the time. However, there’s another
type of metering—spot metering—you’ll want to know about for those sticky exposures,
like in the image above left, where I’m trying to capture both the light inside the little
entryway and outside the building at the same time. In the default evaluative (or matrix)
metering mode, it’s going to make that entryway very dark. So, just switch to spot meter-
ing mode. This essentially tells the camera, “the part of the photo I want to look good is just
this little tiny area right in the center of the frame.” Then, you aim the center of the frame
directly at that area, hold the shutter button down halfway to lock in that exposure read-
ing, then reframe your photo to look how you want it (without releasing that shutter but-
ton), and take the photo. In the example above right, I just switched from matrix metering
to spot, then aimed at the table inside that doorway. That’s all it took (just remember to
switch back to matrix, or evaluative, metering when you’re done, because you generally
only want to use spot metering in tricky exposure situations).
Before
After
SCO
TT KELBY
SCO
TT KELBY
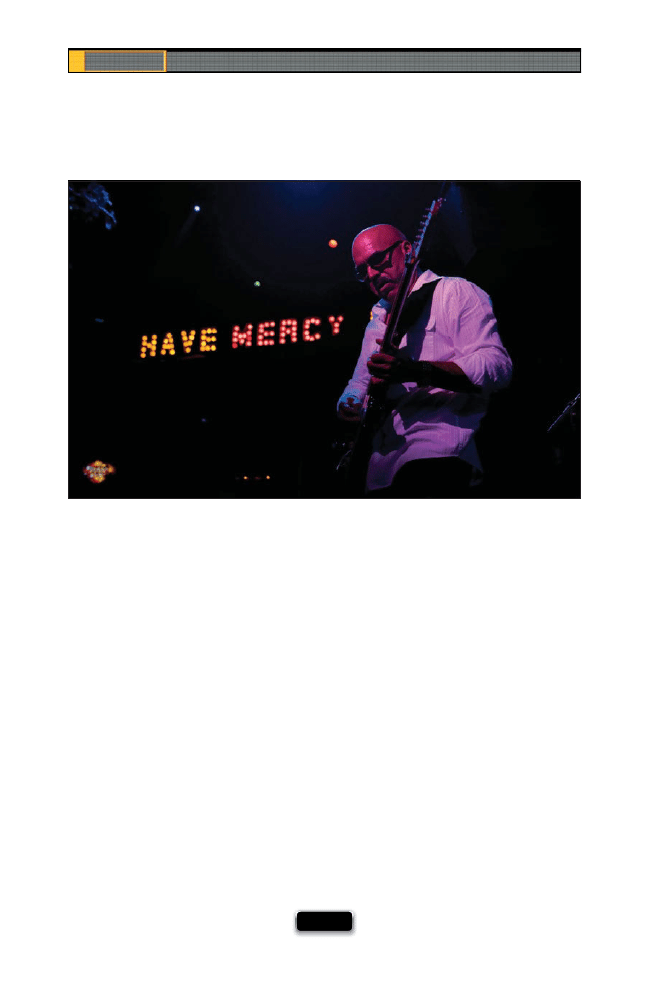
Chapter 8
The Digital Photography Book
[ 172 ]
One of the biggest mistakes people make when shooting concerts or events is to try to use
their fl ash. A friend of mine shot a concert once and hated the results he got (he used fl ash).
He emailed me some of the images, and I saw exactly why. I wrote him back, “So let me
get this straight—there were around 275 of these huge 1,000-watt stage lights aiming
right at the performers, but you thought there just needed to be one more?” We laughed
about it, but there’s a lot of truth to it. You want to see the color and vibrance of the stage
lights, and you want the scene you photograph to look like what it looked like when you
were there at the concert. Using fl ash wipes all that out (besides making the performers
angry), and reveals all sorts of distracting things like cables, cords, plugs, duct tape, etc.,
that would never have been seen under normal stage lighting (in fact, if you shoot big
name acts, they forbid the use of fl ash, and you generally only get to shoot for the fi rst
three songs of the concert, if that!). Since you absolutely shouldn’t use fl ash, the key is to
shoot at a high enough ISO that you can get your shutter speed around 1/125 of a second
(to give you sharp shots in lower light—and yes, the stage is often very dramatically lit,
and the lights are constantly changing, which is why shooting performances is so tricky).
Since you may get some noise at these higher ISOs, be prepared to use a noise reduction
plug-in (I’ve been using Nik Software’s Dfi ne 2.0), and take along the fastest (lowest pos-
sible f-stop) lenses you’ve got (f/2.8, f/2, f/1.8, etc.). If you’re close to the stage, take both a
wide-angle lens and something like a 70–200mm f/2.8, or even an f/4 if you’ve got a good,
low-noise camera.
JOSH BRADLEY

Pro Tips for Getting Better Photos
[ 173 ]
If you want better looking home interior shots, here are a few things to do that will make
a big diff erence: First, turn on all the lights in the room (turn on every single light you can).
This isn’t to add light to the scene—this is to give the room some life (realtors have home-
owners do the same thing when they’re showing the house to prospective home buyers).
Now, you have two jobs: (1) To make the room look big. Nobody wants to see a tiny little
room, and one trick for doing that is to shoot down low, from a kneeling position, with a
wide-angle lens. Then position your camera so you’re aiming into one of the room’s cor-
ners. One of the biggest ideas to get your head around is what to do with bright window
light coming into the room, because your camera isn’t going to properly expose for what’s
inside the room and what’s outside the window at the same time. So, here’s what you need
to consider: First, it’s now fairly acceptable to let what’s outside the window completely
blow out to white (you even see this now in fi ne home magazines, so don’t let it freak you
out). If you feel that what’s outside is as important as what’s inside, then you need to take
two shots with two separate exposures—one exposed for the room interior, then a sec-
ond where you expose for what’s visible through the window, and just ignore how dark
the interior looks in this second shot. Then you put these two separate exposures together
in Photoshop (yup, I did a video for you on that, too, at www.kelbytraining.com/books/
digphotogv3). Now, (2) the fi nal challenge (hey, I didn’t say this was easy) is to evenly light
the room. Most pros use one or more small off -camera fl ashes, hidden behind furniture (so
you don’t see them) and aimed straight up at the ceiling, to evenly light the room.
SCO
TT KELBY
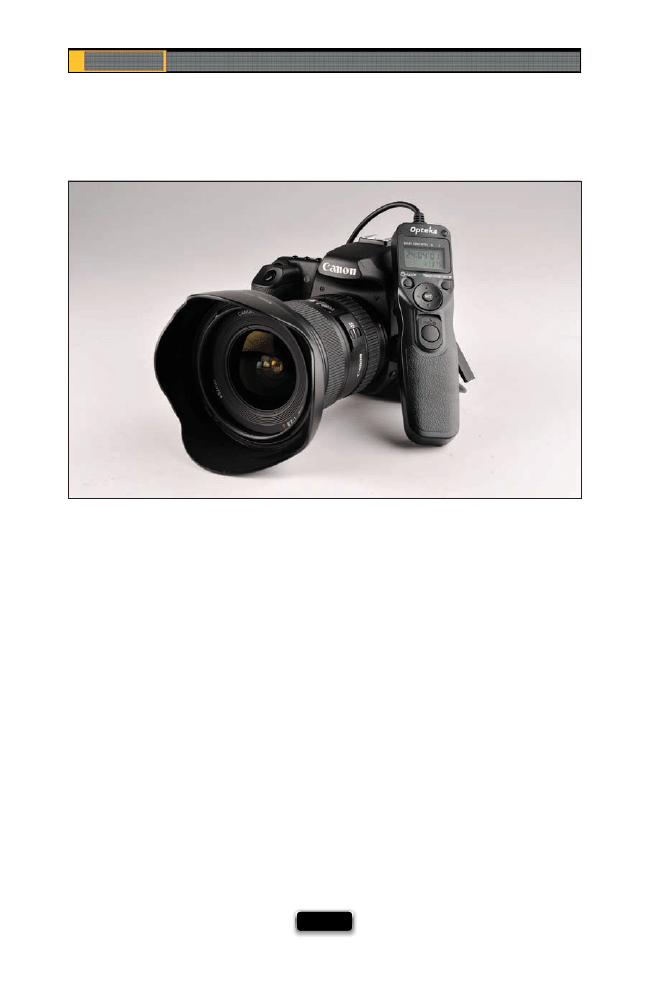
Chapter 8
The Digital Photography Book
[ 174 ]
Shooting Time-Lapse Photography (Canon)
If you’ve ever watched a concert video, they always seem to have a video segment at the
beginning where you see an empty venue, and then you watch while a giant stage, with
tons of lights and speakers, is constructed right before your eyes—something that took
an entire day or two to construct in real time, but here the whole experience lasts maybe
30 seconds total. This technique is called time-lapse photography (you’ve seen this used
on TV to show a setting sun, outdoor events, a fl ower opening, etc.) and to do this, you
set your camera on a tripod, and have the camera take a shot at a regular interval (like
every 30 seconds, or every minute, etc.) over a certain period of time (like an hour, a day,
two weeks, etc.), and then you combine all these images into a movie on your computer
(I did a how-to video for you at www.kelbytraining.com/books/digphotogv3). Now, if
you’re doing this over a short period of time, you can just pull out a stopwatch, and every
so many seconds or minutes, take a shot. However, for longer periods, if you’re shooting a
Canon camera, you’ll need a separate timer accessory like Canon’s TC80N3 Timer Remote
Control, which costs around $140, which is why you probably want the Opteka Timer
Remote Control instead (for around half the price). Either one connects to your camera’s
10-pin input and lets you choose how many shots, how often, and over what length of
time to capture your images. Now just start it, and walk away (well, walk away, providing
of course, that your camera gear is safe and won’t get stolen).
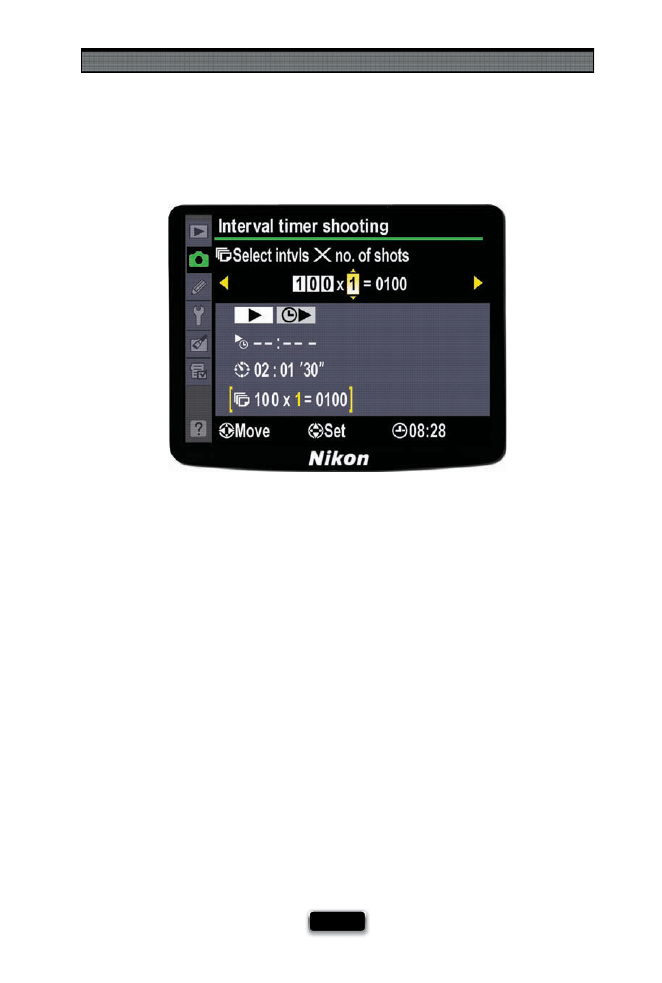
Pro Tips for Getting Better Photos
[ 175 ]
Shooting Time-Lapse Photography (Nikon)
If you’ve ever watched a concert video, they always seem to have a video segment at the
beginning where you see an empty venue, and then you watch while a giant stage, with
tons of lights and speakers, is constructed right before your eyes—something that took
an entire day or two to construct in real time, but here the whole experience lasts maybe
30 seconds total. This technique is called time-lapse photography (you’ve seen this used
on TV to show a setting sun, outdoor events, a fl ower opening, etc.) and to do this, you
set your camera on a tripod, and have the camera take a shot at a regular interval (like
every 30 seconds, or every minute, etc.) over a certain period of time (like an hour, a day,
two weeks, etc.), and then you combine all these images into a movie on your computer
(I did a how-to video for you at www.kelbytraining.com/books/digphotogv3). A number
of Nikon dSLRs have this feature built right in (like the D3, D300, and D700), so all you
have to do is put your camera on a tripod, then go under the Shooting menu and choose
Interval Timer Shooting. Press the right arrow, and choose when you want your interval
timer (time-lapse) shooting to begin, how often you want a photo taken, the number of
intervals, and the number of shots per interval. Now choose On and then OK, and you
can walk away and the camera will record the images for you automatically (of course,
don’t just walk away if you feel like someone might walk up and take your camera).
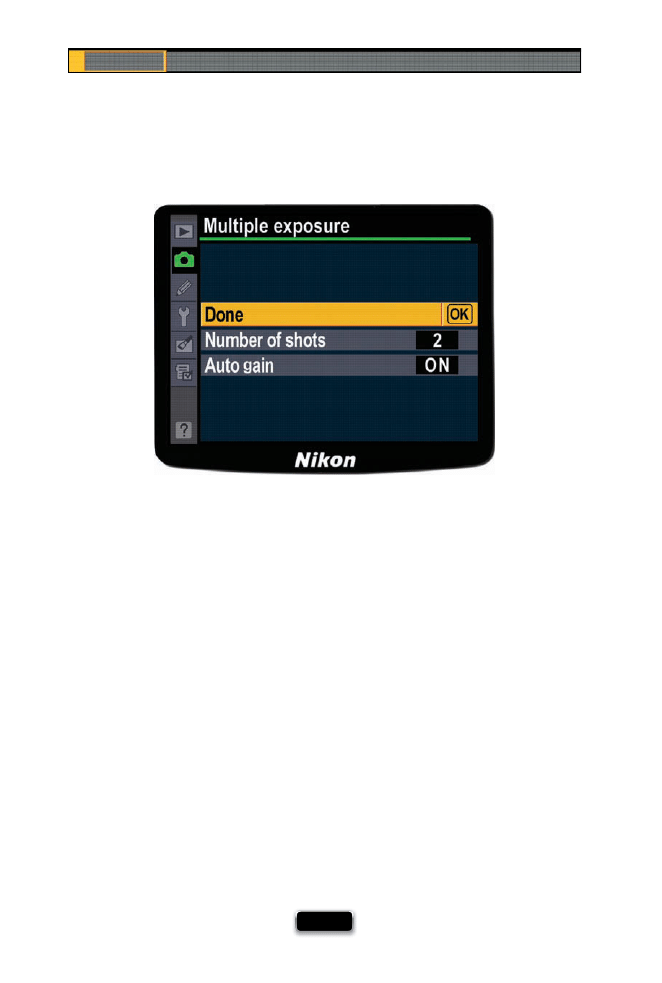
Chapter 8
The Digital Photography Book
[ 176 ]
If you want to combine two separate images into one single frame, there are two ways
to do it: in-camera (if you own a Nikon dSLR) or in Photoshop, after the fact (for Canon or
other dSLR users that don’t have built-in multiple exposures). For the Nikon folks: You turn
this feature on by going under the Shooting menu and choosing Multiple Exposure, then
Number of Shots, and picking how many images you want to combine into one single
image (in the example above, I just chose two), then choose OK. If you want a consistent
background for both shots, put the camera on a tripod. Take the fi rst shot, then have your
subject move to a new position on the other side of the frame (don’t let them move so far
away that they’re out of the frame), and take your second shot. That’s it—both images will
appear in the same frame (the advantage of doing it in-camera is that you have the two
images combined as a single RAW fi le vs. doing this in Photoshop, where the end result
will have to be a JPEG, TIFF, or PSD. If you’re not shooting Nikon, I did a little video to show
you how to combine two photos using Photoshop. You’d still have to start by taking two
separate photos of your subject, and then we’ll combine those in Photoshop. You can fi nd
this video at www.kelbytraining.com/books/digphotogv3.
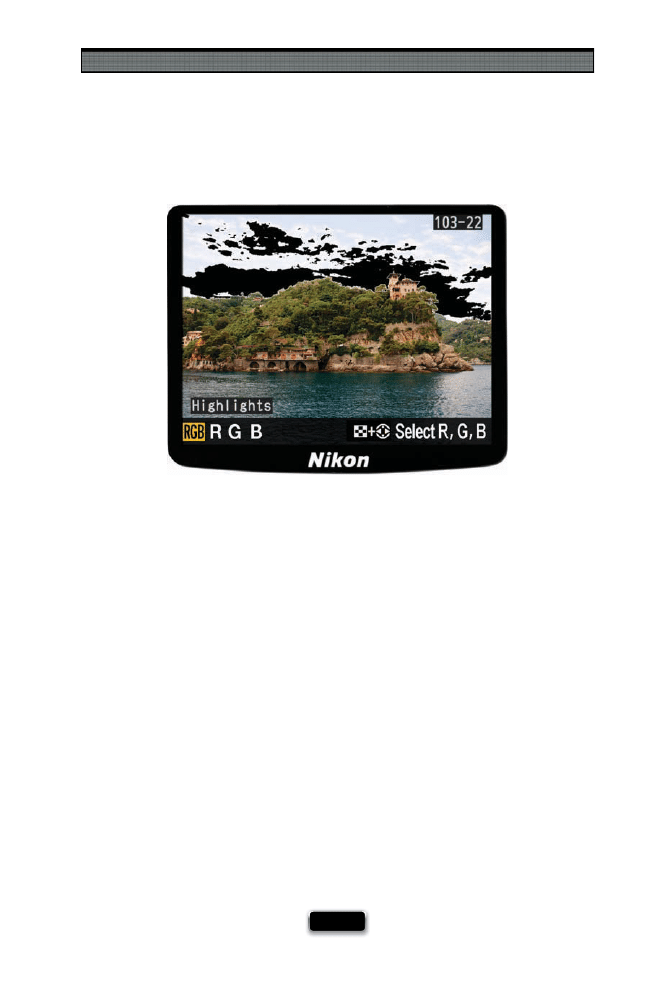
Pro Tips for Getting Better Photos
[ 177 ]
Do You Really Need to Read Your Histogram?
This may be the most shocking thing you read in this book: not only do I not use the
histogram on the back of the camera, but most of the pros I know don’t either. With
digital photography, our main concern is keeping detail in the highlight areas of our
photo (so the brightest parts of our photo don’t get so bright that there’s nothing there
but solid white), so instead of trying to evaluate the histogram, we just turn on our cam-
era’s highlight warning. It warns us if any part of our image is clipping (losing highlight
detail), so then we can use exposure compensation to override the exposure our camera
chose, and darken the exposure a bit until the detail comes back. That warning is telling
us that the right side of the histogram is hitting the right wall of the graph (known as
the “right wall of death” by…well…me). Anyway, here’s why the highlight warning is
better: the histogram only tells me if some part of the photo is hitting that right wall, it
doesn’t tell me if what’s hitting the wall is something I care about, whereas the highlight
warning shows me, right on the LCD monitor, exactly what part of my image is clipping,
so I can quickly see if it’s an area of important detail (like a white shirt) or something
that doesn’t have detail (like the sun. In the example shown above, you can see by all
the black in the sky that these areas are clipping). So, if you’re spending a lot of time
worrying about your histogram, or worse yet, worrying that you don’t know what the
histogram even is, now you can get a good night’s sleep. Note: Some people get really
fanatical about technical stuff like histograms, so I just want to clarify this: I’m not telling
you not to use your histogram, I’m just telling you that I don’t use it. (Wink, wink.)
SCO
TT KELBY

Chapter 8
The Digital Photography Book
[ 178 ]
Back when I was shooting fi lm, I used to send my most important shoots to a professional
fi lm lab for processing, but once digital photography (and great inexpensive printers)
came along, I started doing all my own printing. Today, I do both. I still do some of my
own printing, but I also often use an online lab for fi ve reasons: (1) It’s just so darn fast and
easy. I upload the photos using my Web browser, and if I upload the images to the lab I
use before lunch, they print and ship them the same day. (2) They’ll color correct all my
photos for free (I’m pretty handy in Photoshop, but sometimes it’s just faster to let some-
body else do it). (3) They can print in sizes that perfectly match the size digital cameras
produce (so there’s no cropping of my images to fi t outdated sizes like 8x10" or 11x14".
(4) You can have your prints mounted, matted, and framed (with glass), and (5) you can
choose diff erent types of paper (including metallic prints, matte fi nishes, etc.). This is one
of those things that once you try it, you’ll wonder why you waited so long. Plus, today’s
pricing for online labs is very competitive.
I’ve used Mpix.com since 2007, but had no idea how many Mpix freaks were out there until
I mentioned them on my blog. People came out of the woodwork to tell me about their
love aff air with Mpix, and now I know why. They’re not just for pros—anybody can use
Mpix—but their quality makes you look like a pro. Try them once, and you’ll see what I mean.
Mpix.com Is the Only Online Lab I Use
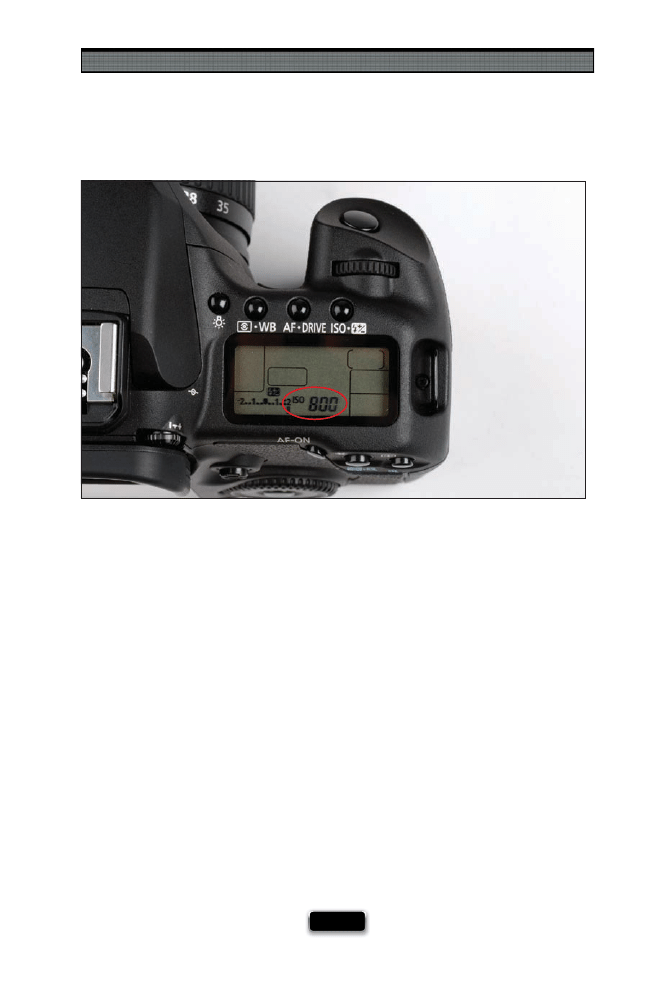
Pro Tips for Getting Better Photos
[ 179 ]
Shooting in Tricky Low-Light Situations
Although there are some tried and true techniques for shooting in tricky low-light situ-
ations (like shooting in a cave, or at your daughter’s dance recital, or around a campfi re),
unfortunately there is no secret setting or magic button that suddenly makes it all work.
However, here’s what you can do: The #1 thing you can do is to fi nd a way to steady your
camera. Because you’re in really low light, your shutter speed is going to drop way below
1/60 of a second (as low as most of us can hand-hold and still get a reasonably sharp
photo), so ideally, you’re going to need to put your camera on a tripod. If you can’t use a
tripod, how about a monopod? If you don’t have either, rest your camera on something
(I’ve been known to balance my camera on the seat back of an empty theater chair, or on
a railing at a tourist attraction, or on the safety wall at the top of the Empire State Building
in New York. I’ve even put the camera on a friend’s or family member’s shoulder to steady
it). I do everything I can to steady it to avoid having to raise the ISO (which is our last resort,
unless you have one of the new high-end cameras with great low-noise results at high
ISOs). If there’s just no way to steady your camera, then you have to resort to raising your
ISO—keep raising it until you get your shutter speed to 1/60 of a second or higher, and
then hold your camera as still as possible. If you raise your ISO up quite a bit, you’re going
to see noise in your photos, so you’re going to need to run some noise reduction software
(I’ve been using Nik Software’s Dfi ne 2.0, a Photoshop and Lightroom plug-in, which does
an amazing job of reducing the noise without blurring your photo too much).
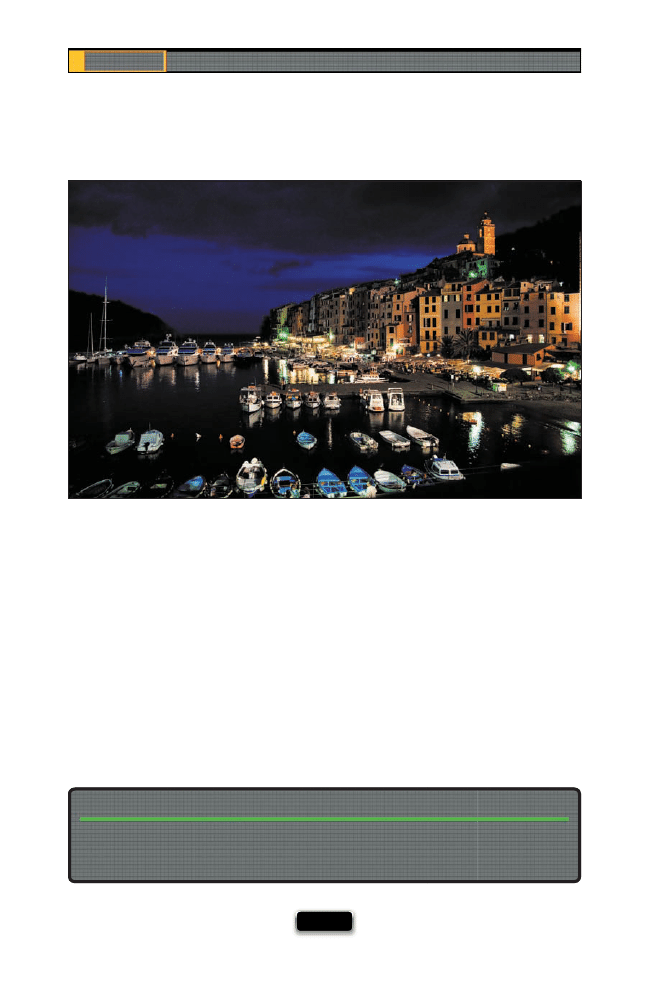
Chapter 8
The Digital Photography Book
[ 180 ]
Shooting Night Scenes Like Cityscapes
Shooting nighttime scenes is kinda tricky, because no two scenes are lit the same. However,
here are some tips to help: The most important thing is getting the right exposure. Since
everything is so dark, your fi rst thought might be to aim at the lights, but if you do, your
camera will think the whole scene is bright, and it will greatly underexpose your photo.
Instead, try focusing just to the left or right of the lights. Take a shot and check your LCD
monitor. If it still looks too dark, use exposure compensation to brighten the image by one
stop, then take another test shot. It won’t take long before you nail the exposure. Also, your
exposure time will go anywhere from a few seconds to a few minutes (depending on how
much light the scene you’re shooting has), so you absolutely must be on a tripod to get a
sharp shot. Since your shutter will be open for a long time, you’ll also want to use a cable re-
lease or wireless shutter release, so you don’t add any movement at all by pressing the shut-
ter button with your fi nger. For getting a white balance that looks good, I use the Live View
white balance trick on page 170. One last thing: the best time to shoot nighttime cityscapes
is about a half-hour past sunset, so you get the perfect mix of natural light and city lights.
When it comes to shooting at night, this is the one time when the limited ultraviolet (UV)
rays work against us (potentially giving us washed out images), and that’s why many pros
suggest removing your UV fi lter when shooting at night.
Remove Your UV Filter for Nighttime Shots
SCO
TT KELBY
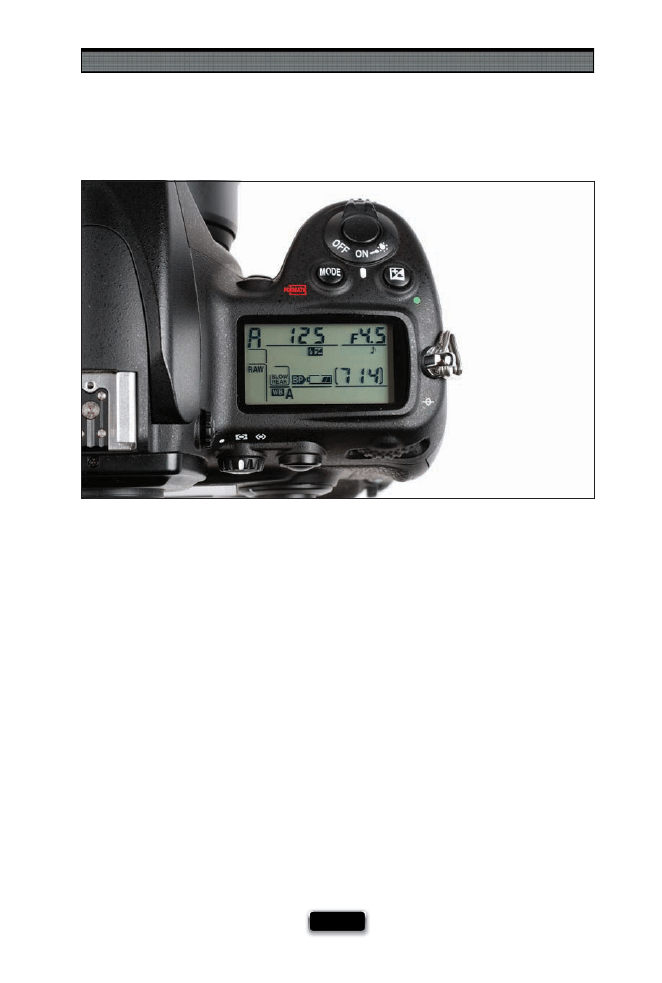
Pro Tips for Getting Better Photos
[ 181 ]
How My Camera Is Usually Set Up
I set up my camera pretty much the same way each time I shoot. First, I nearly always shoot
in aperture priority mode, because I can choose whether I want the background behind my
subject to be out of focus or sharp and in focus. This works whether I’m shooting sports, or
a bee on a fl ower, or a sweeping landscape shot—I have total creative control over how the
background looks. The only other shooting mode I use is manual, and then only when I’m
in the studio using studio strobes. I try to shoot at ISO 200 as much as possible (it’s always
my starting place), and I only raise it if my shutter speed falls below 1/60 of a second (that’s
about as slow as I can go hand-holding my camera and still get a sharp shot. Some folks
can go to 1/30, but not me). If I’m shooting out in daylight (like on a vacation trip or at an
outdoor sporting event), I leave my white balance set on Auto. If I wander into the shade,
I change it to Shade, and if I walk inside, I match the white balance to the lighting I’m shoot-
ing in (this keeps me from having to color correct my photos later). I leave my camera’s fl ash
setting at Rear-Curtain Sync (2nd Curtain for Canon users) all the time (that way, I get some
movement around my subject, but then the fl ash fi res to freeze them and make them sharp).
I leave the highlight warning turned on all the time, and refer to it often (so I don’t blow out
my highlights). I never look at the histogram (sorry).
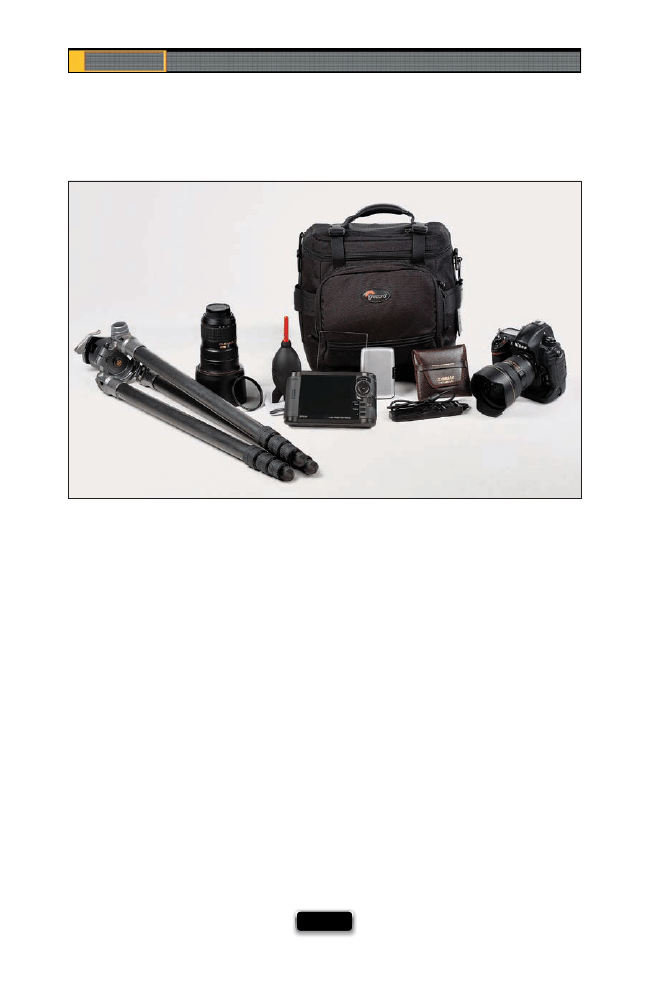
Chapter 8
The Digital Photography Book
[ 182 ]
What I Pack for a Landscape Shoot
If I’m heading out for a landscape shoot, here’s what I pack:
(1) One full-frame camera body (I take a full-frame body when shooting landscapes to get
wider images)
(2) A 14–24mm f/2.8 ultra-wide-angle lens
(3) A good sturdy tripod with a ballhead
(4) One medium zoom lens, in case I want to shoot a panorama (I avoid wide-angle lenses
when shooting panos)
(5) A cable release (either a wired release or, ideally, a wireless release)
(6) A polarizer (to cut refl ections and darken the sky)
(7) A split neutral density gradient fi lter (to let me expose for the foreground and not have
the sky get washed out)
(8) An Epson P-3000, -6000, or -7000 for backing up my images when out in the fi eld
(9) A neutral density fi lter (to darken a waterfall or stream scene, so I can use a long
enough shutter speed to make the water look silky)
(10) A backup battery, my battery charger, a cleaning cloth (in case I get water droplets on
my lens), and a Rocket Air Blower (to blow any dust or specks off my lens)
(11) Multiple memory cards in a hard-sided memory card case
(12) It all goes in a LowePro Pro Mag 2 AW
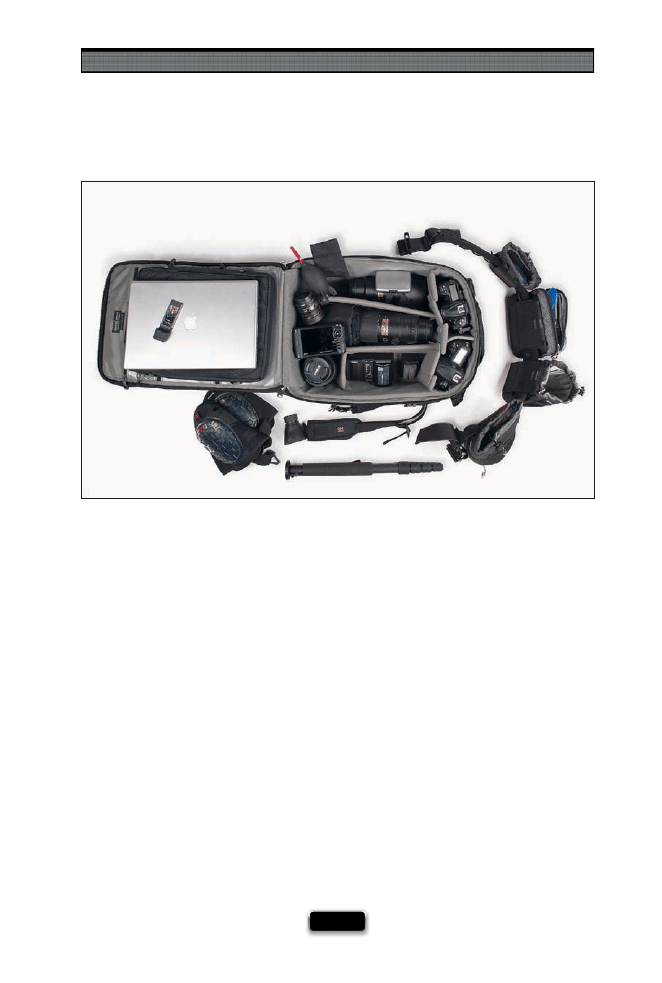
Pro Tips for Getting Better Photos
[ 183 ]
What I Pack for a Sports Shoot
If I’m heading out for a sports shoot, here’s what I pack:
(1) Two camera bodies
(2) A very long lens, like a fast 200–400mm f/4 zoom lens, or a 300mm fi xed focal length lens
(3) A zoom lens, like a 70–200mm f/2.8, and one wide-angle zoom, like a 24–70mm
(4) A fi sheye lens (in case I want to get a shot of the stadium, arena, etc.)
(5) A monopod to support my longest lens
(6) A BlackRapid R-Strap for my second camera body, so I can bring my second camera up
to fi re quickly if I need it
(7) An Epson P-3000, -6000, or -7000 for backing up my images when out in the fi eld
(8) A laptop and a fast FireWire (or IEEE 1394) memory card reader
(9) A wireless PC card for uploading photos while the event is still underway
(10) Backup batteries for both bodies, battery chargers, a cleaning cloth, and a Rocket Air
Blower to blow any dust or specks off my lens
(11) Gel kneepads (to save my knees when kneeling to get a low perspective for sports
photography)
(12) A Think Tank modular belt system that holds my fi sheye lens, backup memory cards, a
water bottle, an energy bar, and my wide-angle lens
(13) A Hoodman HoodLoupe (which covers my LCD, so I can see it clearly in bright daylight)
(14) It all fi ts into a Think Tank Airport Security 2 rolling camera bag
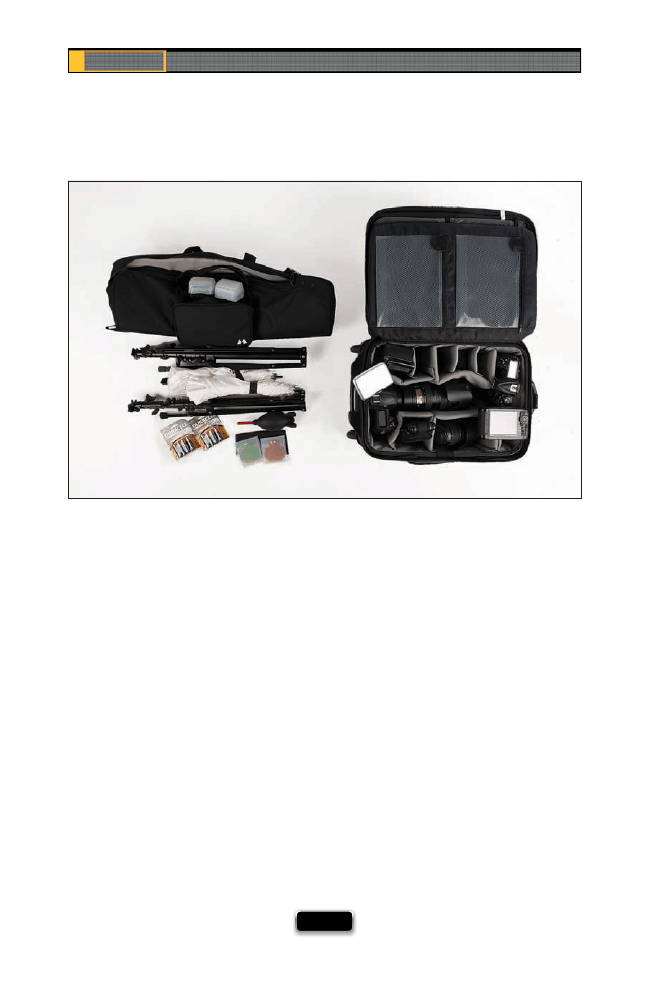
Chapter 8
The Digital Photography Book
[ 184 ]
What I Pack for a Location Portrait Shoot
If I’m heading out for a location portrait shoot, here’s what I pack:
(1) A 70–200mm zoom lens
(2) A 24–70mm zoom lens
(3) Two off -camera wireless fl ashes with diff usion domes
(4) Two lightweight 7' light stands, two shoot-through umbrellas, and two tilt
bracket adapters
(5) Two 8-packs of AA batteries (for the fl ash units)
(6) Two sets of gels for the fl ashes: one orange, one green
(7) A separate battery pack to get faster refreshes from the fl ash units
(8) An Epson P-3000, -6000, or -7000 for backing up my images when out in the fi eld
(9) Multiple memory cards in a hard-sided memory card case
(10) One camera body, and a backup body if it’s a paying gig
(11) A backup battery, my battery charger, a cleaning cloth, and a Rocket Air Blower
to blow any dust or specks off my lens
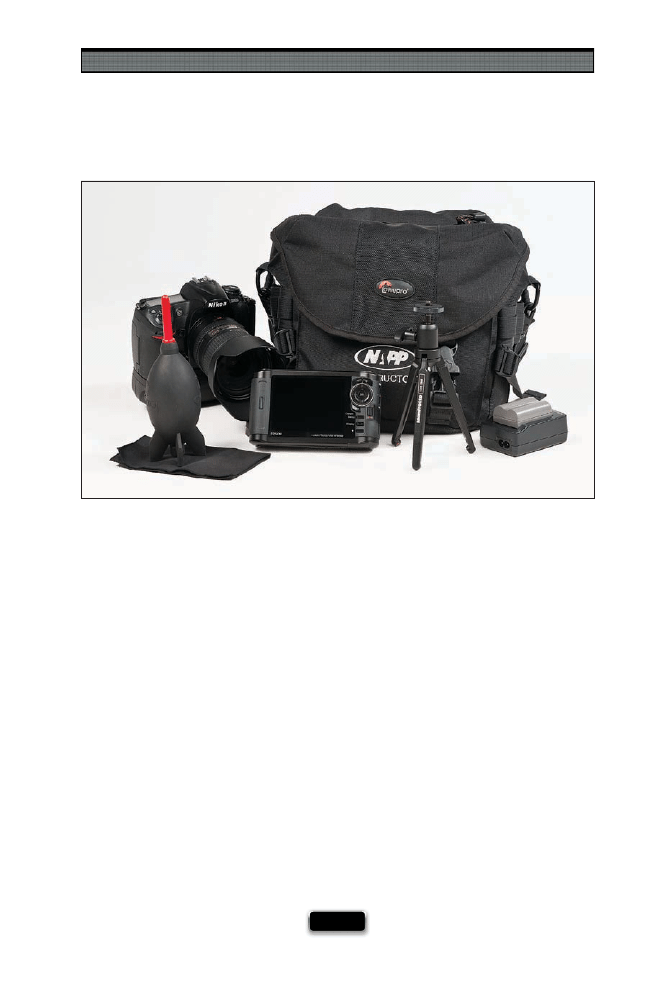
Pro Tips for Getting Better Photos
[ 185 ]
What I Pack for a Travel Shoot
If I’m heading out for a travel shoot while I’m on vacation, here’s what I pack:
(1) One camera body (a regular cropped-frame body)
(2) An 18–200mm zoom lens (I want one lens that does it all)
(3) An Epson P-3000, -6000, or -7000 for backing up my images when out in the fi eld
(4) A backup battery, my battery charger, a cleaning cloth, and a Rocket Air Blower to
blow any dust or specks off my lens
(5) A small tabletop tripod, so I can shoot food or sneak in a shot where full-sized tripods
aren’t usually allowed

Chapter 8
The Digital Photography Book
[ 186 ]
What I Pack for a Wedding Shoot
If I’m heading out for a wedding shoot, here’s what I pack:
(1) Two camera bodies (the extra one is a backup)
(2) A 14–24mm super-wide-angle lens, a 50mm f/1.4 lens (for shooting hand-held in low
light), a 70–200mm f/2.8 VR zoom lens, a 10.5mm fi sheye lens (great for capturing fun at
the reception), and a 24–70mm f/2.8 lens
(3) An Epson P-3000, -6000, or -7000 for backing up on-site and four 8-GB memory cards
(4) A lens cleaning kit
(5) This all fi ts in a LowePro Pro Roller 1 Bag
Lighting Gear:
(1) Two off -camera fl ashes (like Nikon SB-900s)
(2) Diff usion domes for the fl ash units
(3) A Nikon SU-800 commander unit (to fi re the fl ashes wirelessly)
(4) Two Bogen light stands with umbrella swivel brackets (the second one is a backup)
(5) Two Westcott 43" shoot-through white translucent umbrellas (the second is a backup)
(6) A Westcott white/silver refl ector
(7) A tri-grip diff user
(8) Four packs of AA batteries, AA battery charger, and a Nikon SD-9 battery pack
(for longer battery life and faster refresh times)
(9) A ladder cart (to shoot up higher, and to lug the lighting gear around)
(10) I pack my fl ashes, stands, umbrellas, and brackets all in one Hakuba PSTC 100 Tripod Case
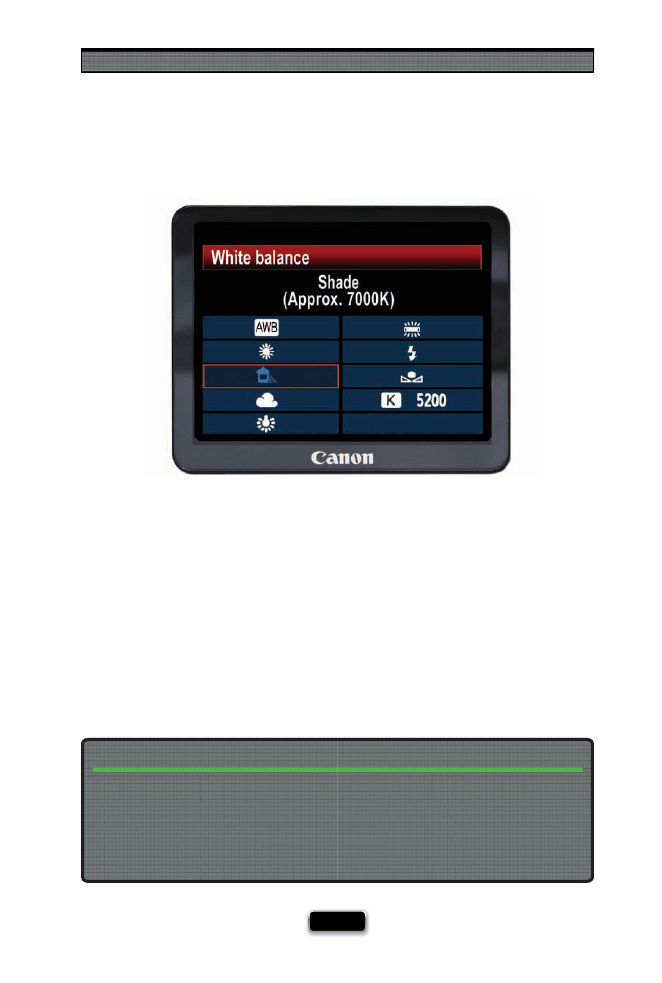
Pro Tips for Getting Better Photos
[ 187 ]
White Balance vs. Color Correction
If you’re wondering why you hear so much these days about getting a proper white bal-
ance when you’re shooting, here’s why: if you get the white balance right in the camera,
you won’t have to do any color correction later in Photoshop (or Lightroom, or Aperture,
or whatever). That’s because, if the white balance is properly set, the color of the photo
will look spot on. If the white balance is off , you’re going to have to do some color cor-
rection later or your photo will look too blue, too yellow, too green, etc., so if you want to
avoid the whole color correction process, just set your camera’s white balance setting to
the type of light you’re shooting in (for example, if you’re shooting in the shade, set your
camera’s white balance to Shade. Yes, it is that easy).
Switching your white balance in-camera to match the type of lighting you’re shooting
in will defi nitely get you closer than not doing it, but if you really want to nail the white
balance every time, you need something like an ExpoDisc (from ExpoImaging). This is a
translucent disc you hold over the end of your lens, aim at the light source, then take a
photo, and it creates a custom white balance for you that is designed for the exact light
you’re shooting in. They do work wonders, and lots of pros swear by them.
If You Want to Nail Your White Balance Every Time, Get an ExpoDisc
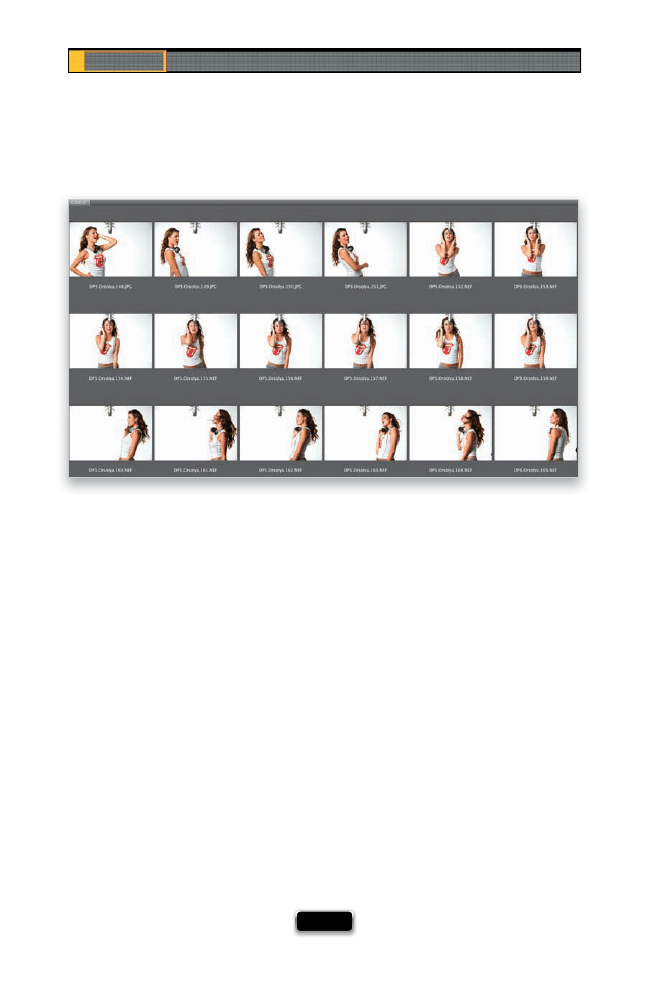
Chapter 8
The Digital Photography Book
[ 188 ]
How Many Great Shots to Expect From a Shoot
So, if you’re a pretty serious photographer and you come back from a few hours of shoot-
ing (let’s say you were on a photowalk, or wandering around a city while on vacation), and
you took, say…240 shots, how many of those should you expect to be really killer shots—
shots you would enlarge, frame, and hang on the wall? A lot of folks are surprised (actu-
ally shocked) to learn that even most pros would be happy to come away with one really
great shot from that 240. Personally, if I can get two or three from that shoot that I really
like, I am thrilled. Think of it this way: if you were hired to shoot the cover shot for Vogue
magazine, and you hired a top model and assistants and a big New York or Paris studio, and
you shot all day long and took thousands of shots, how many of those would wind up on
the cover? One. Realistically, how many would the folks at Vogue really have to choose from,
from your shoot? How many shots would you have captured that were “cover of Vogue”
quality? Even a top pro might have 10 or 12 really great cover-quality shots for them to
choose from. This is true for landscape photographers, travel photographers, commercial
photographers—all of us. Talk to some of the top pros and you’ll fi nd that most of their
shots go in the trash, but when they shoot 240 photos, there are usually a few really great
ones in there, too—some killer shots—but how many of those will they actually frame and
put on the wall? Maybe one. When you see a pro’s work on display (in a gallery or a slide
show presentation), you’re seeing only their very best work. You’re seeing nothing but that
one killer shot from that day. They’ve just done a lot of those 240-image shoots.
SCO
TT KELBY
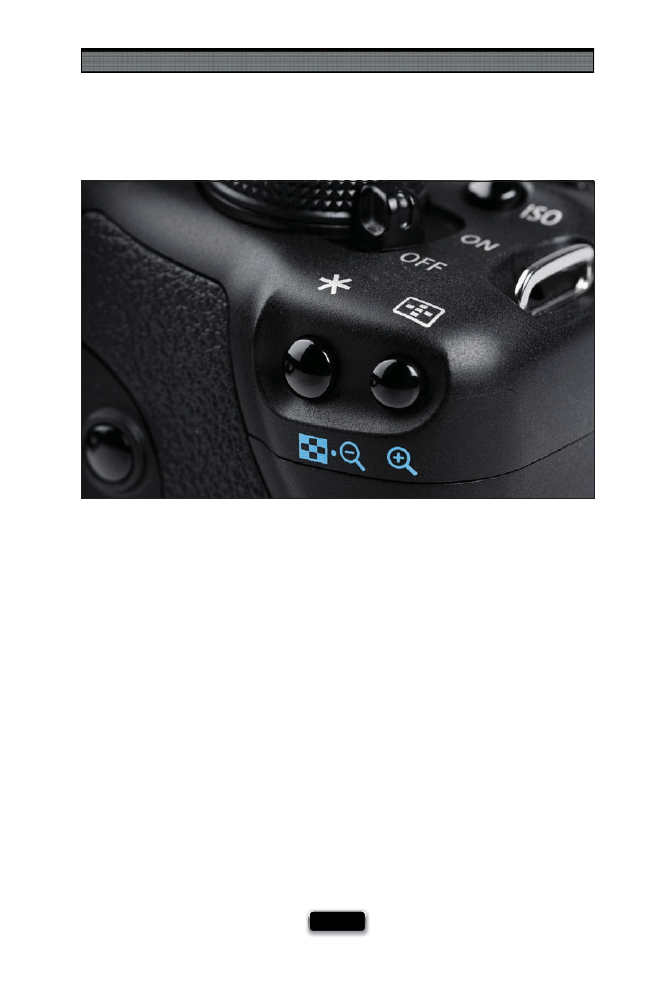
Pro Tips for Getting Better Photos
[ 189 ]
If Your Camera Shoots Video....
If your dSLR has the ability to shoot high-defi nition video, like a Canon 5D Mark II or a
Nikon D90 or D5000 (by the way, more and more dSLR cameras are getting video these
days), then there’s a special setting that will help you get much better results from shoot-
ing video. You want to lock the Auto Exposure setting, or as you pan across a room or a
scene, the exposure will keep trying to change as you pan, so during your pan the video
starts glowing brighter then darker then brighter again (ugh!). On Nikon cameras, go un-
der the Custom menu, to Controls, and choose Assign AE-L/AF-L Button (those acronyms
stand for Auto Exposure Lock and Auto Focus Lock). Then, scroll down to AE Lock (Hold)
and choose that. Now, when you’re shooting video, once you start shooting, you’ll press
the AE-L/AF-L button on the back of the camera, and it will hold your exposure in place
while you’re panning the camera. Press it a second time to turn auto exposure lock off .
On a Canon dSLR with video (other than the Canon 5D Mark II), when you’re in video
shooting mode, you can lock the exposure by holding down the AE Lock/FE Lock button,
at the top right of the back of the camera, to keep the exposure from constantly chang-
ing as you pan or move the camera. In addition, if you have the Canon 5D Mark II, thanks
to a recent fi rmware update, you can also manually control the exposure by switching
to manual mode. This allows you to manually adjust the exposure controls, such as ISO,
aperture, and shutter speed, while shooting video.
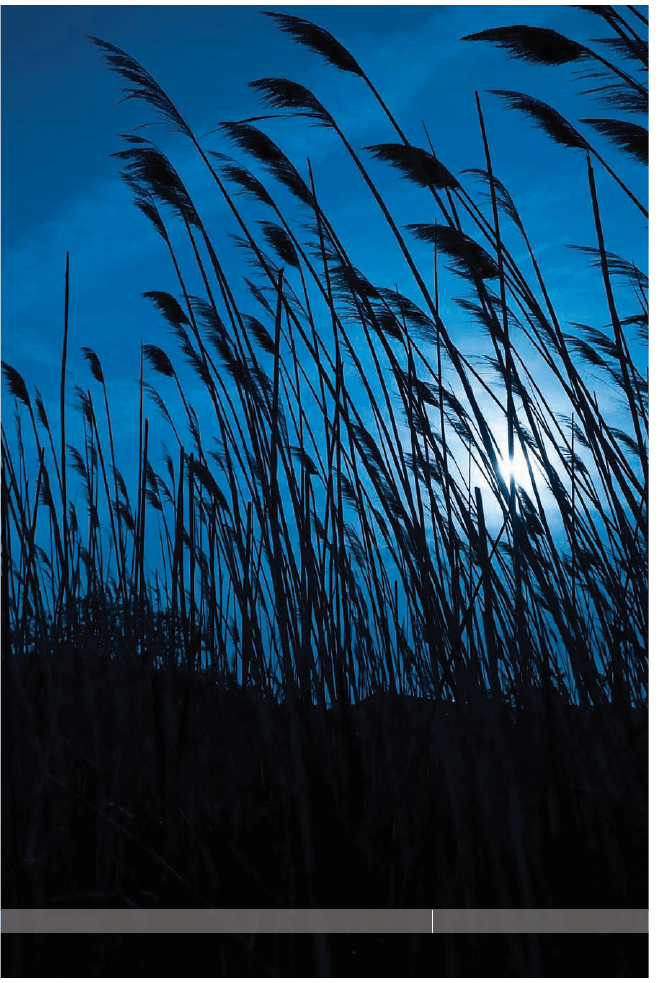
SHUTTER SPEED: 1/8000
SEC
F-STOP:
F
/8 ISO: 200
FOCAL LENGTH: 24
MM
PHOTOGRAPHER: SCOTT KELBY

Today’s digital cameras are amazingly sophisticated devices, and
if you take a moment to really think about it, you’re holding in
your hands a lens, a shutter mechanism, a color TV monitor, and a
computer. That’s right, there actually is a computer inside every single digital
camera. That’s what those menus on the back are for—you’re navigating the
camera’s software and turning on/off specifi c features, just like you do on
your computer at work or at home. You’re setting the preferences for how
your computer works. So, at this point, you’re not really taking a photo, you’re
tweaking your software to get a specifi c desired result. When you press the
shutter button, it sends a signal to the software to briefl y let some amount
of light into the computer-controlled sensor, and that amount is determined
through a mathematical calculation performed by (that’s right) your onboard
computer. So, is it any wonder that occasionally we make a mistake with
this handheld computer, and a photo doesn’t look how we wanted it to?
No, it’s not. So, technically, when the photo doesn’t look the way we want
it to, it’s not our fault—it’s that darn computer. Well, that’s what this chapter
is all about. Blame. You’ll learn how to quickly and easily redirect the blame
for any bad shot back to how the software behaved in your camera, and
you’ll be able to do it in such a convincing and logical way that there’s no
way you could ever be held personally responsible for taking any photo that
is not literally Ansel Adams quality. Underexposed? “That stupid software!”
Out of focus? “Darn autofocus got me again!” Took a shot of your foot as
you were walking? “It fi red without me pressing the button!” See? It’s easier
than you’d think. Let’s try a few more: You hear, “Gee, the color looks off .” You
reply, “My stupid LCD isn’t color balanced.” (Oooh, good one!)
How to Sidestep Those Things
That Drive You Crazy
[ 191 ]
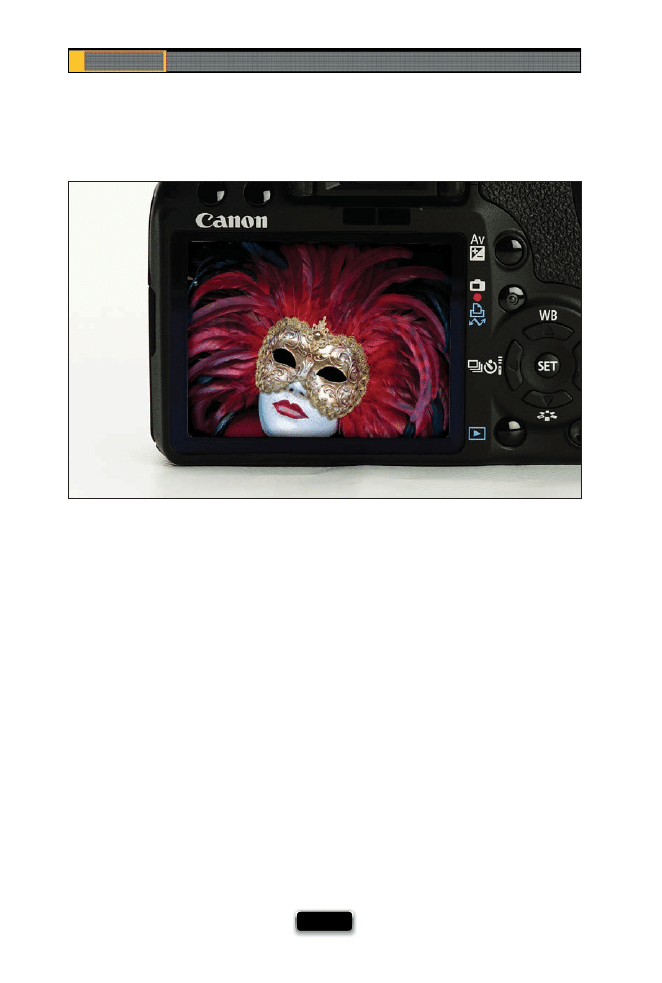
Chapter 9
The Digital Photography Book
[ 192 ]
You read a lot online about not being able to really trust what you see on the LCD
screen on the back of your camera. Some of that is old outdated information, some of it
depends on camera settings (which we’ll cover in just a minute), and some of it is true.
Here are my thoughts on it: If you shoot in JPEG mode using one of today’s newer dSLR
cameras (and the more expensive the camera, usually the better quality the LCD monitor),
what you’re seeing on the monitor is a JPEG preview, and it’s pretty close to what you’ll
actually see when you open the photo on your computer (or get prints made). However,
if you shoot in RAW mode, you’re not seeing a preview of the RAW photo—you’re seeing
a preview of the JPEG image, and the JPEG image usually looks better than an unedited
RAW photo. That’s because JPEG images have been “processed” inside your camera, and
they have sharpening applied, color correction, contrast, and basically your camera tries
to make JPEGs look really good. But when you shoot in RAW, you’re telling your camera,
“Turn all that in-camera, make-it-look-good stuff off , and just give me the raw, untouched
fi le, and then I’ll do all that sharpening, color correction, and contrast stuff myself in Photo-
shop, or Lightroom, or whatever.” However, you’re still seeing that processed JPEG preview
on your camera, so if you shoot in RAW mode, don’t be startled when what you see on
your computer doesn’t look nearly as good as it did on the back of your camera. I’m not
telling you on any level not to shoot in RAW mode, I’m just letting you know how what you
see on your LCD relates to what you’re going to see on your computer. Now ya know.
Can You Trust Your Camera·s LCD Monitor?
SCO
TT KELBY
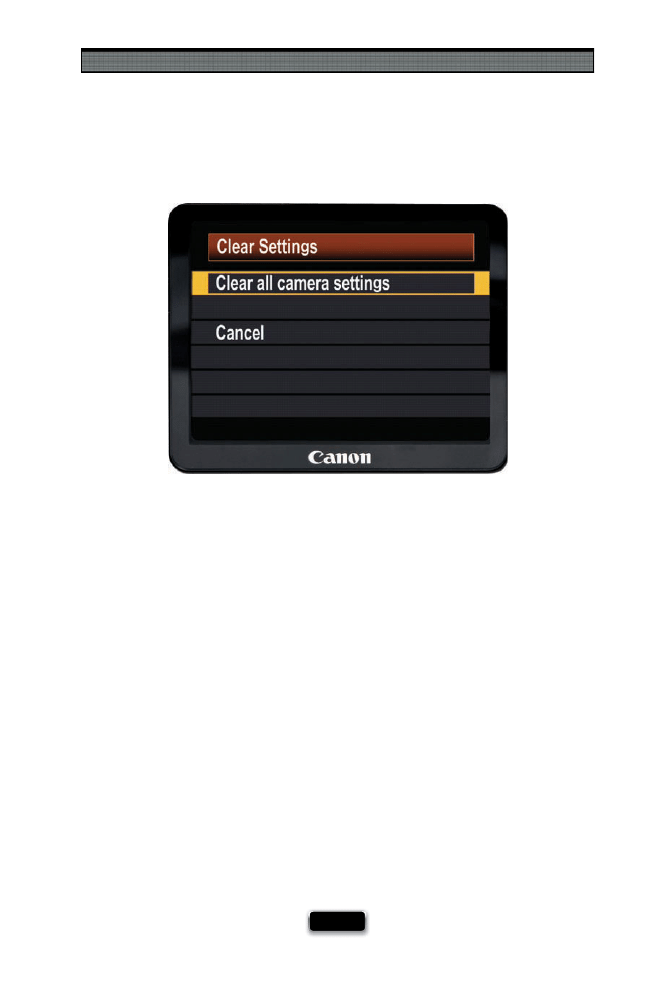
Avoiding Problems Like a Pro
[ 193 ]
If you’ve tweaked and played around with the menus in your camera and you feel like
you’ve totally messed something up, and you just wish everything was back like it was
when you bought the camera, then you’ll be happy to learn that most cameras have a
“return to default” setting that puts all the customizable settings back to their original
factory-default settings. I use this when it just seems like my camera is all whacked out
for some reason, and resetting to the defaults usually snaps it right out of its insanity.
The only downside of doing this is when it returns to the defaults, any of the settings
you changed in your camera are erased, too, so you have to go back and customize
whatever settings you had customized again (which is why it helps to write those little
changes down—that way you won’t forget what your settings were). Anyway, here’s
how it’s done: On a Canon camera, you press the Menu button, then go to the Set-Up 3
menu, and choose Clear Settings. Now choose Clear All Camera Settings and then
select OK. If you’re using a Nikon camera, press-and-hold the Qual (Quality) button and
the +/– (Exposure Compensation button) down for more than two seconds, or you can
press the Menu button, go to the Shooting menu, and choose Reset Shooting Menu,
then go to the Custom Setting menu, and choose Reset Custom Settings. Doesn’t mat-
ter which way you do it, it’ll reset the camera to the factory fresh settings.
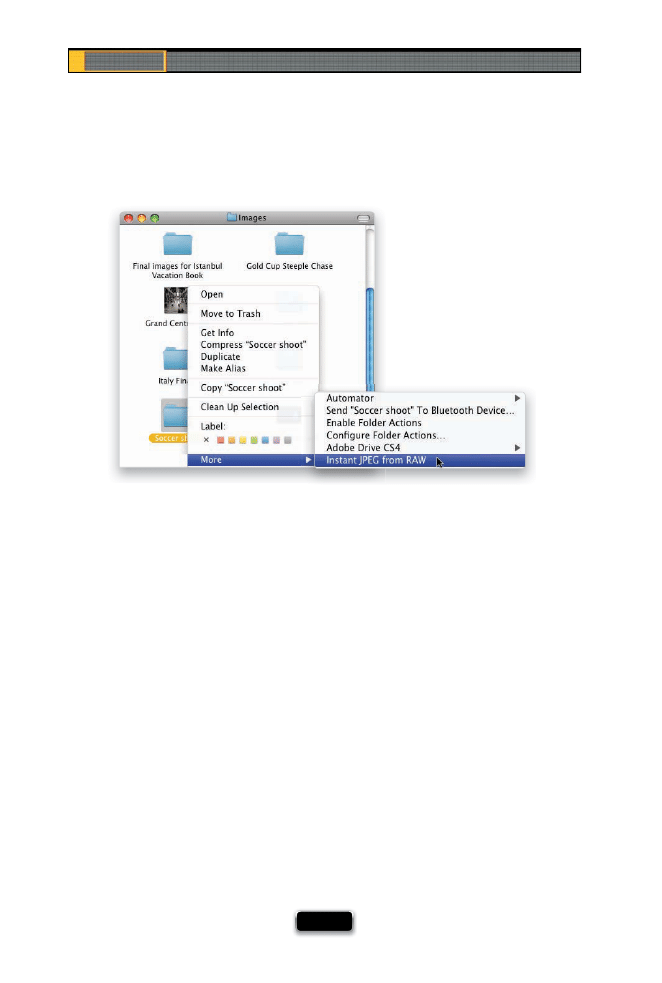
Chapter 9
The Digital Photography Book
[ 194 ]
Most dSLRs these days will let you shoot RAW, or JPEG, and usually Raw + JPEG, which
means it writes two separate fi les to your memory card—one is the untouched RAW
fi le, and the other is a processed JPEG fi le. This is a big advantage for anyone who needs
to quickly send a JPEG fi le to a client (like a pro sports photographer who needs to
email shots to the magazine or wire service while the event is still going on. RAW fi les
are much larger in fi le size, so they’re a somewhat impractical for email, some clients
don’t have the software to read RAW files, and the files are unprocessed, unsharp-
ened, and uncorrected, so having an already processed, compressed JPEG makes sense
for some shooters). The downside is it takes up a lot more room on your memory card,
and now you have two versions of every photo. Now, if you’re one of those folks who
shoots in Raw + JPEG, have I got a tip for you! Michael Tapes at RawWorkfl ow.com (the
guy who makes the popular WhiBal white balance tool) created a free downloadable
software utility that extracts the JPEG preview that’s already embedded in every RAW
image, and it does it incredibly, ludicrously (if that’s even a word) fast! All you do is
download the utility from www.rawworkfl ow.com and run the installer. Then, click on
a folder of RAW photos, Control-click (PC: Right-click) on that folder, and choose Instant
JPEG from RAW from the contextual menu that appears. You’ll get to choose what size
you’d like your JPEG (in case you need a smaller size for uploading to a website), and
then click Extract and, literally in just seconds, it extracts those JPEGs for you and puts
them in their own folder. I use this all the time, and I love it!
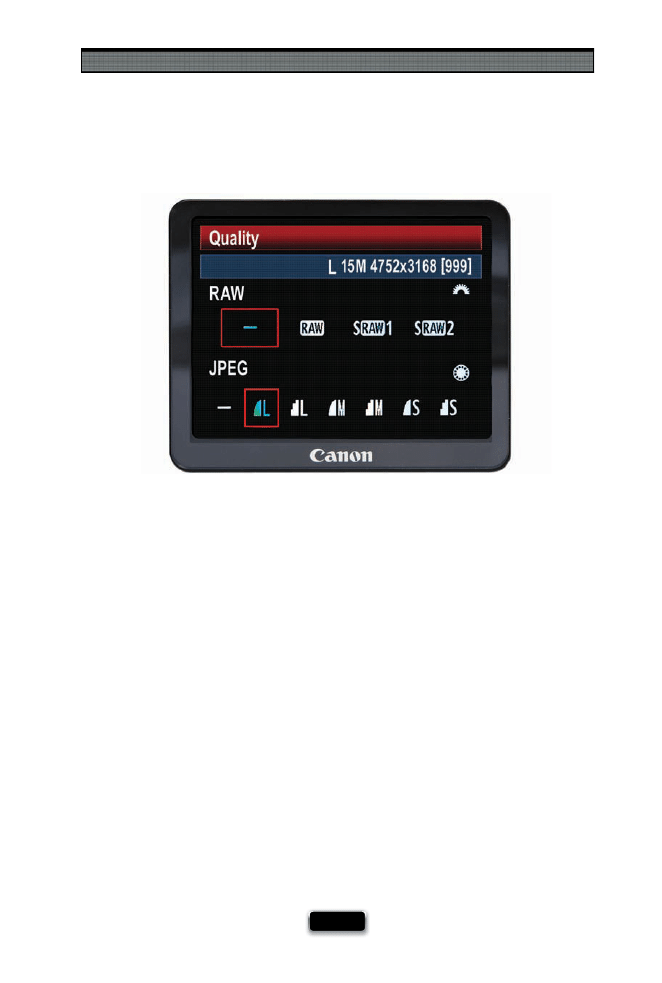
Avoiding Problems Like a Pro
[ 195 ]
I get asked on a regular basis, “When should I shoot in RAW and when should I shoot in
JPEG mode?” This is one sticky question, because some photographers are so fanati-
cal about shooting in RAW that there’s no reason you could ever give them that makes
sense not to shoot in RAW. If the photo you’re going to take is of your wrecked car, and
it’s only going to be 3x4" in size, and the only person who would ever possibly see it is
the insurance adjuster in a diff erent state processing your repair claim, they would still
shoot it in RAW. So, for those people (you know who you are), I’m going to save myself a
lot of angry letters (not all, mind you, but a few), and state categorically that you should
shoot all photos, no matter what the fi nal intended use, in RAW format. There, I said it. It’s
been documented. Now, that being said, I’ve heard of some photographers who don’t
post-process their images—meaning they don’t open the photos in Photoshop, or Ele-
ments, or Lightroom, or Capture, or whatever—they just take the shots, and then either
put them on the Web, or put them on disc, or print them out as is. So, if you are one of
those people who are pretty happy with how their photos look right out of the camera,
and you do very little, if any, editing in a photo software application, and you enjoy fi t-
ting thousands of photos on a 4-GB memory card (rather than a few hundred), and you
enjoy not having the hard drive on your laptop crammed full all the time, I guess in that
situation, it’s okay to shoot in JPEG Fine mode. Just don’t ever tell anyone. Also, two other
groups of people who often shoot in JPEG mode are pro sports photographers (who
shoot thousands of shots per event), and many pro wedding photographers, as well, but
hey—I’m not telling you it’s okay (wink, wink).
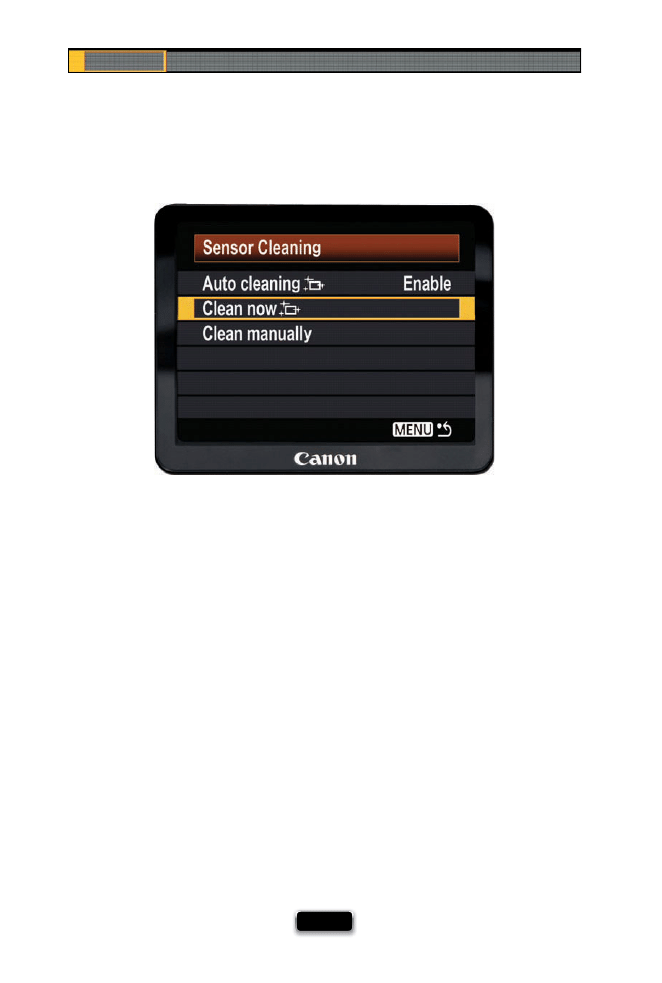
Chapter 9
The Digital Photography Book
[ 196 ]
The sensor on your digital camera collects dust like…like…well, like something that
really collects a lot of dust (like that film camera up in your closet). The sensors in
today’s cameras are magnetized, and each time you change lenses, you’re screwing a piece
of metal into a metal mount, and not surprisingly, tiny metal shavings appear, and those
can get sucked down onto your sensor, and before you know it, you’ve got tiny spots and
specks on your sensor, which means you now have tiny spots and specks on every photo
you’re about to take. That’s why we have to do our best to keep our sensors clean, and that’s
why more and more of the newer digital cameras now have built-in sensor cleaning ca-
pabilities. This basically demagnetizes your sensor for a moment to shake the sensor dust
off , and it does a decent job. Not a great job, an okay job (it doesn’t replace having your
sensor fully cleaned), but if your camera has it built-in, you might as well use it. For example,
on a Canon camera like the 50D, if you turn the power switch to the On higher position, this
turns on the auto sensor cleaning feature, and it shakes the dust off your sensor right then
and there. It cleans the sensor when it shuts down, too. With the power switch in the On
position, you can also go to the Set-Up 2 menu, choose Sensor Cleaning, and then choose
Clean Now. If you have a Nikon camera (like a D300), press the Menu button, go to the
Setup menu, and choose Clean Image Sensor. In the next menu, choose Clean Now, and
your sensor will be cleaned. If you want it to automatically clean the sensor each time you
turn on the camera, choose Clean at Startup/Shutdown.
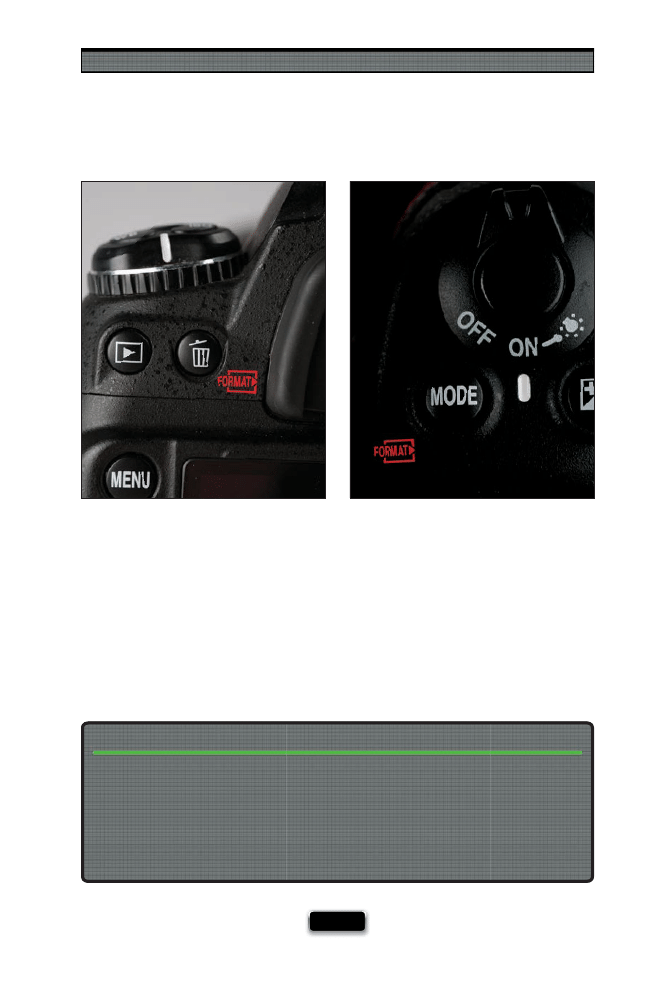
Avoiding Problems Like a Pro
[ 197 ]
Many dSLRs have a shortcut which lets you quickly reformat (erase all your images
on) your memory card without having to dig through all the menus on the back of
the camera. On a Nikon, the shortcut actually appears in red beside the two buttons
you need to hold down to reformat (you hold the Delete [trash can] button and the
Mode button down together for two or three seconds, until you see the word “For”
fl ashing in the LCD info window on top of the camera. Once “For” is fl ashing, release
those buttons and press them again just once, and your card will format). On a Canon,
there isn’t a shortcut, but you can go under the Set-Up 1 menu, select Format, and
then press the Set button. Select OK and your card will be formatted.
Shortcut for Formatting Your Memory Card
If you shoot with just one memory card, it’s going to catch up with you. Your card’s going
to be full, or you’re going to have to wind up formatting the card without having two
backups (or you’ll have to stop shooting for the day), which is why you’ve got to have at
least a second, if not a third, memory card with you on every shoot. I just checked and
a 4-GB memory card is going for as little as $18.95. You can also fi nd lots of cards with
manufacturer’s rebates (I recently bought a number of 8-GB memory cards for $69 with
a $69 mail-in rebate. I kid you not. That’s right—free cards. It happens).
Don’t Go Out Shooting with Just One Memory Card
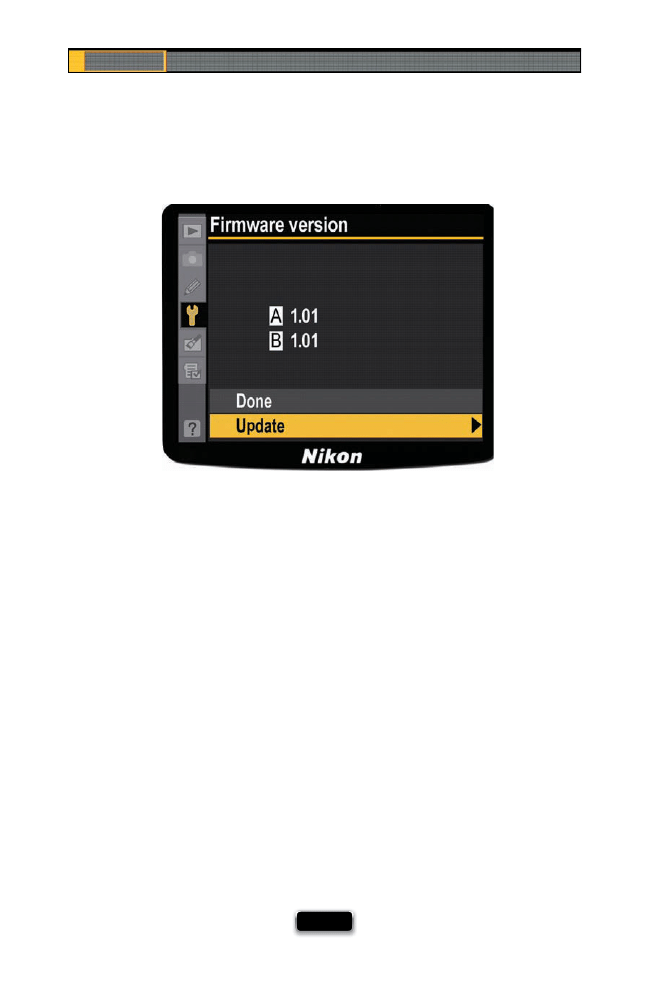
Chapter 9
The Digital Photography Book
[ 198 ]
One huge advantage of having the brains of today’s digital cameras run by software
is that the camera manufacturer can release updates to your camera, which can range
from fi xing problems in the camera (bugs) to adding new features. These free camera
updates are called “fi rmware” updates and you download them directly from the
manufacturer’s website. Once an update is downloaded, you just connect your camera
to your computer (using that little USB cable that came with your camera), and run the
fi rmware updater software (which usually has some simple instructions with it), and
it updates your camera (by the way, it’s not just cameras that get fi rmware updates—
off -camera fl ash units can get them, too). The good news is they don’t issue fi rmware
updates very often—maybe only two or three times in the life of a camera, so this
isn’t something you’ll have to be checking every week, but it doesn’t hurt to stop by
Google.com every once in a while and type in your camera’s name plus fi rmware (so
your search would be “Canon 50D” + “Firmware update” or “Nikon D700” + “Firmware
update”), and you’ll fi nd a direct link to download the update from the manufacturer.
Once you fi nd the update online, check to see if the one available online is a higher
number than the one currently installed on your camera (for example, on Nikon or
Canon cameras, you go under the Setup menu and choose Firmware Version, and it
will show you the version of your currently installed fi rmware [like version 1.01]). So, if
you see that a more recent fi rmware update has been released (like fi rmware version
1.02 [or higher]), you’ll want to download and install that fi rmware.
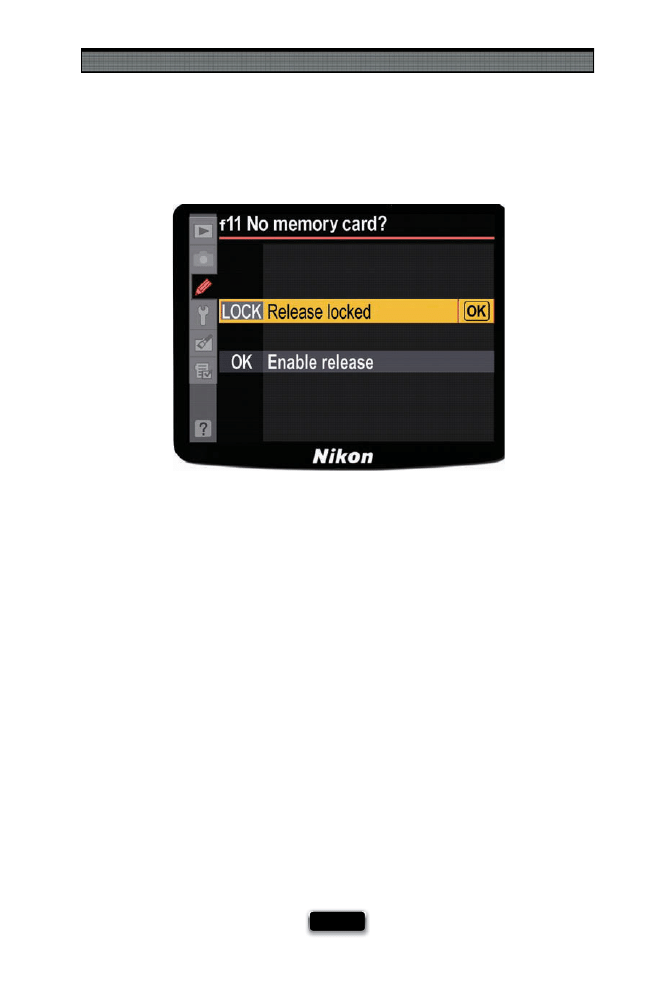
Avoiding Problems Like a Pro
[ 199 ]
When camera manufacturers ship their cameras to camera stores, they want the sales
people at the camera store to be able to open a camera box and hand the customer
the camera to take a few shots and see how the camera feels (after all, how a camera
feels in your hands is very important). So, at the factory, they set the camera up so you
can take shots without actually having a memory card in the camera. The shutter fi res
just like usual, and you see the picture appear on the LCD on the back of the camera,
just like always, except those photos vanish into thin air after, because they’re not
saved to a memory card. This is one thing you usually learn about the hard way. Well,
at least I did when I did a photo shoot in a studio—I shot for 35 minutes—and when
I popped the door on my camera open to back up my photos, I was shocked to fi nd out
there was no memory card, even though I had been looking at some of the shots on the
camera’s LCD monitor. Those shots were gone forever, so the fi rst thing I do with any new
camera is turn the memory card lock on, so it won’t even take a shot without a memory
card in the camera. On Canon cameras, go to the Shooting menu and choose Shoot
Without Card, then set this function to Off . On Nikon cameras, go under the Custom
Setting menu and choose No Memory Card. Change the setting from Enable Release to
Release Locked. Now, the camera’s shutter release will be locked, and it won’t take a shot
unless a memory card is in the camera.

Chapter 9
The Digital Photography Book
[ 200 ]
With so many of us posting our images on the Web, you’ve got to protect yourself (and your
images) by legally copyrighting your work. Luckily, the process (at least in the U.S.) is all now
Web-based, so it’s never been faster, easier, or more aff ordable than it is today. What copy-
righting does is to legally defi ne who owns the photo, and even though, technically, there is
some very limited amount of protection aff orded simply by the fact that you took the shot, if
someone takes your photo off the Web and uses it in their brochure, or website, or print ad,
etc., without actually having registered your work as copyrighted with the U.S. Copyright offi
ce,
your chances of winning a judgment in court against the “photo thief” are virtually nil. Because
this process has become so quick, easy, and inexpensive, there’s no reason not to add this pro-
cess as part of your photo workfl ow. To register your work online in the U.S., start by going to
www.copyright.gov/eco/index.html (it only costs $35, and you can register literally thousands
of photos at a time for that same fee). By the way, make sure you read the tip below.
You Need to Copyright Your Photos
I did a series of video interviews with intellectual property attorney and noted photography
copyright expert Ed Greenburg, and followed up with interviews with photographer rights
advocate Jack Resnicki, in July 2008. These videos have been a huge hit with photographers,
and I invite you to watch them on my blog: www.scottkelby.com. Once you’re there, search
for copyright and you’ll fi nd the videos.
Watch These Free, Short, Absolutely Fascinating Videos on Copyright

Avoiding Problems Like a Pro
[ 201 ]
There’s a rule a lot of photographers (well, paranoid photographers anyway, like me)
follow, and that is: we don’t erase our memory cards until we absolutely know that
we have two copies of our photos elsewhere. For example, when you download your
photos to your computer, that’s only one copy, and you shouldn’t format your memory
card with just this one copy (because when your hard drive crashes one day [notice
that I said “when”] all those photos are gone forever). Now, once you back up those
photos from your computer to a second drive (a backup hard drive), then you’ll have
two copies—one set on your computer and one set on your backup drive—and then
it’s safe to format (erase) your memory card and keep shooting with that card. Without
two backups, it’s just a matter of time before those photos are gone forever (I could tell
you the saddest stories of people who have written me who have lost every photo of
their kids for the past eight or 10 years, because they had them on their computer, and
their computer died. I wish it was just one story, but I’ve got dozens and dozens).
Back Up Twice Before Formatting
I wrote about my entire photography backup and archiving strategy in a very detailed
article on my blog at www.scottkelby.com/blog/2008/archives/1410, and if you’re paranoid
about losing all your photos (and you should be), it’s worth a read.
My Personal Photo Backup Strategy
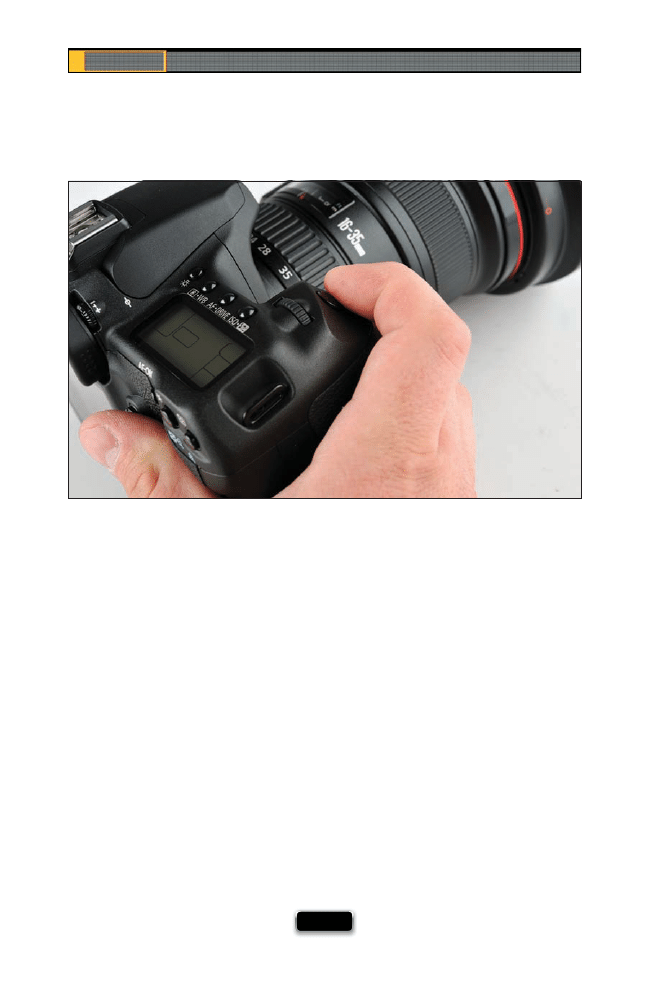
Chapter 9
The Digital Photography Book
[ 202 ]
Want another tip for getting sharper images? Start gently squeezing the shutter but-
ton, rather than just pressing it. Actually, for the least vibration possible, you should
kind of roll your fi nger over the shutter button from back to front. By doing this gentle
pressing of the shutter button, you’ll wind up with sharper photos every time.
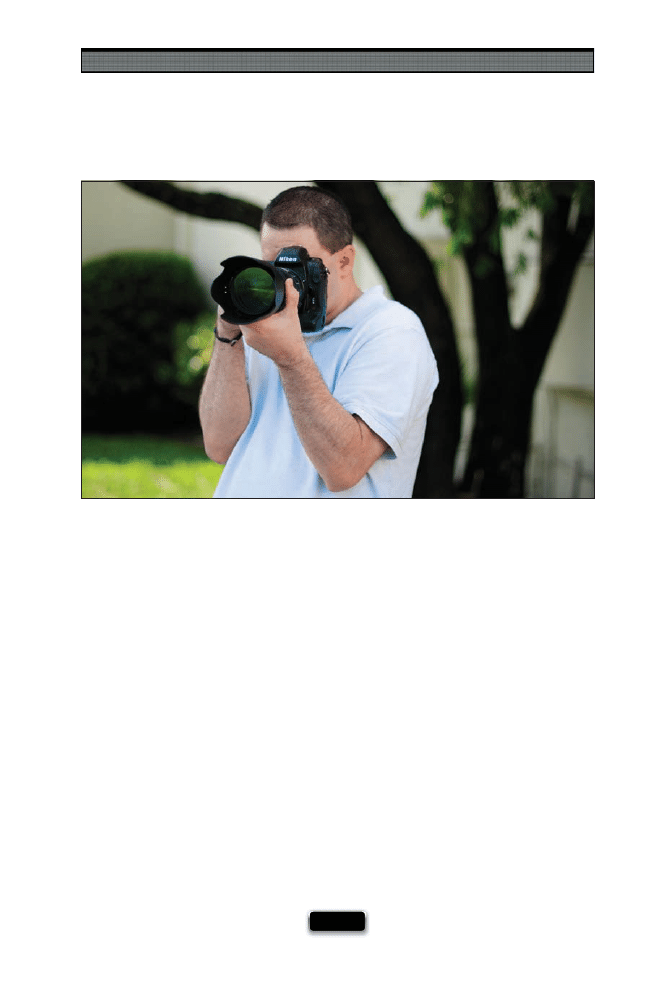
Avoiding Problems Like a Pro
[ 203 ]
Another technique for getting sharper photos when hand-holding your camera is to
steady the camera by holding it with your elbows tucked in toward your body. This
helps anchor the camera to your body, keeping it steadier, and giving you sharper
photos. This is an easier change to make than you’d think, and once you see the results,
you’ll be glad you did it.
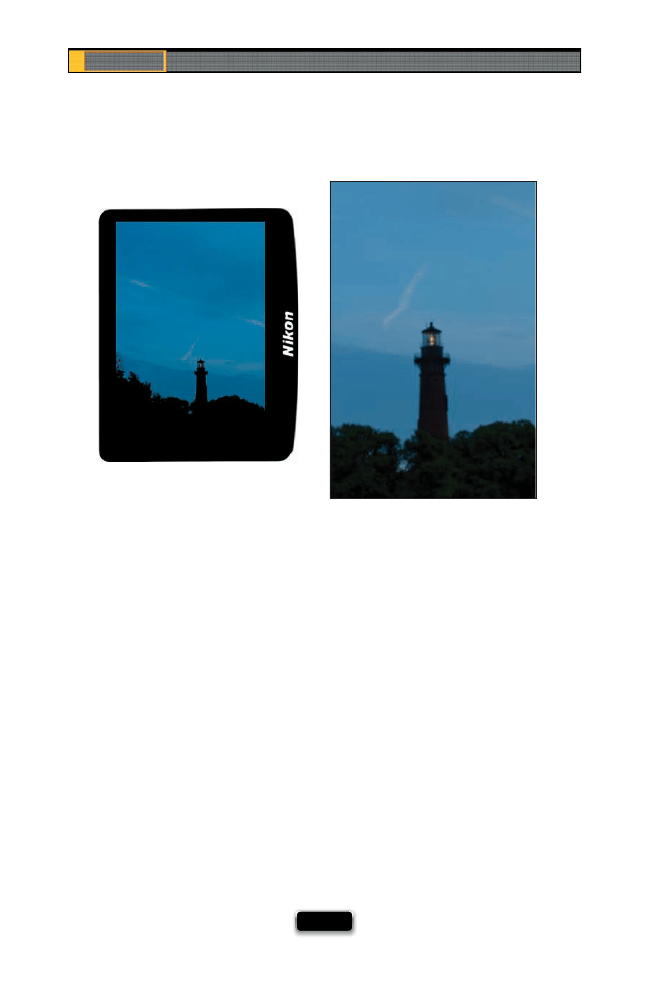
Chapter 9
The Digital Photography Book
[ 204 ]
If you’ve ever taken a shot that looked great on your camera, only to open it later on
your computer to fi nd out that your killer shot was incredibly blurry, don’t feel bad—
everything looks sharp on a tiny 2.5" or 3" LCD screen, and every photographer has
been burned by this (well, every photographer I know anyway). That’s why it’s so critical
to check the sharpness right then and there—out in the fi eld—while you still have
a chance to reshoot the shot. When you see a shot that looks really great on the LCD,
stop right there and make sure it’s sharp by zooming in tight and checking the focus.
Just press the Zoom In (on a Nikon) or Magnify (on a Canon) button on the back of the
camera to zoom in. Once zoomed in, you move to view diff erent parts of your zoomed-
in photo using the multi selector (on a Nikon) or the multi-controller (on a Canon) on
the back of the camera. Once you’re done checking the sharpness, press the Zoom
In (magnifying glass) button again (on a Nikon) or the Reduce button (on a Canon) to
zoom back out. Keep your surprises to a minimum by checking the sharpness now, in
camera, before it’s too late.
Don·t Let the Small Screen Fool You!
SCO
TT KELBY

Avoiding Problems Like a Pro
[ 205 ]
If you use more than one memory card (and I highly recommend that you do—see the
tip at the bottom of page 197), you’ll have experienced that “moment of doubt” when
you go reaching for your second memory card, and you ask yourself, “What’s on this
card? Have I down loaded these? Is it okay to erase it?” I’ve had it happen to me more than
once, but here’s a way to avoid this moment of doubt altogether. Once you’ve download-
ed the images to your computer, and then backed them up to a second hard drive (CDs
and DVDs are a little too risky), right then and there, format your memory card. That way,
if you see a memory card in your memory card case, you know it’s formatted and ready to
go, and that the images that were once on there are now safely backed up twice.
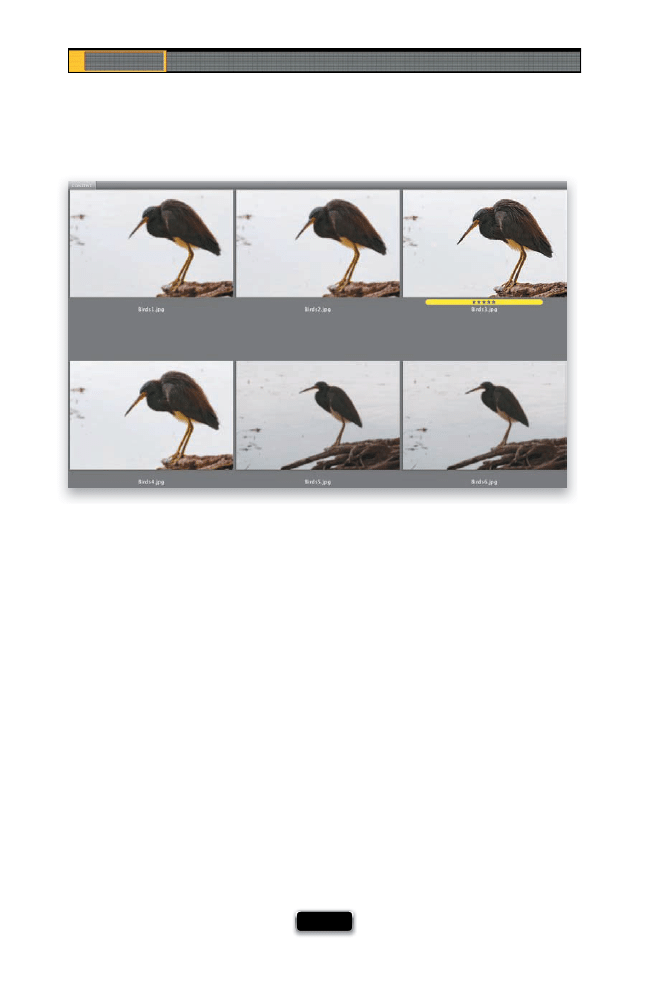
Chapter 9
The Digital Photography Book
[ 206 ]
If you’re in a situation where you’re having to shoot in low light without a tripod (if
your shutter speed gets under 1/60 of second, there’s a pretty good chance your photo
will be somewhat blurry if you’re hand-holding), and you don’t want to raise your ISO
because your photo will get too noisy, here’s a trick you can try that will usually get a
sharp photo: shoot multiple shots in Burst or High-Speed Continuous mode. Chances
are, if you take three or four shots in a quick burst, at least one of those shots will be in
focus. I’ve done this numerous times and I’m always amazed at the results. You’ll see
a blurry one, blurry one, then all of a sudden there’s a nice crisp shot (as shown here
with the fi ve-star image labeled yellow), and then right back to blurry. So, next time
you’re in one of those situations, crank off a few right in a row, and keep your fi ngers
crossed that at least one of those will be in focus (hey, it’s better than the alternative).
Shoot Multiple Shots in Low-Light Situations
SCO
TT KELBY

Avoiding Problems Like a Pro
[ 207 ]
If you upgrade to the latest high-speed Compact Flash or SD memory cards, is it going
to really make a diff erence? Well, honestly, for most folks—probably not. These more
expensive high-speed cards are designed for people like serious sports photographers,
with higher-end dSLRs, who need to shoot long, continuous bursts of images. The reason
high-speed cards matter to them is that they need any images temporarily stored in
their camera’s built-in memory buff er to be written to the memory card as quickly as
possible to free that buff er for their next continuous burst of shots. If you’re reading this
and thinking, “I never shoot that many shots at once,” then there’s good news—you don’t
really need one of those expensive high-speed cards. This is good news, because regular-
speed cards are much less expensive. For example, I just looked up what a regular 8-GB
SD Lexar memory card costs at B&H Photo. It was $9.99. The 133x higher-speed 8-GB
card sells for $61.95, but it did come with a mail-in rebate of $25 (however, retail statistics
show only a very small percentage of consumers ever actually mail in these rebates,
which is why mail-in rebates are so popular), but even with that, it’s still $36.95—more
than 3.5 times as much as the regular-speed card. So, why pay the diff erence if you won’t
experience a diff erence, eh?
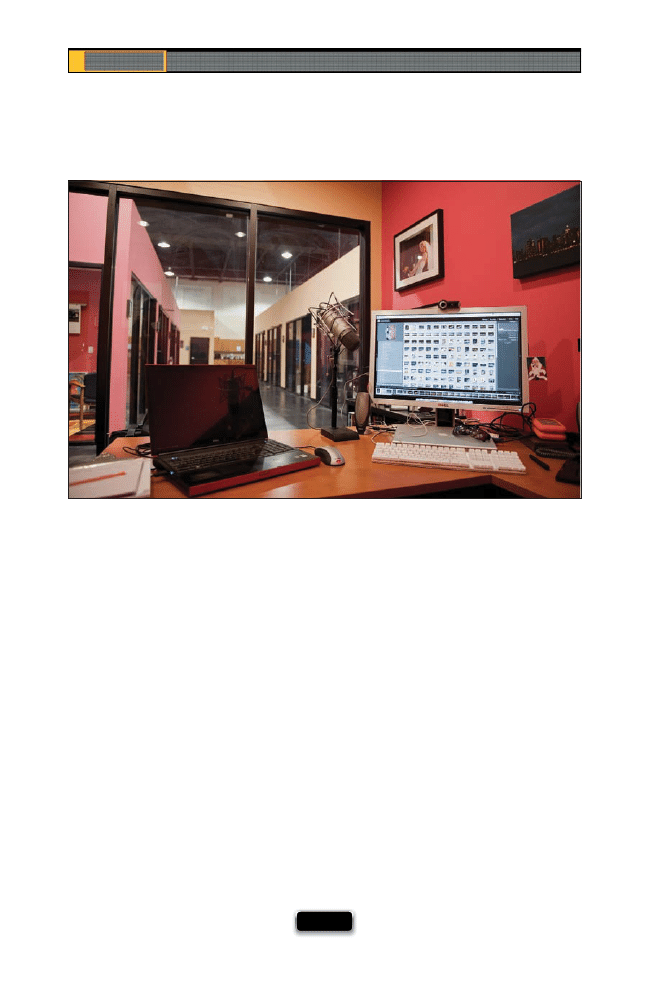
Chapter 9
The Digital Photography Book
[ 208 ]
My friend Janine Smith shared this tip with me last year, and ever since she did, I’ve
been using it and it’s saved my bacon more than once. When you’re packing your cam-
era bag for a shoot, before you close the bag, pick up the camera and take a quick shot
of anything. This will tell you instantly if you have a memory card with you, whether
your battery is charged, and whether your camera is in basic working order. You don’t
want to learn about any of these problems once you’re on location (or on vacation).
You’d rather know now, while you still have time to grab a memory card, charge your
battery, or fi x a potential problem.
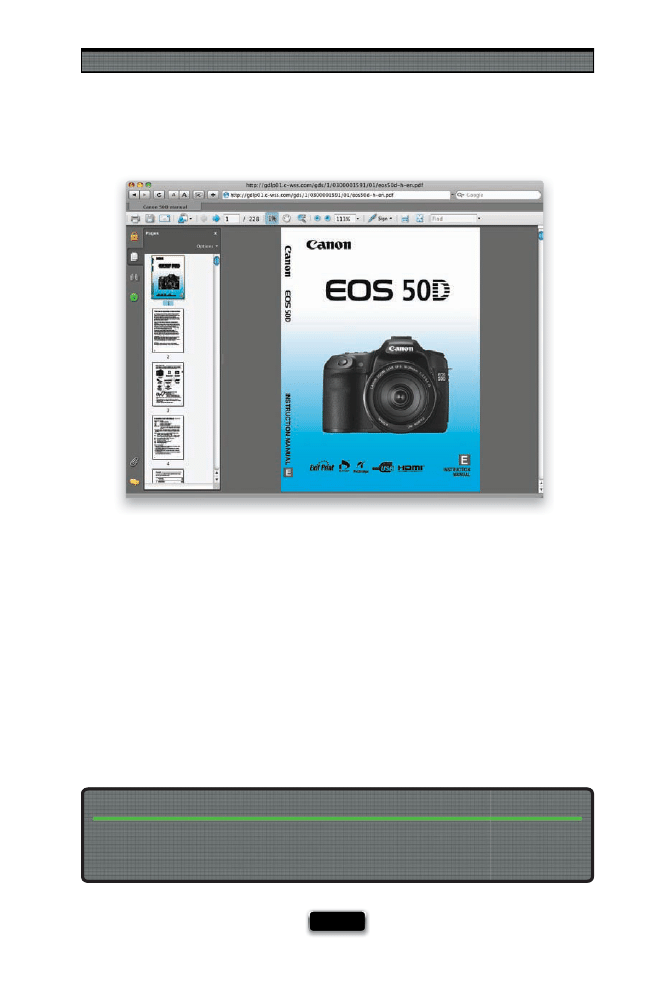
Avoiding Problems Like a Pro
[ 209 ]
One of the biggest problems with camera user manuals is quickly fi nding what you’re
looking for. That’s why I always download the free PDF electronic version of the user
manual from the manufacturer’s website, because the PDF versions have a search fea-
ture, and you can fi nd what you’re looking for in fi ve seconds, rather than fi ve minutes
(of course, it’s only fi ve minutes if you’re lucky. I’ve spent much more time looking for
certain features). Once you use the free PDF version of the manual, you’ll only reach
for the printed manual in an emergency situation, when you’re out in the fi eld and
you don’t mind hauling the user manual around with you. By the way, I download the
manuals for all my gear—fl ashes, cameras, wireless triggers, you name it. They’re so
small in fi le size, and so handy, there’s no reason not to.
Why You Should Download Your User Manual
If you’re a Nikon user in the U.S., go to www.nikonusa.com/Service-And-Support/Download-
Center.page, and if you’re a Canon user in the U.S., go to www.usa.canon.com, click on the
Download link in the menu bar across the top, and choose Consumer.
Where to Find Those Downloadable Manuals

Chapter 9
The Digital Photography Book
[ 210 ]
If you want to do a quick test to see if you’ve got “junk” on your camera’s sensor, try
this: aim at something like a solid gray wall, or a gray, cloudless sky, and take a shot.
Import this photo into your computer, open it in Photoshop, and then press Com-
mand-I (PC: Ctrl-I). This inverts your photo, and any spots, specks, dust, or junk will stick
out like a sore thumb, and you’ll know right then if you need to clean your camera’s
sensor (by the way, although you can buy sensor cleaning kits, and cleaning your sensor
is surprisingly easy, some folks just don’t feel comfortable digging around inside their
camera body, and in that case, you should stop by your local camera store and have one
of their techs do a quick cleaning for you. They’ll charge you a few bucks for it, but
it beats having spots on all your shots). Make sure you do this before a big trip. (See
page 196 for a tip on using your camera’s built-in sensor cleaner.)
The Photoshop Trick for Finding Dust Spots
SCO
TT KELBY
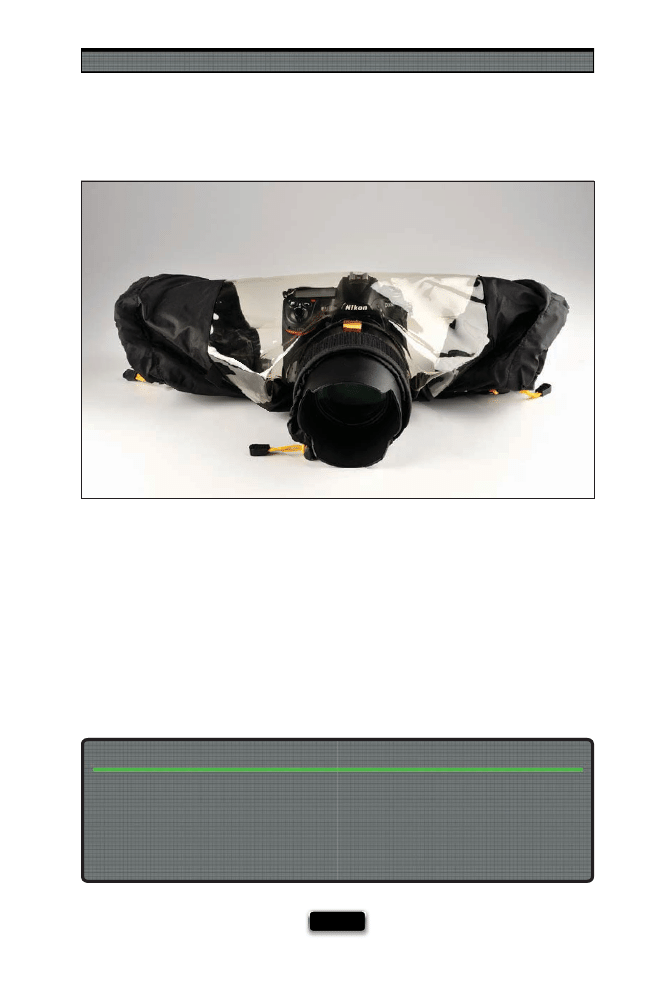
Avoiding Problems Like a Pro
[ 211 ]
Sometimes the best images come from the worst weather, but if you’re going to be
shooting in this type of weather, you need to take a few precautions for your gear. Some
cameras, like Nikon’s D300, D700, and D3 line, have weather-sealed bodies that help keep
moisture out, but your best bet is to buy rain covers for your gear that still allow you to
hold your camera and operate the zooms on your lenses, while keeping the electron-
ics inside your camera nice and dry. The set I use is the KT E-702 Elements Cover made
by Kata (www.kata-bags.com), and it’s got special sleeves on the side so you can reach
inside the cover and adjust your camera settings and lens zoom. I don’t have to use this
often, but when I do, it’s great not having to worry about my gear getting toasted.
If you get caught in an unexpected rain situation, try using the shower cap from your
hotel room to cover the entire back of your camera body (so just the lens sticks out).
If you get caught in the rain and don’t have protective gear (hey, it happens), when you get
back to a dry place, try patting dry the outside of your gear with a cleaning cloth, or a dry
towel if a cleaning cloth isn’t handy. Don’t wipe it, or you risk moving water into places you
don’t want it, so just carefully pat it dry. I’ve heard of photographers using a blow dryer set
on low to help dry things off , but luckily I haven’t had to test that one out. Also, leave your
camera off until the camera has had plenty of time to dry the inside on its own.
What to Do When You Don’t Have Protective Gear

SHUTTER SPEED: 1/8
SEC
F-STOP:
F
/11
ISO: 100
FOCAL LENGTH: 70
MM
PHOTOGRAPHER:
SCOTT
KELBY

Have you ever looked at a photo and thought, “I wonder how you
get a shot like that?” Maybe it was a studio shot, or one taken out
on location, and you’re wondering where the light was positioned,
or maybe if there was even a light at all. Maybe you could fi gure out that
there was a fl ash of some sort used, but maybe you didn’t know which
type of softbox was used, or if there was more than one light. Has that ever
happened to you? No? Really? Rats! That’s going to make this chapter a hard
sell for you, because like its two predecessors in volumes 1 and 2, this is
more of those types of things, but if you’re not into that, then we’ll have to
come up with a way to give this chapter real value for you. Wait…wait…I’ve
got it! Let’s make it a “photo treasure hunt.” Yeah, I’ll give you objects, and
you look through the images in this chapter (being careful not to actually
read any of the detailed step-by-step instructions on how to recreate those
looks yourself), and then you fi nd them. Now, once you fi nd all these items,
then go to the website www.ohyouhavetobekiddingme.com, and there
you’ll fi nd a form with a broken link where you can fi ll in which page you
found each object on, and then in a month or so, I’ll forget to go to that
site to choose a winner (from all the entries that didn’t get submitted), and
that lucky person (probably you, by the way) will win a free copy of one
of my books (probably this book), and we’ll ship that copy directly to you
(probably sometime next year), but by then you’ll have moved to a new
address (you’re probably running from the law), and delivery will be refused
by the current occupant (your ex), and then I’ll get the book back and send
it to the next winner on the list (probably your parole offi
cer). Or you could
just read the chapter and see what you think. Really, it’s your call.
Yet Even More Photo
Recipes to Help You
Get “The Shot”
The Simple Ingredients to
Make It All Come Together
[ 213 ]
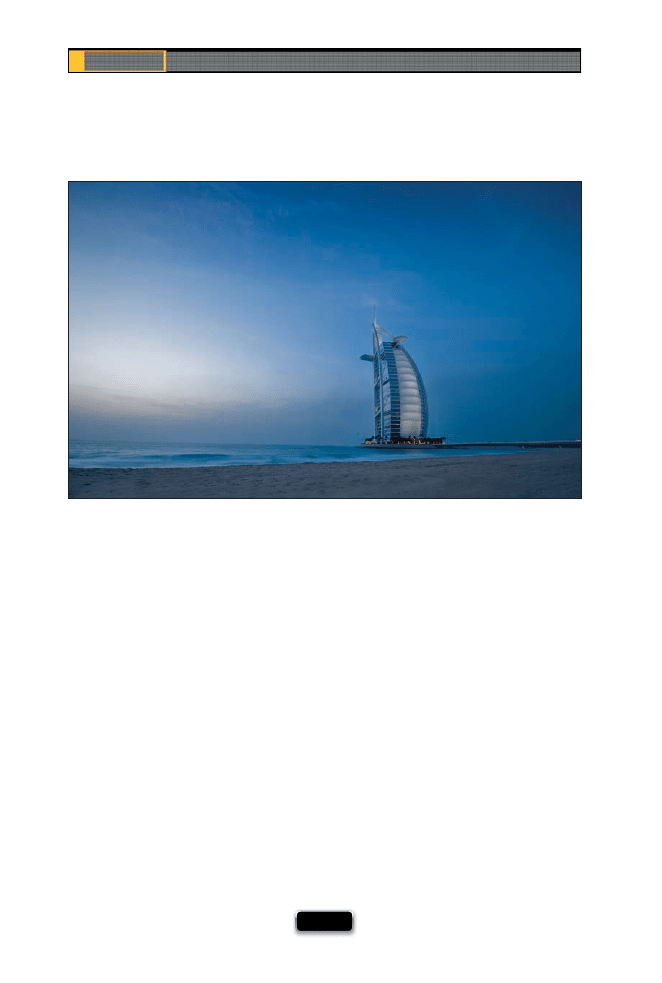
Chapter 10
The Digital Photography Book
[ 214 ]
Characteristics of this type of shot: A sweeping shot that’s both a landscape and travel
shot in one, and with lots of detail all the way through and a clear focus on the hotel,
there’s no doubt what the subject is. (The location is the Burj Al Arab hotel, Dubai, UAE.)
(1) You need to use a very-wide-angle lens to capture this type of expanse. This was shot
at 14mm with a 14–24mm wide-angle zoom lens on a full-frame camera, which makes
the lens even wider than usual.
(2) To capture all the detail front to back, shoot in aperture priority (Av) mode, and
choose the highest number f-stop you can (this was shot at f/22, which keeps every-
thing in focus from front to back).
(3) This was taken right around sunset, so the light is low, which means you absolutely
need to shoot on a tripod to keep the shot sharp and in focus. It also means the light is
going to be gorgeous (even though the sun is tucked behind the clouds, the clouds are
still great because they hold a lot of the color).
(4) To eliminate any camera shake, you can either shoot with a cable release or, at the
very least, use the camera’s built-in self-timer to take the shot, so your fi nger isn’t even
touching the camera when the shot is taken.
The Recipe for Getting This Type of Shot
SCO
TT KELBY
Yet Even More Photo Recipes to Help You Get “The Shot”
[ 215 ]
Characteristics of this type of shot: You’re in really tight, which pulls you into the action,
and the rotation of the wheels gives you a sense of movement, but without blurring
the rest of the image.
(1) To get in really close like this, you need a long lens (this was taken with a 200mm
lens with a 1.4x teleconverter to get in even closer).
(2) The key to this shot is fi nding a shutter speed that freezes the action enough for the
bike and rider to remain sharp, yet keep some blur in the wheels, so it doesn’t look like
the bike is standing still. You can freeze most sports shots at 1/1000 of a second, so to
see some wheel-spin, you know right off the bat it has to be slower than 1/1000. This
was taken at 1/400 of a second.
(3) If you’re shooting at a slow shutter speed like this (well, 1/400 of a second is slow
for sports anyway), you’ll need to pan (follow) along with the bike to keep the bike and
rider sharp. You won’t be shooting on a tripod, so keep your camera steady when pan-
ning (if you’re using a long enough lens, you can try using a monopod).
(4) When panning like this, you need to be shooting in high-speed continuous (burst)
mode to increase your chances of getting a sharp shot.
The Recipe for Getting This Type of Shot
SCO
TT KELBY
Chapter 10
The Digital Photography Book
[ 216 ]
Characteristics of this type of shot: A “beauty-style” shot with soft, full lighting that
wraps around your subject and gives you bright, fl at, almost shadowless light.
(1) There are two keys to a beauty-style shot like this: The fi rst is to have the subject put her
hair back into a ponytail and hide as much of that behind her head as possible, leaving the
face open and clean. The second is the lighting, which bathes the subject in light and gives
the image the clean beauty look.
(2) There are just two lights used for this look: the main light is a beauty dish that’s directly
in front of the subject, but up about two feet above her face, aiming down at her at a
45° angle. The other light is under the plexiglass, aiming up at her at a 45° angle (this is
sometimes called “clamshell” lighting, because it looks like you’re shooting in between an
open clamshell). Position the camera height right at her eye level.
(3) To keep everything in focus, from front to back, you’ll need to use an f-stop that holds
details, like f/11, and a long enough lens (like a 200mm) to give nice perspective.
(4) She’s leaning on the same clear piece of plexiglass that I talked about in the product
photography chapter (Chapter 4), which is held up by two people assisting in the studio.
The background is a gray seamless paper background.
The Recipe for Getting This Type of Shot
SCO
TT KELBY
Yet Even More Photo Recipes to Help You Get “The Shot”
[ 217 ]
The Recipe for Getting This Type of Shot
Characteristics of this type of shot: A tight-in shot, giving you an up-close view you
don’t usually see, and the shot has a lot of energy and vivid color.
(1) The key to this shot is using a very long lens (in this case, a 400mm lens) to get you
really in tight to the action.
(2) Because you’re shooting in direct sunlight during the middle of the day, getting a
shutter speed greater than 1/1000 of a second won’t be a problem at all (in fact, this
was shot at 1/4000 of a second, which freezes everything).
(3) Because the car is coming almost straight at your shooting position, you hardly see
the wheels like you do with a side or three-quarter view of the car, so you don’t have to
be as concerned about using a slow shutter speed to have the wheels blurred to show
motion. Because of that, you can shoot with a much higher shutter speed and create a
really crisp image.
(4) One thing that greatly adds to the energy of the shot is tilting the camera 45° to
one side—a very popular angle for motorsports shots.
(5) You’ll want to use a monopod to steady a lens 300mm or longer.
SCO
TT KELBY
Chapter 10
The Digital Photography Book
[ 218 ]
Characteristics of this type of shot: Dramatic lighting that doesn’t evenly light the
subject. Having a subject with dark hair on a dark background adds to the drama.
(1) To get this type of shot, you need just two lights: the main light is a large softbox
positioned to the left (from our view) and slightly in front of the subject, but very close
to the subject to create very soft light. The key is to keep this large softbox mostly to
the side of the subject, so the light doesn’t fully light her entire face—you want those
shadows on the right side of her face to add drama. Keep the power on the main light
down about as low as it will go, since it will be so close to the subject.
(2) The second light is a strip bank (a tall, thin softbox) positioned behind your subject
on the right side (from our view), lighting her hair and shoulders (it’s at a 45° angle
about eight feet behind her to the right). The reason the light doesn’t spill over every-
where is that there’s a fabric grid over the strip bank (I talked about these in volume 2).
(3) This was shot with the subject on a black seamless paper background. No refl ector
is necessary and no tripod is necessary (the fl ash will freeze your subject). It was taken
at f/8 to keep everything from front to back in focus.
(4) To get a little movement in her hair, just add a fan (any old fan will do).
The Recipe for Getting This Type of Shot
SCO
TT KELBY

Yet Even More Photo Recipes to Help You Get “The Shot”
[ 219 ]
The Recipe for Getting This Type of Shot
Characteristics of this type of shot: Lots of detail throughout the shot, including both
highlight and shadow areas, and a surreal look in the sky.
(1) The key to this shot is shooting bracketed in your camera, so that later you can com-
bine the bracketed shots into an HDR image using Photoshop and/or Photomatix Pro.
(2) This was taken in the middle of the day, in direct sunlight (it wasn’t as cloudy as it
appears—the clouds are enhanced by the HDR eff ect), so there’s enough light to use an
f-stop of f/11 or higher, which keeps as much of the image in focus as possible from front to
back. Set your camera to three- or fi ve-image bracketing (see page 117 for how to do that).
(3) To take all this in, you’ll need a wide-angle lens (I used an 18–200mm lens, so I shot
this at 18mm for the widest view possible).
(4) Although I didn’t use a tripod for this particular shot (I didn’t have one with me), HDR
shots work best when you can shoot on a tripod (although, obviously, you can get away
with hand-holding an HDR shot if you have Photoshop CS3 or CS4, and can use the
Auto-Align Layers feature to perfectly align the shots later, before you create the HDR
image). I created a video just for you to show how to combine your bracketed shots into
an HDR image like you see above. The link to it is on page 118.
SCO
TT KELBY
Chapter 10
The Digital Photography Book
[ 220 ]
Characteristics of this type of shot: An outdoor portrait, taken at midday, with soft
directional lighting (the opposite of what you’d get at midday).
(1) The fi rst step is to get your subject out of the direct sunlight. If you look at the setup
shot on page 30, the subject (above) is standing under a tree, but there’s lots of light
coming through the branches, so you’d have her move back a few feet, so there are no
dapples of light falling on her—you want her completely in the shade.
(2) To light a shot like this, all you need is one single off -camera fl ash (in this case,
a Nikon SB-800 fl ash) on a light stand, up high in front of her and to the left (from
our view). You need something to soften the light—in this case, we used a Lastolite
Ezybox (as seen back on page 7).
(3) To separate the subject from the background, you need to have the background
blurry and out of focus, so you’ll need to use a very low-numbered aperture. In this
case, I used an f-stop of f/5.6 (the lower the number you use, the more out of focus
the background will be).
(4) Set your fl ash at a very low power, so it blends in with the existing light. You don’t
need to shoot on a tripod, because the fl ash will freeze your subject.
The Recipe for Getting This Type of Shot
SCO
TT KELBY
Yet Even More Photo Recipes to Help You Get “The Shot”
[ 221 ]
The Recipe for Getting This Type of Shot
Characteristics of this type of shot: A dark, dramatic editorial-style shot.
(1) This is a simple one-light shot. It’s a beauty dish (of all things) positioned directly
above the subject’s head, aiming straight down (like a street lamp).
(2) Because the light is aiming straight downward, some of the light is spilling onto the
black seamless paper background, giving a little spotlight eff ect behind the subject.
(3) The subject is not a professional model, and didn’t know what to do with his hands,
so since he’s kind of a Mac freak, we handed him a laptop. This is a great trick to use
when your subject is uncomfortable in front of the camera—just hand them a prop,
give them something to do, and then just capture the moment as they interact with
the prop (which is what happened here, when he started jokingly hugging the laptop).
(4) The fi nal key to this is having the light fall off , so his face is well lit, but then the
light falls off as it moves down. This was done by placing a black fl ag (a 24x36" felt
panel) just below the bottom edge of the beauty dish. That way, the light didn’t spill
too much onto his chest, and mostly concentrated on his face. This was shot with a
70–200mm f/2.8 lens (at 85mm) at f/6.3.
SCO
TT KELBY
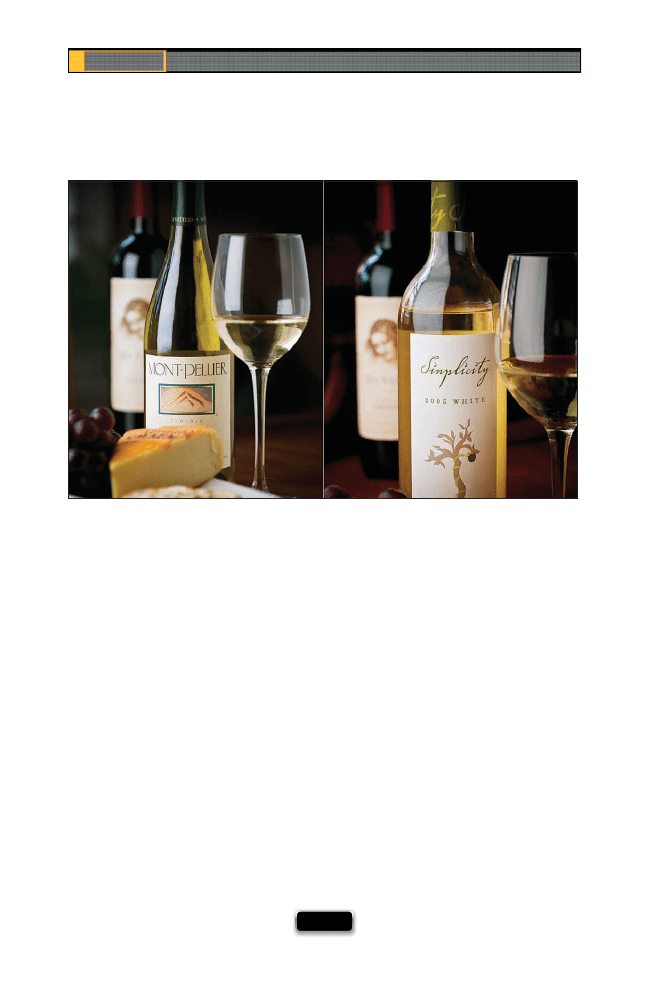
Chapter 10
The Digital Photography Book
[ 222 ]
Characteristics of this type of shot: Soft daylight-looking light, with large, tall high-
lights in the bottles and glasses, and a very shallow depth of fi eld.
(1) These shots are a mixture of natural light and continuous daylight fl uorescent
studio lighting. The natural daylight was coming from a window behind and to the left
(from our view) of the wine bottles.
(2) The main light (lighting the front of the wine bottles) is a Westcott Spiderlite (not a
strobe, but a continuous light) using daylight fl uorescent bulbs with a 24x36" softbox
attached to soften the light. The light is just off to the left of the wine bottle, and in re-
ally close (just outside the left side of the camera frame). To get that nice tall refl ection,
just rotate the softbox so it’s tall (rather than a wide).
(3) Both lights (the natural window light and the Spiderlite continuous light) are on
the left side of the frame, so to bounce some light back into the dark area on the right
side of the bottles is a white foam core refl ector (you can buy these at your local offi
ce
supply store), and it’s standing straight up, to the right of the wine bottles, just outside
the frame.
(4) This is a product shot, so shoot it on a tripod (especially in lower light like this).
The Recipe for Getting This Type of Shot
SCO
TT KELBY
Yet Even More Photo Recipes to Help You Get “The Shot”
[ 223 ]
The Recipe for Getting This Type of Shot
Characteristics of this type of shot: This is the bright, fl at, shadowless look that’s very
popular right now in fl ash photography. However, with ring fl ash, you’ll actually see a
shadow halo outlining your subject, which is part of “the look.”
(1) There’s only one light—an AlienBees Ring Flash (seen on page 47), which is a circle
of very small fl ashes, and your lens goes through the middle of this circle of fl ashes, so
it’s mounted right to the camera. You shoot from directly in front of your subject.
(2) Normally, you’d keep your subject about 10 feet away from the white seamless
paper background, but to get that halo shadow behind her, you can reposition your
subject so she’s only around a foot or two from the background. That way, you can see
the shadows created by the ring fl ash, but they’re not too large.
(3) Since you’re this close to the background, you don’t need to light the background
with a separate fl ash—the light from the ring fl ash is enough to light the background
at the same time.
(4) A ring fl ash produces a harder light source than a strobe with a softbox, so to keep
the shadows that outline your subject soft, make sure you shoot in close to your sub-
ject (this increases the relative size of your light source, which makes the light softer).
SCO
TT KELBY
Chapter 10
The Digital Photography Book
[ 224 ]
Characteristics of this type of shot: Dark, dramatic lighting that picks up the chrome
and the lines of the bike.
(1) You only need one light to get a shot like this, but it has to be a big one (well, the
strobe doesn’t have to be big, but the softbox does—it has to almost be as long as the
bike). Place the softbox directly over the motorcycle, on a large boom stand, aiming
straight down at it.
(2) The reason you don’t see the legs of the boom stand holding up the light is that
I removed them using the Clone Stamp tool (found in Photoshop or Photoshop Ele-
ments). In the original, you could see part of the base of the rolling boom stand, and
even part of the light stand itself, just to the right of the front tire.
(3) To keep the bike pretty sharp throughout, use an f-stop of at least f/8 or higher.
(4) This is essentially a product shot and since that’s the case, you need to shoot it on
a tripod to keep the image really sharp and crisp.
The Recipe for Getting This Type of Shot
SCO
TT KELBY
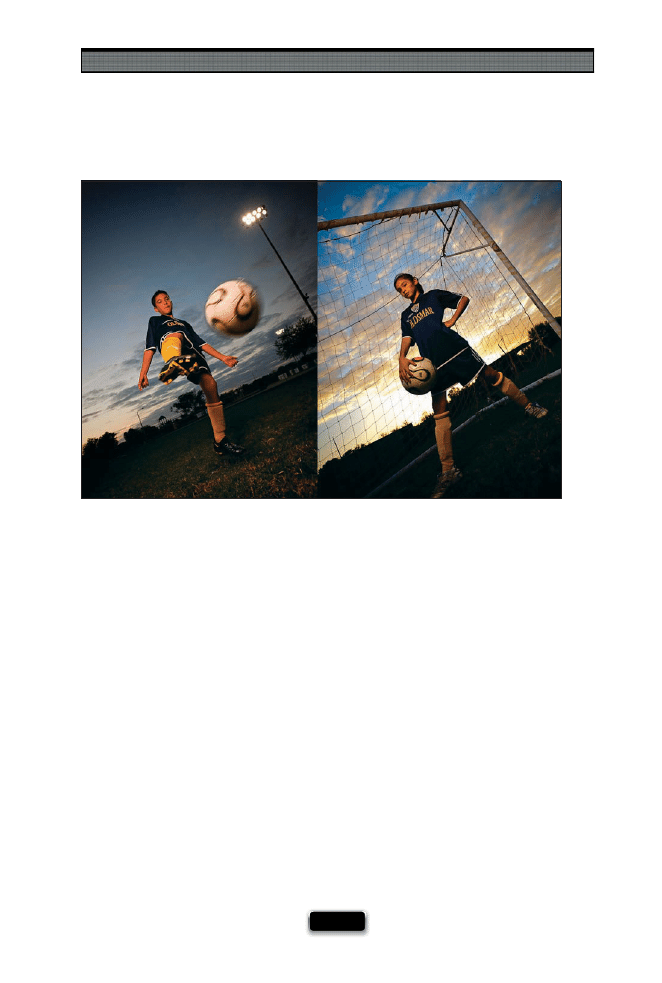
Yet Even More Photo Recipes to Help You Get “The Shot”
[ 225 ]
The Recipe for Getting This Type of Shot
Characteristics of this type of shot: A great mix of sunset color and on-location fl ash,
coupled with a shooting angle that makes these young kids look larger than life.
(1) There are two keys to the shot: The fi rst being composition. To make the kids look
big, you have to get down really low and shoot upward with a wide-angle lens (I used
a 14–24mm ultra-wide-angle zoom on a full-frame camera). When I say to shoot really
low, you actually need to be lying on the ground shooting upward to get this perspec-
tive. The other key to this shot is waiting until right around sunset to take it.
(2) The kids are lit using an off -camera fl ash (in this case, a Nikon SB-900 fl ash) mount-
ed on a lightweight, portable light stand, with a small Ezybox softbox in front of it to
soften and control the spill of the light. For both shots, the fl ash on the stand was on
their right (from our view), just outside the frame.
(3) The key here is to switch to program mode, turn off the fl ash, aim at your subject,
hold the shutter button halfway down, and then look to see the shutter speed and
f-stop chosen by your camera. Then switch to manual mode, put in that f-stop and
shutter speed, turn the fl ash on, and put the power really low—just enough to light
your subject. Also, put an orange gel over the fl ash head, so the light from your fl ash
doesn’t look so white and artifi cial.
SCO
TT KELBY
Chapter 10
The Digital Photography Book
[ 226 ]
Characteristics of this type of shot: A cropped-in-tight shot with lots of detail, high-
lights, and shadows.
(1) It’s a natural-light shot—a bowl of fruit, on a table, in the shade. All you have to do
here is position yourself (or rotate the bowl), so the light is coming from one side, giv-
ing the photo depth and dimension.
(2) Shoot standing far back, and zoom all the way in to 200mm to get this tight compo-
sition. The shot was taken with my favorite all-around travel lens, an 18–200mm lens.
(3) When you’re shooting in open shade like this, there’s no direct light, so you’re going
to have to shoot at the lowest number your lens will allow (in this case, f/5.6) to be able
to hand-hold the shot and still keep it in focus. This will give you a somewhat shal-
low depth of fi eld (especially when you’re zoomed-in tight like this, which is when the
depth of fi eld really kicks in). Notice how the apples in front are a bit out of focus, but
the cherries are nice and sharp, and the apples behind the cherries are also out of focus.
That’s the f/5.6 at work for you. If I could have gone to a lower number f-stop (like f/4 or,
ideally, f/2.8) the depth of fi eld would have been even shallower.
(4) By shooting in aperture priority mode, all you do is choose the f-stop, and your
camera will automatically choose the proper shutter speed for you.
The Recipe for Getting This Type of Shot
SCO
TT KELBY
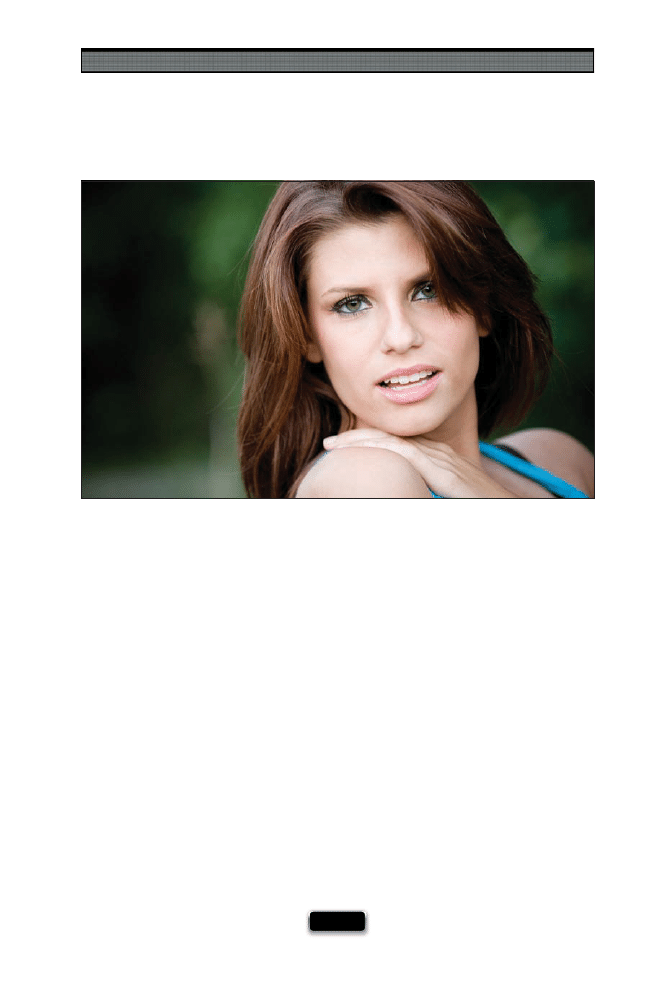
Yet Even More Photo Recipes to Help You Get “The Shot”
[ 227 ]
The Recipe for Getting This Type of Shot
Characteristics of this type of shot: A soft, natural-light portrait where the subject has
great separation from the background.
(1) There are four keys to this shot: The fi rst is to shoot very late in the day (but before
sunset). The sun is lower in the sky and the angle makes the shadows appear softer,
and this late-day sun is generally a more fl attering light.
(2) The second key is to position your subject so the sunlight is coming from one side.
In this photo, the sunlight is coming from her left (from our view), and if you look at
her hair, you’ll see it’s brighter on the left and more in the shadows on the right.
(3) The third key to this shot is to just make sure your subject is not in direct sunlight,
but on the edge of a shady area (in this case, she’s just below the thick branches of a
tree high above). Because you’re shooting in the shade, you’ll have to increase the ISO
a bit to make sure you have enough shutter speed (more than 1/60 of a second) to
keep the image sharp if you’re hand-holding your camera (this was taken at 800 ISO).
(4) To have such great separation between the subject and the background, you need a
zoom lens so you can zoom in tight (here I’m zoomed in to 200mm), and you need the
lowest number f-stop you can use (in this case, f/2.8 to get a nice shallow depth of fi eld).
SCO
TT KELBY
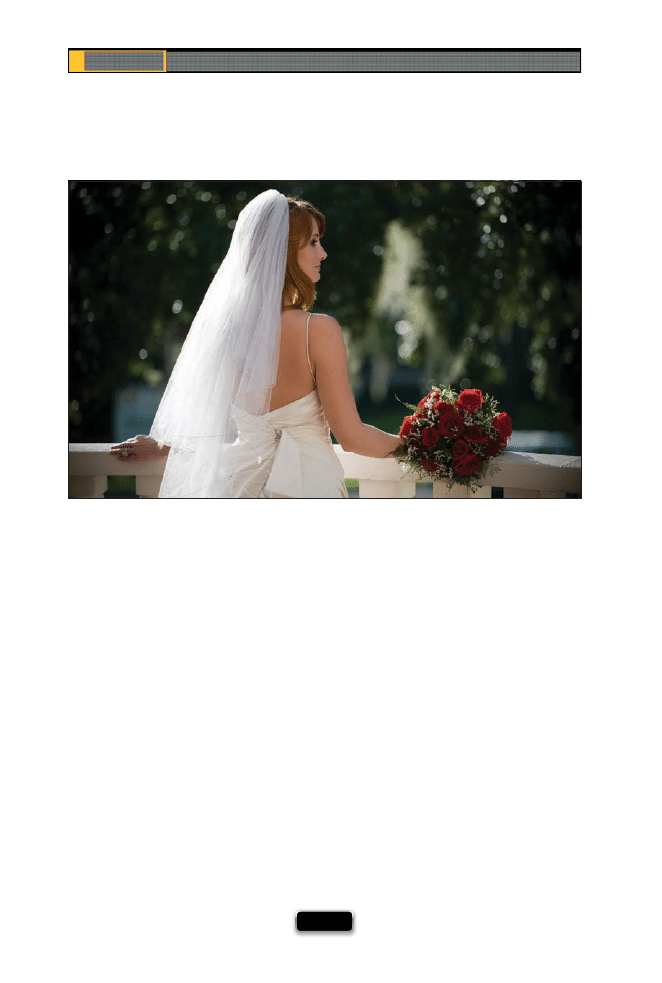
Chapter 10
The Digital Photography Book
[ 228 ]
Characteristics of this type of shot: A bright backlight mixed with soft fi ll light, and a
shallow depth of fi eld to create separation of your subject from the background.
(1) One thing that gives the photo a dream-like quality is the very shallow depth of
fi eld, and you get that by using the smallest number f-stop (in this case, f/2.8), and by
zooming in using a long lens (in this case, a 70–200mm lens, zoomed in to 150mm).
(2) To keep the sun from being harsh, you need to shoot a shot like this very late in the
day (but at least one hour before sunset).
(3) The bride is backlit, with the sun behind her and to the left (from our view) light-
ing the back of her veil. To keep her face from appearing in shadow, position a white
refl ector to the right of the bride’s bouquet to bounce some of that sunlight back onto
her face. White refl ectors aren’t all that powerful, so she doesn’t look washed in light,
because the bounced light looks pretty natural.
(4) The thing to keep an eye out for is blowing out (clipping) the highlights in her veil.
If you have your highlight warning turned on, and you see her veil blinking (warn-
ing you that the veil is blowing out), use your exposure compensation to lower the
exposure by one-third of a stop, and take a test shot. If it’s still blinking, lower it more,
and test again, and so on.
The Recipe for Getting This Type of Shot
SCO
TT KELBY

Yet Even More Photo Recipes to Help You Get “The Shot”
[ 229 ]
The Recipe for Getting This Type of Shot
Characteristics of this type of shot: A bright, fresh look to the lighting, and a very shallow
depth of fi eld.
(1) The key to this type of shot is backlighting. Place the main (most powerful) light
behind the food, and then use a lower-powered light in front.
(2) These shots were lit with a two Westcott Spiderlite daylight fl uorescent lights (these
are continuous lights—see page 88). The larger light is placed behind the food, on the
left (from the camera view), and the second, smaller light is also on the left, with the
power turned down a bit. To keep the shadows from being too dark on the right side
of the food, place a large piece of white foam core standing to the right of the food
(see page 94).
(3) If you don’t have Spiderlites or strobes, you can use window light behind your food,
and a white refl ector in front and on the side.
(4) To get that really shallow depth of fi eld, you need to use the lowest number f-stop
your lens will allow (like f/4 or even lower, if your lens can go lower).
(5) This is essentially a product shot, so ideally you’d shoot this using a tripod.
SCO
TT KELBY

Chapter 10
The Digital Photography Book
[ 230 ]
Characteristics of this type of shot: Hard, chiseled light on both sides of your subject’s
face, and a dark, dramatic, sharp look to the fi nal image.
(1) This popular look takes three lights. You need two lights placed behind and on
either side of your subject, aiming diagonally in at the sides of your subject’s face.
(2) These two lights need to have a hard edge to them, so you’re not going to use a
softbox—just the standard metal refl ectors and a bare fl ash bulb on each. To keep the
light from spilling everywhere, use a 20° grid spot over each of the refl ectors. They do
a great job of aiming a beam of light right where you want it.
(3) To keep the light from these two back lights from creating lens fl are (and washing
out the photo), put a black fl ag (usually a 24x36" felt rectangle) in front of each light to
block the light from entering your camera.
(4) The front light will be a large softbox, to the front and left side of your subject (from
our view), which will be powered way down—just enough to add some fi ll light in his
face. He’s shot on a black seamless background. Shoot at f/8 to keep everything sharp
and in focus, and use a long 200mm lens for a more pleasing look.
The Recipe for Getting This Type of Shot
SCO
TT KELBY
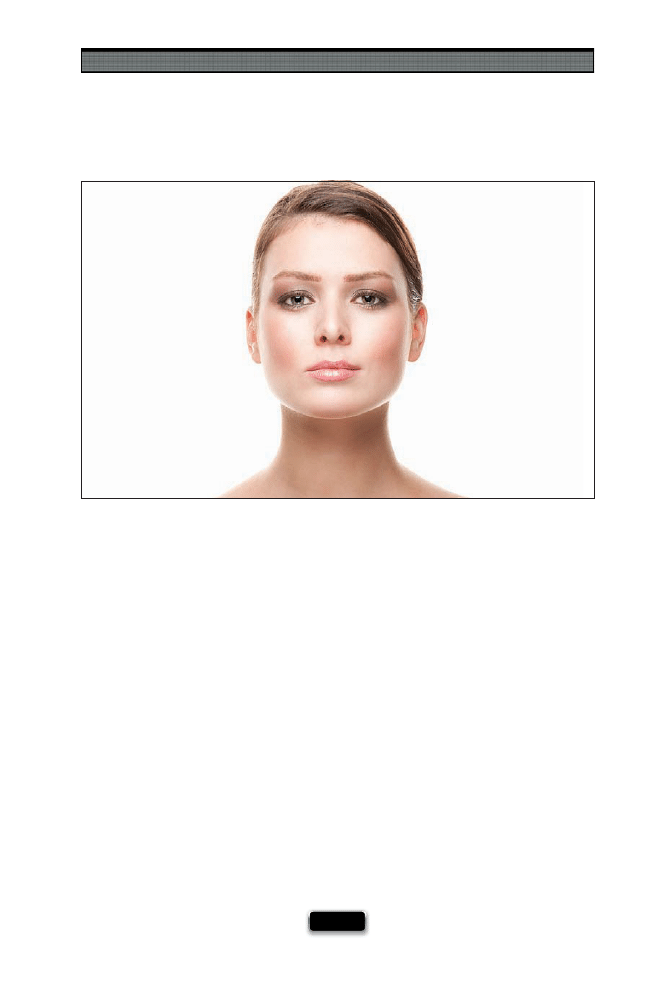
Yet Even More Photo Recipes to Help You Get “The Shot”
[ 231 ]
The Recipe for Getting This Type of Shot
Characteristics of this type of shot: A clean, bright beauty shot with a wrapping light
highlighting the side of your subject’s face.
(1) Although you see light wrapping around the sides of her face from both sides,
there are only two lights used for this look (which I think makes it even cooler). She is
not standing in front of a white background, she’s actually standing in front of a large
softbox that’s about one foot behind her, aiming upward at a 45° angle (just to help
keep the fl ash from creating lens fl are, since it would be aiming straight at the camera).
So, what you’re seeing is the light from that large softbox lighting both sides of her
face, the underside of her chin, and the edge of her neck. (See page 50 for the setup
shot for this shoot.)
(2) You put the second light, a beauty dish, directly in front of her, but up only about
one foot above her head, aiming down at her at a 45° angle (it’s almost right in her
face—just outside the top of your frame). That lights the front of her face (you can
keep the power down pretty darn low, like
¼-power or less).
(3) To keep from having lots of shadows under her eyes, put a large white refl ector at
her chest level, tilted up just a little bit toward her face. Put it up so high that it’s almost
in the frame, but not quite. This will refl ect light from the beauty dish back onto her
face to eliminate shadows and make her eyes nice and bright.
SCO
TT KELBY

[ 232 ]
The Digital Photography Book
A
about this book, 2–4
A-clamps, 42, 91
action shots, 150, 215, 217, 225
See also sports photography
Adobe Photoshop. See Photoshop
Adobe Photoshop Book for Digital
Photographers, Th
e (Kelby), 51
AE Lock button, 147, 189
AlienBees Ring Flash, 47, 223
all-in-one zoom lenses, 76
ambient light, 46
American Society of Media
Photographers (ASMP), 138
anti-movement technology, 65
aperture priority mode, 117, 181, 214, 226
aperture setting, 80, 158
architectural photography, 69
athletic events. See sports photography
Auto Exposure setting, 189
Auto ISO feature, 146
Auto white balance, 105, 181
autofocus feature, 71, 74, 75, 152
B
B&H Photo website, 69
babies
focusing attention of, 142
shooting newborn, 141
See also children
backgrounds
black granite, 95
lighting, 25, 46
sets used as, 36
solid white, 34
backing up memory cards, 201
backlighting eff ect, 121
backup fl ash, 28
batteries, rechargeable, 14
battery grips, 165
battery packs
external, 13
studio strobes and, 45
beach portraits, 136
beauty dish, 38, 221, 231
beauty-style shots, 216, 231
black backgrounds, 46
black bar/gradient, 54
black granite, 95
BlackRapid R-Strap, 160
bracketing shots, 117, 219
breath holding, 61
bridal shots, 228
bright spots, 107
Burst mode, 206
BXRi strobes, 35
C
cable release, 68, 180
camera gear
author’s website on, 3
downloading manuals for, 209
lens gear fi nder, 58, 59
modular belt system for, 166
packing lists for, 102, 182–186
Camera Raw, 51
cameras. See digital cameras
Canon cameras, 4
AI Servo mode, 153
Auto ISO feature, 146
exposure compensation on, 140
external battery pack, 13
eyepiece cover, 115
fi rmware updates for, 198
Focus Confi rmation Light on, 152
HDR bracketing on, 117
IS lenses for, 65
Live View white balance, 170
memory card lock feature, 199

Index
[ 233 ]
mini-light-stand, 26
Picture Styles, 124
reformatting memory cards on, 197
resetting to factory defaults, 193
sensor cleaning feature, 196
time-lapse photography with, 174
TTL feature, 27
video capability on, 189
zooming the LCD on, 204
catch lights, 49
celebrations in sports, 150
channels, fl ash, 9
children
focusing attention of, 142
grouping photos of, 141
handing props to, 143
perspective for shooting, 143
taking portraits of, 142–143
circular polarizer fi lter, 66
cityscapes, nighttime, 180
cleaning
lenses, 70
sensors, 196, 210
clipping warning, 177
close-up photography, 68
color
clouds for holding, 109
settings for vibrant, 124
color casts, 111
color correction
gray card for, 51
white balance vs., 187
composing
action shots, 215, 217, 225
beauty-style shots, 216, 231
editorial-style shots, 221
food shots, 229
landscapes, 214
portraits, 216, 218, 220, 223, 227, 230
product shots, 222, 224, 229
sports shots, 215, 217, 225
still-life shots, 226
travel shots, 107, 214, 219
wedding shots, 228
computers
backing up memory cards to, 201
viewing images on, 41
concert photos, 172
continuous lighting, 88
Continuous-Servo mode, 153
copyrighting photos, 200
creativity, 60, 77, 81, 120
CTO gel, 22
D
dawn, shooting at, 122
daylight
portraits lit with, 227, 228
studio lighting with, 89, 222
See also sunlight
deleting bad shots, 125
depth of fi eld
for portraits, 133, 220, 227
for sports shots, 158
for still-life shots, 226
for wedding shots, 228
Dfi ne 2.0 plug-in, 172, 179
diff usion dome, 21, 25
digital cameras
checking before packing, 208
downloading user manuals for, 209
exposure compensation on, 140
fi rmware updates for, 198
full-frame, 62, 72
hand-holding of, 61, 179, 203, 206
HDR bracketing on, 117
most common brands of, 4
rain covers for, 211
reformatting memory cards on, 197
resetting to factory defaults, 193
sensor cleaning on, 196
sophisticated technology of, 191
suggested setup for, 181
video capability of, 189
waterproof housing for, 110
zoom factor of, 72
See also Canon cameras; Nikon
cameras

[ 234 ]
The Digital Photography Book
digital photos
backing up, 201
combining in Photoshop, 173, 176
copyrighting, 200
deleting, 125
recipes for shooting, 213–231
See also JPEG images; RAW photos
distracting objects
hiding in product photos, 97
modern-day objects as, 107
downloading user manuals, 209
duChemin, David, 112
dust spots, 210
E
edge vignetting, 73
editorial-style shots, 221
eff ects
backlighting, 121
movement, 103
star fi lter, 104
Elinchrom gear
beauty dish, 38
BXRi strobes, 35
Ranger kit, 45
environmental portraits, 58
equipment. See camera gear
evaluative metering, 171
ExpoDisc, 187
exposure compensation, 140, 177, 180
external battery pack, 13
eyeglass glare, 50
eyepiece cap, 115
eyes in portraits, 139
Ezybox, 7, 225
F
fi le formats, 90
fi ll fl ash, 20, 53
fi lters
circular polarizer, 66
darkening, 103
lens, 66, 69
neutral density gradient, 66, 116
UV, 103
fi rmware updates, 198
fi sheye lenses, 59
fi shing line, 92
fl ash, 5–30
adding units of, 19
backgrounds lit with, 25
backup, 28
channels used for, 9
concert photos and, 172
diff usion dome for, 21, 25
fi ll, 20, 53
focusing for, 27
gels used with, 22–24
group assignments for, 8, 19
mini-light-stand for, 26
outdoor portraits and, 17, 220
pop-up, 20
positioning, 29–30
power settings for, 15, 20
recycle time for, 12–14
Remote (or Slave) mode, 16
ring, 18, 47, 223
softening, 5–7
sync speed for, 54
test fi ring, 11
transmitter system for, 10
Fluorescent white balance, 105
foam core, 94
focusing
for off -camera fl ash, 27
for sports photography, 147, 152, 153
See also autofocus feature
food photography, 229
football games
action and celebration shots from, 150
shooting from the end zone at, 149
variety of shots from, 151
See also sports photography
formatting memory cards
backing up twice before, 201
immediately after backing up, 205
on-camera shortcut for, 197

Index
[ 235 ]
formica, white, 91
frames per second (fps), 165
framing shots, 112
freezing action, 154, 215
f-stops
star eff ects and, 104
zoom lenses and, 74
full-frame cameras, 62, 72, 162
G
gaff er’s tape, 42
gear. See camera gear
gels, 22–24
CTO, 22
essential, 23
Sticky Filters, 24
getting “the shot”, 213–231
Gitzo G-065 Monitor Platform, 41
glare in eyeglasses, 50
Glyda, Joe, 120
gold refl ectors, 50
graduated neural density fi lter, 66, 116
granite, black, 95
gray backgrounds, 46
gray card, 51
green gel, 23
Greenburg, Ed, 200
grid spots, 39, 230
groups, fl ash, 8, 19
H
hand-held shots
low-light situations and, 206
super-fast lenses and, 61
tips for stabilizing, 179, 203
HDR (High Dynamic Range) images
camera settings for, 117
composing shots for, 219
creating in Photomatix Pro, 118
hiding
distracting objects, 97
modern-day objects, 107
high vantage point, 130
highlights
enhancing in Photoshop, 90
warning about lost detail, 177
High-Speed Continuous mode, 206
high-speed crop feature, 162
high-speed memory cards, 207
HiLite Illuminated Background, 34
histograms, 177
Hobby, David, 14
home interior shots, 173
hood, lens, 67
I
Image Stabilization (IS) lenses, 65
intelligent-through-the-lens metering
(i-TTL), 27
invisible thread, 92
IS (Image Stabilization) lenses, 65
ISO setting
Auto ISO feature and, 146
landscape photography and, 113
low-light situations and, 179
sports photography and, 146, 148
isolating your subject, 158
i-TTL (intelligent-through-the-lens
metering), 27
iTunes iMix, 37
J
JPEG images
instantly extracting from RAW photos,
LCD monitor preview of, 192
saving fi les as, 90
when to shoot RAW vs., 195
Justin Spring Clamp, 26

[ 236 ]
The Digital Photography Book
K
Kata Elements Cover, 211
kelbytraining.com website
camera gear page, 3
video tutorial, 2
knee pads, 157
L
landscape photography
arriving early for, 122
backlighting eff ect in, 121
clouds included in, 109
composing shots in, 214
covering the viewfi nder for, 115
deleting bad shots during, 125
full-frame cameras and, 162
graduated neural density fi lter for, 116
ISO setting for, 113
lens selection for, 120
lower-level perspective for, 116
packing list for, 102, 182
panoramas made from, 123
scouting locations for, 119
three keys to, 108
ultra-wide zoom lens for, 62
vibrant color settings for, 124
wide-angle lens for, 58
See also outdoor photography
laptop computers, shooting tethered
to, 41
Lastolite gear
Ezybox, 7
HiLite Illuminated Background, 34
Studio Cubelight, 87
Trilite, 134
LCD screens (on-camera)
previewing photos on, 192
zooming in on, 204
lens collar, 70
lens hood, 67
lens vignetting, 73
Lensbaby lenses, 77
lenses, 57–81
all-in-one zoom, 76
changing, 75
cleaning, 70
creative use of, 60, 77, 81
edge vignetting from, 73
fi lters for, 66, 69
fi sheye, 59
f-stops on zoom, 74
full-frame camera, 72
gear fi nder for, 58, 59
Lensbaby, 77
macro, 68
manual focus ring on, 71
portrait, 78
prime vs. zoom, 79
renting, 163
reseating, 75
sharpest aperture on, 80
super-fast, 61
super-telephoto, 63
teleconverters for, 64
telephoto zoom, 60
tilt-shift, 69
ultra-wide zoom, 62
VR or IS, 65
wide-angle, 58, 120
zoom factor for, 72
LensPen, 70
LensProToGo.com, 163
light
ambient, 46
catch, 49
fi ll, 20, 53
main, 53
metering, 171
softening, 5–7
as subject, 106
viewfi nder, 115
See also fl ash
light stands
light tents, 87

Index
[ 237 ]
lighting
backgrounds, 25, 46
below-product, 86
continuous, 88
daylight plus studio, 89, 222
mirrors used for, 85
sports, 148, 156
strip bank, 93
underwater, 111
uneven, 52
Limit focus setting, 74
Live View white balance, 170
location portraits
beach setting for, 136
packing list for, 184
street setting for, 137
lower-level perspective, 116, 157, 225
low-light situations
hand-holding cameras in, 206
super-fast lenses for, 61
tips for shooting in, 179
VR or IS lenses for, 65
M
macro lenses, 68
main light, 53
Maisel, Jay, 137
Manfrotto gear
131DD Tripod Accessory Arm, 41
Justin Spring Clamp, 26
manual focus ring, 71
matrix metering, 171
memory cards
backup strategy for, 201
deleting bad shots from, 125
formatting after backing up, 205
lock feature for shooting without, 199
myth of high-speed, 207
packing multiple for shoots, 197
shortcut for formatting, 197
Memory Set button, 147
metering options, 171
Midsouth Photographic Specialties, 24
MiniTT1 Radio Slave Transmitter, 10
mirrors, tabletop, 85
model releases, 138
modern-day objects, 107
modular belt system, 166
monolights, 45
monopods, 63, 179
motion shots, 154, 215
movement eff ect, 103
Mpix.com photo lab, 178
multiple exposures, 176
music in the studio, 37
N
natural light
portraits lit with, 227, 228
studio lighting combined with, 89, 222
See also sunlight
neutral density gradient fi lter, 66, 116
newborn babies, 141
nighttime photography
cityscapes, 180
sporting events, 148
Nik Software, 172, 179
Nikon cameras, 4
battery grip added to, 165
Continuous-Servo mode, 153
exposure compensation on, 140
external battery pack, 13
eyepiece cap for, 115
fi rmware updates for, 198
Focus Indicator on, 152
gels included with, 23
HDR bracketing on, 117
high-speed crop on, 162
ISO Sensitivity Settings, 146
i-TTL feature, 27
Live View white balance, 170
memory card lock feature, 199
multiple exposure feature, 176
Picture Controls, 124
reformatting memory cards on, 197
resetting to factory defaults, 193

[ 238 ]
The Digital Photography Book
Nikon cameras (continued)
sensor cleaning feature, 196
Speedlight stand, 26
time-lapse photography with, 175
video capability on, 189
viewfi nder door, 115
VR lenses for, 65
zooming the LCD on, 204
NiMH batteries, 14
noise
high ISO shots and, 148
onscreen vs. print, 113
software for reducing, 172, 179
O
Olivella, Mike, 157
online photo labs, 178
orange gel, 23
outdoor photography, 101–125
arriving early for, 122
backlighting eff ect in, 121
bright spots avoided in, 107
clouds included in, 109
covering the viewfi nder for, 115
deleting bad shots during, 125
framing shots in, 112
graduated neural density fi lter for, 116
HDR images from, 117–118
hiding modern-day objects in, 107
ISO setting for, 113
lens selection for, 120
light as the subject in, 106
lower-level perspective for, 116
movement eff ect and, 103
overpowering the sun in, 17
packing list for, 102, 182
panoramas made from, 123
portraits and, 17, 135, 136, 220
postcard images and, 114
puddle refl ections in, 112
scouting locations for, 119
shadows included in, 109
star fi lter eff ect in, 104
texture shots in, 114
three keys to, 108
underwater shots in, 110–111
vibrant color settings for, 124
white balance and, 105
See also landscape photography
overexposing portraits, 140
overpowering the sun, 17
P
packing lists
importance of using, 102
landscape photography, 182
location portrait photography, 184
sports photography, 183
travel photography, 185
wedding photography, 186
panning
freezing motion by, 154, 215
and shooting video, 189
panoramas, 123
people
baby and child photos, 141–143
high vantage point shots of, 130
model releases for, 138
props for shooting, 128, 143
seating for comfort, 129
street shots of, 137
See also portraits
percentage of great shots, 188
perspective
child-level, 143
high vantage point, 130
lower-level, 116, 157, 225
Peterson, Moose, 115
photo labs, 178
Photomatix Pro, 118
photos. See digital photos
Photoshop
Auto Levels adjustment, 111
Auto-Align Layers feature, 219
combining images in, 173, 176
faking refl ections in, 84
fi nding dust spots in, 210
gray card color correction in, 51

Index
[ 239 ]
highlight/shadow enhancement in, 90
panoramas created in, 123
removing edge vignetting in, 73
Photoshop User TV, 92
Picture Controls/Styles, 124
plexiglass
for portrait photography, 216
for product photography, 84, 86
PocketWizard wireless system, 10
pop-up fl ash, 20
portable softbox, 7
portrait lenses, 78
portraits, 127–143
beach setting for, 136
beauty-style, 216, 231
of children, 142–143
composing, 216, 218, 220, 223,
CTO gel for, 22
depth of fi eld for, 133, 220, 227
editorial-style, 221
environmental, 58
eyes looking away in, 139
grid spots for, 39
grouping together, 141
leg-up trick for, 130
lenses used for, 60, 78
model releases for, 138
natural-light, 227, 228
of newborn babies, 141
outdoor, 17, 135, 136, 220
overexposing on purpose, 140
overpowering the sun in, 17
packing list for location, 184
preparing the studio for, 132
props included in, 128, 143, 221
scrims for sunny day, 135
seating subjects for, 129
shooting 3/4 view, 131
smiling vs. non-smiling, 139
street-based, 137
trifl ectors for, 134
wedding, 228
posing stool/table, 129
positioning the fl ash, 29–30
postcard images, 114
power settings for fl ash, 15
prime lenses, 79
product photography, 83–98
below-product lighting for, 86
black granite for, 95
cleaning products before, 98
composing shots in, 222, 224, 229
continuous lighting for, 88
daylight plus studio lights for, 89
dramatic background for, 95
foam core used in, 94
hiding distracting objects in, 97
invisible thread used in, 92
light tents for, 87
mirrors used in, 85
Photoshop enhancements for, 90
plexiglass used in, 84, 86
refl ections created in, 84
strip banks for, 93
tripods and, 96
white formica for, 91
Professional Photographers of America
(PPA), 138
professional tips/techniques, 169–189
concert/event shots, 172
general camera setup, 181
histogram vs. highlight warning, 177
home interior shots, 173
Live View white balance, 170
low-light photography, 179
multiple exposures, 176
nighttime scenes, 180
online photo labs, 178
packing lists, 182–186
percentage of great shots, 188
spot metering, 171
time lapse photography, 174–175
video feature, 189
white balance setting, 187
props, 128, 143, 221
puddle refl ections, 112

[ 240 ]
The Digital Photography Book
R
radio transmitter, 10
rain covers, 211
Ranger kit, 45
Raw + JPEG option, 194
RAW photos
gray card color correction for, 51
instantly extracting JPEGs from, 194
LCD monitor preview and, 192
saving in JPEG format, 90
when to shoot JPEG vs., 195
RawWorkfl ow.com website, 194
Ray Flash, 18
Rear-Curtain Sync setting, 181
rechargeable batteries, 14
recipes for getting “the shot”, 213–231
recycle time for fl ash, 12–14
refl ections
creating in product photos, 84
faking in Photoshop, 84
removing from eyeglasses, 50
shooting in puddles, 112
refl ective umbrellas, 5
refl ectors, 50, 134
Remote mode for fl ash, 16
renting lenses, 163
reseating the lens, 75
resetting digital cameras, 193
Resnicki, Jack, 142, 200
ring fl ash, 18, 47, 223
rolling light stands, 43
R-Strap, 160
S
sandbags, 44
scouting locations, 119
scrims, 135
sensor cleaning, 196, 210
set backgrounds, 36
Shade white balance, 105, 181
shadows
enhancing in Photoshop, 90
including in outdoor shots, 109
shallow depth of fi eld, 133
shapes, shooting, 120
sharpness
checking LCD screen for, 204
hand-held cameras and, 61, 203
lens aperture setting and, 80
shooting tethered, 40–41
shoot-through umbrella, 5–6
accessories for using, 5
controlling softness with, 6
portable softbox vs., 7
shot list, 34
shutter button
cable release for, 68, 180
tip on pressing, 202
wireless release for, 142, 180
shutter speed
action shots and, 215
Auto ISO feature and, 146
low-light situations and, 179
nighttime photos and, 180
panning objects and, 154
silver refl ectors, 50
Singh-Ray Filters, 103
skies, including clouds in, 109
Slave mode for fl ash, 16
smiling vs. non-smiling subjects, 139
Smith, Janine, 208
softbox
softening light, 5–7
portable softbox for, 7
shoot-through umbrella for, 5–6
solid white backgrounds, 34
Speedlight stand, 26
Sports Illustrated, 150
sports photography, 145–167
action shots in, 150, 215, 217
after-the-play shots in, 165
Auto ISO feature for, 146
backgrounds included in, 155
battery grip for, 165
before-the-game shots in, 167
celebration shots in, 150

Index
[ 241 ]
close-up shots in, 159
composing shots in, 215, 217, 225
focus setting to track action in, 153
football end zone used for, 149
full- vs. cropped-frame cameras and,
isolating your subject in, 158
JPEG mode used for, 195
lighting the players in, 156
lower-level perspective for, 157, 225
modular belt system for, 166
multiple focus settings for, 147
night games and ISO for, 148
packing list for, 183
panning objects in, 154
problem with static shots in, 164
reference photos in, 165
renting long lenses for, 163
R-Strap used in, 160
silencing the beep for, 152
storytelling through, 161
super-telephoto lens for, 63
teleconverters for shooting, 64
telephoto zoom lens for, 60
variety of shots in, 151
spot metering, 171
spots and specks, 210
stage events, 172
star fi lter eff ect, 104
starbrights, 104
Sticky Filters, 24
still-life photography, 226
storytelling
with children’s photos, 141
with sports photography, 161
street-based portraits, 137
strip banks, 93
strobes, wireless, 35
Studio Cubelight, 87
studio photography, 33–54
A-clamps for, 42
beauty dish for, 38
black bar appearing in, 54
catch lights in, 49
fast lenses and, 71
fl ash sync speed and, 54
gaff er’s tape for, 42
gray card for, 51
grid spots for, 39
lighting backgrounds in, 46
main vs. fi ll light in, 53
monolights for, 45
playing music for, 37
refl ectors for, 50
ring fl ash for, 47
rolling light stands for, 43
sandbags for, 44
set backgrounds in, 36
shooting tethered in, 40–41
solid white backgrounds in, 34
uneven lighting technique, 52
V-fl ats for, 48
wireless strobes for, 35
sunlight
overpowering with fl ash, 17
portrait lighting using, 227, 228
positioning the fl ash as, 29
scrims used for portraits in, 135
super-fast lenses, 61
super-telephoto lenses, 63
super-wide zoom lenses, 58
T
tabletop mirrors, 85
Tapes, Michael, 194
teleconverters, 64
telephoto lenses
renting for sporting events, 163
super-telephoto lenses, 63
telephoto zoom lenses, 60
television monitors, 40
tents, product, 87
test fi ring fl ashes, 11
tethered shooting, 40–41
texture shots, 114
Think Tank Photo, 166
thread, invisible, 92
through-the-lens metering (TTL), 27

[ 242 ]
The Digital Photography Book
tilt-shift lenses, 69
time-lapse photography
with Canon cameras, 174
with Nikon cameras, 175
Timer Remote Control, 174
tips and techniques. See professional
tips/techniques
transmitter, wireless, 10
travel photography
all-in-one zoom lenses for, 76
composing shots in, 107, 214, 219
deleting bad shots during, 125
packing list for, 102, 185
postcard images and, 114
texture shots in, 114
trifl ectors, 134
Trilite, 134
tripods
HDR image creation and, 117, 219
low-light situations and, 179
nighttime photos and, 180
product photography and, 96
TTL (through-the-lens metering), 27
Tungsten white balance, 105
U
ultra-wide zoom lenses, 62
umbrellas
refl ective, 5
shoot-through, 5–6
underwater shots, 110–111
lighting considerations for, 111
waterproof camera housing for, 110
uneven lighting technique, 52
updating fi rmware, 198
user manuals, 209
UV fi lter, 66, 180
V
V-fl ats, 48
vibrant color settings, 124
Vibration Reduction (VR) lenses, 65
video feature on dSLRs, 189
video instruction
on copyrights, 200
on kelbytraining.com website, 2
viewfi nder, covering, 115
vignetting, edge, 73
VR (Vibration Reduction) lenses, 65
W
waterproof camera housing, 110
weather considerations, 211
wedding photography
composing portraits in, 228
JPEG mode used for, 195
packing list for, 186
super-fast lenses for, 61
Westcott Spiderlite, 88, 89, 222, 229
White, Terry, 37
white backgrounds, 34, 46
white balance
color correction vs., 187
ExpoDisc for nailing, 187
outdoor photography and, 105
setting using Live View, 170
white formica, 91
white refl ectors, 50
wide-angle lenses, 58, 120, 214, 219
wide-open shooting, 80
wildlife photography, 64
window light

Index
[ 243 ]
wireless fl ash
channel settings, 9
dedicated transmitter, 10
group assignments, 8
See also fl ash
wireless shutter release, 142, 180
wireless strobes, 35
wireless transmitter, 10
Z
zoom factor, 72
zoom lenses
f-stops on, 74
prime lenses vs., 79
telephoto, 60
wide-angle, 58
zooming the LCD, 204

This page intentionally left blank
“I find myself using Viveza more
and more because I just want to
get the job done as easy and as
fast as possible.”
– Scott Kelby
President, National Assn. of
Photoshop Professionals
Color Control Revolutionized
Viveza offers the unprecedented
ability to select precise areas of an
image and adjust color and light
without complicated selections
or layer masks.
No other tool does a better job of
controlling color and light naturally in your images.
Spend more time behind the camera and less time
at the computer.
Viveza is available for Photoshop
®
,
Photoshop
®
Elements, Lightroom
®
,
and Aperture
™
© 2009 Scott Kelby
Watch the video and try Viveza for free

This page intentionally left blank

Scott Kelby
The Best Teachers on the
Planet–Online–All in One Place
Mastering digital photography, Adobe
®
Photoshop
®
,
and the entire
Adobe
®
Creative Suite
®
has never been easier or more affordable. Gain
unlimited access to our online training catalog, featuring exclusive classes
from the industry’s most talented and gifted teachers…like Scott Kelby.
Scott is a photographer, designer, and an award-
winning author of more than 40 books. Since 2004,
Scott has also been awarded the distinction of being
the world’s #1 best-selling author of all computer
and technology books, across all categories.
EXCLUSIVE ONLINE TRAINING CLASS
Professional Portrait
Retouching
Learn professional techniques
for making your subjects look
their very best using Adobe®
Photoshop® CS4.
You can only get these lessons, from
this amazing teacher, at just one place...
or call
800.201.7323
$
19
99
A MONTH
$
199
PER YEAR
OR
NAPP Members
$
179 a year or
$
17.99 a month.
I’m Scott Kelby and I’m the Education
Director and a teacher at Kelbytraining.com
I THINK WHAT WE ALL WANT IS A FRIEND
WHO’LL JUST SIT DOWN WITH US AND SAY
That’s the way my classes are; it’s just you and
me. So I can skip all the formal techno-baloney.
I teach you the same way I would teach a
friend so you learn way more in less time.
‘LOOK, HERE’S HOW
YOU DO THIS STUFF.
’
Enhancing Catchlights
Removing Dark Circles
Enhancing Eyelashes
Making Eyes Twinkle
Eliminating Hotspots
Removing Stubble
And Much More
EXCLUSIVE LESSONS INCLUDE

Adobe, Photoshop, Lightroom, Illustrator, Photoshop Camera Raw, and Dreamweaver are registered
trademarks of Adobe Systems Incorporated. Produced by the National Association of Photoshop Professionals.
Scott Kelby covers the features and tools in Camera
Raw CS4 and he also demonstrates specific workflows
to help his viewers practice and retain the information
from the course.
t*OUSPEVDUJPO
t0QFOJOH%JGGFSFOU'JMF'PSNBUT
t$BNFSB1SPGJMFT
t8IJUF#BMBODF
t&YQPTVSF&TTFOUJBMT
t"OE.VDI.PSF
Now
Only:
$
69
99
NAPP Member Price: $54
99
Mastering Camera Raw in
Adobe® Photoshop® CS4 - DVD
by Scott Kelby
Visit www.kelbytraining.com/dvds for more information on this and other
outstanding DVD courses featuring photography, creative design,
8FCEFWFMPQNFOU"EPCF® Photoshop®, and the entire Adobe® Creative
Suite®—CS through CS4.
EXTRAORDINARY PHOTOSHOP
®
TRAINING
AT AN EXCEPTIONAL PRICE
Exclusive Lessons Include:

Download Tour Posters at www.KelbyTrainingLIVE.com
Full Day of Live Training!
100
%
Money Back Guarantee
See website or call for details.
NAPP
Members
With over 40,000 photographers and creatives attending our events each year, it’s easy to see why Kelby Training LIVE is the most popular seminar tour in the world!
Learn from the most gifted and talented photographers and creative gurus on the planet, all sharing their latest tips, tricks and advanced techniques for photography,
Photoshop
®
, InDesign
®
, Lightroom
®
, and more.
For locations, dates & tour info visit www.KelbyTrainingLIVE.com or call 800.201.7323.
Adobe, Lightroom, InDesign and Photoshop are registered trademarks of Adobe Systems Incorporated.
Coming Soon to a City Near You
Photoshop Lightroom 2
Live Tour
with Scott Kelby
Photoshop Creativity
Tour
with Bert Monroy
Photoshop Maximum
Tour
with Dave Cross
Location Lighting Tour
with Joe McNally
Down & Dirty Tricks Tour
with Scott Kelby
Photoshop for Photographers
Tour
with Ben Willmore
Download Tour Posters at www.KelbyTrainingLIVE.com

Simply visit www.peachpit.com/safarienabled and
enter code LEJIZAA to try it today
.
Get free online access
to this book for 45 days!
And get access to thousands more by signing
up for a free trial to Safari Books Online!
With the purchase of this book you have instant online,
searchable access to it for 45 days on Safari Books Online!
And while you’re there, be sure to check out Safari Books
Online’s on-demand digital library and their free trial offer
(a separate sign-up process). Safari Books Online subscribers
have access to thousands of technical, creative and business
books, instructional videos, and articles from the world’s
leading publishers.
Document Outline
- TABLE OF CONTENTS
- CHAPTER ONE: Using Flash Like a Pro, Part 2: Picking Right Up Where the Last Book Left Off
- 9 Things You’ll Wish You Had Known…
- …Before Reading This Book!
- That Was Only 6. Here Are the Last 3
- Soft Light on Location (the Budget Way)
- Controlling Softness with an Umbrella
- Get More Control Using a Portable Softbox
- What Your Flash’s Groups Are For
- What Your Flash’s Channels Are For
- Using a Transmitter to Fire Your Flash
- How to See If All Your Flashes Will Really Fire
- Shorten the Time Between Flashes
- Recycle Faster with an External Battery Pack
- Another Recycle-Faster Tip
- Typical Power Settings for Your Flash
- Firing a Second Flash in Another Room
- Overpowering the Sun
- Getting the Ring Flash Look Using Small Flash
- What If Your Flash at Full Power Isn’t Enough?
- Lowering the Power of Your Pop-Up Flash
- When Not to Use a Diffusion Dome
- The Pro Trick for Better-Looking People Shots
- Two Other Gels You Really Need
- Sticky Filters
- Tips for Lighting Your Background with Flash
- Using That Little Flash Stand in the Box
- Where You Focus Affects Your Flash Exposure
- The Paid-Gig Flash Insurance Policy
- How High to Position Your Flash
- Which Side Should Your Flash Go On?
- CHAPTER TWO: Using Your Studio Like a Pro: In Volume 2, We Built It From Scratch. Now, Let’s Pimp It!
- The Easy Way to a Pure White Background
- Strobes with Built-In Wireless Rock!
- Using a Set Background
- You’ve Got to Have Music During the Shoot
- The Beauty Dish Look
- Using Grid Spots
- Shooting Tethered Directly to a TV Monitor
- Getting Your Laptop Nearby for Tethering
- The Most Useful Inexpensive Accessories
- Why You’ll Love Rolling Light Stands
- Why You Need Sandbags
- Monolight vs. Battery Pack
- One Background, Three Different Looks
- Using a Ring Flash
- Using V-Flats for Fashion
- Catch Lights and Why You Want Them
- Reflectors: When to Use Silver or White
- Using a Gray Card to Nail Your Color
- Don’t Light Your Whole Subject Evenly
- The Difference Between Main and Fill Light
- Avoiding the Flash Sync Speed Black Bar
- CHAPTER THREE: The Truth About Lenses: Which Lens to Use, When, and Why
- When to Use a Wide-Angle Lens
- When to Use a Fisheye Lens
- When to Use a Telephoto Zoom
- When to Use Super-Fast Lenses
- When to Use an Ultra-Wide Zoom Lens
- When to Use a Super-Telephoto Lens
- Using a Teleconverter to Get Even Closer
- Lenses with VR or IS Built In
- Using Filters with Your Lenses
- The Deal on Lens Hoods
- When to Use a Macro Lens
- When to Use a Tilt-Shift Lens
- How to Clean a Lens
- When to Use the Manual Focus Ring
- Zoomed vs. Full-Frame Lenses
- Lens Vignetting and How to Remove It
- Why Some Lenses Have Two f-Stops (Like f/3.5–5.6)
- Tips on Changing Lenses
- When to Use an “All-in-One” Zoom
- When to Use a Lensbaby Lens
- What Makes It a Portrait Lens?
- Fixed-Length Prime Lenses vs. Zooms
- Shooting at Your Lens’ Sharpest Aperture
- But My Friend Has That Lens and He Shoots...
- CHAPTER FOUR: Shooting Products Like a Pro: How to Get Them to Look Like You’ve Always Wanted Them To
- How to Create Real Reflections
- Mirrors for Those Hard-to-Light Places
- Lighting From Underneath
- The Advantage of Shooting Inside a Tent
- Using Continuous Lighting
- Mixing Daylight and Studio Lights
- Enhancing Highlights and Shadows in Post
- Making Your Own Product Table
- Special Wire for Hanging Products
- The Advantage of Using Strip Banks
- Using Foam Core
- A Dramatic Background for Products
- Use a Tripod
- Hide Distracting Stuff
- Clean It Before You Shoot It
- CHAPTER FIVE: Shooting Outdoors Like a Pro: More Tips for Creating Stunning Scenic Images
- Make a Packing List So You Don’t Forget Anything
- Show Movement in Your Shot
- Getting the Star Filter Effect
- Try Getting Creative with White Balance
- Let Great Light Be Your Subject
- Watch for Bright Spots
- The Three Keys to Landscape Photography
- Look for Clouds to Hold the Color
- How to Shoot Underwater, Part 1
- How to Shoot Underwater, Part 2
- It’s What You Leave Out of the Frame
- Shoot at the Lowest ISO Possible
- Not Sure What to Shoot? Try This!
- Keeping Unwanted Light Out
- Using a Graduated Neutral Density Filter
- How to Shoot for HDR
- What to Do with Your HDR Shots
- Scout Your Dawn Shoot Location
- Don’t Always Shoot Wide Angle
- Use Backlighting to Your Advantage
- Why We Get There Early
- Why You Should Shoot Panos Vertically
- Getting More Vibrant Landscapes
- Delete Now Instead of Later
- CHAPTER SIX: Shooting People Like a Pro: Yet Even More Tips to Make People Look Their Very Best
- If They Look Uncomfortable, Hand Them a Prop
- The Advantage of Having Your Subject Sit
- Shoot From Up Really High
- Shooting a ¾-View? Pick a Spot to Look At
- Get Everything Set Before They Arrive
- Super-Shallow Depth of Field for Portraits
- Using a Triflector for Portraits
- Using Scrims for Shooting in Direct Sun
- Shooting at the Beach
- Shooting on the Street
- Get a Model Release
- They Don’t Always Need to Be Smiling
- Overexpose on Purpose
- Put Multiple Photos Together to Tell a Story
- Get Out From Behind the Camera for Kids
- Don’t Shoot Down on Kids
- CHAPTER SEVEN: Shooting Sports Like a Pro: How to Get Professional Results From Your Next Sports Shoot
- Auto ISO Lets You Always Freeze the Action
- Using the Extra Focus Buttons on Long Glass
- Shooting Night Games with Super-High ISO
- The Advantage of Shooting From the End Zone
- The Two Most Popular Sports Shots
- Once You’ve Got the Shot, Move On!
- Turning Off the Beep
- Having Your Focus Auto-Track the Action
- Freezing Motion Doesn’t Always Look Good
- Avoid the Fence at All Costs
- Leveraging Daylight to Light Your Players
- Shoot From a Low Position
- Isolate Your Subject for More Impact
- Why You Want to Get in Tight
- Using a Second Camera Body? Get an R-Strap
- Tell a Story with Your Shots
- Full-Frame vs. Standard Digital Chip
- Don’t Have “Long Glass?” Rent It for the Week!
- Still Players Are Boring
- Another Reason to Keep Shooting After the Play
- You Don’t Have to Drag Around a Camera Bag
- Start Shooting Right Before the Game
- CHAPTER EIGHT: Pro Tips for Getting Better Photos: Tricks of the Trade for Making All Your Shots Look Better
- Using Live View to Set Your White Balance
- Spot Metering
- Shooting Concerts and Events
- Shooting Home Interiors
- Shooting Time-Lapse Photography (Canon)
- Shooting Time-Lapse Photography (Nikon)
- Creating Multiple Exposures
- Do You Really Need to Read Your Histogram?
- Using an Online Photo Lab
- Shooting in Tricky Low-Light Situations
- Shooting Night Scenes Like Cityscapes
- How My Camera Is Usually Set Up
- What I Pack for a Landscape Shoot
- What I Pack for a Sports Shoot
- What I Pack for a Location Portrait Shoot
- What I Pack for a Travel Shoot
- What I Pack for a Wedding Shoot
- White Balance vs. Color Correction
- How Many Great Shots to Expect From a Shoot
- If Your Camera Shoots Video....
- CHAPTER NINE: Avoiding Problems Like a Pro: How to Sidestep Those Things That Drive You Crazy
- Can You Trust Your Camera’s LCD Monitor?
- Resetting Your Camera to the Factory Defaults
- Instant JPEG From RAW
- When to Shoot JPEG; When to Shoot RAW
- Built-In Sensor Cleaning
- Shortcut for Formatting Your Memory Card
- Make Sure You Have the Latest Firmware
- Don’t Get Burned by Shooting Without a Memory Card
- You Need to Copyright Your Photos
- Back Up Twice Before Formatting
- How You Press the Shutter Button Matters!
- Tuck in Your Elbows for Sharper Shots
- Don’t Let the Small Screen Fool You!
- Avoiding the Memory Card Moment of Doubt
- Shoot Multiple Shots in Low-Light Situations
- The High-Speed Memory Card Myth
- Do This Before You Close Your Camera Bag
- Why You Should Download Your User Manual
- The Photoshop Trick for Finding Dust Spots
- Shooting in Bad Weather
- CHAPTER TEN: Yet Even More Photo Recipes to Help You Get “The Shot”: The Simple Ingredients to Make It All Come Together
- INDEX
Wyszukiwarka
Podobne podstrony:
The Digital Photography Book Scott Kelby Volume 2
The Digital Photography Book Scott Kelby Volume 1
Digital Photography The Digital Darkroom
The Dirty Truth?out The Cloud And The Digital Age
Installing the Digital Sc
[Photography Ebook] digital photography hacks
Stephenson, Neal Dreams and Nightmares of the Digital Age
Digital Photography Course
Exploring Digital Photography
(ebook PDF) The Necronomicon Spell Book
Sara Reinke Tiralainn 04 Book of Dragons Volume 02
The Family Reunion Book II
irving washington the art of book making
The Organic Chemistry of Drug Synthesis VOLUME 1 DANIEL LEDNICER
The Incubus Agenda RJ Scott
Ellen Datlow (ed) Omni 04 The 4th Omni Book of Science Fiction
The pet bubble book(1)
The Third Kingdom RJ Scott
więcej podobnych podstron