
Part A
Part D
Part B
Base
Front cover
Back cover
Support
Spoon
Stickers
Part C
Cut out the parts and crease them along the fold lines indicated.
Caution
:Glue, scissors, and other tools may be dangerous to young
children so be sure to keep them out of the reach of young children.
Valley fold
(dashed and dotted line)
*Make a valley fold.
Scissors line
(solid line)
*Cut along the line.
Cut in line
(solid line)
*Make a cut.
Black triangle
Glue here
Mountain fold
(dotted line)
*Make a mountain fold.
Assembly Instructions
scissors, paste, a used ballpoint pen
(tracing along the fold lines
makes them easier to fold)
You will need
You will need
White triangle
Glue the back
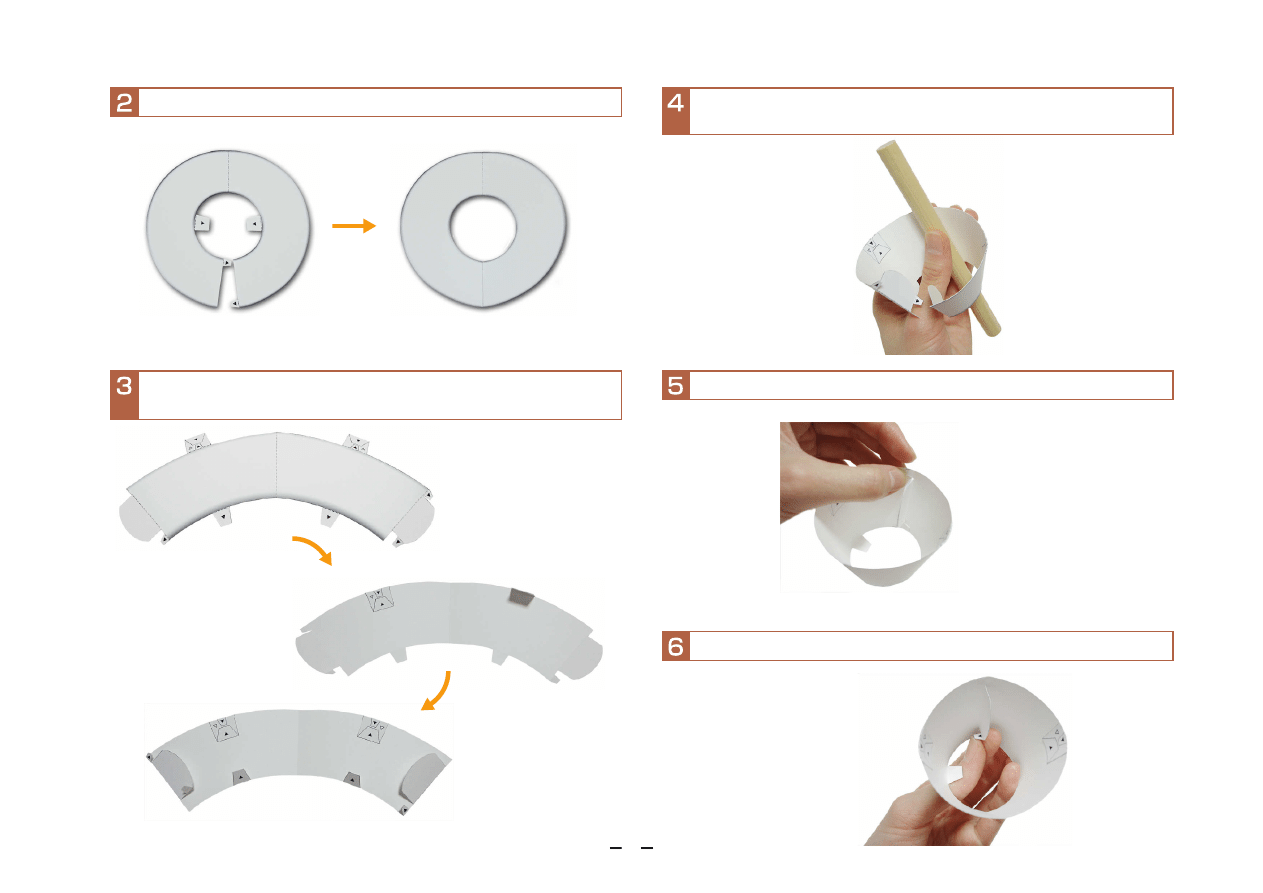
1
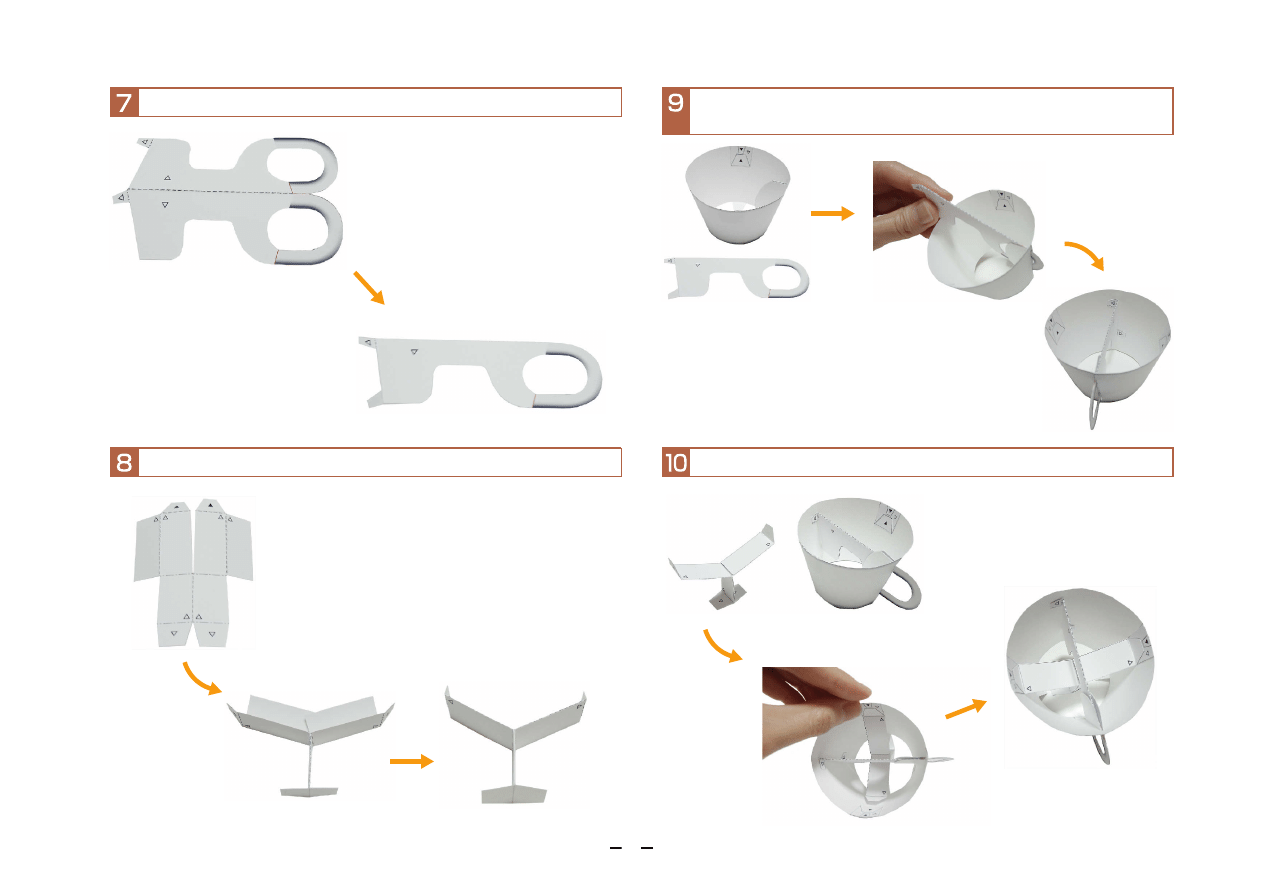
Flip part A over, fold over the upper glue spots and then stick down on
the instead.
Glue the ends of part B and stick them together.
Curl part A.
(Use a pen or other tubular object to make the curl as shown.)
Glue the ends of part A and stick them together.
Fold over the support edges and glue into place.
2
Insert the support assembly 6 into assembly 7 then stick on assembly 7
at the glue spots, along the fold line on the opposite of the support.
Fold the support along the fold line and glue together on the inside.
Fold part C along the center line and glue together on the inside.
Stick assemblies 8 and 9 together.
3
Stick part D and assembly 10 together at their glue spots.
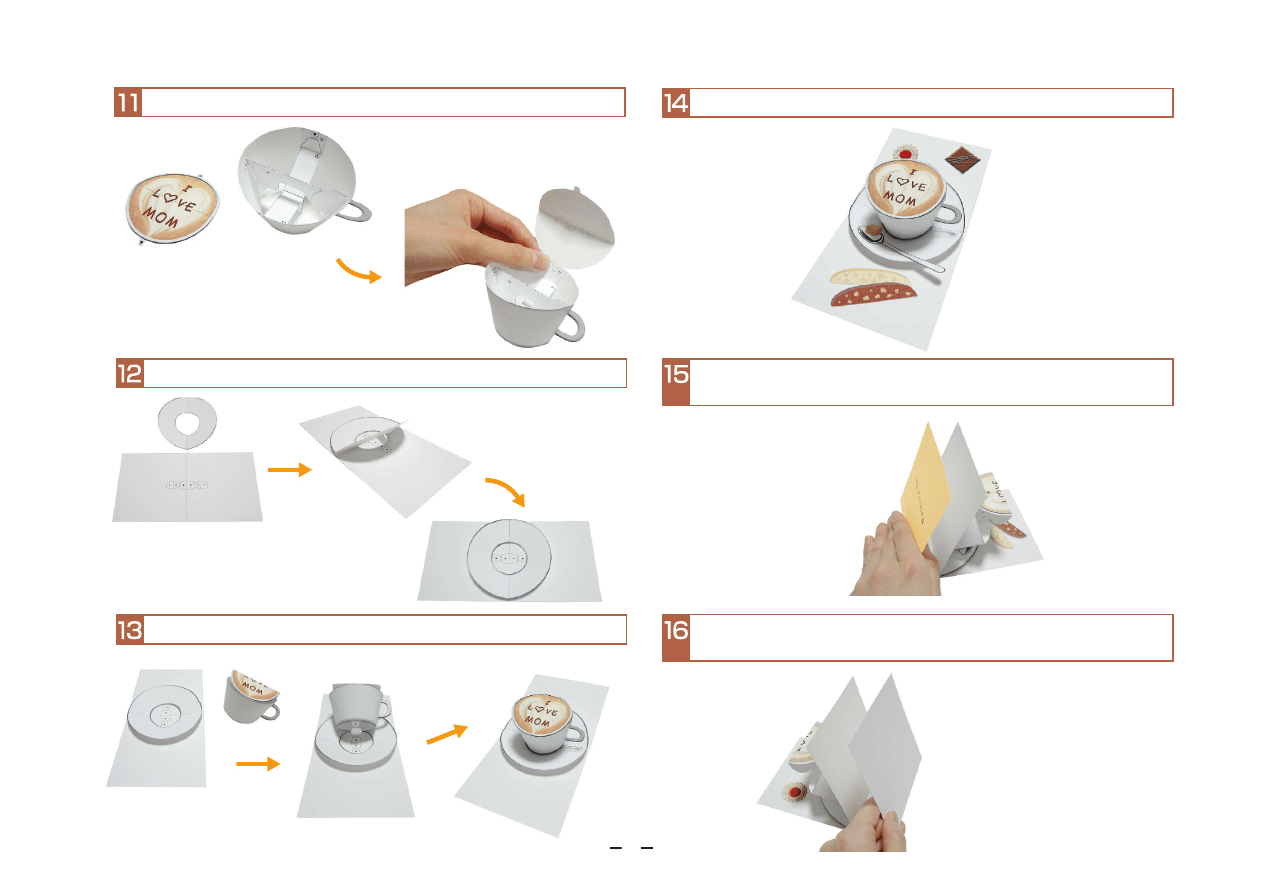
Glue assembly 2 to the base paper, once on each side.
Glue assembly 11 to assembly 12, starting from the back.
If you like, add the spoon and stickers.
Stick on a colored paper cover onto half of the rear side of the base paper.
Be careful to stick in on in the right direction.
Assembly 15 is the completed card when the cover is stuck
on to the other half side.
4
Wyszukiwarka
Podobne podstrony:
pop up ship card
pop up ship pieces1
429 elegant pop up fowers
Pop-up na twardym dnie, Prywatne, Wędkarstwo
pop up ship pieces2
pop up ship card
Bat Pop up
Pop up Bat Halloween Card
429 elegant pop up fowers
429 elegant pop up fowers
Instrukcja obslugi Audi A4 up by dunaj2
Instrukcja obslugi AUDI A4 B7 PL up by dunaj2
Instrukcja obslugi AUDI A4 B6 PL up by dunaj2
Instrukcja obslugi AUDI A4 B7 PL up by dunaj2
Instrukcja obslugi Audi A4 up by dunaj2
Instrukcja obslugi AUDI A4 B6 PL up by dunaj2
więcej podobnych podstron