Copyright 2004 Eni Oken –
www.enioken.com
Page: 1
Tutorial 007: Fat-wrap bead
By Eni Oken - www.oken3d.com/jewelry
This tutorial does a review on the traditional
wrapped bead and shows you how to create a
much nicely designed alternative: the "fat-
wrap". Start by reviewing the traditional
"wrapped bead":
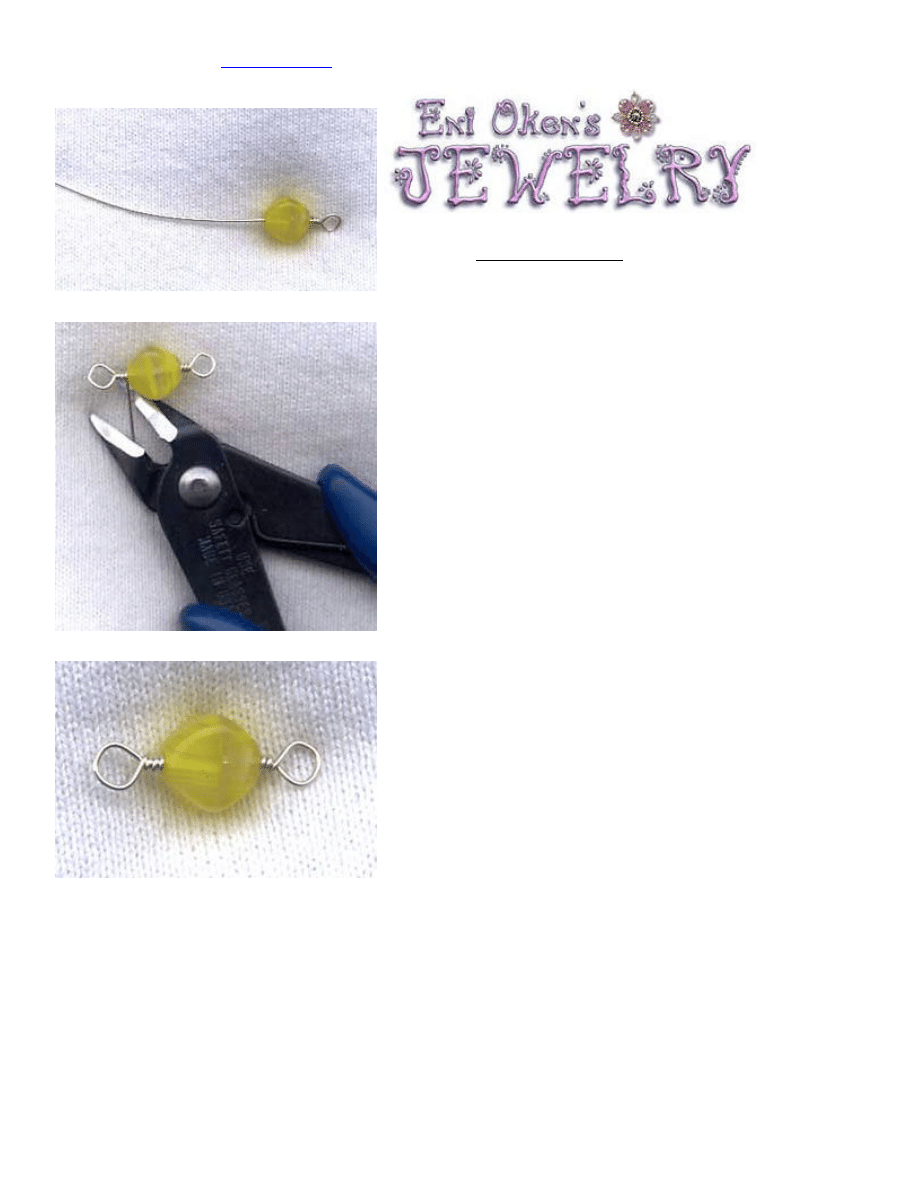
Step 1: Wrap one loop
For this kind of wrap, a 26 or 24 gauge can be
used. A bead was inserted on to the wire and a
loop wrapped on one end. The wire cutter was
used to cut the wire flush to the wrap.
Step 2: Wrap the other side
Using the round-nose pliers, wrap the other
side, coiling tightly as near the bead. Cut flush
with the flat part of the wire cutter.
Simple enough, right!
Although this method seems pretty
straightforward, there are ways to improve on
the design of this well-worn bead wrap.
Copyright 2004 Eni Oken –
www.enioken.com
Page: 2
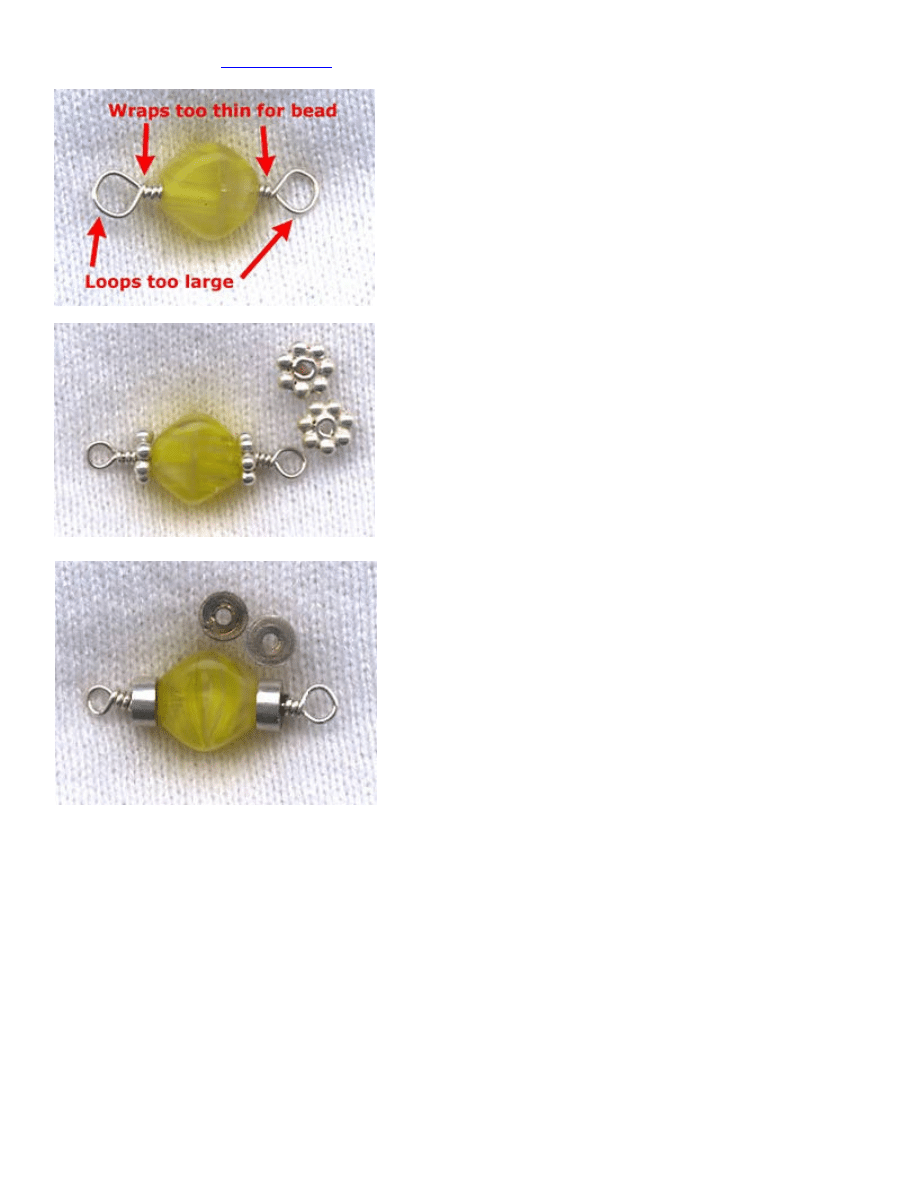
Review the design
Even though so simple and well known, this
method of wrapping a single bead with a
single wire can be improved. The first step is
to analyze the design. Stylistically speaking,
there are a few problems with this type of wrap
which could be improved:
a) The loops are generally too large, resulting
in "mickey ears" around the bead. To improve,
loops should be made as small as possible.
b) The wraps near the bead are too thin to
function as caps. There is no finishing or trim to
the bead. To improve, add caps or washer type
beads.
The loops were made smaller and silver Bali
beads were added, functioning as caps. Hoever,
the Bali beads make the whole piece look too
ornamental, which may not be suitable for
contemporary designs.
Solution: The ornamental washers were
subsituted for more contemporary washers
with clean designed. A completely different
look from review #1, however, still dependent
on washers or other external beads.
Copyright 2004 Eni Oken –
www.enioken.com
Page: 3
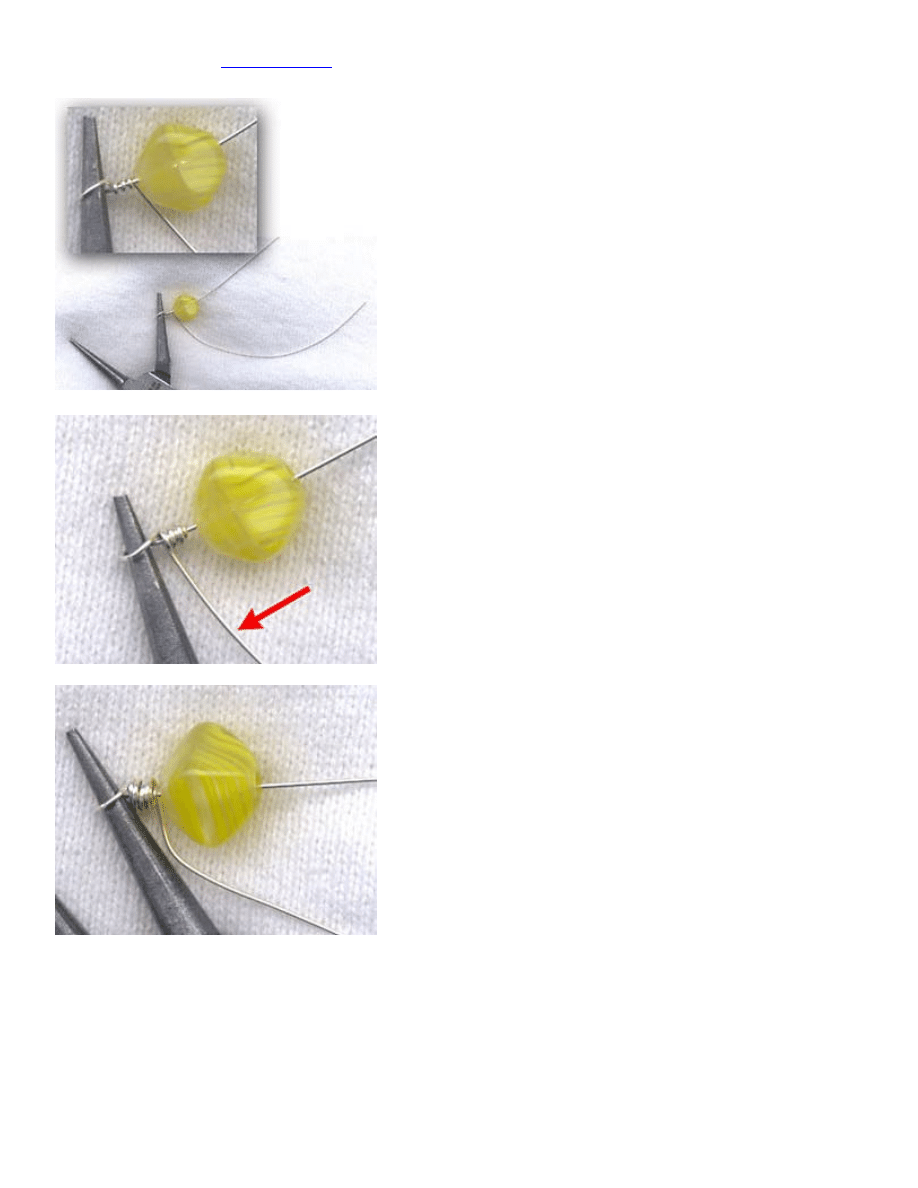
Solution:
To become independent of washers, you can
use a triple overlapping wrap on each side.
Step 1: Start by wrapping a loop using the
round-nosed pliers. While keeping the loop still
hooked on to the pliers, wrap the wire like you
normally would towards the bead.
Step 2: Instead of cutting the wire, continue
wrapping, this time over the previous wrap,
towards the direction of the nose of the pliers.
Step 3: Wrap again, this time overlapping the
two previous wraps, towards the bead. This
forms three layers of wraps.
Copyright 2004 Eni Oken –
www.enioken.com
Page: 4
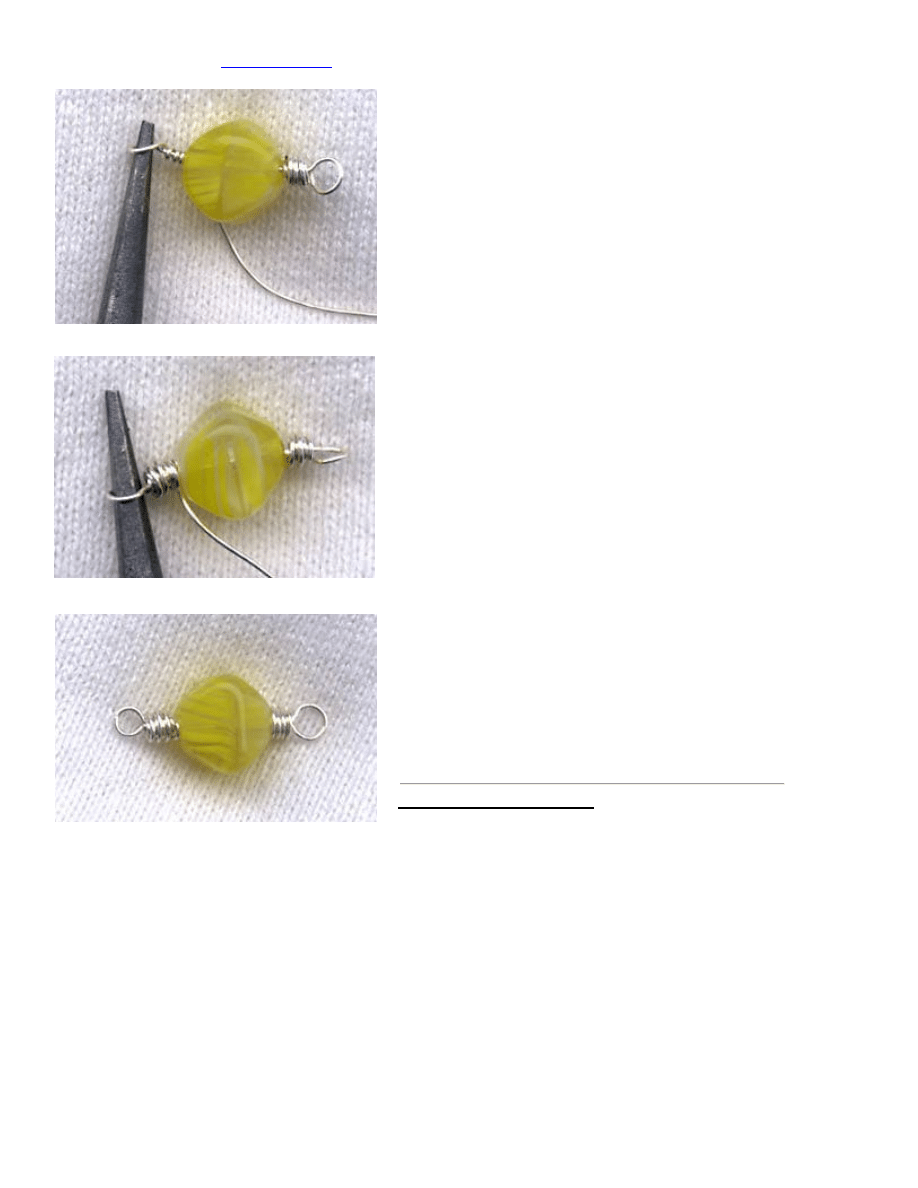
Step 4: Cut the wire flush and wrap the other
side, wrapping very closely to the bead. Be sure
to make the loop (eye) about the same distance
of the bead as the first one.
Step 5: Overlap the other side forming a thick
wrap. To make it easier to hide the wire end,
wrap very closely to the bead on the final layer
and cut flush with the wire cutters.
Step 6: Using the flat-nose pliers, straighten out
the loops. If needed, use the tip of the chain-nose
pliers to tuck in the ends of the wires. Be careful
to not squash the fat ends.
Analysis: The wraps are now thicker, making the
bead look more finished, without the need of using
washers.
Back to Techniques
Wyszukiwarka
Podobne podstrony:
Eni Oken tutorial Holiday Red Necklace
Eni Oken tutorial orange
Eni Oken tutorial herringbone
Eni Oken tutorial briowrap
Eni Oken tutorial Finishing off leather cord
Eni Oken tutorial Grey Rose Montee Circular Pendant
bead pattern central beading tutorial
(CRAFTS) Beading Tutorial Spiral Bead Weave
bead pattern central beading tutorial brick stitch
bugzilla tutorial[1]
freeRadius AD tutorial
Alignmaster tutorial by PAV1007 Nieznany
free sap tutorial on goods reciept
ms excel tutorial 2013
więcej podobnych podstron