Ho w to in s t a l l a pri n t e r in DSL
Cre a t e d by cliv e s a y fro m th e DSL For u m s
This docu m e n t will outlin e the basic ste p s to set u p a prin t e r in DSL. This is
a ste p by step guid e with scr e e n s h o t s .
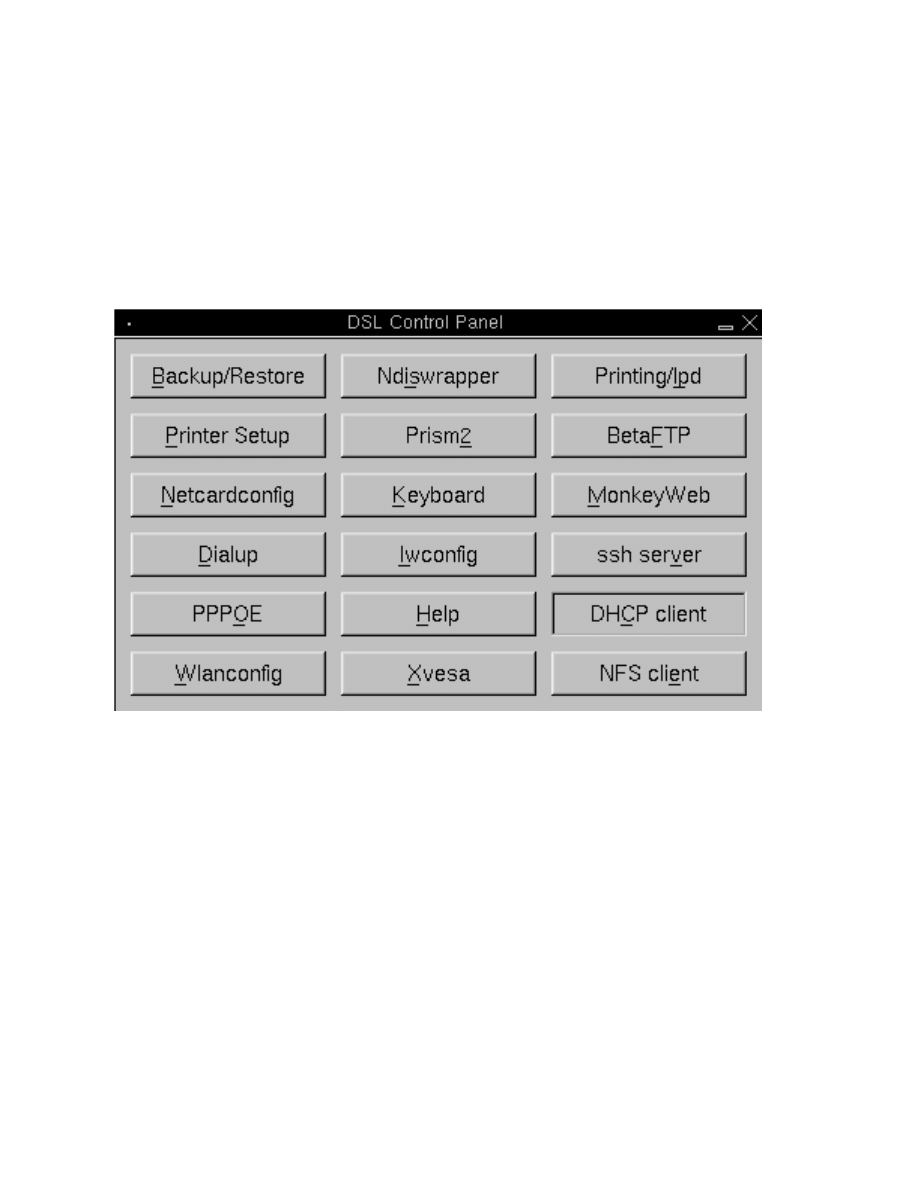
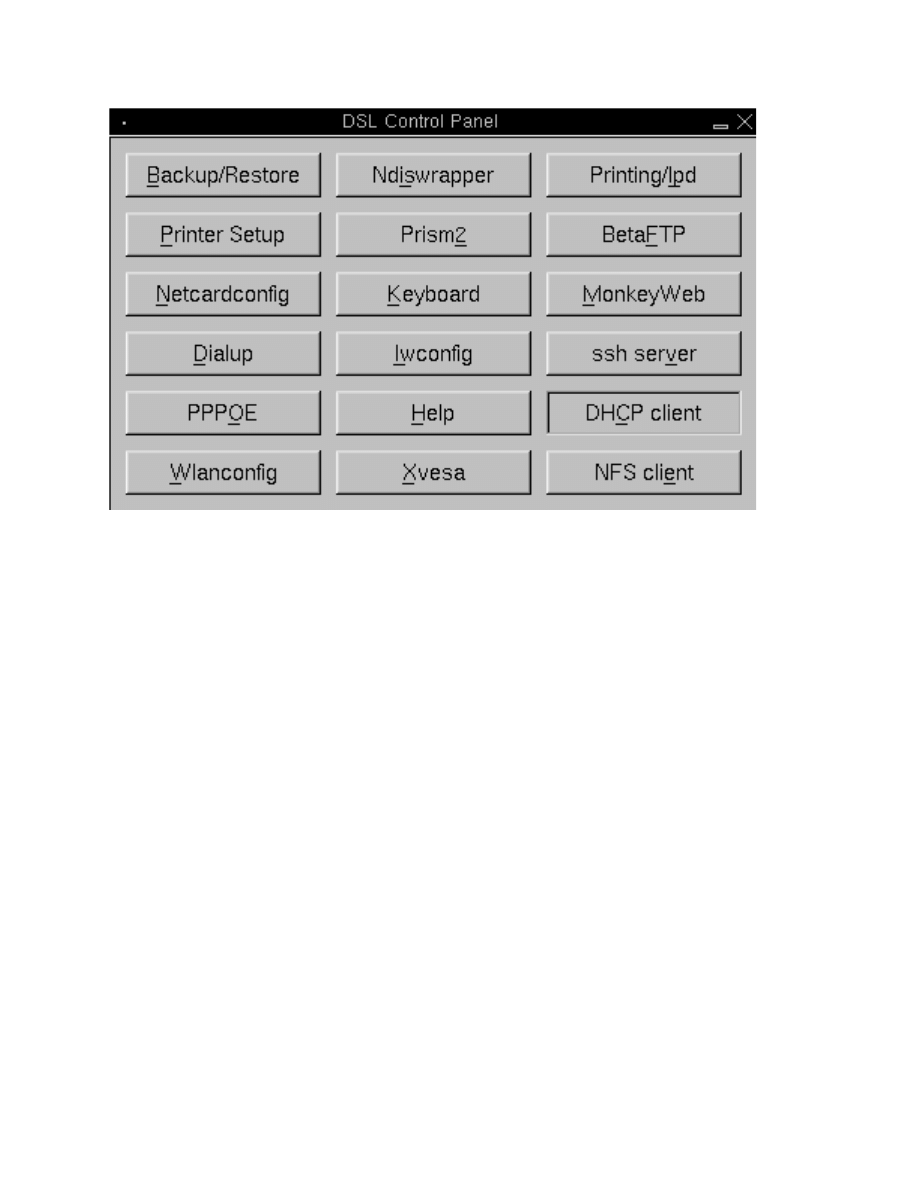
Acces s Apsfilt e r by clickin g on the "Prin t e r Set u p " but t o n in the DSL
Cont r o l Pan e l

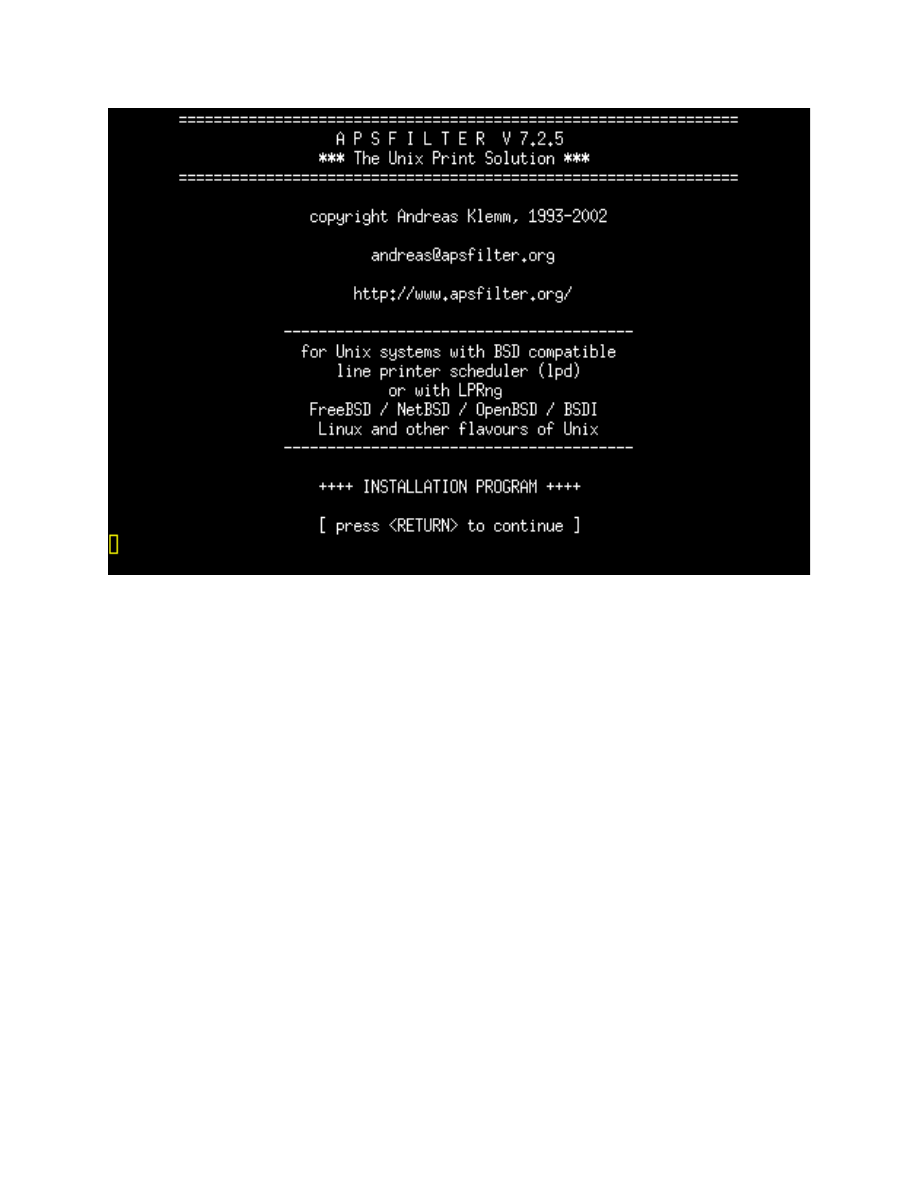
The first scr e e n of Apsfilt e r ask s you to acce p t the licen s e ag r e e m e n t . Ent e r
a "y" an d pr e s s the < E N T E R > key.
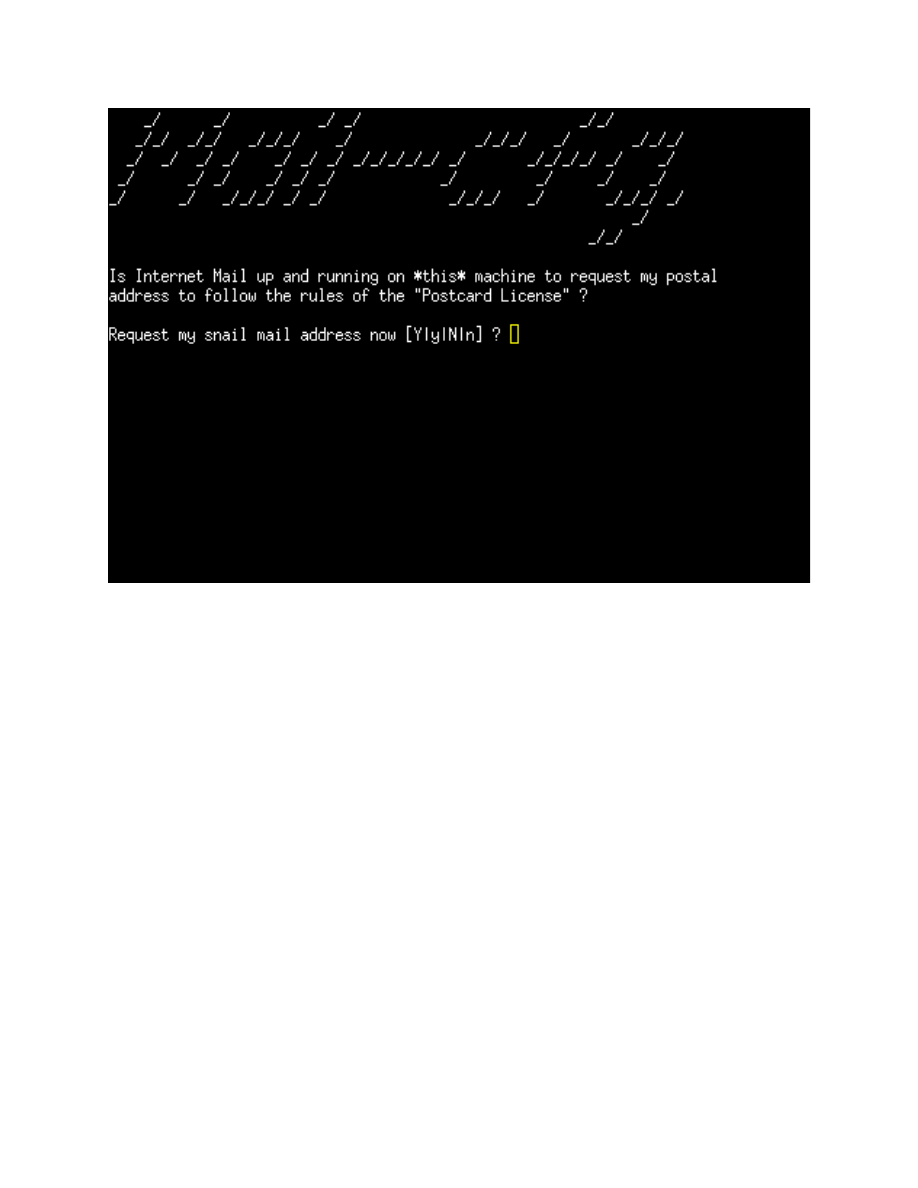
In this scr e e n the aut h o r ask s if you would like to re q u e s t his mailin g
add r e s s . You would nor m a lly en t e r "n" an d pr e s s th e < E N T E R > key. You
can ent e r "y" if you would like the au t h o r s ad d r e s s .
Just pr es s the < E N T E R > key her e to ent e r the Apsfilte r set u p .
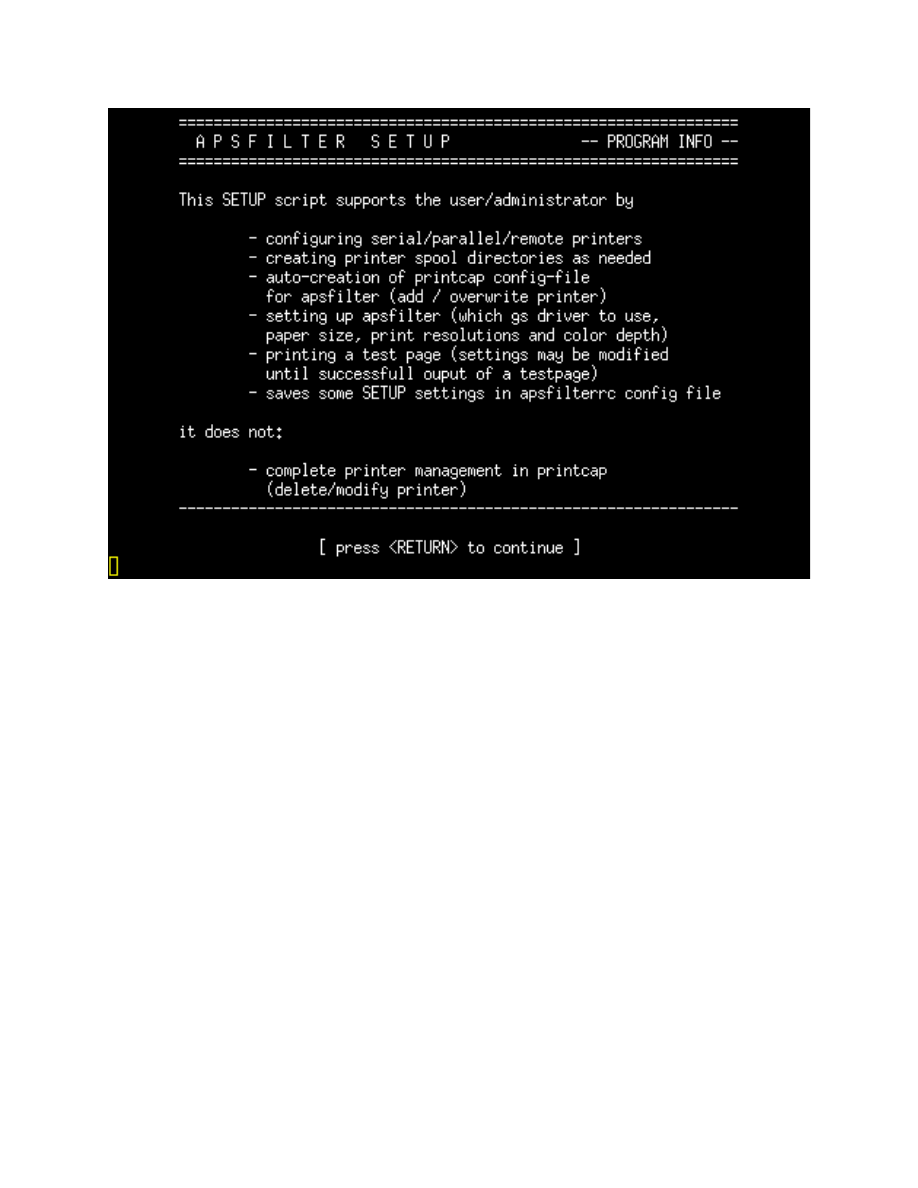
Pr es s the < E N T E R > key to con ti n u e
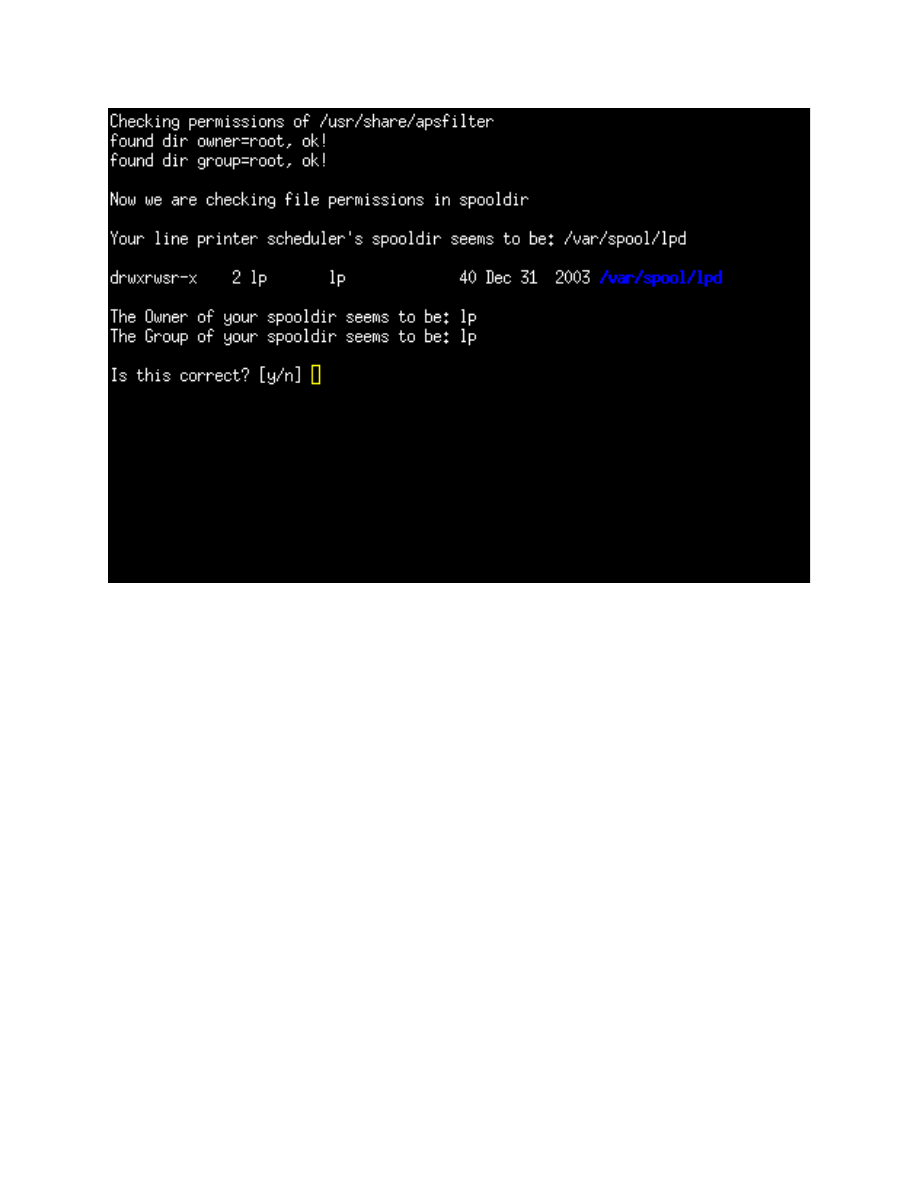
This scr e e n sho w s the per m i s si o n s for apsfilt e r . You should just hav e to
ent e r "y" an d pr e s s the < E N T E R > key.

This scr e e n allows you to set u p a new prin t e r or cha n g e an existin g one. We
wan t to ad d a new prin t e r so ent e r an "a" an d pr e s s the < E N T E R > key.
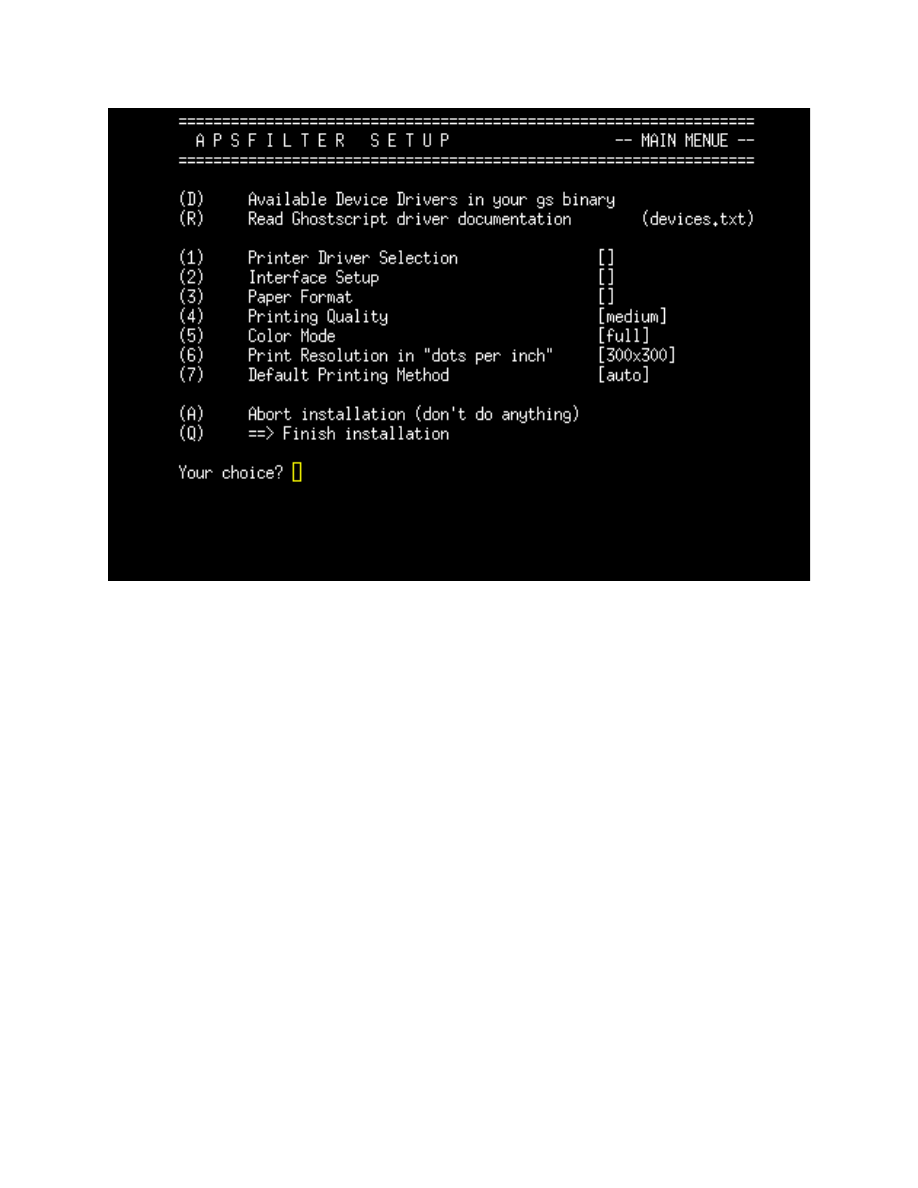
Now we ar e re a d y to ad d our prin t e r set ti n g s . For this exa m p l e we ar e
goin g to set u p an Epso n Stylus C62 prin t e r tha t is con n e c t e d via a USB
por t. For nor m a l prin ti n g , you will only nee d to fill in valu e s for sec tio n s 1, 2
and 3.
Type a "1" and pr es s the < E N T E R > key
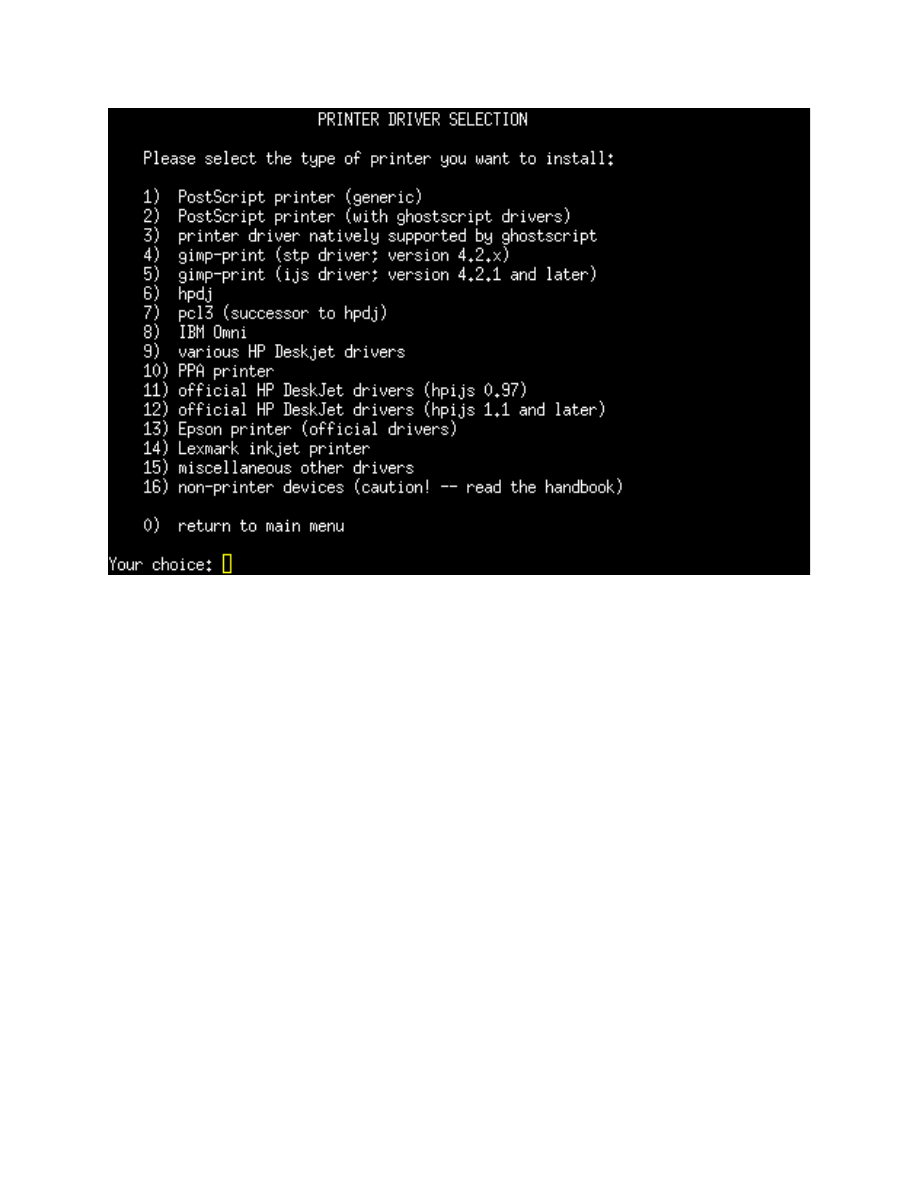
Her e we will choo s e the ap p r o p r i a t e prin t driv e r for our prin t e r . I
rec o m m e n d sta r ti n g with the driv e r s un d e r th e optio n 4 gim p prin t me n u .
The driv e r s in this me n u see m to wor k well with most prin t e r s . If you can n o t
find a suit a b l e drive r , you can try driv e r s und e r th e oth e r me n u optio n s .
Choo s e "4" an d pr e s s th e < E N T E R > key.
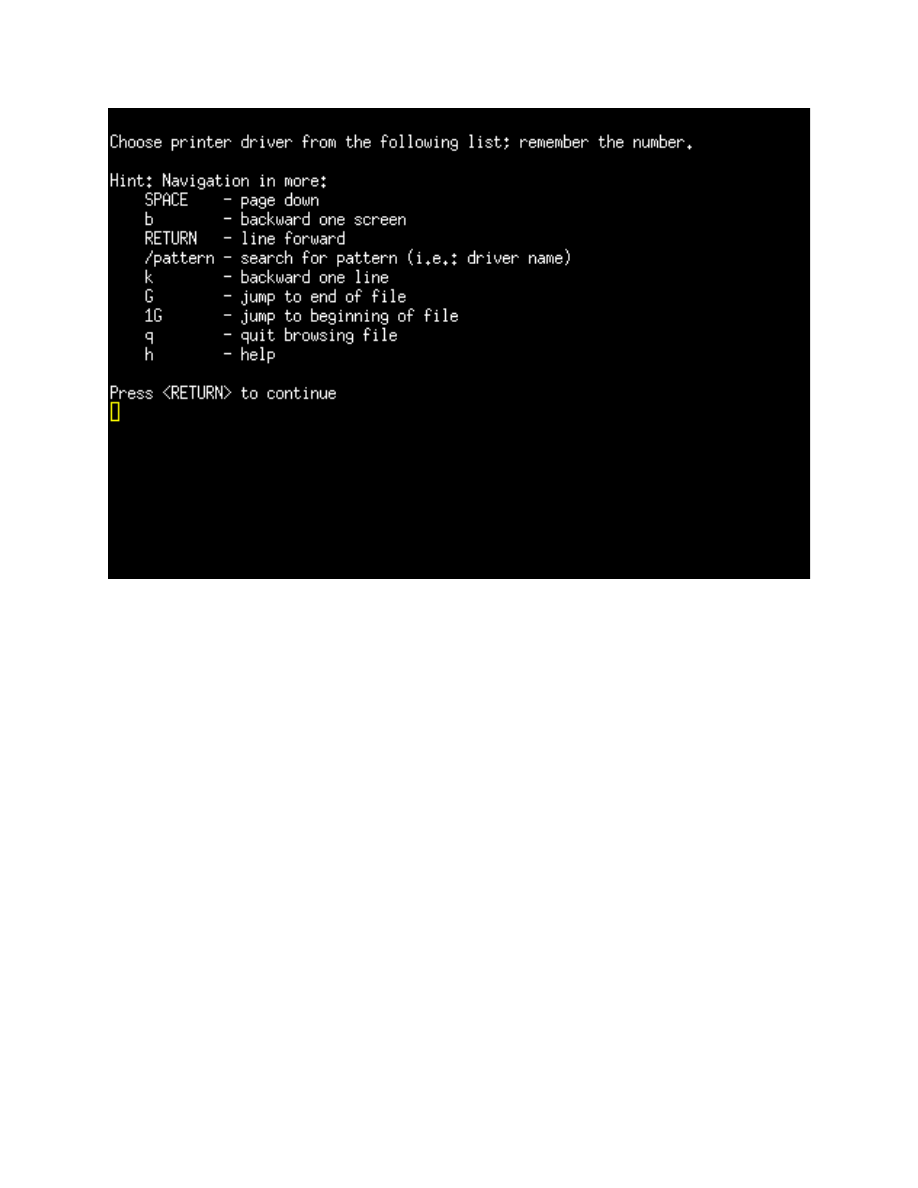
Her e ar e our navig a t i o n optio n s while sea r c h i n g for our driv e r . Pre s s the
< E N T E R > key to contin u e .
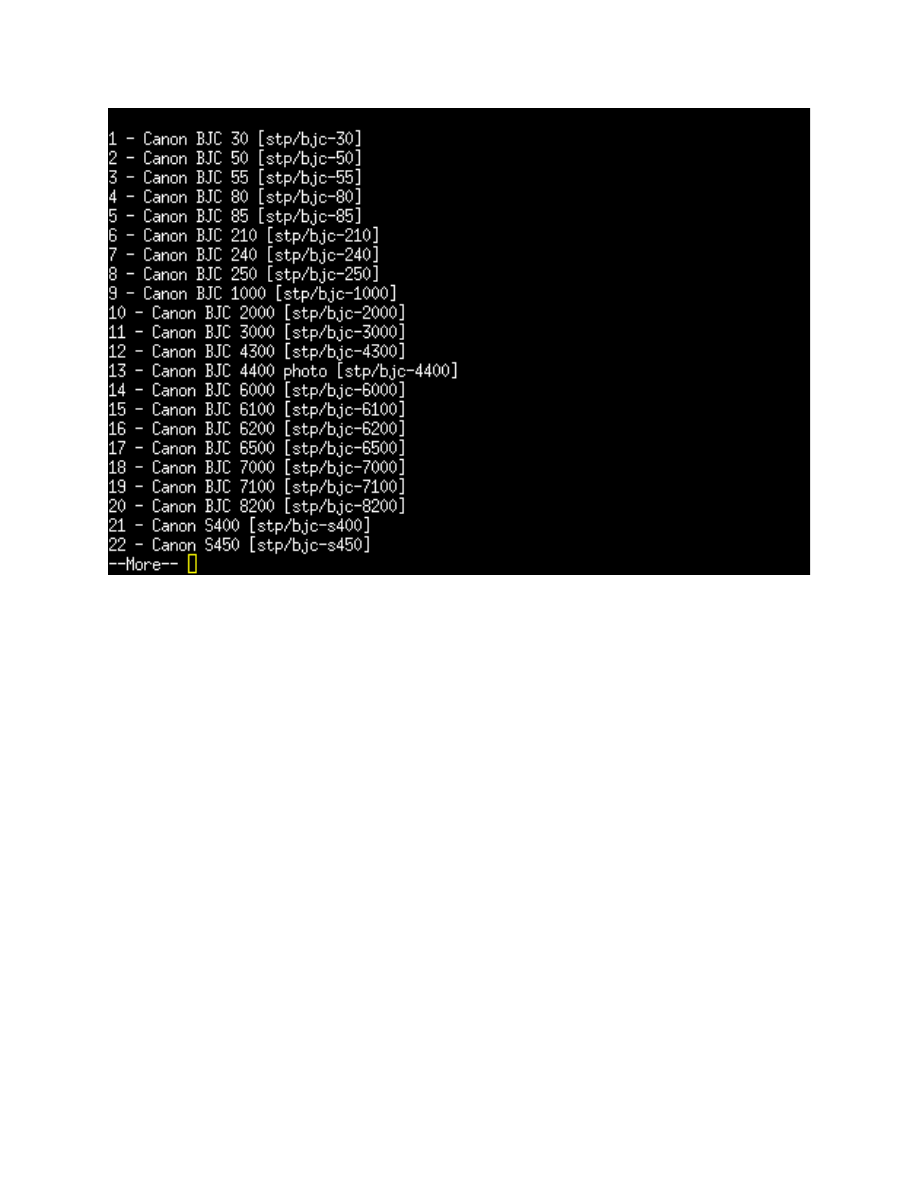
Her e is the first scr e e n you will see. We will hit the ent e r key to scr oll
thr o u g h th e scr e e n until we find a driv e r tha t refe r e n c e s our Epso n Stylu s
C62 prin t e r .
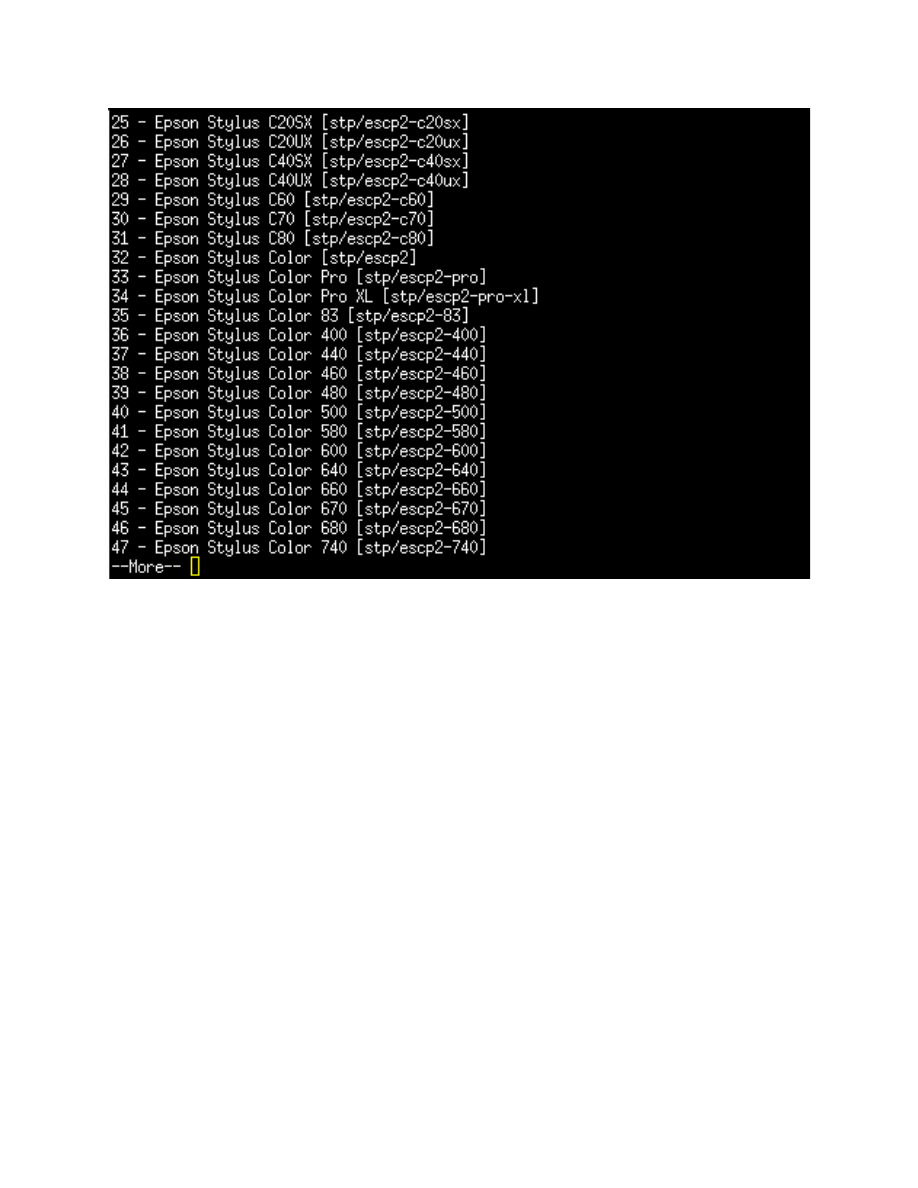
After scr ollin g dow n a sho r t tim e we find "29 - Epso n Stylu s C60 [stp/ e s c p 2 -
c6 0]". We will wan t to re m e m b e r th e nu m b e r "29". wh e n we get to the en d
of the list. Pr es s th e < PAGE DOWN > key until we get to the bott o m of the
list.
Now en t e r the nu m b e r "29" an d pr e s s th e < E N T E R > key to choo s e the
Epso n C62 drive r . You will be ask e d if you wan t to acc e p t th a t driv e r . You
wan t to an s w e r "y" and pr es s the < E N T E R > key ag ai n.

We hav e sele c t e d the drive r an d now we wan t to tell Apsfilte r how your
prin t e r is con n e c t e d to your PC. Ent e r optio n "2" an d pr e s s the < E N T E R >
key.
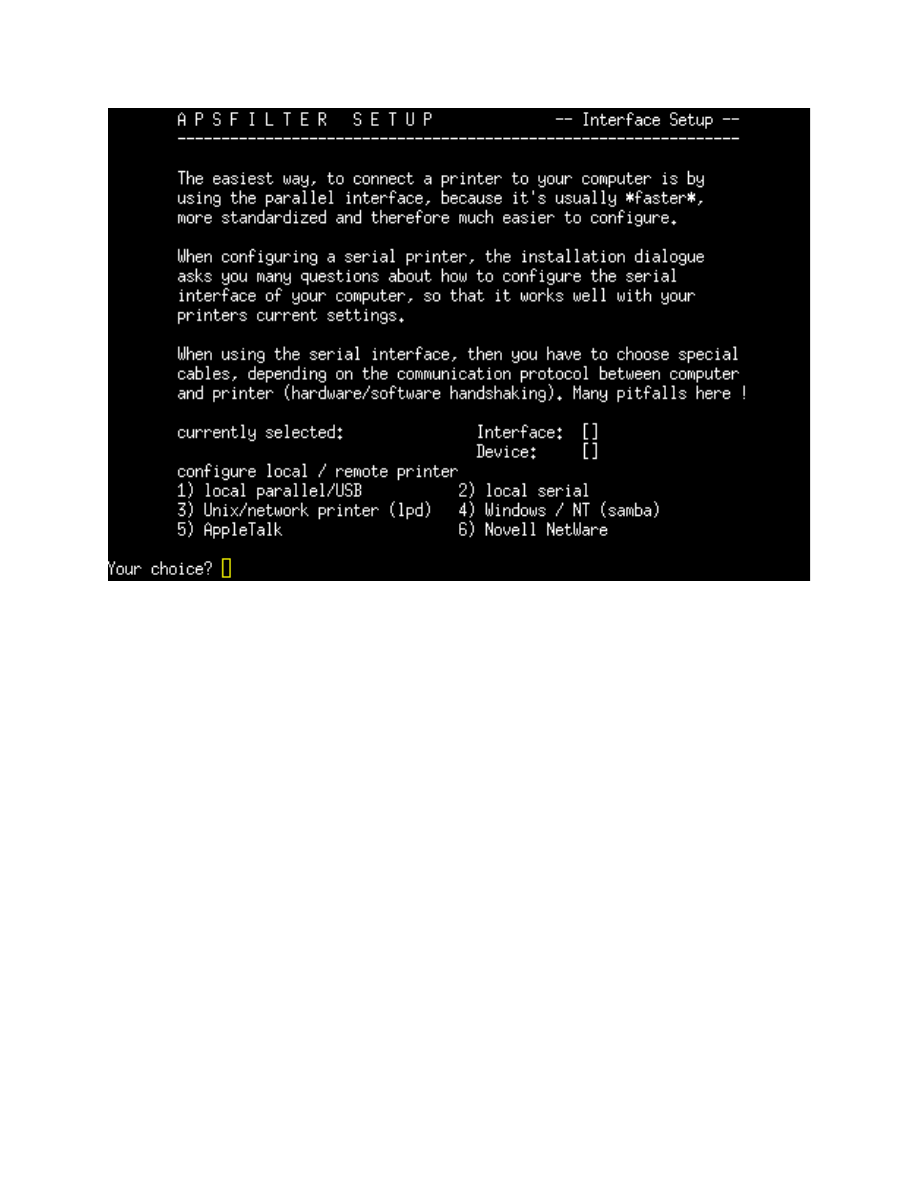
Our prin t e r is con n e c t e d to the PC via a USB cabl e so we will choo s e optio n
"1". Choo s e optio n "1" an d pr e s s the < E N T E R > key.
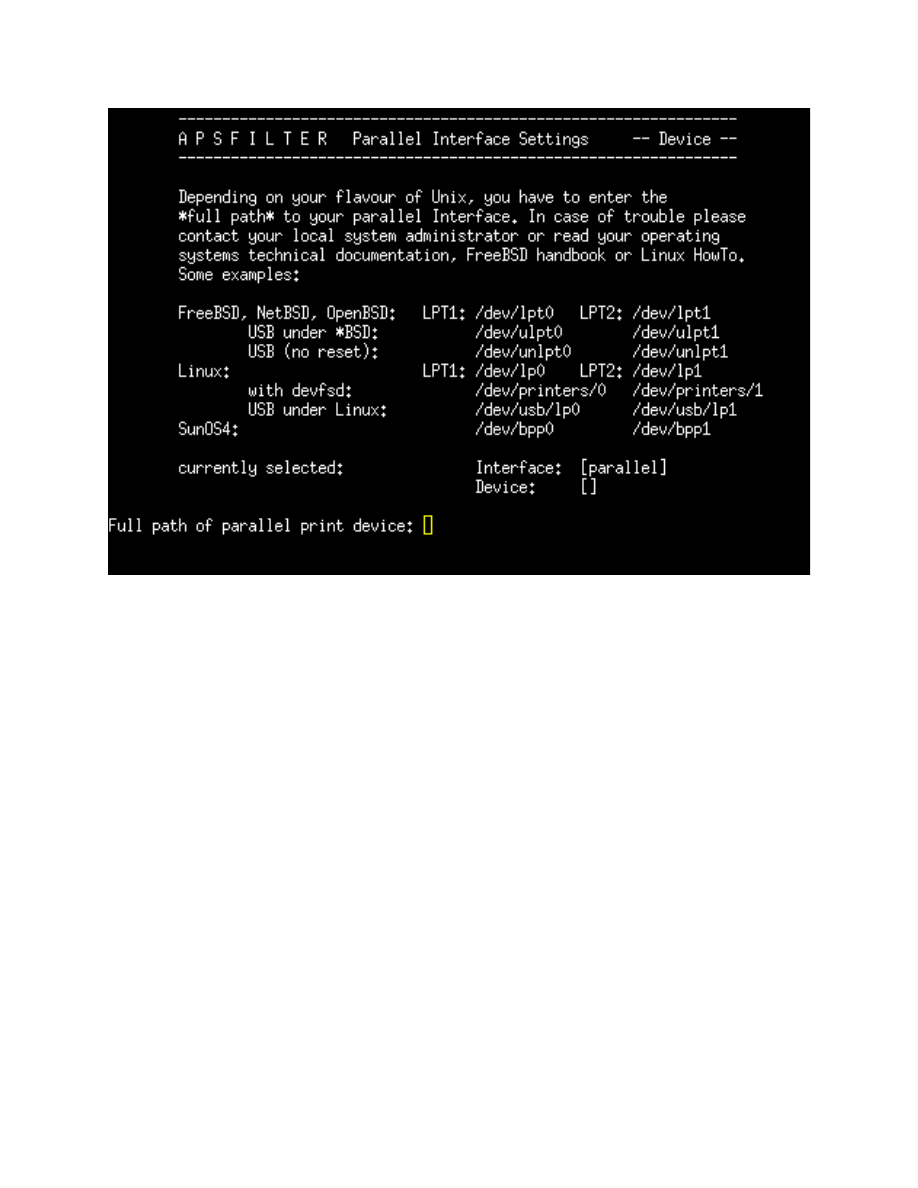
We ar e wor kin g with a Linux OS an d mos t likely your prin t e r is on the por t
LPT1. Sinc e we ar e con n e c t e d with a USB cable we will wan t to use the
optio n sho w n und e r the LPT1 optio n th a t says "USB und e r Linux". Und e r
"Full pat h of th e par allel prin t devic e:" we wan t to ent e r :
Full pat h of the pa r a ll el prin t devic e: /de v/ u s b /lp 0
pr e s s the < E N T E R >
key
If we we r e usin g a par all el prin t e r cabl e to con n e c t to the PC we would hav e
ent e r e d /de v/lp 0

Optio n 2 sho w s 'pa r all el' but tha t is OK. Tha t valu e will sho w for pa r a ll el or
usb por t prin t e r s . We ar e now re a d y to defin e th e pap e r for m a t . Choo s e
optio n "3" and pr e s s the < E N T E R > key.

We wan t to choo s e our pap e r for m a t . I will choo s e "US Lett e r " for this
exa m p l e . Choos e optio n "3" an d pr e s s the < E N T E R > key.
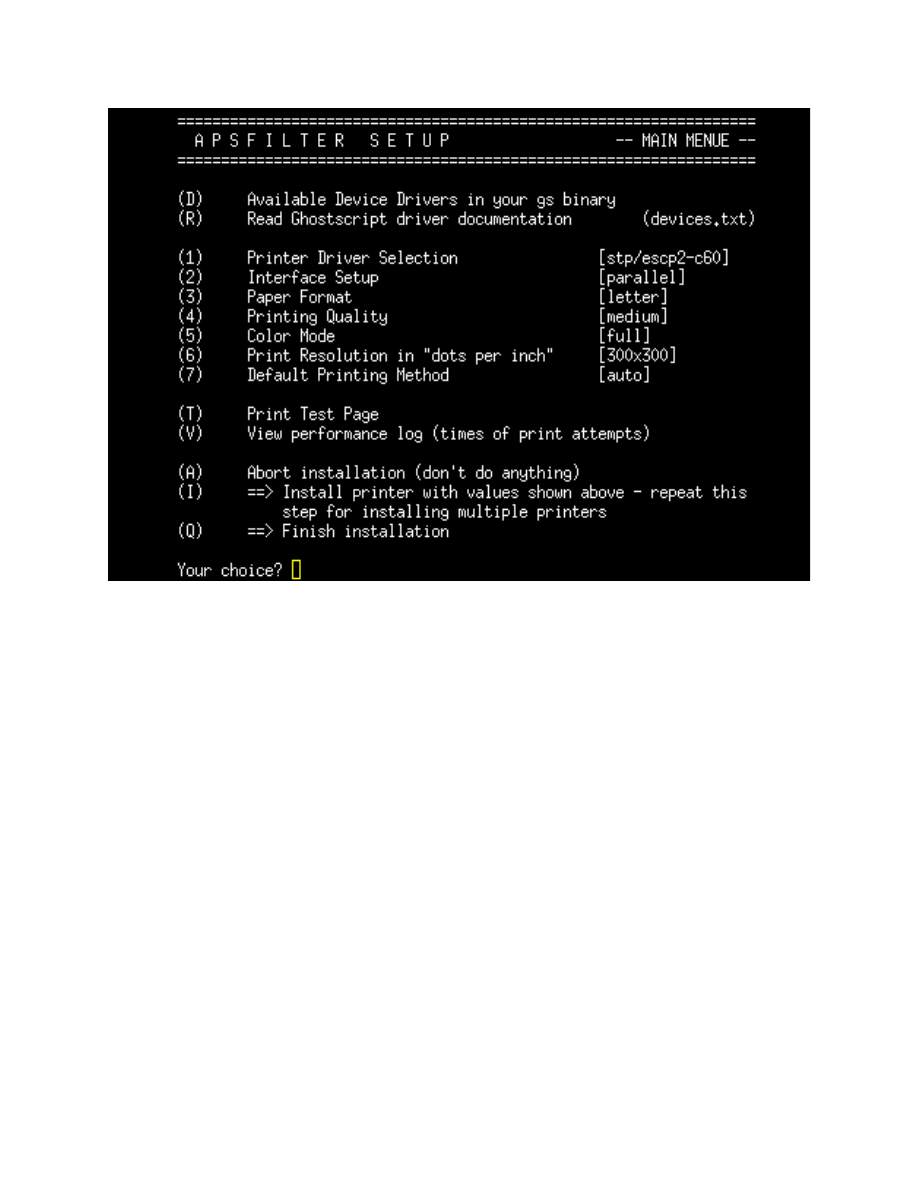
Now we ar e re a d y to tes t our prin t e r by prin ti n g a tes t pag e . Choo s e "T"
and pr e s s the < E N T E R > key. You will be ask e d if you ar e su r e you wan t to
prin t a tes t. After a few seco n d s , a tes t pa g e sho ul d sta r t to prin t. If you do
not get a tes t pag e , you may nee d to go back to optio n "1" to ens u r e you
hav e chos e n the cor r e c t driv e r for you r prin t e r . Anoth e r thin g to che c k
would be the device pat h in optio n "2" to ma k e sur e the r e isn't a typo in the
pat h na m e .
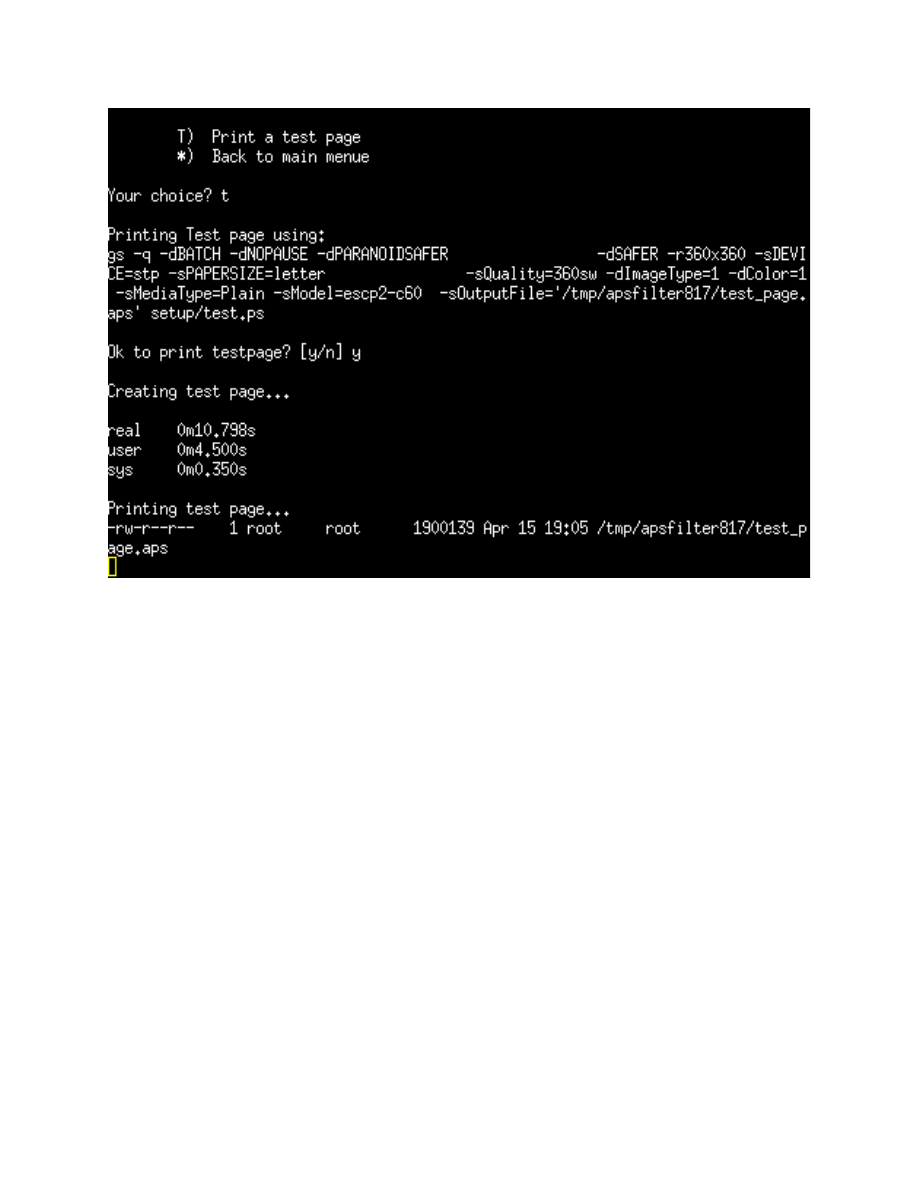
Her e is a scr e e n s h o t of the test pag e bein g sen t to the prin t e r . After th e tes t
pag e is succ e s s f ul, pr e s s the < E N T E R > key to ret u r n to the mai n set u p
me n u .

If you r prin t e r is set u p pro p e r l y, we ar e rea d y to finalize the inst alla tio n .
Choo s e the "I" optio n and pre s s th e < E N T E R > key to give your prin t e r a
na m e .

Her e we will en t e r the na m e of our prin t e r . If you just pr e s s the < E N T E R >
key you r prin t e r will be given the na m e "lp". We will na m e our prin t e r
"EPSO N_C 6 2 " . Pr es s the < E N T E R > key to con ti n u e .
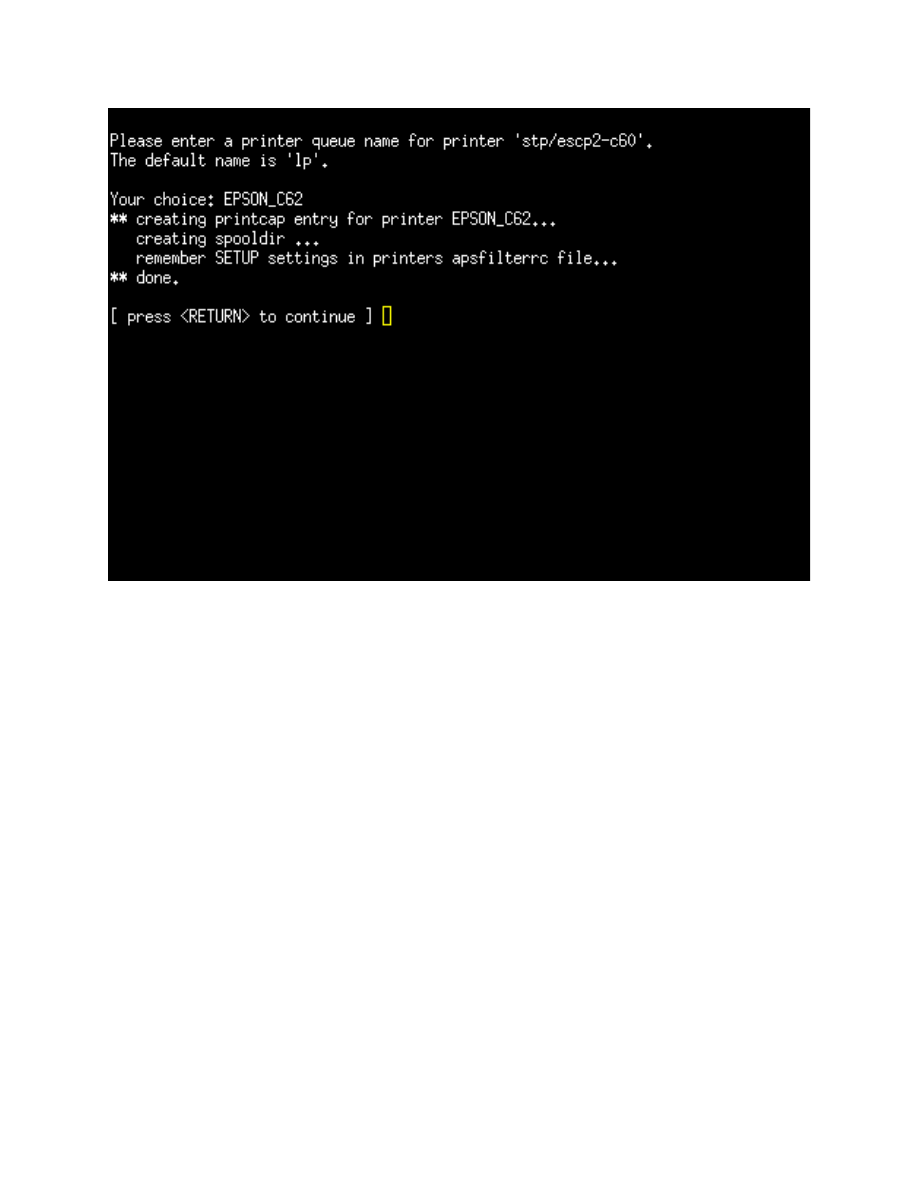
Pr es s the < E N T E R > key to acce p t the prin t e r nam e .

Cong r a t u l a t i o n s ! You hav e set u p you r prin t e r . You can set u p mo r e prin t e r s
if you like. We will choo s e optio n "Q" to quit Apsfilte r . You can hit the
< E N T E R > key re p e a t e d l y to exit Apsfilt e r an d get back to the DSL Con t r o l
Pan el.

You ar e almo s t rea d y to prin t . Ope n a con sol e win do w so tha t all
applic a ti o n s will reco g n i z e your prin t e r .
Type "expo r t PRINTER = E P S O N _ C 6 2 " su b s ti t u t i n g the na m e of you r prin t e r
for 'EPS O N_C 6 2 '
Now you should be able to use your prin t e r in all ap plic a tio n s .
Cong r a t u l a t i o n s on set ti n g up your prin t e r ! !
Now we nee d to sta r t the prin t e r da e m o n befo r e we can prin t in
applic a ti o n s . Click on the "Prin ti n g /l p d " butt o n to tur n on the prin t dae m o n .
If you ar e run n i n g a reg ul a r har d drive inst all, you ar e don e. If you ar e
ru n ni n g from USB, CD or frug al inst all with the back u p / r e s t o r e feat u r e s ,
the r e ar e a few mor e step s to com p l e t e to save your prin t e r setti n g s .
THE FOLLOWI N G IN ST R U CT IO N S ARE FOR LIVE CD, US B an d
FRUGAL in s t a l l opt i o n s utili z i n g th e ba c k u p / r e s t o r e fe a t u r e s .
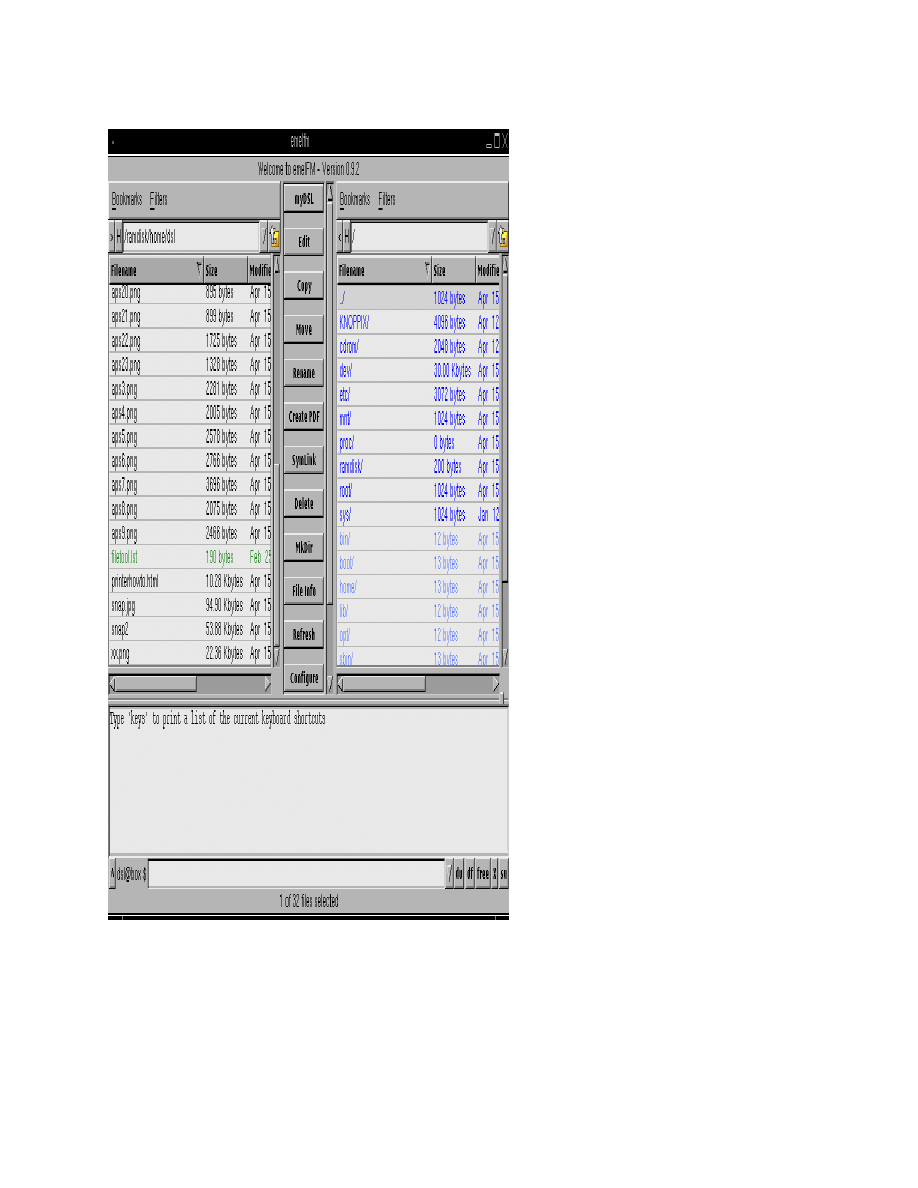
Open th e Em elf m file man a g e r an d choo s e the "filetool.ls t" file in th e /
hom e / d s l dir e c t o r y . Choos e the file and click the < E DIT > but t o n .

In your fileto ol.ls t file you will wan t to add th r e e en t ri e s . I hav e sep a r a t e d
the m from the oth e r s for illust r a t i o n . The last ent r y mus t cont ai n you r
prin t e r na m e . For our exa m p l e , th e ent ri e s would be as follows:
opt/p r i n t c a p
opt/ a p s filt e r /
var/s p o ol/lp d / E P S O N_ C 6 2
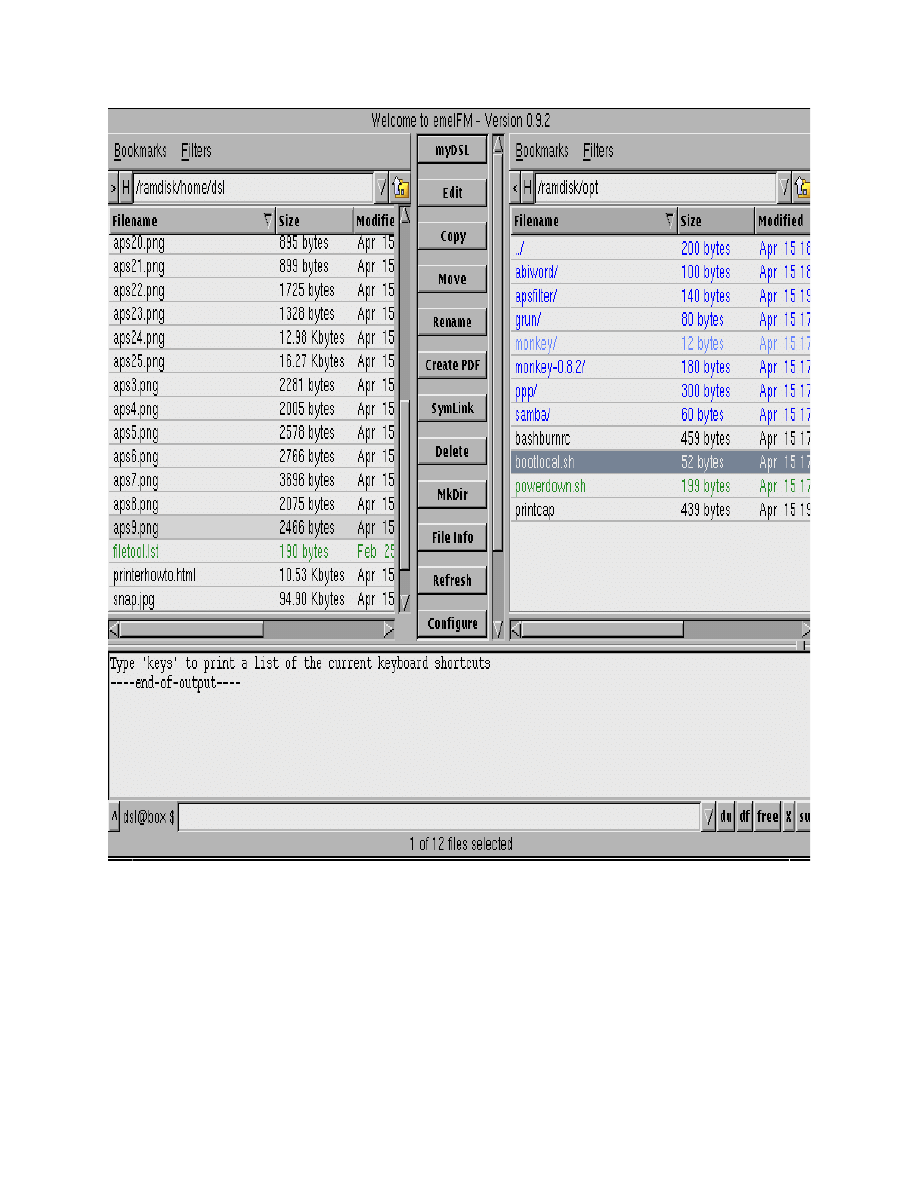
Now we wan t to go to the /opt dir e c t o r y in Em elf m to ad d som e com m a n d s
to the bootloc al. s h file. This file cont ai n s scrip t s you would like to ru n whe n
your PC boot s up. Choos e the bootloc al. s h file an d pr e s s th e < E D IT >
but t o n .
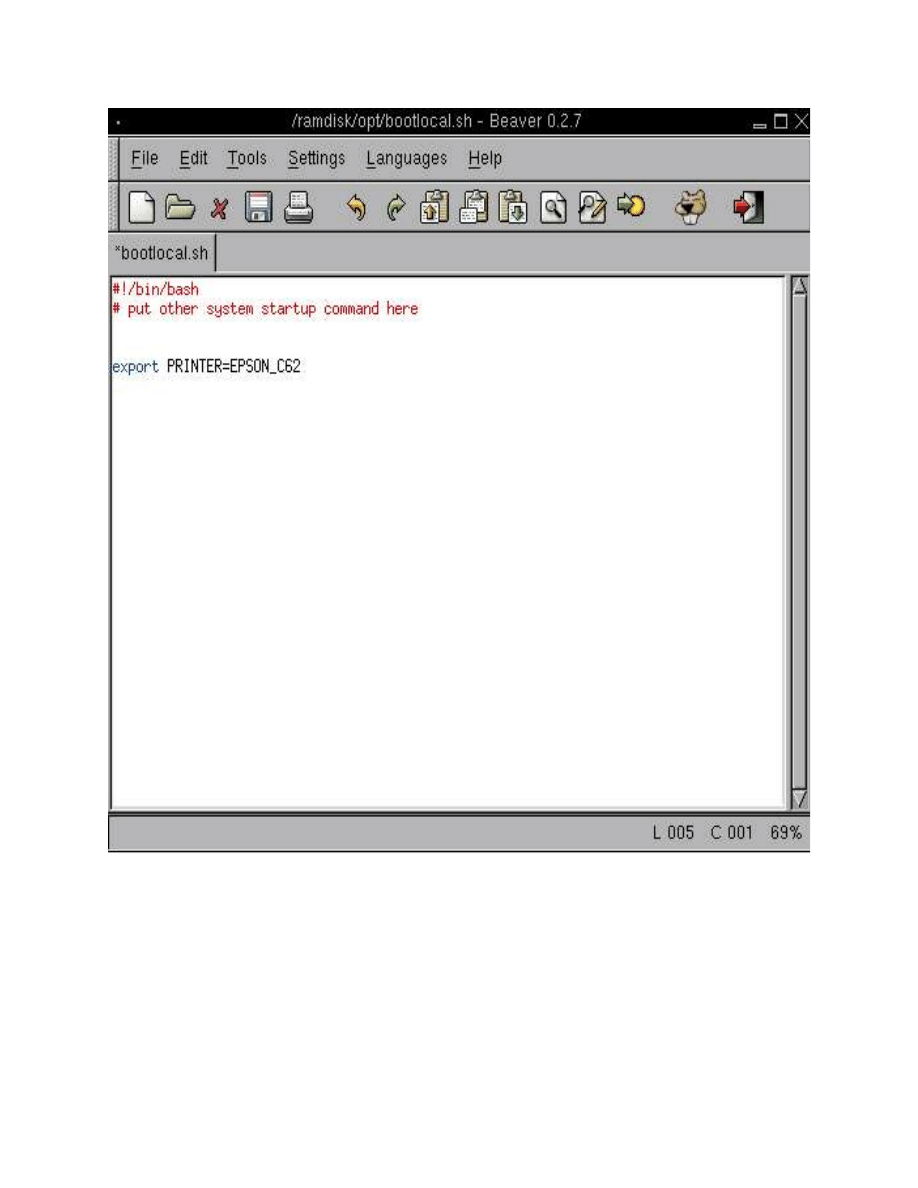
We nee d to ent e r th e sam e co m a n d in bootloc al. s h tha t we ent e r e d in th e
con sol e earlie r . This will allow all app s to use your prin t e r with o u t you
havin g to ent e r you r prin t e r infor m a t i o n .
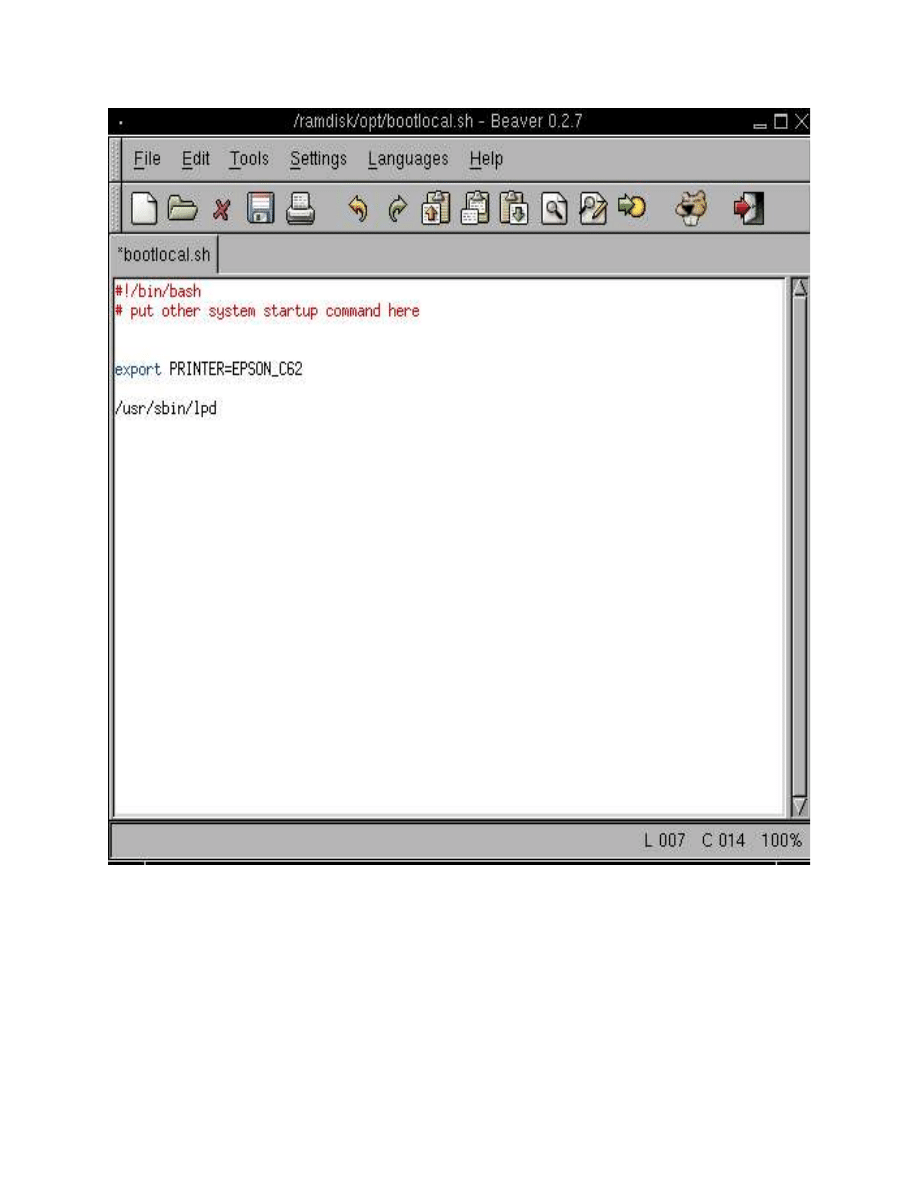
This is one mo r e optio n you can ad d to bootlo c al. s h if you would like the
prin t e r dae m o n to sta r t auto m a t i c a lly at boot. As show n abov e, add /
usr/sbin/lp d an d sav e.
That' s it for this howt o . Enjoy you r prin t e r ! !
Wyszukiwarka
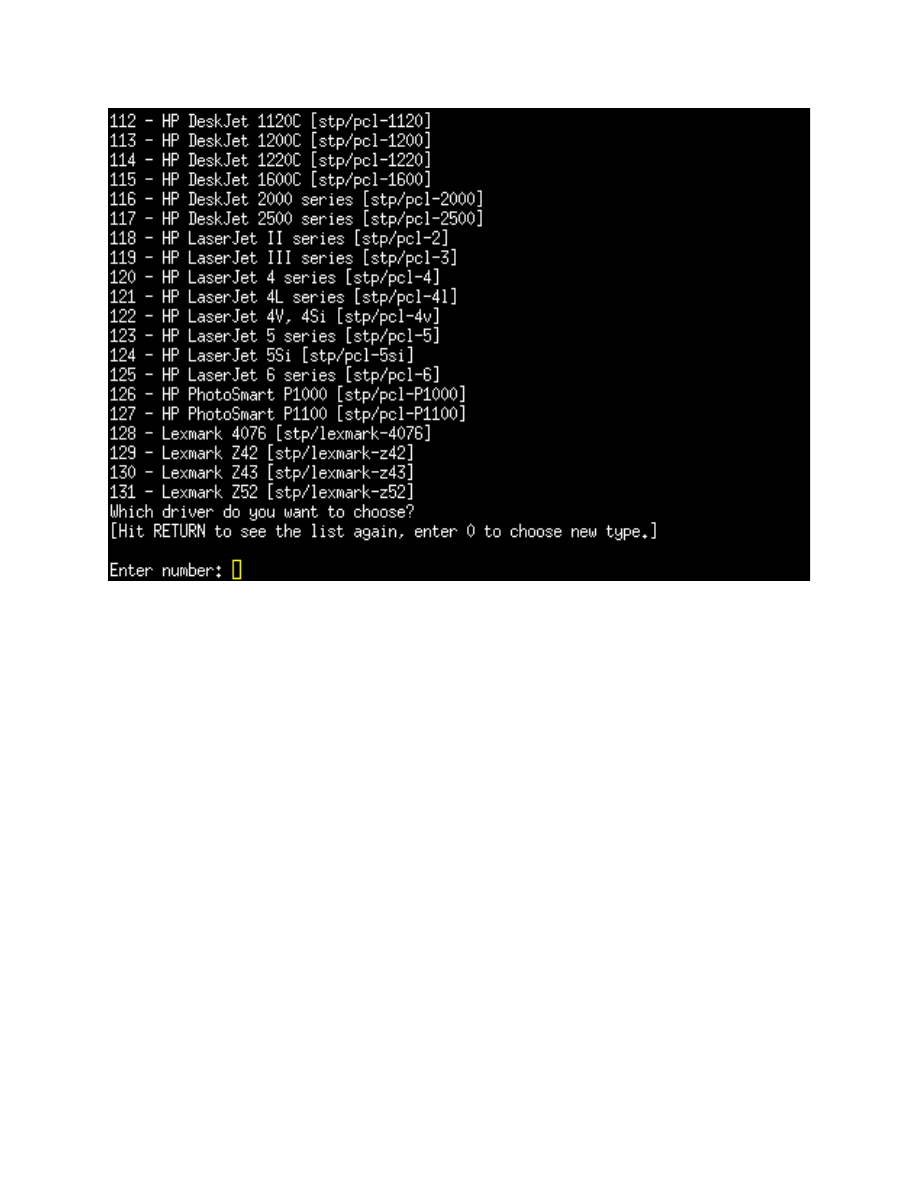
Podobne podstrony:
Printer Backup Server Printer S Nieznany
14 3 2 Lab Share Printer Scanner in Windows 7
Printer Backup Server Printer S Nieznany (2)
14 6 5 Lab Fix Printer
pkorczowski MO printerfriendly
14 3 2 Lab Share Printer Scanner
PRINTER Optionen 2009 02 27
printer 89
Easy Pcb (Printed Circuit Board) Fabrication, Using Laser Printer Toner Tran
printer 71
14 6 3 Lab Troubleshooting Printer Problems in Windows 7
Printer Backup Server Printer S Nieznany
HP LaserJet Companion Printer Service Manual
printer 89
Anet 3D Printer A8 assembly parts list 161230
driver printer brother dcp 195c for windows 7
p910nd Printer Server [OpenWrt Wiki]
więcej podobnych podstron