
1
utdoor Table/Seat
After completing our new patio table (see Basic Patio Table), I planned to build four seats
to go with it. However, now that we have them, we use them not only as seats but as outdoor
cocktail tables and ottomans. We also place them side-by-side and use them as a bench. They are
very easy to build, and the cost is next to nothing. These are made from treated pine, but you
can also use redwood. Just be sure to use waterproof wood glue during the construction.
Materials List
Lumber:
•
11 linear feet 2 x 4 treated lumber
•
8 linear ft. 1 x 4 treated lumber
Hardware:
•
Approx. 20 #6 1-1/2” galvanized flathead wood screws
•
Approx. 25 #10 x 3-1/2” galvanized flathead wood screws
O
2
Cutting List
Code
Description
Qty.
Material
Dimensions
A
Leg
4
2 x 4 treated lumber
18” long
B
Leg support
4
2 x 4 treated lumber
10” long
C
Center support
2 x 4 treated lumber
13” long
D
Slat
5
1 x 4 treated lumber
17” long
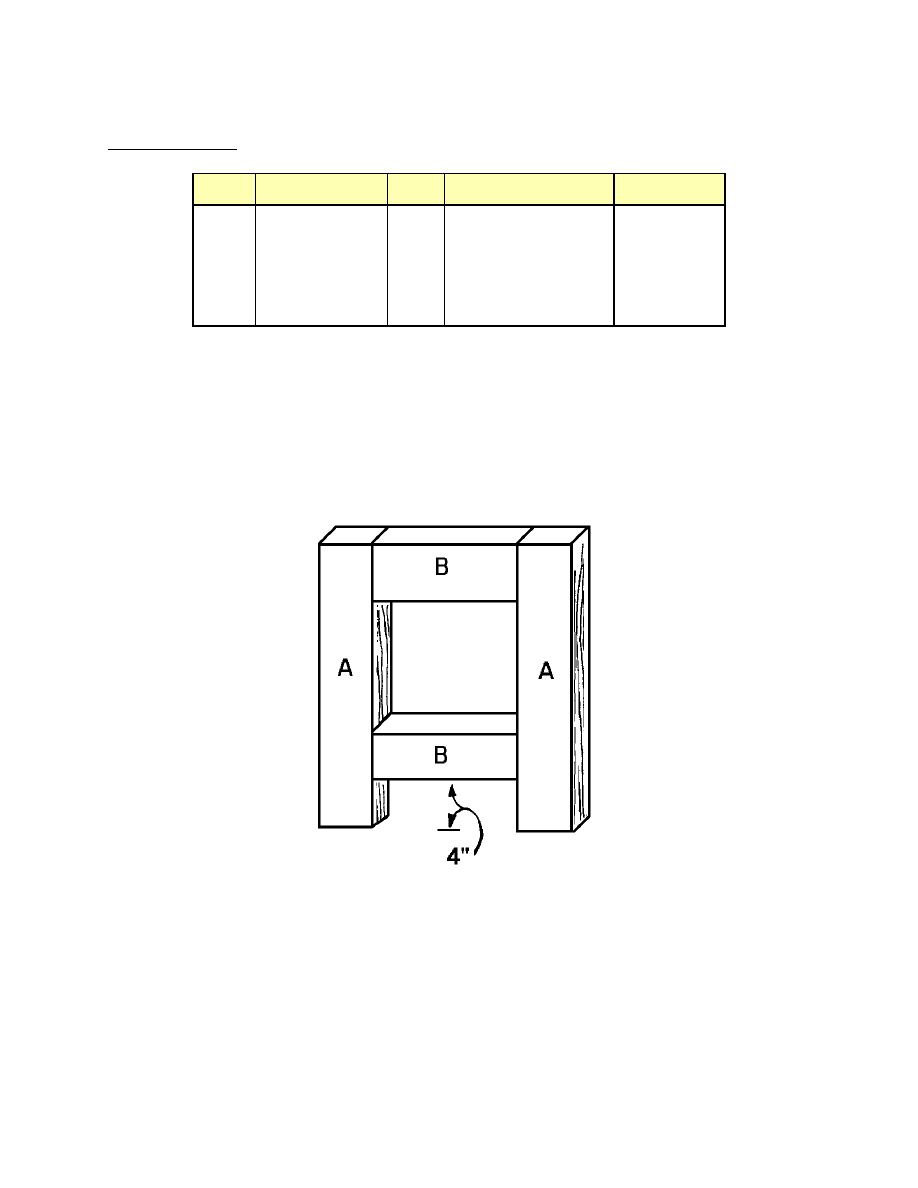
Constructing the Sides
1. Cut four legs (A) from 2 x 4 treated lumber, each 18 inches long.
2. Cut four leg supports (B) from 2 x 4 treated lumber, each 10 inches long.
3. Assemble one side as shown in Figure 1, placing two leg supports (B) between two legs
(A). One leg support (B) should be flush with the ends of the two legs (A), and the second
leg support (B) should be placed 4 inches form the opposite ends of the legs (A). Glue and
screw the assembly together, using 3-1/2”-long screws. Use two screws for each joint.
Drive the screws at an angle (toenail) through the top and bottom edges of each leg support
(B) into each leg (A). Repeat this process to assemble the second side.
Figure 1
3
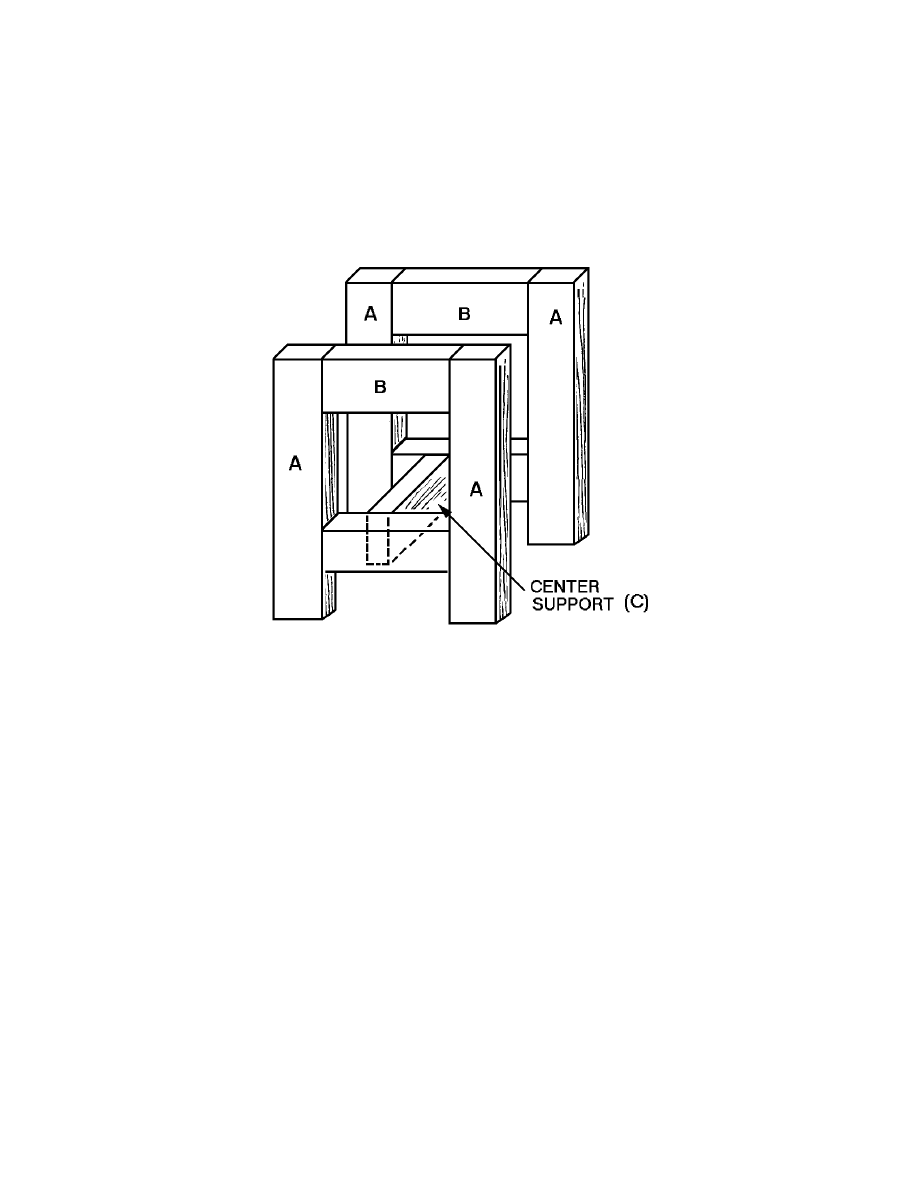
4. Cut one 13”-long center support (C) from 2 x 4 treated lumber.
5. Perform this next assembly on a level work surface to make certain that the finished base is
level. Place the center support (C) between the two sides, as shown in Figure 2, and screw
it in place using 3-1/2” screws. Drive the screws through the face of each leg support (B)
into the ends of the center support.
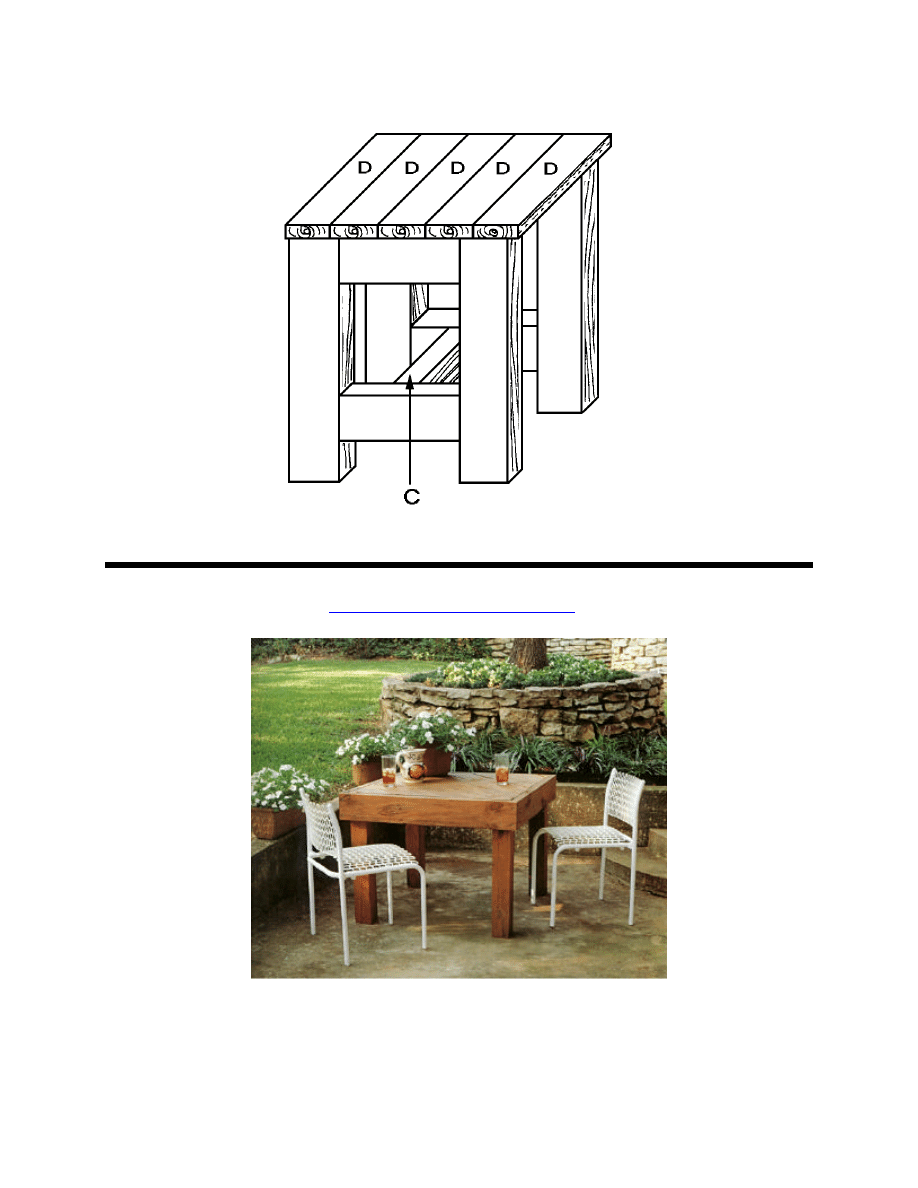
Adding the Slats
1. Cut five slats (D) from 1 x 4 treated lumber, each 17 inches long.
2. Place the five slats (D) side-by-side on top of the base assembly (Figure 3) with their cut
ends facing the sides. They should overhang the base on all four sides by about ½ inch.
Secure the four slats by screwing them to the base assembly using 1-/2”-long screws. (TIP:
it looks much nicer if you draw a line on the slats from the front of the base to the back,
about 1 inch from the slat ends, and place all of your screws on that line.) Put two screws
on each end of each slat, and space them uniformly on all slats.
Finishing
1. Sand the completed project carefully (people will be sitting on this!).
2. Using exterior-grade materials, stain or paint the finished table/seat the color of your
choice.
Figure 2
4
Try other exciting indoor and outdoor projects from
www.wowimadeit.com
!
Figure 3
Wyszukiwarka
Podobne podstrony:
Outdoor Table and Bench
Woodwork Plans Outdoor Table And Bench
Outdoor Cedar Table and Chairs
oak dining table
Coffee Table 1
table style2, ♥Dokumenty
table cellspacin5, ❀KODY RAMEK I INNE, Ramki
table border (2)
Foresight Resolution Table
Chess Table
więcej podobnych podstron