2008 by Elizabeth Green / www.ohfransson.com
Page 1
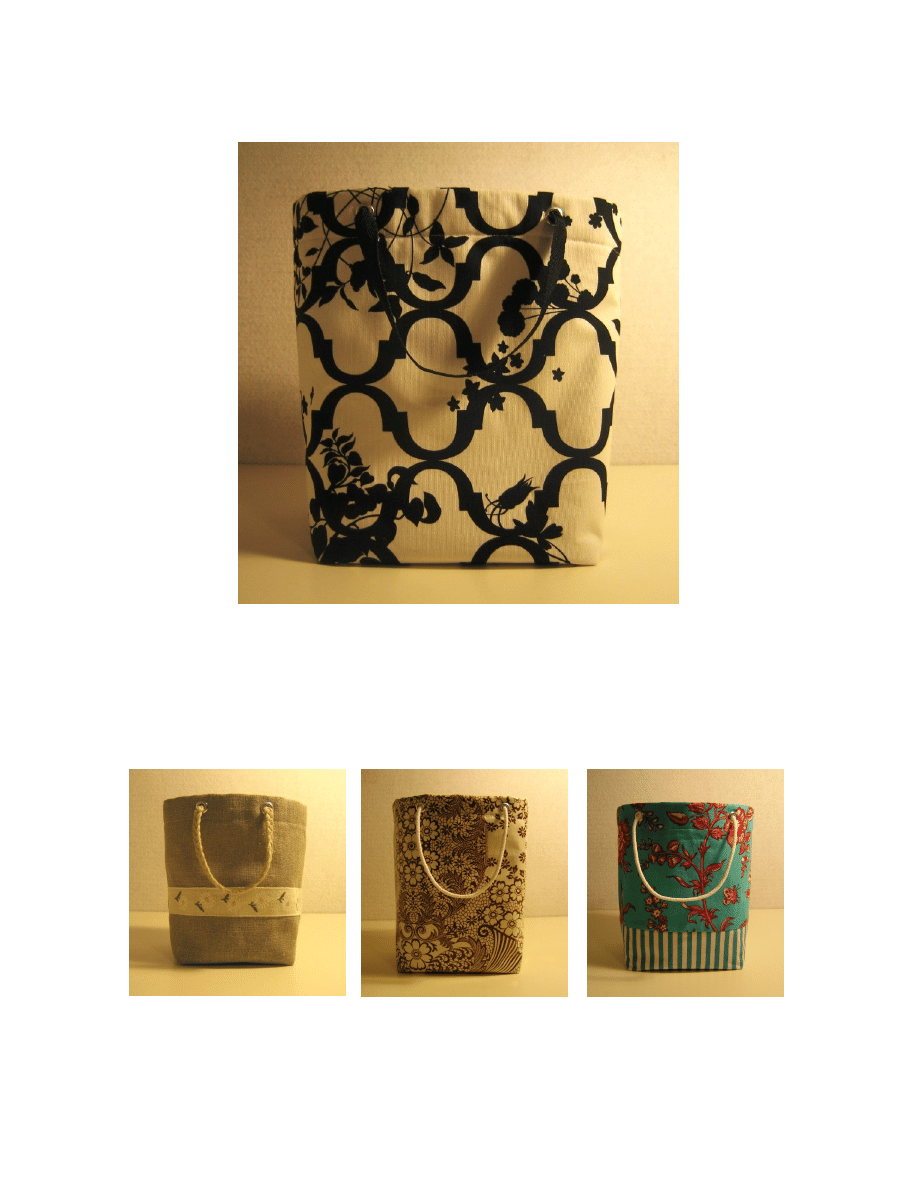
Little Shopping Bag Tutorial
Have you been using a little paper shopping bag to carry your lunch? Would you like
something sturdier? If your answer is yes, then this tutorial is for you! This tutorial is also for
anyone who wants a crafty, reusable gift bag, or just wants to see eyelets in action.
The bag pictured above is made using a home d
écor weight fabric. Some other fabrics that
would work for this project are:
Linen
Oilcloth
Quilter
’s Cotton
2008 by Elizabeth Green / www.ohfransson.com
Page 2
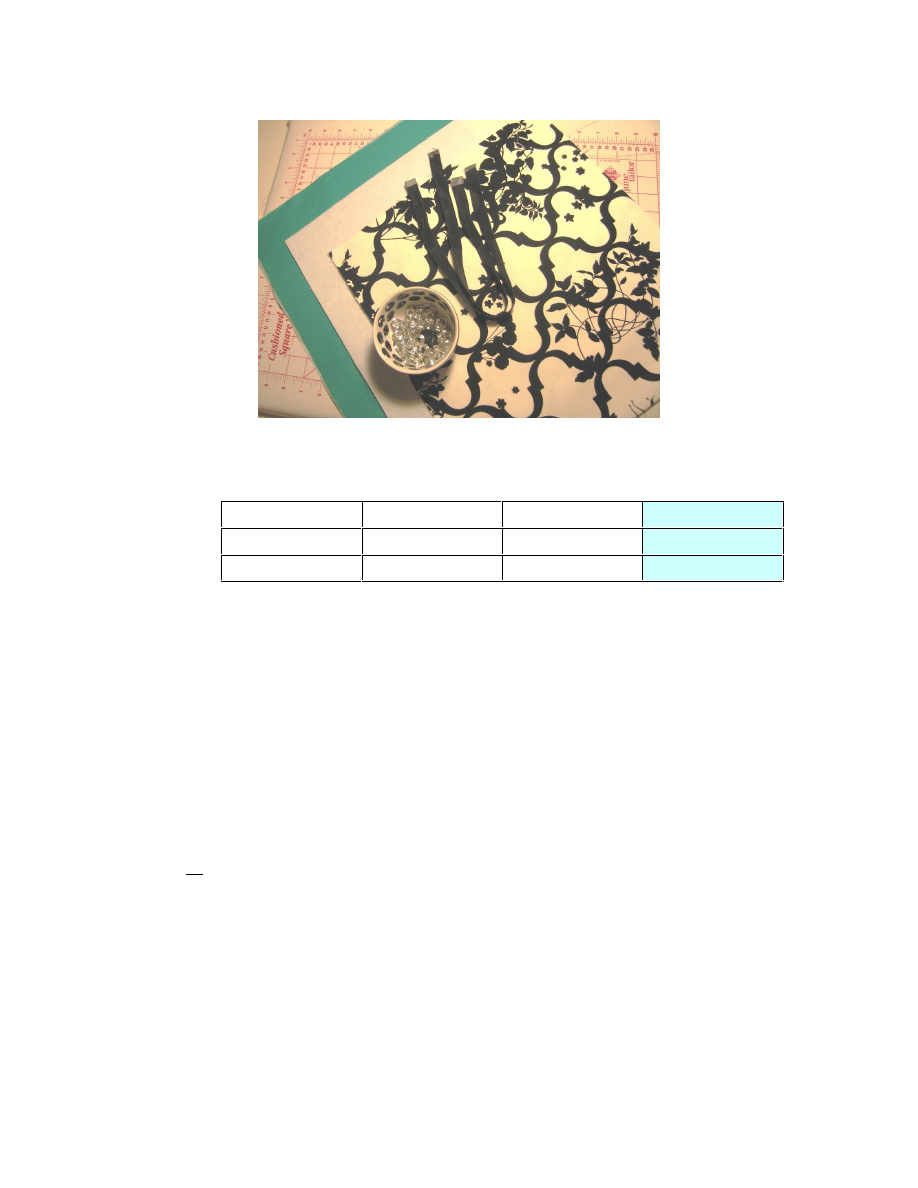
Materials
This project can be made in, pretty much, any size you
’d like. I’ve provided dimensions for three sizes here:
Height
Width
Depth
Panel Size
Small
5
”
7
”
4
”
10 x 22
”
Medium
6.5
”
8.5
”
4.5
”
12 x 26
”
Large
8
”
10
”
5
”
14 x 30
”
Once you determine which size you
’re going to make
, cut your exterior fabric and lining to the appropriate
“panel
size
”
as shown above. I recommend using a lighter (no heavier than quilter
’s cotton) weight fabric for the lining.
Interface this panel with a lightweight fusible. If you
’re making the exte
rior of your bag out of quilter
’s cotton, I
recommend interfacing that panel too.
If you
’re using lin
en or cotton, cut an interlining panel from a mid-weight sew-in interfacing. I used Pellon 40. If
you
’re using oilcloth, vinyl or any heavy material t
hat can
“s
tand on its own,
” skip the interlining
.
You will also need the following materials and tools:
1 yard Cording or Twill Tape for handles. Choose something that, when tied in a knot, will not slip
through the eyelets.
4 Large Eyelets. If you don
’t already have eyelet setting tools, be su
re you buy the package called
“Eyelet
Kit.
” This package includes the setting tools.
Hammer (for setting eyelets)
Quilter
’s Ruler (for measuring gussets)
Heavyweight/Denim Needle (because there are lots of layers to sew through)
Note: If you
’re using oilcloth, you’ll also
want a Teflon presser foot. If you don
’t have a Teflon foot, cut some
strips of tissue paper and place them between your project and your presser foot while you sew. This will
keep the oilcloth from sticking to your presser foot and can be easily torn away when you
’re finished sewing.

2008 by Elizabeth Green / www.ohfransson.com
Page 3
Let
’s get started . . .
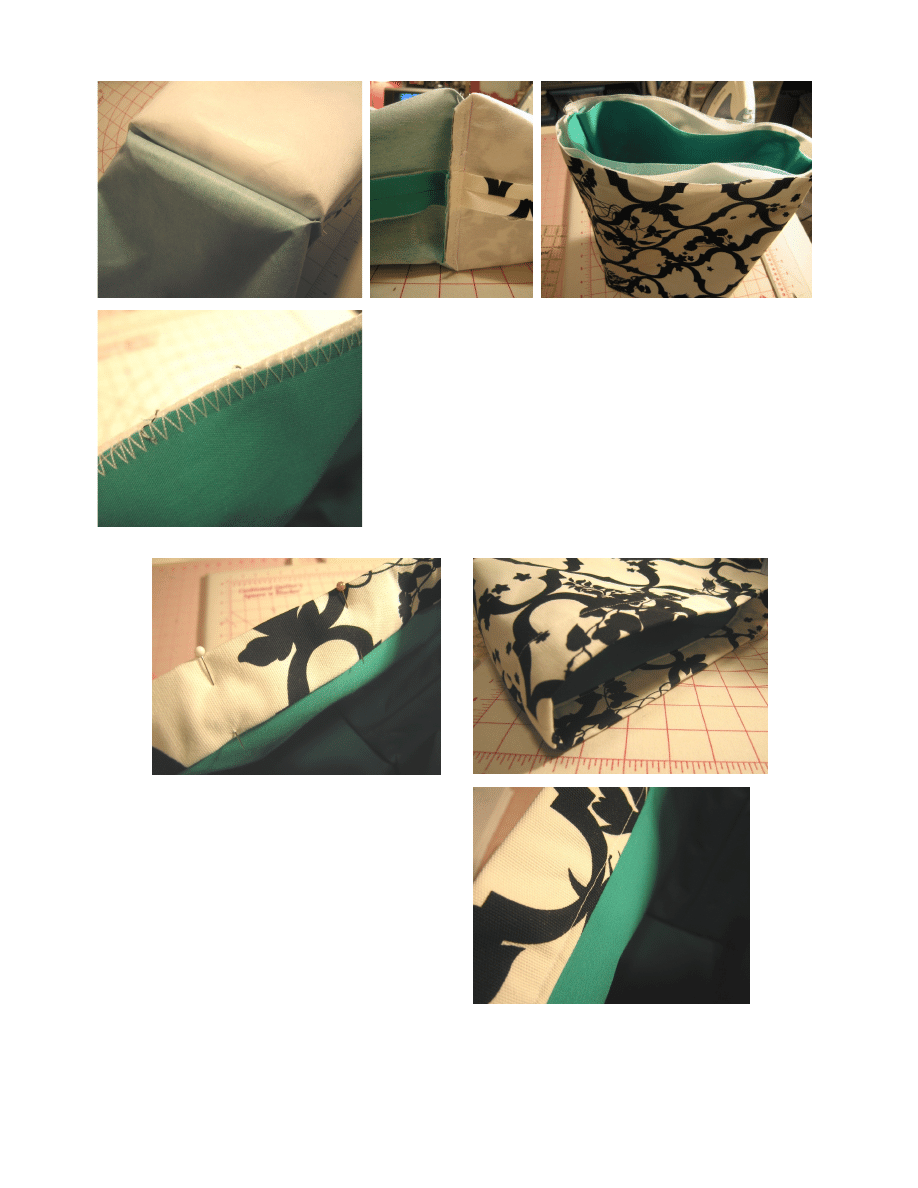
Prepare exterior panel. Place your exterior panel right side up on
top of your interlining panel. Fold the whole thing in half, matching
the two short sides. Using a 1/2
” seam, stitch both long sides
closed. Clip corners as shown, and press seams open.
If using oilcloth, finger press the seams open. Don
’t use an iron on
the oilcloth.
Make gussets. Open up one corner to a point, as shown. Using your
quilting ruler, mark a line 2
” (small), 2.25” (medium) or 2.5” (large) from
the point. The line should measure 4
” (small), 4.5” (medium) or 5” (large)
across. Stitch along this marked line and clip off corner 1/2
” from seam.
Repeat on other side. Repeat all steps with lining panel, using a 5/8
”
seam allowance when sewing the side seams.
2008 by Elizabeth Green / www.ohfransson.com
Page 4
Join Exterior and Lining Panels. Place the exterior and lining
with bottoms together, as shown. Using a zig-zag stitch, stitch
the seam allowances together on both sides.
Turn the whole thing right-side-out. Use a zig-zag stitch to
secure all layers together along the top edge, as shown at left.
Trim, if necessary, to make all layers even.
Hem top of bag. Fold the top of the bag toward
the inside 1/4" and press. Fold toward the
inside again, this time 1
”, and press.
Pin the hem you
’ve created, then stitch in
place.
2008 by Elizabeth Green / www.ohfransson.com
Page 5
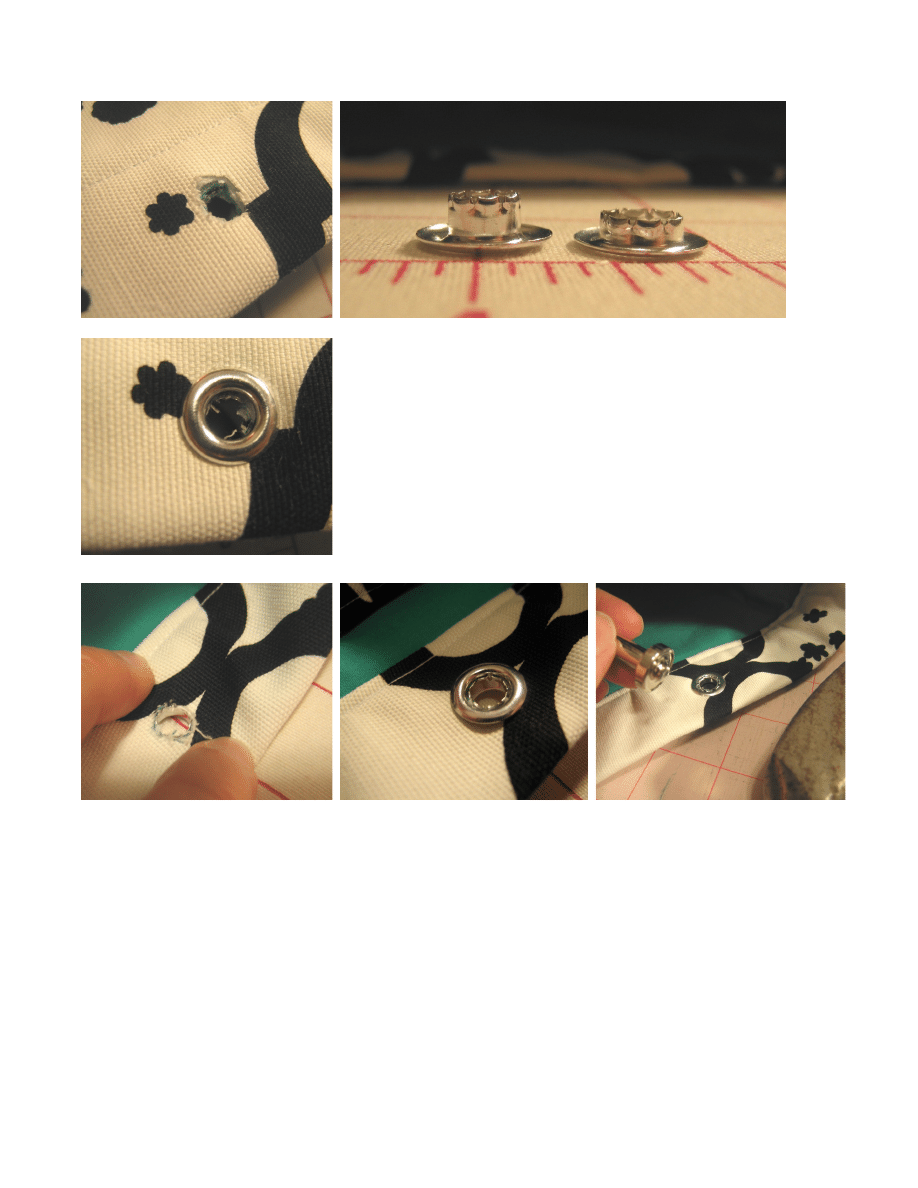
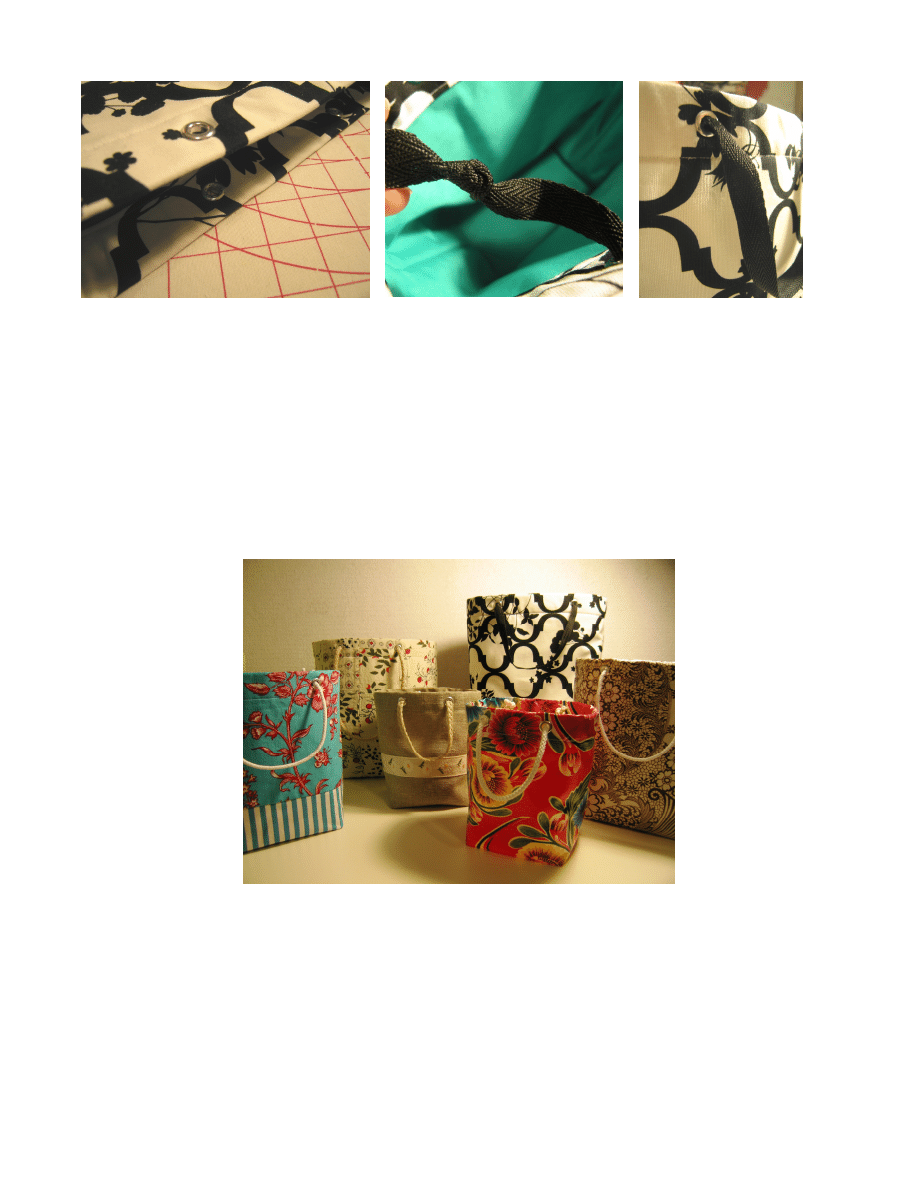
Add eyelets. Mark the placement of your eyelets and use sharp scissors
to cut holes the exact size of the center of the eyelets. Remember the old
adage
“you can always cut more, but you can’t cut less” and err on the
side of caution when cutting these holes.
You
’ll not
ice that there are two pieces to each eyelet. The piece on the left
in the above picture (the taller one) will go on the outside of the bag.
Place one of these through the outside, as shown at left. Turn the bag
over, so the eyelet is now on the table top, but sticking through to the
inside as shown in the lower left corner. Fit the second (shorter) piece on
top, as shown below at center and, using the setting tools provided and a
hammer, set the eyelet into your bag. Repeat this with the other three
eyelets.
2008 by Elizabeth Green / www.ohfransson.com
Page 6
Now that your eyelets are all set, add handles. Cut your yard of cord or tape in half and feed one end through
one of the eyelets, from outside to inside. Tie the end in a knot, so that it cannot slip back out to the front. Feed
the other end of the handle through the other eyelet on the same side of the bag, again outside to inside. Adjust
the handle to desired length and secure by tying a knot in the end and trimming away any excess. Repeat with
the other handle, making sure that handles are the same length.
. . . and you
’re done!
2008 by Elizabeth Green
Not intended for commercial use. / Please do not distribute without my permission.
Wyszukiwarka
Podobne podstrony:
bag tutorial
The Little Black Bag C M Kornbluth
Little Red Hen2
bugzilla tutorial[1]
littlehombre
freeRadius AD tutorial
Alignmaster tutorial by PAV1007 Nieznany
free sap tutorial on goods reciept
ms excel tutorial 2013
Joomla Template Tutorial
ALGORYTM, Tutoriale, Programowanie
7 - Pretty Little Liars - Heartless - Rozdział 7, 7 - HEARTLESS
8051 Tutorial uart
Pattern Peyote Little Mouse Amulet
B tutorial
Labview Tutorial
Obraz partycji (ghost2003) Tutorial
[LAB5]Tutorial do kartkówki
M2H Networking Tutorial Original
więcej podobnych podstron