Rear
REPLACEMENT
1.
REMOVE REAR WHEEL
2.
INSPECT PAD LINING THICKNESS Check the pad thickness. Minimum thickness: 1.0 mm (0.039 inch)
ZOOM
SIZED FOR PRINT
ZOOM
SIZED FOR PRINT
Page 1 of 3
3.
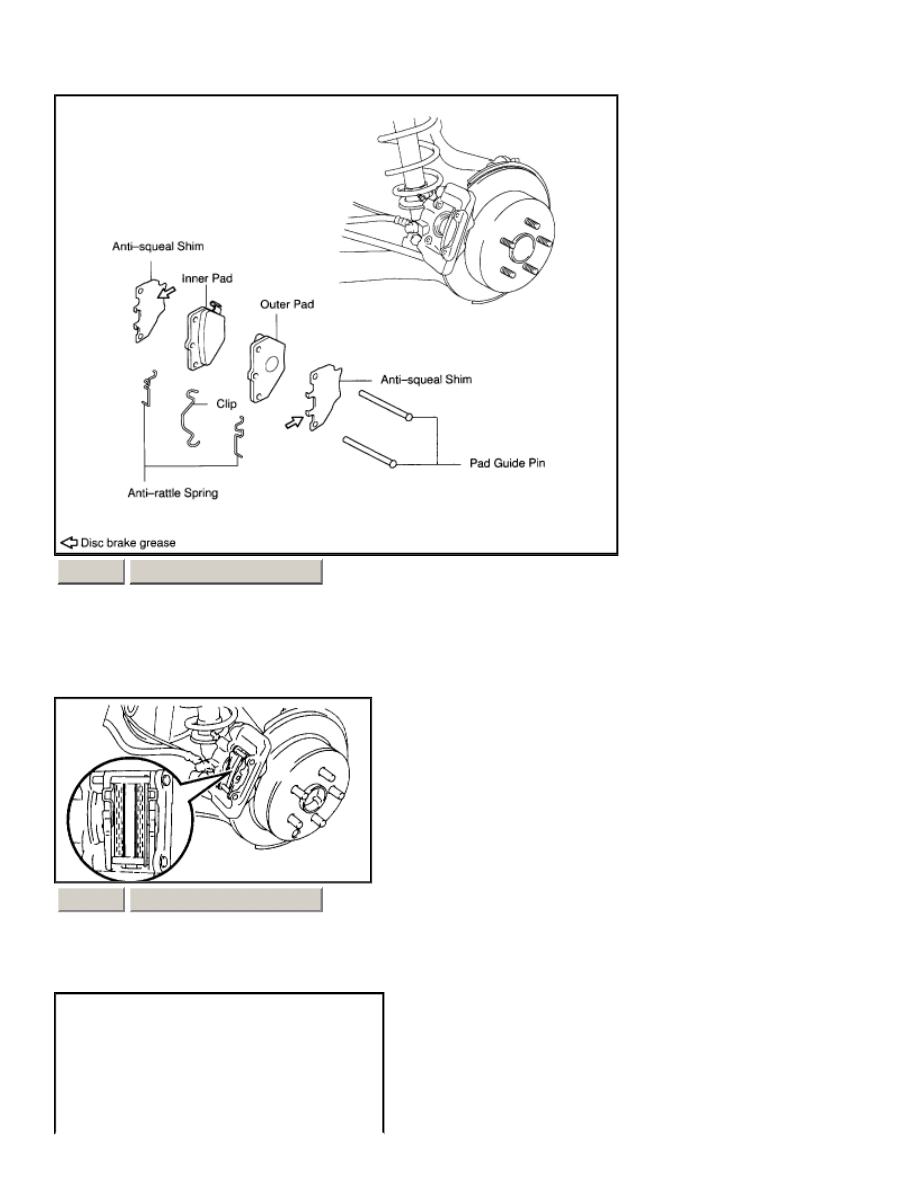
REMOVE CLIP, 2 ANTI-RATTLE SPRINGS AND 2 PAD GUIDE PINS
a.
Using a screwdriver, remove the clip and 2 anti-rattle springs. NOTICE:
¡
Do not deform the clip and anti-rattle spring.
¡
The clip and anti -rattle spring can be used again provided that they have sufficient rebound, no deformation, cracks or
wear, and have had all rust, dirt and foreign particles cleaned off.
b.
Remove the 2 pad guide pins.
4.
REMOVE PADS AND ANTI-SQUEAL SHIMS
a.
Remove the 2 pads.
b.
Remove the anti-squeal shim from each pad.
5.
CHECK DISC THICKNESS AND RUNOUT
6.
INSTALL NEW PADS NOTICE: When replacing worn pads, the anti-squeal shims must be replaced together with the pads.
a.
Apply disc brake grease to inside of anti-squeal shims.
b.
Install the anti-squeal shim on each pad.
c.
Draw out a small amount of
brake fluid
from the reservoir.
ZOOM
SIZED FOR PRINT
Page 2 of 3
d.
Press in the piston with a hammer handle or equivalent. HINT: Tape the hammer handle before use. If the piston is
difficult to push in, loosen the bleeder plug and push in the piston while letting some
brake fluid
escape.
e.
Install the inner pad with the pad wear indicator plats facing upward, and install the outer pad. NOTICE: There should
be no oil or grease adhering to the friction surfaces of the pads and the disc.
7.
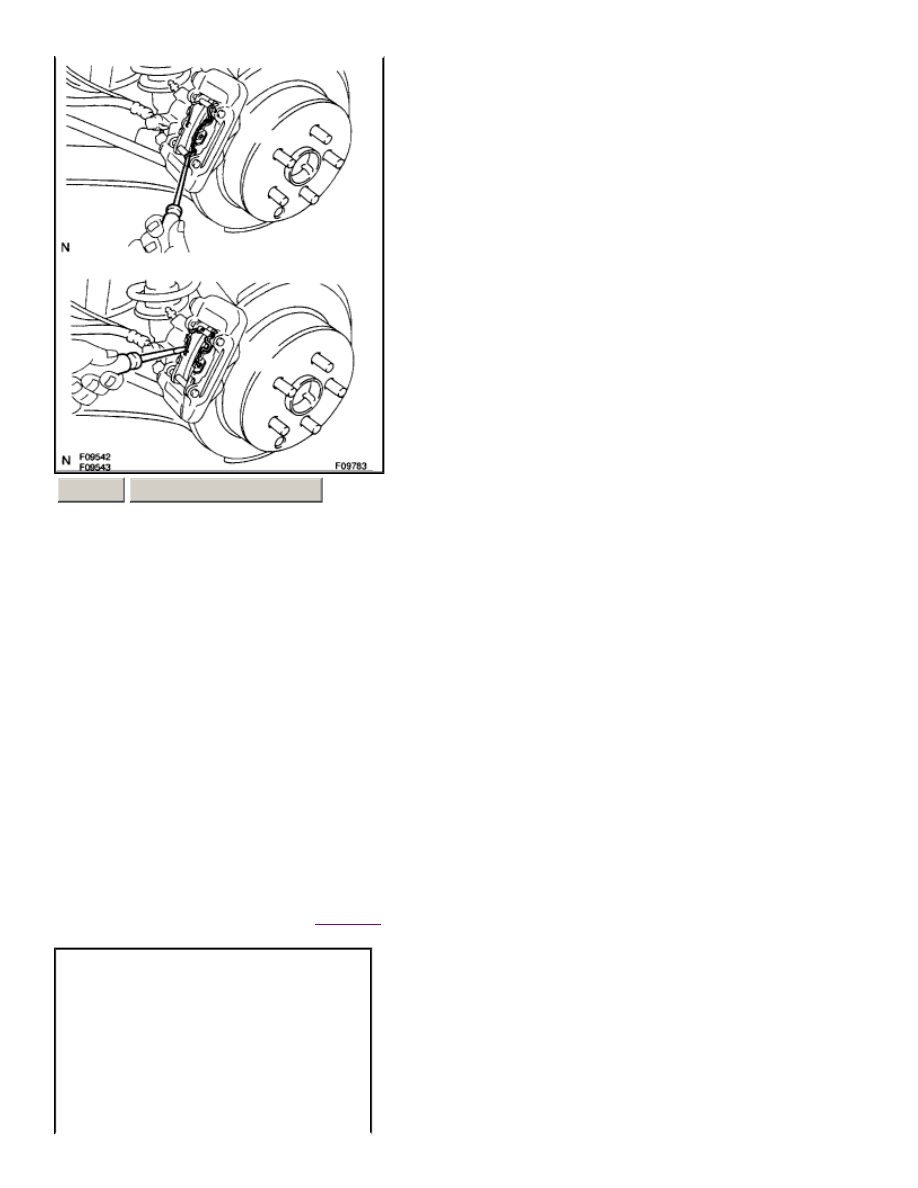
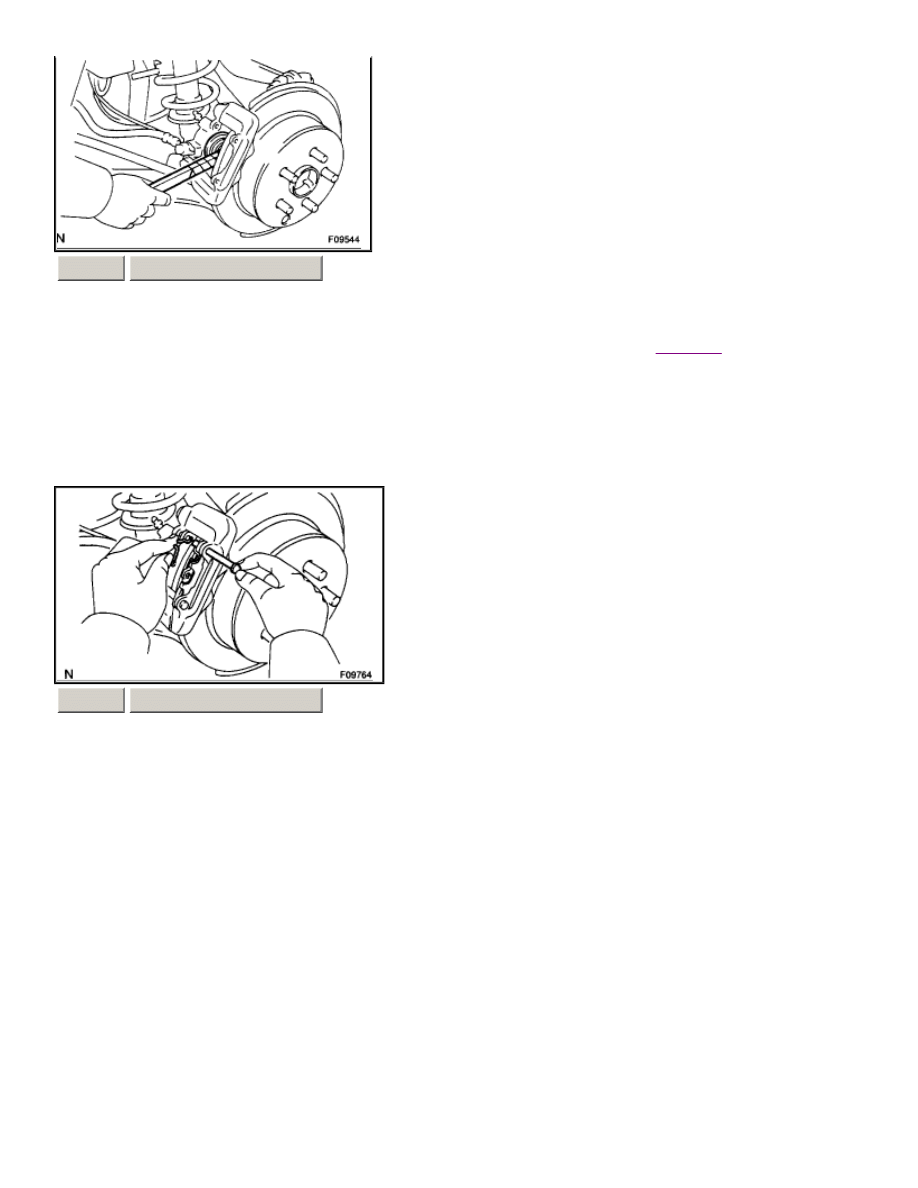
INSTALL 2 PAD GUIDE PINS, 2 ANTI-RATTLE SPRINGS AND CLIP
a.
Install the 2 anti-rattle springs on the each pad.
b.
While pressing the anti -rattle spring, and install the pad guide pin.
c.
Install the clip to the pad guide pin.
8.
INSTALL REAR WHEEL Torque: 103 Nm (1,050 kgf-cm, 76 ft. lbs.)
9.
DEPRESS BRAKE PEDAL SEVERAL TIMES
10.
CHECK THAT FLUID LEVEL IS AT MAX LINE
ZOOM
SIZED FOR PRINT
ZOOM
SIZED FOR PRINT
Page 3 of 3
Wyszukiwarka
Podobne podstrony:
ARTICLE BRAKES PEDAL ASSEMBLY SERVICE
ARTICLE BRAKES PEDAL ASSEMBLY SERVICE
ARTICLE SUSPENSION STABILIZER BAR REAR SERVICE
ARTICLE SUSPENSION UPPER CONTROL ARM REAR SERVICE
ARTICLE SUSPENSION LOWER CONTROL ARM REAR SERVICE
ARTICLE SUSPENSION STRUT REAR DISASSEMBLE REASSEMBLE
ARTICLE SUSPENSION STRUT REAR REPLACE INSTALL
M34e Rear Drum Brakes
Popular Mechanics Servicing Drum Brakes
ARTICLE MAINT INSPECTION BRAKES
ARTICLE SUSPENSION LOWER CONTROL ARM FRONT SERVICE
ARTICLE SUSPENSION STABILIZER BAR FRONT SERVICE
więcej podobnych podstron