
PM: Saturday Mechanic - Servicing Drum Brakes
http://hearst.corp.printthis.clickability.com/pt/cpt?action=cpt&title=P...
1 of 5
29/08/2006 2:29 PM
SAVE THIS | EMAIL THIS | Close
Servicing Drum Brakes
BY MIKE ALLEN
Photography by Monte Isom
Published in the August, 2005 issue.
It's a grinding noise that follows you around town--at least it
sounds like it's following because the sound is coming from the
rear of your vehicle. You only hear it when you use the brakes.
You grab a flashlight to check the thickness of the rear pads--but
then realize you've got rear drums, not discs. Well, it's time to fix
the problem, because you've worn out the linings on your rear
brake shoes, and that grinding noise means the shoes are going
metal-to-metal with the inside of the drums.
PM: Saturday Mechanic - Servicing Drum Brakes
http://hearst.corp.printthis.clickability.com/pt/cpt?action=cpt&title=P...
2 of 5
29/08/2006 2:29 PM
Why do some vehicle manufacturers still use drum brakes instead
of the superior disc brakes? Drums are lighter and have less friction
when not applied--both important for mileage. And they're used on
a lot of light trucks and smaller fwd cars on the rear axle, because
these vehicles have a heavy forward weight bias and don't need
rear brakes that are as effective as the front ones.
For background information on how drum brakes work, click here.
SHOPPING LIST
You'll need to buy a set of brake shoes. Get an axle set so you can
do both rear wheels at the same time, regardless of how broke you
might be. Don't cheap out and get the loss-leader, least expensive
shoes--go for at least the middle of the line. If you drive hard or
tow a trailer, ask for premium parts. I like to replace the hardware
at the same time because it can get very rusty. This is especially
true if you live or regularly drive near salt water, or if you tow a
boat trailer and your rear wheels are submerged frequently. You
should be able to find a hardware kit, which will include springs,
adjusters, retainer clips and pins, and other essential parts.
You may or may not be able to have the friction surface of the
drums machined, depending on how badly they are worn. So you'd
better check on the availability of replacement drums before you
take the vehicle out of service.
Also, unless you work on drum brakes on a regular basis, you'll
need a service manual specific to your car.
JACK IT UP
Start by loosening all the lug nuts on the rear wheels. Block both
front wheels in both directions. Then, put the vehicle up on safety
stands--never work on a vehicle that's resting on a jack. Remove
the wheel. I prefer to put the removed wheel under the car frame
near where I'm working. This way, should the vehicle fall, there
will be something thicker than my head for it to land on. Large
pieces of wood are also a good option, but concrete blocks are not.
Concrete may crumble under the force of a falling car. Parking
brake off, please. And if you have only one wheel up in the air, put
the transmission in Neutral: You'll need to spin the hub during this
procedure and if one wheel is on the ground and the trans is in Park
or any gear, you can't.
OPEN SESAME
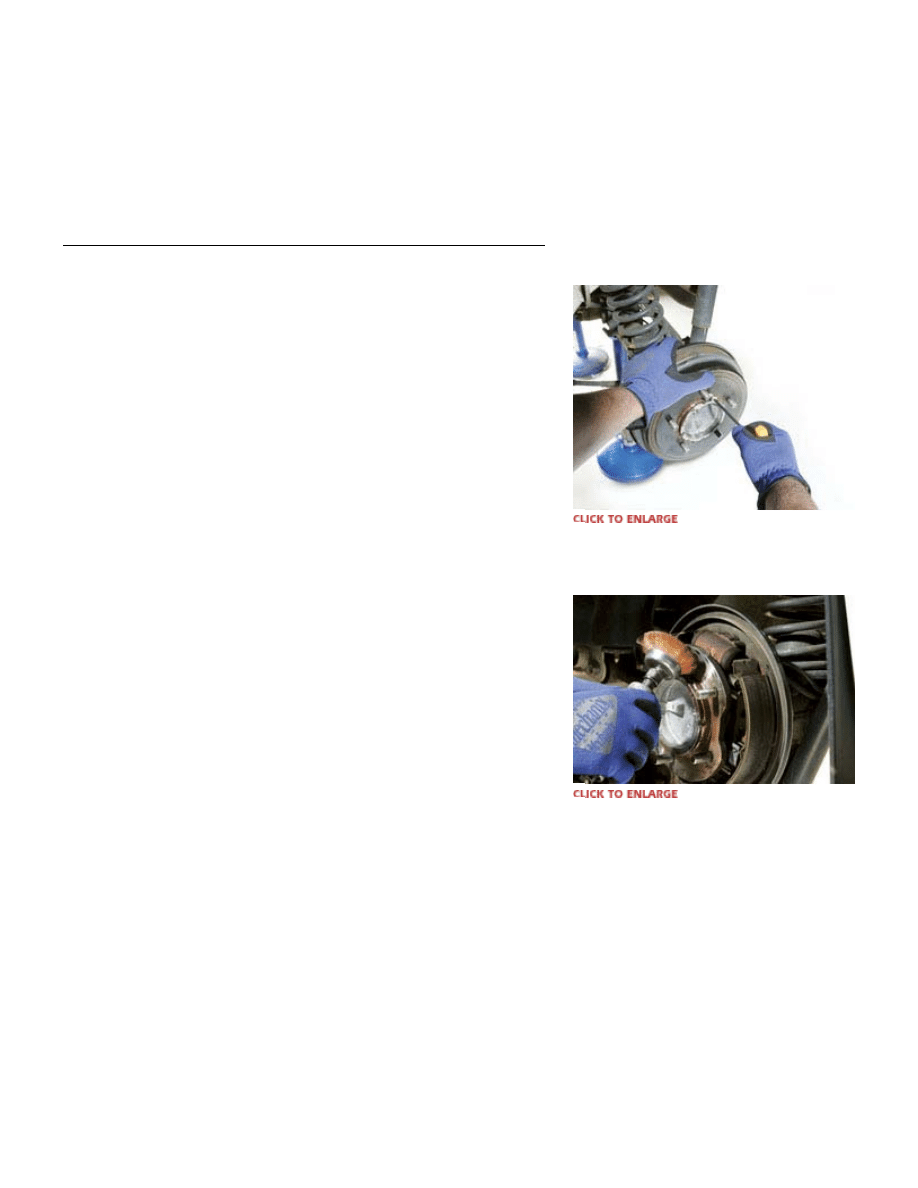
Remove the drum--a job that's often easier said than done. Some
brake drums are simply sandwiched between the hub and wheel
and held in place by nothing more than a clip to keep the drum
from falling onto your foot when the wheel is removed. Others may
First remove retaining screws or clips holding the
drum. This drum comes off by threading bolts into
holes conveniently provided.
Remove rust from the hub's land area where the drum
centers.
PM: Saturday Mechanic - Servicing Drum Brakes
http://hearst.corp.printthis.clickability.com/pt/cpt?action=cpt&title=P...
3 of 5
29/08/2006 2:29 PM
have a Phillips-head screw to achieve the same purpose. All brake
drums have a machined bore in their center that locates on a land
on the hub. This is to keep the drum concentric with the axle. All
too often, corrosion and road dirt will have insinuated themselves
into the few thousandths of an inch of clearance there, making the
drum difficult to remove. Start by giving the drum a few whacks
with a soft-head hammer, in the hope that the shock will pulverize
the corrosion, and let the drum free up.
This never works right off, of course. Soak the area with
penetrating oil and whack again. Don't whack so hard that you
dent, crack or bend the drum. If the drum still won't budge, check
to be sure the parking brake is really off and the cable that actuates
it isn't hung up. Now is the time to check the manual for any
insight it offers into removing the drum.
Our example vehicle, a Suzuki Grand Vitara, has two 8mm holes
drilled and tapped into the face of the drum. We threaded a pair of
8mm bolts into them and the bolts pushed the drum off cleanly.
Stubborn drums may require the use of heat and a large tool called
a drum puller. If you need a drum puller, the auto parts store that
sold you the shoes should be able to rent--or if you ask nicely,
lend--you one.
Once the drum has moved a few millimeters, check to see that
there isn't a ridge worn into the drum's inner surface that prevents it
from coming clear. You may need to release the adjuster through
the rear of the backing plate and retract the shoes enough to let the
drum clear.
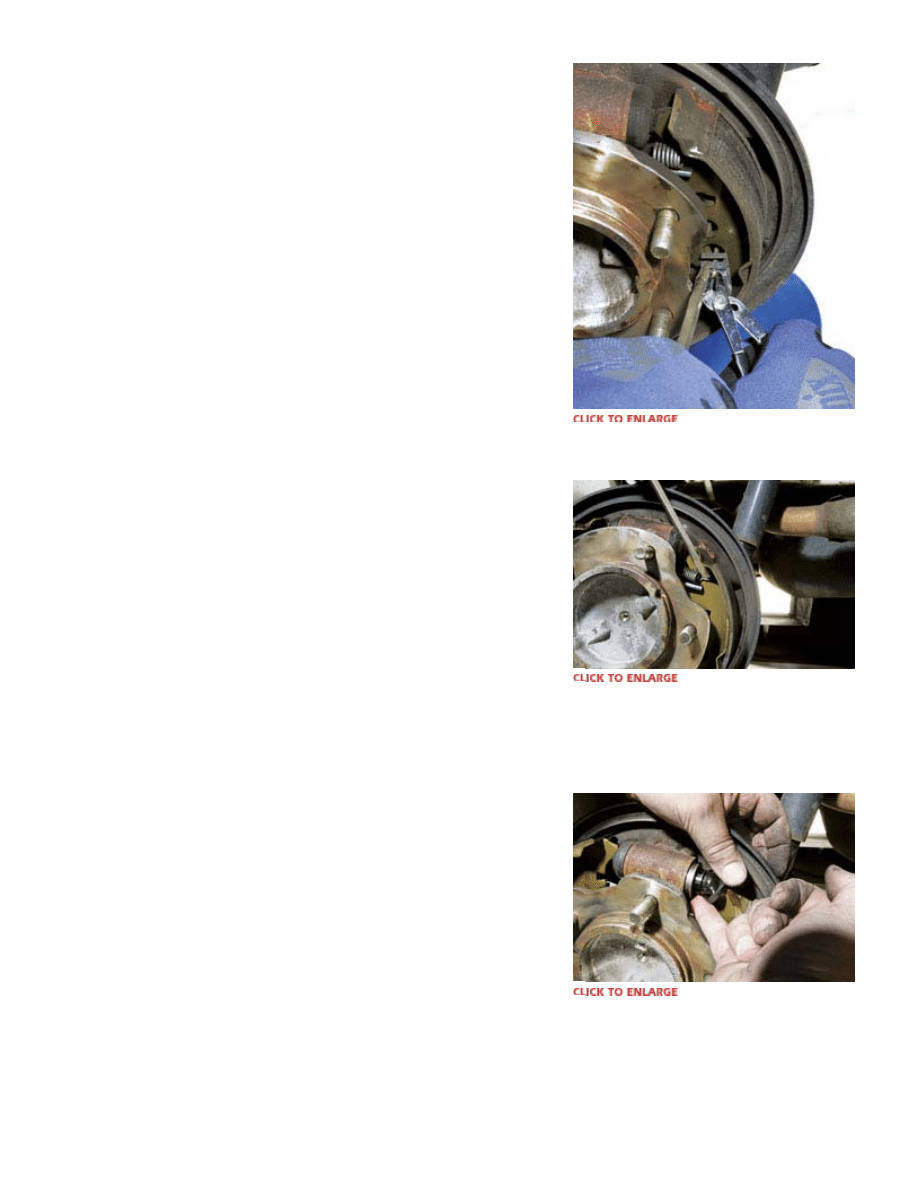
Depress the springs and twist the retaining clips to
release the shoes from the backing plate.
Use an old screwdriver to pop the springs off the
shoes to allow the two shoes to separate and come
away from the hub.
WHERE'S THIS SPRING GO?
Now it's time to remove the springs, retainers and shoes. If you
don't have a good shop manual with an intelligible exploded
diagram, you'll want to take closeup photos or at least make
diagrams of what goes where. Otherwise, you'll have a giant 3D
puzzle to reassemble--and I guarantee you won't remember how to
do it without some visual aids. Use a screwdriver and needle-nose
pliers to pop off the springs. Depress the retainer clips and rotate
the retainer pins 90 degrees, and the whole mess will fall off onto
the ground.
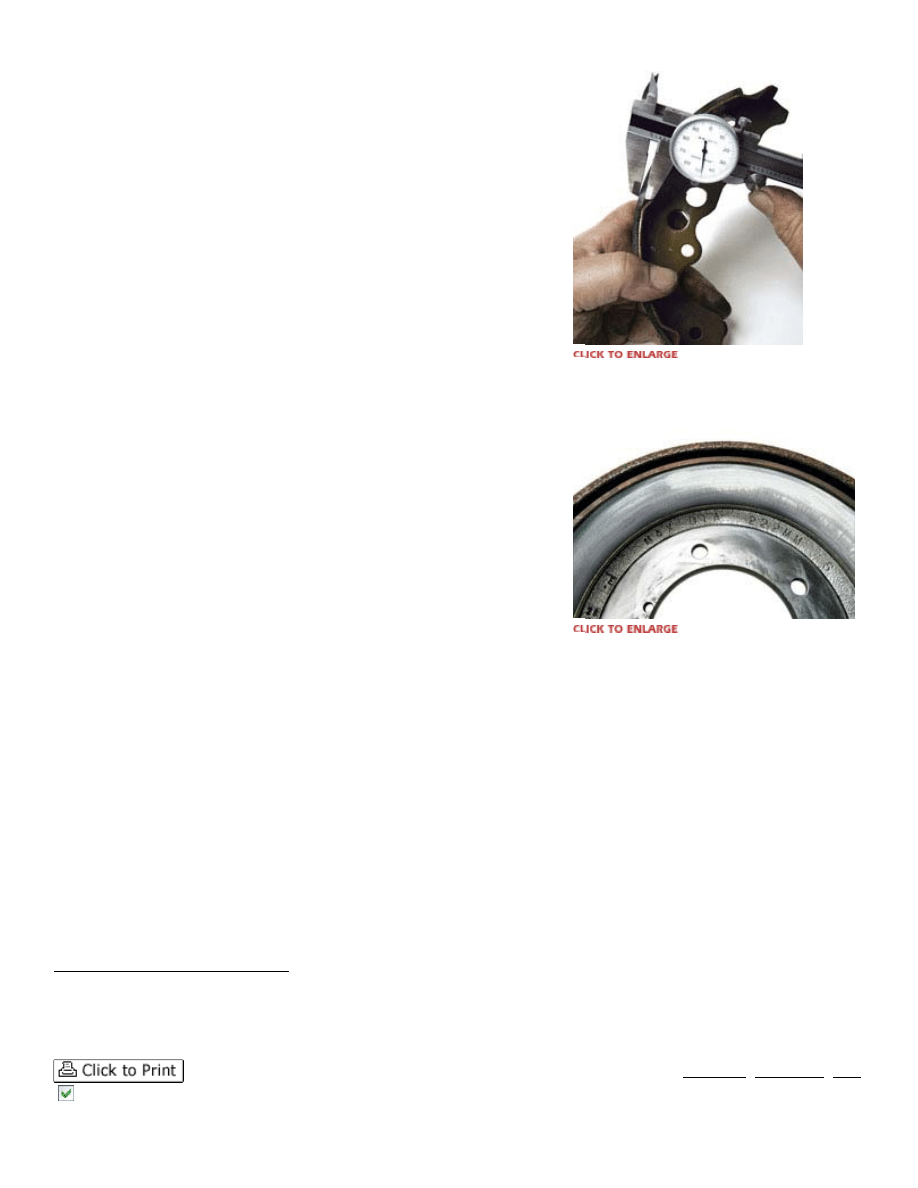
CHECK IT OUT
The drum should have a shiny surface that won't let you catch any
of the grooves with your fingernail. If you've had metal-to-metal
contact, you'll need to machine or replace the drums--both drums
Peel back the sealing boot at both wheel cylinders and
check for wetness. Leaking brake fluid means the
cylinder must be replaced and the brake system bled of
air afterward.
PM: Saturday Mechanic - Servicing Drum Brakes
http://hearst.corp.printthis.clickability.com/pt/cpt?action=cpt&title=P...
4 of 5
29/08/2006 2:29 PM
need to be turned to the same diameter or the car will veer
off-center every time you hit the brakes. The machine shop knows
this. The maximum allowable diameter is cast into the drum. Check
the depth of the friction material on the shoes. The shop manual
tells you the minimum allowable thickness. If any of the four shoes
are worn more than halfway, replace them.
Carefully pull back the boot on the brake slave cylinder and check
for fluid. A slight amount of moisture is normal, but if there is any
accumulation of fluid, replace the cylinder and bleed the system.
Clean up any dirt, corrosion or brake dust powder on the backing
plate with aerosol brake cleaner or the shop vacuum. Use a wire
brush to clean every mating surface between the drum and the hub
to remove any trace of corrosion and dirt, which would make the
drum run out of true. Coat these surfaces with a light film of
antiseize compound, in case you ever need to remove the drum
again. Put a dab of high-temp brake grease on the pivot points of
the adjuster struts and the backing plate.
TOGETHER AGAIN
Clean the friction surface of the drum with solvent or brake cleaner
so you don't leave oily fingerprints on the friction surfaces. Clean
up all the hardware if you're not replacing it, and lube the adjuster
with high-temp grease. Run the adjuster all the way in so the new
shoes will clear the drum later. Now reassemble the shoes, adjuster,
and springs and retainers. You'll need those photos or diagrams.
Trust me. You may need to spin the adjuster star wheel while you
hold the pawl out with a second screwdriver and take up some
slack between the shoe and drum. Now you can hang the drum and
reinstall the wheel.
The self-adjusting mechanism is activated differently on different
vehicles. Some use the handbrake to energize the automatic brake
adjusters, while others simply require you to apply the brakes while
backing up. If the pedal is persistently low, you may need to
manually crank the adjuster star wheel a few clicks.
You can measure the thickness of the
friction material to see if the shoes have
reasonable life. If in doubt, replace all shoes.
Brake drums are marked with their maximum
allowable inside diameter and should never be
machined beyond the limit.
Links referenced within this article
For background information on how drum brakes work, click here.
http://auto.howstuffworks.com/drum-brake.htm
Find this article at:
http://www.popularmechanics.com/automotive/sub_care_sat/1782947.html
SAVE THIS | EMAIL THIS | Close
Uncheck the box to remove the list of links referenced in the article.

PM: Saturday Mechanic - Servicing Drum Brakes
http://hearst.corp.printthis.clickability.com/pt/cpt?action=cpt&title=P...
5 of 5
29/08/2006 2:29 PM
Wyszukiwarka
Podobne podstrony:
Popular Mechanics Servicing Front Brake Calipers
Popular Mechanics Repairing Power Antennas
Popular Mechanics Fixing Hood And Trunk Latches
Popular Mechanics Finding And Fixing Water And Air Leaks
Popular Mechanics Aim Your Headlights
Popular Mechanics Repairing Composite Headlights
Popular Mechanics Calming A Pulsating Brake Pedal
Popular Mechanics Replacing U Joints
Popular Mechanics Saturday Mechanic Troubleshooting Distributorless Ignitions
Popular Mechanics Diagnosing And Repairing Wheel Vibration
Popular Mechanics Scan Tool Diagnostics
M34e Rear Drum Brakes
Popular Mechanics Smoothing Out A Lumpy Idle
Popular Mechanics Electric Cooling Fan Problems
Popular Mechanics Replacing a Bad Power Steering Pump
Popular Mechanics Replacing Loose Motor Mounts
Popular Mechanics Repairing Power Windows
więcej podobnych podstron