theForger's Win32 API Tutorial
]
Welcome to Version 2.0 of theForger's Win32 API
Tutorial
This tutorial attempts to get you started developing with the Win32 API
as quickly and clearly as possible. It is meant to be read as a whole,
so please read it from beginning to end before asking questions... most
of them will probably be answered. Each section builds on the sections
before it. I have also added some solutions to common errors in
Appendix A. If you ask me a question that is answered on this page,
you will look very silly.
●
which is refered to throughout this
document.
●
(source included) for browsing in the convenience of your
own harddrive. This file may not include minor changes such as spelling corrections that
are present on the website.
If you are viewing this locally or on another website, visit the #winprog website for the
.
Contents
●
Basics
2.
3.
4.
Understanding The Message Loop
5.
6.
7.
Dialogs, GUI coders best friend
8.
file:///C|/dona/forgers-win32-tutorial/tutorial/index.html (1 of 3) [7/8/2003 4:34:43 PM]

theForger's Win32 API Tutorial
9.
Standard Controls: Button, Edit, List Box, Static
10.
But what about... (Dialog FAQ)
●
Creating a simple application
App Part 1: Creating controls at runtime
2.
App Part 2: Using files and the common dialogs
3.
App Part 3: Tool and Status bars
4.
App Part 4: Multiple Document Interface
●
Graphics Device Interface
Bitmaps, Device Contexts and BitBlt
2.
3.
4.
●
Tools and Documentation
Recommended Books and References
2.
Free Visual C++ Command Line Tools
3.
Free Borland C++ Command Line Tools
●
Appendices
❍
Appendix A: Solutions to Common Errors
❍
Appendix B: Why you should learn the API before MFC
❍
Appendix C: Resource file notes
I've had reports that the source code presented in the documents itself doesn't display line breaks
properly in very old versions of Netscape, if you encounter this problem please refer to the code in
the source files included in the zip download.
Feeling generous?
You may use this tutorial for absolutely no charge, however there are costs
associated with hosting it on the web. If you found it to be of use to you and want to
give something back, I would be grateful for donations of any amount to help pay for this website.
This page gets approximately 15,000 hits a month, and it adds up after a while :)
Once again, there is absolutely no obligation to pay, and you won't get anything in addition to
what's already here, but if you want to help out, that would be great... just click the PayPal image.
Enjoy the tutorial,
Brook
file:///C|/dona/forgers-win32-tutorial/tutorial/index.html (2 of 3) [7/8/2003 4:34:43 PM]
theForger's Win32 API Tutorial
I would like to thank the following for the contributions they've made: Yih Horng, Todd Troxell, T
Frank Zvovushe, Suzanne Lorrin, Seth McCarus, Crispina Chong, John Crutchfield, Scott
Johnstone, Patrick Sears, Juan Demerutis, Richard Anthony, Alex Fox, Bob Rudis, Eric
Wadsworth, Chris Blume. As well as those who have simply written to say they've found the
tutorial useful. It's much appreciated!
Need more help?
In general I will freely answer any questions that I receive by email, or point you in the direction
of a resource that may be of assistance.
At the moment I am busy with a couple of large ongoing projects and don't have the time to work
on custom examples or small software projects. I would however be willing to entertain job offers
:)
.
Copyright © 1998-2003, Brook Miles (
file:///C|/dona/forgers-win32-tutorial/tutorial/index.html (3 of 3) [7/8/2003 4:34:43 PM]
Tutorial: Getting Started
]
Getting Started
What this tutorial is all about
This tutorial is intended to present to you the basics (and common extras) of writing programs
using the Win32 API. The language used is C, most C++ compilers will compile it as well. As a
matter of fact, most of the information is applicable to any language that can access the API,
inlcuding Java, Assembly and Visual Basic. I will not however present any code relating to these
languages and you're on your own in that regard, but several people have previously used this
document in said languages with quite a bit of success.
This tutorial will not teach you the C language, nor will it tell you how to run your perticular
compiler (Borland C++, Visual C++, LCC-Win32, etc...) I will however take a few moments in
the appendix to provide some notes on using the compilers I have knowledge of.
If you don't know what a macro or a typedef are, or how a
switch()
statement works, then turn
back now and read a good book or tutorial on the C language first.
Important notes
Sometimes throughout the text I will indicate certain things are IMPORANT to read. Because
they screw up so many people, if you don't read it, you'll likely get caught too. The first one is
this:
The source provided in the example ZIP file is not optional! I don't include all the code in the
text itself, only that which is relevant to whatever I'm currently discussing. In order to see how
this code fits in with the rest of the program, you must take a look at the source provided in the
ZIP file.
And here's the second one:
Read the whole thing! If you have a question during one section of the tutorial just have a little
patience and it might just be answered later on. If you just can't stand the thought of not knowing,
at least skim or search (yes computers can do that) the rest of the document before asking the nice
folks on IRC or by email.
file:///C|/dona/forgers-win32-tutorial/tutorial/start.html (1 of 4) [7/8/2003 4:34:43 PM]
Tutorial: Getting Started
Another thing to remember is that a question you might have about subject A might end up being
answered in a discussion of B or C, or maybe L. So just look around a little.
Ok I think that's all the ranting I have to do for the moment, lets try some actual code.
The simplest Win32 program
If you are a complete beginner lets make sure you are capable of compiling a basic windows
application. Slap the following code into your compiler and if all goes well you should get one of
the lamest programs ever written.
Remember to compile this as C, not C++. It probably doesn't matter, but since all the code here is
C only, it makes sense to start off on the right track. In most cases, all this requires if you add your
code to a
.c
file instead of a
.cpp
file. If all of this hurts your head, just call the file
test.c
and be done with it.
#include <windows.h>
int WINAPI WinMain(HINSTANCE hInstance, HINSTANCE hPrevInstance,
LPSTR lpCmdLine, int nCmdShow)
{
MessageBox(NULL, "Goodbye, cruel world!", "Note", MB_OK);
return 0;
}
If that doesn't work, your first step is to read whatever errors you get and if you don't understand
them, look them up in the help or whatever documents accompany your compiler. Make sure you
have specified a Win32 GUI (NOT "Console") project/makefile/target, whatever applies to
your compiler. Unfortunately I can't help much with this part either, as errors and how to fix
them vary from compiler to compiler (and person to person).
You may get some warnings about you not using the parameters supplied to
WinMain()
. This is
OK. Now that we've established you can in fact compile a program, lets go through that little bit
of code....
int WINAPI WinMain(HINSTANCE hInstance, HINSTANCE hPrevInstance,
LPSTR lpCmdLine, int nCmdShow)
file:///C|/dona/forgers-win32-tutorial/tutorial/start.html (2 of 4) [7/8/2003 4:34:43 PM]

Tutorial: Getting Started
WinMain()
is windows equivalent of
main()
from DOS or UNIX. This is where your program
starts execution. The parameters are as follows:
HINSTANCE hInstance
Handle to the programs executable module (the .exe file in memory)
HINSTANCE hPrevInstance
Always
NULL
for Win32 programs.
LPSTR lpCmdLine
The command line arguments as a single string. NOT including the program name.
int nCmdShow
An integer value which may be passed to
ShowWindow()
. We'll get to this later.
hInstance
is used for things like loading resources and any other task which is performed on a
per-module basis. A module is either the EXE or a DLL loaded into your program. For most (if
not all) of this tutorial, there will only be one module to worry about, the EXE.
hPrevInstance
used to be the handle to the previously run instance of your program (if any)
in Win16. This no longer applies. In Win32 you ignore this parameter.
Calling Conventions
WINAPI
specifies the calling convention and is defined as
_stdcall
. If you don't know what
this means, don't worry about it as it will not really affect us for the scope of this tutorial. Just
remember that it's needed here.
Win32 Data Types
You will find that many of the normal keywords or types have windows specific definitions,
UINT
for
unsigned int
,
LPSTR
for
char*
etc... Which you choose is really up to you. If
you are more comfortable using
char*
instead of
LPSTR
, feel free to do so. Just make sure that
you know what a type is before you substitute something else.
Just remember a few things and they will be easy to interpret. An
LP
prefix stands for Long
Pointer. In Win32 the Long part is obsolete so don't worry about it. And if you don't know what a
pointer is, you can either 1) Go find a book or tutorial on C, or 2) just go ahead anyway and screw
up a lot. I'd really recommend #1, but most people go with #2 (I would :). But don't say I didn't
warn you.
Next thing is a
C
following a
LP
indicates a
const
pointer.
LPCSTR
indicates a pointer to a
file:///C|/dona/forgers-win32-tutorial/tutorial/start.html (3 of 4) [7/8/2003 4:34:43 PM]
Tutorial: Getting Started
const string, one that can not or will not be modified.
LPSTR
on the other hand is not
const
and
may be changed.
You might also see a
T
mixed in there. Don't worry about this for now, unless you are
intentionally working with Unicode, it means nothing.
Copyright © 1998-2003, Brook Miles (
file:///C|/dona/forgers-win32-tutorial/tutorial/start.html (4 of 4) [7/8/2003 4:34:43 PM]
Tutorial: A Simple Window
]
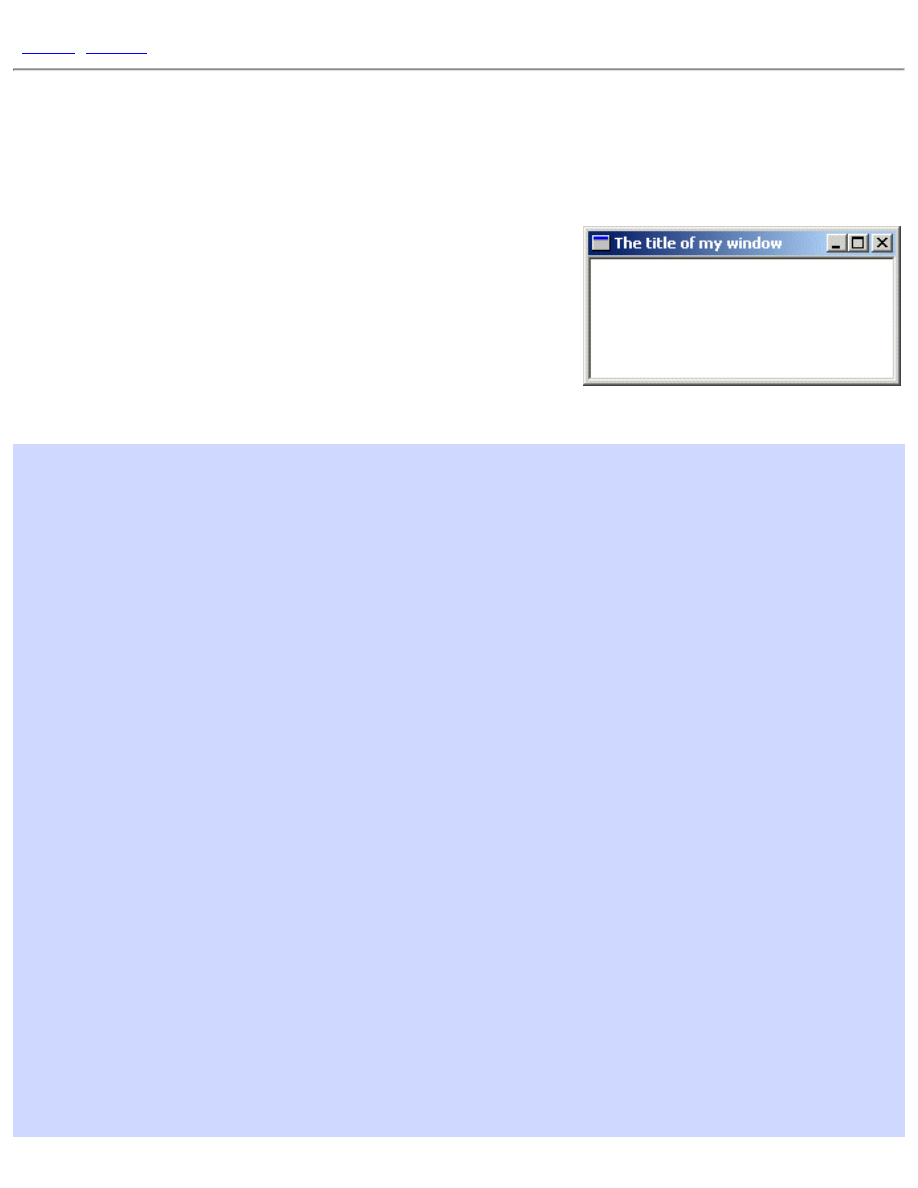
A Simple Window
Example: simple_window
Sometimes people come on IRC and ask "How do I make a
window?"...Well it's not entirely that simple I'm afraid. It's not difficult
once you know what you're doing but there are quite a few things you
need to do to get a window to show up; And they're more than can be
simply explained over a chat room, or a quick note.
I always liked to do things first and learn them later...so here is the
code to a simple window which will be explained shortly.
#include <windows.h>
const char g_szClassName[] = "myWindowClass";
// Step 4: the Window Procedure
LRESULT CALLBACK WndProc(HWND hwnd, UINT msg, WPARAM wParam, LPARAM lParam)
{
switch(msg)
{
case WM_CLOSE:
DestroyWindow(hwnd);
break;
case WM_DESTROY:
PostQuitMessage(0);
break;
default:
return DefWindowProc(hwnd, msg, wParam, lParam);
}
return 0;
}
int WINAPI WinMain(HINSTANCE hInstance, HINSTANCE hPrevInstance,
LPSTR lpCmdLine, int nCmdShow)
{
WNDCLASSEX wc;
HWND hwnd;
MSG Msg;
//Step 1: Registering the Window Class
wc.cbSize = sizeof(WNDCLASSEX);
file:///C|/dona/forgers-win32-tutorial/tutorial/simple_window.html (1 of 8) [7/8/2003 4:34:44 PM]
Tutorial: A Simple Window
wc.style = 0;
wc.lpfnWndProc = WndProc;
wc.cbClsExtra = 0;
wc.cbWndExtra = 0;
wc.hInstance = hInstance;
wc.hIcon = LoadIcon(NULL, IDI_APPLICATION);
wc.hCursor = LoadCursor(NULL, IDC_ARROW);
wc.hbrBackground = (HBRUSH)(COLOR_WINDOW+1);
wc.lpszMenuName = NULL;
wc.lpszClassName = g_szClassName;
wc.hIconSm = LoadIcon(NULL, IDI_APPLICATION);
if(!RegisterClassEx(&wc))
{
MessageBox(NULL, "Window Registration Failed!", "Error!",
MB_ICONEXCLAMATION | MB_OK);
return 0;
}
// Step 2: Creating the Window
hwnd = CreateWindowEx(
WS_EX_CLIENTEDGE,
g_szClassName,
"The title of my window",
WS_OVERLAPPEDWINDOW,
CW_USEDEFAULT, CW_USEDEFAULT, 240, 120,
NULL, NULL, hInstance, NULL);
if(hwnd == NULL)
{
MessageBox(NULL, "Window Creation Failed!", "Error!",
MB_ICONEXCLAMATION | MB_OK);
return 0;
}
ShowWindow(hwnd, nCmdShow);
UpdateWindow(hwnd);
// Step 3: The Message Loop
while(GetMessage(&Msg, NULL, 0, 0) > 0)
{
TranslateMessage(&Msg);
DispatchMessage(&Msg);
}
return Msg.wParam;
}
file:///C|/dona/forgers-win32-tutorial/tutorial/simple_window.html (2 of 8) [7/8/2003 4:34:44 PM]

Tutorial: A Simple Window
For most part this is the simplest windows program you can write that actually creates a functional window, a
mere 70 or so lines. If you got the first example to compile then this one should work with no problems.
Step 1: Registering the Window Class
A Window Class stores information about a type of window, including it's Window Procedure which controls
the window, the small and large icons for the window, and the background color. This way, you can register a
class once, and create as many windows as you want from it, without having to specify all those attributes over
and over. Most of the attributes you set in the window class can be changed on a per-window basis if desired.
A Window Class has NOTHING to do with C++ classes.
const char g_szClassName[] = "myWindowClass";
The variable above stores the name of our window class, we will use it shortly to register our window class with
the system.
WNDCLASSEX wc;
wc.cbSize = sizeof(WNDCLASSEX);
wc.style = 0;
wc.lpfnWndProc = WndProc;
wc.cbClsExtra = 0;
wc.cbWndExtra = 0;
wc.hInstance = hInstance;
wc.hIcon = LoadIcon(NULL, IDI_APPLICATION);
wc.hCursor = LoadCursor(NULL, IDC_ARROW);
wc.hbrBackground = (HBRUSH)(COLOR_WINDOW+1);
wc.lpszMenuName = NULL;
wc.lpszClassName = g_szClassName;
wc.hIconSm = LoadIcon(NULL, IDI_APPLICATION);
if(!RegisterClassEx(&wc))
{
MessageBox(NULL, "Window Registration Failed!", "Error!",
MB_ICONEXCLAMATION | MB_OK);
return 0;
}
This is the code we use in
WinMain()
to register our window class. We fill out the members of a
WNDCLASSEX
structure and call
RegisterClassEx()
.
The members of the struct affect the window class as follows:
cbSize
file:///C|/dona/forgers-win32-tutorial/tutorial/simple_window.html (3 of 8) [7/8/2003 4:34:44 PM]

Tutorial: A Simple Window
The size of the structure.
style
Class Styles (
CS_*
), not to be confused with Window Styles (
WS_*
) This can usually be set to
0
.
lpfnWndProc
Pointer to the window procedure for this window class.
cbClsExtra
Amount of extra data allocated for this class in memory. Usually
0
.
cbWndExtra
Amount of extra data allocated in memory per window of this type. Usually
0
.
hInstance
Handle to application instance (that we got in the first parameter of
WinMain()
).
hIcon
Large (usually 32x32) icon shown when the user presses Alt+Tab.
hCursor
Cursor that will be displayed over our window.
hbrBackground
Background Brush to set the color of our window.
lpszMenuName
Name of a menu resource to use for the windows with this class.
lpszClassName
Name to identify the class with.
hIconSm
Small (usually 16x16) icon to show in the taskbar and in the top left corner of the window.
Don't worry if that doesn't make much sense to you yet, the various parts that count will be explained more
later. Another thing to remember is to not try and remember this stuff. I rarely (never) memorize structs, or
function parameters, this is a waste of effort and, more importantly, time. If you know the functions you need to
call then it is a matter of seconds to look up the exact parameters in your help files. If you don't have help files,
get them. You are lost without. Eventually you will come to know the parameters to the functions you use most.
We then call
RegisterClassEx()
and check for failure, if it fails we pop up a message which says so and
abort the program by returning from the
WinMain()
function.
Step 2: Creating the Window
Once the class is registered, we can create a window with it. You should look up the paramters for
CreateWindowEx()
(as you should ALWAYS do when using a new API call), but I'll explain them briefly
here.
HWND hwnd;
hwnd = CreateWindowEx(
WS_EX_CLIENTEDGE,
g_szClassName,
"The title of my window",
file:///C|/dona/forgers-win32-tutorial/tutorial/simple_window.html (4 of 8) [7/8/2003 4:34:44 PM]
Tutorial: A Simple Window
WS_OVERLAPPEDWINDOW,
CW_USEDEFAULT, CW_USEDEFAULT, 240, 120,
NULL, NULL, hInstance, NULL);
The first parameter (
WS_EX_CLIENTEDGE
) is the extended windows style, in this case I have set it to give it a
sunken inner border around the window. Set it to
0
if you'd like to see the difference. Also play with other
values to see what they do.
Next we have the class name (
g_szClassName
), this tells the system what kind of window to create. Since
we want to create a window from the class we just registered, we use the name of that class. After that we
specify our window name or title which is the text that will be displayed in the Caption, or Title Bar on our
window.
The parameter we have as
WS_OVERLAPPEDWINDOW
is the Window Style parameter. There are quite a few of
these and you should look them up and experiment to find out what they do. These will be covered more later.
The next four parameters (
CW_USEDEFAULT, CW_USEDEFAULT, 320, 240
) are the X and Y co-
ordinates for the top left corner of your window, and the width and height of the window. I've set the X and Y
values to
CW_USEDEFAULT
to let windows choose where on the screen to put the window. Remeber that the
left of the screen is an X value of zero and it increases to the right; The top of the screen is a Y value of zero
which increases towards the bottom. The units are pixels, which is the smallest unit a screen can display at a
given resolution.
Next (
NULL, NULL, g_hInst, NULL
) we have the Parent Window handle, the menu handle, the
application instance handle, and a pointer to window creation data. In windows, the windows on your screen are
arranged in a heirarchy of parent and child windows. When you see a button on a window, the button is the
Child and it is contained within the window that is it's Parent. In this example, the parent handle is
NULL
because we have no parent, this is our main or Top Level window. The menu is
NULL
for now since we don't
have one yet. The instance handle is set to the value that is passed in as the first parameter to
WinMain()
. The
creation data (which I almost never use) that can be used to send additional data to the window that is being
created is also
NULL
.
If you're wondering what this magic
NULL
is, it's simply defined as
0
(zero). Actually, in C it's defined as
((void*)0)
, since it's intended for use with pointers. Therefore you will possibly get warnings if you use
NULL for integer values, depending on your compiler and the warning level settings. You can choose to ignore
the warnings, or just use
0
instead.
Number one cause of people not knowing what the heck is wrong with their programs is probably that they
didn't check the return values of their calls to see if they failed or not.
CreateWindow()
will fail at some
point even if you're an experianced coder, simply because there are lots of mistakes that are easy to make. Untill
you learn how to quickly identify those mistakes, at least give yourself the chance of figuring out where things
go wrong, and Always check return values!
if(hwnd == NULL)
{
file:///C|/dona/forgers-win32-tutorial/tutorial/simple_window.html (5 of 8) [7/8/2003 4:34:44 PM]
Tutorial: A Simple Window
MessageBox(NULL, "Window Creation Failed!", "Error!",
MB_ICONEXCLAMATION | MB_OK);
return 0;
}
After we've created the window and checked to make sure we have a valid handle we show the window, using
the last parameter in
WinMain()
and then update it to ensure that it has properly redrawn itself on the screen.
ShowWindow(hwnd, nCmdShow);
UpdateWindow(hwnd);
The
nCmdShow
parameter is optional, you could simply pass in
SW_SHOWNORMAL
all the time and be done
with it. However using the parameter passed into
WinMain()
gives whoever is running your program to
specify whether or not they want your window to start off visible, maximized, minimized, etc... You will find
options for these in the properties of windows shortcuts, and this parameter is how the choice is carried out.
Step 3: The Message Loop
This is the heart of the whole program, pretty much everything that your program does passes through this point
of control.
while(GetMessage(&Msg, NULL, 0, 0) > 0)
{
TranslateMessage(&Msg);
DispatchMessage(&Msg);
}
return Msg.wParam;
GetMessage()
gets a message from your application's message queue. Any time the user moves the mouse,
types on the keyboard, clicks on your window's menu, or does any number of other things, messages are
generated by the system and entered into your program's message queue. By calling
GetMessage()
you are
requesting the next available message to be removed from the queue and returned to you for processing. If there
is no message,
GetMessage()
Blocks. If you are unfamiliar with the term, it means that it waits untill there is
a message, and then returns it to you.
TranslateMessage()
does some additional processing on keyboard events like generating
WM_CHAR
messages to go along with
WM_KEYDOWN
messages. Finally
DispatchMessage()
sends the message out to
the window that the message was sent to. This could be our main window or it could be another one, or a
control, and in some cases a window that was created behind the scenes by the sytem or another program. This
isn't something you need to worry about because all we are concerned with is that we get the message and send
it out, the system takes care of the rest making sure it gets to the proper window.
Step 4: the Window Procedure
file:///C|/dona/forgers-win32-tutorial/tutorial/simple_window.html (6 of 8) [7/8/2003 4:34:44 PM]
Tutorial: A Simple Window
If the message loop is the heart of the program, the window procedure is the brain. This is where all the
messages that are sent to our window get processed.
LRESULT CALLBACK WndProc(HWND hwnd, UINT msg, WPARAM wParam, LPARAM lParam)
{
switch(msg)
{
case WM_CLOSE:
DestroyWindow(hwnd);
break;
case WM_DESTROY:
PostQuitMessage(0);
break;
default:
return DefWindowProc(hwnd, msg, wParam, lParam);
}
return 0;
}
The window procedure is called for each message, the
HWND
parameter is the handle of your window, the one
that the message applies to. This is important since you might have two or more windows of the same class and
they will use the same window procedure (
WndProc()
). The difference is that the parameter
hwnd
will be
different depending on which window it is. For example when we get the
WM_CLOSE
message we destroy the
window. Since we use the window handle that we received as the first paramter, any other windows will not be
affected, only the one that the message was intended for.
WM_CLOSE
is sent when the user presses the Close Button
or types Alt-F4. This will cause the window to be
destroyed by default, but I like to handle it explicitly, since this is the perfect spot to do cleanup checks, or ask
the user to save files etc. before exiting the program.
When we call
DestroyWindow()
the system sends the
WM_DESTROY
message to the window getting
destroyed, in this case it's our window, and then destroys any remaining child windows before finally removing
our window from the system. Since this is the only window in our program, we are all done and we want the
program to exit, so we call
PostQuitMessage()
. This posts the
WM_QUIT
message to the message loop.
We never receive this message, because it causes
GetMessage()
to return
FALSE
, and as you'll see in our
message loop code, when that happens we stop processing messages and return the final result code, the
wParam
of
WM_QUIT
which happens to be the value we passed into
PostQuitMessage()
. The return
value is only really useful if your program is designed to be called by another program and you want to return a
specific value.
Step 5: There is no Step 5
Phew. Well that's it! If I haven't explained stuff clearly enough yet, just hang in there and hopefully things will
become more clear as we get into more usefull programs.
file:///C|/dona/forgers-win32-tutorial/tutorial/simple_window.html (7 of 8) [7/8/2003 4:34:44 PM]
Tutorial: A Simple Window
Copyright © 1998-2003, Brook Miles (
file:///C|/dona/forgers-win32-tutorial/tutorial/simple_window.html (8 of 8) [7/8/2003 4:34:44 PM]
Tutorial: Handling Messages
[
]
Handling Messages
Example: window_click
Alright, we've got a window, but it doesn't do
anything except what
DefWindowProc()
allows
it to, like be sized, maximised, etc... Not really all
that exciting.
In the next section I am going to show you how to
modify what you already have to do somehting
new. This way I can just tell you "Handle this
message, and do this in it..." and you will know
what I mean and be able to do so without seeing an entire example. That's the hope anyway, so pay attention :P
Okay for starters take the example code for the last window we worked on and make sure it compiles and runs as
expected. Then you can either keep working on it for the next little bit or copy it to a new project to modify.
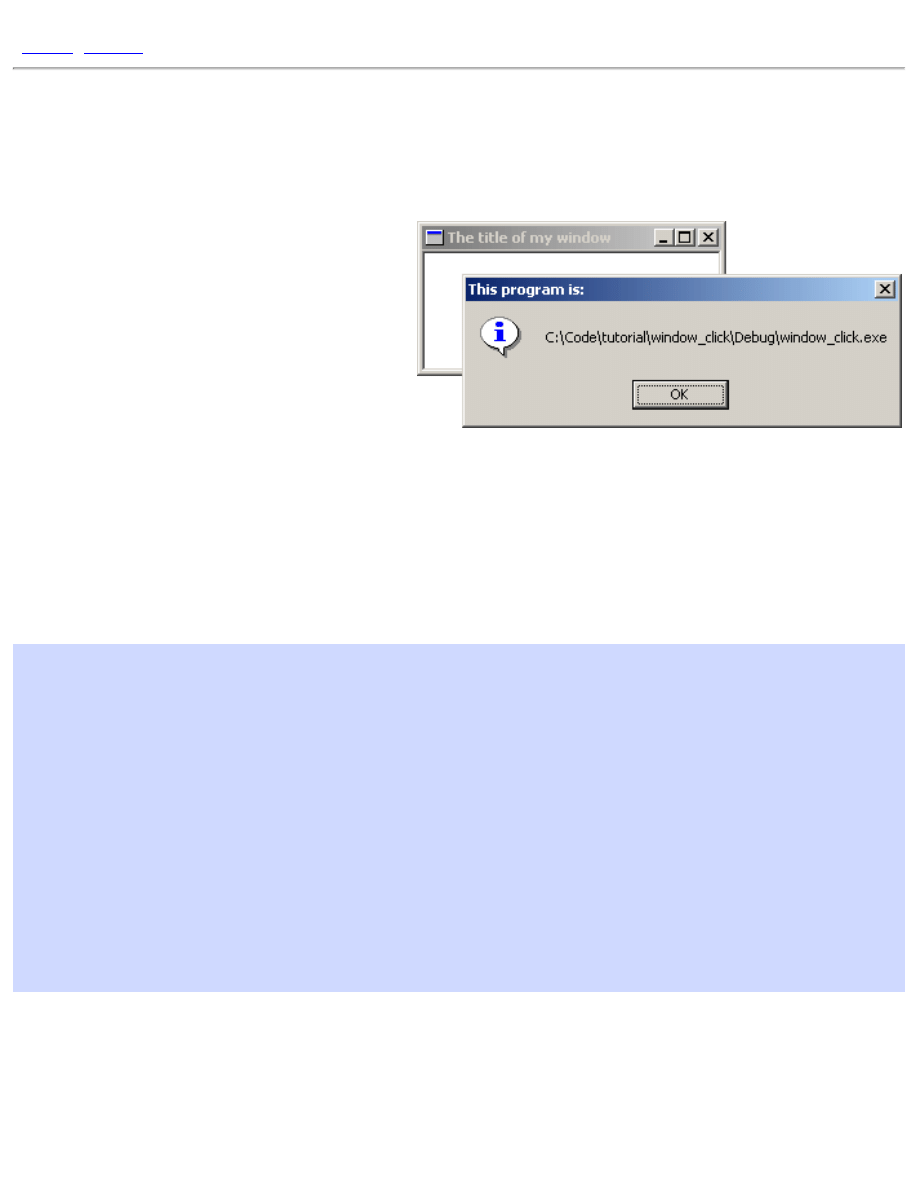
We're going to add the capability to show the user what the name of our program is when they click on our
window. Not very exciting, it's basically to get the hang of handling messages. Lets look at what we have in our
WndProc()
:
LRESULT CALLBACK WndProc(HWND hwnd, UINT msg, WPARAM wParam, LPARAM lParam)
{
switch(msg)
{
case WM_CLOSE:
DestroyWindow(hwnd);
break;
case WM_DESTROY:
PostQuitMessage(0);
break;
default:
return DefWindowProc(hwnd, msg, wParam, lParam);
}
return 0;
}
If we want to handle mouse clicks, we need to add a
WM_LBUTTONDOWN
handler (or
WM_RBUTTONDOWN
,
WM_MBUTTONDOWN
, for right and middle clicks respectively).
If I or someone else refers to handling a message they mean to add it into the
WndProc()
of your window class
as follows:
file:///C|/dona/forgers-win32-tutorial/tutorial/window_click.html (1 of 5) [7/8/2003 4:34:45 PM]
Tutorial: Handling Messages
LRESULT CALLBACK WndProc(HWND hwnd, UINT msg, WPARAM wParam, LPARAM lParam)
{
switch(msg)
{
case WM_LBUTTONDOWN: // <-
// <- we just added this stuff
break; // <-
case WM_CLOSE:
DestroyWindow(hwnd);
break;
case WM_DESTROY:
PostQuitMessage(0);
break;
default:
return DefWindowProc(hwnd, msg, wParam, lParam);
}
return 0;
}
The order in which you handle your messages rarely matters. Just make sure you've got your
break;
after each
one. As you can see we added another
case
into our
switch()
. Now we want something to happen when we
get to this part of our program.
First I will present the code we want to add (that will show the user the filename of our program) and then I will
integrate it into our program. Later on I will probably just show you the code and let you integrate it into your
program. This is of course better for me as I don't have to type as much and it's better for you because you will be
able to add the code into ANY program and not just the ones I present. If you aren't sure how to do it, look at
the example zip file included with the section.
GetModuleFileName(hInstance, szFileName, MAX_PATH);
MessageBox(hwnd, szFileName, "This program is:", MB_OK | MB_ICONINFORMATION);
Now this code does not stand on it's own, it can't just be slapped into our code any old place. We specifically want
it to run when the user clicks the mouse button so this is how I would merge this small bit of code into our skeleton
program:
LRESULT CALLBACK WndProc(HWND hwnd, UINT msg, WPARAM wParam, LPARAM lParam)
{
switch(msg)
{
case WM_LBUTTONDOWN:
// BEGIN NEW CODE
{
char szFileName[MAX_PATH];
HINSTANCE hInstance = GetModuleHandle(NULL);
file:///C|/dona/forgers-win32-tutorial/tutorial/window_click.html (2 of 5) [7/8/2003 4:34:45 PM]
Tutorial: Handling Messages
GetModuleFileName(hInstance, szFileName, MAX_PATH);
MessageBox(hwnd, szFileName, "This program is:", MB_OK |
MB_ICONINFORMATION);
}
// END NEW CODE
break;
case WM_CLOSE:
DestroyWindow(hwnd);
break;
case WM_DESTROY:
PostQuitMessage(0);
break;
default:
return DefWindowProc(hwnd, msg, wParam, lParam);
}
return 0;
}
Note the new set of curly braces {} . These are required when declaring variables inside a
switch()
statement.
This should be basic C knowledge but I thought I should point it out anyway for those of you doing things the hard
way.
So if you've added in that code, compile it now. If it works, click on the window and you should see a box with the
name of the .exe pop up.
You'll notice we've added two variables,
hInstance
and
szFileName
. Look up
GetModuleFileName()
and you will see that the first parameter is a
HINSTANCE
refering to the executable module (our program, the .exe
file). Where do we get such a thing?
GetModuleHandle()
is the answer. The references for
GetModuleHandle()
indicate that passing in NULL will return us "a handle to the file used to create the
calling process", which is exactly what we need, the
HINSTANCE
just mentioned. Putting all this information
together we end up with the following declaration:
HINSTANCE hInstance = GetModuleHandle(NULL);
Now on to the second parameter, again turning to our trusty reference manual, we see that it is " a pointer to a
buffer that receives the path and file name of the specified module" and the data type is
LPTSTR
(or
LPSTR
if
your references are old). Since
LPSTR
is equivalent to
char*
we can declare an array of
char
's like this:
char szFileName[MAX_PATH];
MAX_PATH
is a handy macro included via
<windows.h>
that is defined to the maximum length of a buffer
needed to store a filename under Win32. We also pass
MAX_PATH
to
GetModuleFileName()
so it knows the
size of the buffer.
After
GetModuleFileName()
is called, the buffer
szFileName
will be filled with a null terminated string
containing the name of our .exe file. We pass this value to
MessageBox()
as an easy way of displaying it to the
user.
file:///C|/dona/forgers-win32-tutorial/tutorial/window_click.html (3 of 5) [7/8/2003 4:34:45 PM]
Tutorial: Handling Messages
So if you've added in that code, compile it now. If it works, click on the window and you should see a box with the
name of the .exe pop up.
If it doesn't work, here's the full code to the program. Compare it to what you have and see what, if any, mistakes
you made.
#include <windows.h>
const char g_szClassName[] = "myWindowClass";
LRESULT CALLBACK WndProc(HWND hwnd, UINT msg, WPARAM wParam, LPARAM lParam)
{
switch(msg)
{
case WM_LBUTTONDOWN:
{
char szFileName[MAX_PATH];
HINSTANCE hInstance = GetModuleHandle(NULL);
GetModuleFileName(hInstance, szFileName, MAX_PATH);
MessageBox(hwnd, szFileName, "This program is:", MB_OK |
MB_ICONINFORMATION);
}
break;
case WM_CLOSE:
DestroyWindow(hwnd);
break;
case WM_DESTROY:
PostQuitMessage(0);
break;
default:
return DefWindowProc(hwnd, msg, wParam, lParam);
}
return 0;
}
int WINAPI WinMain(HINSTANCE hInstance, HINSTANCE hPrevInstance,
LPSTR lpCmdLine, int nCmdShow)
{
WNDCLASSEX wc;
HWND hwnd;
MSG Msg;
wc.cbSize = sizeof(WNDCLASSEX);
wc.style = 0;
wc.lpfnWndProc = WndProc;
wc.cbClsExtra = 0;
file:///C|/dona/forgers-win32-tutorial/tutorial/window_click.html (4 of 5) [7/8/2003 4:34:45 PM]
Tutorial: Handling Messages
wc.cbWndExtra = 0;
wc.hInstance = hInstance;
wc.hIcon = LoadIcon(NULL, IDI_APPLICATION);
wc.hCursor = LoadCursor(NULL, IDC_ARROW);
wc.hbrBackground = (HBRUSH)(COLOR_WINDOW+1);
wc.lpszMenuName = NULL;
wc.lpszClassName = g_szClassName;
wc.hIconSm = LoadIcon(NULL, IDI_APPLICATION);
if(!RegisterClassEx(&wc))
{
MessageBox(NULL, "Window Registration Failed!", "Error!",
MB_ICONEXCLAMATION | MB_OK);
return 0;
}
hwnd = CreateWindowEx(
WS_EX_CLIENTEDGE,
g_szClassName,
"The title of my window",
WS_OVERLAPPEDWINDOW,
CW_USEDEFAULT, CW_USEDEFAULT, 240, 120,
NULL, NULL, hInstance, NULL);
if(hwnd == NULL)
{
MessageBox(NULL, "Window Creation Failed!", "Error!",
MB_ICONEXCLAMATION | MB_OK);
return 0;
}
ShowWindow(hwnd, nCmdShow);
UpdateWindow(hwnd);
while(GetMessage(&Msg, NULL, 0, 0) > 0)
{
TranslateMessage(&Msg);
DispatchMessage(&Msg);
}
return Msg.wParam;
}
Copyright © 1998-2003, Brook Miles (
). All rights reserved.
file:///C|/dona/forgers-win32-tutorial/tutorial/window_click.html (5 of 5) [7/8/2003 4:34:45 PM]
Tutorial: Understanding the Message Loop
Understanding the Message Loop
Understanding the message loop and entire message sending structure of windows programs is
essential in order to write anything but the most trivial programs. Now that we've tried out message
handling a little, we should look a little deeper into the whole process, as things can get very confusing
later on if you don't understand why things happen the way they do.
What is a Message?
A message is an integer value. If you look up in your header files (which is good and common practice
when investigating the workings of API's) you can find things like:
#define WM_INITDIALOG 0x0110
#define WM_COMMAND 0x0111
#define WM_LBUTTONDOWN 0x0201
...and so on. Messages are used to communicate pretty much everything in windows at least on basic
levels. If you want a window or control (which is just a specialized window) to do something you send
it a message. If another window wants you to do something it sends you a message. If an event
happens such as the user typing on the keyboard, moving the mouse, clicking a button, then messages
are sent by the system to the windows affected. If you are one of those windows, you handle the
message and act accordingly.
Each windows message may have up to two parameters,
wParam
and
lParam
. Originally
wParam
was 16 bit and
lParam
was 32 bit, but in Win32 they are both 32 bit. Not every message uses these
parameters, and each message uses them differently. For example the
WM_CLOSE
message doesn't use
either, and you should ignore them both. The
WM_COMMAND
message uses both,
wParam
contains two
values,
HIWORD(wParam)
is the notification message (if applicable) and
LOWORD(wParam)
is the
control or menu id that sent the message.
lParam
is the
HWND
(window handle) to the control which
sent the message or
NULL
if the messages isn't from a control.
HIWORD()
and
LOWORD()
are macros defined by windows that single out the two high bytes (High
Word) of a 32 bit value (
0xFFFF0000
) and the low word (
0x0000FFFF
) respectively. In Win32 a
WORD
is a 16bit value, making
DWORD
(or Double Word) a 32bit value.
To send a message you can use
PostMessage()
or
SendMessage()
.
PostMessage()
puts the
message into the Message Queue and returns immediatly. That means once the call to
file:///C|/dona/forgers-win32-tutorial/tutorial/message_loop.html (1 of 4) [7/8/2003 4:34:45 PM]
Tutorial: Understanding the Message Loop
PostMessage()
is done the message may or may not have been processed yet.
SendMessage()
sends the message directly to the window and does not return untill the window has finished
processing it. If we wanted to close a window we could send it a
WM_CLOSE
message like this
PostMessage(hwnd, WM_CLOSE, 0, 0);
which would have the same effect as clicking on
the
button on the top of the window. Notice that
wParam
and
lParam
are both
0
. This is because,
as mentioned, they aren't used for
WM_CLOSE
.
Dialogs
Once you begin to use dialog boxes, you will need to send messages to the controls in order to
communicate with them. You can do this either by using
GetDlgItem()
first to get the handle to the
control using the ID and then use
SendMessage()
, OR you can use
SendDlgItemMessage()
which combines the steps. You give it a window handle and a child ID and it will get the child handle,
and then send it the message.
SendDlgItemMessage()
and similar APIs like
GetDlgItemText()
will work on all windows, not just dialog boxes.
What is the Message Queue
Lets say you were busy handling the
WM_PAINT
message and suddenly the user types a bunch of stuff
on the keyboard. What should happen? Should you be interrupted in your drawing to handle the keys
or should the keys just be discarded? Wrong! Obviously neither of these options is reasonable, so we
have the message queue, when messages are posted they are added to the message queue and when you
handle them they are removed. This ensure that you aren't going to miss messages, if you are handling
one, the others will be queued up untill you get to them.
What is a Message Loop
while(GetMessage(&Msg, NULL, 0, 0) > 0)
{
TranslateMessage(&Msg);
DispatchMessage(&Msg);
}
1. The message loop calls
GetMessage()
, which looks in your message queue. If the message
queue is empty your program basically stops and waits for one (it Blocks).
2. When an event occures causing a message to be added to the queue (for example the system
registers a mouse click)
GetMessages()
returns a positive value indicating there is a
message to be processed, and that it has filled in the members of the
MSG
structure we passed it.
It returns
0
if it hits
WM_QUIT
, and a negative value if an error occured.
3. We take the message (in the
Msg
variable) and pass it to
TranslateMessage()
, this does a
bit of additional processing, translating virtual key messages into character messages. This step
file:///C|/dona/forgers-win32-tutorial/tutorial/message_loop.html (2 of 4) [7/8/2003 4:34:45 PM]
Tutorial: Understanding the Message Loop
is actually optional, but certain things won't work if it's not there.
4. Once that's done we pass the message to
DispatchMessage()
. What
DispatchMessage()
does is take the message, checks which window it is for and then
looks up the Window Procedure for the window. It then calls that procedure, sending as
parameters the handle of the window, the message, and
wParam
and
lParam
.
5. In your window procedure you check the message and it's parameters, and do whatever you
want with them! If you aren't handling the specific message, you almost always call
DefWindowProc()
which will perform the default actions for you (which often means it
does nothing).
6. Once you have finished processing the message, your windows procedure returns,
DispatchMessage()
returns, and we go back to the beginning of the loop.
This is a very important concept for windows programs. Your window procedure is not magically
called by the system, in effect you call it yourself indirectly by calling
DispatchMessage()
. If you
wanted, you could use
GetWindowLong()
on the window handle that the message is destined for to
look up the window's procedure and call it directly!
while(GetMessage(&Msg, NULL, 0, 0) > 0)
{
WNDPROC fWndProc = (WNDPROC)GetWindowLong(Msg.hwnd, GWL_WNDPROC);
fWndProc(Msg.hwnd, Msg.message, Msg.wParam, Msg.lParam);
}
I tried this with the previous example code, and it does work, however there are various issues such as
Unicode/ANSI translation, calling timer callbacks and so forth that this method will not account for,
and very likely will break all but trivial applications. So do it to try it, but don't do it in real code :)
Notice that we use
GetWindowLong()
to retreive the window procedure associated with the
window. Why don't we just call our
WndProc()
directly? Well our message loop is responsible for
ALL of the windows in our program, this includes things like buttons and list boxes that have their
own window procedures, so we need to make sure that we call the right procedure for the window.
Since more than one window can use the same window procedure, the first parameter (the handle to
the window) is used to tell the window procedure which window the message is intended for.
As you can see, your application spends the majority of it's time spinning round and round in this
message loop, where you joyfully send out messages to the happy windows that will process them. But
what do you do when you want your program to exit? Since we're using a
while()
loop, if
GetMessage()
were to return
FALSE
(aka
0
), the loop would end and we would reach the end of
our
WinMain()
thus exiting the program. This is exactly what
PostQuitMessage()
accomplishes. It places a
WM_QUIT
message into the queue, and instead of returning a positive value,
GetMessage()
fills in the Msg structure and returns
0
. At this point, the
wParam
member of
Msg
contains the value that you passed to
PostQuitMessage()
and you can either ignore it, or return it
file:///C|/dona/forgers-win32-tutorial/tutorial/message_loop.html (3 of 4) [7/8/2003 4:34:45 PM]
Tutorial: Understanding the Message Loop
from
WinMain()
which will then be used as the exit code when the process terminates.
IMPORTANT:
GetMessage()
will return
-1
if it encounters an error. Make sure you remember
this, or it will catch you out at some point... even though
GetMessage()
is defined as returning a
BOOL
, it can return values other than
TRUE
or
FALSE
, since
BOOL
is defined as
UINT
(
unsigned
int
). The following are examples of code that may seem to work, but will not process certian
conditions correctly:
while(GetMessage(&Msg, NULL, 0, 0))
while(GetMessage(&Msg, NULL, 0, 0) != 0)
while(GetMessage(&Msg, NULL, 0, 0) == TRUE)
The above are all wrong! It may be of note that I used to use the first of these throughout the tutorial,
since as I just mentioned, it works fine as long as
GetMessage()
never fails, which when your code
is correct it won't. However I failed to take into consideration that if you're reading this, your code
probably won't be correct a lot of the time, and
GetMessage()
will fail at some point :) I've gone
through and corrected this, but forgive me if I've missed a few spots.
while(GetMessage(&Msg, NULL, 0, 0) > 0)
This, or code that has the same effect should always be used.
I hope you now have a better understanding of the windows message loop, if not, do not fear, things
will make more sense once you have been using them for a while.
Copyright © 1998-2003, Brook Miles (
file:///C|/dona/forgers-win32-tutorial/tutorial/message_loop.html (4 of 4) [7/8/2003 4:34:45 PM]
Tutorial: Using Resources
Using Resources
You may also want to refer to the Appendices at the end of this tutorial for more information on
resources with VC++ and BC++.
Before we get any deeper I will cover the topic of resources so that I won't have to re-write it for each
section.You don't actually need to compile the stuff in this section, it's as example only.
Resources are pre-defined bits of data stored in binary format inside your executable file. You create
resources in a resources script, a file with an extension of ".rc". comercial compilers will have a visual
resource editor which allows you to create resources without manually editing this file but sometimes
editing it is the only way to go, especially if your compiler has no visual editor, it sucks, or doesn't
support the exact feature you need.
Unfortunately different compiler suites handle resources differently. I will do the best I can to explain
the common features needed to work with resources in general.
The resource editor included with MSVC++ makes it very difficult to edit the resources manually,
since it enforces a proprietary format on them, and will totally mangle the file if you save one that you
had created by hand. In general you shouldn't bother with creating .rc files from scratch, but knowing
how to modify them manually can be very useful. Another annoyance is that MSVC++ will by default
name the resource header file "resource.h" even if you wanted to call it something else. I will go with
this for the sake of simplicity in this document, but will show you how to change this in the appendix
on compilers.
First lets take a very simple resource script, with a single icon.
#include "resource.h"
IDI_MYICON ICON "my_icon.ico"
That's the entire file.
IDI_MYICON
is the identifier of the resource,
ICON
is the type and
"my_icon.ico" is the name of the external file which contains it. This should work on any compiler.
Now what about this
#include "resource.h"
? Well your program needs a way to identify the
icon, and the best way to do that is to assign it a unique ID (
IDI_MYICON
). We can do this by
creating the file "resource.h" and including it in both our resource script, and our source file.
file:///C|/dona/forgers-win32-tutorial/tutorial/resources.html (1 of 3) [7/8/2003 4:34:45 PM]

Tutorial: Using Resources
#define IDI_MYICON 101
As you can see, we've assigned
IDI_MYICON
the value of
101
. We could just forget about the
identifier and use
101
wherever we need to reference the icon, but
IDI_MYICON
is a lot clearer as to
what you are refering too, and easier to remember when you have large number of resources.
Now lets say we add a
MENU
resource:
#include "resource.h"
IDI_MYICON ICON "my_icon.ico"
IDR_MYMENU MENU
BEGIN
POPUP "&File"
BEGIN
MENUITEM "E&xit", ID_FILE_EXIT
END
END
Again
IDR_MYMENU
is the name of the resource and
MENU
is the type. Now a fine point, see the
BEGIN
and
END
up there? Some resource editors or compilers use
{
in place of
BEGIN
and
}
in place
of
END
. If your compiler supports both feel free to pick which one you use. If it only supports one or
the other, you will need to make the necessary replacements to get it to work.
We've also added a new identifier,
ID_FILE_EXIT
, so we need to add this to our resource header
file, resource.h, in order to use it in our program.
#define IDI_MYICON 101
#define ID_FILE_EXIT 4001
Generating and keeping track of all these ids can become a real chore with large projects, that's why
most people use a visual resource editor which takes care of all this for you. They still screw up from
time to time, and you could end up with multiple items with the same ID or a similar problem, and it's
good to be able to go in and fix it yourself.
Now an example of how to use a resource in your program.
HICON hMyIcon = LoadIcon(hInstance, MAKEINTRESOURCE(IDI_MYICON));
The first parameter of
LoadIcon()
and many other resource using functions is the handle to the
file:///C|/dona/forgers-win32-tutorial/tutorial/resources.html (2 of 3) [7/8/2003 4:34:45 PM]
Tutorial: Using Resources
current instance (which we are given in
WinMain()
and can also be retreived by using
GetModuleHandle()
as demonstrated in previous sections). The second is the identifier of the
resource.
You're probably wondering what's up with
MAKEINTRESOURCE()
and possibly wondering why
LoadIcon()
takes a parameter of type
LPCTSTR
instead of say
UINT
when we're passing it an ID.
All
MAKEINTRESOURCE()
does is cast from an integer (what our ID is) to
LPCTSTR
, which
LoadIcon()
expects. This brings us to the second way of identifying resources, and that's with
strings. Almost nobody does this any more, so I won't go into details, but basically if you don't use
#define to assign an integer value to your resources then the name is interpreted as a string, and can be
referenced in your program like this:
HICON hMyIcon = LoadIcon(hInstance, "MYICON");
LoadIcon()
and other resource loading APIs can tell the difference between an integer passed in
and a pointer to a string passed in by checking the high word of the value. If it's
0
(as would be the
case of any integer with a value less than or equal to 65535) then it assumes it is a resource ID. This
effectively limits your resources to using IDs below 65535, which unless you have a whole lot of
resources, should not be a problem. If it's not
0
then it assumes the value is a pointer, and looks up the
resource by name. Never rely on an API to do this unless it is explicitely stated in the documentation.
For example, this doesn't work for menu commands like
ID_FILE_EXIT
, since they can only be
integers.
Copyright © 1998-2003, Brook Miles (
file:///C|/dona/forgers-win32-tutorial/tutorial/resources.html (3 of 3) [7/8/2003 4:34:45 PM]
Tutorial: Menus and Icons
Menus and Icons
Example: menu_one
This is just a small section to show how to add basic menus to your window.
Usually you use a pre-made menu resource. This will be in an .rc file and
will be compiled and linked into your .exe. This is rather compiler specific,
commercial compilers will have a resource editor that you can use to create
your menus, but for this example I will show the text of the .rc file so you
can add it in manually. I usually have an .h file as well which is included in
both my .rc file and my .c source files. This file contains the identifiers for
controls and menu items etc.
For this example you can start with the window code from simple_window and add this code into it as instructed.
First the .h file. Usually called "resource.h"
#define IDR_MYMENU 101
#define IDI_MYICON 201
#define ID_FILE_EXIT 9001
#define ID_STUFF_GO 9002
Not much there, but our menu will be pretty simple. The names and values here are up to you for the choosing. Now
we write our .rc file.
#include "resource.h"
IDR_MYMENU MENU
BEGIN
POPUP "&File"
BEGIN
MENUITEM "E&xit", ID_FILE_EXIT
END
POPUP "&Stuff"
BEGIN
MENUITEM "&Go", ID_STUFF_GO
MENUITEM "G&o somewhere else", 0, GRAYED
END
END
IDI_MYICON ICON "menu_one.ico"
file:///C|/dona/forgers-win32-tutorial/tutorial/menus.html (1 of 6) [7/8/2003 4:34:46 PM]
Tutorial: Menus and Icons
You will want to add the .rc file to your project or makefile depending on what tools you are using.
You also want to
#include "resource.h"
in your source file (.c) so that the menu command identifiers and the
menu resource id will be defined.
The easiest way to attach the menu and icon to your window is to specify them when you register the window class,
like this:
wc.lpszMenuName = MAKEINTRESOURCE(IDR_MYMENU);
wc.hIcon = LoadIcon(GetModuleHandle(NULL), MAKEINTRESOURCE(IDI_MYICON));
wc.hIconSm = (HICON)LoadImage(GetModuleHandle(NULL),
MAKEINTRESOURCE(IDI_MYICON), IMAGE_ICON, 16, 16, 0);
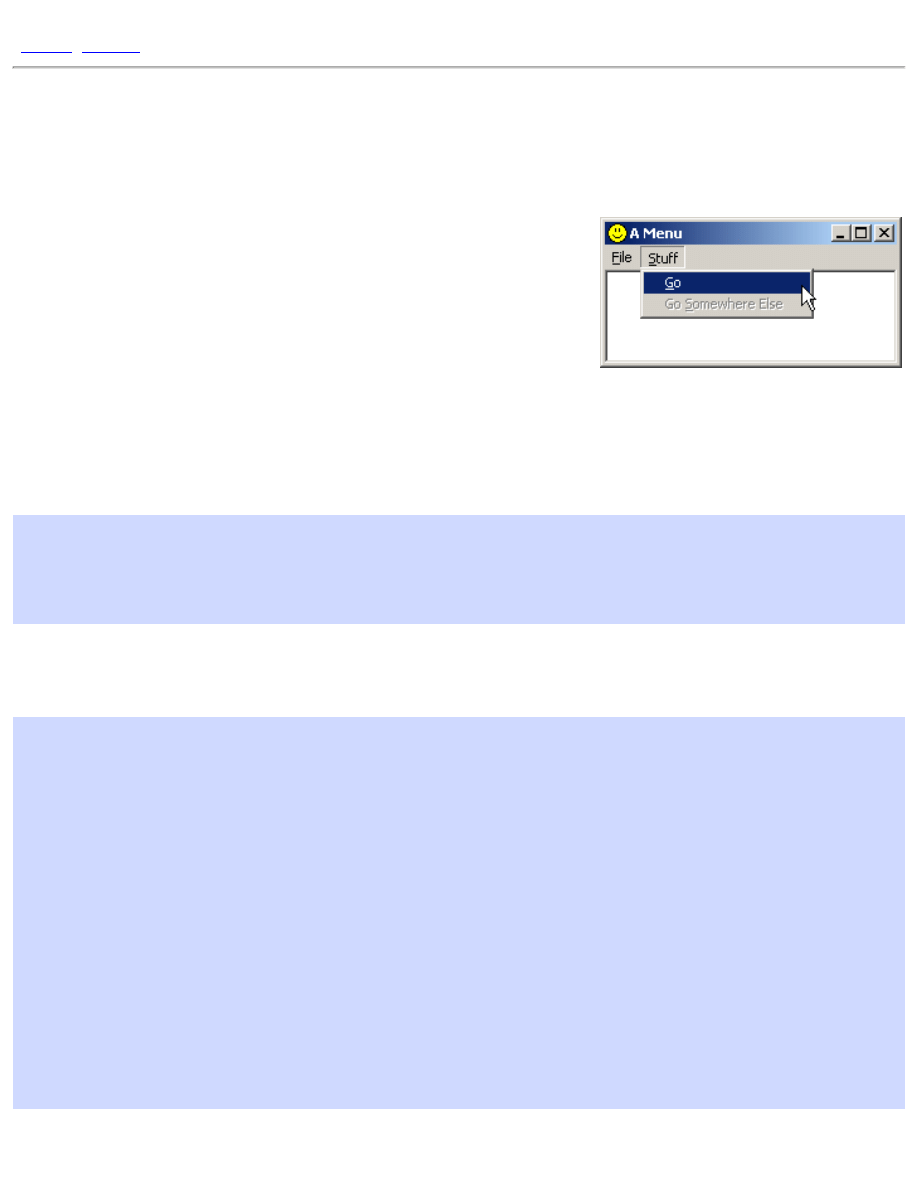
Change that and see what happens. Your window should now have a File and Stuff menu with the respective items
underneath. That is assuming your .rc file was properly compiled and linked into your program. (again, see compiler
notes)
The icon in the top left of the window and on the task bar should now display the small custom icon that we specified.
If you hit Alt-Tab, the large version of the icon should be displayed in the application list.
I've used
LoadIcon()
to load the large icon because it's simpler, however it will only load icons at the default
resolution of 32x32, so in order to load the smaller image, we need to use
LoadImage()
. Be aware that icon files
and resources can contain multiple images, and in this case the ones I've supplied contain the two sizes that I'm
loading.
Example: menu_two
An alternative to using a menu resource is to create one on the fly (or when your program runs). This is a bit more
work programming wise, but adds flexibility and is sometimes necessary.
You can also use icons that aren't stored as resources, you could choose to store your icon as a seperate file and load it
at runtime. This would also give you the option of allowing the user to select an icon of their choice with the common
dialogs discussed later, or something to that effect.
Start again from simple_window without the .h or .rc added. Now we will handle the
WM_CREATE
message and add a
menu to our window.
#define ID_FILE_EXIT 9001
#define ID_STUFF_GO 9002
Put these two id's at the top of your .c file this time, underneath your
#include
s. Next we add the following code
into our
WM_CREATE
handler.
case WM_CREATE:
{
HMENU hMenu, hSubMenu;
HICON hIcon, hIconSm;
file:///C|/dona/forgers-win32-tutorial/tutorial/menus.html (2 of 6) [7/8/2003 4:34:46 PM]
Tutorial: Menus and Icons
hMenu = CreateMenu();
hSubMenu = CreatePopupMenu();
AppendMenu(hSubMenu, MF_STRING, ID_FILE_EXIT, "E&xit");
AppendMenu(hMenu, MF_STRING | MF_POPUP, (UINT)hSubMenu, "&File");
hSubMenu = CreatePopupMenu();
AppendMenu(hSubMenu, MF_STRING, ID_STUFF_GO, "&Go");
AppendMenu(hMenu, MF_STRING | MF_POPUP, (UINT)hSubMenu, "&Stuff");
SetMenu(hwnd, hMenu);
hIcon = LoadImage(NULL, "menu_two.ico", IMAGE_ICON, 32, 32,
LR_LOADFROMFILE);
if(hIcon)
SendMessage(hwnd, WM_SETICON, ICON_BIG, (LPARAM)hIcon);
else
MessageBox(hwnd, "Could not load large icon!", "Error", MB_OK |
MB_ICONERROR);
hIconSm = LoadImage(NULL, "menu_two.ico", IMAGE_ICON, 16, 16,
LR_LOADFROMFILE);
if(hIconSm)
SendMessage(hwnd, WM_SETICON, ICON_SMALL, (LPARAM)hIconSm);
else
MessageBox(hwnd, "Could not load small icon!", "Error", MB_OK |
MB_ICONERROR);
}
break;
This creates a menu almost the same as the one we had in the resource and attaches it to our window. A menu that is
assigned to a window is automatically removed when the program terminates, so we don't need to worry about getting
rid of it later. If we did though, we could use
GetMenu()
and
DestroyMenu()
.
The code for the icons is pretty simple, we call
LoadImage()
twice, to load the icon as both a 16x16 size and a
32x32 size. We can't use
LoadIcon()
at all because it will only load resources, not files. We specify
NULL
for the
instance handle parameter because we aren't loading a resource from our module, and instead of a resource ID we
pass in the name of the icon file we want to load. Finally, we pass in the
LR_LOADFROMFILE
flag to indicate that
we want the function to treat the string we give it as a filename and not a resource name.
If each call succeeds we assign the icon handle to our window with
WM_SETICON
, and if it fails we pop up a
message box letting us know something went wrong.
NOTE: that the
LoadImage()
calls will fail if the icon file isn't in the current working directory of the program. If
you are using VC++ and you run the program from the IDE, the current working directory will be the one the project
file is in. However if you run the program from the Debug or Release directories from explorer or the command shell,
then you'll need to copy the icon file into that directory in order for the program to find it. If all else fails, specify the
file:///C|/dona/forgers-win32-tutorial/tutorial/menus.html (3 of 6) [7/8/2003 4:34:46 PM]
Tutorial: Menus and Icons
full path to the icon,
"C:\\Path\\To\\Icon.ico"
.
Okay now that we have our menu, we need to make it do something. This is pretty simple, all we need to do is handle
the
WM_COMMAND
message. Also we'll need to check which command we are getting and act accordingly. Now our
WndProc()
should look something like this.
LRESULT CALLBACK WndProc(HWND hwnd, UINT Message, WPARAM wParam, LPARAM lParam)
{
switch(Message)
{
case WM_CREATE:
{
HMENU hMenu, hSubMenu;
hMenu = CreateMenu();
hSubMenu = CreatePopupMenu();
AppendMenu(hSubMenu, MF_STRING, ID_FILE_EXIT, "E&xit");
AppendMenu(hMenu, MF_STRING | MF_POPUP, (UINT)hSubMenu, "&File");
hSubMenu = CreatePopupMenu();
AppendMenu(hSubMenu, MF_STRING, ID_STUFF_GO, "&Go");
AppendMenu(hMenu, MF_STRING | MF_POPUP, (UINT)hSubMenu, "&Stuff");
SetMenu(hwnd, hMenu);
hIcon = LoadImage(NULL, "menu_two.ico", IMAGE_ICON, 32, 32,
LR_LOADFROMFILE);
if(hIcon)
SendMessage(hwnd, WM_SETICON, ICON_BIG, (LPARAM)hIcon);
else
MessageBox(hwnd, "Could not load large icon!", "Error", MB_OK |
MB_ICONERROR);
hIconSm = LoadImage(NULL, "menu_two.ico", IMAGE_ICON, 16, 16,
LR_LOADFROMFILE);
if(hIconSm)
SendMessage(hwnd, WM_SETICON, ICON_SMALL, (LPARAM)hIconSm);
else
MessageBox(hwnd, "Could not load small icon!", "Error", MB_OK |
MB_ICONERROR);
}
break;
case WM_COMMAND:
switch(LOWORD(wParam))
{
case ID_FILE_EXIT:
break;
file:///C|/dona/forgers-win32-tutorial/tutorial/menus.html (4 of 6) [7/8/2003 4:34:46 PM]
Tutorial: Menus and Icons
case ID_STUFF_GO:
break;
}
break;
case WM_CLOSE:
DestroyWindow(hwnd);
break;
case WM_DESTROY:
PostQuitMessage(0);
break;
default:
return DefWindowProc(hwnd, Message, wParam, lParam);
}
return 0;
}
As you can see we've got our
WM_COMMAND
all set up, and it even has another
switch()
in it. This
switch()
's
on the value of the low word of
wParam
, which in the case of
WM_COMMAND
contains the control or menu id that
sent the message.
We obviously want the Exit menu item to close the program. So in the
WM_COMMAND
,
ID_FILE_EXIT
handler you
can use the following code to do just that.
PostMessage(hwnd, WM_CLOSE, 0, 0);
Your WM_COMMAND handler should now look like this:
case WM_COMMAND:
switch(LOWORD(wParam))
{
case ID_FILE_EXIT:
PostMessage(hwnd, WM_CLOSE, 0, 0);
break;
case ID_STUFF_GO:
break;
}
break;
I leave it up to you to make the other menu command
ID_STUFF_GO
do something.
The program file icon
You may have noticed that the
menu_one.exe
file now shows up as the custom icon we added as a resource,
whereas the
menu_two.exe
file does not, since we are loading an external file. Windows Explorer simply displays
the first icon (numerically by ID) in the program files resources, so since we only have one icon, that's what it is
displaying. If you want to be sure that a certain icon is displayed with your program file, simply add it as a resource
file:///C|/dona/forgers-win32-tutorial/tutorial/menus.html (5 of 6) [7/8/2003 4:34:46 PM]
Tutorial: Menus and Icons
and assign it a very low ID... like
1
. You don't even need to refer to the file in your program, and you can load
completely different icons for your windows if you choose.
Copyright © 1998-2003, Brook Miles (
file:///C|/dona/forgers-win32-tutorial/tutorial/menus.html (6 of 6) [7/8/2003 4:34:46 PM]
Tutorial: Dialogs, GUI coders best friend
[
|
]
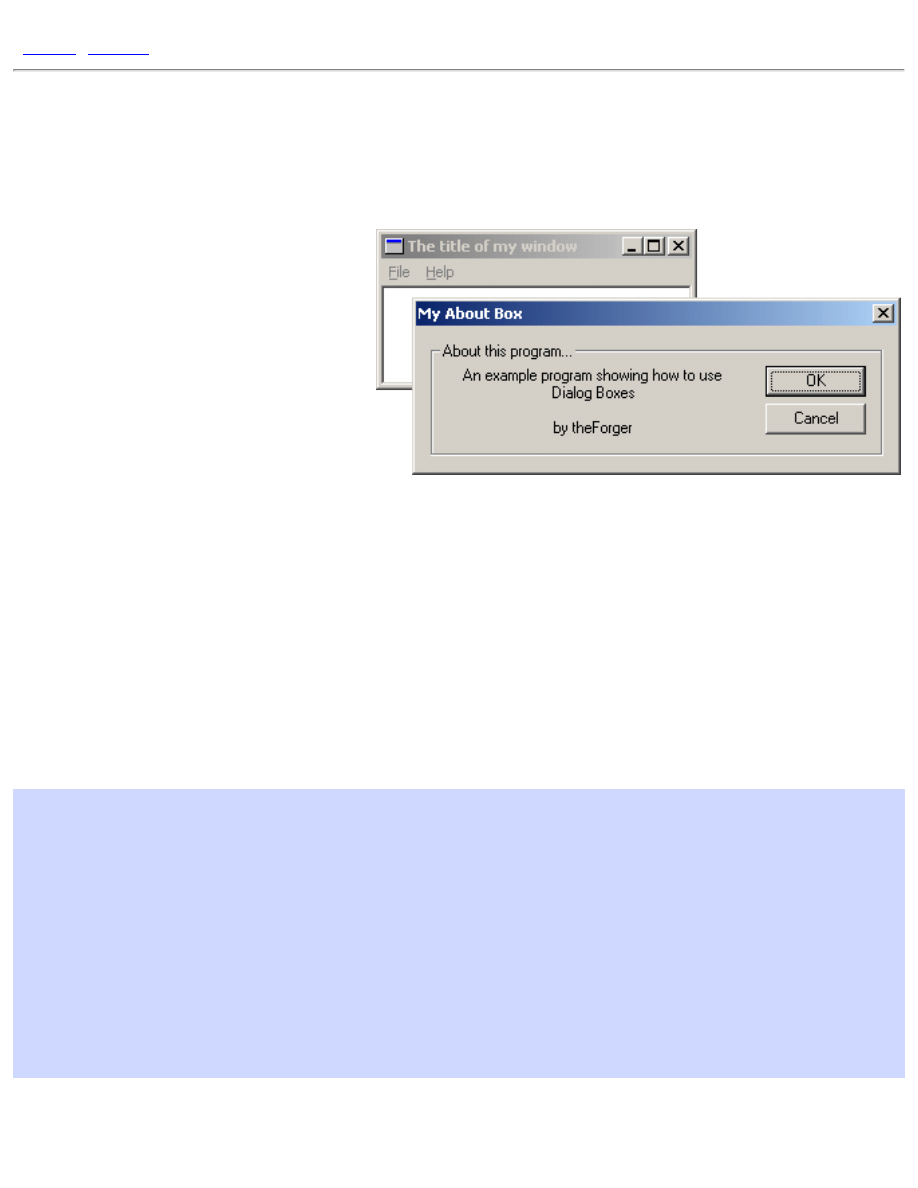
Dialogs, GUI coders best friend
Example: dlg_one
There's hardly a windows program out there
that doesn't use dialog boxes. Just go File ->
Open in any text editor or any other kind of
editor for that matter and voila, you are
presented with a dialog box, one that
probably allows you to select a file to be
opened.
Dialogs aren't limited to the standard open
file ones, they can look like and do
whatever you choose. The attractive point of
dialogs is that they provide a quick way to arrange and create a GUI (Graphic User Interface) and even some
default processing, cutting down on the amount of code you must write.
One thing to remember is that dialogs are just windows. The difference between a dialog and a "normal"
window is that the system does some additional default processing for dialogs, such as creating and initialising
controls, and handling tab order. Nearly all APIs that are applicable to "normal" windows will work just as
well on dialogs, and vice versa!
The first step is to create the dialog resource. As with any resource how you do this will depend on your
compiler/IDE. Here I will show you the plain text of the dilaog in the .rc file and let you incorporate it into
your project.
IDD_ABOUT DIALOG DISCARDABLE 0, 0, 239, 66
STYLE DS_MODALFRAME | WS_POPUP | WS_CAPTION | WS_SYSMENU
CAPTION "My About Box"
FONT 8, "MS Sans Serif"
BEGIN
DEFPUSHBUTTON "&OK",IDOK,174,18,50,14
PUSHBUTTON "&Cancel",IDCANCEL,174,35,50,14
GROUPBOX "About this program...",IDC_STATIC,7,7,225,52
CTEXT "An example program showing how to use Dialog
Boxes\r\n\r\nby theForger",
IDC_STATIC,16,18,144,33
END
On this first line,
IDD_ABOUTDLG
is the id of the resource.
DIALOG
is the resource type, and the four
file:///C|/dona/forgers-win32-tutorial/tutorial/dialogs.html (1 of 5) [7/8/2003 4:34:46 PM]
Tutorial: Dialogs, GUI coders best friend
number are the Left, Top, Width and Height co-ordinates. These ARE NOT PIXELS, they are in Dialog Units,
which are based on the size of the font used by the system (and chosen by the user). If you have a large font
selected, the dialog will be large, if you use a smaller font, the dialog will be that much smaller. This is
important as it makes sure that all of the controls are the proper size to display their text in the current font.
You can convert dialog units to pixels at runtime using
MapDialogRect()
.
DISCARDABLE
tells the
system it may swap the resource memory to disk when it's not being used in order to conserve system
resources (essentially pointless).
The second line starts with
STYLE
and follows with the window styles that will be used to create the dialog.
These should be explained under
CreateWindow()
in your help files. In order to use the predefined
constants you may need to add
#include "windows.h"
to your .rc file, or in the case of VC++,
winres.h
or
afxres.h
will do. If you use the resource editor these files will certainly be included
automatically if needed.
The
CAPTION
line should be self explanitory.
The
FONT
line specifies the size and name of the font you wish to use for this dialog box. This might not end
up exactly the same on each computer as different people will have different fonts and may have specified
different font sizes. You usually don't need to worry about that though.
Now we have the list of controls to create on the dialog
DEFPUSHBUTTON "&OK",IDOK,174,18,50,14
Here's the line for the OK button. The & in this case like with menus underlines the next letter "O", so that by
pressing Alt+O the user can activate this control (part of the default processing I mentioned).
IDOK
is the
control identifier.
IDOK
is pre-defined so we don't need to
#define
it ourselves. The four numbers at the
end are the left, top, width and height, all in dialog units.
This information should be purely academic, as you almost always use a resource editor to create dialogs, but
knowing how to do it from text is sometimes necessary, expecially if you have no visual editor.
Two of the controls have an ID of
IDC_STATIC
(which is -1), this is used to indicate we never need to
access them, so they have no need of an identifier. However it doesn't hurt to give them an ID and your
resource editor might do so automatically.
The
"\r\n"
in the text of the static control is a CR-LF pair, the way windows represents a new line.
So! Having added that to your .rc file we need to write a Dialog Procedure to process message for this box.
Don't worry this is nothing new, it's practicly the same as our main Window Procedure (but not exactly).
BOOL CALLBACK AboutDlgProc(HWND hwnd, UINT Message, WPARAM wParam, LPARAM
lParam)
{
switch(Message)
file:///C|/dona/forgers-win32-tutorial/tutorial/dialogs.html (2 of 5) [7/8/2003 4:34:46 PM]
Tutorial: Dialogs, GUI coders best friend
{
case WM_INITDIALOG:
return TRUE;
case WM_COMMAND:
switch(LOWORD(wParam))
{
case IDOK:
EndDialog(hwnd, IDOK);
break;
case IDCANCEL:
EndDialog(hwnd, IDCANCEL);
break;
}
break;
default:
return FALSE;
}
return TRUE;
}
There are a few important differences between a dialog procedure and window procedure. One is that you DO
NOT call
DefWindowProc()
for message you don't handle. With dialogs this is done automatically for you
(and will really screw things up if you do it).
Secondly, in general you return FALSE for messages you don't process, and TRUE for messages you do
process, UNLESS the message specifies you return something else. Note that this is what we do above, the
default is to do nothing and return FALSE, while messages we do handle break the
switch()
and return
TRUE
.
Thirdy, You do not call
DestroyWindow()
to close a dialog, you call
EndDialog()
. The second
paramter is the value that is returned to whatever code called
DialogBox()
.
Finally, instead of handling
WM_CREATE
, you handle
WM_INITDIALOG
to do any processing that needs to
be done before the dialog appears, and then return TRUE to have the keyboard focus set to the default control.
(You can actually handle
WM_CREATE
as well, but it is sent BEFORE any of the controls have been created,
so you can't access them. In
WM_INITDIALOG
the controls have already been created).
Enough chit-chat, lets create it....
case WM_COMMAND:
switch(LOWORD(wParam))
{
case ID_HELP_ABOUT:
{
file:///C|/dona/forgers-win32-tutorial/tutorial/dialogs.html (3 of 5) [7/8/2003 4:34:46 PM]
Tutorial: Dialogs, GUI coders best friend
int ret = DialogBox(GetModuleHandle(NULL),
MAKEINTRESOURCE(IDD_ABOUT), hwnd, AboutDlgProc);
if(ret == IDOK){
MessageBox(hwnd, "Dialog exited with IDOK.", "Notice",
MB_OK | MB_ICONINFORMATION);
}
else if(ret == IDCANCEL){
MessageBox(hwnd, "Dialog exited with IDCANCEL.", "Notice",
MB_OK | MB_ICONINFORMATION);
}
else if(ret == -1){
MessageBox(hwnd, "Dialog failed!", "Error",
MB_OK | MB_ICONINFORMATION);
}
}
break;
// Other menu commands...
}
break;
This is the code I used to create my about box, you can probably guess that this is to be merged into your
WM_COMMAND
handler, if you aren't clear on this aspect, you might want to review the section on menus.
ID_HELP_ABOUT
is the identifier of my Help -> About menu item.
Since we want the menu on our main window to create the dialog, we obviously want to put this code in the
WndProc()
of our main window, not the dialog proc.
Now I stored the return value from the call to
DialogBox()
, this is just so you can observe the effects of
pressing the two buttons, hitting Esc, Enter etc... from inside the dialog. It also illustrates how to use the return
value from a dialog box to check for success, failure, a users choice, or whatever other information you choose
to send back to the caller from the Dialog Procedure.
DialogBox(GetModuleHandle(NULL), MAKEINTRESOURCE(IDD_ABOUT), hwnd,
AboutDlgProc);
This is the only important part, and you can choose to put it wherever in your code that you want the dialog to
come up.
IDD_ABOUT
is the id of the dialog resource.
hwnd
is the handle to the parent window of the dialog.
AboutDlgProc()
is of course the dialog procedure to use to control the dialog.
That's it! Sit IDD_UBU, sit.
A perticularly astute reader might eventually wonder, if
DialogBox()
doesn't return untill the dialog closes
we can't process messages while it's up, so how does it work? Well the nifty thing about
DialogBox()
is
that it has it's own message loop, so while the dialog is displayed, our message loop is out of the picture and
the default loop is handled by windows. This loop also takes care of fun things like moving the keyboard focus
file:///C|/dona/forgers-win32-tutorial/tutorial/dialogs.html (4 of 5) [7/8/2003 4:34:46 PM]
Tutorial: Dialogs, GUI coders best friend
from control to control when you press Tab.
Another effect of using DialogBox is that your main window is disabled untill the dialog is dismissed.
Sometimes this is what we want, and sometimes it isn't, such as when we want to use a dialog as a floating
toolbar. In this case we want to be able to interact with both out dialog and our main window, and this will be
the focus of the next section.
Copyright © 1998-2003, Brook Miles (
file:///C|/dona/forgers-win32-tutorial/tutorial/dialogs.html (5 of 5) [7/8/2003 4:34:46 PM]

Tutorial: Modeless Dialogs
]
Modeless Dialogs
Example: dlg_two
Now we take a look at
CreateDialog()
,
DialogBox()
's sister
function. The difference is that while
DialogBox()
implements it's
own message loop and does not return untill the dialog is closed,
CreateDialog()
acts more like a window created with
CreateWindowEx()
in that it returns immediately and depends on
your message loop to pump the messages as it does for your main
window. This is termed Modeless, whereas
DialogBox()
creates
Modal dialogs.
You can create the dialog resource just like you did for the last dialog example, you might also want to set the "Tool
window" extended style to give it's title bar the typical smaller caption of toolbars. The dialog resource I created
follows:
IDD_TOOLBAR DIALOGEX 0, 0, 98, 52
STYLE DS_MODALFRAME | WS_POPUP | WS_CAPTION
EXSTYLE WS_EX_TOOLWINDOW
CAPTION "My Dialog Toolbar"
FONT 8, "MS Sans Serif"
BEGIN
PUSHBUTTON "&Press This Button",IDC_PRESS,7,7,84,14
PUSHBUTTON "&Or This One",IDC_OTHER,7,31,84,14
END
You may notice that the resource editor has replaced
DIALOG
with
DIALOGEX
indicating we want to set an
EXSTYLE on our dialog.
Next we want to create the dialog when our program runs, I want the dialog visible right away so we do this in
WM_CREATE
. We also want to declare a global variable to hold the window handle returned from
CreateDialog()
so that we can use it later.
DialogBox()
didn't return a handle to us since when
DialogBox()
returns the window
has been destroyed.
HWND g_hToolbar = NULL;
case WM_CREATE:
g_hToolbar = CreateDialog(GetModuleHandle(NULL),
MAKEINTRESOURCE(IDD_TOOLBAR),
hwnd, ToolDlgProc);
if(g_hToolbar != NULL)
{
ShowWindow(g_hToolbar, SW_SHOW);
}
file:///C|/dona/forgers-win32-tutorial/tutorial/modeless_dialogs.html (1 of 4) [7/8/2003 4:34:47 PM]
Tutorial: Modeless Dialogs
else
{
MessageBox(hwnd, "CreateDialog returned NULL", "Warning!",
MB_OK | MB_ICONINFORMATION);
}
break;
We check the return value, which is ALWAYS a good idea, and if it's valid (not
NULL
) we show the window with
ShowWindow()
, with
DialogBox()
this isn't necessary since the system calls
ShowWindow()
for us.
Now we need a dialog procedure for our toolbar.
BOOL CALLBACK ToolDlgProc(HWND hwnd, UINT Message, WPARAM wParam, LPARAM lParam)
{
switch(Message)
{
case WM_COMMAND:
switch(LOWORD(wParam))
{
case IDC_PRESS:
MessageBox(hwnd, "Hi!", "This is a message",
MB_OK | MB_ICONEXCLAMATION);
break;
case IDC_OTHER:
MessageBox(hwnd, "Bye!", "This is also a message",
MB_OK | MB_ICONEXCLAMATION);
break;
}
break;
default:
return FALSE;
}
return TRUE;
}
Most of the same message handling rules apply to dialogs created with
CreateDialog()
as with
DialogBox()
,
don't call
DefWindowProc()
, return
FALSE
for messages you don't handle and
TRUE
for those you do.
One change is that we don't call
EndDialog()
for modeless dialogs, we can use
DestroyWindow()
just like for
regular windows. In this case I destroy the dialog when the main window is destroyed. In the main window's
WndProc()
...
case WM_DESTROY:
DestroyWindow(g_hToolbar);
PostQuitMessage(0);
break;
Last but not least, we want to be able to display and hide our toolbar whenever we choose so I've added two commands
to my menu to do this, and handled them so:
file:///C|/dona/forgers-win32-tutorial/tutorial/modeless_dialogs.html (2 of 4) [7/8/2003 4:34:47 PM]
Tutorial: Modeless Dialogs
case WM_COMMAND:
switch(LOWORD(wParam))
{
case ID_DIALOG_SHOW:
ShowWindow(g_hToolbar, SW_SHOW);
break;
case ID_DIALOG_HIDE:
ShowWindow(g_hToolbar, SW_HIDE);
break;
//... other command handlers
}
break;
You should be able to create your own menu using the resource editor or manually, but if not (as always) take a look at
the example project dlg_two provided with the tutorial.
Now when you run the program, you should be able to access both the dialog window, and main window at the same
time.
If you've run the program at this point and tried tabbing between the two buttons, you have probably noticed it doesn't
work, neither does hitting Alt-P or Alt-O to activate the buttons. Why not? Whereas
DialogBox()
implements it's
own message loop and handles these events by default,
CreateDialog()
does not. We can do it ourselves though,
by calling
IsDialogMessage()
in our message loop which will do the default processing for us.
while(GetMessage(&Msg, NULL, 0, 0))
{
if(!IsDialogMessage(g_hToolbar, &Msg))
{
TranslateMessage(&Msg);
DispatchMessage(&Msg);
}
}
Here we first pass the message to
IsDialogMessage()
, if the message is destined for our toolbar (indicated by the
window handle we pass in) the system will perform the default processing and return
TRUE
. Is this case the message
has already been handled so we don't want to call
TranslateMessage()
or
DispatchMessage()
. If the
message is for another window we process as usual.
It's also worth noting that
IsDialogMessage()
can also be used with windows that aren't dialogs in order to to
give them dialog-like behaviour. Remember, a dialog is a window, and most (if not all) dialog APIs will work on any
window.
And that is pretty much all there is to modeless dialogs! One issue that may arise is if you have more than one toolbar...
what do you do? Well one possible solution is to have a list (either an array, an STL
std::list
, or similar) and loop
through it in your message loop passing each handle to
IsDialogMessage()
until the right one is found, and if
none, do the regular processing. This is a generic programming problem, not one that is Win32 related, and is left as an
excersize to the reader.
file:///C|/dona/forgers-win32-tutorial/tutorial/modeless_dialogs.html (3 of 4) [7/8/2003 4:34:47 PM]
Tutorial: Modeless Dialogs
Copyright © 1998-2003, Brook Miles (
file:///C|/dona/forgers-win32-tutorial/tutorial/modeless_dialogs.html (4 of 4) [7/8/2003 4:34:47 PM]
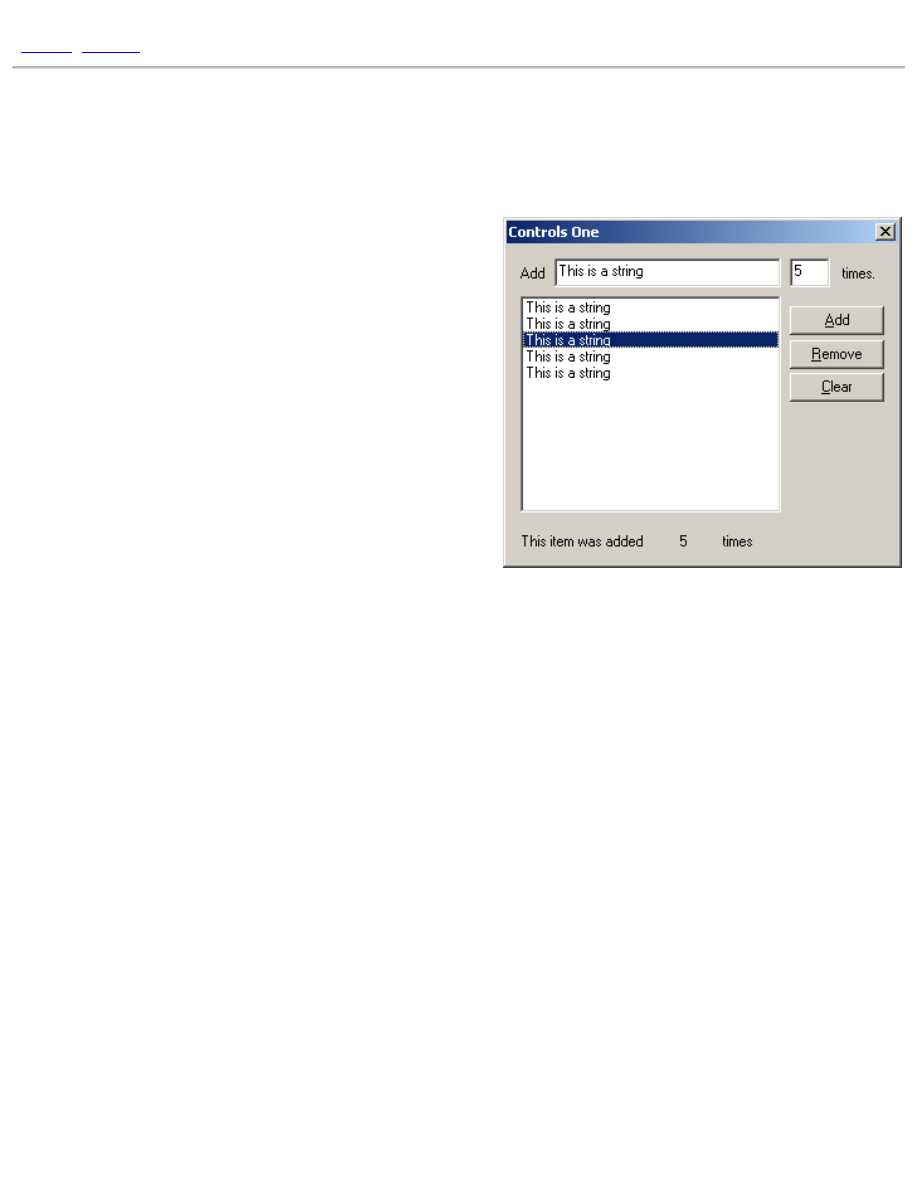
Standard Controls: Button, Edit, List Box, Static
Standard Controls: Button, Edit, List Box
Example: ctl_one
I realize I've already used buttons in previous examples, so you
should already be more or less familiar with them, however I
figured that since I was using them in this example I might as
well add it to the title for the sake of being complete.
Controls
One thing to remember about controls is that they are just
windows. Like any other window they have a window
procedure, a window class etc... that is registered by the system.
Anything you can do with a normal window you can do with a
control.
Messages
As you may remember from our earlier discussion of the message loop, windows communicate using messages, you
send them to get a control to do something, and when an event occurs on the control it will send you a notification
message back. For the standard controls this notification will be a
WM_COMMAND
message as we've already seen with
buttons and menus. For the Common Controls which I may get to later, it will be
WM_NOTIFY
.
The messages you send are widely varied between each control, and each control has it's own set of messages. Once
in a while the same message will be used for more than one kind of control, but in general they will only work on the
control they are intended for. This is especially annoying with the listbox and combobox messages (
LB_*
and
CB_*
)
which although they perform nearly identical tasks, are NOT interchangeable, and I accidently get them mixed up
more than I'd like to admit :)
On the other hand, generic messages like
WM_SETTEXT
are supported by almost all controls. A control is just a
window after all.
You can send messages using the
SendMessage()
API, and use
GetDlgItem()
to retreive the handle to the
control, or you can use
SendDlgItemMessage()
which does both steps for you, the results of both methods are
identical.
Edits
One of the most commonly used controls in the windows environment, the EDIT control, is used to allow the user to
enter, modify, copy, etc... text. Windows Notepad is little more than a plain old window with a big edit control inside
it.
file:///C|/dona/forgers-win32-tutorial/tutorial/controls.html (1 of 5) [7/8/2003 4:34:47 PM]
Standard Controls: Button, Edit, List Box, Static
Here is the code used to interface with the edit control in this example:
SetDlgItemText(hwnd, IDC_TEXT, "This is a string");
That's all it takes to change the text contained in the control (this can be used for pretty much any control that has a
text value associated with it, STATICs, BUTTONs and so on).
Retreiving the text from the control is easy as well, although slightly more work than setting it...
int len = GetWindowTextLength(GetDlgItem(hwnd, IDC_TEXT));
if(len > 0)
{
int i;
char* buf;
buf = (char*)GlobalAlloc(GPTR, len + 1);
GetDlgItemText(hwnd, IDC_TEXT, buf, len + 1);
//... do stuff with text ...
GlobalFree((HANDLE)buf);
}
First of all, we need to allocate some memory to store the string in, it won't just return us a pointer to the string
already in memory. In order to do this, we first need to know how much memory to allocate. There isn't a
GetDlgItemTextLength()
, but there is a
GetWindowTextLength()
, so all we need to do it get the handle
to the control yourself using
GetDlgItem()
.
Now that we have the length, we can allocate some memory. Here I've added a check to see if there is any text to
begin with, since most likely you don't want to be working with an empty string... sometimes you might, but that's up
to you. Assuming that there is something there to work with, we call
GlobalAlloc()
to allocate some memory.
GlobalAlloc()
as I've used it here is equivalent to
calloc()
, if you're used to DOS/UNIX coding. It allocates
some memory, initializes it's contents to
0
and returns a pointer to that memory. There are different flags you can pass
as the first paramter to make it behave differently for different purposes, but this is the only way I will be using it in
this tutorial.
Note that I added
1
to the length in two places, what's up with that? Well,
GetWindowTextLength()
returns the
number of characters of text the control contains NOT INCLUDING the null terminator. This means that if we were
to allocate a string without adding
1
, the text would fit, but the null terminator would overflow the memory block,
possibly corrupting other data, causing an access violation, or any number of other bad things. You must be careful
when dealing with string sizes in windows, some APIs and messages expect text lengths to include the null and others
don't, always read the docs thoroughly.
If I lost you talking about null terminators, please refer to a basic C book or tutorial which discusses strings.
Finally we can call
GetDlgItemText()
to retrieve the contents of the control into the memory buffer that we've
just allocated. This call expects the size of the buffer INCLUDING the null terminator. The return value, which we
ignored here, is the number of characters copied, NOT including the null terminator.... fun eh? :)
file:///C|/dona/forgers-win32-tutorial/tutorial/controls.html (2 of 5) [7/8/2003 4:34:47 PM]
Standard Controls: Button, Edit, List Box, Static
After we're all done using the text (which we'll get to in a moment), we need to free up the memory that we allocated
so that it doesn't leak out and drip down onto the CPU and short circuit your computer. To accomplish this, we simply
call
GlobalFree()
and pass in our pointer.
You may be or become aware of a second set of APIs named
LocalAlloc()
,
LocalFree()
, etc... which are
legacy APIs from 16-bit windows. In Win32, the
Local*
and
Global*
memory functions are identical.
Edits with Numbers
Entering text is all well and fine, but what if you want the user to enter in a number? This is a pretty common task,
and fortunately there is an API to make this simpler, which takes care of all the memory allocation, as well as
converting the string to an integer value.
BOOL bSuccess;
int nTimes = GetDlgItemInt(hwnd, IDC_NUMBER, &bSuccess, FALSE);
GetDlgItemInt()
works much like
GetDlgItemText()
, except that instead of copying the string to a buffer,
it converts it internally into an integer and returns the value to you. The third parameter is optional, and takes a
pointer to a
BOOL
. Since the function returns
0
on failure, there is no way to tell just from that whether or not the
function failed or the user just entered
0
. If you are fine with a value of
0
in the event of an error, then feel free to
ignore this parameter.
Another useful feature is the
ES_NUMBER
style for edit controls, which allows only the characters 0 through 9 to be
entered. This is very handy if you only want positive integers, otherwise it's not much good, since you can't enter any
other characters, including - (minus) . (decimel) or , (comma).
List Boxes
Another handy control is the list box. This is the last standard control that I'm going to cover for now, cause frankly
they aren't that interesting, and if you aren't bored yet well, I am :)
Adding Items
The first thing you'll want to do with a listbox is add items to it.
int index = SendDlgItemMessage(hwnd, IDC_LIST, LB_ADDSTRING, 0, (LPARAM)"Hi
there!");
As you can see, this is a pretty simple task. If the listbox has the
LBS_SORT
style, the new item will be added in
alphabetical order, otherwise it will just be added to the end of the list.
This message returns the index of the new item either way, and we can use this to perform other tasks on the item,
such as associating some data with it. Usually this will be things like a pointer to a struct containing more
information, or maybe an ID that you will use to identify the item, it's up to you.
SendDlgItemMessage(hwnd, IDC_LIST, LB_SETITEMDATA, (WPARAM)index,
file:///C|/dona/forgers-win32-tutorial/tutorial/controls.html (3 of 5) [7/8/2003 4:34:47 PM]

Standard Controls: Button, Edit, List Box, Static
(LPARAM)nTimes);
Notifications
The whole purpose of listboxes is to allow the user to select things from a list. Now sometimes we don't care when
exactly they do this, for example with our Remove button, we don't need to know when the selection changes right
away, we just check when the user activates the button.
However, sometimes you want to be able to do something right away, perhaps display different or updated
information based on what items are selected. In order to do this we need to handle the notification messages that the
listbox passes to us. In this case, we are interested in
LBN_SELCHANGE
, which tells us that the selection has been
modified by the user.
LBN_SELCHANGE
is sent via
WM_COMMAND
but unlike handling the
WM_COMMAND
from
buttons or menu's, which are usually only in response to a click, a list box sends
WM_COMMAND
for various reasons,
and we need a second check to find out what it's telling us. The Notification Code is passed as the
HIWORD
of
wParam
, the other half of the parameter that gave us the control ID in the first place.
case WM_COMMAND:
switch(LOWORD(wParam))
{
case IDC_LIST:
// It's our listbox, check the notification code
switch(HIWORD(wParam))
{
case LBN_SELCHANGE:
// Selection changed, do stuff here.
break;
}
break;
// ... other controls
}
break;
Getting Data from the ListBox
Now that we know the selection has changed, or at the request of the user, we need to get the selection from the
listbox and do something useful with it.
In this example I've used a multiselection list box, so getting the list of selected items is a little trickier. If it were a
single selection listbox, than you could simply send
LB_GETCURSEL
to retrieve the item index.
First we need to get the number of selected items, so that we can allocate a buffer to save the indexes in.
HWND hList = GetDlgItem(hwnd, IDC_LIST);
int count = SendMessage(hList, LB_GETSELCOUNT, 0, 0);
Then we allocate a buffer based on the number of items, and send
LB_GETSELITEMS
to fill in the array.
file:///C|/dona/forgers-win32-tutorial/tutorial/controls.html (4 of 5) [7/8/2003 4:34:47 PM]
Standard Controls: Button, Edit, List Box, Static
int *buf = GlobalAlloc(GPTR, sizeof(int) * count);
SendMessage(hList, LB_GETSELITEMS, (WPARAM)count, (LPARAM)buf);
// ... Do stuff with indexes
GlobalFree(buf);
In this example,
buf[0]
is the first index, and so on up to
buf[count - 1]
.
One of the things you would likely want to do with this list of indexes, is retreive the data associated with each item,
and do some processing with it. This is just as simple as setting the data was originally, we just send another message.
int data = SendMessage(hList, LB_GETITEMDATA, (WPARAM)index, 0);
If the data was some other type of value (anything that is 32-bits) you could simply cast to the appropriate type. For
example if you stored
HBITMAP
s instead of
int
s...
HBITMAP hData = (HBITMAP)SendMessage(hList, LB_GETITEMDATA, (WPARAM)index,
0);
Statics
Like buttons, static controls are largely trivial, but for the sake or being complete I include them here. Static controls
are usually just that, static, meaning they don't change or really do anything else very special, they're largely for
displaying text to the user. However you can make them slightly more useful by assigning them a unique ID (VC++
assigns a default ID of
IDC_STATIC
, which is
-1
and effectively means "No ID") and then setting the text at
runtime to present dynamic data to the user.
In the example code, I use one to display the data of the item selected in the list box, assuming one and only one is
selected.
SetDlgItemInt(hwnd, IDC_SHOWCOUNT, data, FALSE);
Copyright © 1998-2003, Brook Miles (
file:///C|/dona/forgers-win32-tutorial/tutorial/controls.html (5 of 5) [7/8/2003 4:34:47 PM]
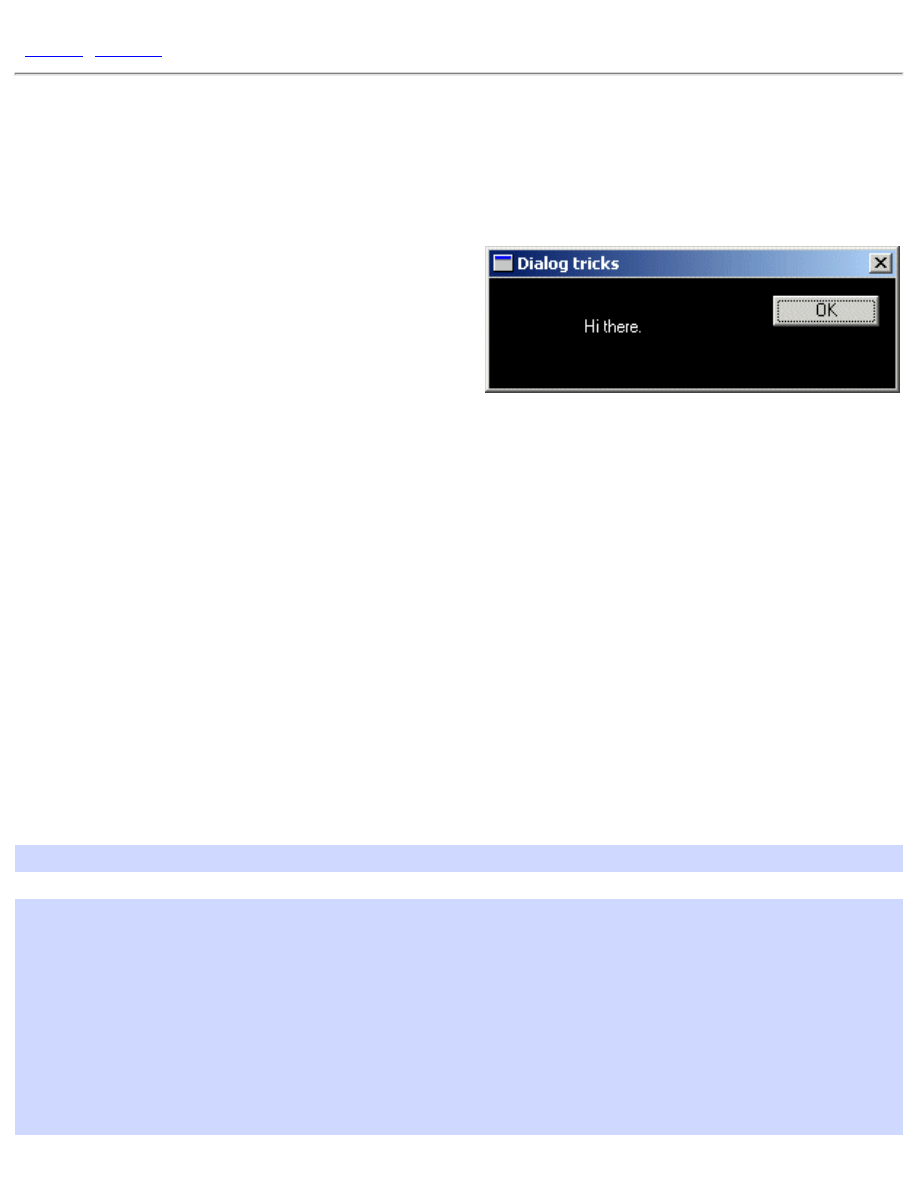
Tutorial: Dialog FAQ
[
Dialog FAQ
Example: dlg_three
Now don't get me wrong, this is a Tutorial, not a
Reference, but some questions people ask SO often
that I figured I might as well include them here.
Changing Colours
In general, the only reason you'd want to do this is to simulate an link on a dialog box or some similar
task, because otherwise you're probably just making your program ugly and hard on the eyes if you
go adding a bunch of colors to the dialogs, but that doesn't stop people from doing it, and there are
actually a few valid reasons, so here you go :)
Windows sends a variety of messages related to colours to your dialog procedure, and by handling
these messages you can change what colour certain things are displayed in. For example, to change
the color of the dialog box itself, you can handle
WM_CTLCOLORDLG
, to change the colors for a
static control you handle
WM_CTLCOLORSTATIC
and so on.
First you can create a brush to use to paint the background and store it for later. the
WM_CTLCOLORDLG
and related messages will get called often during the course of your program,
and if you created a new brush every time, eventually you would use up a great deal of RAM with
dead brushes. This way we have more control, and we can delete it when the dialog is destroyed and
we know we won't need it any more.
HBRUSH g_hbrBackground = CreateSolidBrush(RGB(0, 0, 0));
case WM_CTLCOLORDLG:
return (LONG)g_hbrBackground;
case WM_CTLCOLORSTATIC:
{
HDC hdcStatic = (HDC)wParam;
SetTextColor(hdcStatic, RGB(255, 255, 255));
SetBkMode(hdcStatic, TRANSPARENT);
return (LONG)g_hbrBackground;
}
file:///C|/dona/forgers-win32-tutorial/tutorial/dlgfaq.html (1 of 3) [7/8/2003 4:34:47 PM]
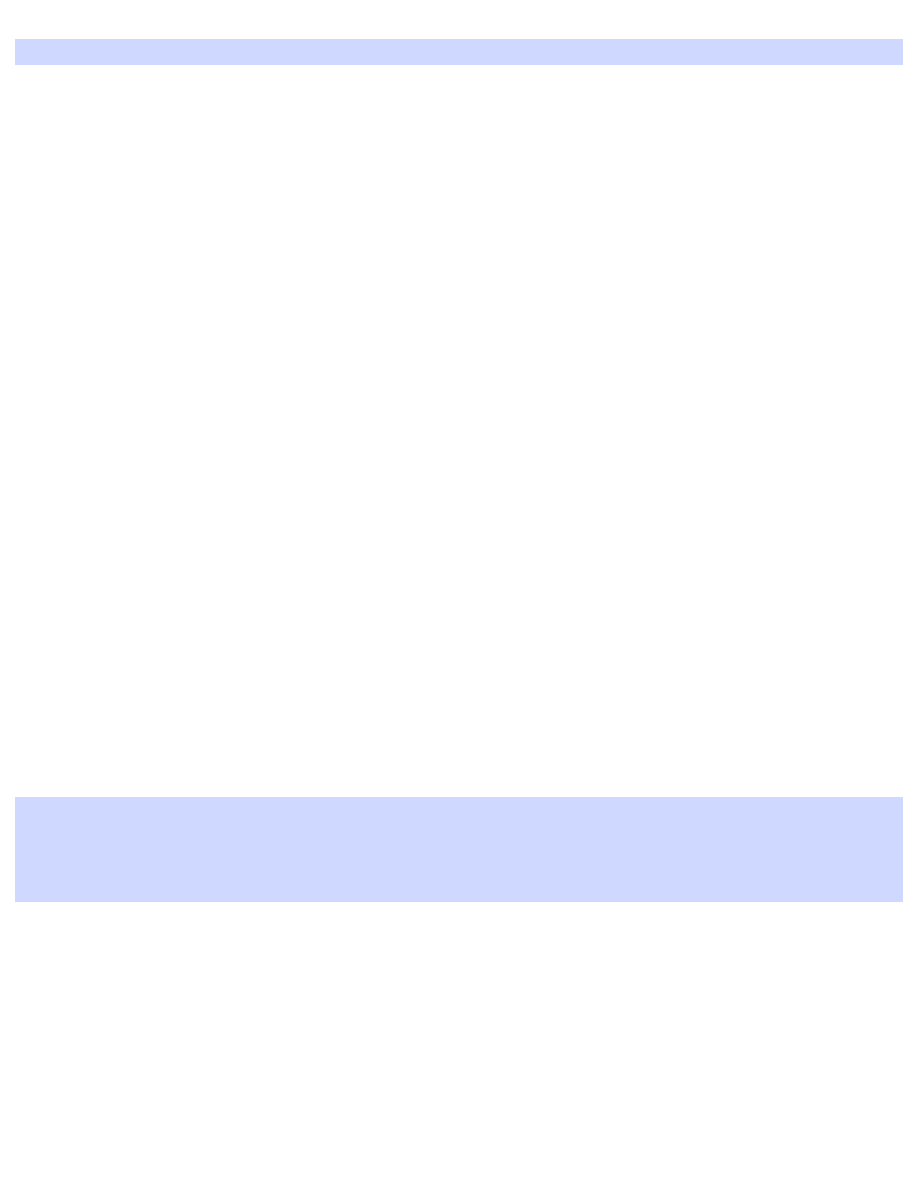
Tutorial: Dialog FAQ
break;
Notice the line that sets the background mode to transparent... if you leave this line off the
background will be filled in with the brush you specify, but when the control draws the text it will get
written over with the default background color! Setting the text drawing mode to transparent fixes
this problem. The other option would be to
SetBkColor()
to the same color as our background
brush, but I like this solution better.
Changing the colors on pretty much any other standard control works the same way, just look up the
WM_CTLCOLOR*
messages in your Win32 reference. Note that an edit control will send a
WM_CTLCOLORSTATIC
if it is read only, and
WM_CTLCOLOREDIT
if it isn't.
If you have more than one static (or other) control that you want to be different colours, then you'll
need to check the ID of the control you are getting the message from and change your colours based
on that. You are passed the
HWND
of the control in
lParam
, and you can get the ID of the control
from this using
GetDlgCtlrID()
. Note that static controls are all given a default ID of
IDC_STATIC
(-1) by the resource editor, so if you want to be able to tell them apart you'll need to
assign them new IDs.
Giving the Dialog an Icon
A fairly simple task, you just need to send
WM_SETICON
to your dialog. Since windows uses two
icons however, you need to call it twice, once for the small icon displayed in the corner of the
window, and once for the large one displayed when you hit Alt-Tab. You can just send the same
handle both times unless you have multi-sized icons.
To just set the default application icon, you can use the following code:
SendMessage(hwnd, WM_SETICON, ICON_SMALL, (LPARAM)LoadIcon(NULL,
MAKEINTRESOURCE(IDI_APPLICATION)));
SendMessage(hwnd, WM_SETICON, ICON_BIG, (LPARAM)LoadIcon(NULL,
MAKEINTRESOURCE(IDI_APPLICATION)));
When you substitute your own icon resource for the default, remember to change the
HINSTANCE
parameter of
LoadIcon()
to your applications instance (you can get it by calling
GetModuleHandle(NULL)
if you don't have it stored from
WinMain()
).
Why Doesn't my Combo Box Work?
An all-too-common problem is people adding a combo box to their dialog and they can't figure out
file:///C|/dona/forgers-win32-tutorial/tutorial/dlgfaq.html (2 of 3) [7/8/2003 4:34:47 PM]

Tutorial: Dialog FAQ
why the list doesn't show up when they run their program and click the little arrow. This is
understandable, since the solution is not very intuitive.
When you create a combo box and specify it's height, you are actually specifying the entire height,
drop-down list included, NOT the height of the control when it is collapsed which is determined by
the system based on the size of the font used.
For example, giving the control a height of 100 pixels, the system sizes the control itself to the
default (lets say 30 in this case), and when you click on the arrow, the drop down list would be 70
pixels high, for a total of 100 pixels.
If you use the VC++ resource editor to place the combo on your dialog, you will notice you can't size
it vertically. Unless you click on the arrow in the editor, and it will then change the focus rectangle to
indicate you are sizing the dropdown list, and you can set the height to whatever you want.
What about all the other controls!
Well I could give examples of all of the other controls, but that's what MSDN and Petzold are for :) If
you can't figure out how to use them, you probably need to re-read some parts of this tutorial, or get a
book which will explain things more thouroughly.
I'd like to give you a link to a useful page on MSDN, but Microsoft seems to be determined to
prevent me from doing so as links to individual MSDN pages either change rapidly or don't work
period. Therefor you'll probably have to figure out how to get around yourself, look around for
sections like User Interface Services, and Windows Controls, sometimes under a Platform SDK
section.
Copyright © 1998-2003, Brook Miles (
file:///C|/dona/forgers-win32-tutorial/tutorial/dlgfaq.html (3 of 3) [7/8/2003 4:34:47 PM]
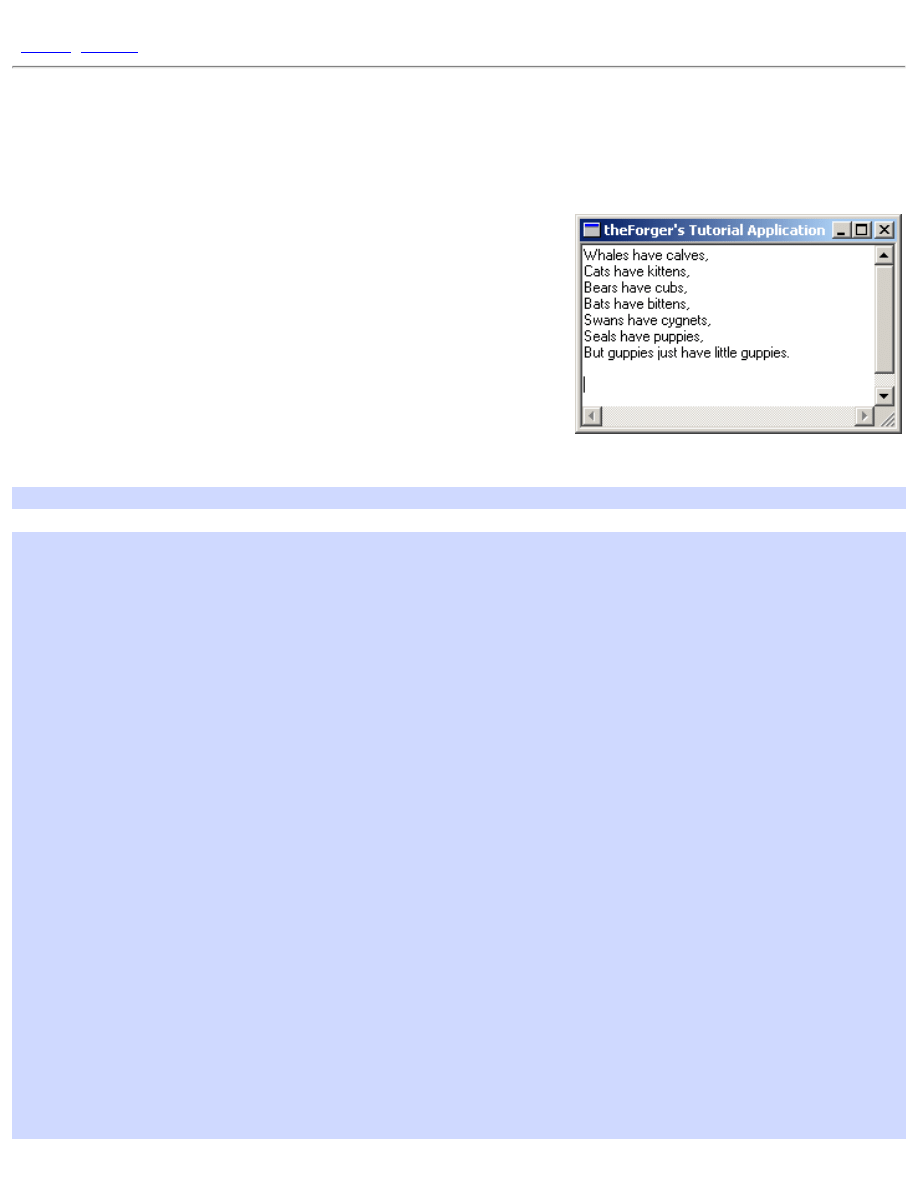
App Part 1: Creating controls at runtime
]
App Part 1: Creating controls at runtime
Example: app_one
I thought that since an example on creating controls on the fly, although
usefull, would be quite pointless unless the application actually did
something, so in this entry I will start the workings of a text editor and
build upon it untill we reach a nearly useful program that supports
opening, editing and saving text documents.
The first step, which this particular page covers will be simply creating the
window and the EDIT control that will serve as the center of our program.
Starting with the skeleton code from the Simple Window application we
add a
#define
as our control ID and the following two message handlers into our window procedure:
#define IDC_MAIN_EDIT 101
case WM_CREATE:
{
HFONT hfDefault;
HWND hEdit;
hEdit = CreateWindowEx(WS_EX_CLIENTEDGE, "EDIT", "",
WS_CHILD | WS_VISIBLE | WS_VSCROLL | WS_HSCROLL | ES_MULTILINE |
ES_AUTOVSCROLL | ES_AUTOHSCROLL,
0, 0, 100, 100, hwnd, (HMENU)IDC_MAIN_EDIT, GetModuleHandle(NULL),
NULL);
if(hEdit == NULL)
MessageBox(hwnd, "Could not create edit box.", "Error", MB_OK |
MB_ICONERROR);
hfDefault = GetStockObject(DEFAULT_GUI_FONT);
SendMessage(hEdit, WM_SETFONT, (WPARAM)hfDefault, MAKELPARAM(FALSE, 0));
}
break;
case WM_SIZE:
{
HWND hEdit;
RECT rcClient;
GetClientRect(hwnd, &rcClient);
hEdit = GetDlgItem(hwnd, IDC_MAIN_EDIT);
SetWindowPos(hEdit, NULL, 0, 0, rcClient.right, rcClient.bottom,
file:///C|/dona/forgers-win32-tutorial/tutorial/app_one.html (1 of 3) [7/8/2003 4:34:48 PM]

App Part 1: Creating controls at runtime
SWP_NOZORDER);
}
break;
Creating controls
Creating controls, like creating any other window, is done through the
CreateWindowEx()
API. We pass in pre-
registered class that we want, in this case the "EDIT" control class, and we get a standard edit control window. When
using dialogs to create our controls, we are basically writing a list of controls to create so that then you call
DialogBox()
or
CreateDialog()
the system reads through the list of controls in the dialog resource and calls
CreateWindowEx()
for each one with the position and styles that were defined in the resource.
hEdit = CreateWindowEx(WS_EX_CLIENTEDGE, "EDIT", "",
WS_CHILD | WS_VISIBLE | WS_VSCROLL | WS_HSCROLL | ES_MULTILINE |
ES_AUTOVSCROLL | ES_AUTOHSCROLL,
0, 0, 100, 100, hwnd, (HMENU)IDC_MAIN_EDIT, GetModuleHandle(NULL),
NULL);
if(hEdit == NULL)
MessageBox(hwnd, "Could not create edit box.", "Error", MB_OK |
MB_ICONERROR);
You can see that this call to
CreateWindowEx()
specifies quite a few styles, and it's not uncommon to have many
more, especially for the Common Controls which have a hearty list of options. The first 4
WS_
styles should be fairly
obvious, we are creating the control as a child of our window, we want it to be visible, and have vertical and horizontal
scroll bars.
The 3 styles that are specific to EDIT controls (
ES_MULTILINE | ES_AUTOVSCROLL | ES_AUTOHSCROLL
)
specify that the EDIT control should contain multiple lines of text, and scroll automatically as you type beyond the
bottom and right hand side of the control respectively.
The regular window styles (
WS_*
. And the extended windows styles (
WS_EX_*
) are explained under
the
reference in MSDN, where you can also find links to the styles that are specific to each
control (
ES_*
in our case of the edit control).
We have specified our window handle as the parent of the control, and assigned it an ID of
IDC_MAIN_EDIT
which
we'll use later on to refer to the control just as you would if the control had been created on a dialog. The position and
size parameters don't mean too much at the moment since we will be resizing the control dynamically in the
WM_SIZE
message so that it will always fit our window.
Sizing of dynamically created controls
Generally if your window is sizeable you'll want some code to resize or reposition the controls you created within it so
that they are always layed out properly.
GetClientRect(hwnd, &rcClient);
hEdit = GetDlgItem(hwnd, IDC_MAIN_EDIT);
SetWindowPos(hEdit, NULL, 0, 0, rcClient.right, rcClient.bottom,
file:///C|/dona/forgers-win32-tutorial/tutorial/app_one.html (2 of 3) [7/8/2003 4:34:48 PM]
App Part 1: Creating controls at runtime
SWP_NOZORDER);
Since we only have one control for now, the task is relatively simple. We use
GetClientRect()
to get the
dimentions of the Client Area of the window, the big (up untill now) blank area that does not include the borders, menu
or caption. This will fill in our
RECT
structure with the value, the
left
and
top
values will always be 0, so you can
usually just ignore them. The
right
and
bottom
values will give you the width and the hight of the client area.
Next we simply get a handle to our edit control using
GetDlgItem()
which works just as well on regular windows
as it does on dialogs, and the call
SetWindowPos()
to move and size it to fill the entire client area. You can of
course change the values you pass into
SetWindowPos()
to do something like only fill half of the window's height,
leaving the bottom free to place other controls.
Creating other controls at runtime
I'm not going to give examples of dynamically creating the other controls like LISTBOX, BUTTON, etc... because it's
basically the same and it gets kinda boring after a while :) If you follow the links into MSDN above, or look in your
local Win32 API reference you will be able to find all of the information needed to create any of the other standard
controls.
We'll be doing more of this with the common controls in the next couple of sections so you'll get more practice
eventually.
Copyright © 1998-2003, Brook Miles (
file:///C|/dona/forgers-win32-tutorial/tutorial/app_one.html (3 of 3) [7/8/2003 4:34:48 PM]
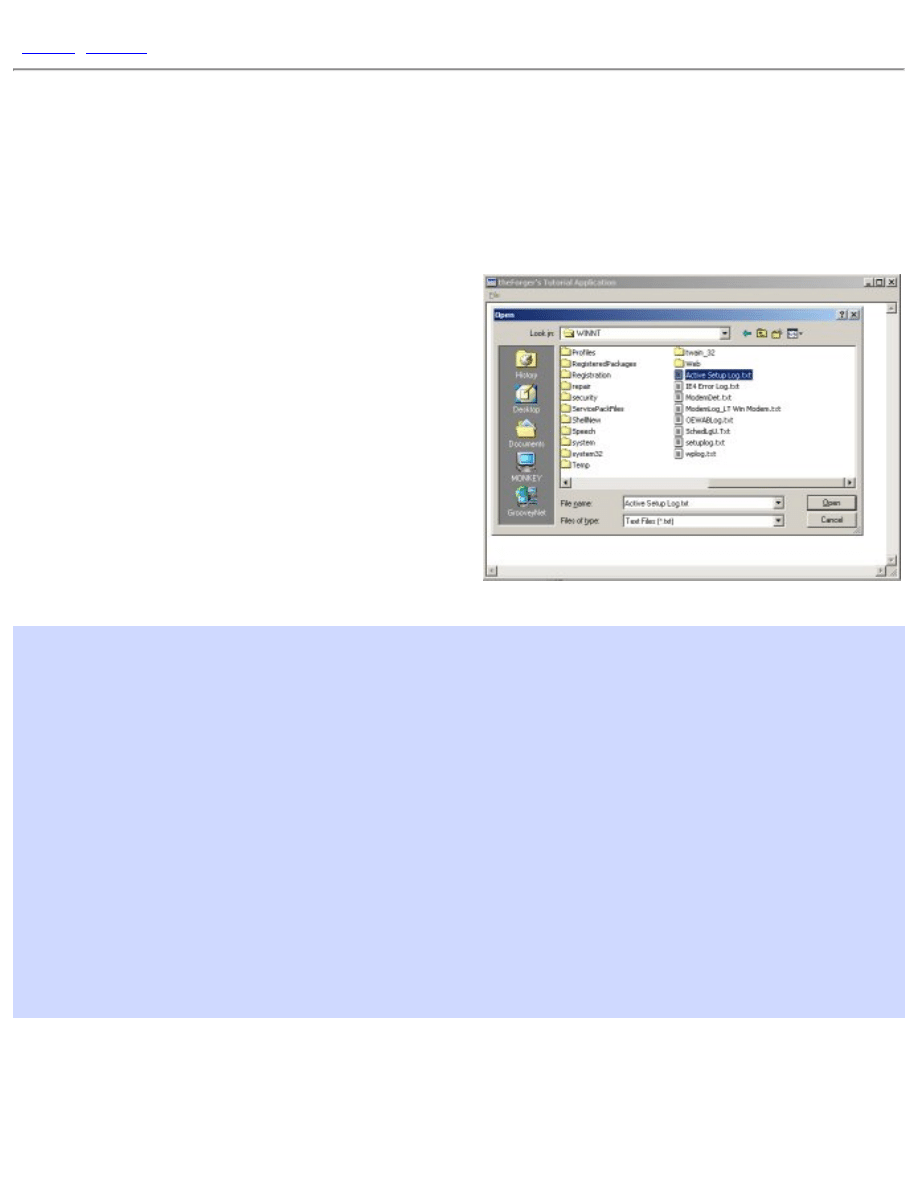
App Part 2: Using files and the common dialogs
]
App Part 2: Using files and the common
dialogs
Example: app_two
The Common File Dialogs
The first step to opening or saving files is finding out the
filename to use... of course you could always hard code
the name of the file into your program, but honestly that
doesn't make for very useful programs most of the time.
Since this is such a common task, there are predefined
system dialogs that you can use to allow the user to select
a file name. The most common open and save file dialogs
are accessed through
GetOpenFileName()
and
GetSaveFileName()
respectively, both of which take
an
OPENFILENAME
struct.
OPENFILENAME ofn;
char szFileName[MAX_PATH] = "";
ZeroMemory(&ofn, sizeof(ofn));
ofn.lStructSize = sizeof(ofn); // SEE NOTE BELOW
ofn.hwndOwner = hwnd;
ofn.lpstrFilter = "Text Files (*.txt)\0*.txt\0All Files (*.*)\0*.*\0";
ofn.lpstrFile = szFileName;
ofn.nMaxFile = MAX_PATH;
ofn.Flags = OFN_EXPLORER | OFN_FILEMUSTEXIST | OFN_HIDEREADONLY;
ofn.lpstrDefExt = "txt";
if(GetOpenFileName(&ofn))
{
// Do something usefull with the filename stored in szFileName
}
Note that we call
ZeroMemory()
on the struct in order to initialise it to
0
. This is generally a wise practice, as
some APIs are very picky about members that you don't use being set to
NULL
. This way you don't need to
explicitely set each member that you don't use.
file:///C|/dona/forgers-win32-tutorial/tutorial/app_two.html (1 of 5) [7/8/2003 4:34:48 PM]
App Part 2: Using files and the common dialogs
You can easily find out the meanings of the various members by looking them up in your documentation. The
lpstrFilter
value points to a double-NULL terminated string, and you can see from the example that there
are several
"\0"
throughout it, including one at the end... the compiler will add the second one at the end as it
always does with string constants (that's what you generally don't need to put them in yourself). The
NULL
s in
this string break it up into filters, each one is two parts. The first filter has the description
"Text Files
(*.txt)"
, the wildcard isn't required here I just put it in because I felt like it. The next part is the actual
wildcard for the first filter,
"*.txt"
. We do the same thing with the second filter except that this is a generic
filter for all files. You can add as many different filters as you'd like.
The
lpstrFile
points to the buffer we have allocated to store the name of the file, since filenames can't be
larger than
MAX_PATH
this is the value that I've chosen for the buffer size.
The flags indicate that the dialog should only allow the user to enter filenames that already exist (since we want
to open them, not create them) and to hide the option to open the file in readonly mode, which we aren't going
to support. Finally we provide a default extention, so if the user types in
"foo"
and the file is not found, it will
try to open
"foo.txt"
before finally giving up.
To select a file for saving instead of opening, the code is nearly the same, except for calling
GetSaveFileName()
we need only change the flags member to options more suitable for saving.
ofn.Flags = OFN_EXPLORER | OFN_PATHMUSTEXIST | OFN_HIDEREADONLY |
OFN_OVERWRITEPROMPT;
In this case we no longer want to require the file exist, but we do want the directory to exist since we aren't
going to try and create it first. We'll also prompt the user if they select an existing file to make sure they want to
overwrite it.
NOTE: MSDN States the following for the
lStructSize
member:
lStructSize
Specifies the length, in bytes, of the structure.
Windows NT 4.0: In an application that is compiled with WINVER and _WIN32_WINNT >= 0x0500,
use OPENFILENAME_SIZE_VERSION_400 for this member.
Windows 2000/XP: Use sizeof (OPENFILENAME) for this parameter.
Basically what this means is that as of Windows 2000 they added some members to this struct, and so it's size
changed. If the code above doesn't work for you it's possibly because the size that your compiler used and the
size that your operating system (ie. Windows 98, Windows NT4) expected were different and so the call failed.
If this happens, try using
OPENFILENAME_SIZE_VERSION_400
instead of
sizeof(ofn)
. Thanks to
people that pointed this out to me.
Reading and Writing Files
file:///C|/dona/forgers-win32-tutorial/tutorial/app_two.html (2 of 5) [7/8/2003 4:34:48 PM]

App Part 2: Using files and the common dialogs
In windows you have a few options as to how you want to access files. You can use the old
io.h
open()
/
read()
/
write()
, you can use
stdio.h
fopen()
/
fread()
/
fwrite()
, and if you are in C++
use can use iostreams.
However in windows all of these method ultimately call the Win32 API functions, which are what I will use
here. If you are already comfortable using file IO with another method it should be fairly easy to pick up, or if
you want simply use your method of choice to access files.
To open files, you can use
OpenFile()
or
CreateFile()
. MS recommends using only
CreateFile()
as
OpenFile()
is now "obsolete".
CreateFile()
is a much more versatile function and provides a great
deal of control over the way you open files.
Reading
Say for example you have allowed the user to select a file using GetOpenFileName()...
BOOL LoadTextFileToEdit(HWND hEdit, LPCTSTR pszFileName)
{
HANDLE hFile;
BOOL bSuccess = FALSE;
hFile = CreateFile(pszFileName, GENERIC_READ, FILE_SHARE_READ, NULL,
OPEN_EXISTING, 0, NULL);
if(hFile != INVALID_HANDLE_VALUE)
{
DWORD dwFileSize;
dwFileSize = GetFileSize(hFile, NULL);
if(dwFileSize != 0xFFFFFFFF)
{
LPSTR pszFileText;
pszFileText = GlobalAlloc(GPTR, dwFileSize + 1);
if(pszFileText != NULL)
{
DWORD dwRead;
if(ReadFile(hFile, pszFileText, dwFileSize, &dwRead, NULL))
{
pszFileText[dwFileSize] = 0; // Add null terminator
if(SetWindowText(hEdit, pszFileText))
bSuccess = TRUE; // It worked!
}
GlobalFree(pszFileText);
}
}
file:///C|/dona/forgers-win32-tutorial/tutorial/app_two.html (3 of 5) [7/8/2003 4:34:48 PM]

App Part 2: Using files and the common dialogs
CloseHandle(hFile);
}
return bSuccess;
}
There is a complete function to read a text file into an edit control. It takes as paramters the handle to the edit
control and the name of the file to read in. This perticular function has a fair bit of error checking, file IO is one
place where a lot of things can go wrong, and so you need to be on the lookout for errors.
Note the variable
dwRead
. We don't use it except as a paramter in
ReadFile()
. This parameter MUST be
provided, the call will fail without it.
In the call to
CreateFile()
GENERIC_READ
means we only want read access.
FILE_SHARE_READ
means it's okay if other programs open the file at the same time we do, but ONLY if they want to read as well,
we don't want them writing to the file while we are reading it. And
OPEN_EXISTING
means only open the file
if it already exists, don't create it, and don't overwrite it.
Once we've opened the file and chacked to see that
CreateFile()
succeeded, we check the size of the file so
we'll know how much memory we need to allocate in order to read the entire thing. We then allocate the
memory, check to make sure the allocation succeeded, and then call
ReadFile()
to load the contents from
disk into our memory buffer. The API file functions have no concept of Text Files so they won't do things like
read a single line of text, or add
NULL
terminators to the end of our strings. This is why we've allocated an extra
byte and after we read in the file we add the
NULL
ourselves so that we can then pass the memory buffer as a
string to
SetWindowText()
.
Once all that has succeeded we set out success variable to
TRUE
, and clean up as we reach the end of the
function, freeing the memory buffer and closing the file handle before finally returning to the caller.
Writing
BOOL SaveTextFileFromEdit(HWND hEdit, LPCTSTR pszFileName)
{
HANDLE hFile;
BOOL bSuccess = FALSE;
hFile = CreateFile(pszFileName, GENERIC_WRITE, 0, NULL,
CREATE_ALWAYS, FILE_ATTRIBUTE_NORMAL, NULL);
if(hFile != INVALID_HANDLE_VALUE)
{
DWORD dwTextLength;
dwTextLength = GetWindowTextLength(hEdit);
// No need to bother if there's no text.
if(dwTextLength > 0)
{
LPSTR pszText;
file:///C|/dona/forgers-win32-tutorial/tutorial/app_two.html (4 of 5) [7/8/2003 4:34:48 PM]
App Part 2: Using files and the common dialogs
DWORD dwBufferSize = dwTextLength + 1;
pszText = GlobalAlloc(GPTR, dwBufferSize);
if(pszText != NULL)
{
if(GetWindowText(hEdit, pszText, dwBufferSize))
{
DWORD dwWritten;
if(WriteFile(hFile, pszText, dwTextLength, &dwWritten,
NULL))
bSuccess = TRUE;
}
GlobalFree(pszText);
}
}
CloseHandle(hFile);
}
return bSuccess;
}
Very similar to reading files, the function to write files has a few changes. First of all when we call
CreateFile()
we specify that we want Read access, that the file should always be created new (and if it
exists it will be erased as it's opened) and that if it doesn't exist, it will be created with the normal file attributes.
Next we get the length of the memory buffer needed from the edit control, since this is the source of the data.
Once we've allocated the memory, we request the string from the edit control using
GetWindowText()
and
then write it to the file with
WriteFile()
. Again, like with
ReadFile()
the parameter that returns how
much was actually written is required, even though we don't use it.
Copyright © 1998-2003, Brook Miles (
file:///C|/dona/forgers-win32-tutorial/tutorial/app_two.html (5 of 5) [7/8/2003 4:34:48 PM]
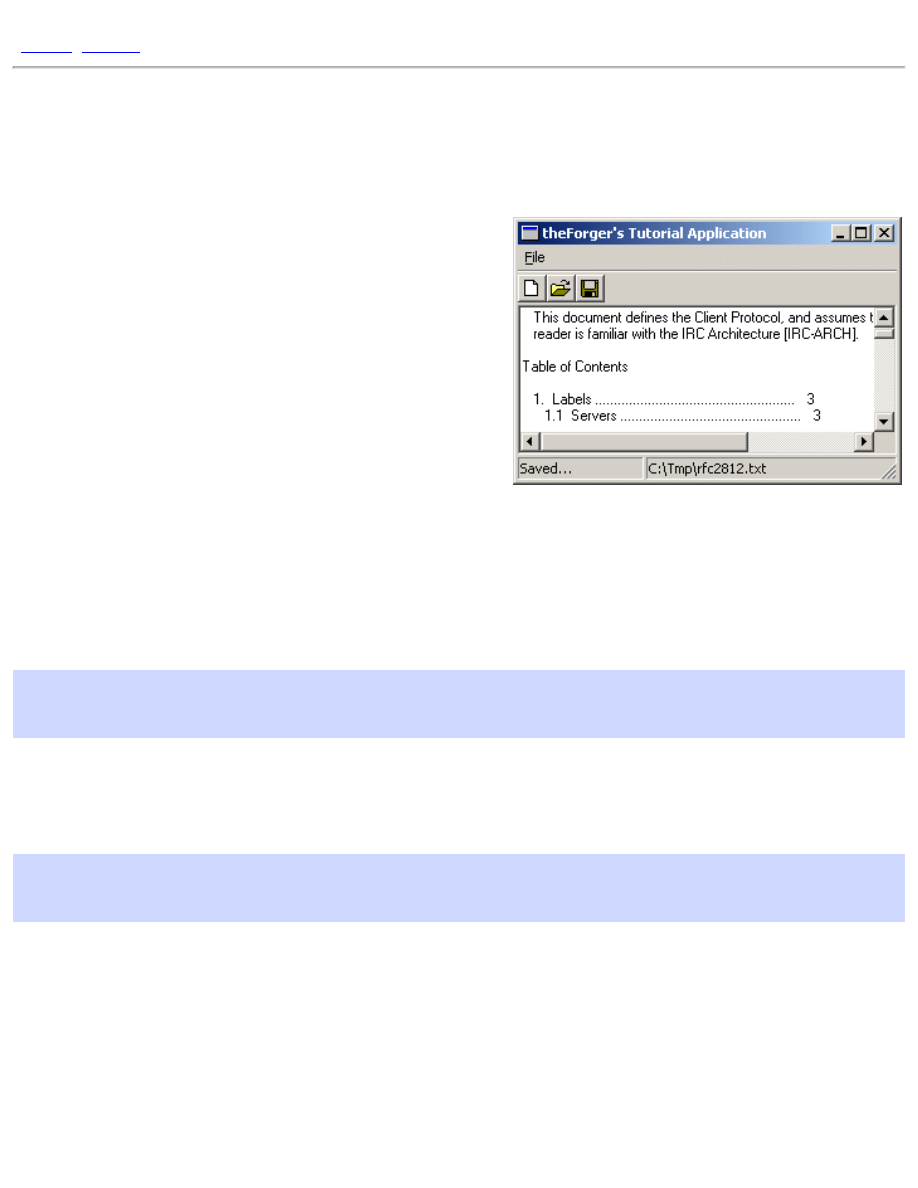
App Part 3: Tool and Status bars
App Part 3: Tool and Status bars
Example: app_three
An IMPORTANT Word on Common Controls
As with all common controls, you must call
InitCommonControls()
BEFORE you try and use them.
You will need to
#include <commctrl.h>
in order to use
this function and to get the functions and declarations necessary
for use of the Common Controls. You will also need to add
comctl32.lib
to your linker settings if it is not already there.
Note that
InitCommonControls()
is an older API, and for
more control you can use
InitCommonControlsEx()
(aka
InitCommonControlSex()) which is also required for the most
recent common controls. However since I'm not using any of the
advanced features,
InitCommonControls()
is adequate and simpler.
Toolbars
You can create a toolbar using
CreateToolbarEx()
but I'm not going to, so there. First thing you need to do is
actually create the toolbar...
hTool = CreateWindowEx(0, TOOLBARCLASSNAME, NULL, WS_CHILD | WS_VISIBLE, 0,
0, 0, 0,
hwnd, (HMENU)IDC_MAIN_TOOL, GetModuleHandle(NULL), NULL);
That's simple enough,
TOOLBARCLASSNAME
is a constant defined by the common control headers.
hwnd
is the
parent window, the one you want to put the toolbar in.
IDC_MAIN_TOOL
is an identifier that you can use later to get
the
HWND
of the toolbar using
GetDlgItem()
, if you so desire.
// Send the TB_BUTTONSTRUCTSIZE message, which is required for
// backward compatibility.
SendMessage(hTool, TB_BUTTONSTRUCTSIZE, (WPARAM)sizeof(TBBUTTON), 0);
This message is required to let the system figure out which version of the common controls library you are using.
Since new versions add new stuff to the structure, by giving it the size it can figure out what behaviour you are
expecting.
Toolbar buttons
Button bitmaps on basic toolbars come in two varieties, standard buttons that are provided by comctl32, and user
defined buttons that you create yourself. NOTE: Buttons and bitmaps are added to toolbars seperately... first you add
file:///C|/dona/forgers-win32-tutorial/tutorial/app_three.html (1 of 4) [7/8/2003 4:34:49 PM]
App Part 3: Tool and Status bars
a list of images to use, and THEN you add a list of buttons, and telling it which button uses which image.
Adding Standard Buttons
Now that we have a toolbar created, we need to add some buttons to it. The most common bitmaps are available in the
common control library itself, so we don't need to recreate them or add them to every exe that uses them.
First we declare a
TBBUTTON
and
TBADDBITMAP
TBBUTTON tbb[3];
TBADDBITMAP tbab;
And then we add the standard bitmaps to the toolbar, using the imagelist predefined in the common control library...
tbab.hInst = HINST_COMMCTRL;
tbab.nID = IDB_STD_SMALL_COLOR;
SendMessage(hTool, TB_ADDBITMAP, 0, (LPARAM)&tbab);
Now that we have our images loaded up, we can add some buttons that use them...
ZeroMemory(tbb, sizeof(tbb));
tbb[0].iBitmap = STD_FILENEW;
tbb[0].fsState = TBSTATE_ENABLED;
tbb[0].fsStyle = TBSTYLE_BUTTON;
tbb[0].idCommand = ID_FILE_NEW;
tbb[1].iBitmap = STD_FILEOPEN;
tbb[1].fsState = TBSTATE_ENABLED;
tbb[1].fsStyle = TBSTYLE_BUTTON;
tbb[1].idCommand = ID_FILE_OPEN;
tbb[2].iBitmap = STD_FILESAVE;
tbb[2].fsState = TBSTATE_ENABLED;
tbb[2].fsStyle = TBSTYLE_BUTTON;
tbb[2].idCommand = ID_FILE_SAVEAS;
SendMessage(hTool, TB_ADDBUTTONS, sizeof(tbb)/sizeof(TBBUTTON),
(LPARAM)&tbb);
Here we've added a New, Open and Save As button using the standard images, which is always a good idea since
people are used to seeing them and they know what they mean.
The indexes of each image in the imagelist are defined in the common control headers and are listed in MSDN.
We have assigned each button an ID (
ID_FILE_NEW
etc...) which is identical to the IDs of the equivalent menu
items. These buttons will generate
WM_COMMAND
messages identical to the menu, so no extra processing is required!
If we were adding a button for a command that didn't already have a menu item, we would simply pick a new ID for it
and add a handler to
WM_COMMAND
.
file:///C|/dona/forgers-win32-tutorial/tutorial/app_three.html (2 of 4) [7/8/2003 4:34:49 PM]
App Part 3: Tool and Status bars
If you're wondering what's up with the funky
wParam
I passed to
TB_ADDBUTTONS
it's doing a calculation of the
number of buttons in the array tbb so that we don't need to hardcode a value. If I put in 3 instead it would still be
correct, but as soon as I added another button I'd have to change it to 4 and in programming that's bad... you want one
change to cause as few other changes as possible. For example if the
sizeof(TBBUTTON)
was 16 bytes (I made
that up, it actually varies by platform) then since we have 3 buttons the
sizeof(tbb)
would be 16 * 3 or 48.
Therefor 48/16 gives us the number of buttons, 3.
Status bars
Something often found in apps with toolbars are status bars, the little things at the bottom of the window that display
information. They're pretty simple to use, just create...
hStatus = CreateWindowEx(0, STATUSCLASSNAME, NULL,
WS_CHILD | WS_VISIBLE | SBARS_SIZEGRIP, 0, 0, 0, 0,
hwnd, (HMENU)IDC_MAIN_STATUS, GetModuleHandle(NULL), NULL);
And then (optionally) set the number of sections that you want. If you don't set any, it will simply have one section
using the entire width of the bar, and you can set and retreive the text with
SetWindowText()
as with many other
controls. For more than one part, you need to give the widths of each section, and then use
SB_SETTEXT
to set the
text of each one.
To define the widths, we declare an array of
int
s, where each value is the width in pixels of a section. If you want
one section to use up any remaining space, set it's width to
-1
.
int statwidths[] = {100, -1};
SendMessage(hStatus, SB_SETPARTS, sizeof(statwidths)/sizeof(int),
(LPARAM)statwidths);
SendMessage(hStatus, SB_SETTEXT, 0, (LPARAM)"Hi there :)");
The wParam again is our calculation of how many elements are in the array. Once we're done adding sections, we set
the first one (index
0
) to see it in action.
Proper Sizing
Unlike menus, tool and status bars are seperate controls that live inside the parent window's client area. Therefor if we
just leave our
WM_SIZE
code from before, they are going to overlap with the edit control we added in the previous
examples. This is a simple matter to correct... in
WM_SIZE
, we move the tool and status bars into position, and then
subtract their heights and positions from the client area so that we can move our edit control to fill the remaining
space...
HWND hTool;
RECT rcTool;
int iToolHeight;
HWND hStatus;
file:///C|/dona/forgers-win32-tutorial/tutorial/app_three.html (3 of 4) [7/8/2003 4:34:49 PM]
App Part 3: Tool and Status bars
RECT rcStatus;
int iStatusHeight;
HWND hEdit;
int iEditHeight;
RECT rcClient;
// Size toolbar and get height
hTool = GetDlgItem(hwnd, IDC_MAIN_TOOL);
SendMessage(hTool, TB_AUTOSIZE, 0, 0);
GetWindowRect(hTool, &rcTool);
iToolHeight = rcTool.bottom - rcTool.top;
// Size status bar and get height
hStatus = GetDlgItem(hwnd, IDC_MAIN_STATUS);
SendMessage(hStatus, WM_SIZE, 0, 0);
GetWindowRect(hStatus, &rcStatus);
iStatusHeight = rcStatus.bottom - rcStatus.top;
// Calculate remaining height and size edit
GetClientRect(hwnd, &rcClient);
iEditHeight = rcClient.bottom - iToolHeight - iStatusHeight;
hEdit = GetDlgItem(hwnd, IDC_MAIN_EDIT);
SetWindowPos(hEdit, NULL, 0, iToolHeight, rcClient.right, iEditHeight,
SWP_NOZORDER);
Unfortunately it's a somewhat long code snippet, but it's quite simple... toolbars will auto position themselves when
sent the
TB_AUTOSIZE
message, and status bars will do the same if you send them
WM_SIZE
(the common control
libraries are not known for consistancy).
Copyright © 1998-2003, Brook Miles (
file:///C|/dona/forgers-win32-tutorial/tutorial/app_three.html (4 of 4) [7/8/2003 4:34:49 PM]
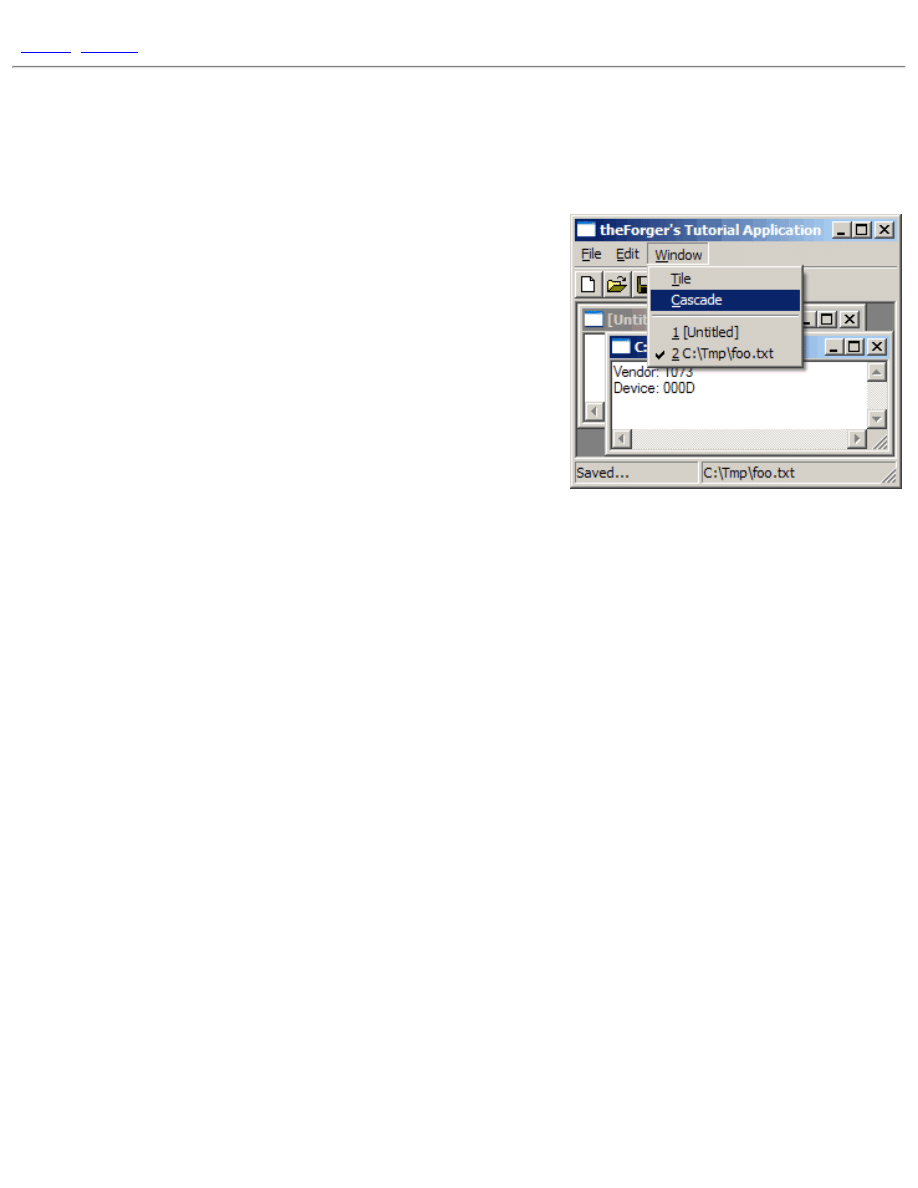
App Part 4: Multiple Document Interface
]
App Part 4: Multiple Document Interface
Example: app_four
MDI Overview
First a bit of background... Every window has a Client Area, this is where
most programs draw images, place controls etc... the Client Area is not
seperate from the window itself, it is simply a smaller specialised region
of it. Sometimes a window can be all client area, and nothing else,
sometimes the client area is smaller to make room for menus, titles,
scrollbars, etc...
In MDI terms, your main window is called the Frame, this is probably the
only window you would have in a SDI (Single Document Interface)
program. In MDI there is an additional window, called the MDI Client
Window which is a child of your Frame window. Unlike the Client Area it is a complete and seperate window all on it's
own, it has a client area of it's own and probably a few pixels for a border. You never directly handle messages for the
MDI Client, it is done by the pre-defined windows class
"MDICLIENT"
. You can communicate with and manipulate
the MDI Client and the windows it contains through messages.
When it comes to the windows which actually display your document or whatever your program displays, you send a
message to the MDI Client to tell it to create a new window of the type you've specified. The new window is created as
a child of the MDI Client, not of your Frame window. This new window is an MDI Child. The MDI Child is a child of
the MDI Client, which in turn is a child of the MDI Frame (Getting dizzy yet?). To make matters worse, the MDI Child
will probably have child windows of its own, for instance the edit control in the example program for this section.
You are responsable for writing two (or more) Window Procedures. One, just like always, for your main window(the
Frame). And one more for the MDI Child. You may also have more than one type of Child, in which case, you'll want a
seperate window procedure for each type.
If I've thoroughly confused you now talking about MDI Clients and things, this diagram may clear things up a little
better:
file:///C|/dona/forgers-win32-tutorial/tutorial/app_four.html (1 of 9) [7/8/2003 4:34:50 PM]
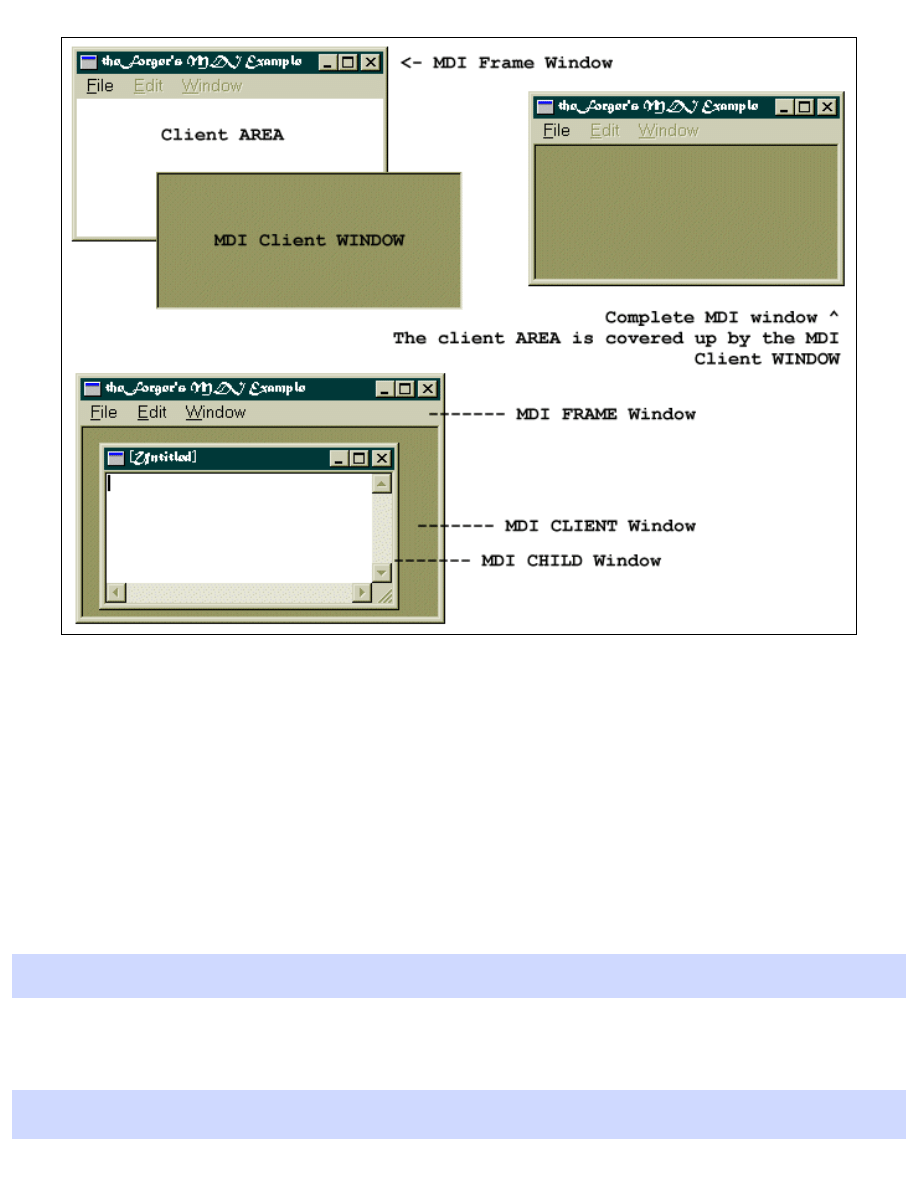
App Part 4: Multiple Document Interface
Getting Started with MDI
MDI requires a few subtle changes throughout a program, so please read through this section carefully... chances are
that if your MDI program doesn't work or has strange behaviour it's because you missed one of the alterations from a
regular program.
MDI Client Window
Before we create our MDI window we need to make a change to the default message processing that goes on in our
Window Procedure... since we're creating a Frame window that will host an MDI Client, we need to change the
DefWindowProc()
call to
DefFrameProc()
which adds specialized message handling for Frame Windows,
default:
return DefFrameProc(hwnd, g_hMDIClient, msg, wParam, lParam);
The next step is to create the MDI Client window itself, as a child of our frame window. We do this in
WM_CREATE
as
usual...
CLIENTCREATESTRUCT ccs;
file:///C|/dona/forgers-win32-tutorial/tutorial/app_four.html (2 of 9) [7/8/2003 4:34:50 PM]

App Part 4: Multiple Document Interface
ccs.hWindowMenu = GetSubMenu(GetMenu(hwnd), 2);
ccs.idFirstChild = ID_MDI_FIRSTCHILD;
g_hMDIClient = CreateWindowEx(WS_EX_CLIENTEDGE, "mdiclient", NULL,
WS_CHILD | WS_CLIPCHILDREN | WS_VSCROLL | WS_HSCROLL | WS_VISIBLE,
CW_USEDEFAULT, CW_USEDEFAULT, CW_USEDEFAULT, CW_USEDEFAULT,
hwnd, (HMENU)IDC_MAIN_MDI, GetModuleHandle(NULL), (LPVOID)&ccs);
The menu handle is the handle to the popup menu that the MDI client will add items to representing each window that
is created, allowing the user to select the window they want to activate from the menu, we'll add functionality shortly to
handle this case. In this example it's the 3rd popup (index 2) since I've added Edit and Window to the menu after File.
ccs.idFirstChild
is a number to use as the first ID for the items the Client adds to the Window menu... you want
this to be easily distinguishable from your own menu identifiers so you can handle your menu commands and pass the
Window menu commands to
DefFrameProc()
for processing. In the example I specify an identifier defined as
50000
, high enough that I know none of my menu command id's will be above it.
Now to get this menu to work properly we need to add some special handling to our
WM_COMMAND
handler:
case WM_COMMAND:
switch(LOWORD(wParam))
{
case ID_FILE_EXIT:
PostMessage(hwnd, WM_CLOSE, 0, 0);
break;
// ... handle other regular IDs ...
// Handle MDI Window commands
default:
{
if(LOWORD(wParam) >= ID_MDI_FIRSTCHILD)
{
DefFrameProc(hwnd, g_hMDIClient, msg, wParam, lParam);
}
else
{
HWND hChild = (HWND)SendMessage(g_hMDIClient,
WM_MDIGETACTIVE,0,0);
if(hChild)
{
SendMessage(hChild, WM_COMMAND, wParam, lParam);
}
}
}
}
break;
I've added a
default:
case which will catch all commands that I didn't process directly and do a check to see if the
file:///C|/dona/forgers-win32-tutorial/tutorial/app_four.html (3 of 9) [7/8/2003 4:34:50 PM]
App Part 4: Multiple Document Interface
value is greater than or equal to
ID_MDI_FIRSTCHILD
. If it is, then the user has clicked on one of the Window menu
items and we send the message on to
DefFrameProc()
for processing.
If it isn't one of the Window IDs then I get the handle to the active child window and forward the message to it for
processing. This allows you to delegate responsibility to the Child windows for performing certain actions, and allows
different child windows to handle commands in different ways if so desired. In the example I only handle commands
that are global to the program in the Frame window procedure, and send the commands which affect a certain
document or child window on to the child window itself for processsing.
Since we're building on the last example, the code to size the MDI client is the same as the code to resize the edit
control in the last example, that takes into account the size and position of the tool and status bars so they don't overlap
the MDI client window.
We also need to modify our message loop a little...
while(GetMessage(&Msg, NULL, 0, 0))
{
if (!TranslateMDISysAccel(g_hMDIClient, &Msg))
{
TranslateMessage(&Msg);
DispatchMessage(&Msg);
}
}
We've added an extra step (
TranslateMDISysAccel()
), that checks for the pre-defined accelerator keys, Ctrl+F6
which swtiches to the next window, Ctrl+F4 which closes the Child and so on. If you don't add in this check you will
annoy your users by not providing the standard behaviour they've gotten used to, or you'll have to implement it
manually.
Child Window Class
In addition to the main window of the program (the Frame window) we need to create new window classes for each
type of child window we want. For example you might have one to display text, and one to display a picture or graph.
In this example we'll only be creating one child type, which will be just like the editor program in the previous
examples.
BOOL SetUpMDIChildWindowClass(HINSTANCE hInstance)
{
WNDCLASSEX wc;
wc.cbSize = sizeof(WNDCLASSEX);
wc.style = CS_HREDRAW | CS_VREDRAW;
wc.lpfnWndProc = MDIChildWndProc;
wc.cbClsExtra = 0;
wc.cbWndExtra = 0;
wc.hInstance = hInstance;
wc.hIcon = LoadIcon(NULL, IDI_APPLICATION);
wc.hCursor = LoadCursor(NULL, IDC_ARROW);
wc.hbrBackground = (HBRUSH)(COLOR_3DFACE+1);
file:///C|/dona/forgers-win32-tutorial/tutorial/app_four.html (4 of 9) [7/8/2003 4:34:50 PM]
App Part 4: Multiple Document Interface
wc.lpszMenuName = NULL;
wc.lpszClassName = g_szChildClassName;
wc.hIconSm = LoadIcon(NULL, IDI_APPLICATION);
if(!RegisterClassEx(&wc))
{
MessageBox(0, "Could Not Register Child Window", "Oh Oh...",
MB_ICONEXCLAMATION | MB_OK);
return FALSE;
}
else
return TRUE;
}
This is basically identical to registering our regular frame window, there are no particularly special flags here for use
with MDI. We've set the menu as NULL, and the window procedure to point to the child window procedure which we
will write next.
MDI Child Procedure
The window procecure for an MDI child is much like any other with a few small exceptions. First of all, default
messages are passed to
DefMDIChildProc()
instead of
DefWindowProc()
.
In this particular case, we also want to disable the Edit and Window menu's when they aren't needed (just because it's a
nice thing to do), so we handle
WM_MDIACTIVEATE
and enable or disable them depending on if our window is
getting activated or not. If you have multiple types of child window, this is where you could put code to completely
change the menu or toolbar or make alterations to other aspects of the program to reflect the actions and commands that
are specific to the type of window being activated.
To be even more complete, we can disable the Close and Save File menu items as well, since they aren't going to be
any good with no windows to act on. I've disabled all these items by default in the resource so that I don't need to add
extra code to do it when the application first starts up.
LRESULT CALLBACK MDIChildWndProc(HWND hwnd, UINT msg, WPARAM wParam, LPARAM
lParam)
{
switch(msg)
{
case WM_CREATE:
{
HFONT hfDefault;
HWND hEdit;
// Create Edit Control
hEdit = CreateWindowEx(WS_EX_CLIENTEDGE, "EDIT", "",
WS_CHILD | WS_VISIBLE | WS_VSCROLL | WS_HSCROLL | ES_MULTILINE |
ES_AUTOVSCROLL | ES_AUTOHSCROLL,
0, 0, 100, 100, hwnd, (HMENU)IDC_CHILD_EDIT,
file:///C|/dona/forgers-win32-tutorial/tutorial/app_four.html (5 of 9) [7/8/2003 4:34:50 PM]
App Part 4: Multiple Document Interface
GetModuleHandle(NULL), NULL);
if(hEdit == NULL)
MessageBox(hwnd, "Could not create edit box.", "Error", MB_OK |
MB_ICONERROR);
hfDefault = GetStockObject(DEFAULT_GUI_FONT);
SendMessage(hEdit, WM_SETFONT, (WPARAM)hfDefault, MAKELPARAM(FALSE,
0));
}
break;
case WM_MDIACTIVATE:
{
HMENU hMenu, hFileMenu;
UINT EnableFlag;
hMenu = GetMenu(g_hMainWindow);
if(hwnd == (HWND)lParam)
{ //being activated, enable the menus
EnableFlag = MF_ENABLED;
}
else
{ //being de-activated, gray the menus
EnableFlag = MF_GRAYED;
}
EnableMenuItem(hMenu, 1, MF_BYPOSITION | EnableFlag);
EnableMenuItem(hMenu, 2, MF_BYPOSITION | EnableFlag);
hFileMenu = GetSubMenu(hMenu, 0);
EnableMenuItem(hFileMenu, ID_FILE_SAVEAS, MF_BYCOMMAND |
EnableFlag);
EnableMenuItem(hFileMenu, ID_FILE_CLOSE, MF_BYCOMMAND | EnableFlag);
EnableMenuItem(hFileMenu, ID_FILE_CLOSEALL, MF_BYCOMMAND |
EnableFlag);
DrawMenuBar(g_hMainWindow);
}
break;
case WM_COMMAND:
switch(LOWORD(wParam))
{
case ID_FILE_OPEN:
DoFileOpen(hwnd);
break;
case ID_FILE_SAVEAS:
DoFileSave(hwnd);
break;
case ID_EDIT_CUT:
SendDlgItemMessage(hwnd, IDC_CHILD_EDIT, WM_CUT, 0, 0);
file:///C|/dona/forgers-win32-tutorial/tutorial/app_four.html (6 of 9) [7/8/2003 4:34:50 PM]

App Part 4: Multiple Document Interface
break;
case ID_EDIT_COPY:
SendDlgItemMessage(hwnd, IDC_CHILD_EDIT, WM_COPY, 0, 0);
break;
case ID_EDIT_PASTE:
SendDlgItemMessage(hwnd, IDC_CHILD_EDIT, WM_PASTE, 0, 0);
break;
}
break;
case WM_SIZE:
{
HWND hEdit;
RECT rcClient;
// Calculate remaining height and size edit
GetClientRect(hwnd, &rcClient);
hEdit = GetDlgItem(hwnd, IDC_CHILD_EDIT);
SetWindowPos(hEdit, NULL, 0, 0, rcClient.right, rcClient.bottom,
SWP_NOZORDER);
}
return DefMDIChildProc(hwnd, msg, wParam, lParam);
default:
return DefMDIChildProc(hwnd, msg, wParam, lParam);
}
return 0;
}
I've implemented the File Open and Save as commands, the
DoFileOpen()
and
DoFileSave()
are nearly the
same as in previous examples with the ID of the edit control changed, and additionally setting the title of the MDI
Child to the filename.
The Edit commands are easy, because the edit control has built in support for them, we just tell it what to do.
Remember I mentioned that there are little things you need to remember or your application will behave strangely?
Note that I've called
DefMDIChildProc()
at the end of
WM_SIZE
, this is important otherwise the system wont'
have a chance to do it's own processing on the message. You can look up
DefMDIChildProc()
in MSDN for a list
of the messages that it processes, and always be sure to pass them to it.
Creating and Destroying Windows
MDI Child windows are not created directly, isntead we send a
WM_MDICREATE
message to the client window telling
it what kind of window we want by setting the members of an
MDICREATESTRUCT
. You can look up the various
members of this struct in your documentation, they are fairly straight forward. The return value from the
WM_MDICREATE
message is the handle to the newly created window.
HWND CreateNewMDIChild(HWND hMDIClient)
file:///C|/dona/forgers-win32-tutorial/tutorial/app_four.html (7 of 9) [7/8/2003 4:34:50 PM]
App Part 4: Multiple Document Interface
{
MDICREATESTRUCT mcs;
HWND hChild;
mcs.szTitle = "[Untitled]";
mcs.szClass = g_szChildClassName;
mcs.hOwner = GetModuleHandle(NULL);
mcs.x = mcs.cx = CW_USEDEFAULT;
mcs.y = mcs.cy = CW_USEDEFAULT;
mcs.style = MDIS_ALLCHILDSTYLES;
hChild = (HWND)SendMessage(hMDIClient, WM_MDICREATE, 0, (LONG)&mcs);
if(!hChild)
{
MessageBox(hMDIClient, "MDI Child creation failed.", "Oh Oh...",
MB_ICONEXCLAMATION | MB_OK);
}
return hChild;
}
One member of
MDICREATESTRUCT
that I didn't use that can be quite usefull is the
lParam
member. This can be
used to send any 32bit value (like a pointer) to the child you are creating in order to provide it with any custom
information you choose. In the
WM_CREATE
handler for your child window, the
lParam
value for the
WM_CREATE
message will point to a
CREATESTRUCT
. the
lpCreateParams
member of that structure will point to the
MDICREATESTRUCT
you sent along with
WM_MDICREATE
. So in order to access the
lParam
value from the Child
window you need to do something like this in the child window procedure...
case WM_CREATE:
{
CREATESTRUCT* pCreateStruct;
MDICREATESTRUCT* pMDICreateStruct;
pCreateStruct = (CREATESTRUCT*)lParam;
pMDICreateStruct = (MDICREATESTRUCT*)pCreateStruct->lpCreateParams;
/*
pMDICreateStruct now points to the same MDICREATESTRUCT that you
sent along with the WM_MDICREATE message and you can use it
to access the lParam.
*/
}
break;
If you don't want to bother with those two extra pointers you can access the lParam in one step with
((MDICREATESTRUCT*)((CREATESTRUCT*)lParam)->lpCreateParams)->lParam
Now we can implement the File commands on our menu in our Frame window procedure:
case ID_FILE_NEW:
file:///C|/dona/forgers-win32-tutorial/tutorial/app_four.html (8 of 9) [7/8/2003 4:34:50 PM]
App Part 4: Multiple Document Interface
CreateNewMDIChild(g_hMDIClient);
break;
case ID_FILE_OPEN:
{
HWND hChild = CreateNewMDIChild(g_hMDIClient);
if(hChild)
{
DoFileOpen(hChild);
}
}
break;
case ID_FILE_CLOSE:
{
HWND hChild = (HWND)SendMessage(g_hMDIClient, WM_MDIGETACTIVE,0,0);
if(hChild)
{
SendMessage(hChild, WM_CLOSE, 0, 0);
}
}
break;
We can also provide some default MDI processing of window arrangment for our Window menu, since MDI supports
this itself it's not much work.
case ID_WINDOW_TILE:
SendMessage(g_hMDIClient, WM_MDITILE, 0, 0);
break;
case ID_WINDOW_CASCADE:
SendMessage(g_hMDIClient, WM_MDICASCADE, 0, 0);
break;
Copyright © 1998-2003, Brook Miles (
file:///C|/dona/forgers-win32-tutorial/tutorial/app_four.html (9 of 9) [7/8/2003 4:34:50 PM]
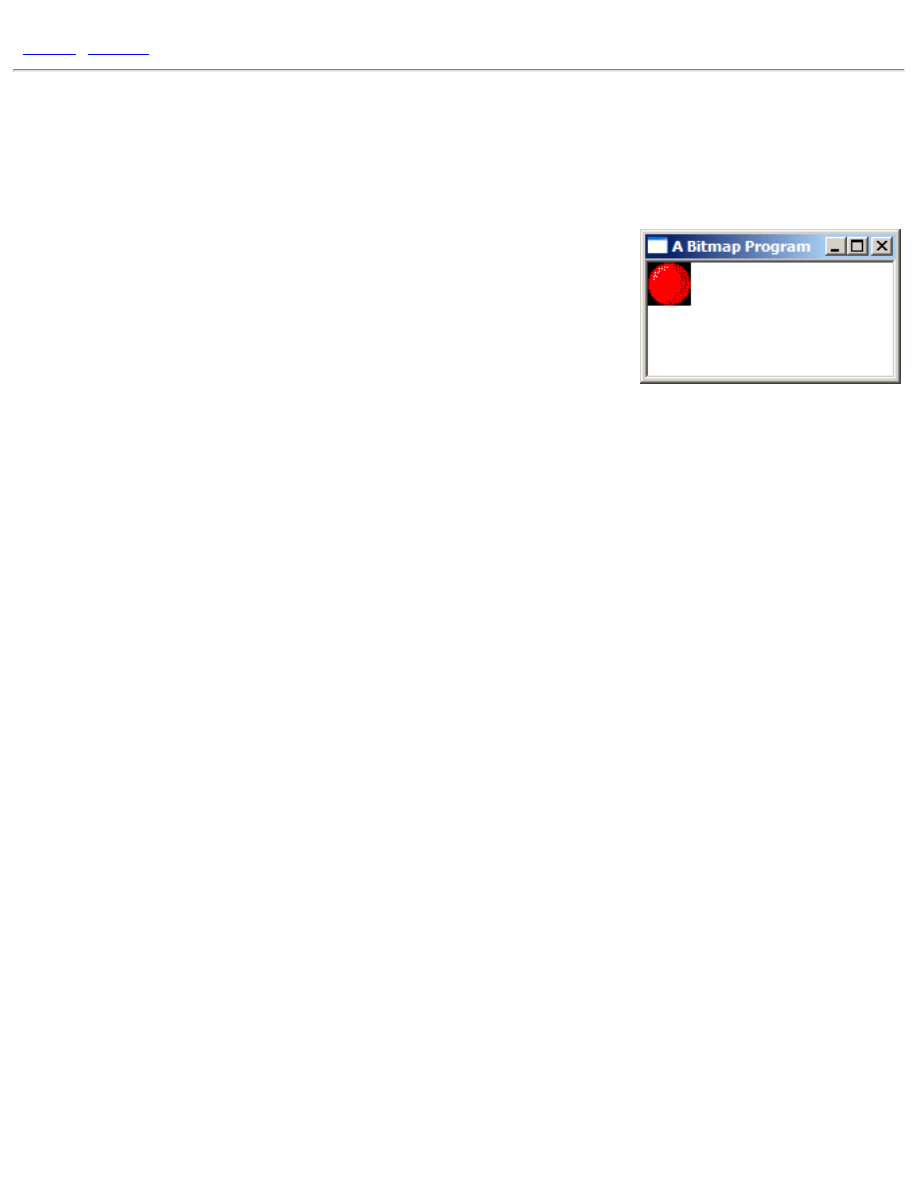
Bitmaps, Device Contexts and BitBlt
[
|
]
Bitmaps, Device Contexts and BitBlt
Example: bmp_one
GDI
The really great thing about MS Windows is that unlike DOS, you don't need
to know anything about what video hardware you are using to display
graphics. Instead, windows provides an API called the Graphics Device
Interface, or GDI. The GDI uses a set of generic graphics objects that can be
used to draw to the screen, to memory, or even to printers.
Device Contexts
The GDI revolves around an object called the Device Context (DC), represented by the data type
HDC
(Handle
to Device Context). An HDC is basically a handle to something you can draw on; it can represent the entire
screen, an entire window, the client area of a window, a bitmap stored in memory, or a printer. The nice part is
that you don't even need to know which one it refers to, you can use it basically the same way, which is
especially handy for writing custom drawing functions which you can then use on any of these devices
without changing it for each one.
An HDC like most GDI objects is opaque, meaning that you can't access it's data directly... but you can pass it
to various GDI functions that will operate on it, either to draw something, get information about it, or change
the object in some way.
For example, if you wanted to draw on a window, first you would retreive an
HDC
representing the window
with
GetDC()
, then you could use any of the GDI functions that take an
HDC
like
BitBlt()
for drawing
images,
TextOut()
for drawing text,
LineTo()
for lines and so on.
Bitmaps
Bitmaps can be loaded much like icons in earlier examples, there is
LoadBitmap()
for the most basic
functionality of simply loading a bitmap resource, and
LoadImage()
can be used to load bitmaps from a
*.bmp
file just as it can for icons.
One of the quirks of GDI is that you can't draw to bitmap objects (
HBITMAP
type) directly. Remember that
drawing operations are abstracted by Device Contexts, so in order to use these drawing functions on a bitmap,
you need to create a Memory DC, and then select the
HBITMAP
into it with
SelectObject()
. The effect
is that the "device" that the
HDC
refers to is the bitmap in memory, and when you operate on the
HDC
, the
resulting graphic operations are applied to the bitmap. As I mentioned, this is actually a very conveiniant way
file:///C|/dona/forgers-win32-tutorial/tutorial/bitmaps.html (1 of 5) [7/8/2003 4:34:50 PM]

Bitmaps, Device Contexts and BitBlt
of doing things, as you can write code that draws to an
HDC
and you can use it on a Window DC or a Memory
DC without any checks or changes.
You do have the option of manipulating the bitmap data in memory yourself. You can do this with Device
Independant Bitmaps (DIB), and you can even combine GDI and manual operations on the DIB. However for
the time being, this is beyond the scope of the basic tutorial and for now we're just cover the simpler GDI
operations on their own.
GDI Leaks
Once you're finished with an
HDC
, it's very important to release it (just how you do that depends on how you
got it, which we'll talk about in a bit). GDI objects are limited in number. In versions of windows prior to
Windows 95, they were not only incredably limited but also shared system wide, so that if one program used
up too many, none of the rest would be able to draw anything! Fortunately this isn't the case any longer, and
you could get away with using up quite a lot of resources in Windows 2000 or XP before anything too bad
happened... but it's easy to forget to free GDI objects and they can quickly run your program out of GDI
resources under Windows 9x. Theorehtically you shouldn't be able to drain the system of GDI resources in NT
systems (NT/2K/XP) but it still happens in extreme cases, or if you hit the right bug on the nose.
If your program runs fine for a few minutes and then starts drawing strangely or not at all, it's a good sign that
you're leaking GDI resources. HDCs aren't the only GDI objects you need to be careful about releasing, but
generally it's ok to keep things like bitmaps and fonts around for the entire lifetime of your program, since it's
much more efficiant than reloading them each time you need them.
Also, an HDC can only contain one of each type of object (bitmap, font, pen...) at a time, and when you select
a new one in it will return the last one. It's very important that you deal with this object properly. If you ignore
it completely, it will be lost and they will pile up in memory causing GDI leaks. When an HDC is created, it's
also created with some default objects selected into it... it's a good idea to store these when they are returned to
you, and then when you are completed drawing with the
HDC
select them back into it. This will not only
remove any of your own objects from the
HDC
(which is a good thing) but it will also cause the default objects
to be properly disposed of when you release or destroy the
HDC
(a VERY good thing).
Important Update: Not all objects have defaults selected into
HDC
s, and you can refer to MSDN for the few
that don't. Because of this I was previously uncertain as to wether
HBITMAP
s were one of them, since there
doesn't seem to be any definitive documentation on it, and examples (even those by Microsoft) often ignored
the default bitmap. Since the writing of the original tutorial several years ago, it was confirmed to me that
there was in fact a default bitmap that needs releasing. This information is courtesy of Shaun Ivory, a software
engineer for MS and a friend of mine from #winprog.
Apparently there was a bug in a screensaver written at MS, and it turns out it was because the default bitmap
wasn't getting replaced or destroyed, and it eventually ran out of GDI resources. Be warned! It's an easy
mistake to make.
Displaying Bitmaps
file:///C|/dona/forgers-win32-tutorial/tutorial/bitmaps.html (2 of 5) [7/8/2003 4:34:50 PM]
Bitmaps, Device Contexts and BitBlt
Ok, down to business. The simplest drawing operations on a window occure by handling
WM_PAINT
. When
your window is first displayed, restored from being minimised, or uncovered from having another window on
top of it, Windows sends the
WM_PAINT
message to the window to let it know that it needs to redraw it's
contents. When you draw something on the screen it is NOT permanent, it's only there untill something else
draws over it, and at that point you need to draw it again when the time comes.
HBITMAP g_hbmBall = NULL;
case WM_CREATE:
g_hbmBall = LoadBitmap(GetModuleHandle(NULL),
MAKEINTRESOURCE(IDB_BALL));
if(g_hbmBall == NULL)
MessageBox(hwnd, "Could not load IDB_BALL!", "Error", MB_OK |
MB_ICONEXCLAMATION);
break;
The first step is of course loading the bitmap, this is quite simple with a bitmap resource, there are no
significant differences from loading other resource types. Then we can get down to drawing...
case WM_PAINT:
{
BITMAP bm;
PAINTSTRUCT ps;
HDC hdc = BeginPaint(hwnd, &ps);
HDC hdcMem = CreateCompatibleDC(hdc);
HBITMAP hbmOld = SelectObject(hdcMem, g_hbmBall);
GetObject(g_hbmBall, sizeof(bm), &bm);
BitBlt(hdc, 0, 0, bm.bmWidth, bm.bmHeight, hdcMem, 0, 0, SRCCOPY);
SelectObject(hdcMem, hbmOld);
DeleteDC(hdcMem);
EndPaint(hwnd, &ps);
}
break;
Getting the Window DC
To start off we declare a couple of variables we need. Notice that the first one is a
BITMAP
, not an
HBITMAP
.
BITMAP
is a struct that holds information about an
HBITMAP
which is the actual GDI object. We need a way
to get the height and width of the
HBITMAP
so we use
GetObject()
which contrary to it's name doesn't
file:///C|/dona/forgers-win32-tutorial/tutorial/bitmaps.html (3 of 5) [7/8/2003 4:34:50 PM]

Bitmaps, Device Contexts and BitBlt
really get an object, but rather information about an existing one. "GetObjectInfo" would have been a more
appropriate label.
GetObject()
works for various GDI object types which it can distinguish based on the
value of the second parameter, the size of the structure.
The
PAINTSTRUCT
is a structure that contains information about the window being painted and what exactly
is going on with the paint message. For most simple tasks, you can simply ignore the information it contains,
but it's required for the call to
BeginPaint()
.
BeginPaint()
as it's name suggests is designed
specifically for handling the
WM_PAINT
message. When not handling a
WM_PAINT
message you would use
GetDC()
which we will see in the timer animation examples in a while... but in
WM_PAINT
, it's important to
use
BeginPaint()
and
EndPaint()
.
BeginPaint()
returns us an
HDC
that represents the
HWND
that we pass to it, the one that
WM_PAINT
is
being handled for. Any drawing operation we perform on this
HDC
will immediately display on the screen.
Setting up a Memory DC for the Bitmap
As I mention above, in order to draw on or with bitmaps, we need to create a DC in memory... the easiest way
to do that here is to
CreateCompatibleDC()
with the one we already have. This gives us a Memory DC
that is compatible with the color depth and display properties of the
HDC
for the window.
Now we call
SelectObject()
to select the bitmap into the DC being careful to store the default bitmap so
that we can replace it later on and not leak GDI objects.
Drawing
Once we've gotten the dimentions of the bitmap filled into the
BITMAP
struct, we can call
BitBlt()
to copy
the image from our Memory DC to the Window DC, thus displaying on the screen. As always, you can look
up each parameter in MSDN, but in short they are: The destination, the position and size, the source and
source position, and finally the Raster Operation (ROP code), which specifies how to do the copy. In this case,
we want a simple exact copy of the source made, no fancy stuff.
BitBlt()
is probably the all time happiest function in all of the Win32 API and is the staple diet of anyone
learning to write games or other graphics applications in windows. It was probably the first API that I
memorised all the parameters to.
Cleanup
At this point the bitmap should be on the screen, and we need to clean up after ourselves. The first thing to do
is restore the Memory DC to the state it was when we got it, which means replacing our bitmap with the
default one that we saved. Next we can delete it altogether with
DeleteDC()
.
Finally we release the Window DC we got from
BeginPaint()
using
EndPaint()
.
Destroying an
HDC
is a little confusing sometimes because there are at least 3 ways to do it depending on how
file:///C|/dona/forgers-win32-tutorial/tutorial/bitmaps.html (4 of 5) [7/8/2003 4:34:50 PM]
Bitmaps, Device Contexts and BitBlt
you got it in the first place. Here's a list of the common methods of gaining an HDC, and how to release it
when you're done.
●
GetDC() - ReleaseDC()
●
BeginPaint() - EndPaint()
●
CreateCompatibleDC() - DeleteDC()
And finally, at the termination of our program, we want to free any resources that we allocated. Technically
speaking this isn't absolutely required, since modern Windows platforms are pretty good at freeing everything
when your program exists, but it's always a good idea to keep track of your own objects because if get lazy
and don't delete them they have a habit of getting loose. And no doubt, there are still bugs in windows
especially older versions that won't clean up all of your GDI objects if you don't do a thorough job.
case WM_DESTROY:
DeleteObject(g_hbmBall);
PostQuitMessage(0);
break;
Copyright © 1998-2003, Brook Miles (
file:///C|/dona/forgers-win32-tutorial/tutorial/bitmaps.html (5 of 5) [7/8/2003 4:34:50 PM]
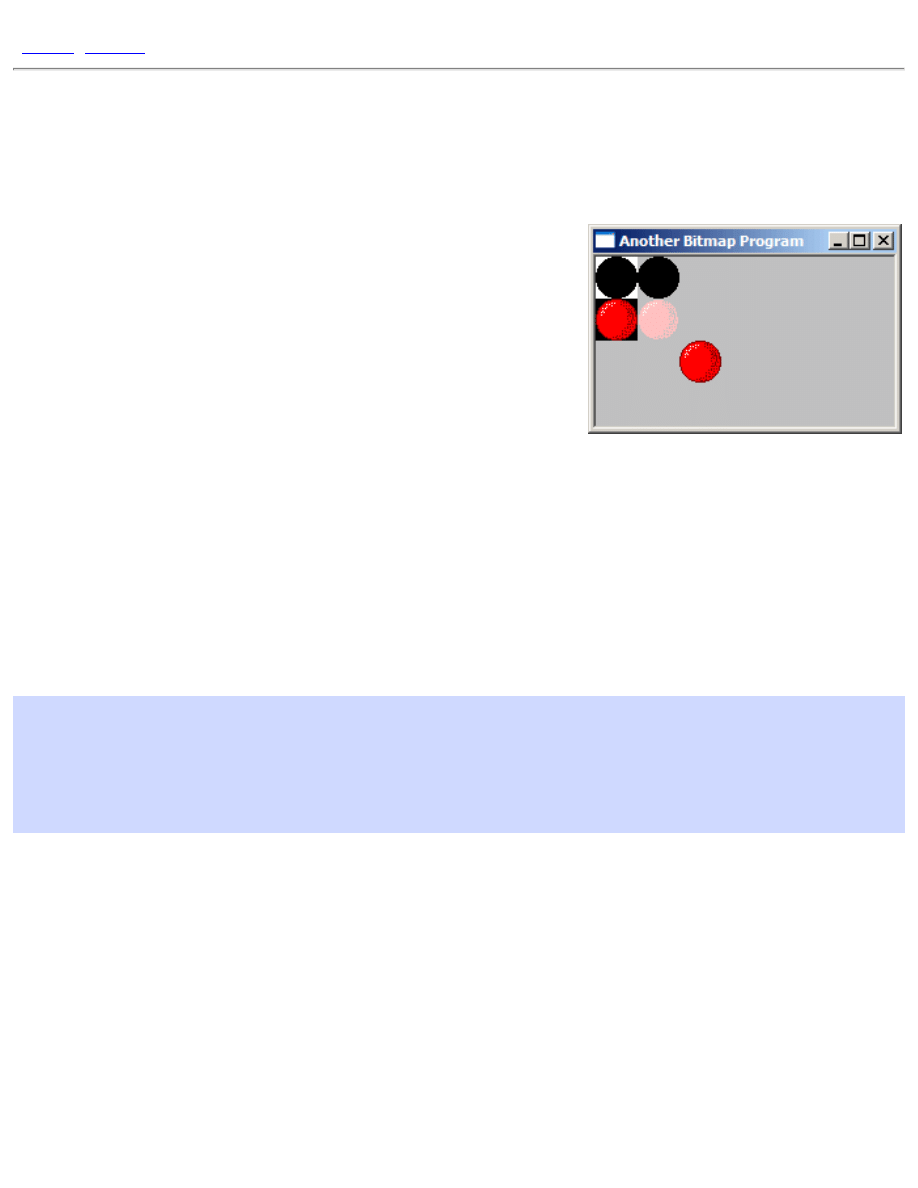
Transparent Bitmaps
]
Transparent Bitmaps
Example: bmp_two
Transparency
Giving bitmaps the appearance of having transparent sections is quite
simple, and involves the use of a black and white Mask image in
addition to the colour image that we want to look transparent.
The following conditions need to be met for the effect to work correctly:
First off, the colour image must be black in all areas that we want to
display as transparent. And second, the mask image must be white in
the areas we want transparent, and black elsewhere. The colour and mask images are displayed as the two left
most images in the example picture on this page.
BitBlt operations
How does this get us transparency? First we
BitBlt()
the mask image using the
SRCAND
operation as the last
parameter, and then on top of that we
BitBlt()
the colour image using the
SRCPAINT
operation. The result is
that the areas we wanted transparent don't change on the destination
HDC
while the rest of the image is drawn as
usual.
SelectObject(hdcMem, g_hbmMask);
BitBlt(hdc, 0, 0, bm.bmWidth, bm.bmHeight, hdcMem, 0, 0, SRCAND);
SelectObject(hdcMem, g_hbmBall);
BitBlt(hdc, 0, bm.bmHeight, bm.bmWidth, bm.bmHeight, hdcMem, 0, 0,
SRCPAINT);
Pretty simple eh? Fortunately it is, but one question remains... where does the mask come from? There are
basically two ways to get the mask...
●
Make it yourself in whatever graphics program you made the colour bitmap in, and this is a reasonable
solution if you are using a limited number of graphics in your program. This way you can just add the
mask resource to your program and load it with
LoadBitmap()
.
●
Generate it when your program runs, by selecting one colour in your original image to be your
"transparent" colour, and create a mask that is white everywhere that colour exists, and black everywhere
else.
Since the first one is nothing new, you should be able to do things that way yourself if you want to. The second
file:///C|/dona/forgers-win32-tutorial/tutorial/transparency.html (1 of 5) [7/8/2003 4:34:51 PM]
Transparent Bitmaps
way involves from
BitBlt()
trickery, and so I will show one way of accomplishing this.
Mask Creation
The simplest way to do it, would be to loop through every pixel on the colour image, check it's value and then set
the corresponding pixel on the mask to black or white...
SetPixel()
is a very slow way to draw images
however, and it's not really practical.
A much more efficient way involves using the way
BitBlt()
converts from colour images to black and white.
If you
BitBlt()
(using
SRCCOPY
) from an
HDC
holding a colour image into an
HDC
holding a black and white
image, it will check what colour is set as the Background Colour on the colour image, and set all of those pixels
to White, any pixel that is not the background colour will end up Black.
This works perfectly to our advantage, since all we need to do is set the background colour to the colour we want
transparent, and
BitBlt()
from the colour image to the mask image. Note that this only works with a mask
bitmap that is monochrome (black and white)... that is bitmaps with a bit depth of 1 bit per pixel. If you try it
with a colour image that only has black and white pixels, but the bitmap itself is greater than 1 bit (say 16 or 24
bit) then it won't work.
Remember the first condition for succesful masking above? It was that the colour image needs to be black
everywhere we want transparent. Since the bitmap I used in this example already meets that condition it doesn't
really need anything special done, but if you're going to use this code for another image that has a different colour
that you want transparent (hot pink is a common choice) then we need to take a second step, and that is use the
mask we just created to alter the original image, so that everywhere we want transparent is black. It's ok if other
places are black too, because they aren't white on the mask, they won't end up transparent. We can accomplish
this by
BitBlt()
ing from the new mask to the original colour image, using the
SRCINVERT
operation, which
sets all the areas that are white in the mask to black in the colour image.
This is all a bit of a complex process, and so it's nice to have a handy utility function that does this all for us, and
here it is:
HBITMAP CreateBitmapMask(HBITMAP hbmColour, COLORREF crTransparent)
{
HDC hdcMem, hdcMem2;
HBITMAP hbmMask;
BITMAP bm;
// Create monochrome (1 bit) mask bitmap.
GetObject(hbmColour, sizeof(BITMAP), &bm);
hbmMask = CreateBitmap(bm.bmWidth, bm.bmHeight, 1, 1, NULL);
// Get some HDCs that are compatible with the display driver
hdcMem = CreateCompatibleDC(0);
hdcMem2 = CreateCompatibleDC(0);
file:///C|/dona/forgers-win32-tutorial/tutorial/transparency.html (2 of 5) [7/8/2003 4:34:51 PM]
Transparent Bitmaps
SelectBitmap(hdcMem, hbmColour);
SelectBitmap(hdcMem2, hbmMask);
// Set the background colour of the colour image to the colour
// you want to be transparent.
SetBkColor(hdcMem, crTransparent);
// Copy the bits from the colour image to the B+W mask... everything
// with the background colour ends up white while everythig else ends up
// black...Just what we wanted.
BitBlt(hdcMem2, 0, 0, bm.bmWidth, bm.bmHeight, hdcMem, 0, 0, SRCCOPY);
// Take our new mask and use it to turn the transparent colour in our
// original colour image to black so the transparency effect will
// work right.
BitBlt(hdcMem, 0, 0, bm.bmWidth, bm.bmHeight, hdcMem2, 0, 0, SRCINVERT);
// Clean up.
DeleteDC(hdcMem);
DeleteDC(hdcMem2);
return hbmMask;
}
NOTE: This function call
SelectObject()
to temporarily select the colour bitmap we pass it into an
HDC
. A
bitmap can't be selected into more than one
HDC
at a time, so make sure the bitmap isn't selected in to another
HDC
when you call this function or it will fail. Now that we have our handy dandy function, we can create a mask
from the original picture as soon as we load it:
case WM_CREATE:
g_hbmBall = LoadBitmap(GetModuleHandle(NULL),
MAKEINTRESOURCE(IDB_BALL));
if(g_hbmBall == NULL)
MessageBox(hwnd, "Could not load IDB_BALL!", "Error", MB_OK |
MB_ICONEXCLAMATION);
g_hbmMask = CreateBitmapMask(g_hbmBall, RGB(0, 0, 0));
if(g_hbmMask == NULL)
MessageBox(hwnd, "Could not create mask!", "Error", MB_OK |
MB_ICONEXCLAMATION);
break;
The second parameter is of course the colour from the original image that we want to be transparent, in this case
black.
file:///C|/dona/forgers-win32-tutorial/tutorial/transparency.html (3 of 5) [7/8/2003 4:34:51 PM]

Transparent Bitmaps
How does all this work?
.. you may be asking. Well hopefully your experience with C or C++ means that you understand binary
operations such as OR, XOR, AND, NOT and so on. I'm not going to explain this process completely, but I will
try to show how I used it for this example. If my explanation isn't clear enough (which it's bound to not be),
reading up on binary operations should help you understand it. Understanding it isn't critical for using it right
now, and you can just get away with trusting that it works if you want.
SRCAND
The
SRCAND
raster operation, or ROP code for
BitBlt()
means to combine the bits using
AND
. That is: only
bits that are set both in the source AND the destination get set in the final result. We use this with our mask to set
to black all the pixels that will eventually have colour on them from the colour image. The mask image has black
(which in binary is all 0's) where we want colour, and white (all 1's) where we want transparency. Any value
combined with 0 using AND is 0, and therefor all the pixels that are black in the mask are set to 0 in the result
and end up black as well. Any value that is combined with 1 using AND is left unaffected, so if it was 1 to begin
with it stays 1, and if it was 0 to begin with it stays 0... therefor all the pixels that are white in our mask, are
completely unaffected after the
BitBlt()
call. The result is the top right image in the example picture.
SRCPAINT
SRCPAINT
uses the OR operation, so if either (or both) of the bits are set, then they will be set in the result. We
use this on the colour image. When the black (transparent) part of our colour image is combined with the data on
the destination using OR, the result is that the data is untouched, because any value combined with 0 using the
OR operation is left unaffected.
However, the rest of our colour image isn't black, and if the destination also isn't black, then we get a
combination of the source and destination colours, the result you can see in the second ball on the second row in
the example picture. This is the whole reason for using the mask to set the pixels we want to colour to black first,
so that when we use OR with the colour image, the coloured pixels don't get mixed up with whatever is
underneath them.
SRCINVERT
This is the
XOR
operation used to set the transparent colour in our original image to black (if it isn't black
already). Combining a black pixel from the mask with a non-background colour pixel in the destination leaves it
untouched, while combining a white pixel from the mask (which remember we generated by setting a particular
colour as the "background") with the background colour pixel on the destination cancels it out, and sets it to
black.
This is all a little GDI mojo that depends on it's colour vs. monochrome handling, and it hurts my head to think
about it too much, but it really makes sense... honest.
Example
file:///C|/dona/forgers-win32-tutorial/tutorial/transparency.html (4 of 5) [7/8/2003 4:34:51 PM]
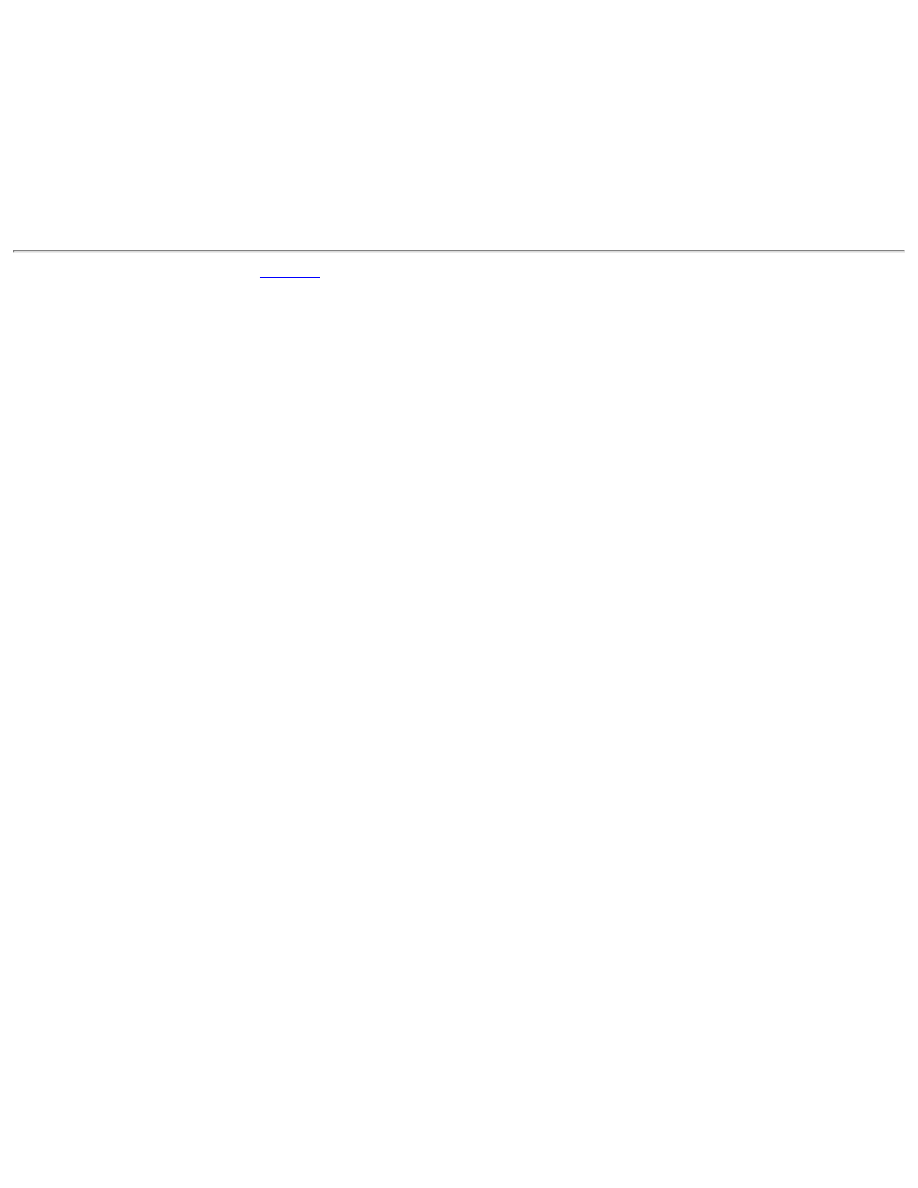
Transparent Bitmaps
The example code in the project bmp_two that goes along with this section contains the code for the example
picture on this page. It consists of first drawing the mask and the colour image exactly as they are using
SRCCOPY
, then using each one alone with the
SRCAND
and
SRCPAINT
operations respectively, and finally
combining them to produce the final product.
The background in this example is set to gray to make the transparency more obvious, as using these operations
on a white or black background makes it hard to tell if they're actually working or not.
Copyright © 1998-2003, Brook Miles (
). All rights reserved.
file:///C|/dona/forgers-win32-tutorial/tutorial/transparency.html (5 of 5) [7/8/2003 4:34:51 PM]
Timers and Animation
[
]
Timers and Animation
Example: anim_one
Setting up
Before we get things animated, we need to set up a structure to store the
position of the ball between updates. This struct will store the current
position and size of the ball, as well as the delta values, how much we want
it to move each frame.
Once we have the structure type declared, we also declare a global instance
of the struct. This is ok since we only have one ball, if were were going to
animate a bunch of them, you'd probably want to use an array or other container (such as a linked list in C++) to
store them in a more convenient way.
const int BALL_MOVE_DELTA = 2;
typedef struct _BALLINFO
{
int width;
int height;
int x;
int y;
int dx;
int dy;
}BALLINFO;
BALLINFO g_ballInfo;
We've also defined a constant
BALL_MOVE_DELTA
which is how far we want the ball to move on each update.
The reason we store deltas in the
BALLINFO
structure as well is that we want to be able to move the ball left or
right and up and down independantly,
BALL_MOVE_DELTA
is just a handy name to give the value so we can
change it later if we want.
Now we need to initialize this structure after we load our bitmaps:
BITMAP bm;
GetObject(g_hbmBall, sizeof(bm), &bm);
ZeroMemory(&g_ballInfo, sizeof(g_ballInfo));
file:///C|/dona/forgers-win32-tutorial/tutorial/animation.html (1 of 5) [7/8/2003 4:34:51 PM]
Timers and Animation
g_ballInfo.width = bm.bmWidth;
g_ballInfo.height = bm.bmHeight;
g_ballInfo.dx = BALL_MOVE_DELTA;
g_ballInfo.dy = BALL_MOVE_DELTA;
The ball starts off in the top left corner, moving to the right and down according to the
dx
and
dy
members of
BALLINFO
.
Setting the Timer
The easiest way to add a simple timer into a window program is with
SetTimer()
, it's not the best, and it's not
recommended for real multimedia or full games, however it's good enough for simple animations like this. When
you need something better take a look at
timeSetEvent()
in MSDN; it's more accurate.
const int ID_TIMER = 1;
ret = SetTimer(hwnd, ID_TIMER, 50, NULL);
if(ret == 0)
MessageBox(hwnd, "Could not SetTimer()!", "Error", MB_OK |
MB_ICONEXCLAMATION);
Here we've declared a timer id so that we can refer to it later (to kill it) and then set the timer in the
WM_CREATE
handler of our main window. Each time the timer elapses, it will send a
WM_TIMER
message to the window, and
pass us back the ID in
wParam
. Since we only have one timer we don't need the ID, but it's useful if you set more
than one timer and need to tell them apart.
We've set the timer to elapse every 50 milliseconds, which results in approximately 20 frames per second.
Approximately because like I said,
SetTimer()
is a little inaccurate, but this isn't critical code, and a few
milliseconds here or there won't kill us.
Animating in WM_TIMER
Now when we get
WM_TIMER
we want to calculate the new position for the ball and draw it's updated position.
case WM_TIMER:
{
RECT rcClient;
HDC hdc = GetDC(hwnd);
GetClientRect(hwnd, &rcClient);
UpdateBall(&rcClient);
DrawBall(hdc, &rcClient);
ReleaseDC(hwnd, hdc);
file:///C|/dona/forgers-win32-tutorial/tutorial/animation.html (2 of 5) [7/8/2003 4:34:51 PM]
Timers and Animation
}
break;
I've put the code for updating and drawing the ball in their own functions. This is good practice, and it lets us draw
the ball from either
WM_TIMER
or
WM_PAINT
without duplicating code, note that the method we use to get the
HDC
in each case is different, so it's best to leave this code in the message handlers and pass the result into the
DrawBall()
function.
void UpdateBall(RECT* prc)
{
g_ballInfo.x += g_ballInfo.dx;
g_ballInfo.y += g_ballInfo.dy;
if(g_ballInfo.x < 0)
{
g_ballInfo.x = 0;
g_ballInfo.dx = BALL_MOVE_DELTA;
}
else if(g_ballInfo.x + g_ballInfo.width > prc->right)
{
g_ballInfo.x = prc->right - g_ballInfo.width;
g_ballInfo.dx = -BALL_MOVE_DELTA;
}
if(g_ballInfo.y < 0)
{
g_ballInfo.y = 0;
g_ballInfo.dy = BALL_MOVE_DELTA;
}
else if(g_ballInfo.y + g_ballInfo.height > prc->bottom)
{
g_ballInfo.y = prc->bottom - g_ballInfo.height;
g_ballInfo.dy = -BALL_MOVE_DELTA;
}
}
All this does is some basic math, we add the delta value to the x position to move the ball. If the ball goes outside
the client area, move it back in range and change the delta value to the opposite direction so that the ball "bounces"
off the sides.
void DrawBall(HDC hdc, RECT* prc)
{
HDC hdcBuffer = CreateCompatibleDC(hdc);
HBITMAP hbmBuffer = CreateCompatibleBitmap(hdc, prc->right, prc->bottom);
HBITMAP hbmOldBuffer = SelectObject(hdcBuffer, hbmBuffer);
HDC hdcMem = CreateCompatibleDC(hdc);
file:///C|/dona/forgers-win32-tutorial/tutorial/animation.html (3 of 5) [7/8/2003 4:34:51 PM]
Timers and Animation
HBITMAP hbmOld = SelectObject(hdcMem, g_hbmMask);
FillRect(hdcBuffer, prc, GetStockObject(WHITE_BRUSH));
BitBlt(hdcBuffer, g_ballInfo.x, g_ballInfo.y, g_ballInfo.width,
g_ballInfo.height, hdcMem, 0, 0, SRCAND);
SelectObject(hdcMem, g_hbmBall);
BitBlt(hdcBuffer, g_ballInfo.x, g_ballInfo.y, g_ballInfo.width,
g_ballInfo.height, hdcMem, 0, 0, SRCPAINT);
BitBlt(hdc, 0, 0, prc->right, prc->bottom, hdcBuffer, 0, 0, SRCCOPY);
SelectObject(hdcMem, hbmOld);
DeleteDC(hdcMem);
SelectObject(hdcBuffer, hbmOldBuffer);
DeleteDC(hdcBuffer);
DeleteObject(hbmBuffer);
}
This is essentially the same drawing code as the past few examples, with the exception that it gets the position and
dimentions of the ball from the
BALLINFO
structure. There is however one important difference...
Double Buffering
When doing your drawing directly to the
HDC
of the window, it's entirely possible that the screen will get updated
before you're done... for example after you draw the mask and before you draw the colour image over top, the user
might see a flicker of the back background before your program has a chance to draw over it in colour. The slower
your computer and the more drawing operations that you do, the more flicker will be apparent and eventually it
will look like a big jumbled mess.
This is terribly distracting, and we can solve it simply by doing all the drawing in memory first, and then copying
the completed masterpiece to the screen in a single
BitBlt()
so that the screen is updated directly from the old
image, to the complete new image with none of the individual operations visible.
To do this, we create a temporary
HBITMAP
in memory that is the exact size of the area we are going to draw to
on the screen. We also need an
HDC
so that we can
BitBlt()
to the bitmap.
HDC hdcBuffer = CreateCompatibleDC(hdc);
HBITMAP hbmBuffer = CreateCompatibleBitmap(hdc, prc->right, prc->bottom);
HBITMAP hbmOldBuffer = SelectObject(hdcBuffer, hbmBuffer);
Now that we have a place to draw to in memory, all of the drawing operations use
hdcBuffer
instead of
hdc
(the window) and the results are stored on the bitmap in memory untill we are complete. We can now copy the
whole thing over to the window in one shot.
file:///C|/dona/forgers-win32-tutorial/tutorial/animation.html (4 of 5) [7/8/2003 4:34:51 PM]
Timers and Animation
BitBlt(hdc, 0, 0, prc->right, prc->bottom, hdcBuffer, 0, 0, SRCCOPY);
That's it, and we clean up our
HDC
s and
HBITMAP
s as usual.
Faster Double Buffering
In this example I am creating and destroying the bitmap used for double buffering each frame, I did this basically
because I wanted to be able to size the window so it's easier to just always create a new buffer than to track when
the window position changes and resize the buffer. It would be more efficient to create a global double buffer
bitmap and either not allow the window to resize or only resize the bitmap when the window resized, instead of
creating it and destroying it all the time. It's up to you to implement this if you want to optimize the drawing for a
game or something.
Killing the Timer
When our window is destroyed, it's a good idea to release all resources we used, and in this case that includes the
timer we set. To stop it, we simply call
KillTimer()
and pass in the ID that we used when we created it.
KillTimer(hwnd, ID_TIMER);
Copyright © 1998-2003, Brook Miles (
). All rights reserved.
file:///C|/dona/forgers-win32-tutorial/tutorial/animation.html (5 of 5) [7/8/2003 4:34:51 PM]
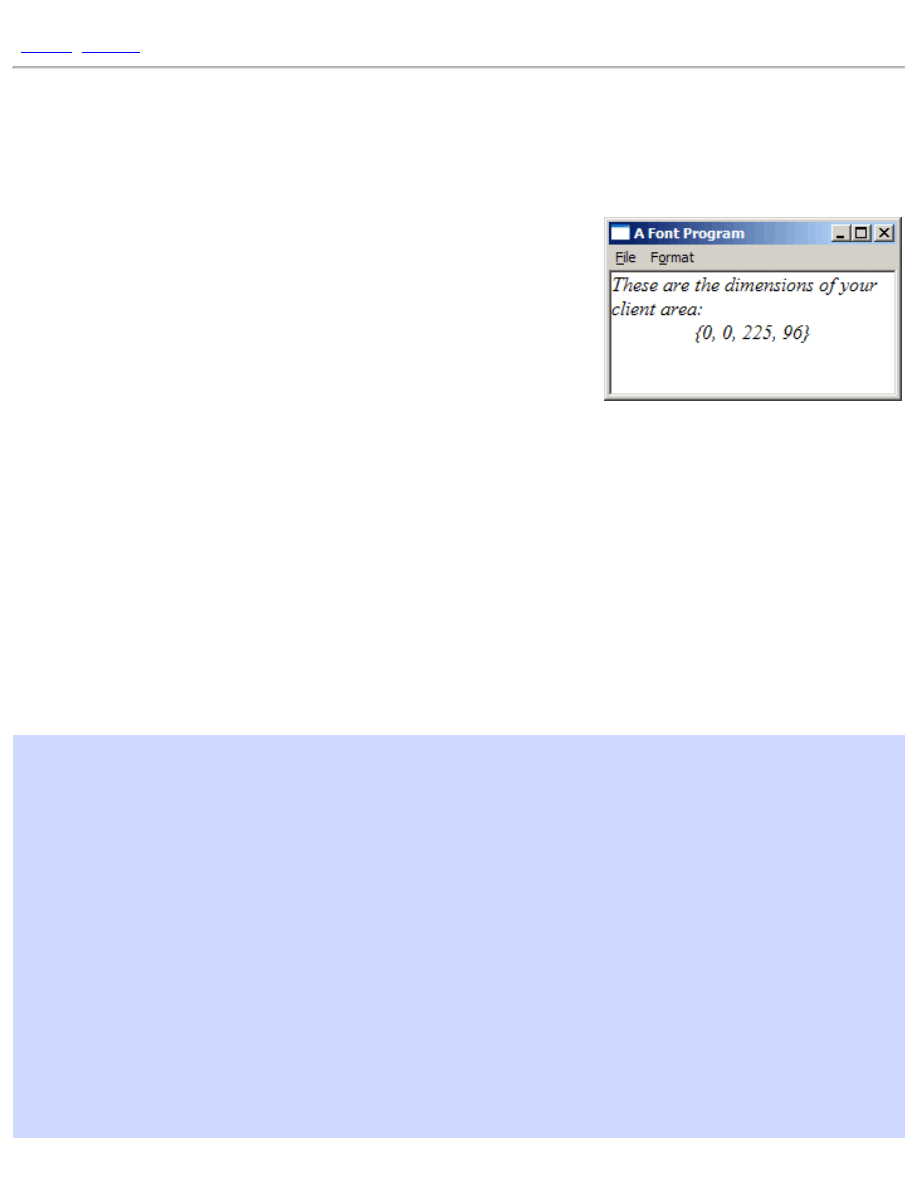
Text and Fonts
Text and Fonts
Example: font_one
Loading Fonts
The Win32 GDI has some remarkable capabilites for dealing with vastly
different typefaces, styles, languages and characters sets. One of the
drawbacks of this is that dealing with fonts can look rather intimidating to the
newcomer.
CreateFont()
, the primary API when it comes to fonts, has
14 parameters for specifying height, style, weight, family, and various other
attributes.
Fortunately, it's not really has hard as it might appear, and a large portion of the work involved is taken care of my
sensible default values. All but 2 of the parameters to
CreateFont()
can be set to
0
or
NULL
, and the system will
simply use a default value giving you a plain ordinary font.
CreateFont()
creates an
HFONT
, a handle to a Logical Font in memory. The data held by this handle can be
retreived into a
LOGFONT
structure using
GetObject()
just as a
BITMAP
struct can be filled from an
HBITMAP
.
The members of the
LOGFONT
are identical to the parameters to
CreateFont()
and for convenience you can
create a font directly from an existing
LOGFONT
structure using
CreateFontIndirect()
. This is very handy,
since it makes it simple to create a new font from an existing font handle when you only want to alter certain aspects
of it. Use
GetObject()
to fill a
LOGFONT
, alter the members that you wish, and create a new font with
CreateFontIndirect()
.
HFONT hf;
HDC hdc;
long lfHeight;
hdc = GetDC(NULL);
lfHeight = -MulDiv(12, GetDeviceCaps(hdc, LOGPIXELSY), 72);
ReleaseDC(NULL, hdc);
hf = CreateFont(lfHeight, 0, 0, 0, 0, TRUE, 0, 0, 0, 0, 0, 0, 0, "Times New
Roman");
if(hf)
{
DeleteObject(g_hfFont);
g_hfFont = hf;
}
else
{
file:///C|/dona/forgers-win32-tutorial/tutorial/fonts.html (1 of 6) [7/8/2003 4:34:52 PM]
Text and Fonts
MessageBox(hwnd, "Font creation failed!", "Error", MB_OK |
MB_ICONEXCLAMATION);
}
This is the code used to create the font in the example image. This is Times New Roman at 12 Point with the Italics
style set. The italics flag is the 6th parameter to
CreateFont()
which you can see we have set to
TRUE
. The name
of the font we want to use is the last parameter.
The one bit of trickery in this code is the value used for the size of the font, the
lfHeight
parameter to
CreateFont()
. Usually people are used to working with Point sizes, Size 10, Size 12, etc... when dealing with
fonts.
CreateFont()
however doesn't accept point sizes, it wants
Logical Units
which are different on your
screen than they are on your Printer, and even between Printers and screens.
The reason this situation exists is because the resolution of different devices is so vastly different... Printers can easily
display 600 to 1200 pixels per inch, while a screen is lucky to get 200... if you used the same sized font on a printer as
on a screen, you likely wouldn't even be able to see individual letters.
All we have to do is convert from the point size we want, into the appropriate logical size for the device. In this case
the device is the screen, so we get the
HDC
to the screen, and get the number of logical pixels per inch using
GetDeviceCaps()
and slap this into the formula so generously provided in MSDN which uses
MulDiv()
to
convert from our pointsize of
12
to the correct logical size that
CreateFont()
expects. We store this in
lfHeight
and pass it as the first parameter to
CreateFont()
.
Default Fonts
When you first call
GetDC()
to get the
HDC
to your window, the default font that is selected into it is System, which
to be honest isn't all that attractive. The simplest way to get a reasonable looking font to work with (without going
through the
CreateFont()
hassle) is to call
GetStockObject()
and ask for the
DEFAULT_GUI_FONT
.
This is a system object and you can get it as many times as you want without leaking memory, and you can call
DeleteObject()
on it which won't do anything, which is good because now you don't need to keep track of
whether your font is one from
CreateFont()
or
GetStockObject()
before trying to free it.
Drawing Text
Now that we have a handy-dandy font, how do we get some text on the screen? This is assuming that we don't just
want to use an Edit or Static control.
Your basic options are
TextOut()
and
DrawText()
.
TextOut()
is simpler, but has less options and doesn't do
word wrapping or alignment for you.
char szSize[100];
char szTitle[] = "These are the dimensions of your client area:";
HFONT hfOld = SelectObject(hdc, hf);
SetBkColor(hdc, g_rgbBackground);
SetTextColor(hdc, g_rgbText);
file:///C|/dona/forgers-win32-tutorial/tutorial/fonts.html (2 of 6) [7/8/2003 4:34:52 PM]

Text and Fonts
if(g_bOpaque)
{
SetBkMode(hdc, OPAQUE);
}
else
{
SetBkMode(hdc, TRANSPARENT);
}
DrawText(hdc, szTitle, -1, prc, DT_WORDBREAK);
wsprintf(szSize, "{%d, %d, %d, %d}", prc->left, prc->top, prc->right, prc-
>bottom);
DrawText(hdc, szSize, -1, prc, DT_SINGLELINE | DT_CENTER | DT_VCENTER);
SelectObject(hdc, hfOld);
First thing we do is use
SelectObject()
to get the font we want to use into our
HDC
and ready for drawing. All
future text operations will use this font untill another one is selected in.
Next we set the Text and Background colours. Setting the background colour doesn't actually make the whole
background this colour, it only affects certain operations (text being one of them) that use the background colour to
draw with. This is also dependant on the current Background Mode. If it is set to
OPAQUE
(the default) then any text
drawn is filled in behing with the background colour. If it is set to
TRANSPARENT
then text is drawn without a
background and whatever is behind will show through and in this case the background colour has no effect.
Now we actually draw the text using
DrawText()
, we pass in the
HDC
to use and the string to draw. The 3rd
parameter is the length of the string, but we've passed -1 because
DrawText()
is smart enough that it will figure out
how long the text is itself. In the 4th parameter we pass in
prc
, the pointer to the client
RECT
.
DrawText()
will
draw inside this rectangle based on the other flags that you give it.
In the first call, we specify
DT_WORDBREAK
, which defaults to aligned to the top left, and will wrap the text it draws
automatically at the edge of the rectangle... very useful.
For the second call, we're only printing a single line without wrapping, and we want it to be centered horizontally as
well as vertically (which
DrawText()
will do only when drawing a single line).
Client Redraw
Just a note about the example program... when the
WNDCLASS
is registered I have set the
CS_VREDRAW
and
CS_HREDRAW
class styles. This causes the entire client area to be redrawn if the window is resized, whereas the
default is to only redraw the parts that have changed. That looks really bad since the centered text moves around when
you resize and it doesn't update like you'd expect.
Choosing Fonts
In general, any program that deals with fonts will want to let the user choose their own font, as well as the colour and
file:///C|/dona/forgers-win32-tutorial/tutorial/fonts.html (3 of 6) [7/8/2003 4:34:52 PM]
Text and Fonts
style attribute to use when displaying it.
Like the common dialogs for getting open and save file names, there is a common dialog for choosing a font. This is,
oddly enough, called
ChooseFont()
and it works with the
CHOOSEFONT
structure for you to set the defaults it
should start with as well as returning the final result of the users selection.
HFONT g_hfFont = GetStockObject(DEFAULT_GUI_FONT);
COLORREF g_rgbText = RGB(0, 0, 0);
void DoSelectFont(HWND hwnd)
{
CHOOSEFONT cf = {sizeof(CHOOSEFONT)};
LOGFONT lf;
GetObject(g_hfFont, sizeof(LOGFONT), &lf);
cf.Flags = CF_EFFECTS | CF_INITTOLOGFONTSTRUCT | CF_SCREENFONTS;
cf.hwndOwner = hwnd;
cf.lpLogFont = &lf;
cf.rgbColors = g_rgbText;
if(ChooseFont(&cf))
{
HFONT hf = CreateFontIndirect(&lf);
if(hf)
{
g_hfFont = hf;
}
else
{
MessageBox(hwnd, "Font creation failed!", "Error", MB_OK |
MB_ICONEXCLAMATION);
}
g_rgbText = cf.rgbColors;
}
}
The
hwnd
in this call is simply the window you want to use as the parent for the font dialog.
The easiest way to use this dialog is in conjunction with an existing
LOGFONT
structure, which is most likely from
whichever
HFONT
you are currently using. We set the
lpLogFont
member of the structure to point to the
LOGFONT
that we just filled with our current information and also added the
CF_INITTOLOGFONTSTRUCT
flag so that
ChooseFont()
knows to use this member. The flag
CF_EFFECTS
tells
ChooseFont()
to allow the user to
select a colour, as well as Underline and Strikeout attributes.
Oddly enough, the Bold and Italics styles don't count as effects, they are considered part of the font itself and in fact
some fonts only come in Bold or Italics. If you want to check or prevent the user from selecting a bold or italic font
you can check the
lfWeight
and
lfItalic
members of the
LOGFONT
respectively, after the user has made their
file:///C|/dona/forgers-win32-tutorial/tutorial/fonts.html (4 of 6) [7/8/2003 4:34:52 PM]

Text and Fonts
selection. You can then prompt the user to make another selection or something change the members before calling
CreateFontIndirect()
.
The colour of a font is not associated with an
HFONT
, and therefor must be stored seperately, the
rgbColors
member of the
CHOOSEFONT
struct is used both to pass in the initial colour and retreive the new colour afterward.
CF_SCREENFONTS
indicates that we want fonts designed to work on the screen, as opposed to fonts that are
designed for printers. Some support both, some only one or the other. Depending on what you're going to be using the
font for, this and many other flags can be found in MSDN to limit exactly which fonts you want the user to be able to
select.
Choosing Colours
In order to allow the user to change just the colour of the font, or to let them pick a new colour for anything at all,
there is the
ChooseColor()
common dialog. This is the code used to allow the user to select the background
colour in the example program.
COLORREF g_rgbBackground = RGB(255, 255, 255);
COLORREF g_rgbCustom[16] = {0};
void DoSelectColour(HWND hwnd)
{
CHOOSECOLOR cc = {sizeof(CHOOSECOLOR)};
cc.Flags = CC_RGBINIT | CC_FULLOPEN | CC_ANYCOLOR;
cc.hwndOwner = hwnd;
cc.rgbResult = g_rgbBackground;
cc.lpCustColors = g_rgbCustom;
if(ChooseColor(&cc))
{
g_rgbBackground = cc.rgbResult;
}
}
This is fairly straightforward, again we're using the
hwnd
parameter as the parent to the dialog. The
CC_RGBINIT
parameter says to start off with the colour we pass in through the
rgbResult
member, which is also where we get
the colour the user selected when the dialog closes.
The
g_rgbCustom
array of 16
COLORREF
s is required to store any values the user decides to put into the custom
colour table on the dialog. You could potentially store these values somewhere like the registry, otherwise they will
simply be lost when your program is closed. This parameter is not optional.
Control Fonts
Something else you might want to do at some point is change the font on the controls on your dialog or window. This
is usually the case when using
CreateWindow()
to create controls as we've done in previous examples. Controls
file:///C|/dona/forgers-win32-tutorial/tutorial/fonts.html (5 of 6) [7/8/2003 4:34:52 PM]
Text and Fonts
like windows use System by default, so we used
WM_SETFONT
to set a new font handle (from
GetStockObject()
) for the control to use. You can use this method with fonts you create from
CreateFont()
as well. Simply pass the font handle as
wParam
and set
lParam
to
TRUE
to make the control redraw.
I've done this in previous examples, but it makes sense to mention it here because it's relevant and very short:
SendDlgItemMessage(hwnd, IDC_OF_YOUR_CONTROL, WM_SETFONT, (WPARAM)hfFont,
TRUE);
Where
hfFont
is of course the
HFONT
you want to use, and
IDC_OF_YOUR_CONTROL
is the ID of whichever
control you want to change the font of.
Copyright © 1998-2003, Brook Miles (
file:///C|/dona/forgers-win32-tutorial/tutorial/fonts.html (6 of 6) [7/8/2003 4:34:52 PM]
Win32 Tutorial - Recommended Books and References
]
Recommended Books and References
Books
If you expect anyone online to treat you with respect while you are learning, you NEED to get a
good book to learn from. We're here to provide direction and explain things that need explaining,
not to be your librarian or teach you step by step.
You can find more recommended books and links to buy at the
by Charles Petzold. The book to get on Win32 API. If you want to write programs using
just the API (which is what this tutorial covers), you need this book.
by Jeff Prosise. If you want to venture into MFC (AFTER becoming fully accustomed to
using the Win32 API), this is the book for you. If you don't like MFC but intend on getting
a job doing windows developement, get this anyway, it's better to know than not.
Programming Applications for Windows
by Jeffrey Richter. Not for newbies, if you want to be up on managing processes and
threads, dlls, windows memory management, exception handling, and hooking into the
system, then this is the book for you.
Visual C++ Windows Shell Programming
by Dino Esposito. For anyone interested in the visual and user-friendly aspects of
windows, this book covers writing extentions to the windows shell, working efficiently
with files and drag and drop, customizing the taskbar and windows explorer, and numerous
other tricks. Well worthwhile for anyone writing GUI apps in windows.
Network Programming for Microsoft Windows
Up to date information on network programming, including NetBIOS, mailslots and pipes,
and of course the ever important windows sockets, complete with winsock2 and raw
sockets. Also contains specific information on the various windows platforms including
2000 and CE.
Links
file:///C|/dona/forgers-win32-tutorial/tutorial/references.html (1 of 2) [7/8/2003 4:34:52 PM]
Win32 Tutorial - Recommended Books and References
This site has references for all imaginable Microsoft technologies, including full Win32
API and MFC documentation. If this didn't come with your compiler (ie. VC++) then the
completely free online site will provide you with the required information. People will get
really pissed off if you ask questions you could answer by doing a simple search on
MSDN.
See FAQ and Store
Copyright © 1998-2003, Brook Miles (
file:///C|/dona/forgers-win32-tutorial/tutorial/references.html (2 of 2) [7/8/2003 4:34:52 PM]
file:///C|/dona/forgers-win32-tutorial/tutorial/msvc.html
]
Free Visual C++ Command Line Tools
Getting Them
Microsoft has quietly released it's command line compiler and linker tools as part of the .NET
Framework SDK. The Framework SDK comes with everything you need to for .NET
development (C# compiler etc...) including the command line compiler
cl.exe
which, while it's
intended for use with the .NET framework, is the same compiler that comes with Visual C++
Standard.
Since this is the .NET SDK, it doesn't come with the headers and libraries required for Win32 API
development, as these are part of the Platform SDK. Lo and behold, the Platform SDK is free as
well. You only need the Core SDK, but feel free to download the other components as you desire.
As a bonus, if you download the Platform SDK documentation (which I highly recommend) you
will have a complete local and up to date Win32 reference which is MUCH easier to use than
MSDN online.
Remember to check the options to Register Environment Variables in both SDKs, otherwise
you'll need to set up the PATH and other variables yourself before the tools will work from the
command line.
Using Them
Since comprehensive documentation is provided, and also accessable at MSDN online, you'll need
to RTFM yourself to learn about the VC++ compiler and tools. To get you started, here are the
most basic ways to build a program...
To build a simple console application:
file:///C|/dona/forgers-win32-tutorial/tutorial/msvc.html (1 of 2) [7/8/2003 4:34:52 PM]
file:///C|/dona/forgers-win32-tutorial/tutorial/msvc.html
cl foo.c
To build a simple windows application such as the examples on this tutorial:
rc dlg_one.rc
cl dlg_one.c dlg_one.res user32.lib
Copyright © 1998-2003, Brook Miles (
file:///C|/dona/forgers-win32-tutorial/tutorial/msvc.html (2 of 2) [7/8/2003 4:34:52 PM]
Win32 Tutorial - Free Borland C++ Command Line Tools
]
Free Borland C++ Command Line Tools
Getting Them
Fortunately for anyone that wants to get into windows developement, Borland has offered its
command line tools to the general public for FREE. Isn't that nice of them? There is no pretty IDE
or resource editor, but beggers can't be choosers, and I'd have to say the compiler itself is of far
better quality than either LCC-Win32 (which doesn't even do C++) or the various ports of other
tools, gcc, mingw, cygwin, djgpp etc...
Read the readme to get yourself set up.
What's extra spiffy is it even comes with a debugger! I don't use this, so I can't offer much help on
it, but it's better than nothing. And if you're used to Turbo C++ from the DOS days, then this
should be right up your ally.
For some reason Internet Explorer seems to have a problem with downloading this file, so if it
clicking the link doesn't work, right click and Copy Shortcut, and then use your favourite FTP
client to get it.
Last but not least, a windows help file with full Win32 API reference. It's a few years old but
still entirely accurate and much more convenient than MSDN online unless you need access to the
most recent additions to the API (which if you're on this page, you don't). I use it regularly.
Using Them
Basic commands
file:///C|/dona/forgers-win32-tutorial/tutorial/bcpp.html (1 of 4) [7/8/2003 4:34:53 PM]

Win32 Tutorial - Free Borland C++ Command Line Tools
If you want to compile a single file program (simple_window.c for example), then you can use the
following command:
bcc32 -tW simple_window.c
The -tW switch specifies a Win32 GUI application, instead of the default console application.
You can compile multiple files into a single .exe by adding the other files to the end of this
command.
Linking in Resources
This is a very frustrating issue for many users of the command line tools, and no wonder, since it
seems borland tried to make it as hard as possible to link resources into your applications, the
resource compiler
brc32
no longer behaves as it did in earlier versions of the program where it
would link the compiled resource into the .exe itself. When you run brc32 with no option to get
the usage help, it still lists an option to turn .exe linking OFF, there simply appears to be no way
to turn it ON.
I tried various combinations of command and options, but couldn't find any way to add a .res file
to an .exe build with the above method. Which really sucks, cause the way I found to do it is a lot
more complicated.
There is an easier way however...
BC++ now has an alternative method of including resources in a program by use of a
#pragma
(a non-standard preprocessor directive that compilers will ignore if they don't recognise it).
#pragma resource "app_name.res"
Placing this code in your main .c or .cpp file will cause the compiler to automatically link in the
.res file that is generated from your .rc (.res is like an .obj file for resources).
Using the #pragma will allow you to compile programs nearly as simply as above, but you still
need to compile the .rc file first using brc32. If you still want to use command line options as I did
in the tutorial makefiles, read on...
The hard way...
These are the commands to use to compile the dlg_one example, including the resource.
file:///C|/dona/forgers-win32-tutorial/tutorial/bcpp.html (2 of 4) [7/8/2003 4:34:53 PM]
Win32 Tutorial - Free Borland C++ Command Line Tools
bcc32 -c -tW dlg_one.c
ilink32 -aa -c -x -Gn dlg_one.obj c0w32.obj,dlg_one.exe,,import32.lib cw32.lib,,dlg_one.res
Nice eh? The -c option to bcc32 means compile only, don't link into an .exe. The -x -Gn options
get rid of some extra files the linker creates that you probably don't need.
The real bugger with this is that since we are manually specifying the linker command, we need to
include the default libraries and objs that the compiler would normally do for us. As you can see
above, I've specified the appropriate files for a regular windows application.
To make things easier on yourself, it's best to do all this in a makefile. I've prepared a generic one
that should work with all of the examples in the tutorial, and you should be able to adapt it to any
of your own programs.
APP = dlg_one
EXEFILE = $(APP).exe
OBJFILES = $(APP).obj
RESFILES = $(APP).res
LIBFILES =
DEFFILE =
.AUTODEPEND
BCC32 = bcc32
ILINK32 = ilink32
BRC32 = brc32
CFLAGS = -c -tWM- -w -w-par -w-inl -W -a1 -Od
LFLAGS = -aa -V4.0 -c -x -Gn
RFLAGS = -X -R
STDOBJS = c0w32.obj
STDLIBS = import32.lib cw32.lib
$(EXEFILE) : $(OBJFILES) $(RESFILES)
$(ILINK32) $(LFLAGS) $(OBJFILES) $(STDOBJS), $(EXEFILE), , \
$(LIBFILES) $(STDLIBS), $(DEFFILE), $(RESFILES)
clean:
del *.obj *.res *.tds *.map
You only need to modify the first 6 lines with the appropriate information.
file:///C|/dona/forgers-win32-tutorial/tutorial/bcpp.html (3 of 4) [7/8/2003 4:34:53 PM]

Win32 Tutorial - Free Borland C++ Command Line Tools
Copyright © 1998-2003, Brook Miles (
file:///C|/dona/forgers-win32-tutorial/tutorial/bcpp.html (4 of 4) [7/8/2003 4:34:53 PM]
Win32 Tutorial - Solutions to Common Errors
]
Solutions to Common Errors
Error LNK2001: unresolved external symbol _main
Error C2440: cannot convert from 'void*' to 'HICON__ *'
Fatal error RC1015: cannot open include file 'afxres.h'
Error LNK2001: unresolved external symbol InitCommonControls
Dialog does not display when certain controls are added
Error LNK2001: unresolved external symbol _main
An unresolved external occurs when some code has a call to a function in another module and the linker can't
find that function in any of the modules or libraries that you are currently linking to.
In this specific case, it means one of two things. Either you are trying to write a Win32 GUI application (or non-
console application) and accidently compiled it as a Console application... or you really are trying to compile a
console application and didn't write or properly compile in a main() function.
Generally the first is the most common, if you specify Win32 Console as the project type in VC++ when you
create your project you will get this error. You will also likely get it if you try to compile from the command
line using BC++ but you neglect to specify the correct parameters to tell it to make a Win32 GUI application
instead of a console app which is the default.
Fixing
If you're using VC++ re-create your project and select the Win32 Application project type (NOT "Console").
If you're using BC++ command line compiler, use -tW to specify a windows application.
Error C2440: cannot convert from 'void*' to 'HICON__ *' (or
similar)
If you're compiling the code from this tutorial, it means that you are trying to compile it as C++ code. The code
is written for the bcc32 and VC++ C compilers, and as such may not compile exactly the same under C++ since
C++ has much stricter rules about converting types. C will just let it happen, C++ wants to you to make it
explicit.
VC++ (and most compilers) will automatically compile a file with a .cpp extension as C++ code, and a file with
a .c extension as C code. If you have added the tutorial code to a .cpp file, this is the most likely reason of
getting this error.
file:///C|/dona/forgers-win32-tutorial/tutorial/errors.html (1 of 3) [7/8/2003 4:34:53 PM]
Win32 Tutorial - Solutions to Common Errors
If you're compiling code not from this tutorial, I can't guarantee that it's correct and therefor it may actually be
an error that needs resolving. You'll have to use your own judgement to determine if it's safe to cast the value
and remove the error, or if you are actually trying to make a variable be something it's not.
Fixing
If you want to use C, simply rename your file from .cpp to .c. Otherwise, simply add a cast, all of the code in
the tutorial will work without any other changes when compiled as C++.
For example, in C this will work:
HBITMAP hbmOldBuffer = SelectObject(hdcBuffer, hbmBuffer);
But in C++ requires a cast:
HBITMAP hbmOldBuffer = (HBITMAP)SelectObject(hdcBuffer, hbmBuffer);
Fatal error RC1015: cannot open include file 'afxres.h'.
Oddly enough, VC++ adds
afxres.h
to resource files even when you aren't using an MFC project, and yet
the file may only be installed if you install MFC. This perticular file isn't actually required, so to fix the error
you can edit the .rc file in notepad and replace both occurances of
"afxres.h"
with
"winres.h"
(note
that there should be two of them, and you need to change both).
Error LNK2001: unresolved external symbol
InitCommonControls
You aren't linking to comctl32.lib which this API is defined in. This library is not included by default so you
will either need to add it to the libraries on your command line, or add it in your VC++ project settings on the
Link tab.
Dialog does not display when certain controls are added
Controls such as the ListView, TreeView, Hotkey, Progress Bar, and others are classified as Common Controls,
as they were added to windows in comctl32.dll and were not available prior to Windows 95. Controls such as
BUTTON, EDIT, LISTBOX, etc... while no doubt being common, are not "Common Controls" and I generally
refer to them as "Standard Controls".
If you add a Common Control to a dialog and it fails to display, you most likely failed to call
InitCommonControls()
before running your dialog, or perhaps at all. The best place to call it is first thing
in
WinMain()
. Calling it in
WM_INITDIALOG
is too late, since the dialog will fail before it reaches this point
and it will never get called.
file:///C|/dona/forgers-win32-tutorial/tutorial/errors.html (2 of 3) [7/8/2003 4:34:53 PM]

Win32 Tutorial - Solutions to Common Errors
Some people and documentation may tell you that
InitCommonControls()
is deprecated and you should
use
InitCommonControlsEx()
. Feel free to do this if you want,
InitCommonControls()
is just
simpler and there's nothing wrong with using it.
Copyright © 1998-2003, Brook Miles (
file:///C|/dona/forgers-win32-tutorial/tutorial/errors.html (3 of 3) [7/8/2003 4:34:53 PM]

file:///C|/dona/forgers-win32-tutorial/tutorial/apivsmfc.html
]
Why you should learn the API before
MFC
The Controversy
Too many people come on to IRC and ask "What is better, MFC or API?" and too many people
are willing to say "MFC sucks" or "API sucks" either because of traumatic events involving one
or the other in early childhood, or because everyone else is saying it.
The standard arguments are:
●
API is too hard
●
MFC is too confusing
●
API is too much code
●
MFC is bloated
●
API doesn't have wizards
●
MFC is badly designed
●
API isn't Object Oriented
●
MFC kicked my dog
●
API stole my girlfriend
And so on...
My Answer
My opinion, although by no means the only one, is that you should use the right framework for
the right job.
First of all a clarification on what the API and MFC are. API is a generic term meaning
Application Programming Interface, however in the context of Windows programming, it means
specifically the Windows API, which is the lowest level of interaction between applications and
the windows operating system. Drivers of course have even lower levels, and different sets of
function calls to work with, but for the vast majority of windows development this is not an issue.
MFC is a Class Library, it's a bunch of C++ classes that have been written to reduce the amount
file:///C|/dona/forgers-win32-tutorial/tutorial/apivsmfc.html (1 of 3) [7/8/2003 4:34:53 PM]

file:///C|/dona/forgers-win32-tutorial/tutorial/apivsmfc.html
of work it takes to do certain things with the API. It also introduces an (arguably) Object Oriented
framework into the application that you can either take advantage of or ignore, which is what most
beginners do since the framework isn't really aimed at writing MP3 players, IRC clients or games.
Every program, whether it is written with MFC, Delphi, Visual Basic, perl, or any other wacked
out language or framework you can think of, is eventually built upon the API. In many cases this
interaction is hidden, so you don't deal directly with the API, the runtime and support libraries do
it for you. Some people ask, "MFC can do Blah Blah Blah, can the API?" The answer is that MFC
can only do what the API can do, because it's built on top of it. However doing things yourself
with the API may take considerably more code than using the pre-written MFC classes.
So what is the right framework? For starters, for people that are just learning to program, I
strongly believe that you should work with the API untill you are comfortable with the way
windows applications work and you understand all of the basic mechanics behind things like the
message loop, GDI, controls, and maybe even multithreading and sockets. This way you will
understand the fundamental building blocks of all windows applications, and can apply this
common knowledge to MFC, Visual Basic, or whatever other framework you choose to work with
later. It's also important because these other frameworks don't support everything that the API
does, simply because it does a whole lot and they can't necessarily support all of the arcane little
things that most people won't use. So when you finally do need to use them you need to add it
yourself, you can't rely on the framework to do it for you and if you don't understand the API this
could be quite the chore.
But isn't MFC easier? In a certain sense it's easier in that many common tasks are done for you,
thus reducing the amount of code that you need to actually type. However, less code does not
mean "easier" when you don't understand the code you DO need to write, or how all of the code
that is there to support you actually works. Generally beginners who use the wizards to start there
applications have no idea what most of the generated code does, and spend a great deal of time
trying to figure out where to add things, or what changes to make to acheive a certain result. If
you start your programs from scratch, either in the API or with MFC, then you know where
everything is because you put it there, and you will only use features that you understand.
Another important factor is that most people that are learing the Win32 API for the first time don't
already have a strong base in C++. To try and comprehend windows programming with MFC and
learn C++ at the same time can be a monumental task. Although it's not impossible, it will take
you considerably longer to become productive than if you already knew either C++ or the API.
So basically...
file:///C|/dona/forgers-win32-tutorial/tutorial/apivsmfc.html (2 of 3) [7/8/2003 4:34:53 PM]
file:///C|/dona/forgers-win32-tutorial/tutorial/apivsmfc.html
What it comes down to is that I think you should learn the API untill you feel comfortable with it,
and then try out MFC. If it seems like it's making sense to you and saving you time, then by all
means use it.
However, and this is important... if you work with MFC without understanding the API and
then ask for help with something, and the answer you get is stated using the api (such as "Use the
HDC provided in the WM_CTLCOLORSTATIC message") and you say "huh?" because you
don't know how to translate an API subject into MFC on your own, then you are in trouble and
people will get frustrated with you for not learning what you need to know before you try and use
MFC.
I personally prefer to work with the API, it just suits me better, but if I were to write a database
frontend, or a host for a set of ActiveX controls I would seriously consider using MFC, as it
would eliminate a lot of code that I would need to reinvent otherwise.
Copyright © 1998-2003, Brook Miles (
file:///C|/dona/forgers-win32-tutorial/tutorial/apivsmfc.html (3 of 3) [7/8/2003 4:34:53 PM]

Win32 Tutorial - Resource file notes
]
Resource file notes
Argh!
The one thing I really hated when I switched my primary development environment from Borland
C++ to MS Visual C++ was the way VC++ handles resource scripts (.rc files).
In BC++ was free to control the layout and content of the .rc files, and when using the resource
editor, only the things that I specifically changed in the editor got changed in the resource file.
Much to my dismay, the VC++ resource editor will completely rewrite your .rc file, and possibly
destroy or ignore any changes that you personally make.
This was terribly frustrating at first, but I basically learned to deal with it and it's not SO bad after
a while, since in general I don't write any amount of my resources by hand, but reserve that for
minor changes that perhaps I can't quite accomplish in the editor.
Compatibility
One small challange for this tutorial was to make the resource files compile properly under VC++
and BC++ without changes. In the original tutorial I used the Borland naming convention for the
resource header, which was
project_name.rh
. However by default in VC++ this header is
ALWAYS called
resource.h
, so for simplicity I've adopted this for the current tutorial
revision, as it doesn't impact BC++ at all.
For the curious, it is possible to change the name of the resource that VC++ uses by editing the .rc
file manually and changing the name in two places, once where it is
#include
d, and second
where it is contained in a
TEXTINCLUDE
resource.
The next problem is that by default VC++ requires the file
afxres.h
to be included in it's .rc
files, whereas BC++ has all the necessary preprocessor macros defined automatically and requires
no such include. Another dumb thing about this is that
afxres.h
is only installed when you
insall MFC which not everyone does, even when you are creating an API application which only
requires
winres.h
which is always installed.
Since I work in VC++ and use it's resource editor I've solved this problem by slightly altering
file:///C|/dona/forgers-win32-tutorial/tutorial/resnotes.html (1 of 2) [7/8/2003 4:34:53 PM]
Win32 Tutorial - Resource file notes
each .rc file that is generated to include the following:
#ifndef __BORLANDC__
#include "winres.h"
#endif
Which under default circumstances would usually read:
#include "afxres.h"
For those of you that are using VC++ you can find the option to change this text within the IDE
under "View > Resource Includes". There is generally no need to ever use this in normal practice,
it's simply a way I used to work around the problem of making things work with BC++ and
VC++.
To those of you using BC++, I'm sorry about the extra mess in the .rc files that are generate by the
VC++ editor, but it shouldn't interfere with anything.
Compiling resources under BC++
Try as I might I couldn't find a simple way to compile a program with BC++ that included RC
files, and ultimately had to settle on the non-optimal configuration that you will find in the
makefiles included with the source for this tutorial. You can find the notes for the BC++ compiler
in
Free Borland C++ Command Line Tools
.
Copyright © 1998-2003, Brook Miles (
file:///C|/dona/forgers-win32-tutorial/tutorial/resnotes.html (2 of 2) [7/8/2003 4:34:53 PM]
Document Outline
- Tutorial File
- Basics
- Tutorial: Getting Started
- Tutorial: A Simple Window
- Tutorial: Handling Messages
- Tutorial: Understanding the Message Loop
- Tutorial: Using Resources
- Tutorial: Menus and Icons
- Tutorial: Dialogs, GUI coders best friend
- Tutorial: Modeless Dialogs
- Standard Controls: Button, Edit, List Box, Static
- Tutorial: Dialog FAQ
- Creating a simple application
- Graphics device interface
- Tools and Documentation
- Appendices
Wyszukiwarka
Podobne podstrony:
git tutorial id 191729 Nieznany
Abolicja podatkowa id 50334 Nieznany (2)
4 LIDER MENEDZER id 37733 Nieznany (2)
katechezy MB id 233498 Nieznany
metro sciaga id 296943 Nieznany
perf id 354744 Nieznany
interbase id 92028 Nieznany
Mbaku id 289860 Nieznany
Probiotyki antybiotyki id 66316 Nieznany
miedziowanie cz 2 id 113259 Nieznany
LTC1729 id 273494 Nieznany
D11B7AOver0400 id 130434 Nieznany
analiza ryzyka bio id 61320 Nieznany
pedagogika ogolna id 353595 Nieznany
Misc3 id 302777 Nieznany
cw med 5 id 122239 Nieznany
więcej podobnych podstron