31
DECK BENCH
Copyright 2004 Martian Auctions
126
Due to its modular design, this bench can be mixed or matched with planters or other
benches. Cedar wood enables this bench to withstand sun, rain, and even snow. This
bench will enhance your enjoyment of your deck and its beauty.
Everything You Need:
Materials:
3" gold-colored deck screws (60)
2 1/2" gold-colored deck screws (16)
Directions: Deck Bench
CONSTRUCTION MATERIALS
Quantity
Lumber
1
2 × 4" × 8' cedar
1
2 × 4" × 6' cedar
4
2 × 2" × 8' cedar
1
2 × 6" × 6' cedar
1
4 × 4" × 6' cedar
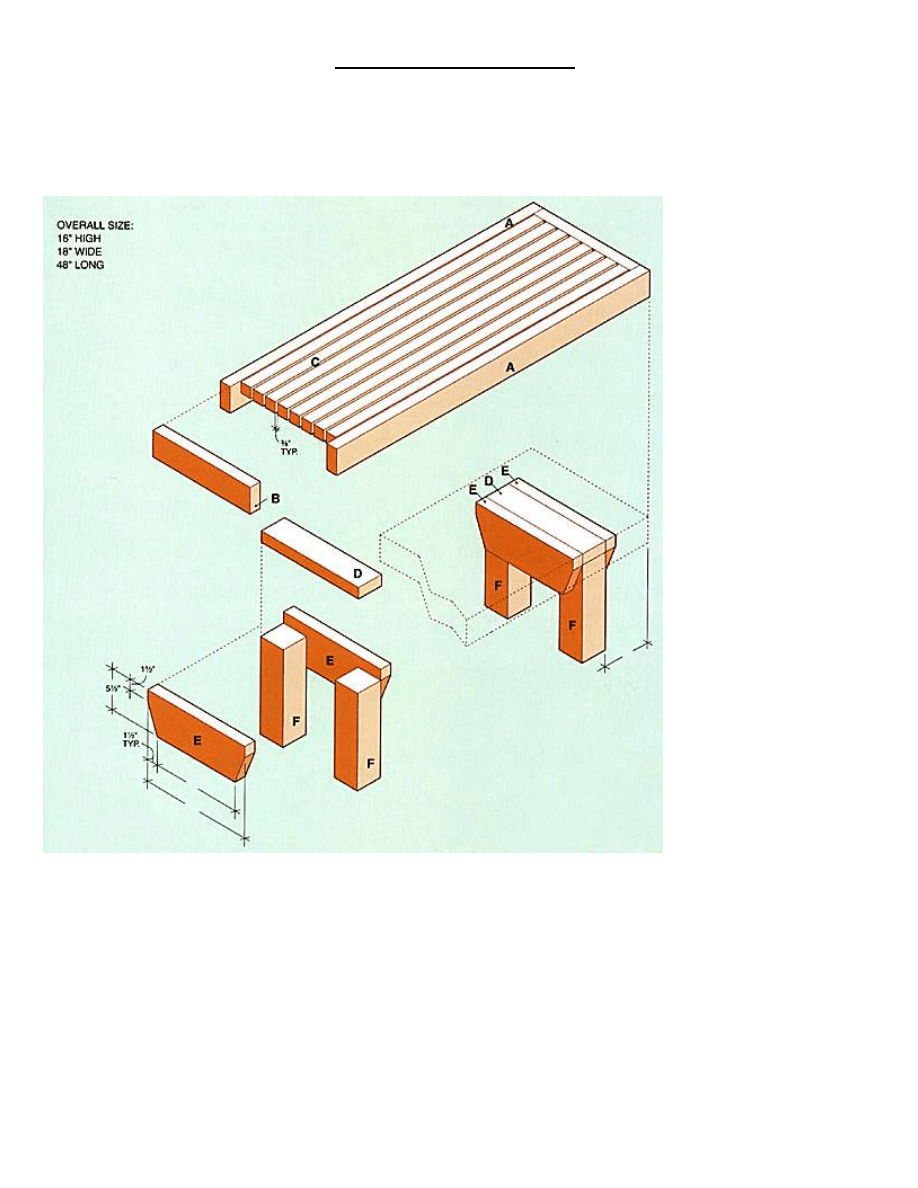
Cutting List
Key
Part
Dimensions Pcs. Material
A
Sides
1 1/2 × 3 1/2 ×
48"
2
Cedar
B
Ends
1 1/2 × 3 1/2 ×
15"
2
Cedar
C
Slats
1 1/2 × 1 1/2 ×
45"
8
Cedar
D Stretchers
1 1/2 × 3 1/2 ×
15"
2
Cedar
E
Braces
1 1/2 × 5 1/2 ×
15"
4
Cedar
F
Legs
3 1/2 × 3 1/2 ×
13"
4
Cedar
Note: Measurements reflect the actual thickness of dimensional lumber.
Copyright 2004 Martian Auctions
127
MAKE THE FRAME.
The butt joints make this bench sturdy and easy to construct. For strength and good looks,
we used gold-colored deck screws.
1. Measure, mark and cut the sides (A) and ends (B) to length, using a circular saw.
2. Position the ends between the sides so the edges are flush. Measure from corner to
corner. When the diagonals are equal the frame is square.
3. Drill 1/8" pilot holes through the sides and into the ends. Fasten the sides to the ends by
driving 3" gold-colored screws through the pilot holes.
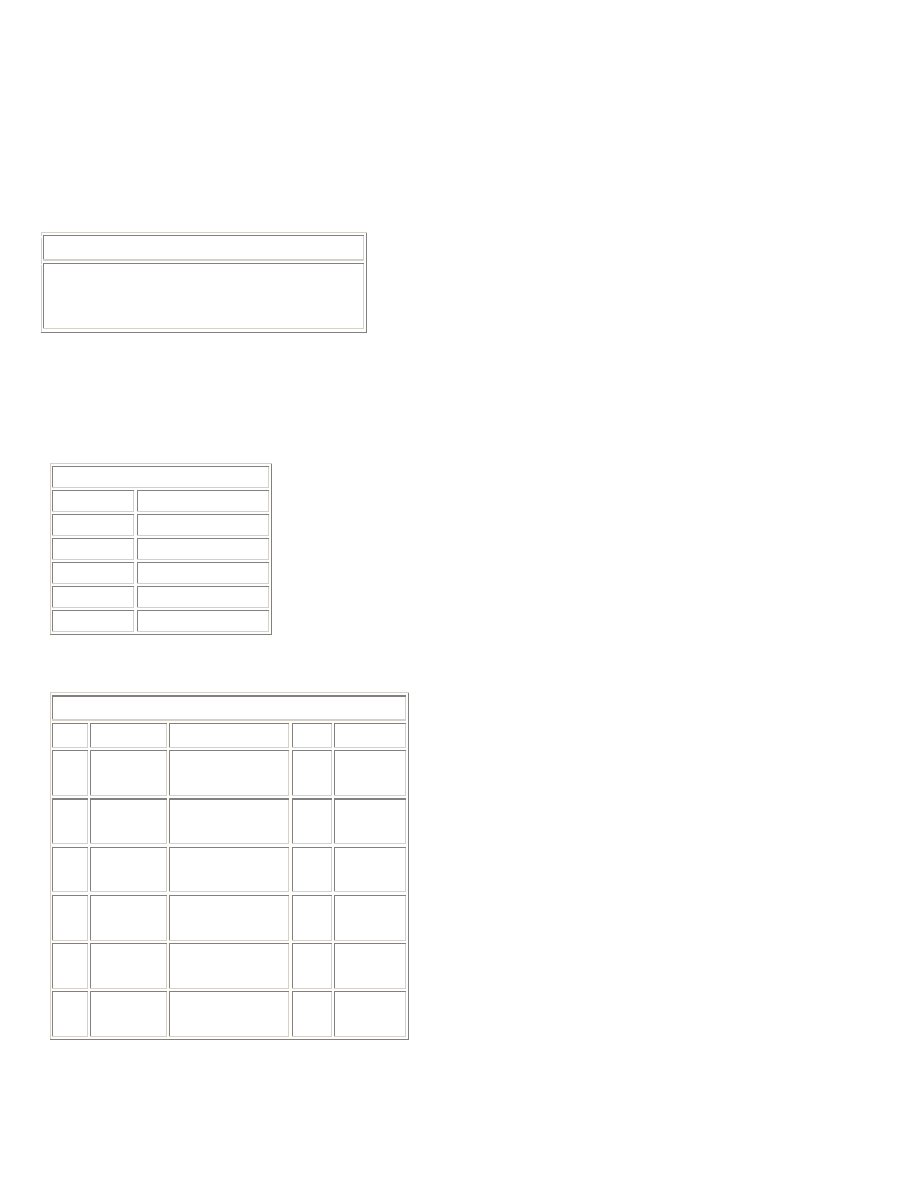
BUILD THE SEAT.
The slats that make up the seat are spaced 3/8" apart to allow rain water to run off.
1. Cut the slats (C) to length using a circular saw.
2. Set the frame on a flat surface and
place 3/8" spacers against one side. Place
the first slat in the frame against the
spacers. Drill 1/8" pilot holes through
both ends into the slat. Secure the slat to
the ends with 3" deck screws. Repeat this
process of positioning and attaching slats
until all the slats are in place (photo A).
3. Measure, mark and cut the stretchers (D) to length.
4. To mark the stretcher outlines, measure in 5" and 3 1/2" from the inside of each end
piece on the back of the slats and make a mark.
5. Position the stretchers between the
marks. Drill 1/8" pilot holes through the
stretchers into the slats. Attach the
stretchers with 2 1/2" screws (photo B).
Copyright 2004 Martian Auctions
128
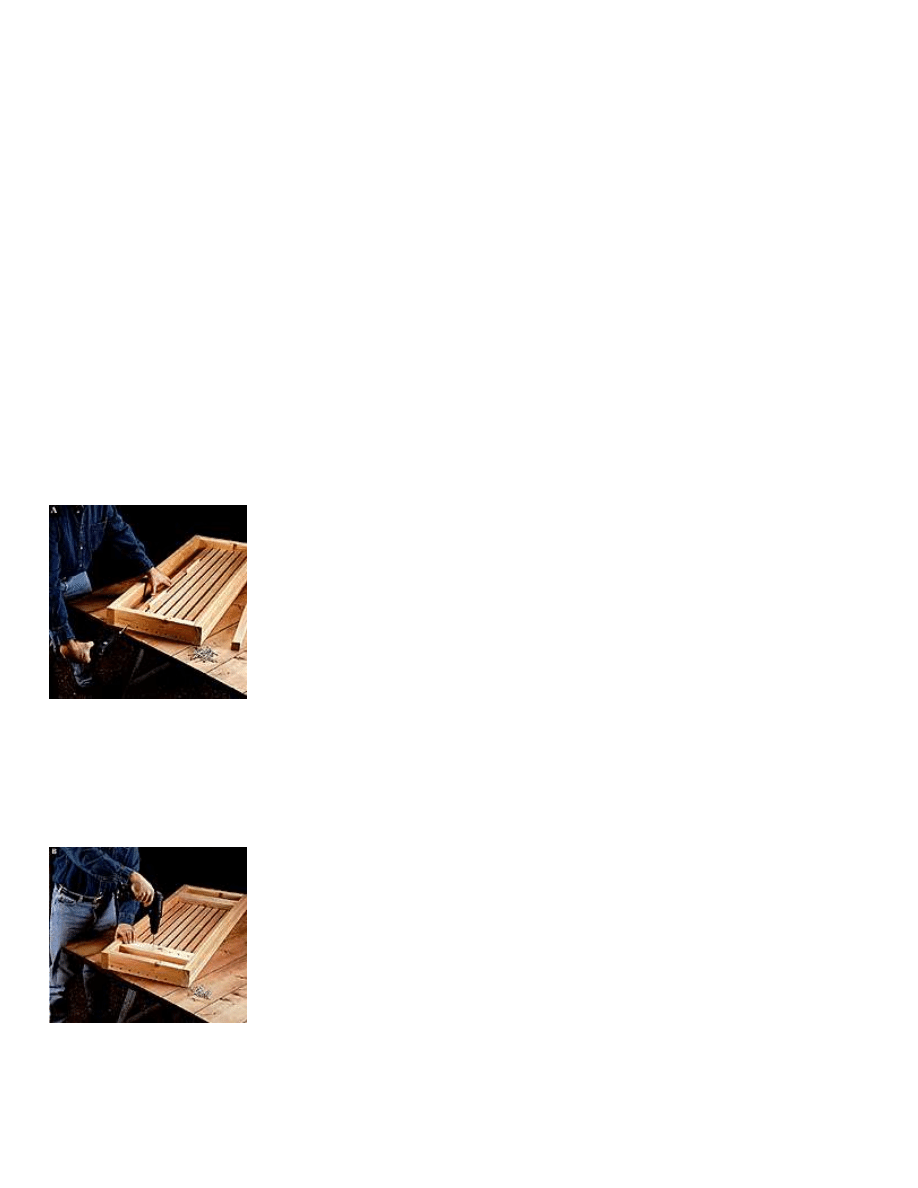
ASSEMBLE THE BENCH.
The braces hold the legs in place against the stretchers.
1. Measure, mark and cut the braces (E) to length.
2. To shape the ends of each brace, mark
the angle by measuring down 1 1/2 " from
the top edge and 1 1/2'' along the bottom
edge. Draw a line between the two end
points and cut along that line (photo C).
Repeat this step at the other end of the
brace.
3. On each brace, measure down 3/4" from the top edge and draw a reference line
across the stretcher for the screw positions. Drill 1/8" pilot holes along the reference
line. Position a brace on each side of the stretchers and fasten it with 3" screws driven
through the braces and into the stretchers.
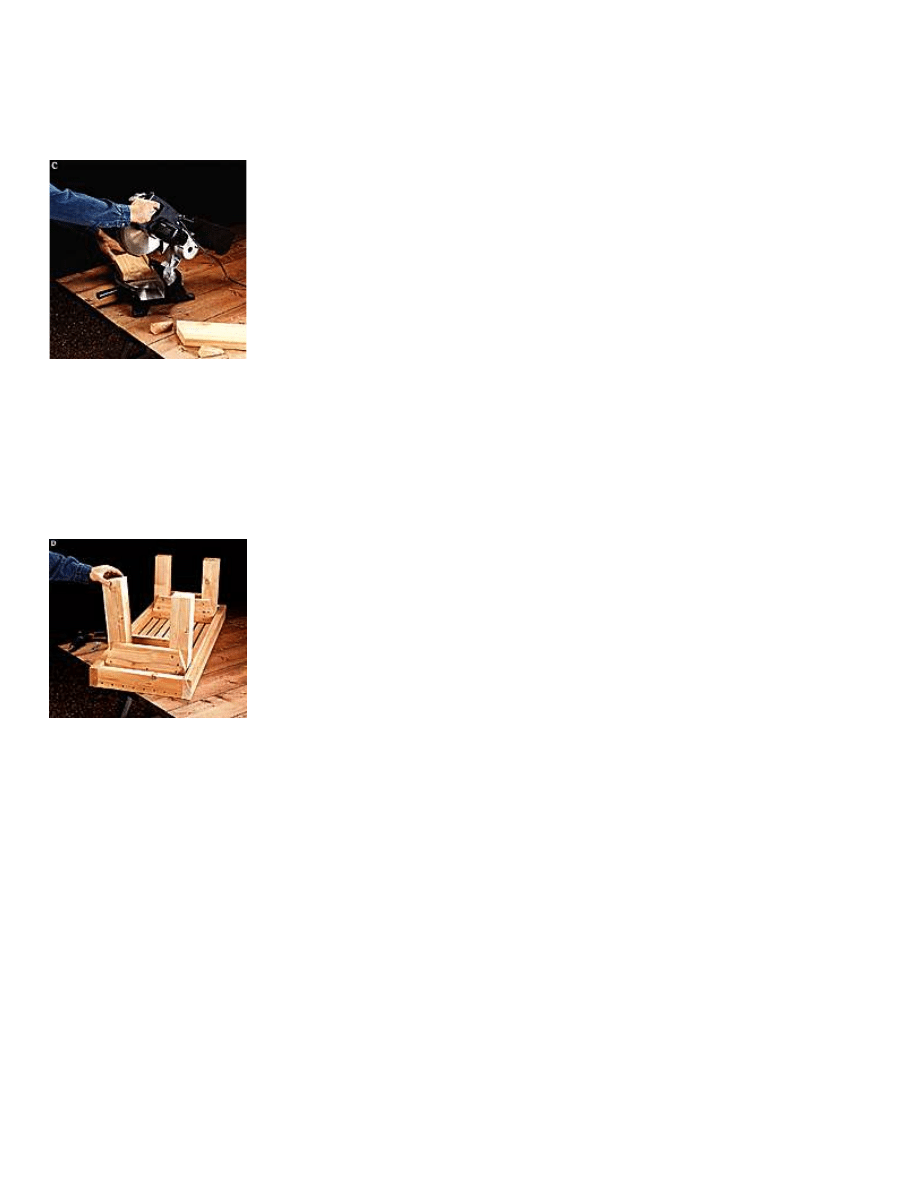
4. Measure, mark and cut the legs (F) to length, using a circular saw. If needed, finish
any cuts with a handsaw.
5. Position each leg between the braces
and against the sides of the bench frame.
Drill pilot holes through each brace and
attach the leg to the braces by driving 3"
screws through the braces and into the
leg. Repeat the process for each leg until
all legs are installed (photo D).
APPLY THE FINISHING TOUCHES.
1. Sand all surfaces with 150-grit sandpaper. Be sure to sand edges thoroughly so bare legs
will not be scratched.
2. Because cedar is naturally resistant to decay, it will age to a natural gray. To preserve its
reddish color, you can apply a clear sealer as we did. Cedar is also suitable for painting.
Copyright 2004 Martian Auctions
129
Wyszukiwarka
Podobne podstrony:
Double Duty Deck Bench(1)
Deck Bench
Bench for your deck
potting bench
Arbor Bench id 67571 Nieznany
Bench Outdoor
planter bench
Build a Garden Bench(1)
Illuminati CCG Rulebook (card deck game)
03 A 2 Deck Linesid 4585
Gardening Bench
Boot Bench(1)
Deck Covers
Bridgewater Bench Swing lawka
Outdoor Table and Bench
planter bench plan
Deck The Hall
więcej podobnych podstron