1
MY PERFECT PURPLE PURSE
Designed and created especially for Pfaff
By Kim Fillmore
Sewing Expressions
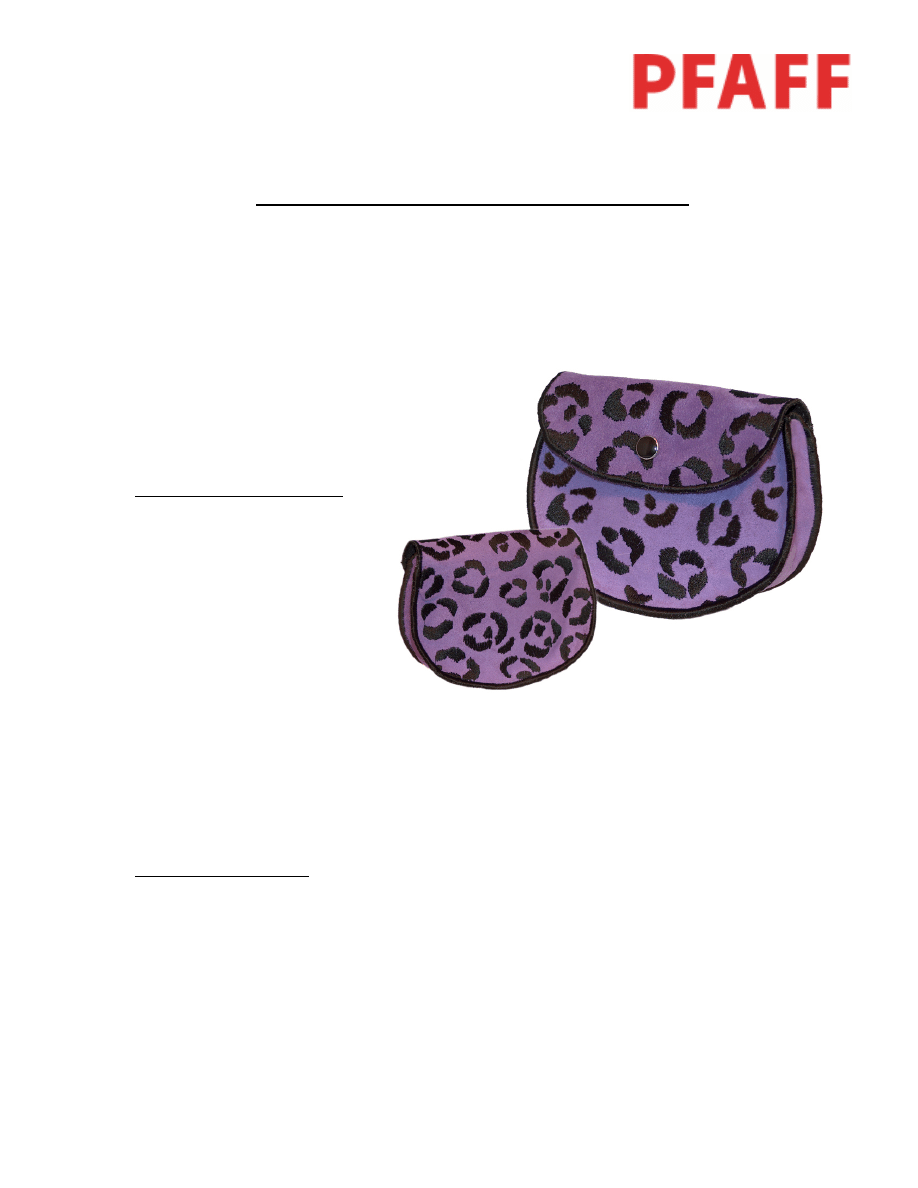
Seeing spots...leopard spots that
is! Pfaff creative Card/CD 356
lends just the right touch to our
trendy clutch.
Supplies You’ll Need:
• Pfaff creative embroidery
machine
• Pfaff creative Card/cd 356
Beasts of Prey, design 41871
• 1 – 9” x 12” UltraSuede (or
other fabric of your choice
• 2 – 9” x 12” fusible black
cotton interfacing – fairly stiff
so the purse sides are stable
• Black rayon embroidery
thread (wind a bobbin with the rayon thread to complete all the satin stitching)
• Black tear-away stabilizer (black – so the white pokies won’t show through the black
satin stitch edge!)
• Temporary
spray
adhesive
• 1 black gripper snap fastener
• Water-soluble fabric marker
Let’s Get Started:
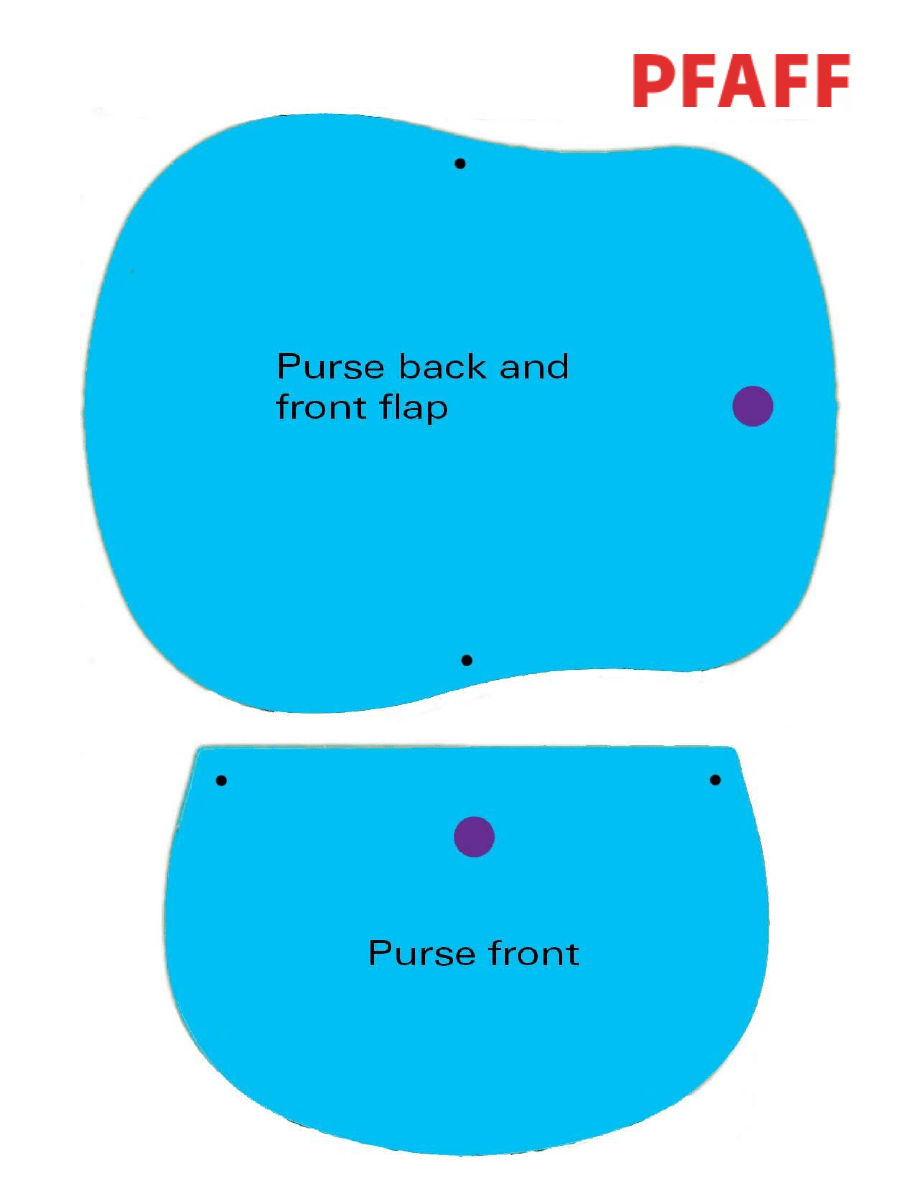
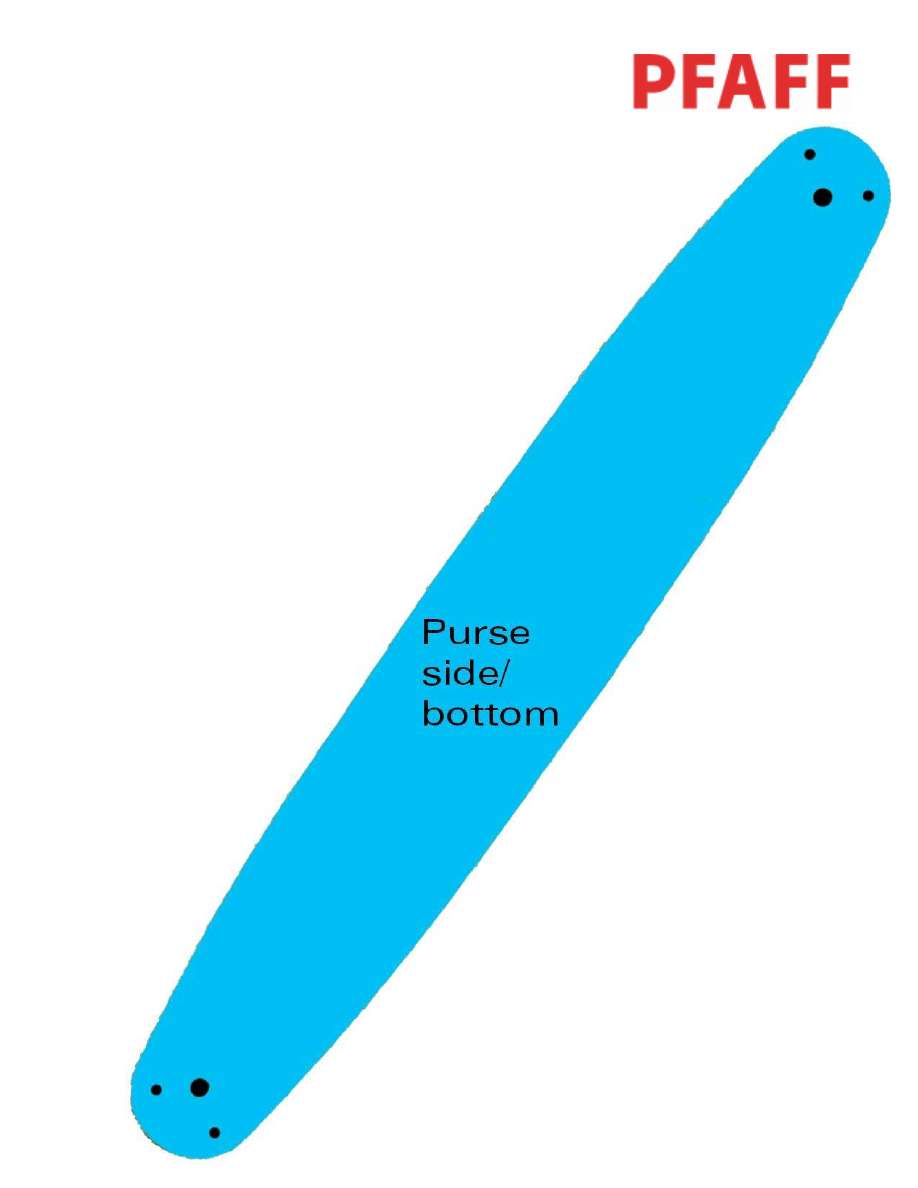
1. Fuse one piece of the interfacing to the back of the suede (set second piece aside).
2. Print a template of the design to allow you to determine where to place the second
hooping of spots. Two sections of the leopard spots will NOT fit together in the Grand
Hoop – use the standard 225 x 140 hoop to embroidery your entire piece of suede.
3. Hoop a piece of stabilizer and lightly spray with temporary adhesive spray.

2
4. Embroider leopard spots over the entire piece, using the template to determine
placement of the two large sections (you can leave the spots off the narrow strip if
desired).
5. After embroidery is complete, remove from hoop and remove all excess stabilizer.
6. Trim thread ends and fuse the second piece of stabilizer to the back of the suede piece.
7. Use a fabric marker to trace outlines of each pattern piece on fabric, including dots for
matching sections.
8. Use satin stitch #10 and strips of black tear-away stabilizer to satin stitch around the
outer edges of all three pieces.
9. With wrong sides together, match the dots at the top of
the purse front with the dots on the long side/bottom
piece. Set machine for a slightly wider satin stitch and
satin stitch the edges together (yep…you’ll be re-
stitching the satin stitch you already did – this makes
for a very dense, pretty satin finish!) Pin as needed to
make sure the edges match.
10. Repeat to satin stitch back/front flap piece to opposite
side of long side/bottom piece.
11. Attach snap to front of bag flap and front of bag at marked points.
3
4
Wyszukiwarka
Podobne podstrony:
MN energetyka zadania od wykładowcy 09-05-14, STARE, Metody Numeryczne, Część wykładowa Sem IV
09 05
Ekonomika ochrony srodowiska 09.05.05, administracja, II ROK, III Semestr, rok II, sem IV, Ekonomika
formy opieki 09.05, Formy opieki zdrowotnej
09 05 2013
My perfect weekend
wp a3yw+bezrobocia+na+skal ca+przest capczo 8cci+licencjat+10 09 05 XUMQLVUF4ZYDFAYGT3GWUGGIYNGFHUCI
ppok materiały 09 05 2012
09 05 86
Andragogika wykład 18 04, 09 05
09-05-Oswietlenie placu budowy i stanowisk pracy
plan laborek elektroniki wer 09-05-14, STARE, Inne
09 05
09 05 2011
DGP 2014 09 05 prawnik
ćw 28 09, 05 10, 12 10
badania marketingowe-ćwiczenia 09.05.2009r, WSZiB w Poznaniu Zarządzanie, 3 rok zarządzanie 2009-201
Kryon 07 09 05 Public Channeling
więcej podobnych podstron