Four ways to build a tavern table
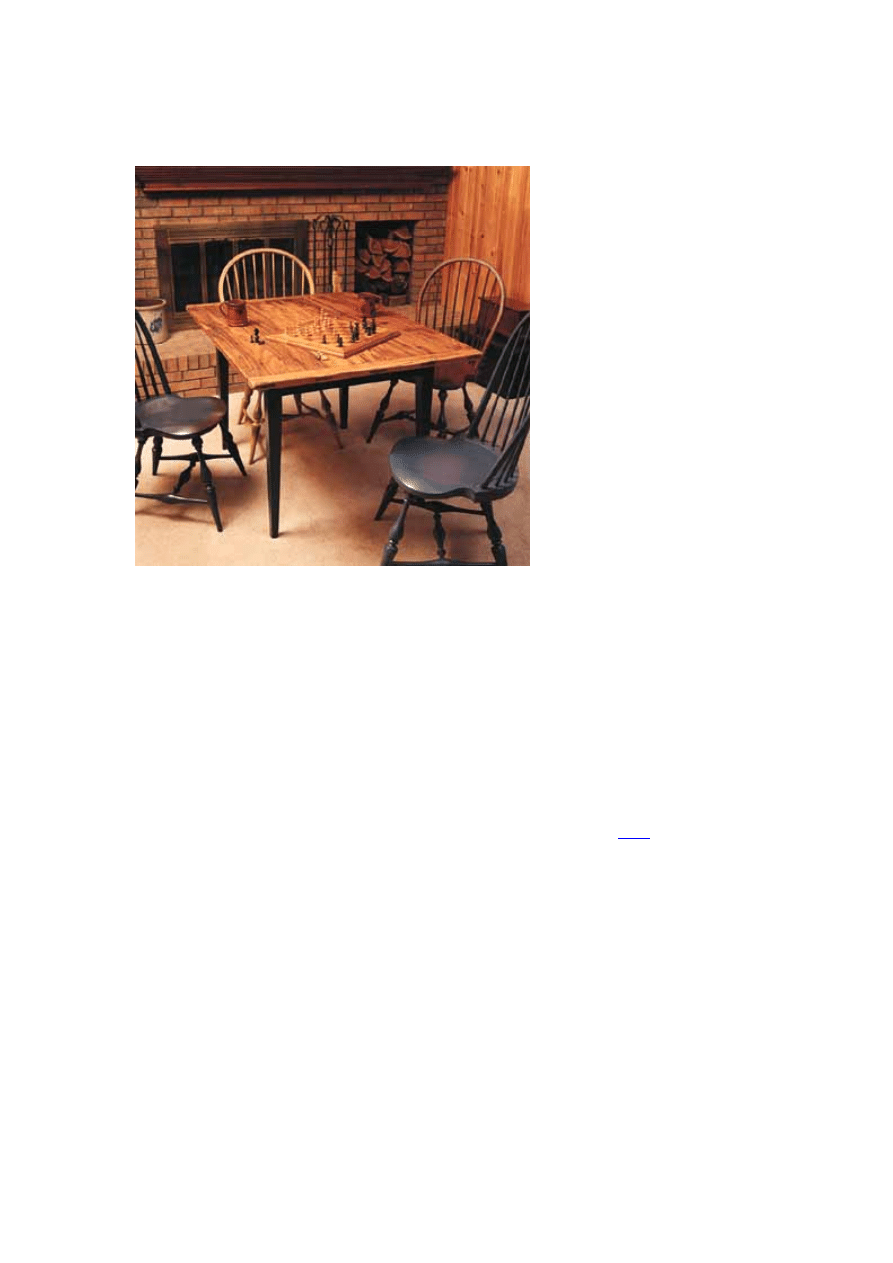
We used to have a table just like this one that was great for playing cards or board games with
our two kids. Unfortunately, I sold that table and have always regretted it. So when we finished
out a couple new basement rooms for the kids, building a new game table was first on my list.
The top of this table is made from three boards of wormy chestnut, a species of wood that
you're going to have to hunt for. I bought mine from a wholesaler who bought it out of a barn in
the Smokies. And it was expensive: about $10 a board foot. The painted base is made from
poplar.
Begin the project by milling the legs and cutting the taper. You can use a tapering jig for your
table saw, but I don't recommend it. A few years ago I came up with a quick way to use a jointer
to cut tapers faster and safer. See the story on this technique by clicking
Here
.
There are a lot of ways you can join the aprons to the legs, from totally traditional to quick-and-
dirty. I prefer using a straight mortise-and-tenon joint, though if I were building a little side table
or something else that wouldn't see daily abuse, the two less traditional methods I'm going to
cover would work just fine. But before we talk about the bases, build the top.
Making the Top
After I pulled the right boards from my woodpile, I got them ready for glue-up. I wanted this top
to look rustic, so I didn't plane the lumber. Instead, I jointed the edges of the planks and glued
up the top. Then I rough sanded it with a belt sander to get it reasonably flat and to remove
some of the milling marks. Then I cut the top to size and worked on the breadboard ends.
For a long time I used traditional through-mortises to attach breadboards to cover the end grain
of my tabletops. Other people showed my how to do it with slotted screw holes. I was always
against using that method until I actually tried it. Now it's the only way I'll attach breadboards.
You actually get less up-and-down movement using screws, and the top stays flatter-looking for

a longer time. Here's how I make my breadboard ends.
After cutting the breadboards to size, cut 3/8"-wide by 2-1/2"-long by 1-1/2"-deep mortises in the
breadboards. I cut five of these for my 36"-wide top. How ever many you use, it's always good
practice to use an odd number of mortises so it's easier to lay them out. I put the two outside
mortises 1/2" in from the end of the breadboard.
Now cut two slots for two screws in each mortise. I make the slots about 3/8" long to give the
top some real room to move if it has to. You can make a router jig to cut the slots, or you can
use your drill press and work the bit back and forth. Clamp the breadboard to the table top and
put two screws in each mortise. I put the screws at the sides of the mortise, not at the center. I
do this because I peg the fake plug later in the process, and this keeps me from boring a hole
into one of my screws accidentally. Don't drive the screws in too tightly because you want the
table top to be able to move. For general thoughts on table design, click
Here
.
Now plug the mortises. I cut plugs to fit the opening and taper them a bit so they fit snugly when
tapped in place. Glue the plugs in place, then peg the plugs through the top with 1/4" x 1/4"
square pegs.
Now age the top. I strike the top with a key ring full of keys; I even write people's names in the
top with a knife. It's pretty amusing to watch people as they see me do this. They freak out.
Stain the top with a golden oak color and then add a natural oil finish, such as Watco, which is
an oil/varnish blend. You don't want the top to look too shiny.
Now plug the mortises. I cut plugs to fit the opening and taper them a bit so they fit snugly when
tapped in place. Glue the plugs in place, then peg the plugs through the top with 1/4" x 1/4"
square pegs.
Now turn your attention to the base.
Mortise and Tenon
Cut your aprons to size. Cut 1"-long tenons that are 3/8" thick. The apron lengths in the
Schedule of Materials include the tenons. I cut my tenons first and use them to lay out my
mortises, which results in less layout, in my opinion. These aprons are set back 1/4" from the
front of the legs, this is called a "set back."
Now cut a bead on the bottom edge of the aprons using a beading bit in your router. Finally, cut
a slot on the inside of the aprons for fastening the base to the top. I use metal tabletop fasteners
from Rockler (see the supplies list at the end of the article). Rockler sells very sturdy ones, and I
recommend them.
For these fasteners, the slot needs to be the width of your table saw's blade (between 1/8" or
1/16" wide) and 7/16" down from the top of the apron and 3/8" deep.
Glue up your base, peg the mortises through the legs and finish the base. I use square pegs in
my legs. Drill a round hole through the leg and into the mortise. Then take a piece of square
stock, whittle one end of it roundish, then pound it into the hole. It should convert your round
hole into a square.
Mitered Mortise and Tenon
This method is similar to the straight mortise and tenon above, but you must miter the ends of
the tenons because your mortises meet in the middle of the leg. Why would they meet? Well
you might have a thinner leg, or your mortises might be back farther if you chose to use a larger
set back.

When this is the case, I make a standard tenon and chop the end off at a 45-degree angle on
my miter saw. You're not trying to match the two miters exactly (it will never show) so leave a
little gap between the two tenons. If it's too tight, it could get you in trouble because the ends of
the tenons will touch before the shoulders seat into the legs.
Pocket Screws
I wouldn't recommend this for a large table. If you're going to spend the money on the wood, you
might as well do it right. But if you want to build a quick-and-dirty side table, this will work fine.
Be sure to glue and screw this joint for added strength. It's important to keep the pieces tightly
together as you screw the apron to the leg.
Corner Brackets
Corner brackets are a faster alternative to traditional joinery, but they aren't as sturdy. However,
you can't beat them when you want to make a table that can be knocked down and stored away.
These measurements apply to the brackets from Rockler (see the supplies box at the end of the
article). The first step to installing these brackets is to cut a bevel on the inside corner of the
legs. This is where you'll later install the hanger bolts. The best way to cut the bevel is on your
jointer. Set the machine's fence to a 45-degree angle and the depth of cut to 1/4". Cut 3-1/2" in
on the top corner as shown in the photo.
Now install the hanger bolts, which are odd-looking fasteners that have wood screw threads on
one end and machine screw threads on the other. The wood screw end goes into the leg, and
the machine screw end is bolted to the corner bracket. To install the hanger bolts, first lay out
and drill pilot holes on the leg. Then install the bolts using the method shown in the photo.
Now you need to cut a kerf in each apron for the bracket to grab. The kerf should be 1-3/4" in
from the end and 3/8" deep for these brackets. Different brands can use different
measurements.
Attaching the Top and Finishing
I attach the top with tabletop fasteners that I screw in place about every foot. On the long
aprons, don't push the fasteners all the way into the kerf when screwing them down. This will
give your top some room to move.
I finished the base with a couple coats of latex paint followed by a glazing stain. Finally, I added
a couple coats of lacquer for protection.
Wyszukiwarka
Podobne podstrony:
Are You Good Enough 15 Ways to Build a Confident Mindset
LeGuin, Ursula K Ekumen 05 Four Ways to Forgiveness
(psychology, self help) 10 Ways to Build Resilience
Four Ways to Forgiveness Ursula K Le Guin
O'Reilly How To Build A FreeBSD STABLE Firewall With IPFILTER From The O'Reilly Anthology
How to build a Raised Formal Pool
Kydland, Prescott Time to Build and Aggregate Fluctuations
Seven Signs You’re?out to? Fired and Seven Ways to?al with It
How to build a Retaining Wall
Instructions to Build the Cotton reel tank
200 Ways To Recover Revive Your Hard Drive
15 ways to improve oral communi Nieznany
1001 Brilliant Ways to Checkmate Fred Reinfeld, 2014
How to build an arbor id 206318 Nieznany
5 Ways To Make Precision Rabbet Cuts
How to build a solar icemaker
100 Ways to Keep Kids Busy
50 Ways To Reach Your Goals
więcej podobnych podstron