
A Guide to Error Fixing Assets for TRS2006
So why do my Assets have errors then?
First, a short history of the development of Trainz is necessary. Over the years there
have been many different versions of the Trainz program and the assets available
were based on the best information available at the time, or in some cases as Trainz
didn’t complain the author assumed that the asset was OK. In fact what was
happening was that earlier versions of Trainz were working around problems which
TRS2006 does not. Hence assets that apparently worked fine in TRS2004 are being
shown as ‘faulty’ in TRS2006 – the assets always were broken but TRS2004 didn’t
tell you.
Why Should Errors be Fixed?
In many cases you don’t need to fix ‘faulty’ assets as they will continue to work in
TRS2006. In some cases though a fault will prevent an asset from showing up in
Trainz, so if something you have downloaded won’t show up in Surveyor the first
thing to do is fire up CMP and see if errors are present.
Additionally human nature being what it is if something is described as ‘faulty’ then it
needs fixing. It has been reported though that using error free content can actually
improve the stability of Trainz and increase frame rates so it would seem to be
worthwhile.
What is Involved in Fixing Assets?
We’ll be looking at correcting some common faults later, but it is something that
anybody can do. Each Trainz asset has a ‘config’ text file called (surprise surprise)
‘config.txt’ (though your PC may well hide the ‘txt’ file extension in which case it
appears as ‘config’ in an Explorer window), and this is where most of the faults are to
be found.
CMP is also very helpful for analysing assets and telling you what is wrong with them.
A couple of tips though – firstly CMP has a habit of checking the DLS every so often
and opens a dialog box saying it is updating the database or verifying your
registration code. When the DLS is busy it can take a long time for these messages
to disappear if at all. Simply hit the ESC key to close the dialog box(es) and then you
can carry on working.
Secondly there are two options available for editing the config files via CMP – always
use ‘open in Explorer’ and not ‘open in CCP’. All of the files you need to edit are in
the ‘local’ folder inside the TRS2006 folder, but you should never try and edit
anything in the ‘local’ folder, instead open the asset for editing via CMP.
How Do I Find the Faults?
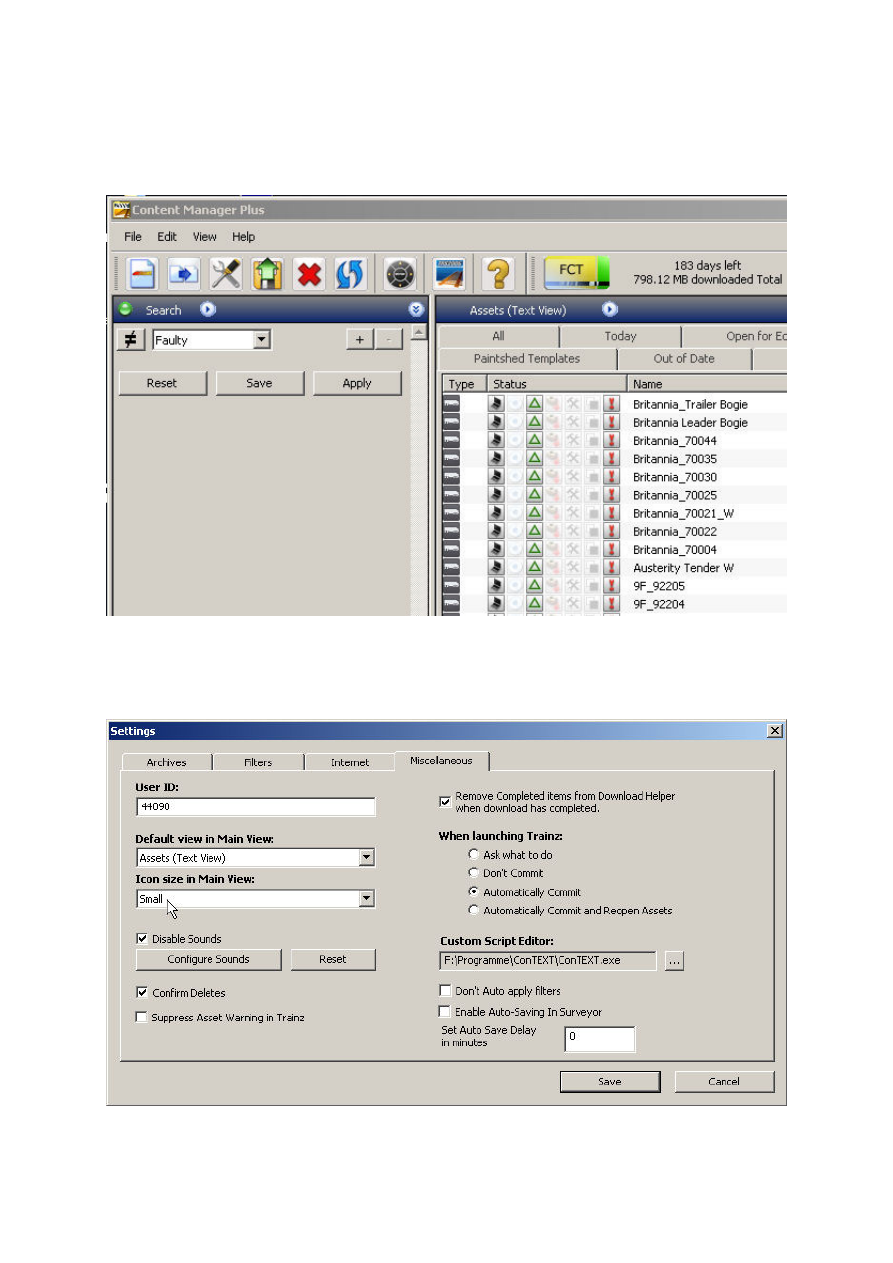
Start CMP and in the Search Filter choose ‘Faulty’ like this:
The ‘!’ icon denotes that the asset(s) have faults. Note that this only appears if the
‘Icon size in Main View’ is set to ‘small’ and the ‘default view in main view’ is set to
‘Assets (Text View) in the ‘Miscellaneous’ tab of the ‘Settings’ dialog box.
It is also worth noting that CMP itself includes help documentation (found under the
‘Help’ menu at the top of the window), and the main TRS2006 manual (click on the
‘Manual’ button on the TRS2006 launcher screen) has a fuller description of CMP.
Fixing Assets – Illegal Tags
The first faulty asset listed above, ‘Britannia_trailer_bogey’ demonstrates a very
common error, an illegal tag. Everything that appears at the start of a line in a config
file is a ‘tag’, a description of what follows the tag itself. Trainz versions prior to
TRS2006 simply ignored anything they couldn’t understand so tags got used for
adding comments or special information that could be used by scripts. Sometimes
the tag was even wrongly spelled which causes problems for TRS2006.
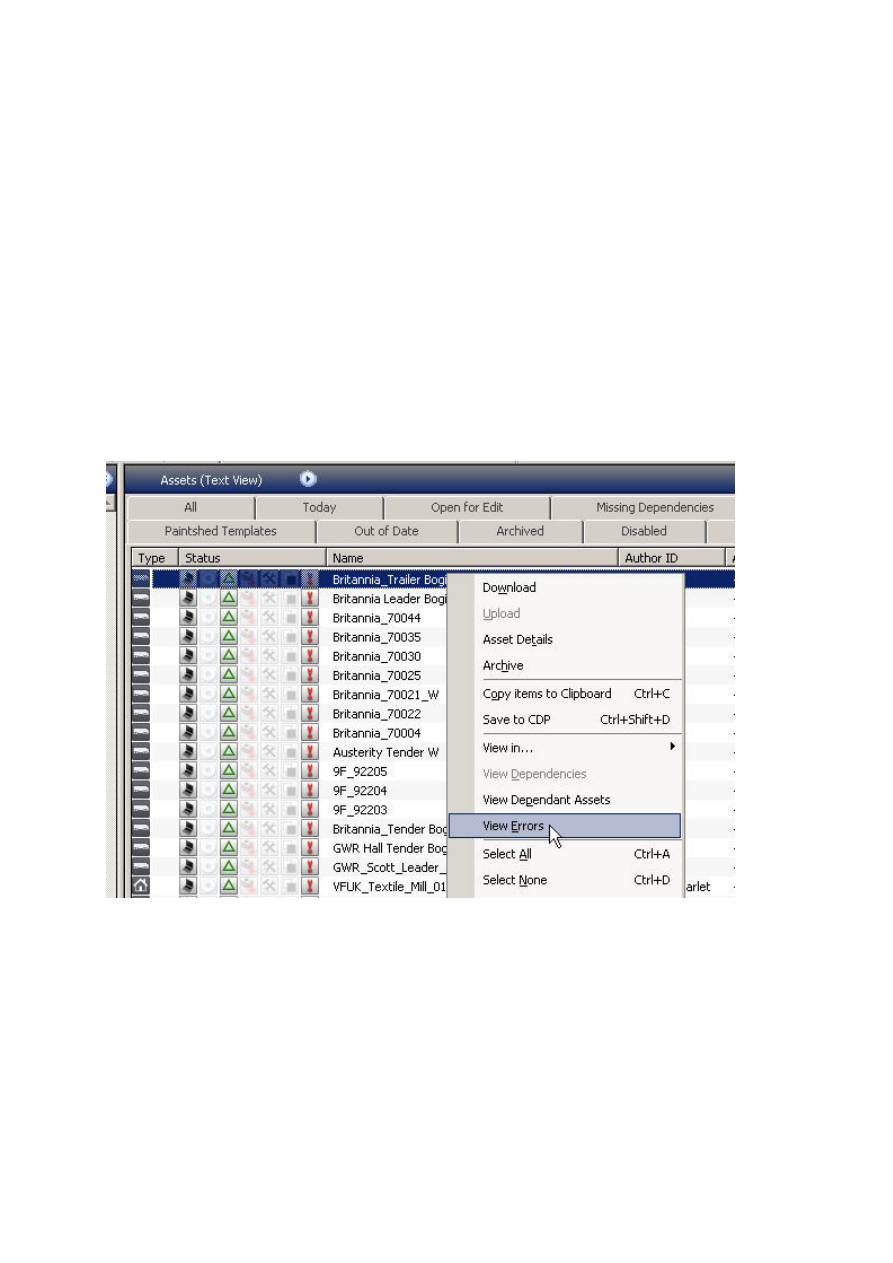
So, lets fix this error. Right click the mouse button over the faulty asset and choose
‘View Errors’ like this:
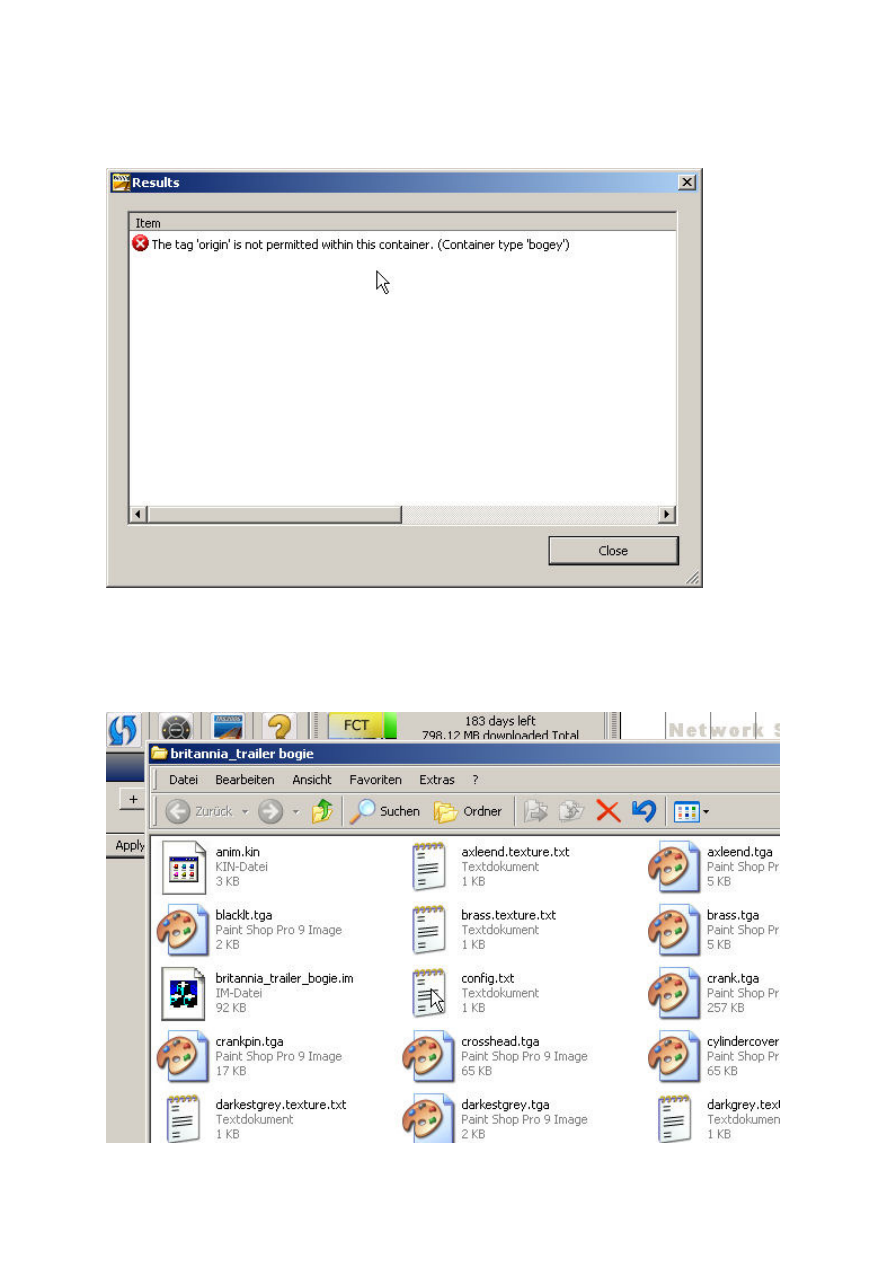
An information window opens:
Now we have to open the asset for editing to correct it. Close this window and select
the asset again with the right mouse button. This time choose ‘Edit in Explorer’.
An Explorer window will now open showing the files belonging to this asset.
‘config.txt’ or ‘config’ is what we need to change, so double click on it to open it in
your usual text editor. Don’t use Word or anything too fancy as some programs can
add extra invisible characters to the file that can trip TRS2006 up. If in doubt use the
standard Windows text editor.
Now delete the line that CMP complained about and resave the file. Select the asset
with the left mouse button in the main CMP window if it is not already selected and hit
CTRL and M together to commit the asset back into the database. This simply means
that CMP will check the asset again to see if any errors are present and will make it
available in Surveyor. Assets that are open for editing will not show up in Surveyor
unless certain options are set in the ‘Settings’ dialog box.
Once the asset has been committed the ‘!’ icon should be greyed out denoting that
the asset is now error free.
That wasn’t too bad was it?
Another case of this error could be that the ‘description’ tag in the config includes
extra ‘”’ characters The first ‘”’ defines the start of the description text and the second
one marks the end, so if there is an extra ‘”’ somewhere in the middle TRS attempts
to interpret the rest of the description as tags.

If you get error messages that a tag is not allowed have a good look at the
description tag and replace any “’ characters in the middle of the text with a single
quote character.
Here’s an example of a config with this error:
Description "A Lunch Break"
"these
"dude's are a product
of my imagination + AURAN's mesh's / textures + a little bit
of Gmax from me ........... only available for regestered
users of Auran TRAINZ Service pack Ect..........on the
download station no where else these boyz work in UTC
TRS..........have fun .......Dreddman '"
The description should read:
Description "A Lunch Break. These dude's are a product of my
imagination + AURAN's mesh's / textures + a little bit of Gmax
from me ........... only available for regestered users of
Auran TRAINZ Service pack Ect..........on the download station
no where else these boyz work in UTC TRS..........have fun
.......Dreddman '"
All on one line of course.
Fixing Assets – Missing Tags
The next faulty asset (don’t worry, I’m not going through the whole list and there is no
significance that the assets are not my own, it’s just what is in my CMP at the
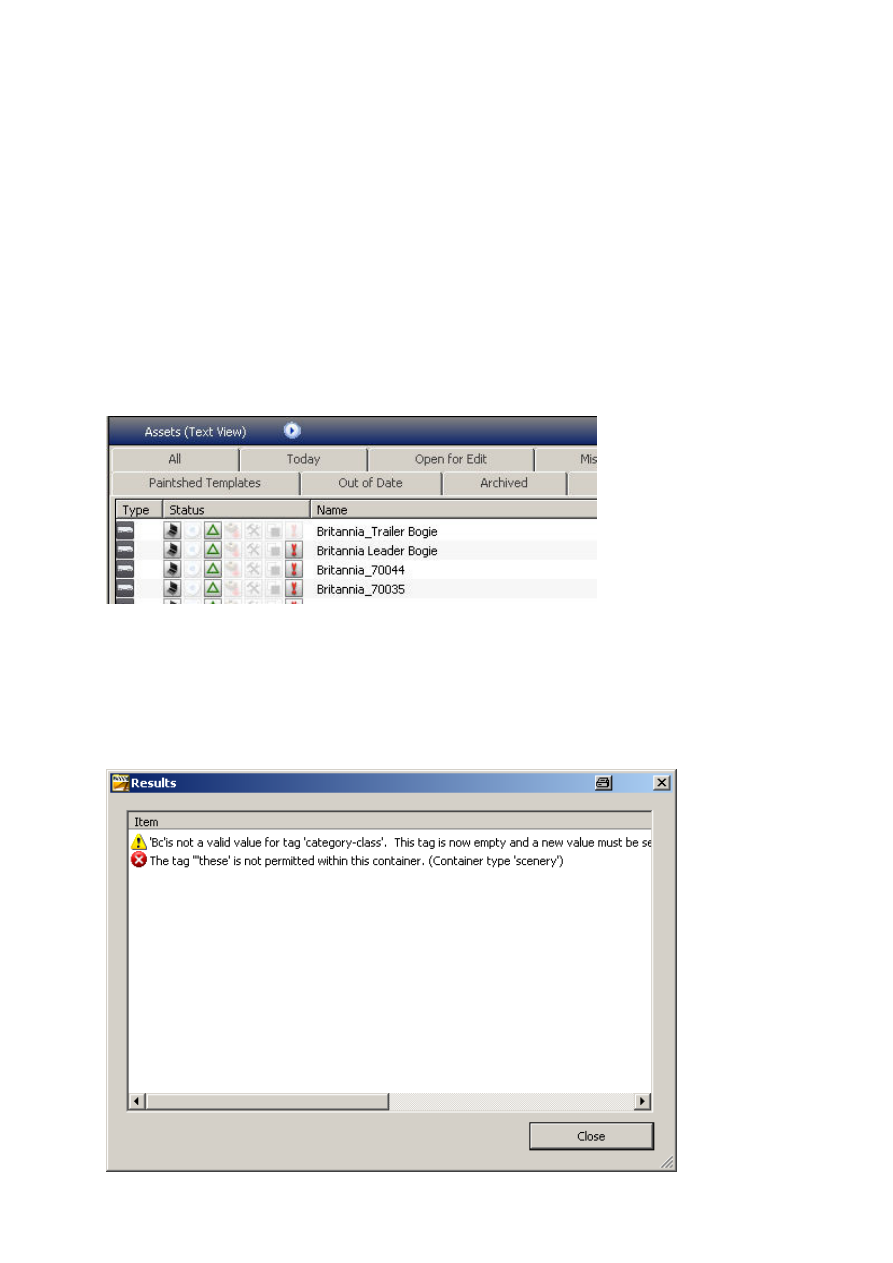
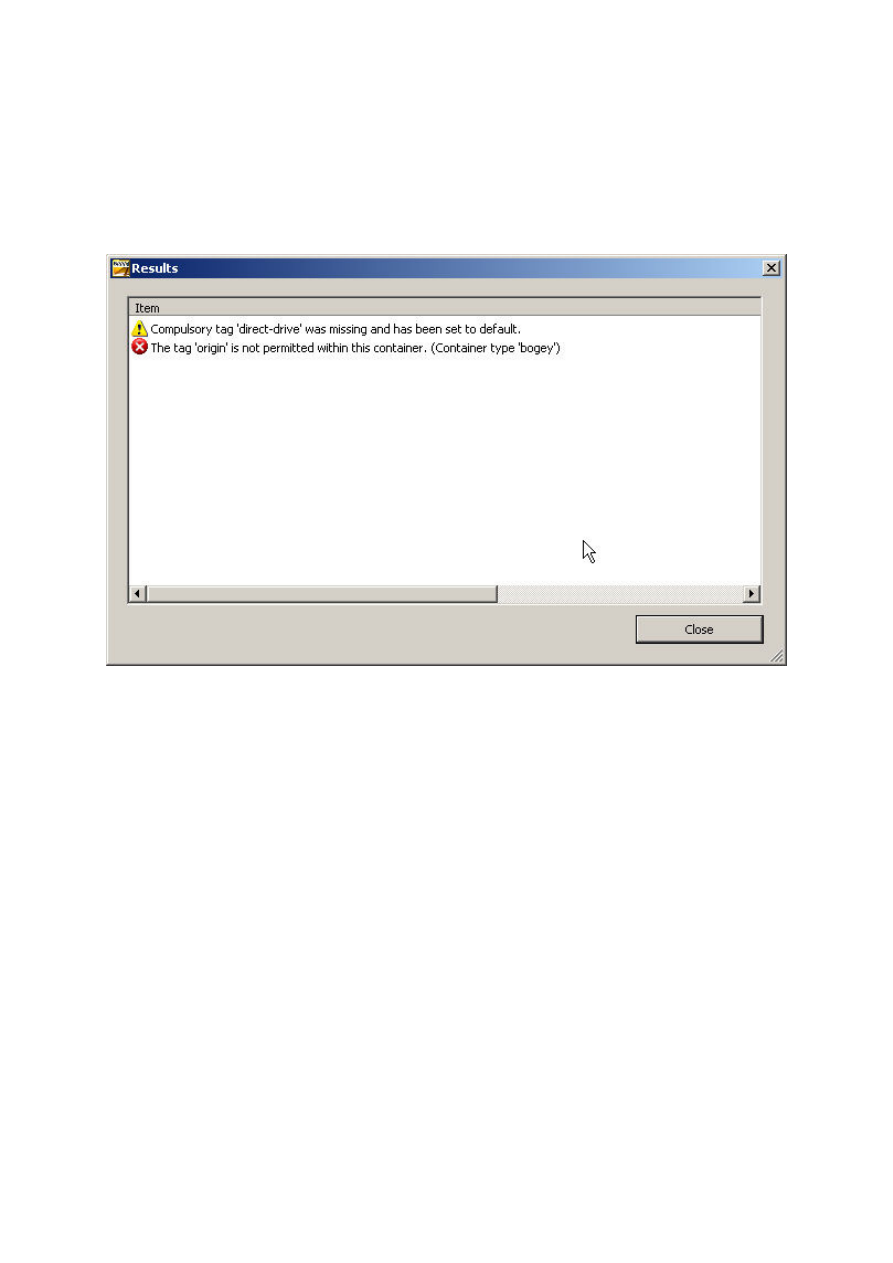
moment) has a missing tag that needs to be added:
The red icon with the cross denotes a real error and should be fixed in the same way
as the previous example. The yellow icon denotes a warning that will not be
displayed once the ‘red’ errors have been fixed, but we may as well fix this as well, so
open the config file for editing as before and add the line ‘direct-drive 0’.
Do not add this to the first, apparently empty line in the file and not somewhere
between a pair of curly brackets. If in doubt add new lines directly after the line that
starts with ‘kuid’.
This example begs the question how do you know that the new line should read
‘direct-drive 0’ and not ‘direct-drive’? The easy answer is to look at a
similar asset that is error-free and see what that has in the config file. The more
complicated answer is to look in the Content Creation Guide which will tell you what
can follow the ‘direct-drive’ tag. In fact in this case ‘direct-drive’ will also result in
an error-free asset…
Once again, don’t forget to commit the asset after editing it.
Fixing Errors – Missing Mesh Files
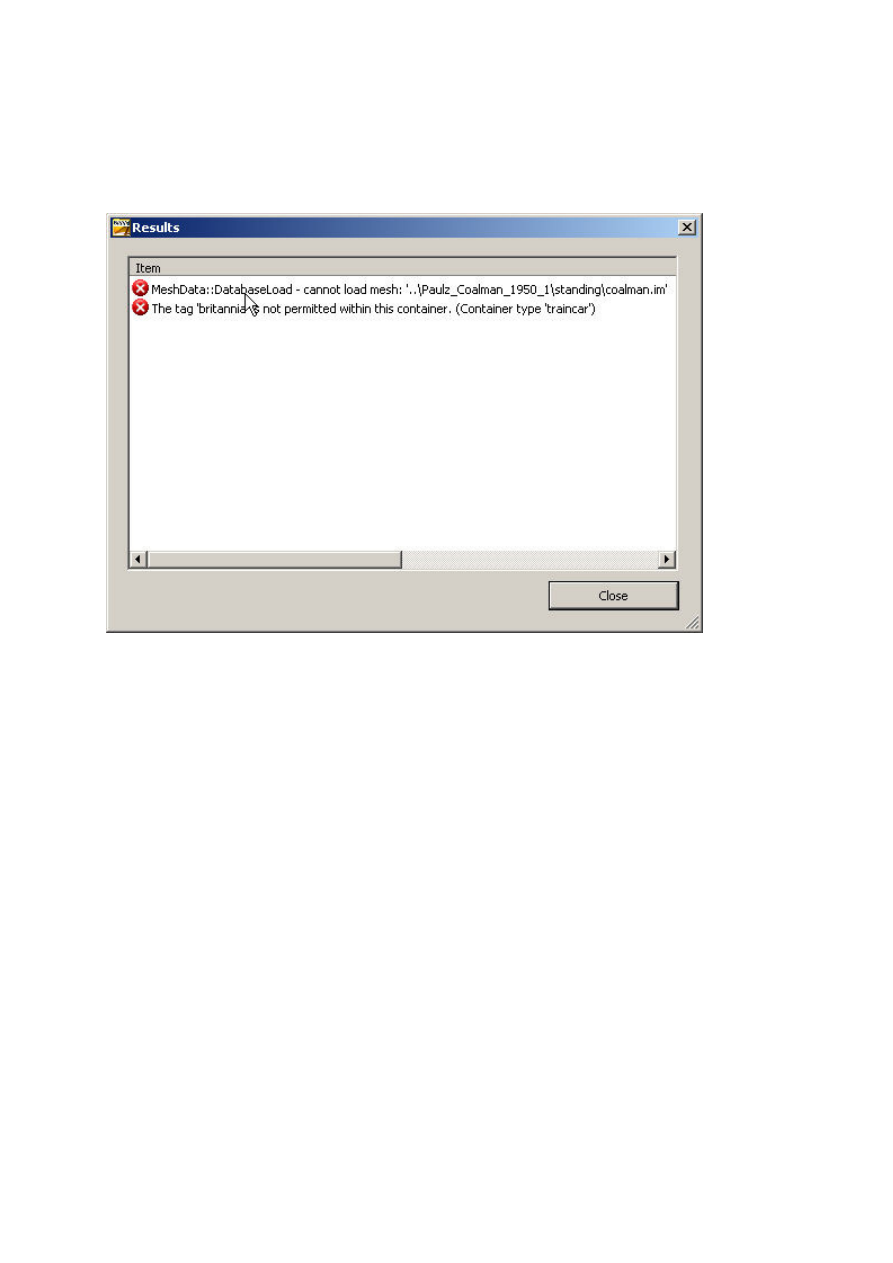
The next asset has a missing mesh file as can be seen from the error report:
This is a bit trickier to fix as this asset relies on the data structure that was present in
TRS2004. It is an attempt to share the coalman mesh asset between different locos,
but unfortunately this would have only worked on the author’s PC. This method was
never supported or encouraged by Auran for the very good reason that they knew it
probably wouldn’t work in future versions of Trainz.
It’s also interesting in that the asset will still work in both TRS2004 and TRS2006, the
only thing that will happen is that the coalman mesh will not be displayed which may
well not be noticed.
There’s an easy way to fix this, simply delete the references to this mesh in the config
file. You’ll have to remove the whole block, i.e. remove these lines:
coalman {
mesh
"../Paulz_Coalman_1950_1/standing/coalman.im"
auto-create 1
att-parent
"default"
att
"a.coalman"
}
Resave and commit the asset.
Slightly more complicated is to edit the lines so that they read:
coalman {
mesh
“standing/coalman.im”
auto-create 1
att-parent
"default"
att
"a.coalman"
}
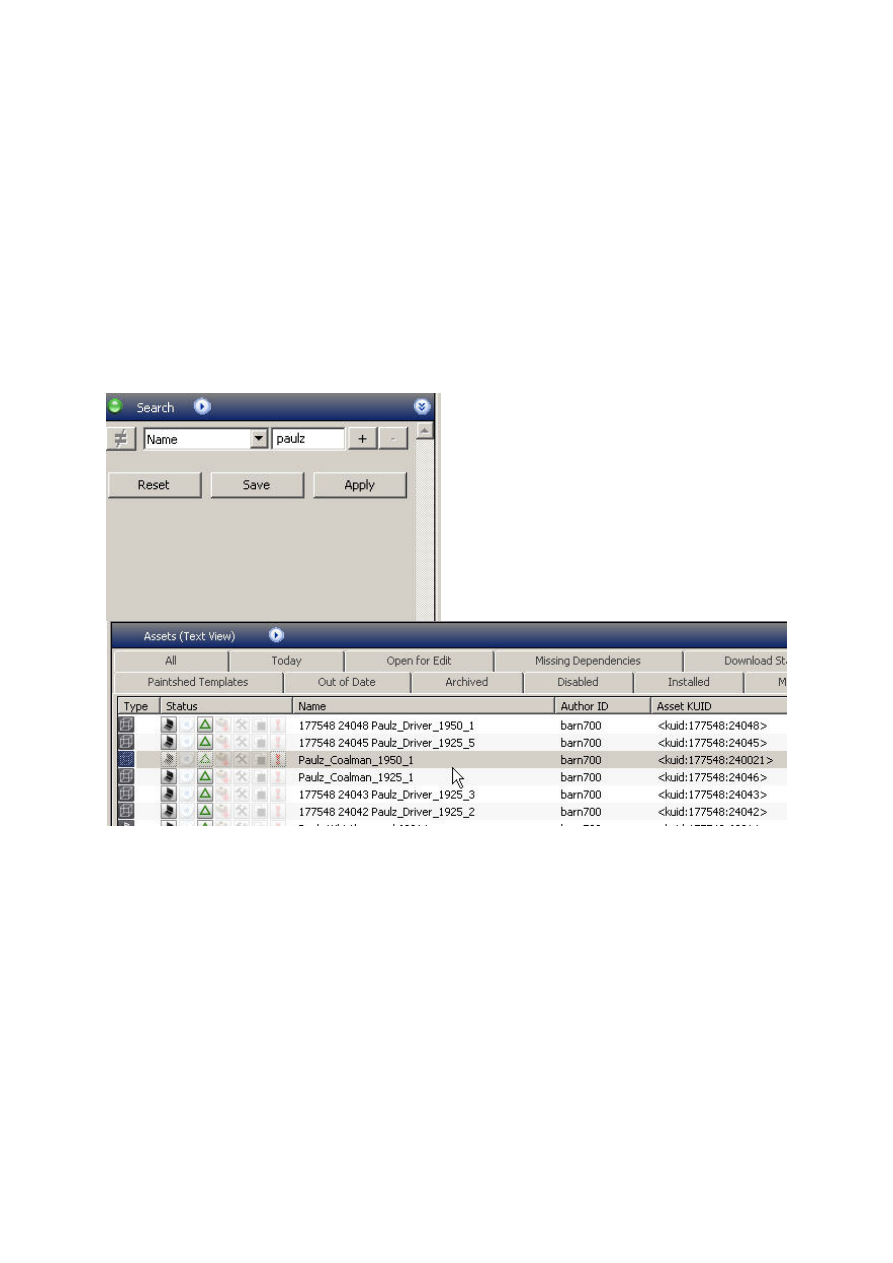
Now it is necessary to find the missing mesh which can be done using CMP. First
find the asset by searching for part of the name (note that CMP does not use any
wildcards in the search fields):
Open this asset for editing and copy the folder called ‘standing’ into the folder of the
loco that we are fixing. This method has the advantage that the coalman mesh
should appear now.
A more likely cause of the missing mesh message would be a typo in the config file,
so check that the path and filename in the config really exists. If not you will have to
work out which of the *.im files present should be referenced by the config. In some
cases it could be that the mesh really is missing and here the choices are to remove
the references to the mesh (and hope it wasn’t anything important!) or to contact the
author.
Before taking any drastic steps like removing parts of the config making a backup
copy would be a very good idea.
Fixing Assets – Could not Load Texture
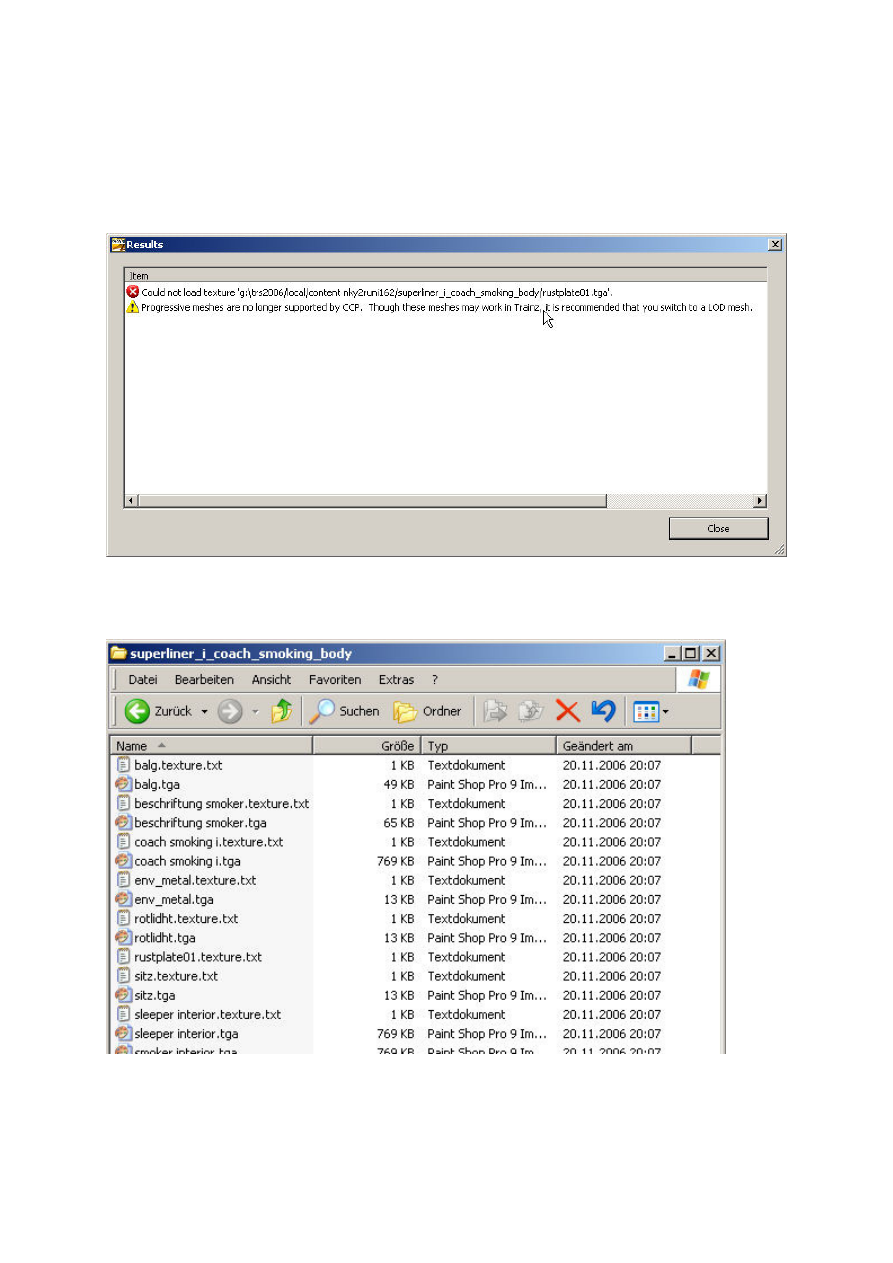
Now so something easier. A very common error is ‘Could not Load Texture’ as in this
example:
Opening the asset for edit and listing the contents of the
‘superliner_1_coach_smoking_body’ in Explorer gives the following result:
Looking at this you can see that each texture file has a corresponding *.texture.txt file
except for ‘rustplate01’ where no texture file is present. There are a couple of
possibilities here, for the brave just delete the file ‘rustplate01.texture.txt’. If you are
feeling less brave open the ‘rustplate01.texture.txt file to see what type of file it is
looking for:

OK, a *.tga. Find the smallest *.tga file in the asset folder, in this case we can use the
‘env_metal.tga’ file and copy it, changing the name to ‘rustplate01.tga’. If you feel
confident enough to create your own texture files you can make one using PaintShop
Pro or a similar graphics program, but ensure that *.tga files are saved
uncompressed. Fill the new *.tga file with a bright colour like pink and save it under
the name ‘rustplate01.tga’ in the folder where the ‘rustplate01.texture.txt’ file is
stored.
Commit the asset and try it out in TRS2006 – if you can’t see any bright pink bits it is
probably safe to delete both the ‘rustplate01.tga’ and the ‘rustplate01.texture.txt’ files.
Leaving them there will affect the performance very slightly but it will not cause any
major problems.
Should any pink bits be visible then it means that the texture file is needed and was
indeed missing in which case the new pink texture can be recoloured to something
more appropriate or you could try contacting the author for the missing texture. If all
else fails looking for similar assets by the same author might find the missing one.
Another cause of the ‘Could not Load Texture’ error is that a *.tga file has been
saved in a compressed format but this is unlikely to happen as the author should
have spotted this himself/herself.
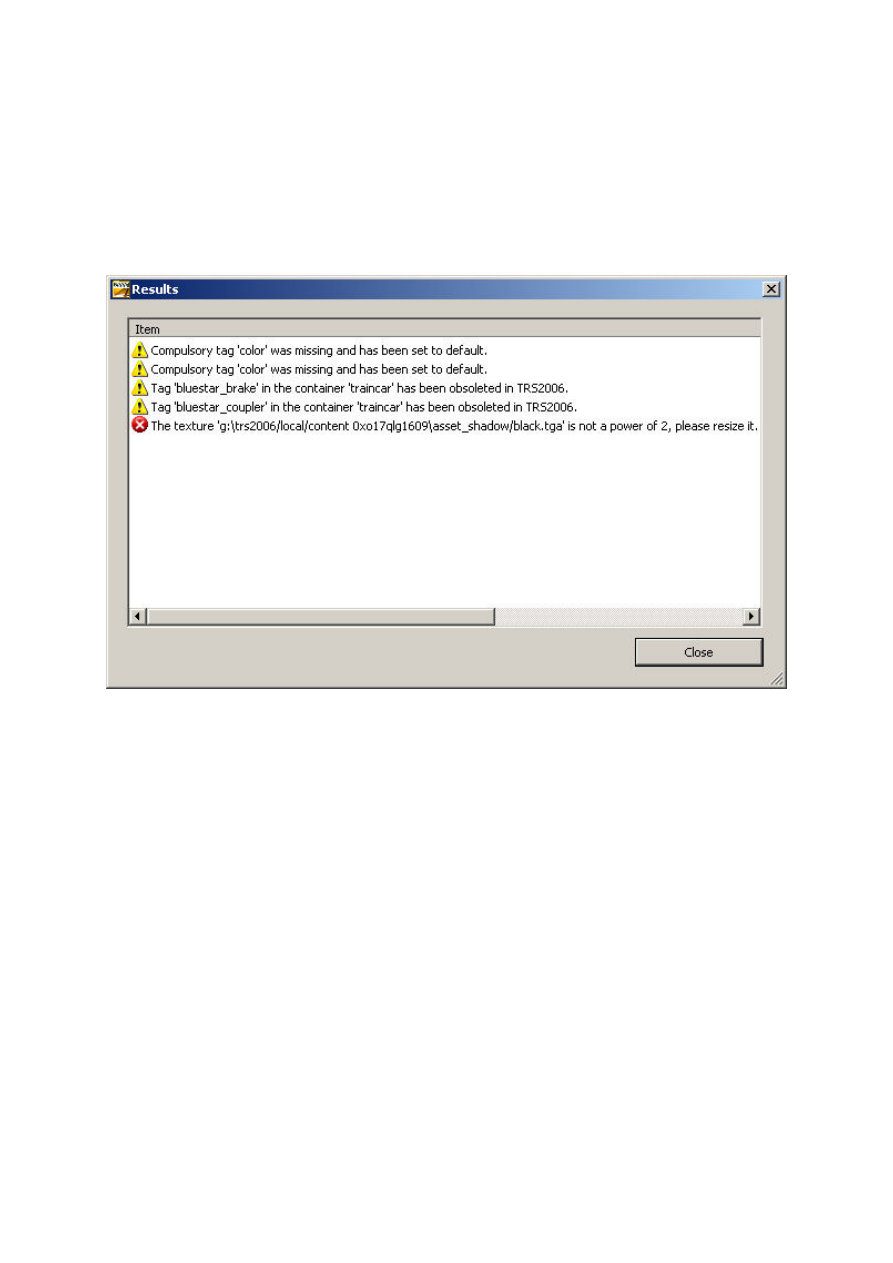
Fixing Assets – Texture is not a power of 2
Another error that is fairly unlikely to occur with assets that you have downloaded
(but it does happen sometimes) is that the texture size is not a power of 2. The width
and height of a texture must be a power of 2, i.e. 1, 2, 4, 8, 16, 32, 64, 128 etc.
Check the size of the texture by first opening the asset for editing in Explorer and
then opening the offending texure file in a graphics program like PaintShop Pro. In
this case the texture was 3x3 so it needs resizing – in PaintShop Pro is is done with
SHIFT-S and typing in the desired sizes. Resave the texture and commit the asset.
Also note the four warnings shown in the error box, once the texture has been
resized these will not be shown.
Fixing Assets – primary and alpha texture are not the same size
Some assets use texture files that have an extra *.bmp file to define the alpha map –
this is used to create see through areas on a model without actually cutting holes in
the mesh. An example would be a ladder or a fence which could be modelled as a
single plane with an alpha map.
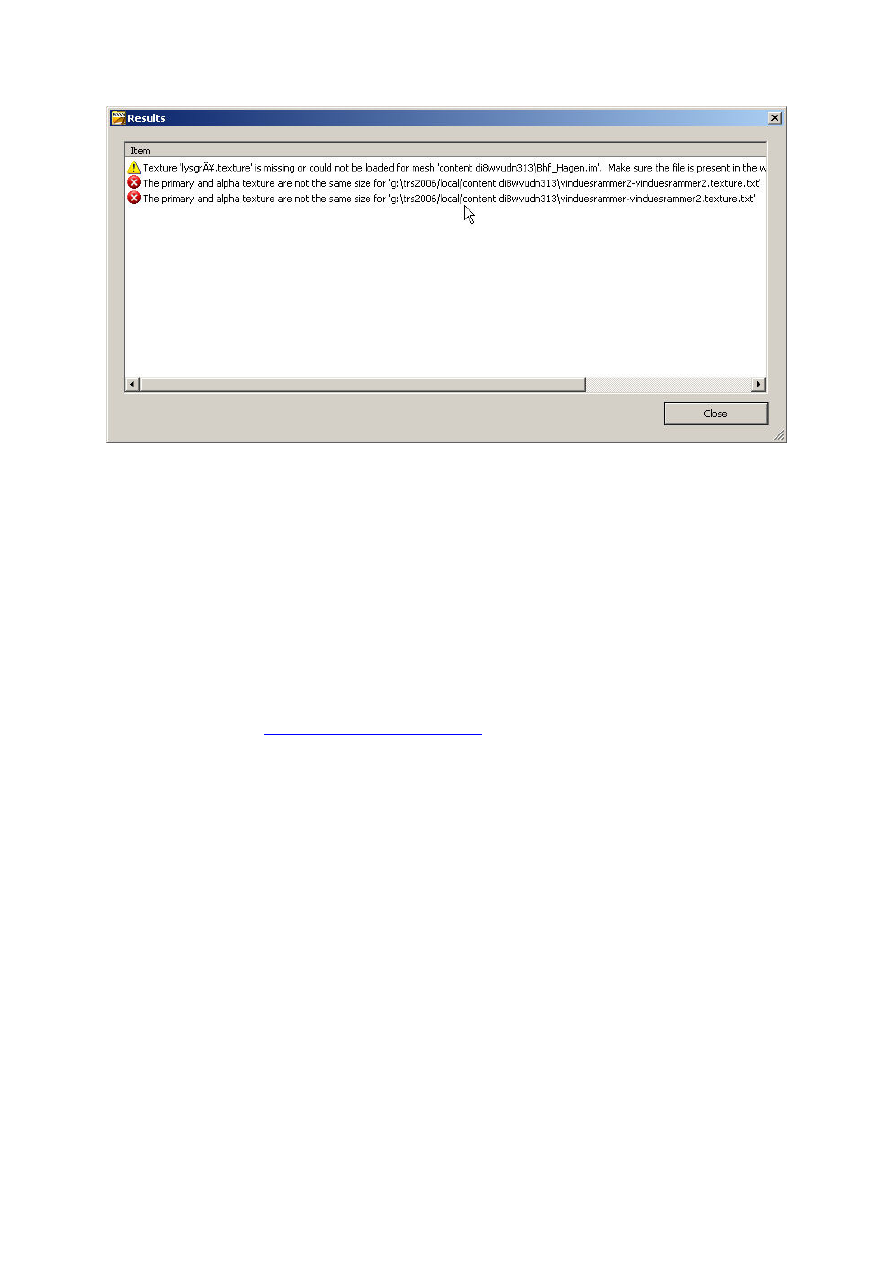
Prior to TRS2006 the textures did not have to be the same size in pixels, but they do
now. The solution is to resize the alpha texure to the same size as the main texture
which can be done using a graphics proram such as PaintShop Pro.
Resave the texture and commit the asset.
Postscript
Hopefully this document has helped you to find and fix the more common errors in
TRS assets for use in TRS2006. If there are any that I have missed or points that are
unclear get it touch
mailto:paul.hobbs@web.de
and I’ll post a revised version of this
document on the Rail-sim site. Please make sure to give any emails a meaningful
subject line as they may well land in my spam trap.
Wyszukiwarka
Podobne podstrony:
Zap miesnia sercowego, CMP, omdlenia
Popular Mechanics Fixing Hood And Trunk Latches
Popular Mechanics Finding And Fixing Water And Air Leaks
error
c wxSmith and Code Blocks build error Stack Overflow
eco sciaga, 25. System jednolitej ceny na gieldzie - fixing, Prawo popytu - wraz ze wzrostem ceny da
Fixing to plasterboard and plasterboard fixings
ERROR panasonic
Fixing to lathe & plaster
Error Correction in Methods
Error Analysis
Lexmark Laser Error Codes
Fujitsu error codes old
CMP kolo Wiewiorowska (1)
Sensor Error
14 Fluency vs ?curacy Error correction
Popular Mechanics Fixing Suspension Clunks and Rattles
ERROR CODE CZYLI SPIS ERRORów XBOX 360
Error message Pricing
więcej podobnych podstron