Smiley’s Workshop 6: A Menu Navigator.
Smiley’s Workshop 6: A Menu Navigator
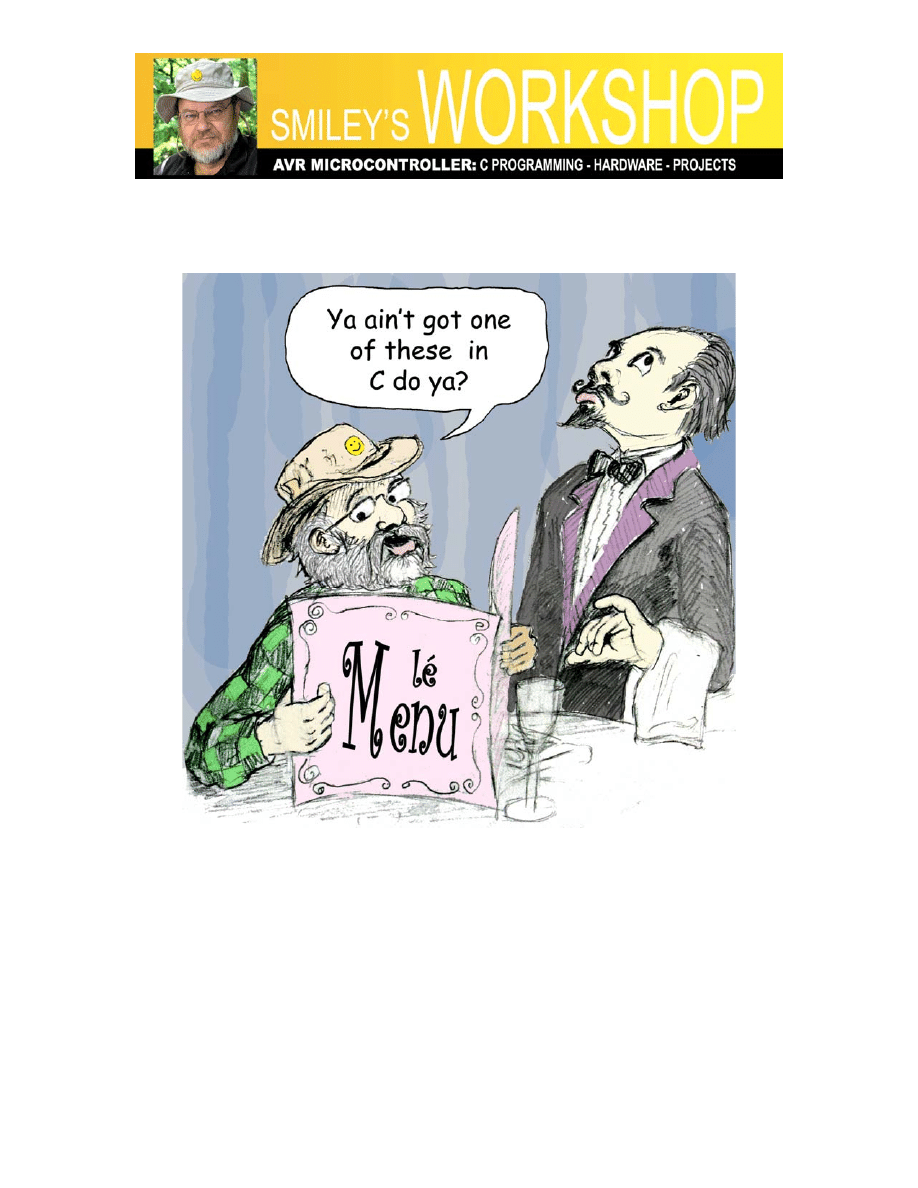
Figure 1: Lé barbare et lé menu.
I know just enough French to be dangerous, so on a visit to Paris, I insisted on using the
regular menu and got some very strange meals. After a few such mishaps, I discovered
that they usually had an English menu hidden away for les barbares so I started using
that one and still got some very strange meals. C’est la Vie.
In this month’s workshop, after learning more about C syntax for decision-making, we
are going to write a menu navigation system similar in concept to the one on your cell
phone, but for the Butterfly using it’s LCD and joystick. Important safety tip: make sure

Smiley’s Workshop 6: A Menu Navigator.
you understand the concepts in Workshops 1 to 5 before slamming your head into this
article.
C Control Flow
Statements and Blocks
Expressions such as PORTD = ~i or j -= 128 become statements when they are followed
by a semicolon.
PORTD = ~i;
j -= 128;
The semicolon terminates the statement.
Tale of a bug:
I wrote the following statement:
while(QuarterSecondCount < 17600);
QuarterSecondCount = 0;
Then decided that the 17600 wait count was too long so I changed it to 2200:
while(QuarterSecondCount < 2200)//17600);
QuarterSecondCount = 0;
But I wanted to remember the 17600 in case I ever needed it again, so I commented it out
and added the new value. Do you see a problem here?
Well, what I meant to say was:
while(QuarterSecondCount < 2200);
QuarterSecondCount = 0;
Which is two statements, the first waits while an interrupt running in the background
increments QuarterSecondCount, and once that is finished the QuarterSecondCount is set
to zero. What the compiler saw was:
while(QuarterSecondCount < 2200)
QuarterSecondCount = 0;
But the compiler doesn’t see anything following the // comment delimiter. See the
problem yet?
Well how about the equivalent statement:

Smiley’s Workshop 6: A Menu Navigator.
while(QuarterSecondCount < 2200) QuarterSecondCount = 0;
I had accidentally ‘commented out’ the terminating semicolon from the first statement.
The compiler doesn’t know about the line breaks, all it sees is a single statement, which
says that while QuarterSecondCount is less than 2200, set QuarterSecondCount to 0. So
each time the interrupt incremented QuarterSecondCount, this statement set it back to
zero. One lousy semicolon gone and everything changes!
This is the kind of bug, that after spending X amount of time locating, you carefully hide
it from your boss lest she think you are stupid or careless or both. Fortunately, I am my
own boss, so I’ve learned to live with my stupid and careless employee. (I fired myself
once, but that just didn’t work out.)
Compound statements are made by enclosing a group of statements or declarations in a
block delimited by braces ‘{‘ and ‘}’. This causes the compiler to handle the block as a
unit.
If-else and else-If
We can make decisions using the if-else statement:
if (expression1)
{
statement1a;
statement1b;
}
else
if(expression2)
{
statement2a;
statement2b;
}
else
{
statement3a;
statement3b;
}
In this case each expression will be evaluated sequentially looking for the first non-zero
(true) expression and if they all equal 0 (false) we do the final block of statements.
You can omit the final else statement if you want to do nothing if all the expressions are
0 (false). Note also that only the first true expression is used, if expression1 is true and
expression2 is also true, it won’t matter because the code will exit the if-else after the
first true case.

Smiley’s Workshop 6: A Menu Navigator.
We could use this construction to write a block of code for interpreting joystick input
positions:
if(input == KEY_UP) keyUP();
else if(input == KEY_DOWN) keyDOWN();
else if(input == KEY_LEFT) keyLEFT();
else if(input == KEY_RIGHT) keyRIGHT();
else if(input == KEY_PUSH) keyPUSH();
else
keyERROR();
This says: if the input is equal to KEY_UP then call the keyUP() function. If the first line
is true then the rest of the statements are skipped. If the first line isn’t true, then each line
is evaluated sequentially until a true expression is found or it calls the final ‘else’
keyError() function
Switch
The ‘if else’ construction limits us to expressions that are either true or false. If we want
to make decisions using expressions that can have any numeric result we use the switch
statement that selects an expression with results equal to a specified constant.
We can redo the if-else block used in the joystick interrupt example using a switch
statement as follows:
switch(input){
case
KEY_UP:
keyUP();
Break;
case KEY_DOWN:
keyDOWN();
break;
case KEY_LEFT:
keyLEFT();
break;
case KEY_RIGHT:
keyRIGHT();
break;
case KEY_PUSH
keyPUSH();
break;
default:
keyERROR();
break;
}
This works just like the if-else block. The ‘break’ statement causes an immediate exit
from the switch block - there is no need to check the rest as we have found our case. If

Smiley’s Workshop 6: A Menu Navigator.
you want to continue evaluating cases against the input, leave out the break and the next
statements will be looked at.
You can let cases fall through, which can be handy in circumstances such as evaluating
character input where you don’t care if the character is a capital or lower case letter, or
perhaps you want the same response for a range of integers:
switch( input){
case
‘a’
:
case
‘A’
:
doaA();
break;
case
‘b’
:
case
‘B’
:
dobB();
break;
case
‘0’
:
case
‘1’
:
case
‘2’
:
case
‘3’
:
gofer0123();
break;
case
‘4’
:
case
‘5’
:
case
‘6’
:
case
‘7’
:
gofer4567();
break;
default:
doDefault();
break;
}
Switch statements are error prone and a frequent source of head boinking bugs (one
where you boink your head for being dumb enough to leave out a break statement). The
break after default: isn’t even necessary, but is recommended (by K&R) as a good
practice to help you remember to use it when you add a statement to the end of the list.
Loops – While, For, and Do-while
We’ve been using while for a while (har!).
while(expression)
{
// Do stuff while expression is true
}
While will repeat the associated statement or block as long as the expression is true.

Smiley’s Workshop 6: A Menu Navigator.
The code fragment:
int
i;
while( i < 128)
{
PORTD = i;
_delay_loop_2(30000);
i = i*2;
}
This does exactly the same thing as the following for loop:
int
i;
for(i = 1; i < 128; i = i*2)
{
PORTD = i;
_delay_loop_2(30000);
}
The for loop is constructed as follows:
for(expresson1; expression2; expresson3)
{
//
Do
stuff
}
Usually expression1 and expression3 are assignments or function calls and expression2 is
a test of some sort. The expressions can be any expression including the empty
expression which is nothing followed by a semicolon:
for(;;)
{
//
Do
stuff
forever
}
This is an alternative way to do the while(1) eternal loop.
You can usually accomplish the same goal using either while or for statements. Generally
it is clearer to use for loops with a simple initialization and incrementing such as:
for(i = 1; i < 128; i = i*2)
{
// Do stuff while ‘i’ less than or equal 128
}

Smiley’s Workshop 6: A Menu Navigator.
But it’s really a matter of personal preference though most C dudes will want to smack
you around a little if you don’t do it their way.
While and for loops test for the termination condition before running the block, ‘do
while’ runs the block first before checking the expression, insuring that the block will be
run at least once:
do
{
// Do stuff at least once
}
while(expression);
A Butterfly Menu System
If you still have the box your Butterfly came in, you can see the full Butterfly menu laid
out for you (or you can find it in Figure 2-2 Application Menu in the
Butterfly_UserGuide.pdf in the workshop6.zip file), for this project we will recreate
roughly the first half of the Butterfly menu system (Figure 2: Partial Butterfly menu).
Look at this figure for a while and think about how you might do this task based on the C
syntax flow control discussion above.
We will make heavy use of the switch statement for creating our menu system. For our
hardware we will use the Butterfly LCD to display the menu text, and the joystick to
navigate around the menu and make menu item selections. The joystick gives us the
option of ‘moving’ the menu up or down to view main menu items, left or right to view
submenu items, or press to the center to select an item. We will hide all the details of
using the LCD and joystick in the smws6 object module that I’ve precompiled for you
and put in the C:\smws6\default directory so that you don’t have to blow your mind
looking at the source code for a lot of LCD and joystick support functions that are a bit
advanced and messy and you don’t need to understand them to understand menus. I
strongly suggest that you copy the entire source directory (in workshop6.zip) and keep a
virgin copy somewhere convenient so that as you mess with these ideas can go back to a
version that works.
Smiley’s Workshop 6: A Menu Navigator.
State 00
AVR BUTTERFLY
State 01
REVISION
State 02
TIME
State 03
CLOCK
State 04
"HH:MM:SS"
State 05
ADJUST CLOCK
State 06
CLOCK FORMAT
State 10
DATE FORMAT
State 11
MUSIC
State 07
DATE
State 08
"YY:MM:DD"
State 09
ADJUST DATE
State 12
FUR ELISE
State 13
TURKEY MARCH
State 14
SIREN
State 15
NAME
State 16
ENTER NAME
State 17
DOWNLOAD
NAME
Figure 2: Partial Butterfly menu.
The original Butterfly source code uses some intense C ideas to accomplish this task, but
we will use something a bit clearer for early learning purposes. More advanced
programmers will react to this code much like the waiter in Figure 1.
We start off in an initial menu state, which in our case is state00 (AVR BUTTERFLY).
After running the action function for this state: menuState00Func(), we enter an eternal
loop and check for input from the UART or the Joystick buttons. (We won’t discuss the
UART functions – they were useful for debugging and I left them in.) When the
checkJoystick() function tells us that there is a button press pending, we call the
parseJoystickInput() function.
int main(void)
{
// Setup the system
initialization();
// Introduce yourself
show("You are talking to MenuTest.c 1.00\n\0");
// Set the initial menu state
menuState = 0;

Smiley’s Workshop 6: A Menu Navigator.
keyPush = 0;
// Call the initial menu function
menuState00Func();
// Loop forever
while(1)
{
if(checkUART()) // a return of not 0 indicates a string is in s[]
{
parseUartInput();
}
if(checkJoystick()) // Process joystick state changes
{
parseJoystickInput();
}
}
}
[As an aside, the show(“this”) ‘function’ is actually a hidden macro that outputs the
“this” string on both the UART and the LCD. ]
We will keep the current state in ‘menuState’:
volatile uint8_t menuState; // what state are we in?
This is a global 8-bit unsigned (uint8_t) variable declared as volatile so that the compiler
knows it may change unpredictable and won’t try to second-guess you and eliminate it if
it thinks it isn’t really being used (compilers are a lot like the waiter in Figure 1).
The parseJoystickInput function is a 17 case switch statement that calls the state function
for the current menuState variable:
void parseJoystickInput()
{
switch(menuState)
{
case
0:
state00();
break;
case
1:
state01();
break;
case
2:
state02();
break;
// Cases 3 through 16 deleted to save magazine space
case
17:
state17();
break;
default:
// TODO: DEAL WITH ERROR

Smiley’s Workshop 6: A Menu Navigator.
break;
}
}
Note that this function is not related to any particular joystick button, it simply calls the
state function for the current state if there is joystick input. The state function that gets
called will look at the global variable ‘joystickInput’ value and act accordingly.
We will navigate the menu states by using the joystick buttons: UP, DOWN, LEFT, and
RIGHT. We will decide if an action other than moving about the menu states should be
done by looking at the joystick button: PUSH. So if we are in a given menu state and we
get any of the movement states, we move if there is another state in that direction (and
change the menu state to the new state) or we ignore it if there is no valid state in that
direction (no change to the menu state). If we see that the joystick button is PUSH we
keep the state the same, but process the PUSH action specified for that state. If, at this
point your personal state is thinking about tearing up the magazine and finding a French
waiter to punch-out; try to bear with this for a while. Read the code snippets below and
reread this section if necessary. It may take a while to get your head around these
concepts.
We will also keep track of whether the joystick button has been pressed to the center,
which we will use to take actions not related to menu state changes:
volatile uint8_t keyPush; // do we need to something?
To repeat, when we get a new joystick button state, we can do one of two things:
Change the menu state or take an action for the current menu state.
Let’s look at a single state and see what can happen. Look at state03 (CLOCK) in Figure
2 and think about what happens next when the joystick button changes to:
1. Up – Do nothing.
2. Down – Change to state07.
3. Left – Change to state02.
4. Right – Change to state04.
5. Push – Set keyPush equal true.
When we change menu states we will call a function with the actions for that new state. If
the button is not a menu state change, but is PUSH, we will call the action function for
the current menu state
We can write this as:
Smiley’s Workshop 6: A Menu Navigator.
void state03()
{
switch(joystickInput)
{
case
KEY_UP:
//
Do
nothing
break;
case
KEY_DOWN:
// Change to menu state07
menuState
=
7;
menuState07Func();
break;
case
KEY_LEFT:
// Change to menu state02
menuState
=
2;
menuState02Func();
break;
case
KEY_RIGHT:
// Change to menu state04
menuState
=
4;
menuState04Func();
break;
case
KEY_PUSH:
// Call this menu state funcion with keyPress =
keyPush = 1; //true
menuState03Func(); // take action for this state
break;
default:
//
Do
nothing
break;
}
joystickInput = KEY_INVALID;
}
As usual, this is just an overview of the actual code. You can play with it by getting
Workshop6.zip from
We are doing something different this time, instead of using a library for the LCD and
joystick functions we are using an object module, smws6.o that must be located in the
C:\MenuTest\default directory so that the MenuTest project can find it.
I avoided mentioning ‘state machine’ up to this point since these two words, when
connected, tend to send folks running for the exits. But, guess what? You just studied a
‘state machine’ and your head didn’t explode (I hope). Yes, state machines are often the
topics of Computer Science doctoral dissertations, but they can also be as simple as a
switch statement.
We have three more workshops that will complete our study of introductory C syntax,
then we will assume the reader already knows enough C, and move on to some hardware
oriented project.

Smiley’s Workshop 6: A Menu Navigator.
Next month we will continue with more C syntax and build a Butterfly alarm clock.
Joe Pardue (
) is author of Virtual Serial Port Cookbook and C
Programming for Microcontrollers.
Document Outline
Wyszukiwarka
Podobne podstrony:
lp a Worksheet 06
eim1 06 worksheet
eim2 06 worksheet
eim1 06 worksheet
CE Elementary module 06 web worksheet
MT st w 06
Kosci, kregoslup 28[1][1][1] 10 06 dla studentow
06 Kwestia potencjalności Aid 6191 ppt
06 Podstawy syntezy polimerówid 6357 ppt
06
06 Psych zaburz z somatoformiczne i dysocjacyjne
GbpUsd analysis for July 06 Part 1
Probl inter i kard 06'03
06 K6Z4
więcej podobnych podstron