
Shopping list:
Stereo 3.5mm jack
2 metres good quality single core screened audio cable
Tools required:
T20 Torx screwdriver
Electrical snips
Small nosed pliers
Stanley knife
Soldering iron
Consumables:
Electrical insulation tape
Small cable ties
Solder
Heat shrink (3-5 mm)
One blank CD-R
Total Cost: £1.24 from a local electronics shop
Preface:
Please note this mod is only applicable to UK model cars fitted with stock head units and
post production dealership fitted CD changers.
I cannot be held responsible for
any damage incurred to your vehicle or yourself from undertaking this
modification.
New Beetle Aux-In mod
Process:
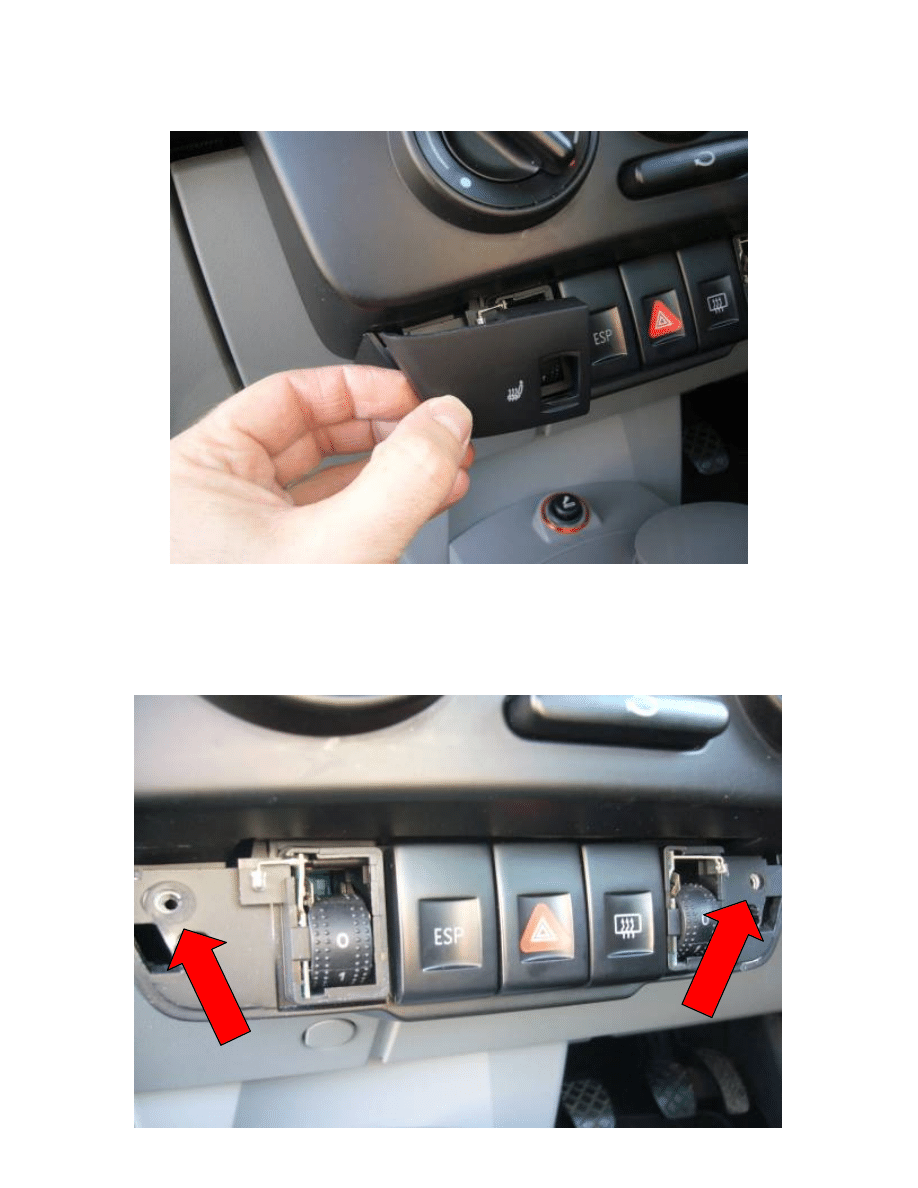
1.
Remove trim from lower dash pod – this will either be blanks, or if your car has
the optional Winter Pack, will be the Heated Seat switch trims:
2.
Remove the 4 T20 torx screws holding the switch assembly in place, as marked
here:
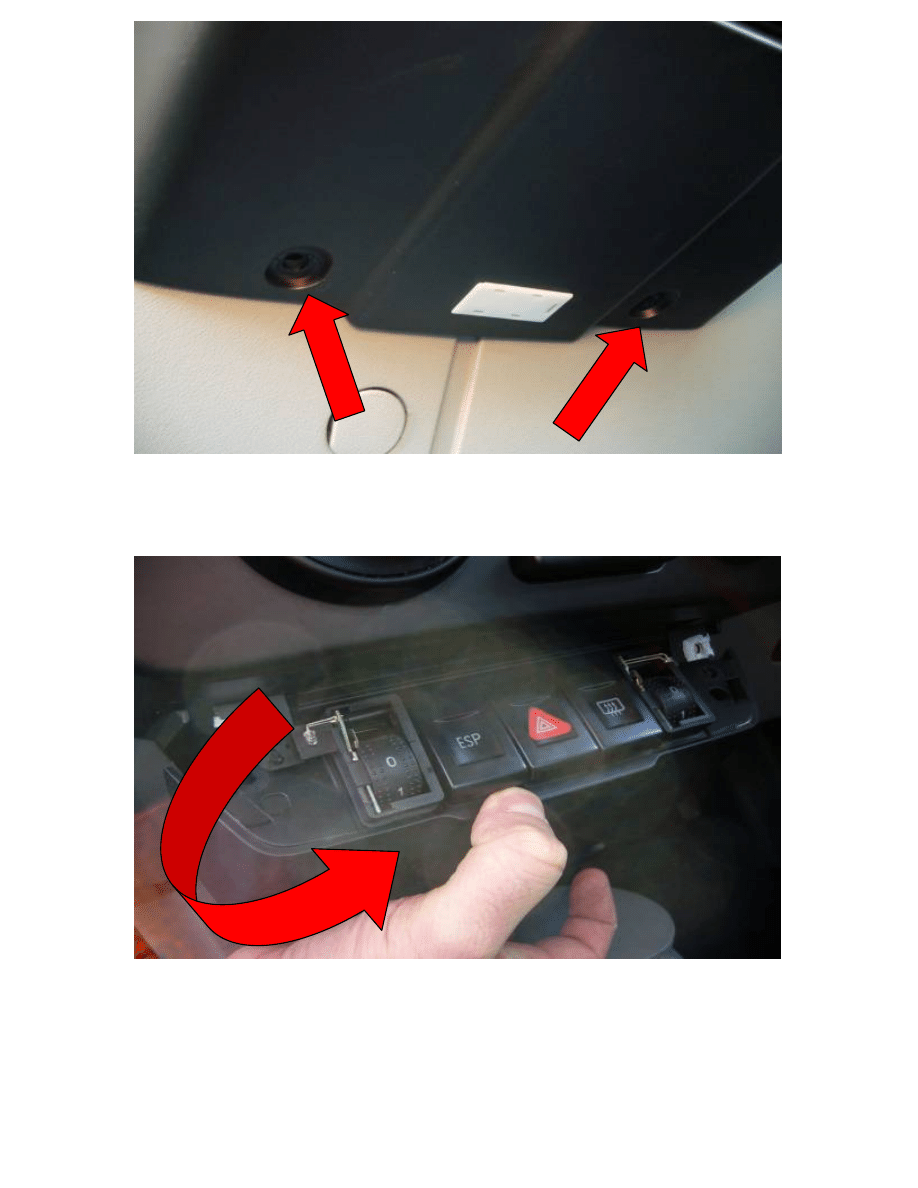
3.
Remove the switch assembly by pulling from the bottom and swinging away
from the top (imagine the top of the assembly in hinged – you’ll get the idea!)
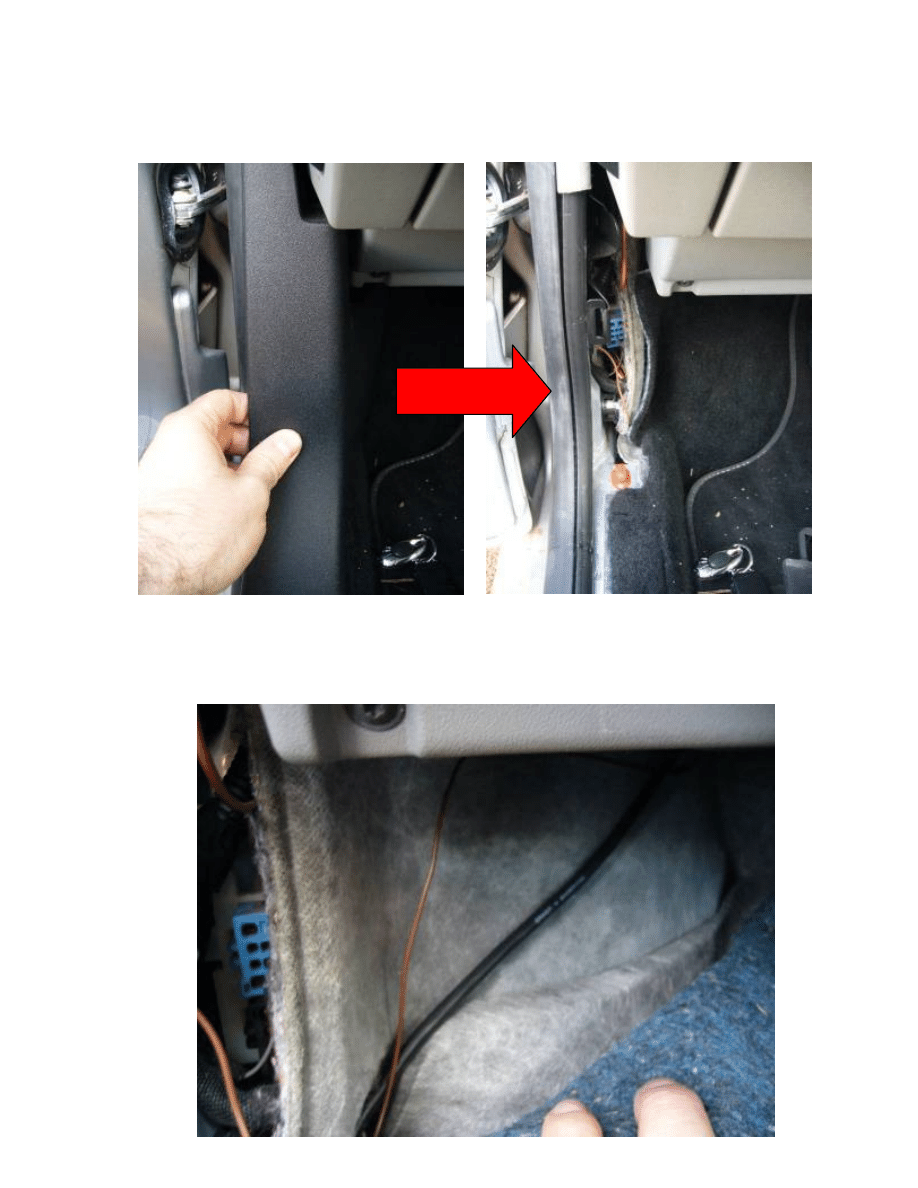
4.
To discover the CD changer control and audio cable, you will need to remove the
door threshold trim and lower A-pillar trim. These are held in with clips, and may
need some encouragement to remove!
5.
Pull back the carpet, and hopefully you should reveal a black cable – don’t
assume this to be the correct one – make sure you trace it back to the CD
changer in the boot.
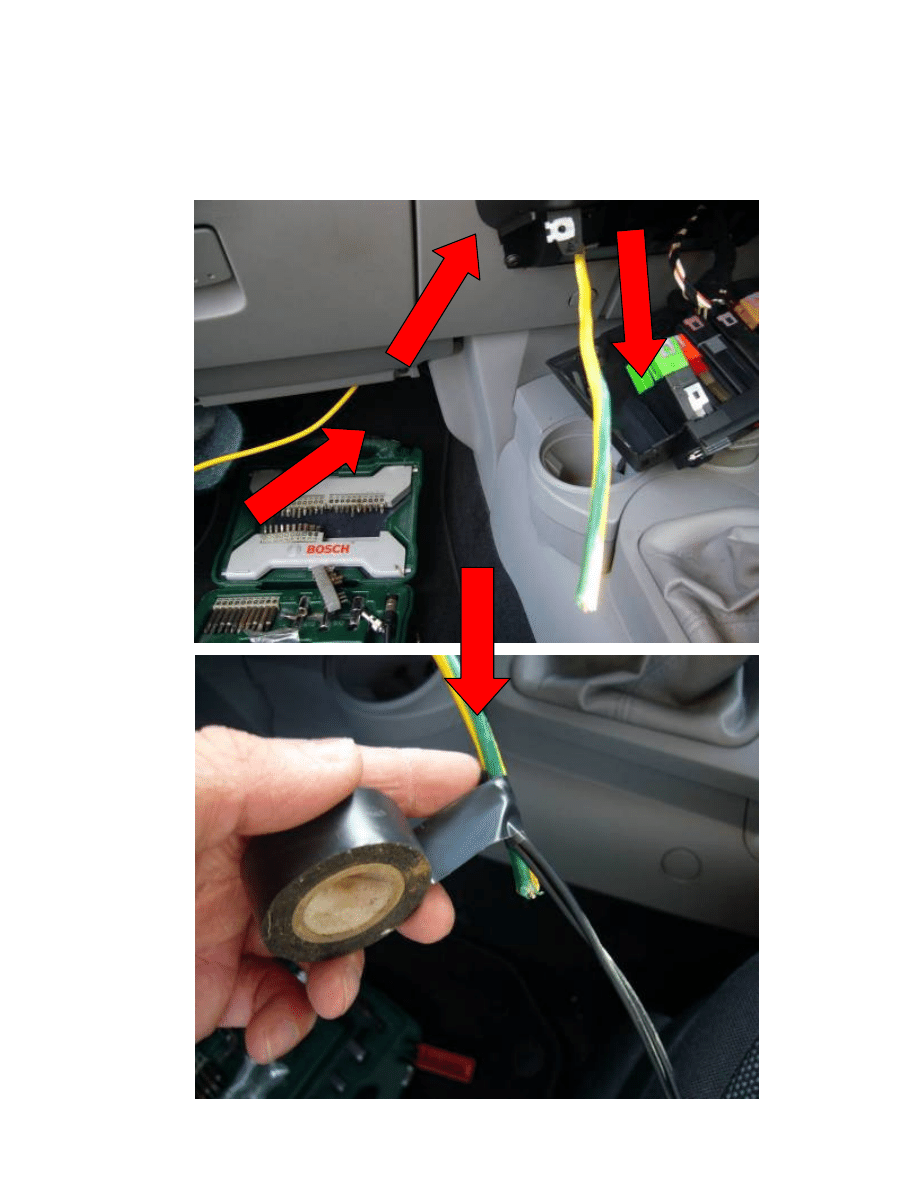
6.
Now you’re nearly ready to make the cut and connections, you’ll need to thread
the new audio cable through to the dash. Use a piece of stiff cable and thread
from the rear of the centre console, up to the location of the switch assembly
previously removed. Attach the audio cable to the mouse and pull back leaving
enough slack to make the connections later on.
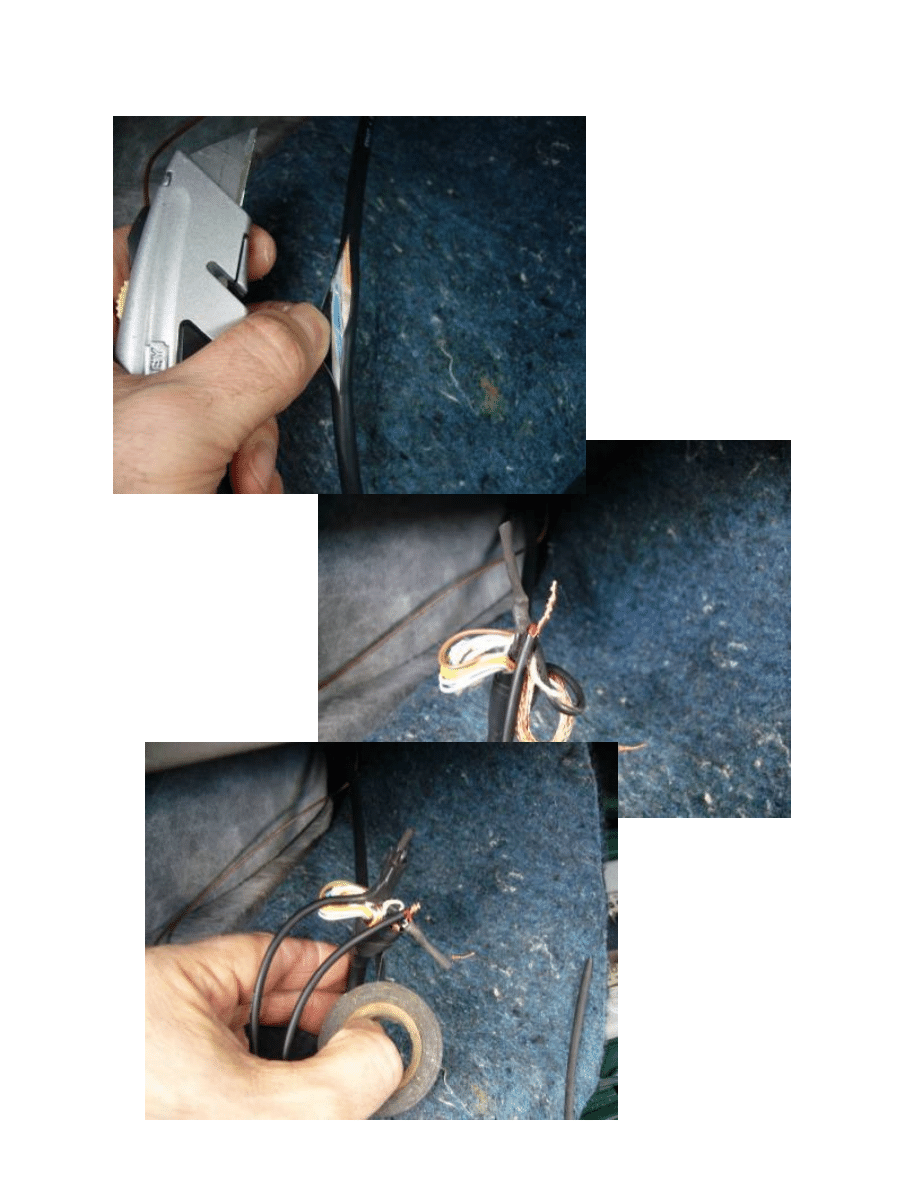
7.
Carefully splice in to the black outer sheath of the CD changer cable, and remove
some of the sheath. Look for two slightly fatter black cables –, carefully cut away
some of the
sheath – both of
these are audio
cables – one left
and one right.
Snip the cables,
bare the wires
and connect the
audio cables you
have threaded
through to these.
Make sure to
also connect the
shielding as this
will eliminate
any
interference.
Finally, use
some
heatshrink
over the
connections
and wrap the
whole lot in
tape making
sure you
don’t have
any loose
strands of
copper that
could short
out your
new
connections!
8.
Turning your attention to the switch assembly area. Strip back the cables and
tidy up the ends. Make sure you know which wire is left, and which is right. If
your new 3.5mm jack was like mine, you may not know which solder legs are left
and right, I plugged in a 3.5mm to phono cable and used a multimeter set to
continuity check to figure this out. Once you’ve worked that out, solder the wires
to the legs and make sure your connections are good.
9.
The only draw back to this rig is the fact that you will need to keep the CD player
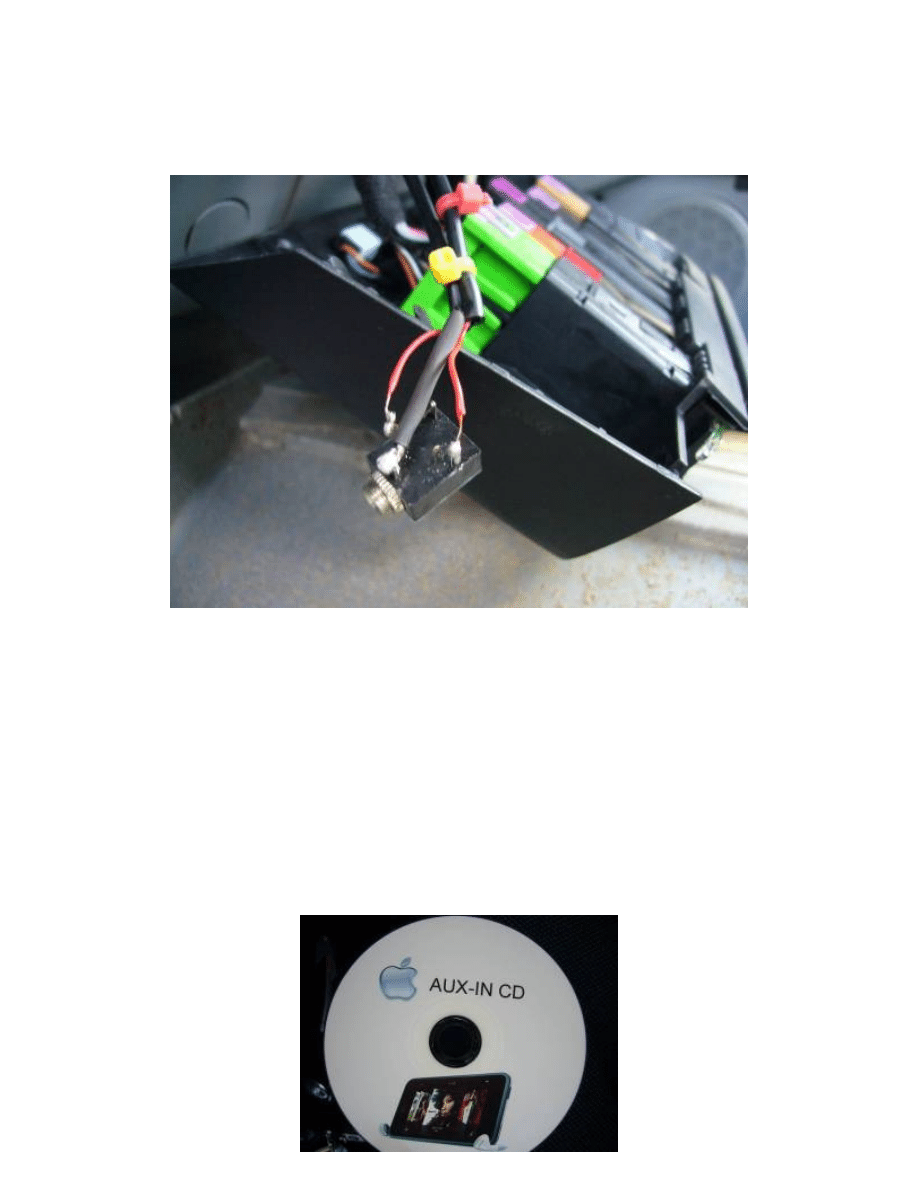
running while listening to your MP3 player. To get round this, I made up a blank
70 minute audio CD – this CD is one 70 minute long track with NO sound on it!
This will enable the CD option on the head unit to be used without any sound
coming from the CD’s in the changer. If you unplug the CD changer and hope to
rely on the audio input you have just wired in alone, then unfortunately you will
be greeted with NO CD CHANGER message on the head unit. If you need help
creating a blank CD: using Windows Sound Recorder set it recording with no
sound turned on for approx 1 minute. Save this to the Desktop and import in to
an Audio editing suite, copy and paste this until you reach 70 minutes, render
this as a .WAV file and burn to a blank CD. Then, mark up the CD or print a label
to it in case you wonder what the hell it is in the future!
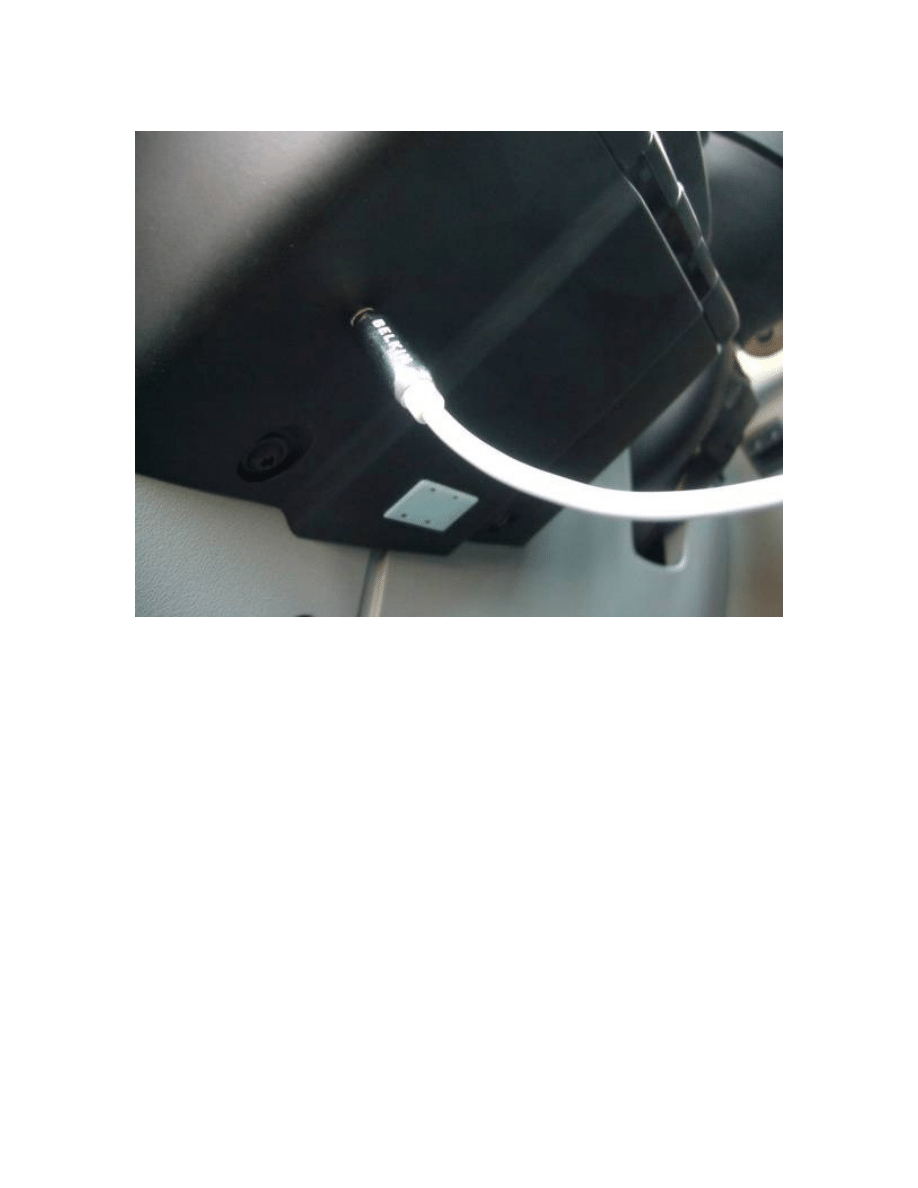
10.
Offer up the jack to the switch assembly and decide where to mount it – you
may need to cut a small amount of the assembly housing away to fit the jack in
to. Drill and fit the jack. Reassemble switch assembly and trims.
Stand back, and enjoy!
Wyszukiwarka
Podobne podstrony:
64 919 934 New Trends in Thin Coatings for Sheet Metal Forming Tools
2008 5 SEP Practical Applications and New Perspectives in Veterinary Behavior
Basic in Mod carrier mid 01 ENG PG 1
new features in version2
2009 4 JUL New Concepts in Diagnostic Radiology
New Developments in HBV Treatment
NEW %20Falow%C3%B3d%20prostok%C4%85tny mod TM[1]
Chomsky New Horizons in the Study of Language
SSP 211 New Beetle Parte 01
New Beetle Teil 1
New Beetle PART (2) Szary Nadwozie
NEW baby in Halloween suit and ghost amigurumi pdf pattern italiano english
New Beetle blue
Żakowski, Karol New Parties in Japan – In the Search of a “Third Pole” on the Political Scene (2013
New directions in sample preparation for analysis of organic
New thoughts in ring3 NT rootkit
New Beetle red
więcej podobnych podstron