1
irdhouse Floor Lamp
Place this cheerful floor lamp beside a comfortable chair in a corner of any room, and it
will surely become your favorite spot to curl up with a good book. It’s also a terrific addition to
a garden room or a little girl’s bedroom.
B
2
Materials List
§ 10 linear feet of 1 x 1 pine
§ 18 linear feet of 1 x 8 pine
§ 2 linear feet of 2 x 4 pine
Hardware
§ 30 1-1/2”3d finishing nails
§ 50 1-1/2”4d finishing nails
§ 20 2-1/2”8d finishing nails
§ Lamp kit (available at most hardware stores)
§ Lampshade of your choice
Special Tools & Techniques
§ Miter
§ Bar Clamps
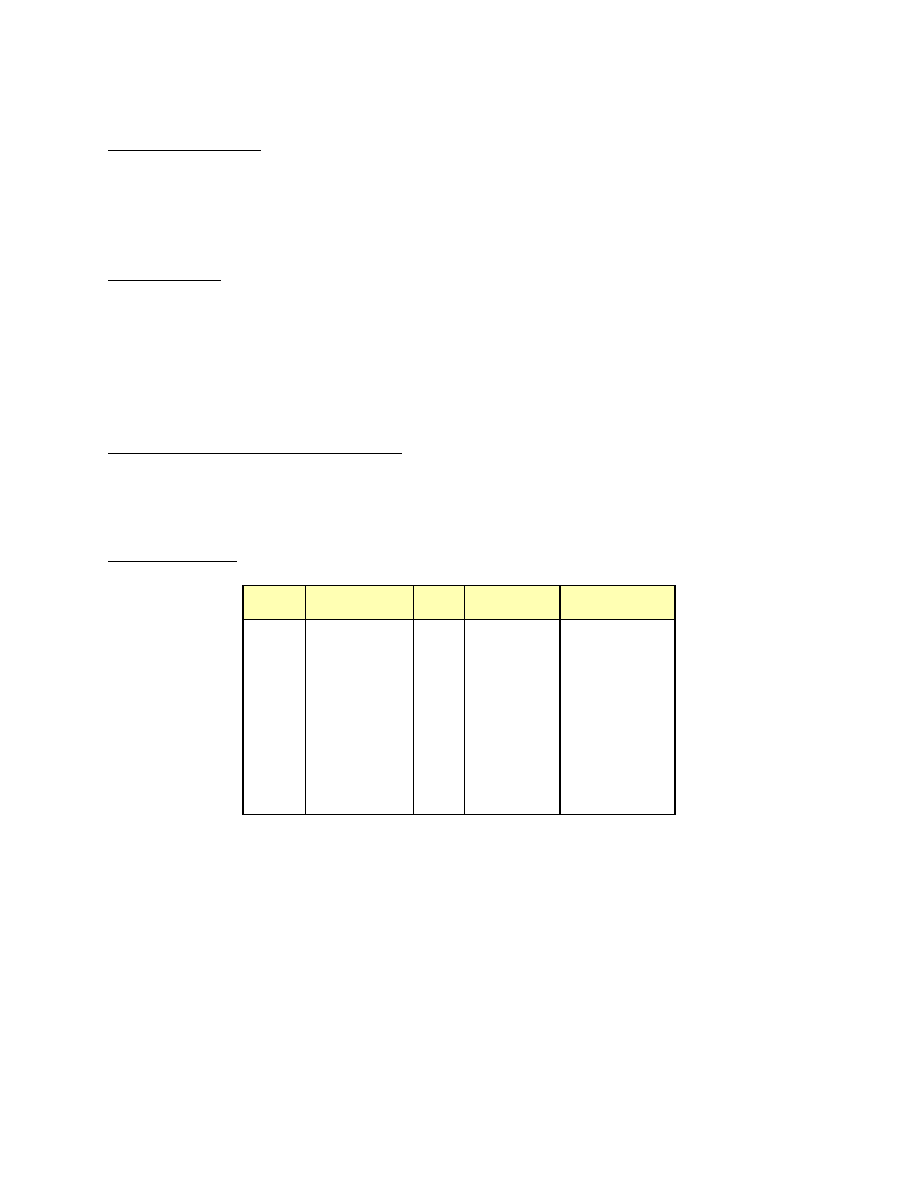
Cutting List
Code Description Qty. Material
Dimensions
A
Back/Front
2
1 x 8 pine 46-1/4”long
B
Side
2
1 x 8 pine 43-5/8”long
C
Roof
2
1 x 8 pine 10-1/2”long
D
Side Trim
8
1 x 1 pine 8-3/4”long
E
Front Trim
4
1 x 1 pine 8-3/4”long
F
Base
4
2 x 4 pine 10-1/2”long
Constructing the Base
1. Cut two Back/Front (A) from 1 x 8 pine, each measuring 46-1/4 inches.
2. Referring to Figure 1, remove the shaded area on one end of a Back/Front (A).
3. Repeat Step 2 to remove the shaded area on one end of the remaining Back/Front (A).
4. Cut two Sides (B) from 1 x 8 pine, each measuring 43-1/8 inches.

3
5. Place the two Sides (B) on a level surface, parallel to each other and 5-3/4 inches apart.
Apply glue to the meeting edges, and place one Back/Front (A) over the two Sides (B), as
shown in Figure 2. Note that the square end of the Back/Front (A) is even with the end of
the Sides (B), and that the pointed end of the Back/Front (A) extends beyond the Sides (B).
Nail through the Back/Front (A) into the edges of the two Sides (B) using 1-1/2” nails
placed approximately every 5 inches.
6. Turn the assembly upside-down, and repeat Step 4 to attach the remaining Back/Front (A).
Figure 1
Figure 2
4
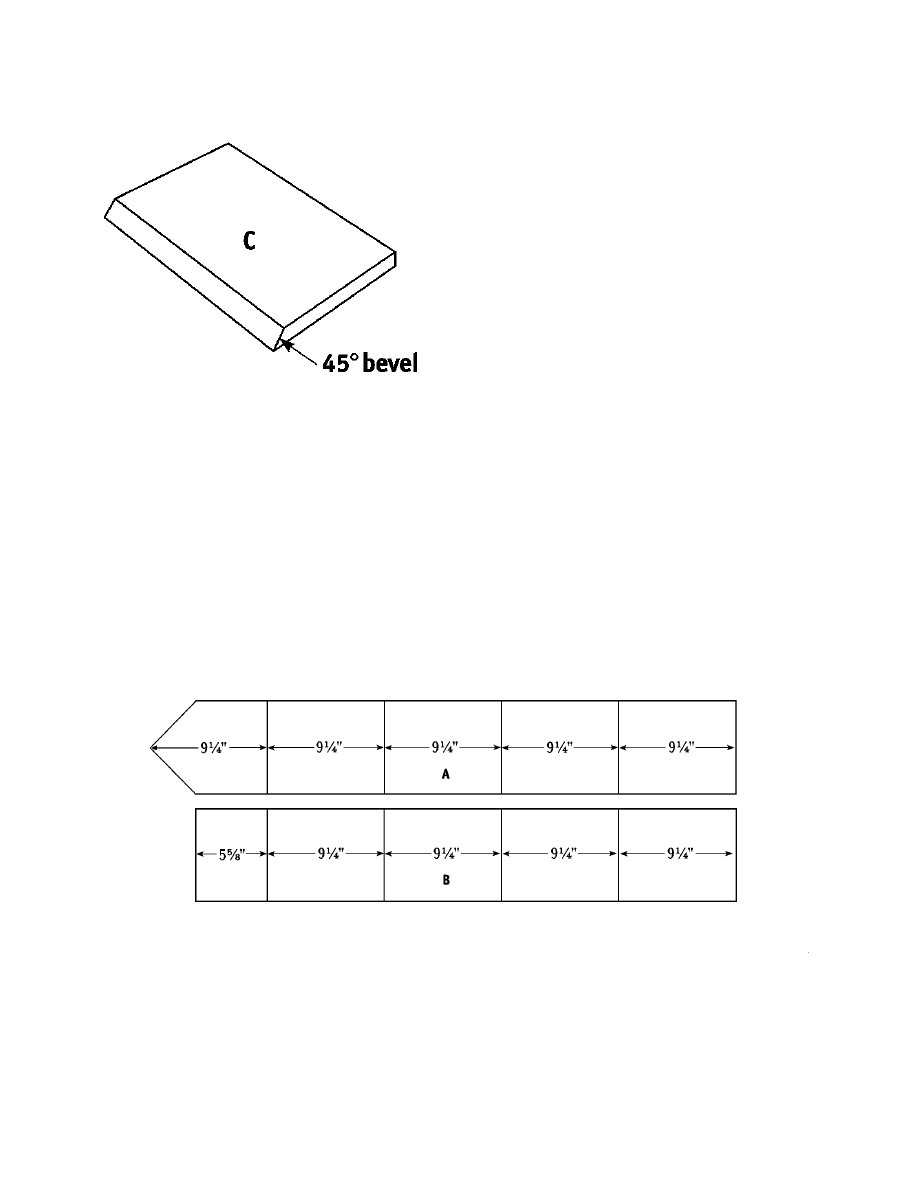
Constructing the Roof
1. Cut two Roofs (C) from 1 x 8 pine, each
measuring 10-1/2 inches.
2. Bevel one 10-1/2” edge of one Roof (C) at a
45-degree angle, as shown in Figure 3.
3. Repeat Step 2 to bevel one edge of the
remaining Roof (C).
4. Apply glue to the beveled edges, and place
the two Roofs (C), beveled edges together, on top of the base assembly, and nail them
together. Nail through each of the Roofs (C), into the beveled edge of the other Roof (C)
using four 1-1/2” finishing nails on each side. Do not nail into the base structure yet, as the
roof will have to be removed to wire the lamp.
5. Drill a 1/2-inch-diameter hole through the center of the roof peak to accommodate the later
addition of the lamp parts.
6. Remove the completed roof, and set it aside until later.
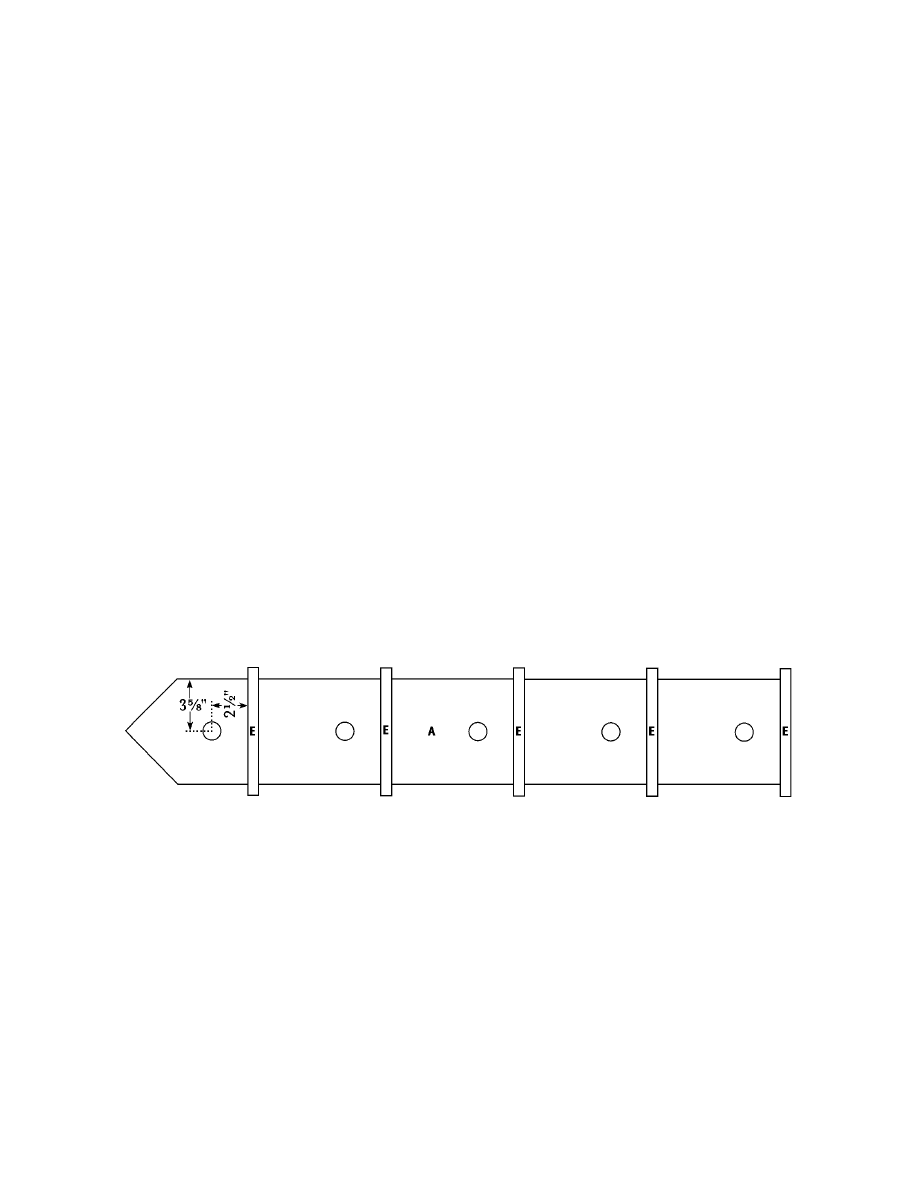
Adding the Trim
1. Refer to Figure 4 to mark the trim placement lines on the two Sides (B) and one Front/Back
(B), using a soft pencil.
2. Cut eight Side Trims (D) from 1 x 1 pine, each measuring 8-3/4 inches.
Figure 3
Figure 4
5
3. Apply glue to the meeting surfaces, and place one Side Trim (D) on the base assembly,
under the penciled placement line. Nail through the Side Trim (D) into the Side (B) using
two 1-1/4” finishing nails.
4. Repeat Step 3 seven more times to attach the remaining Side Trims (D) to the base
assembly.
5. Cut four Front Trims (D) from 1 x 1 pine, each measuring 8-3/4 inches.
6. Apply glue to the meeting surfaces, and attach one Front Trim (E) to the front of the base
assembly (you choose the best-looking peaked Back/Front [A]), under the placement line,
and over the ends of the Side Trims (D). Nail through the Front Trim (E) into the
Back/Front (A) and Side Trims (D) using three 1-1/4” finishing nails.
7. Repeat Step 6 three more times to attach the remaining three Front Trims (D) to the front of
the base assembly.
Completing the Base Assembly
1. Refer to Figure 5, and mark the placement of five holes in the front of the base assembly.
2. Drill five 1-1/4-inch-diameter holes through the front of the base assembly using marks as a
guide.
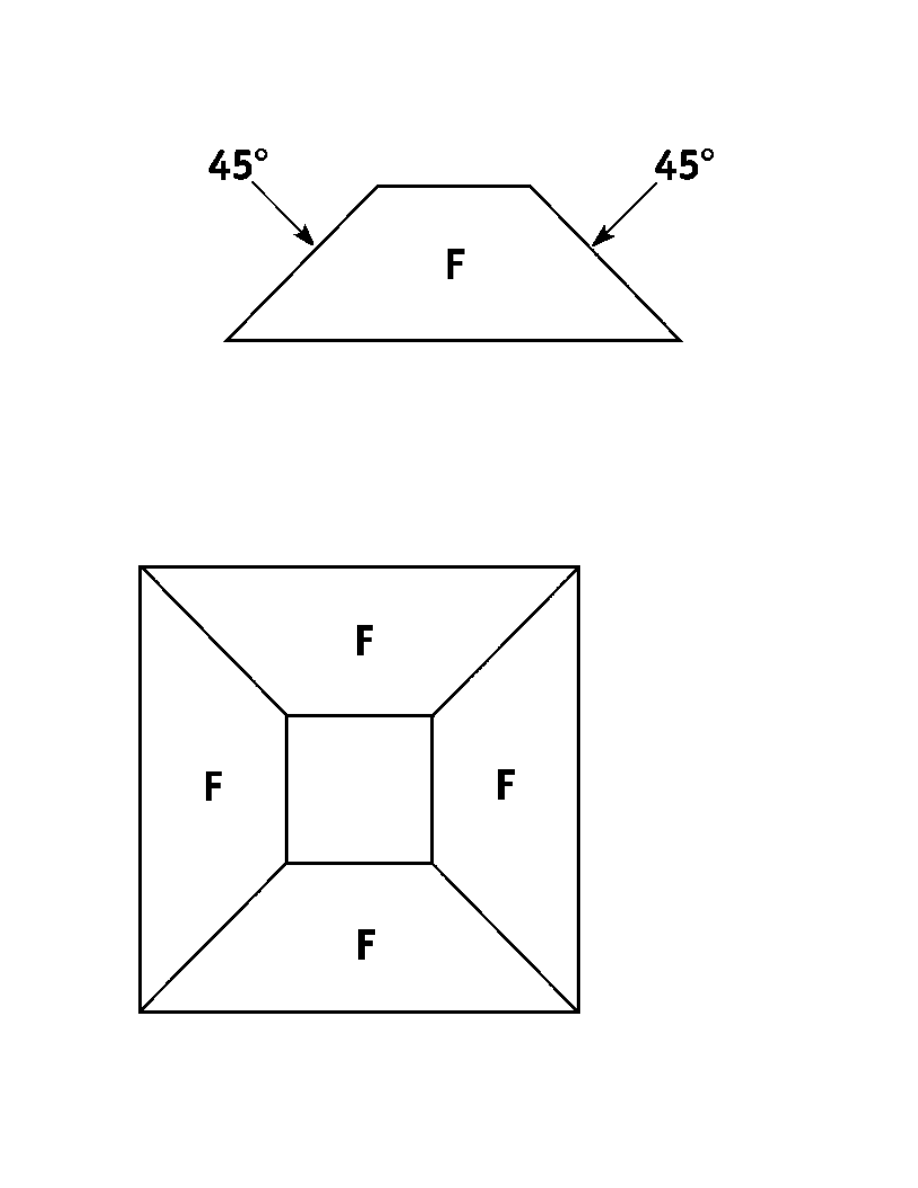
3. Cut four Bases (F) from 2 x 4 pine, each measuring 10-1/2 inches.
4. Miter the ends of each of the four Bases (F) at opposing 45-degree angles, as shown in
Figure 6.
5. Apply glue to the meeting surfaces, and place the four Bases (F), with mitered ends together,
to form a square, as shown in Figure 7.
Figure 5
6
6. Clamp the four Bases (F) together, and toenail through both sides of each joint to hold the
assembly together. Use two 2-1/2” nails on each joint.
7. Center the four Bases (F) over the bottom of the base assembly. Nail through the Bases (F)
into the bottom edges of the two Bank/Fronts (A) and the two Sides (B). Use two 2-1/2”
nails through each Base (F).
Figure 6
7
Finishing
1. Fill all cracks and crevices with wood filler.
2. Sand the completed floor lamp thoroughly.
3. Paint the floor lamp the color of your choice. We painted the roof and the trim a hunter
green, and the rest of the lamp bright white.
4. Install the lamp kit following the manufacturer’s instructions.
5. Center the assembled roof (with lamp kit installed) over the top of the base assembly,
threading the wire through the center of the assembly. Apply glue to the meeting surfaces,
and nail through each side of the roof into the Back/Fronts (A) and the Sides (B). Use two
1-1/2” nails on each of the roof sections.
Enjoy other indoor and outdoor projects from
www.wowimadeit.com
!
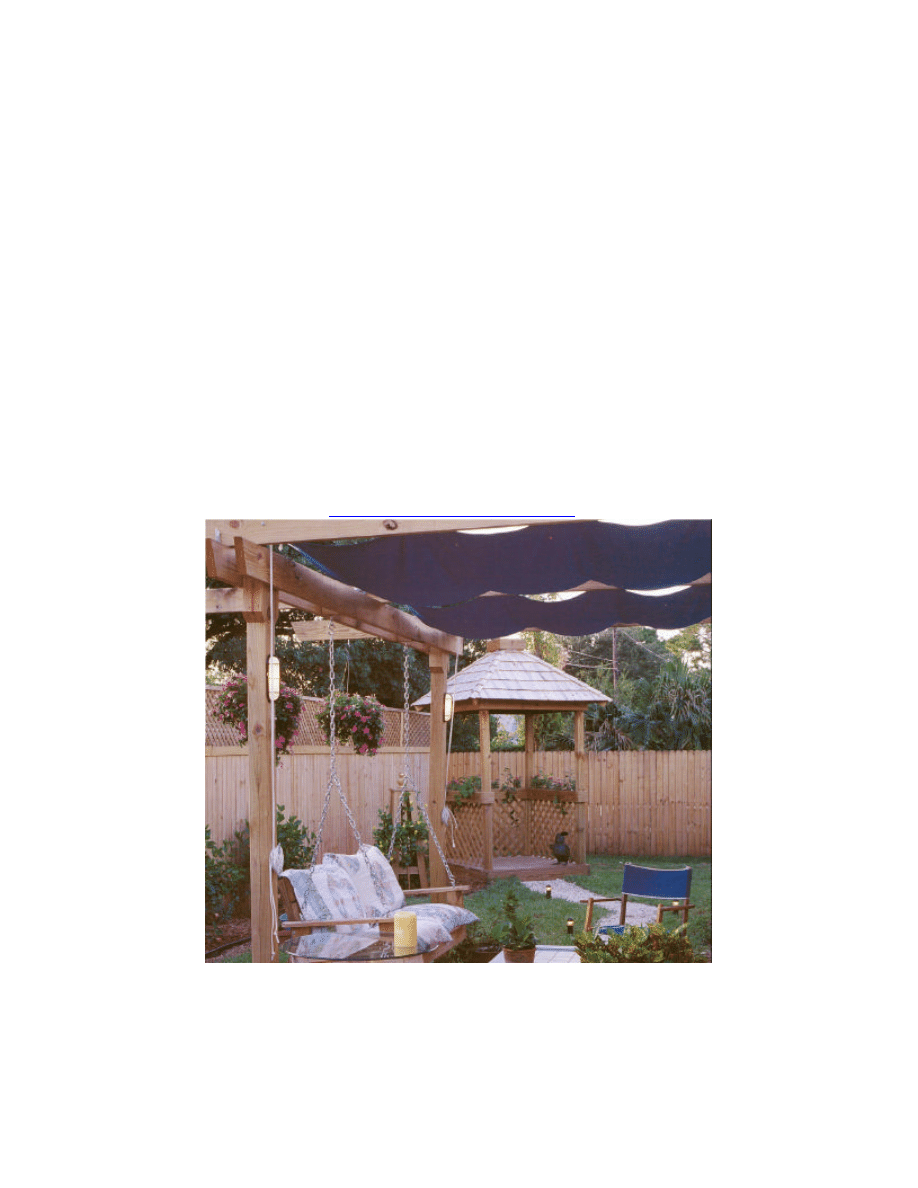
Your family will love our outdoor projects!
Wyszukiwarka
Podobne podstrony:
77 Nw 10 Lampa stojaca
Floor Lamp
Lampa stojąca
Floor Lamp (Mission Style)
77 Nw 10 Lampa stojaca
Floor beam ver 1 Student id 178 Nieznany
Luftwaffe Hangar, hangar floor
Przylibski,geologia, Działalność wód stojących
[EN]Fale stojace o skonczonej a Nieznany
(38) Statek stojący na kotwicy (Prawidło 30 b) )
02 Aladyn i czarodziejska lampa
lamp 02
Ceramic Floor Tile
Lampa górnicza
launch cresetter oil lamp reset tool introduction
#24 Eliminacja pasożytów lampą z węglowym łukiem elektrycznym
ćw nr 2 badanie lamp fluorescencyjnych (2)
więcej podobnych podstron