1
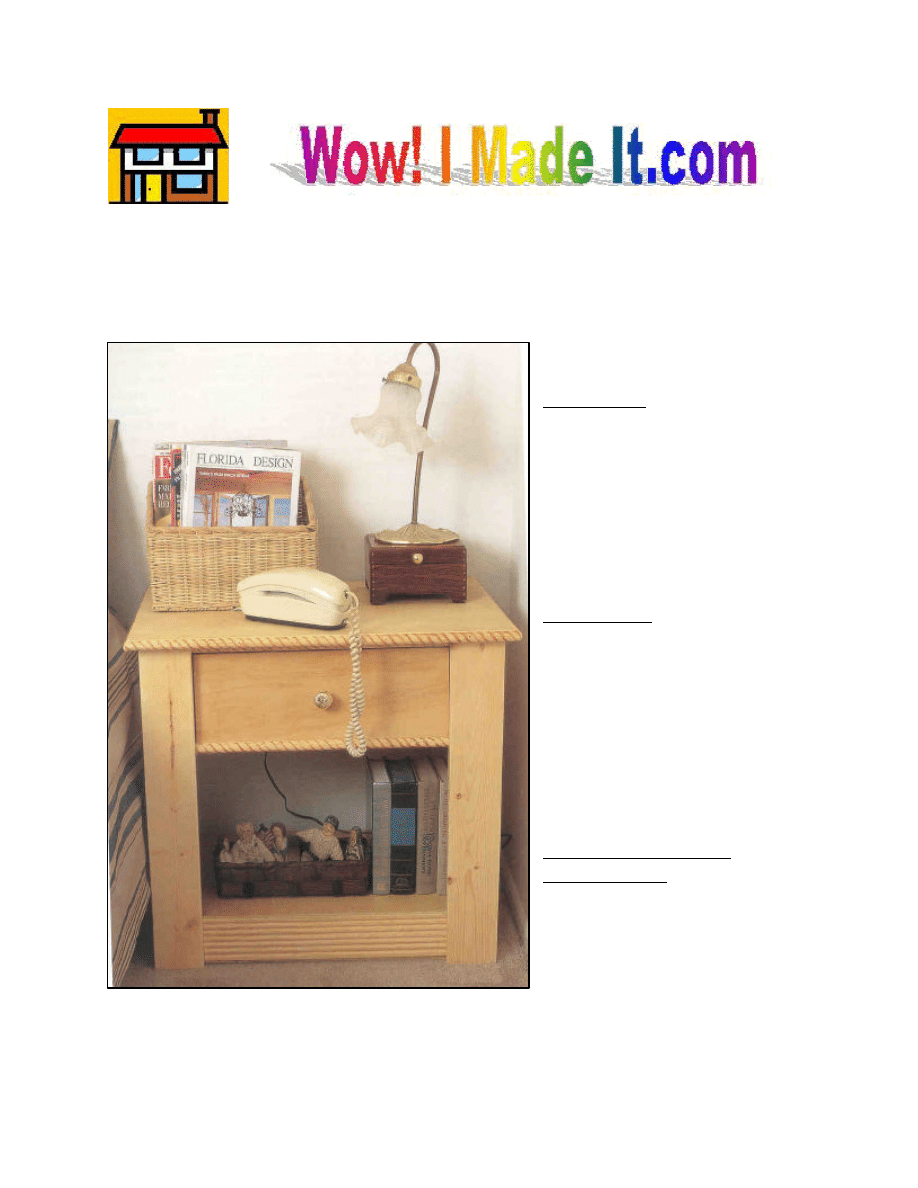
ight Stand
Our nightstand is a practical addition to any bedroom. The lower shelf holds books and
magazines, and the drawer is large enough to store nighttime necessities.
Materials
§ 22 linear feet of 1 x 4 pine
§ ½ sheet of 1/4" plywood (4' x 4')
§ 1 sheet of 3/4" plywood (4" x 8")
§ 11 linear feet of 3/4"-wide rope
molding
§ 2 linear feet of 3"-wide beaded
molding
Hardware
§ Approximately 4 5-3/4" brads
§ Approximately 15 1" (2d)
finishing nails
§ Approximately 20 1-1/4 (3d)
finishing nails
§ Approximately 85 1-1/2" (4d)
finishing nails
§ 1 drawer pull
Special Tools and
Techniques
§ Bar clamps or pipe clamps
§ Dadoes
N
2
Cutting List
Code Description
Qty Materials
Dimensions
A
Vertical Trim
4
1 x 4 pine
23" long
B
Horizontal Trim
4
1 x 4 pine
8” long
C
Sides
2
1/4" plywood
15" x 23"
D
Back
1
3/4" plywood
22-1/2" x 23"
E
Shelf
2
3/4" plywood
22-1/2 x 14-1/4"
F
Drawer Guides
2
1 x 4 pine
14-1/2" long
G
Top Supports
2
1 x 4 pine
22-1/2" long
H
Front Vertical Trim 2
1 x 4 pine
23" long
I
Bottom Trim
1
3"-wide beaded molding 17-1/2" long
J
Shelf Trim
2
3/4"-wide beaded
rope molding
17-1/2" long
K
Top
1
3/4" plywood
16-3/4" x 26-1/2"
L
Top Trim
4
3/4"-wide rope molding
Cut to fit
M
Drawer Front/Back
2
3/4" plywood
5-5/8" x 17-3/8"
N
Drawer Sides
2
3/4" plywood
5-5/8" x 12-3/4"
O
Drawer Bottom
1
1/4" plywood
13-1/8" x 16-1/4"
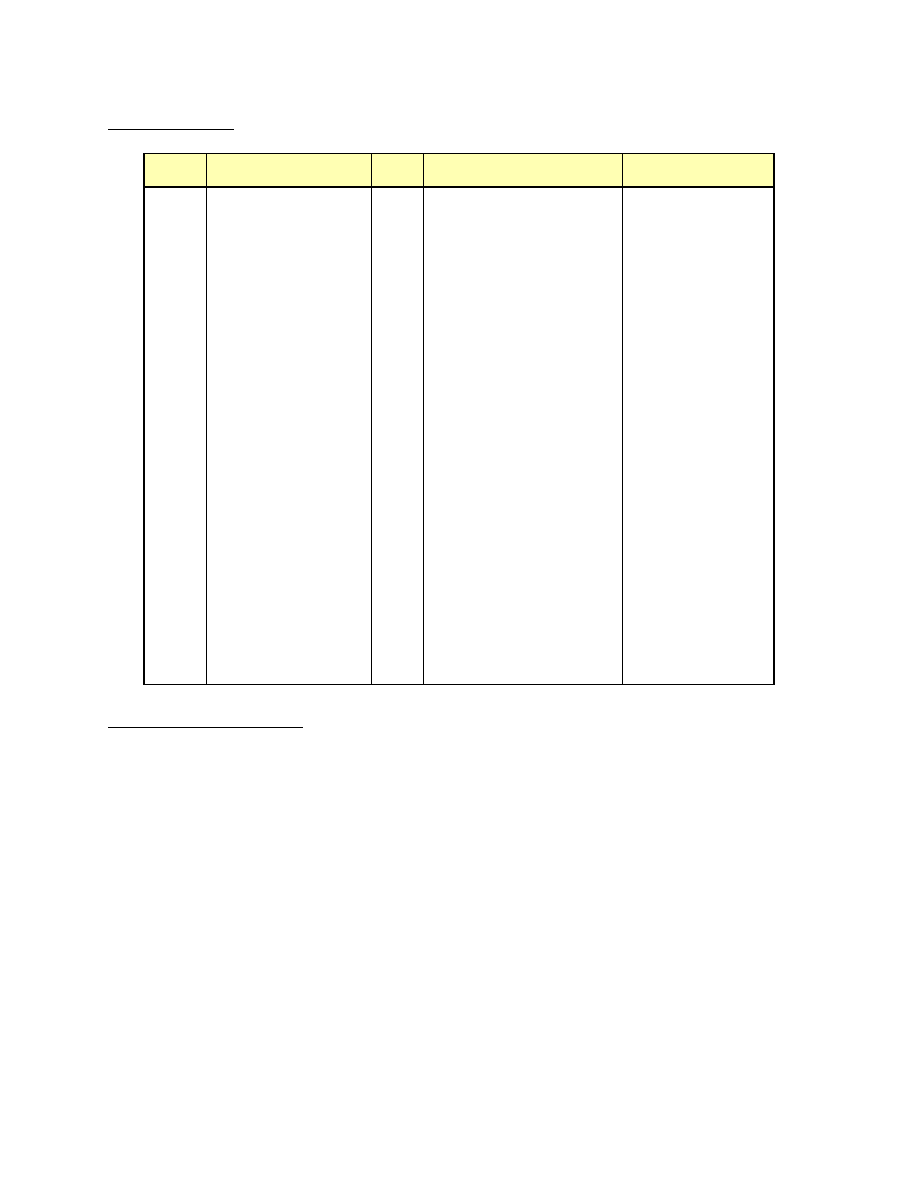
Building the Sides
1. Cut four vertical trims (A) from 1 x 4 pine, each measuring 23 inches long.
2. Cut four horizontal trims (B) from 1 x 4 pine, each measuring 8 inches long.
3. Cut two sides (C) from 1/4-inch beaded plywood, each measuring 15 x 23 inches.
4. Place two vertical trims (A), better face down, on a level surface, parallel to each other
and 8 inches apart. Fit two horizontal trims (B), better face down, between the ends of
the vertical trims (A), as shown in Figure 1.
5. Apply glue to the faces of the trims (A and B). Place one side (C) (beaded side down)
over the horizontal and vertical trims (A and B), matching all four edges. Nail through the
side (C) 1 inch from each of the edges, using 3/4-inch brads spaced about 4 inches apart.
3
6. Repeat Steps 4 and 5 to assemble a second side,
using the remaining two vertical trims (A), two
horizontal trims (B), and side (C).
Completing the Base Assembly
1. Cut one back (D) from 3/4-inch plywood,
measuring 22-1/2 x 23 inches.
2. Place the two side assemblies on a level surface,
on edge, parallel to each other and 22-1/2 inches
apart.
3. Place the back (D) between the two side
assemblies, matching the 23-inch edges, as
shown in Figure 2. Nail through the side assemblies into the edge of the back (D) using
1-1/2-inch (4d) nails placed every 4 inches.
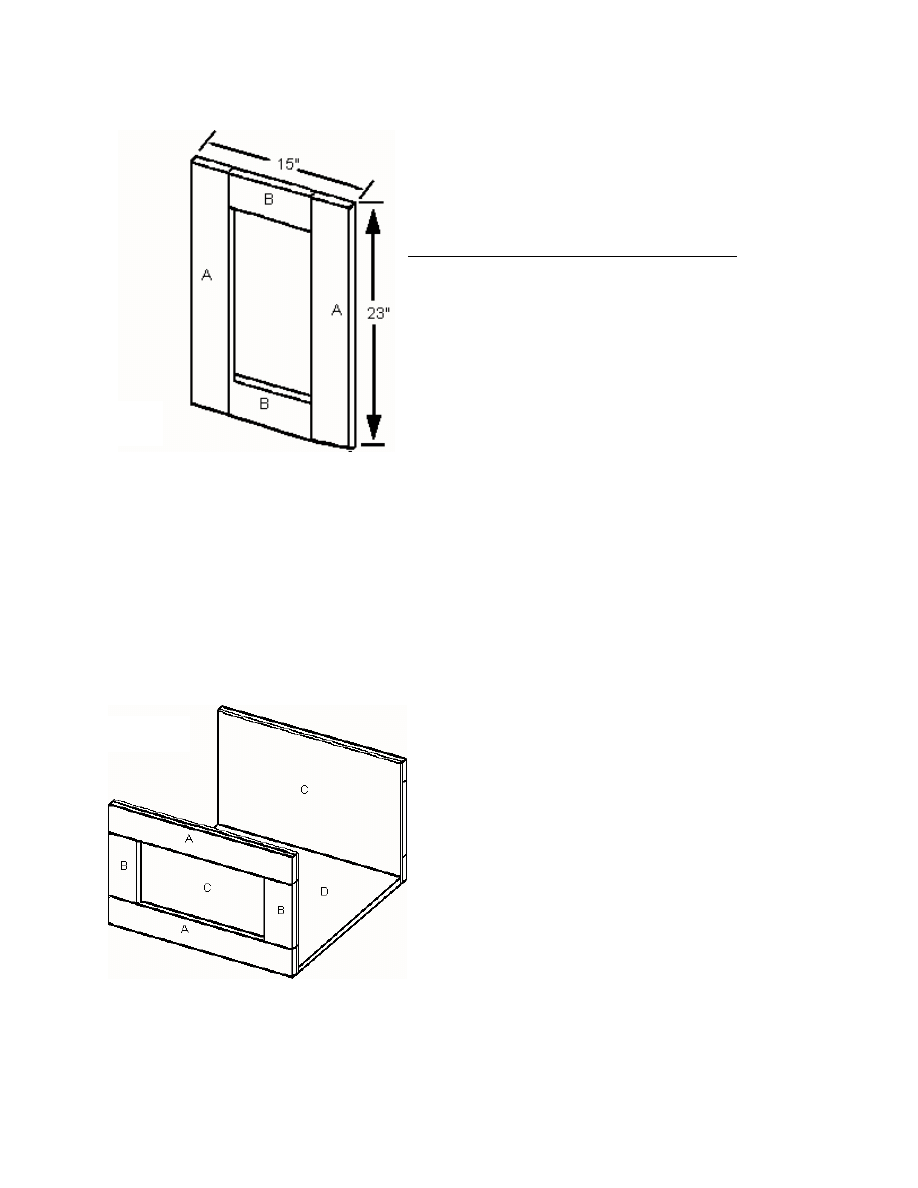
4. Cut two shelves (E) from 3/4-inch plywood, each measuring 22-1/2 x 14-1/4 inches.
5. Cut two drawer guides (F) from 1 x 4 pine, each measuring 14-1/2 inches long.
6. Attach both drawer guides (F) to one shelf (E), 1-3/4 inches from each 15-inch edge, as
shown in Figure 3. Nail through the shelf (E) into the edges of the drawer guides (F),
using four 1-1/2-inch (4d) nails on each joint.
7. Attach the shelf (E) without the drawer guides
2-3/4 inches from what will be the bottom of
the nightstand, as shown in Figure 4. Nail
through the side assemblies into the edges,
using four 1-1/2-inch (4d) nails on each joint.
8. Repeat Step 7 to attach the remaining shelf
(E), with the drawer guides facing the top of
the nightstand, 6-1/2 inches from the top of
the nightstand, as shown in Figure 4.
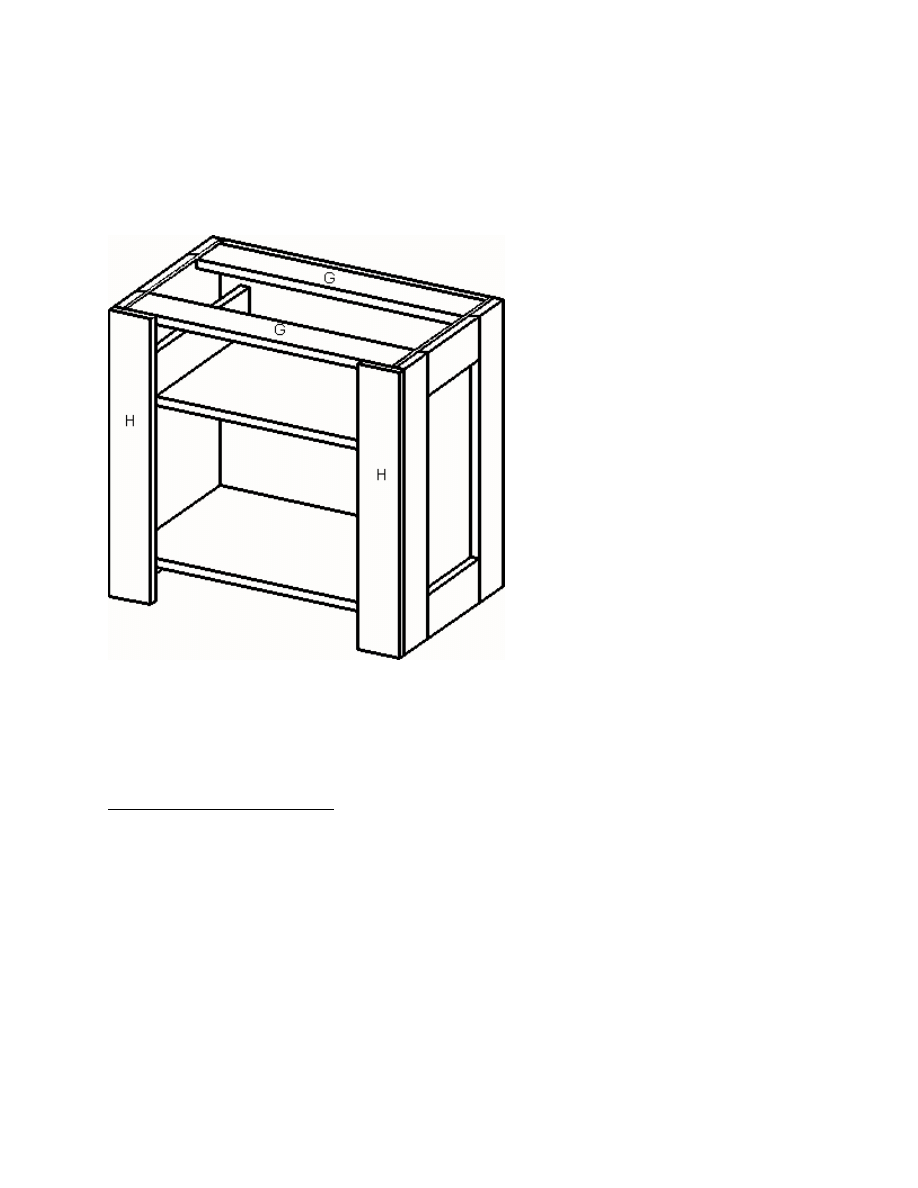
9. Cut two top supports (G) from 1 x 4 pine, each measuring 22-1/2 inches long.
10. Attach one top support (G) between the two side assemblies, flush with the top edge of
Figure 1
Figure 2
4
the back (D), as shown in Figure 4. Nail through the side assemblies into the ends of the
top support, using two 1-1/2-inch (4d) nails on each joint.
11. Repeat Step 10 to attach the remaining top support (G) between the two side assemblies,
flush with the front and top of the base assembly, as shown in Figure 4.
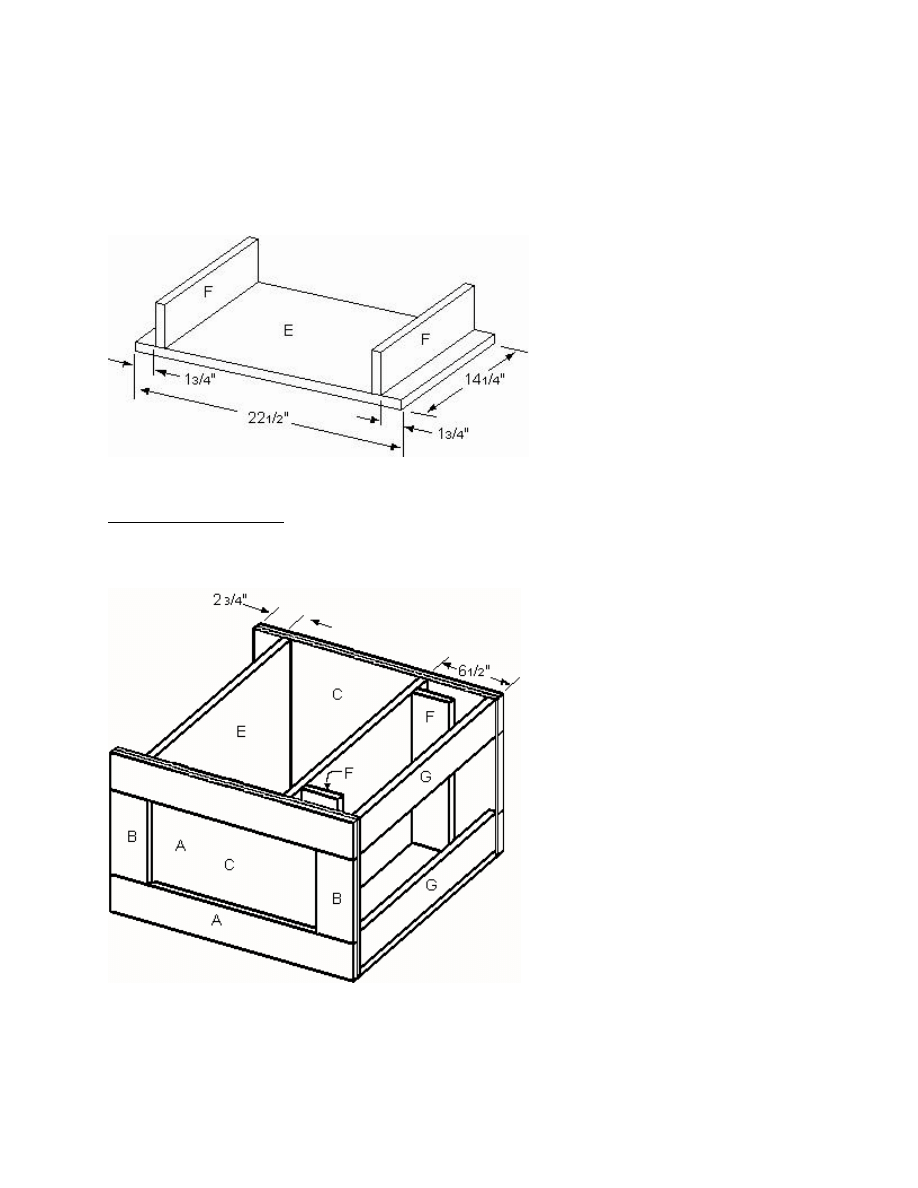
Adding the Trim
1. Cut two front vertical trims (H) from 1 x 4 pine, each measuring 23 inches long.
2. Apply glue to the meeting surfaces, and attach one front vertical trim (H) to the edge of
the left side assembly, as shown in Figure 5. Nail through the front vertical trim (H) into
Figure 3
Figure 4
5
the side assembly, the two shelves (E), the drawer guide (F), and the top support (G).
Use 1-1/2-inch (4d) nails spaced every 4 inches.
3. Repeat Step 2 to attach the remaining vertical trim (H) to the edge of the right side
assembly, as shown in Figure 5.
4. Cut one bottom trim (I) from 3-
inch-wide beaded molding,
measuring 17-1/2 inches long.
5. Apply glue to the meeting
surfaces, and nail the bottom
trim (I) between the two vertical
trims (H), flush with the top of
the lower shelf (E). Use 1-inch
(2d) nails spaced about every 4
inches.
6. Cut two shelf trims (J) from 3/4-
inch-wide rope molding, each
measuring 17-1/2 inches long.
7. Apply glue to the meeting
surfaces, and nail one shelf trim
(J) over the exposed edge of the top support (G), between the two vertical trims (H). Use
1-inch (2d) nails spaced about every 4 inches.
8. Nail the remaining shelf trim (J) over the exposed edge of the upper shelf (E), between the
vertical trims (H). Use 1-inch (2d) nails spaced about every 4 inches.
Constructing the Top
1. Cut one top (K) from 3/4-inch plywood, measuring 16-3/4 x 26-1/2 inches.
2. Cut and fit four top trims (L) from 3/4-inch-wide rope molding to fit over the four
exposed edges of the top (K), mitering the top trims (L) at each of the corners. Use glue
and 1-1/2-inch (4d) nails spaced every 4 inches to attach the top trims (L) to the top (K).
3. Place the base assembly upright and place the top assembly over it. The top assembly
should be centered widthwise, with the edge of the plywood top (K) flush with the back of
the nightstand, and overhanging the front. When the position is correct, apply glue on the
meeting surfaces, and nail through the top assembly into the top supports (G) using six 1-
6
1/4-inch (3d) nails.
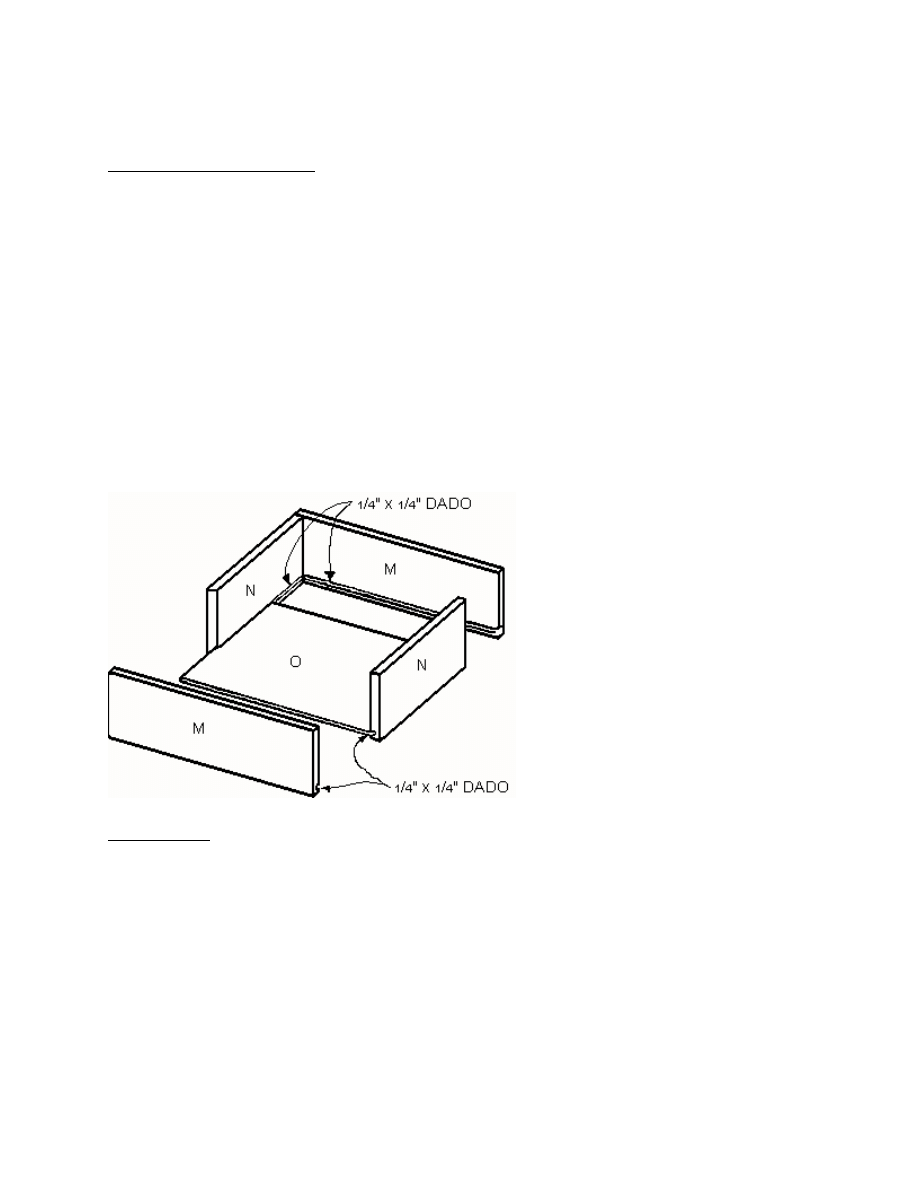
Making the Drawer
1. Cut two drawer front/backs (M) from 3/4-inch plywood, each measuring 5-5/8 x 17-3/8
inches.
2. Cut two drawer sides (N) from 3/4-inch plywood measuring 5-5/8 x 12-3/4 inches.
3. Cut one drawer bottom (O) from 1/4-inch plywood measuring 13-1/8 x 16-1/4 inches.
4. Cut a 1/4 x 1/4-inch dado on the inside of each drawer piece (M and N) 3/8 inch from the
lower edge, to accommodate the drawer bottom (O).
5. Assemble the drawer as shown in Figure 6. Note that the drawer front/back pieces (M)
overlap the ends of the drawer sides (N). Use two 1-1/2-inch (4d) nails on each end of the
overlapping boards.
Finishing
1. Fill any nail holes or imperfections in the wood with wood filler.
2. Thoroughly sand all of the wood parts on the completed night stand.
3. Stain or paint the nightstand the color of your choice. We chose to retain the natural
wood color and simply sealed it with polyurethane.
4. Install the drawer pull in the center of the nightstand drawer.
Figure 6
Wyszukiwarka
Podobne podstrony:
One night stand away
One Night Stand 2 1 That Night with My Boss J S Cooper and Helen Cooper
Clare London One Night Stand
One Night Stand 1 One Night Stand J S Cooper and Helen Cooper
Marcy Jacks DeWitt s Pack 12 One Night Stand with a Werewolf
One Night Stand 2 Falling for My Best Friend s Brother J S Cooper and Helen Cooper
One Night Stand 1 1 That Night with My Best Friend s Brother J S Cooper and Helen Cooper
One Night Stand 0 1 That Night J S Cooper and Helen Cooper
bench and night stand
One Night Stand 3 Falling for My Boss J S Cooper and Helen Cooper
Audyt wewnetrzny (SGHowy) Stand Nieznany (2)
arkusz ang stand pr cz2 A
lumber cut off stand
Stand.V.8 kom, Wycena gruntów
bassinet and stand
Jacques Derrida Taking A Stand For Algeria
stand
0393 dziewczyna w bikini duo night AS4MQP3DNVVXWDNWWF3OYKCKYJOCFRMMTUFZKSY
A Midsummer Night's Dream
więcej podobnych podstron