
NEXT LEVEL GUITAR
®
DELTA/CHICAGO BLUES JAM TRACK CD
LEAD GUITAR WRITTEN LESSON MANUAL
-written by David Taub
®

2
INTRODUCTION:
Hello good people! David Taub here and I want to take a second to thank you for purchasing this Next Level
Guitar instructional product. I think you will find that my teaching methods are of the best available on the market
today. I have successfully taught thousands of students both privately and online all over the world and I am
dedicated to getting your playing to the next level in the fastest and most efficient manner. This written lesson
booklet was designed to coincide with the Delta/Chicago Blues Jam Tracks Plus Audio CD.
This Next Level Guitar Delta/Chicago Blues Jam Tracks CD comes complete with ten full on audio jam tracks.
Each track includes a full band playing minus the lead guitar. The audio CD and this book of written lessons is an
excellent tool for the guitarist to develop and enhance their lead guitar playing, improvisation skills, music theory
knowledge, scale and mode learning, rhythm, and timing.
Use these instructional materials to help open up guitar avenues and to examine different chords and rhythms,
lead guitar techniques, learning the fretboard, music theory, scales, and the world of playing over chord changes.
I designed these tracks and lessons to give you the most complete and limitless lead guitar picture possible.
If you don’t keep a practice log you want to start one for sure. A three ring binder with filler paper works best. Print
out this booklet of written lessons and keep it with all other music reference materials in the three ring binder.
Keep these items handy so you can refer to them when studying and practicing.
Add filler paper to your binder and keep accurate records in your practice log of the items you are working on,
what needs work, chord changes, progressions, songs, original material, scales, etc. Date the entries and keep
track of your progress as you move forward in your guitar journey. Just like setting goals in life you want to set
musical goals……and then go out there and achieve them.
Remember to follow my structured curriculum, keep on practicing the right things, and keep developing your ear.
Don’t overwhelm yourself by trying to take on too many new things at once. Take these lessons and techniques in
stages and slow and steady wins the race. Some of the more advanced lead guitar avenues will take time to
digest.
One of the keys is consistency. Keep trying to put those guitars in your hands every day, even if it’s only for ten to
fifteen minutes. You don’t necessarily need an hour block of time each day to learn guitar. Those little pockets of
time where you have a spare ten minutes or so that you can practice really add up.
Make it easy for yourself to practice. Buy a guitar stand and keep your guitar out on the stand so it is accessible to
you at all times. Keep the guitar on the stand in a room you are in the most. This way you will be much more likely
to grab it and practice when you have that free ten minute pocket of time. Don’t keep your guitar packed up in its
case under your bed or packed away in the closet. Leave it out and make it accessible at all times.
Like with anything new and different on the instrument dive into these materials with an open mind. Know that if
you practice these techniques, work hard, keep honing your skills and refining your art that these methods will
bring you results.
Enjoy these materials and please let me know if you have any questions. I always welcome your insights and
feedback as I am constantly tweaking my instructional products to make them the best they can be. You can
email me at
thenextlevelguitar@yahoo.com
Stay positive and remember that your guitar playing is an evolution.
And please check out my full on video instructional website at
www.nextlevelguitar.com
………now let’s get to it!
I wish you the best in all your musical endeavors.
Thanks again, enjoy the journey, and as always……..ROCK ON!
David Taub
www.nextlevelguitar.com
Copyright Next Level Guitar Inc., 2011 - all rights reserved – unauthorized duplication or distribution of any part of this book is prohibited

3
TABLE OF CONTENTS:
Written Lesson
Page
Introduction .............................................................................................................. 2
Table of contents & Delta/Chicago Blues Jam Track CD listings ............................ 3
Getting started ......................................................................................................... 4
The choices when soloing ....................................................................................... 5
Key Signature and chord analyzing ......................................................................... 6
Example progressions and soloing options – Major Key ......................................... 7-8
Example progressions and soloing options – Minor Key ......................................... 9
The tracks one by one - lead playing application over each jam track .................... 10-17
Blues rhythms - The I-IV-V 12-bar blues ................................................................. 18
Chords – Dominant 7
th
chords ................................................................................. 19
Notes on the fretboard ............................................................................................. 20
Lead Guitar – rhythm, the ride, note choice, & phrasing ......................................... 21
Lead Guitar – the Big Four ...................................................................................... 22
The Minor Pentatonic scale ..................................................................................... 23
The Minor Pentatonic Expanded I Scale ................................................................. 24
The Minor Pentatonic Expanded II Scale ................................................................ 25
The Minor Pentatonic scale – five box scales ......................................................... 26
The Minor Pentatonic Blues scale ........................................................................... 27
The Minor Pentatonic Blues Expanded II Scale ...................................................... 28
The Minor Pentatonic Blues scale all five box scales .............................................. 29
Spicing up the Minor Pentatonic Blues scale .......................................................... 30
The Major Pentatonic scale ..................................................................................... 31
Major Pentatonic Sus4 scale ................................................................................... 32
Major Pentatonic Sus4 scale links ........................................................................... 33
Top ten key hints to get your playing to the next level ............................................ 34-35
Chord construction .................................................................................................. 36-37
Building chords from the Major scale ...................................................................... 38
Circle of fifths ........................................................................................................... 39
Order of sharps & flats ............................................................................................ 40
Blank tablature staff paper (document your favorite licks & riffs) ............................ 41-43
NEXT LEVEL GUITAR DELTA/CHICAGO BLUES JAM TRACKS AUDIO CD
Track 1 – Shuffle in C
118 BPM
4:10 min
Track 2 – Slow Blues in A
65 BPM
4:37 min
Track 3 – Flat Tire in D
116 BPM
4:14 min
Track 4 – Two-beat Rolling in G
104 BPM
4:42 min
Track 5 – Box Groove in A
119 BPM
4:10 min
Track 6 – Slow Blues in E
63 BPM
4:44 min
Track 7 – Grinder in D
99 BPM
4:32 min
Track 8 – Mambo in A
146 BPM
4:07 min
Track 9 – Train Beat in G
136 BPM
4:16 min
Track 10 – Grinder in E
92 BPM
4:16 min
Copyright Next Level Guitar Inc., 2011 - all rights reserved – unauthorized duplication or distribution of any part of this book is prohibited

4
GETTING STARTED
Keep in mind that I want to give you the most complete guitar curriculum possible. This does not mean you have
to master every lead guitar avenue listed in each jam before moving on to the next jam. In fact you may not
understand some avenues listed under each jam and that is okay.
In these materials I teach many lead guitar avenues. Some will be more challenging than others and of course
take more time to learn and apply. At first take the lead guitar paths that you are comfortable with or what I list out
at the top of each jam first, playing what relates to all. Then continue to study these lessons and try moving down
the list of suggestions for each jam.
Some of the soloing suggestions are more advanced and will take some time but remember there are no short
cuts here. Don’t rush things and don’t skim over topics. But over time you will find the principles and techniques
start to sink in and eventually will become automatic.
It’s important to take the extra time to learn about the “why” things work as I write out in the lessons throughout
this book. Learning the “why things work” will give you the musical knowledge to blast these principles and
techniques across all your playing. It will give you the lead guitar confidence to be able to instantly know what
avenues are possible when soloing and improvising.
That’s the trick, to use these lessons as “templates” or “vehicles” to learn the why things work, and then develop
them into your guitar arsenal through practical application. Then you have the tools to blast these playing
techniques across all your playing at any given time, in any given jam, and in any given song.
When first starting each jam I suggest listening to the chords and then playing the rhythm progression a few times
around so you can feel the amount of measures on each chord and get a good feel for the changes. Listening is
an art, so really try and dial in your ear.
Don’t forget that even though this is a jam CD, to further develop your lead guitar skills you want to keep
practicing and working on your rhythm skills. Your rhythm and timing are critical elements to your overall abilities
on the guitar. Never forget that your lead playing will really only ever be as good as your rhythm playing.
As I dive further and further into lead guitar techniques and concepts in this book, keep in mind that these very
systematic and methodical techniques will seem a bit daunting at first. However, these will soon become second
nature and automatic, they will become engrained in your playing style. You wont have to think about what to play
so much as it will eventually become second nature. Then you will be letting your ear take you to all the right
notes and chords and not having to think about techniques and application so much but rather focus on emotion
and feel in your playing. The more you practice and apply these materials the faster you will be on “autopilot”.
That said, throughout my teaching career I have found that first learning things utilizing this systematic approach
will get your playing to the next level the fastest. Remember we are building your guitar chops and you need to
have that solid foundation to build upon as you move along in your guitar journey.
Because many blues progressions utilize I-IV-V chord changes you will often be utilizing Minor Pentatonic & Blues
and/or Major Pentatonic as potential lead playing avenues. Pentatonic scales are killer scales to play over blues
and over I-IV-V changes. They just ooze that minor bluesy vibe or sweet major vibe.
Many big name players and rock bands have made careers using pentatonic scales. However, I urge you to try
some of the other suggestions that I list, don’t limit yourself. You will also want to eventually learn the modes of
the major scale. Modes like Dorian, Aeolian, and Mixolydian can sound awesome over Blues progressions when
utilized properly.
KEY POINT: Keep in mind that at this stage of your lead guitar playing journey there is just no substitute
for practicing the right things, learning scales, studying the sounds and relationships between chords
and scales, developing your ear, practicing and honing your skills using jam tracks, and continually
pushing yourself and refining your art.
Remember that your guitar playing is an evolution. Stay positive, keep with it, swing for the fences, and also give
yourself plenty of fun time on the guitar to go along with all the hard work and studying.
YOU CAN DO IT!

5
THE CHOICES WHEN SOLOING
Remember when you are soloing or improvising, you have TWO CHOICES – you can:
1. Play “what relates to all” – this means you solo with the same scale or same mode over all the chords. No
matter what chord is being played in the progression you play the same scale or mode over each chord – you are
playing what works over ALL the chords and chord changes. You play the same scale or the same mode no
matter what chord is going by in the rhythm – you play what relates to all the chords.
This is probably the most common choice among guitarists and definitely what most players do when first learning
or developing their soloing skills and chops. So start with what relates to all. You want to get good at this first
before moving on to the next choice.
OR YOU CAN:
2. “Treat each chord like a separate event” - this choice is much more challenging but will give you a more
sophisticated sound. By treating each chord as a separate event you solo with a different scale, mode, or
arpeggio over each chord. So you can change your scale, mode, and/or arpeggio with each chord change. You
don’t stay within the confines of the same scale as with what relates to all.
This technique gives you a more sophisticated sound and is much more challenging to apply than playing what
relates to all. You have to listen to what is going on underneath your soloing. You have to listen to what chords
are going by and you have to listen for the changes. You then have to time your playing and change your scales
and notes depending on what chord you are soloing over. More challenging but well worth the efforts as you can
make HUGE soloing statements employing this technique.
You want to employ this technique when you have enough time on a given chord. Obviously if the chords are
flying by fast you wont have enough time to treat each one as a separate event. So remember to listen to the
chords and the amount of time on each chord to determine if this technique can be utilized. This technique takes
practice getting used to but it will skyrocket your playing to the next level. Practice this technique at first with slow
tempo progressions, like slows blues jam tracks, where there is lots of time on each chord before they change to
the next chord.
KEY POINT: Keep in mind the above two choices are NOT mutually exclusive to one another. You can mix
them both. In fact I do that often when soloing. I treat each chord as a separate event for a while, then switch it up
and play what relates to all or vice versa. It’s a great combination to do both and you get some great effects from
mixing them both together. Many big name blues players like BB King and Eric Clapton employ these techniques.
Sometimes you can even use both major and minor scale elements in certain jams as well as modal playing. In
those type examples you can throw a bunch of different soloing applications into the soup. It all depends on the
chords you are playing over. And again, this technique is very common in the blues.
KEY POINT:
When soloing and improvising in the blues you will often be soloing over I-IV-V progressions. In
these scenarios you will have three chord changes that keep repeating throughout the progression – the I chord,
the IV chord, and the V chord - just three chords to zone in on.
After rhythmically playing through I-IV-V progressions for a while you will start to memorize the patterns, feel the
changes, and musically know when they are coming around. Knowing when the changes happen is critical for
soloing options over each chord and/or landing on the hip chord tones when the chord changes.
As stated above, treating each chord separately, as an independent event will give your soloing more complex
sounds and infinite possibilities. And with many blues progressions its mainly just three chords to hone into. On
the following page we will study a few musical examples.

6
KEY SIGNATURE & CHORD ANALYZING
Often in the Blues you will be soloing over progressions that are in either major key or minor key. Most often it will
be major key and often using dominant chords. But you want to have the tools to be able to solo over both major
and minor key.
Knowing the key is important, and a good place to start. But to go deeper you have to analyze the chords that
make up the progression to get the complete roadmap for soloing options.
In the examples below we shall study a major key and minor key example of I-IV-V blues progressions and how to
systematically analyze the chords and determine various soloing options. Use these examples as templates when
examining chords and progressions to determine soloing options. Always start with what are the chords and what
is the key.
Like I mentioned previously to treat each chord as a separate event you have to have enough musical time on
each chord. If the chords are rolling by very fast then you will probably play more of what relates to all.
After a while practicing these techniques, this procedure will become more automatic, but at first doing it in a very
systematic and methodical way will get you used to these principles.
KEY POINT: Analyze the chords to determine what solo avenues to take – it’s the chords that give the
roadmap to the various soloing avenues – the key signature is only part of the equation.
It’s important to understand why these principles and techniques work so that you can solo over any progression
on your own. Armed with this knowledge and practicing in a musical context will give you the lead guitar
confidence to solo over any progression, song, or jam. So take the time to learn the whys – it’s a critical step.
KEY POINT: Remember that as soon as you hear that very identifiable I-IV-V blues, swing, or shuffle, it is
wide open as there will be many different soloing avenues to try.
Key Points To Determine Soloing Avenues:
1. Determine the key signature - most of the time you will be soloing in minor key or major key. Knowing the key
is the first step. Even when you are just noodleing around on the guitar, always know what key you are playing in.
2. Analyze the chord progression – it’s the chords that will give you the complete roadmap to what you can
utilize for soloing and improvisation. Analyzing the chords is critical to get the full lead guitar picture.
Remember the points I list throughout these materials are guidelines to get you started off. They are not
necessarily rules forged in stone. Often in jams you have to use your discretion. You want to learn the principles
and techniques so you have a solid jump off point to get creative and then start bending the rules a bit.
Keep in mind that you want to find a balance. After studying and learning the whys there has to come a point
when you take a break from learning scales and the theory behind them and just play music. Music is so much
more than jus the logical application of theories and melodies. There is a human emotional element to music and
that is what you want to get across in your playing. So bone up yes, but get out there and PLAY!
Be creative and keep in mind that there is just no substitute for practicing the right things, learning scales,
studying the sounds and relationships between chords and scales, developing your ear, practicing and honing
your skills using jam tracks, and continually pushing yourself while honing you skills and refining your art.

7
EXAMPLE PROGRESSIONS AND SOLOING OPTIONS – Major Key
-If a progression is in major key you can almost always solo using Major Pentatonic over ALL the chords. So
that should be a default setting. As soon as you hear major key, you know one option is to solo over all the chords
with Major Pentatonic, as it relates to all the chords.
-MAJOR KEY I-IV-V blues, shuffles, and swings (like many of the jams on the CD):
If a progression is a major key I–IV–V blues, swing, or shuffle there are MANY avenues to utilize when soloing
and improvising. It’s wide open and these I-IV-V progressions are extremely common in the blues. And you can
solo over what relates to all and also try treating each chord as a separate event.
-Try Minor Pentatonic & Blues scales over all the chords in the key of the progression for that bluesy minor
sound. (Minor Pentatonic & Blues – 1,b3,4,b5,5,b7)
-Try Major Pentatonic scales over all the chords in the key of the progression for that sweet major sound ala BB
King/Allman Brothers. This will be a totally different sound than Minor Pentatonic. (Major Pentatonic – 1,2,3,5,6)
-Try mixing both Minor Pentatonic & Blues and Major Pentatonic. You will hear this a lot in the lead playing of
Eric Clapton and BB King. The switching, combining, and mixing of Minor and Major Pentatonic is an awesome
sound. (Minor & Major Pentatonic 1,2,b3,3,4,5,6,b7)
-Try the Dorian Mode over all the chords in the key of the progression. Dorian is the 2
nd
mode of the major scale
and is considered more of a minor mode but it’s intervals have elements of both minor, (b3, b7), and major (2nd,
6th). So Dorian works great in any situation where you know both Minor Pentatonic and Major Pentatonic will
work. Give it at try over these I-IV-V blues progressions and you will be surprised how killer it can sound. (Dorian
Mode – 1,2,b3,4,5,6,b7)
-Try the Mixolydian Mode as it works great over dominant chords like 7
ths
and 9th chords. Try to play this mode
over each chord independently in the key of the chord. (Mixolydian Mode – 1,2,3,4,5,6,b7)
1. EXAMPLE PROGRESSION I: E7-A7-B7 - Key of E Major I-IV-V progression - major key blues
*What Relates to all the chords: There are many avenues here, totally wide open, so a lot will depend on your
playing style and what type of mood or sound you want to create. Try some of these:
-Try E Minor Pentatonic & Blues scales over all the chords for that bluesy minor sound (E,G,A,Bb,B,D)
-Try E Major Pentatonic scales over all the chords for that sweet major sound (E,F#,G#,B,C#)
Note: Remember that for any major key jam you can use Major Pentatonic over all the chords. Major Pentatonic
relates to all in this jam. E Major Pentatonic is the same as C# Minor Pentatonic. E Major and C# Minor are
relative major and minor. If you think more in terms of Minor Pentatonic or just know those shapes then play all
your C# Minor Pentatonic scales, but start on and emphasize the E notes and it will be E Major Pentatonic and
have that real major happy sweet sound.
-Try mixing both E Minor Pentatonic and E Major Pentatonic over all the chords (E,F#,G,G#,A,B,C#,D)
-Try the E Dorian over all the chords (E,F#,G,A,B,C#,D)
Note: Because we know that both Major Pentatonic & Minor Pentatonic & Blues will work we then know that the
Dorian mode will also work. Dorian is considered more of a minor mode, (1,2,b3,4,5,6,b7), but works great over
major key I-IV-V blues, swing, and shuffle progressions.

8
Dorian has the minor elements in it (b3, b7) but also has some major elements, (2
nd
, 6
th
). So the Dorian mode will
give you that hybrid kind of minor/major sounds as it combines the elements of both minor and major. So try E
Dorian over all the chords.
Dorian is the 2
nd
mode in any major key and E Dorian is the same as D major, (E Dorian=D major). So play all
your D major scales but emphasize and start on the E notes – really resolve to and focus on those D notes.
*Treat each chord like a separate event: Remember to always listen to the rhythm going on under your soloing
and time your changes so you change your scale or landing notes as the chords change. Here are a few avenues
to try treating each chord as a separate event:
-Try moving Minor Pentatonic & Blues over each chord:
-Play E Minor Pentatonic & Blues over the E7 chord
-Play A Minor Pentatonic & Blues over the A7 chord
-Play B Minor Pentatonic & Blues over the B7 chord
-Try moving Major Pentatonic over each chord
-Play E Major Pentatonic over the E7 chord
-Play A Major Pentatonic over the A7 chord
-Play B Major Pentatonic over the B7 chord
-Try mixing up the above Minor Pentatonic and Major Pentatonic over each chord – this is a very cool
technique that many blues players often utilize.
-Play E Major Pentatonic over the E7 chord. Then switch to E Minor Pentatonic over the A7 chord. Then
try E Major Pentatonic over the B7 chord. Listen to how well this technique outlines and implies the chord
changes. Mix this up a bit, maybe the next time around the progression try E Minor Pentatonic over the
B7 chord.
-Try Mixolydian mode over each chord: Mixolydian works great over 7
th
chords as there is that b7 in the 7
th
chords, (1,3,5,b7), as well as in the Mixolydian mode (1,2,3,4,5,6,b7). Mixolydian mode is the 5
th
mode of the
major scale.
-Over the E7 chord try E Mixolydian (=A Major, start on and emphasize the E notes)
-Over the A7 chord try A Mixolydian (=D Major, start on and emphasize the A notes)
-Over the B7 chord try B Mixolydian (=E Major, start on and emphasize the B notes)

9
EXAMPLE PROGRESSIONS AND SOLOING OPTIONS – Minor Key
-In most instances if a song or jam is in minor key you can solo using Minor Pentatonic & Blues over all the
chords. So that should be a default setting for minor key. As soon as you determine you are in minor key, or it’s a
major key bluesy I-IV-V, you know one option is to solo over all the chords with Minor Pentatonic & Blues scales.
(An exception to this rule is if it’s a minor key progression with a major V chord – you have to be careful over that
major V chord - one option is to use Harmonic Minor over just that V chord).
-Usually a minor mode will work over all the chords in a minor key jam. Usually it’s either Aeolian or Dorian. To
determine which one you have to analyze the chords and look for certain things. For now just memorize this
critical point for soloing in minor key over all the chords:
KEY POINT: When playing over all the chords in a minor key progression you can always use the AEOLIAN
mode, UNLESS there is a IV major chord or II minor chord, then use the DORIAN mode. (Exception - If there
is a V major chord then use Harmonic Minor over just that V chord)
Aeolian mode is the same thing as Natural Minor or Pure Minor.
Aeolian mode = Natural Minor = Pure Minor
When to use Minor Pentatonic & Blues Scales (4 great applications):
1. Over all the chords in a minor key song, jam, or progression, (in most instances, few exceptions).
2. Over all the chords in major key I-IV-V blues, shuffles, and swings.
3. Over any minor type chord when treating each chord as a separate event.
4. Over all the chords in rock type jams, or jams using power or 5
th
chords, (as long as the jam is not real
ballad/major sounding, if so then use major pentatonic or possibly full major scales).
2. EXAMPLE PROGRESSION II: Bm-Em-F#m Key of B minor I-IV-V progression minor key blues
This example is in the key of B minor. We instantly know since we are in minor key, with no major V chord, we
can solo with Minor Pentatonic & Blues scales over all the chords.
*What Relates to all the chords:
-Try B Minor Pentatonic & Blues over all the chords. We instantly know since we are in minor key, with no major
V chord, we can solo with Minor Pentatonic & Blues scales over all the chords as those scales relates to all. So
whether we are playing over the Bm chord, the Em chord, or the F#m chord one option is we can play B minor
Pentatonic & Blues scales all day long over all the chords.
-Try B Aeolian over all the chords. Usually in minor key we can play a minor mode over all the chords. In minor
key a minor mode usually relates to all. We are in minor key and when analyzing the chords the IV chord is minor,
(Em), this tells us we can also play B Aeolian mode, (B Natural Minor), over all the chords. So again whether we
are playing over the Bm chord, the Em chord, or the F#m chord we can play B Aeolian scales over all the chords–
it relates to all. B minor is the relative minor of D major. So play all your D major scales but start on and
emphasize the B notes making it B Aeolian (B Aeolian = D major).
-Try mixing both B Aeolian and B Minor Pentatonic & Blues over all the chords for some killer sounds.
*Treat each chord like a separate event:
We can also try choice number two and treat each chord as a separate event. What this means is you play what
relates to each chord separately and treat each chord independently. With this 12-bar progression you have a lot
of time on each chord. This is perfect for treating each chord as a separate event
-Over the Bm chord try B Minor Pentatonic & Blues, B Aeolian, B Dorian, or B minor arpeggios.
(But then when the chords change to Em you then abandon all the B minor lead work and switch to scales,
modes, or arpeggios that relate to the Em chord.)
-Over the Em chord try E Minor Pentatonic & Blues, E Aeolian, E Dorian, or E Minor arpeggios.
(Then when the chord changes again to F#m you abandon all the Em work and switch to what relates to the F#m
chord.)
-Over the F#m chord try F# Minor Pentatonic & Blues, F# Aeolian, F# Dorian, or F# minor arpeggios.

10
THE TRACKS ONE BY ONE - LEAD PLAYING APPLICATION OVER EACH JAM TRACK ON THE CD
KEY POINT: Use the below track listings as a template to follow when analyzing a song or jam to
determine soloing options. This will give you the lead guitar confidence to figure out soloing options over
any song or any jam that you may encounter.
Below is an outline of each track on the Delta/Chicago Blues Jam CD followed by a breakdown of the chords,
progressions, key signature, and beats per minute, (BPM). Following each track is a list of suggestions on what
you can try improvisation wise over the chords and progressions. I take you through the complete process in full
in the first jam below, shuffle in C – then follow that same protocol as you go through the rest of the tracks.
Notice how I always take the time at first to analyze the rhythm and chords of the track. This is an absolutely
crucial step that you want to get used to employing. The rhythm will unlock the soloing possibilities.
Work on what you know first and move into the newer more advanced techniques with patience over time. Don’t
overwhelm yourself. Remember with major key blues there are many lead avenues to choose from, so why not
explore them all and get creative and see what sounds best to your ears.
KEY POINT: As soon as you hear that very identifiable I-IV-V blues, swing, or shuffle, it is wide open and
there will be many different soloing avenues to try.
Get creative and challenge yourself to try new things and eventually come up with other lead guitar avenues
within your personal playing style. Use these jams as examples to practice and learn what works over what so
you will also gain this valuable knowledge and will then be well prepared to jam over any progression. Use these
jams as vehicles to get your playing to that next level
KEY POINT: Analyze the chords to determine what solo avenues to take – it’s the chords that give the
roadmap to the various soloing avenues – the key signature is only part of the equation.
TRACK 1 – Shuffle in C C9-F9-G9 I-IV-V 12-Bar Blues slow change 118 BPM Key of C 4:10min
This is a major key I-IV-V blues jam in the key of C major. C is the I chord, F is the IV chord, and G is the V chord.
This jam is what’s called a “slow change” to the IV chord, (Read all about slow and fast changes to the IV chord
on page 18). So you are staying on the I chord at first for four bars before it switches to the IV chord for two bars.
The first thing to note about this jam is that it is a major key I-IV-V blues progression, so it is wide open for soloing
options. Soon you will get used to hearing these I-IV-V blues type shuffle progressions and will able to identify
them immediately.
*What Relates to all the chords: There are many soloing avenues with major key I-IV-V blues progressions so a
lot will depend on your playing style and what type of mood or sounds you want to create. Try some of these:
-For that minor bluesy sound try C Minor Pentatonic & Blues over all the chords. Be sure to try and spice up
those scales with all the extras as I teach in the lesson on spicing up Minor Pentatonic on page 30.
-For that sweet major sound try C Major Pentatonic over all the chords. This will give you that sweet major
bluesy sound that is quite different than the above minor sound. Remember that for any major key jam you can
use Major Pentatonic over all the chords. Major Pentatonic relates to all in this jam.
C Major Pentatonic is the same as A Minor Pentatonic. C Major and A Minor are relative major and minor. If you
think more in terms of Minor Pentatonic, or you just know those shapes, then play all your A Minor Pentatonic

11
scales, but start on and emphasize the C notes and it will be C Major Pentatonic and have that sweet major
sound.
-Try C Dorian over all the chords. Because we know that both Major Pentatonic & Minor Pentatonic will work we
then know that the Dorian mode will also work. Dorian is considered more of a minor mode, (1,2,b3,4,5,6,b7),
but works great over major key I-IV-V blues, swing, and shuffle progressions.
Dorian has the minor elements in it (b3, b7) but also has some major elements, (2
nd
, 6
th
). So in these blues
progressions the Dorian mode will give you that hybrid kind of minor/major sounds as it combines the elements of
both minor and major.
So try C Dorian over all the chords. Dorian is the 2
nd
mode in any major key and C Dorian is the same as Bb
major, (C Dorian = Bb major as C is the 2
nd
note in the Bb major scale). So play all your Bb major scales but
emphasize and start on the C notes. Resolve to and emphasize those C notes and you will now be playing in C
Dorian.
-Try mixing both C Minor Pentatonic and C Major Pentatonic as well as C Dorian over all the chords for some
killer sounds.
*Treat each chord like a separate event: with bluesy 12-bar progressions like in this jam you have time on each
chord, perfect for treating each chord as a separate event. Remember to listen to the rhythm and time your
changes so you change your scale or landing notes as the chords change. Be careful not to get caught on the
wrong chord. Be sure to time your changes appropriately. Here are a few avenues to try:
-Try moving Minor Pentatonic & Blues over each chord:
-Play C Minor Pentatonic & Blues over the C chord
-Play F Minor Pentatonic & Blues over the F chord
-Play G Minor Pentatonic & Blues over the G chord
-Try moving Major Pentatonic over each chord
-Play C Major Pentatonic over the C chord, (C Major Pentatonic = A Minor Pentatonic)
-Play F Major Pentatonic over the F chord, (F Major Pentatonic = D Minor Pentatonic)
-Play G Major Pentatonic over the G chord, (G Major Pentatonic = E Minor Pentatonic)
-Try mixing up the Minor Pentatonic and Major Pentatonic over each chord – this is a very cool device that
many blues players like BB King often utilize.
-Play C Major Pentatonic over the C chord or I chord – then switch to C Minor Pentatonic over the F
chord or IV chord – then try C Major Pentatonic over the G chord or V chord. Listen to how well this
technique outlines and implies the chord changes. Mix this up a bit, maybe the next time around the
progression try C Minor Pentatonic & Blues over the G chord. Try it out!
-Try moving the Mixolydian mode over each chord – because the chords used in this jam are 9
th
chords
Mixolydian would be a great mode to utilize. Whenever you see 7
th
or 9
th
chords you instantly want to think of
Mixolydian mode as a possibility. (9
th
chord – 1,3,5,b7,9)
Dominant 7
th
and 9
th
chords have a b7 in them so Mixolydian is a perfect modal choice as it is considered more a
major mode and has that b7 interval in the mode (1,2,3,4,5,6,b7). Mixolydian is the 5
th
mode of the major scale.
To determine the conversion for C Mixolydian just ask yourself what major scales’ fifth note is a C – answer is F.
The 5
th
note of a F major scale is C. So to play C Mixolydian over the C9 chord just play all your F major scales
but just start on and emphasize the C notes and its C Mixolydian. Follow the same formula for the F and G
chords.
-Play C Mixolydian, (= Fmajor), over the C9 chord
-Play F Mixolydian, (= Bb major), over the F9 chord
-Play G Mixolydian, (= C major), over the G9 chord

12
TRACK 2 – Slow Blues in A A9-D9-E9 I-IV-V 12-Bar Blues fast change 65 BPM Key of A 4:37 min
Here we have a major key I-IV-V 12-bar slow blues with the fast change to the IV chord. This jam utilizes 9
th
chords much like Track one. Dominant 7
th
and 9
th
chords are very common in the blues.
This is a slower tempo blues jam so you have a long time on each chord, perfect for treating each chord as a
separate event. You should hear that identifiable major key 12-bar I-IV-V pattern that alerts you to a wide-open
jam. As well as soon as you hear 9
th
chords consider using Mixolydian mode over each chord.
*What Relates to all the chords: you have many options here so much depends on what type of sounds you
prefer or what you want to get across – minor bluesy or sweet major or both, try these:
-Try A Minor Pentatonic & Blues over all the chords for that minor bluesy vibe.
-Try A Major Pentatonic over all the chords for that sweet major sound. A Major Pentatonic is the same as F#
Minor Pentatonic. A Major and F# Minor are relative major and minor. Play all your F# Minor Pentatonic scales,
but start on and emphasize the A notes and it will be A Major Pentatonic.
-Try A Dorian over all the chords. Dorian works great over major key I-IV-V blues, swing, and shuffle
progressions. A-Dorian is the same as G major, (A-Dorian=G major). So play all your G major scales but
emphasize and start on the A notes and you have A-Dorian.
-Try mixing A Minor Pentatonic and A Major Pentatonic as well as A Dorian over all the chords.
*Treat each chord like a separate event:
-Switch Pentatonics over each chord:
-Over the A chord try A Minor Pentatonic & Blues or A Major Pentatonic
-Over the D chord try D Minor Pentatonic & Blues or D Major Pentatonic
-Over the E chord try E Minor Pentatonic & Blues or E Major Pentatonic
-Try Mixolydian mode over each chord: Mixolydian works great over 9
th
chords as there is that b7 in the 9
th
chord, (1,3,5,b7,9), as well as in the Mixolydian mode (1,2,3,4,5,6,b7)
-Over the A9 chord try A Mixolydian (=D Major)
-Over the D9 chord try D Mixolydian (=G Major)
-Over the E9 chord try E Mixolydian (=A Major)
-Try mixing Minor Pentatonic and Major Pentatonic over each chord –
-Play A Major Pentatonic over the A9 chord, then switch to A Minor Pentatonic & Blues over the D9
chord, then try A Major Pentatonic again when you get to the E9 chord. Listen to how well this technique
outlines and implies the chord changes. Mix this up a bit, maybe the next time around the progression try
A Minor Pentatonic & Blues over the E9 chord instead of the Major, or maybe Dorian – get creative!
TRACK 3 – Flat Tire in D D7-G7-A7 I-IV-V 12-Bar Blues slow change 116 BPM Key of D 4:14 min
In this jam we have a very cool Flat Tire groove or what is also known as a Texas Backbeat Shuffle. It is a 12-Bar
I-IV-V in the key of D major and utilizes 7
th
chords and a slow change to the IV chord.
From analyzing the chords and rhythm we know a bunch of things right off the bat. First we hear that major key
and it’s a I-IV-V 12-Bar pattern. That tells us this jam track is wide open for soloing avenues. Next we hear 7
th
chords so we know that Mixolydian mode can be employed as well as many other soloing avenues.
*What Relates to all the chords:
-Try D Minor Pentatonic & Blues over all the chords for that minor bluesy vibe.
-Try D Major Pentatonic over all the chords for that sweet major sound. D Major Pentatonic is the same as B
Minor Pentatonic. D Major and B Minor are relative major and minor. Play all your B Minor Pentatonic scales, but
start on and emphasize the D notes and it will be D Major Pentatonic.
-Try D Dorian over all the chords. D Dorian is the same as C major, (D Dorian=C major). So play all your C major
scales but emphasize and start on the D notes and you have D Dorian.

13
-Try mixing D Minor Pentatonic and D Major Pentatonic as well as D Dorian over all the chords.
*Treat each chord like a separate event:
-Switch Pentatonics over each chord:
-Over the D7 chord try D Minor Pentatonic & Blues or D Major Pentatonic
-Over the G7 chord try G Minor Pentatonic & Blues or G Major Pentatonic
-Over the A7 chord try A Minor Pentatonic & Blues or A Major Pentatonic
-Try Mixolydian mode over each chord: Mixolydian works great over 7
th
chords as there is that b7 in the 7
th
chords, (1,3,5,b7), as well as in the Mixolydian mode (1,2,3,4,5,6,b7)
-Over the D7 chord try D Mixolydian (=G Major)
-Over the G7 chord try G Mixolydian (=C Major)
-Over the A7 chord try A Mixolydian (=D Major)
-Try mixing Minor Pentatonic and Major Pentatonic over each chord –
-Play D Major Pentatonic over the D7 chord, then switch to D Minor Pentatonic & Blues over the G7
chord, then try D Major Pentatonic again when you get to the A7 chord. Listen to how well this technique
outlines and implies the chord changes. Mix this up a bit, maybe the next time around the progression try
D Minor Pentatonic & Blues over the A7 chord instead of the Major, or maybe Dorian – get creative!
TRACK 4 – Two-beat Rolling in G G7-C7-D7 I-IV-V 12-Bar Blues slow change Key of G 104 BPM 4:42 min
This jam track is in the key of G and it’s a 12-Bar blues I-IV-V slow change progression utilizing 7
th
chords.
*What Relates to all the chords: Many options in this jam as it’s a major key I-IV-V 12-bar blues so a lot will
depend on your playing style and what type of mood or sound you will want to create.
-Try G Minor Pentatonic & Blues over all the chords for that minor bluesy vibe. Minor Pentatonic is awesome
and often one of the first choice amongst blues players over I-IV-V blues progressions.
-Try G Major Pentatonic over all the chords for that sweet major sound. G Major Pentatonic is the same as E
Minor Pentatonic. G Major and E Minor are relative major and minor. Play all your E Minor Pentatonic scales all
over the neck, but start on and emphasize the G notes and it will be sweet sounding G Major Pentatonic.
-Try G Dorian - Dorian works great over major key I-IV-V blues, swing, and shuffle progressions. In these blues
progressions the Dorian mode will give you that hybrid kind of minor/major sounds as it combines the elements of
both major and minor. Try G Dorian over all the chords. Dorian is the 2
nd
mode of the major scale so ask yourself
what major scales’ 2
nd
note is a G – answer F. So G Dorian is the same as F major, (G Dorian=F major). So play
all your F major scales but emphasize and start on the G notes and you have G Dorian.
-Try mixing G Minor Pentatonic and G Major Pentatonic as well as G Dorian over all the chords.
*Treat each chord like a separate event:
-Switch Pentatonics over each chord:
-Over the G7 chord try G Minor Pentatonic & Blues or G Major Pentatonic
-Over the C7 chord try C Minor Pentatonic & Blues or C Major Pentatonic
-Over the D7 chord try D Minor Pentatonic & Blues or D Major Pentatonic
-Try Mixolydian mode over each chord: Mixolydian mode works great over 7
th
chords as there is that b7 in the
7
th
chords, (1,3,5,b7), as well as in the Mixolydian mode (1,2,3,4,5,6,b7). Mixolydian would be one mode of choice
over the chords.
-Over the G7 chord try G Mixolydian (=C Major)
-Over the C7 chord try C Mixolydian (=F Major)
-Over the D7 chord try D Mixolydian (=G Major)

14
TRACK 5 – Box Groove in A A9-D9-E9 12-Bar Blues slow change Key of A 119 BPM 4:10 min
Here we have what is known as a Box Groove jam. It is a major key I-IV-V 12-bar blues with the slow change to
the IV chord in the key of A. Much like track 2 on the CD this jam also uses 9
th
chords in the key of A, but it is a
much faster tempo and a different groove. This track has a totally different feel than the slow blues in A jam track.
Again, you should hear that very identifiable major key 12-bar I-IV-V pattern that alerts you to a wide-open jam.
As well as soon as you hear 9
th
chords consider using Mixolydian mode as one viable option.
*What Relates to all the chords:
-Try A Minor Pentatonic & Blues over all the chords.
-Try A Major Pentatonic over all the chords. A Major Pentatonic is the same as F# Minor Pentatonic. A Major
and F# Minor are relative major and minor. Play all your F# Minor Pentatonic scales, but start on and emphasize
the A notes and it will be A Major Pentatonic.
-Try A Dorian over all the chords. Dorian works great over major key I-IV-V blues, swing, and shuffle
progressions. A-Dorian is the same as G major, (A-Dorian=G major). So play all your G major scales but
emphasize and start on the A notes and you have A-Dorian.
-Try mixing A Minor Pentatonic and A Major Pentatonic as well as A Dorian over all the chords.
*Treat each chord like a separate event:
-Switch Pentatonics over each chord:
-Over the A chord try A Minor Pentatonic & Blues or A Major Pentatonic
-Over the D chord try D Minor Pentatonic & Blues or D Major Pentatonic
-Over the E chord try E Minor Pentatonic & Blues or E Major Pentatonic
-Try Mixolydian mode over each chord:
-Over the A9 chord try A Mixolydian (=D Major)
-Over the D9 chord try D Mixolydian (=G Major)
-Over the E9 chord try E Mixolydian (=A Major)
-Try mixing Minor Pentatonic and Major Pentatonic over each chord –
-Play A Major Pentatonic over the A9 chord, then switch to A Minor Pentatonic & Blues over the D9
chord, then try A Major Pentatonic again when you get to the E9 chord. Listen to how well this technique
outlines and implies the chord changes. Mix this up a bit, maybe the next time around the progression try
A Minor Pentatonic & Blues over the E9 chord instead of the Major, or maybe Dorian – get creative!
TRACK 6 – Slow Blues in E E-A-B7 I-IV-V 12-Bar Blues slow change Key of E 63 BPM 4:44 min
Here we have a slow blues jam in the key of E. It’s a I-IV-V 12-Bar progression with a slow change to the IV
chord. This is a very slow tempo blues track so you have lots of time on each chord if you to choose to solo by
treating each chord as a separate event.
*What Relates to all the chords:
-For that minor bluesy sound try E Minor Pentatonic & Blues over all the chords.
-For that sweet major sound try E Major Pentatonic over all the chords. E Major Pentatonic is the same as C#
Minor Pentatonic. E Major and C# Minor are relative major and minor. If you think more in terms of Minor
Pentatonic or just know those shapes then play all your C# Minor Pentatonic scales, but start on and emphasize
the E notes and it will be E Major Pentatonic and have that real major happy sweet sound.
-Try E Dorian - Dorian is the 2
nd
mode in any major key. So ask yourself what major scales’ 2
nd
note is an E –
answer is D. So E Dorian is the same as D major, (E Dorian=D major). Play all your D major scales but
emphasize and start on the E notes – resolve to and focus on those E notes and you are playing in E Dorian.
-Try mixing both E Minor Pentatonic and E Major Pentatonic as well as E Dorian over all the chords for some
killer sounds.

15
*Treat each chord like a separate event: In this jam the chords are moving pretty slow so you have a lot of time
on each chord, perfect for treating each chord as a separate event. Remember to listen to the rhythm and time
your changes so you change your scale or landing notes as the chords change. Here are a few avenues to try:
-Try moving Minor Pentatonic & Blues over each chord:
-Play E Minor Pentatonic & Blues over the E chord
-Play A Minor Pentatonic & Blues over the A chord
-Play B Minor Pentatonic & Blues over the B7 chord
-Try moving Major Pentatonic over each chord
-Play E Major Pentatonic over the E chord
-Play A Major Pentatonic over the A chord
-Play B Major Pentatonic over the B7 chord
-Try mixing up the above Minor Pentatonic and Major Pentatonic over each chord:
-Play E Major Pentatonic over the E chord or I chord – then switch to E Minor Pentatonic & Blues over the
A chord or IV chord – then try E Major Pentatonic over the B7 chord or V chord. Listen to how well this
technique outlines and implies the chord changes.
-Try B Mixolydian over the B7 chord. Remember that Mixolydian is one of the modes of choice when soloing
over 7
th
and 9
th
chords. Mixolydian is the 5
th
mode of the major scale. Ask yourself what major scales’ 5
th
note is a
B – answer E. B Mixolydian=E major, play some E major scales and licks but start on and emphasize the B notes
and you are now playing in B Mixolydian.
TRACK 7 – Grinder in D D-G-A I-IV-V 12-Bar Blues slow change Key of D 99 BPM 4:32 min
Here we have a standard major key 12-bar blues progression known in the industry as a Grinder. It’s one of the
more common rhythm grooves that you will find in the blues. Lots of time on each chord and this groove is often
played as it is here with 5
th
chords and embellished with 6
th
chords.
*What Relates to all the chords:
-Try D Minor Pentatonic & Blues over all the chords.
-Try D Major Pentatonic over all the chords. Remember that for most major key jams you can use Major
Pentatonic over all the chords. D Major Pentatonic is the same as B Minor Pentatonic. D Major and B minor are
relative major and minor. Play all you’re B Minor Pentatonic scales, but start on and emphasize the D notes and it
will be D Major Pentatonic and have that sweet major sound.
-Try D Dorian - Dorian is considered more of a minor mode but works great over major key I-IV-V blues, swing,
and shuffle progressions. So try D Dorian over all the chords. D Dorian is the same as C major, (D Dorian=C
major). So play all your C major scales but emphasize and start on the D notes.
-Try mixing both D Minor Pentatonic and D Major Pentatonic as well as D Dorian over all the chords.
*Treat each chord like a separate event: Be sure to time your changes over each chord and really listen to the
rhythm to ensure you don’t get caught playing the wrong scale over a given chord.
-Try moving Minor Pentatonic & Blues over each chord:
-Play D Minor Pentatonic & Blues over the D chord
-Play G Minor Pentatonic & Blues over the G chord
-Play A Minor Pentatonic & Blues over the A chord
-Try moving Major Pentatonic over each chord:
-Play D Major Pentatonic over the D chord
-Play G Major Pentatonic over the G chord
-Play A Major Pentatonic over the A chord

16
-Try moving the Dorian mode over each chord – because the rhythm of this jam is embellished with 6
th
chords,
Dorian is a great choice as that is a key interval in the mode (1,2,b3,4,,5,6,b7)
-Play D Dorian, (=C major), over the D chord
-Play G Dorian, (=F major), over the G chord
-Play A Dorian, (=G major), over the A chord
TRACK 8 – Mambo in A A6-D7-E9 I-IV-V 12-Bar Blues slow change Key of A 146 BPM 4:07 min
Here we have a Mambo groove in the key of A starting off with a cool A6
th
chord slide. Again it’s a 12-bar I-IV-V
with a slow change to the IV chord. So it’s pretty wide open for soloing opportunities.
*What Relates to all the chords:
-Try A Minor Pentatonic & Blues over all the chords.
-Try A Major Pentatonic over all the chords Remember that for most major key jams you can use Major
Pentatonic over all the chords. A Major Pentatonic is the same as F# Minor Pentatonic. A Major and F# minor are
relative major and minor. Play all you’re F# Minor Pentatonic scales, but start on and emphasize the A notes and
it will be A Major Pentatonic and have that sweet major sound.
-Try A Dorian - Dorian is considered more of a minor mode but works great over major key I-IV-V blues, swing,
and shuffle progressions. So try A Dorian over all the chords. A Dorian is the same as G major, (A Dorian=G
major). So play all your G major scales but emphasize and start on the A notes and it’s A Dorian.
-Try mixing both A Minor Pentatonic and A Major Pentatonic as well as A Dorian over all the chords.
*Treat each chord like a separate event: Be sure to time your changes over each chord and really listen to the
rhythm to ensure you don’t get caught playing the wrong scale over a given chord.
-Try moving Minor Pentatonic & Blues over each chord:
-Play A Minor Pentatonic & Blues over the A chord
-Play D Minor Pentatonic & Blues over the D chord
-Play E Minor Pentatonic & Blues over the E chord
-Try moving Major Pentatonic over each chord:
-Play A Major Pentatonic over the A chord
-Play D Major Pentatonic over the D chord
-Play E Major Pentatonic over the E chord
-Try Mixolydian mode over the D7 and E9 chords: Mixolydian works great over 7
th
and 9
th
chords. You don’t
have much time on each chord as they are moving by pretty fast, but you can sneak a cool lick in there for sure!
-Over the D7 chord try D Mixolydian (=G Major)
-Over the E9 chord try E Mixolydian (=A Major)
TRACK 9 – Train Beat in G G7-C7-D7 I-IV-V 12-Bar Blues slow change Key of G 136 BPM 4:16 min
This is a Train Beat jam track is in the key of G and it’s a 12-Bar blues I-IV-V slow change progression utilizing 7
th
chords. The chords are rolling by pretty fast, as it is an up-tempo groove. But you still have time on each chord to
solo over them independently if you choose.
*What Relates to all the chords:
-Try G Minor Pentatonic & Blues over all the chords.
-Try G Major Pentatonic over all the chords. G Major Pentatonic is the same as E Minor Pentatonic. G Major and
E Minor are relative major and minor. Play all your E Minor Pentatonic scales all over the neck, but start on and
emphasize the G notes and it will be sweet sounding G Major Pentatonic.

17
-Try G Dorian over all the chords. Dorian is the 2
nd
mode of the major scale. So ask yourself what major scales’
2
nd
note is a G – answer F. So G Dorian is the same as F major, (G Dorian=F major). So play all your F major
scales but emphasize and start on the G notes and you have G Dorian.
-Try mixing G Minor Pentatonic and G Major Pentatonic as well as G Dorian over all the chords.
*Treat each chord like a separate event:
-Switch Pentatonics over each chord:
-Over the G7 chord try G Minor Pentatonic & Blues or G Major Pentatonic
-Over the C7 chord try C Minor Pentatonic & Blues or C Major Pentatonic
-Over the D7 chord try D Minor Pentatonic & Blues or D Major Pentatonic
-Try Mixolydian mode over each chord: Mixolydian mode works great over 7
th
chords as there is that b7 in the
7
th
chords, (1,3,5,b7), as well as in the Mixolydian mode (1,2,3,4,5,6,b7). Mixolydian would be one mode of choice
over each of the chords.
-Over the G7 chord try G Mixolydian (=C Major)
-Over the C7 chord try C Mixolydian (=F Major)
-Over the D7 chord try D Mixolydian (=G Major)
TRACK 10 – Grinder in E E-A-B I-IV-V 12-Bar Blues slow change Key of E 92 BPM 4:16 min
Here we have another Grinder track. In track 7 we had a Grinder track in D. This one is a Grinder in E. Again it’s a
very traditional major key 12-bar blues progression with a slow change to IV chord. So it’s wide open for soling
opportunities and improvisation.
*What Relates to all the chords:
-Try E Minor Pentatonic & Blues over all the chords.
-Try E Major Pentatonic over all the chords. E Major Pentatonic is the same as C# Minor Pentatonic. E Major
and C# minor are relative major and minor. Play all you’re C# Minor Pentatonic scales, but start on and
emphasize the E notes and it will be E Major Pentatonic and have that sweet major sound.
-Try E Dorian - Dorian is considered more of a minor mode but works great over major key I-IV-V blues, swing,
and shuffle progressions. So try E Dorian over all the chords. E Dorian is the same as D major, (E Dorian=D
major). So play all your D major scales but emphasize and start on the E notes.
-Try mixing both E Minor Pentatonic and E Major Pentatonic as well as E Dorian over all the chords.
*Treat each chord like a separate event: Be sure to time your changes over each chord and really listen to the
rhythm to ensure you don’t get caught playing the wrong scale over a given chord.
-Try moving Minor Pentatonic & Blues over each chord:
-Play E Minor Pentatonic & Blues over the E chord
-Play A Minor Pentatonic & Blues over the A chord
-Play B Minor Pentatonic & Blues over the B chord
-Try moving Major Pentatonic over each chord:
-Play E Major Pentatonic over the E chord
-Play A Major Pentatonic over the A chord
-Play B Major Pentatonic over the B chord
-Try moving the Dorian mode over each chord:
-Play E Dorian, (=D major), over the E chord
-Play A Dorian, (=G major), over the A chord
-Play B Dorian, (=A major), over the B chord

18
BLUES RHYTHMS – THE I-IV-V 12-BAR BLUES
You will hear me state over and over the importance of understanding and analyzing the chords in a given chord
progression in order to get the full roadmap of soloing avenues. It’s the chords that give the complete lead guitar
scenario. The key only gives you one small piece of the puzzle.
You need to know what are the chords in the progression, when are chords changing, and how much musical
time, or measures, are spent on each chord. This way you can play the proper rhythm structure and also you can
play all lead guitar avenues available including playing over each chord independently.
Understanding the chords within the rhythmic structure of the song or jam is crucial as it’s the chords you will be
soloing on top of. You need to know and understand the various chord structures and pattern variations so you
can readily adapt your solo skills to play over the chords.
There are many types of blues rhythms but the most common is the I-IV-V 12-bar blues. (If you are not familiar
with the numbering system of the chords then please check out the lesson on chord construction on pages 36-
37). Often these blues progressions will contain dominant chords such as 7
th
chords.
The “12-bar” means that the song or jam is divided into 12 parts or measures. Then you just keep repeating that
same 12-bar pattern over and over for the length of the song. Other common blues progressions include the 8-
bar, 16-bar, and 24-bar blues.
The traditional 12-bar blues has a total of 12 bars or measures of the I-IV-V chords that keep repeating in 12-bar
blocks over and over. Two of the most common 12 bar patterns or arrangements are the slow change and the fast
change. You will need to be VERY familiar with both.
The only difference between the two is the 2
nd
bar or second measure. The slow change stays on the I chord for 4
bars at first while the fast change at first goes from one bar on the one chord to one bar on the four chord then
back to the one chord for two bars, (see diagram below).
12 Bar Slow Change:
Measure:
1
2
3
4
5
6
7
8
9
10
11
12
Chord:
I
I
I
I
IV
IV
I
I
V
IV
I
V
12 Bar Fast Change:
Measure:
1
2
3
4
5
6
7
8
9
10
11
12
Chord:
I
IV
I
I
IV
IV
I
I
V
IV
I
V
The fast change is often used for slower tempo blues. With a little practice you will soon know the patterns by
heart and can whip them out instantly, they will become automatic.
These 12 bar patterns are the rhythmic standards of the blues and soon they will be instantly recognizable. Ever
wonder why any group of blues musicians can just sit down together and instantly play with a vibe? It’s because
of these standard progressions that are so common in blues music. Everyone knows these and they are ingrained
in the musicians’ musical vocabulary.
I suggest playing the rhythms to jam tracks to dial in your rhythm chops as well as to develop your ear. Feel the
changes and how long you are on each chord. It won’t take long before you get the hang of these standard blues
progressions. Then you can go about making strong solo statements by outlining the chord changes with your
lead lines and landing on strong chord tones, (notes that make up each chord).
Keep in mind that your rhythm playing is absolutely critical - so do not neglect it. I see that mistake made by guitar
players over and over again. They focus too much on lead playing and not enough on rhythm playing. Keep
things balanced and remember in most band situations that you will be playing rhythm guitar way more than you
will be playing solo guitar. So your lead playing is really only ever as good as your rhythm playing.
19
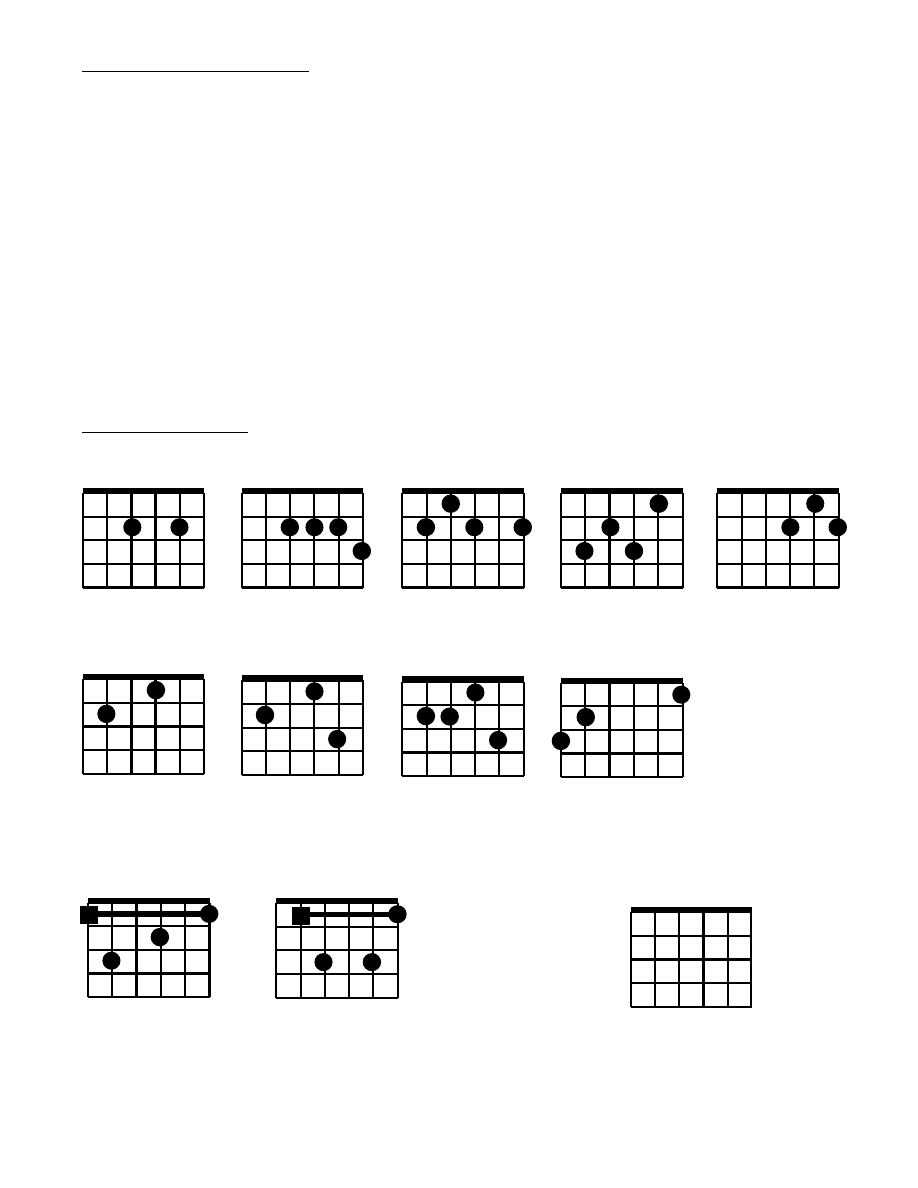
CHORDS – Dominant 7
th
chords
There are many different types of seventh chords, i.e. the dominant 7
th
, major 7
th
, minor 7
th
, diminished 7
th
, 7 #9s,
etc. There are so many types because a variety of 7ths can be added to a variety of chords.
Blues music makes heavy use of dominant 7
th
chords. So you really want to arm yourself with a thorough
knowledge of dominant 7
th
chords. These chords are denoted by adding the superscript “7” after the letter of the
chord.
Typically the dominant 7
th
chord is built off the fifth or dominant degree of the major scale. The dominant 7
th
chord
is constructed from the scale degrees of root, 3
rd
, 5th, and b7
th
. The dominant 7
th
is so useful and popular
because it is a major type chord with a very strong sound and strong resolution qualities to the ear.
The dominant 7
th
is utilized in all genres of music but most commonly seen in blues and jazz. The b7 is what gives
the chord its color, making it sound twangy and bluesy compared to the sweet and jazzy sounds of major seventh
chords.
Commit the following dominant seventh chords to memory and try to incorporate them into your daily practice
regimen. Some have various voicings that provide slightly different tones. You will be utilizing these chords all the
time when playing the Blues.
7th chords - (1, 3, 5,
b7)
Copyright Next Level Guitar Inc. 2011 - all rights reserved – unauthorized duplication or distribution is prohibited
A7
X 0 1 0 2 0
A7
X 0 1 2 3 4
B7
X 2 1 3 0 4
C7
X 3 2 4 1 0
D7
X X 0 2 1 3
G7
3 2 0 0 0 1
E7
0 2 0 1 0 0
E7
0 2 0 1 4 0
E7
0 2 3 1 4 0
6
th
string root
7th bar chord
1 3 1 2 1 1
5
th
string root
7th bar chord
X 1 3 1 3 1
Low
LEGEND
High
E A D G B E
1
st
fret
2
nd
fret
3rd fret
4th fret
Nut
20
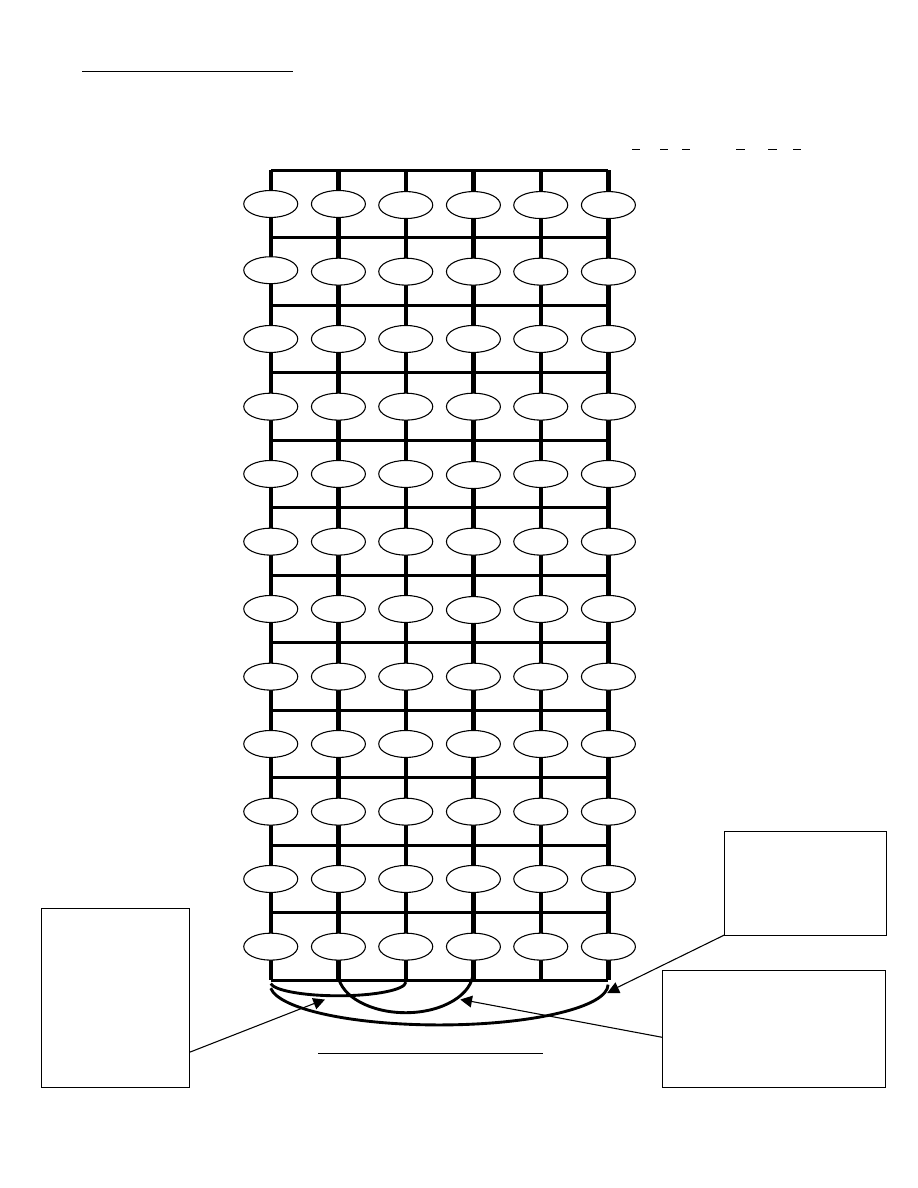
NOTES ON THE FRETBOARD
6 5 4 3 2 1
E A D G B E
Edie Ate Dynamite Good Bye Edie
Low
12
th
fret
9
th
fret
7
th
fret
5
th
fret
3
rd
fret
1
st
Fret
F
Bb
F
C
G#
Eb
G#
G
F#
C
B
Bb
A
B
E
Eb
D
C#
F
E
Eb
D
C#
C
E
F
F#
G
A
G#
G
F#
B
Bb
A
D
C#
C
B
Bb
A
G#
C#
C
D
Bb
A
E
B
G
F#
F
E
Eb
D
G
G#
A
Bb
F#
G
B
C
G#
C#
Eb
F#
Eb
D
C#
F
E
The twelve-note scale consists of:
A, Bb, B, C, C#, D, Eb, E, F, F#, G, G#
Copyright Next Level Guitar Inc., 2011
All rights reserved – unauthorized duplication or distribution is prohibited
# = SHARP
b = FLAT
High
A and G strings are related –
from any note on the A string
go 2 strings down and 2 frets
over and you have the same
note an octave higher on the
G string
E and D strings
are related – from
any note on the E
string go 2 strings
down and 2 frets
over and you have
the same note an
octave higher on
the D string
Low E and High E
strings have same
note names on each
fret – just two
octaves apart

21
LEAD GUITAR - Rhythm, The Ride, Note Choice, & Phrasing
Lead playing is something that can identify a player like a signature or fingerprint. Players like Stevie Ray
Vaughan, Eddie Van Halen, BB King, Eric Clapton, Eric Johnson, Steve Vai, and Carlos Santana can be identified
with a single note. They have a very signature sound and identifiable guitar tone.
As you continue your lead guitar studies and keep up with your practicing, you will find your playing will evolve
over time – your playing is an evolution. An element of lead playing which may seem simple, like vibrato or string
bending, can takes months and months to develop into a signature statement in your lead guitar bag of tricks.
GEAR/EQUIPMENT – Sometimes guitarists think that if they purchase the same guitar, amp, and effects of their
favorite guitarist that they will cop their signature sound and replicate their tone. You will find that this is not the
case.
Here is a quick story to illustrate this point. When Van Halen was first starting out they opened for some name
acts of the time. Eddie Van Halen was so revolutionary with his guitar playing that he virtually floored the guitar
community. One show Van Halen was opening for Ted Nugent and Ted watched in amazement as Eddie played
during sound check. Ted couldn’t believe the sounds he was hearing. After Eddie left the stage Ted then talked
Eddie’s guitar tech into letting him plug into Eddie’s rig. Ted Nugent starting playing through Eddie’s gear and
guess what - he sounded like Ted Nugent.
The point is that your tone comes mainly from your fingers and your technique, not the amp or effect. Tone is truly
in your hands and in your heart. Gear can surely be motivating and empowering and point you in a certain
direction, but ultimately your tone is in your hands.
Eddie Van Halen can play any guitar through any amp or effect and will still sound like Eddie Van Halen. You
want to play through the best gear that you can afford, but spend time developing your own technique and sound
and not someone else’s.
What you want to accomplish with your lead guitar playing and improvisation is two-fold:
1. Complement the song – it all comes back to the song and how the guitar lines complement it and help to get
its musical statement and emotions across.
2. Draw people in to your solo – you want the listener to latch onto what you are playing. You want to keep the
listener on the edge of their seat wondering, “what is he going to play next”? You want to have the power to take
the listener on a musical journey with ups and downs and great emotion and passion. You want your leads to tell
a story. And of course you always want to be aware of melody happening in your guitar lines.
At times many guitarists forget the above two items and are off soloing in their own “little world”. They forget about
the song, the chord changes, and what the other musicians behind them are doing. What happens then is the
song suffers, or the band has to “reel” the guitarist back into the groove.
Below are four critical parts to great lead playing. Work on all four of these aspects by studying each individually,
and then apply them in a musical context.

22
LEAD GUITAR - Rhythm, The Ride, Note Choice, & Phrasing – THE BIG FOUR
1. Rhythm – the rhythm of your notes and licks. It’s the way we take the notes we choose to play and do things
musically with them. This quite possibly could be the most important element of lead guitar, taking the notes and
doing musically interesting things with them. Repetition is one key component and melody is another.
Repetition is a key to good melody and phrasing. You don’t have to play your licks verbatim every time in a lead
line, but rather the same in concept. Noodle around on the guitar till you find a killer sounding riff, find the magic.
Then dig into that idea that you like and keep repeating it. Repeat it but try playing it a little different rhythmically
each time or maybe hit the same note two or three times one time, or do a bend one time, vary it. These little
variations of the same lick or idea are critical.
Learn to vary your magical licks both note wise and rhythm wise. Learn a rhythm or rhythmic phrase and then
apply it to some of your favorite licks across all the strings. So when you noodle around and get into a little cool
idea – keep it – keep playing it – turn the rhythm around and exploit it. Remember rhythm and melody are key!
2. The Ride – I am talking about the ups and downs, the peaks and valleys, the highs and lows in your lead
playing. It’s the way your lines move up and down the neck and loud and soft dynamically. It is critical to have
these peaks and valleys in your lead lines. You just don’t want to be rambling on and on with straight across the
board flat line playing – blah, blah, blah – no good.
You want to move your listeners and draw them into your solo. Your solo should have ups and downs and twists
and turns. You don’t want only flat straight lines with no emphasis, connections, different rhythms, no dynamics,
or sans any musical events or melody.
3. Note choice – this may seem pretty obvious but which notes you play are equally important as which notes
you don’t play. Note choice is what most musicians focus on but actually most players can benefit from building
their rhythm and ride vocabularies and chops.
For example, if you are playing the blues you have only have five or six main notes to choose from so note
choices are limited. So you better have a very big rhythm and ride bag of tricks because that is what is going to
make your lead lines sound interesting and not boring.
4. Phrasing – Basically a phrase is a group of notes that compose a musical thought. Phrasing is all about how
you connect your notes, scales, ideas, and licks. You want to connect your groups of phrases in a manner that
makes good musical sense.
When you don’t have a lot of note choices then you really have to concentrate on your phrasing to keep things
interesting and different. Some players really excel at phrasing and it’s very clear when someone is good at it.
Listen to the playing of Stevie Ray Vaughan. The music just flows out of him. His playing is smooth and effortless
with his musical thoughts and ideas phrasing effortlessly into one another. Almost like he had a direct channel
between his brain, heart, and fingers. Work on your own personal channel and musical connections, its
invaluable.
23
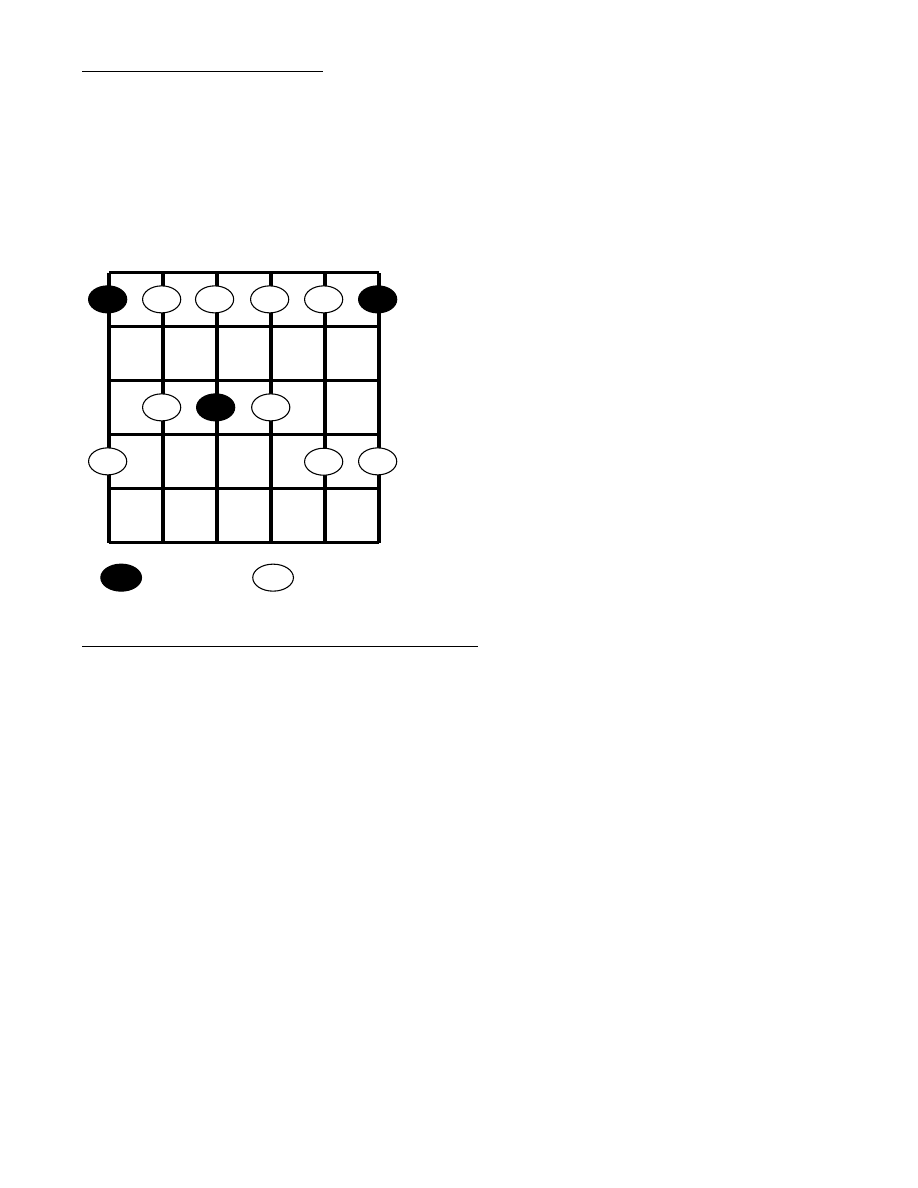
THE MINOR PENTATONIC SCALE
The Pentatonic scale is one of the most commonly utilized scales in just about all genres of music. Penta, is Latin
for five, much like a penta-gram has five sides, Pentatonic scales are constructed from five notes. The Minor
Pentatonic scale is constructed from five notes from the Natural Minor Scale, also called the Aeolian mode. The
Minor Pentatonic scale is built from the five scale degrees of root, b3
rd
, 4
th
, 5th, and b7th. The scale illustrated
below is what many call the basic “box” position and has its low root played with the first finger on the low E string.
The root notes are illustrated with black circles and the numbers inside the circles indicate the fingering to be
utilized when playing this scale. It’s important to learn this basic scale first, as we are going to build upon this
scale in coming lessons and eventually you will need to learn this scale in all positions all over the neck and in all
keys. Many other scale shapes and scale connecting links are diagrammed out in the coming pages.
Hip string bends when utilizing the above Minor Pentatonic scale: – bending strings is one of the most expressive things you
can do on the guitar. You will want to get very proficient and exact with string bending, it’s an art. Always bend to a target note.
When bending strings it is imperative that you are bending the notes in pitch. You don’t want to over bend or under bend
notes, as they will then sound sharp or flat. Practice bending strings and then check the pitch by sounding the note you are
attempting to bend to, your target note. This is a good self-check to ensure you are bending in pitch. Also practice string
bending by plugging directly into an electronic tuner and watch the needle as you bend a note. See the progress as you bend
the note and ultimately hit pitch. Keep doing it over and over till you feel the bend strength wise, and hear the bend in pitch.
For purposes of this string bending exercise play the scale with a fifth fret root or A Minor Pentatonic scale, but once learned,
practice the bends and scale in all keys.
1. Bend the b7th a whole step up to the root. Bend the G note at the 8
th
fret of the B string up one whole step to the A root
note. You can also bend the same note an octave lower at the G note at the 5
th
fret on the D string up one whole step.
2. Bend the 4
th
a half step to the blue note - bend the D note on the 7
th
fret of the G string up one half step to the Eb note.
3. Bend the 4
th
degree a whole step to the fifth - bend the D note on the 7
th
fret of the G-string up one whole step to the E note.
The 4
th
or D note can be bent either a whole or a half step, try both.
4. Bend the b3rd a full step to the 4
th
– bend the C note at the 8
th
fret of the high E string one whole step to the D note.
5. Try a unison bend. Utilize your 4
th
finger to bend the G note on the 8
th
fret of the B string a whole step to an A note while
playing the A note at the 5
th
fret of the high E string with your 1st finger.
6. Unison bend – Utilize your 3rd finger to bend the D note on the 7
th
fret of the G string a whole step to an E note while
playing the E note at the 5
th
fret of the B string with your 1
st
finger.
7. Double stop bend – bend two strings a half step each with your 3
rd
finger. Bend the D note at the 7
th
fret of the G string one
half step while also bending the F# note at the 7
th
fret of the B string one half step.
8. Double stop bend – with your 3
rd
finger bend the D note at the 7
th
fret of the G string a whole step while playing the G note
on the B string with your 4
th
finger.
9. b3rd to major 3
rd
bend – bend the b3rd or C notes a quarter to a half step to the major 3
rd
. This is a very cool bend as the
b3rd is a very ambiguous note in this scale. It sometimes will sound great as the b3rd but also as a major 3
rd
like when playing
over a 7
th
chord. So this note has some play in it and you don’t have to be exact with the bend – play with it and you will soon
be utilizing it all the time. Bend the note slow and put a hook on the end of it.
Take your time and play the scale slow and in time, speed will come.
Practice the scale utilizing the fingerings illustrated. Sound each note
clean, with no string buzzes or overtones. As you move through the
scale make a mental note of when you hit the three root notes,
(illustrated with the black circles).
The key signature is determined by which root note is played. For
example if you play this scale starting at the fifth fret on the low E
string it is an A Minor Pentatonic scale consisting of the five notes A,
C, D, E, and G. If you were to play this scale on the 8
th
fret it would
be a C Minor Pentatonic scale consisting of the five notes C, Eb, F,
G, and Bb.
Much like moveable bar chords this scale can be moved up and
down the guitar neck and the root note will determine the key you are
playing. Practice the scale in all keys.
This scale will form the building block of many concepts to come.
You want to be very familiar with this scale pattern, but do not rely on
it exclusively. We are going to build on this scale extensively. Soon
we will be spicing it up and expanding it, making it a more fluid
sounding scale that you can move laterally across the neck and not
limited to box to box type lead playing.
1
1
1
4
3
1
4
4
3
3
1
1
Minor Pentatonic Scale Basic Box
= root notes
Fingering to
be utilized
#
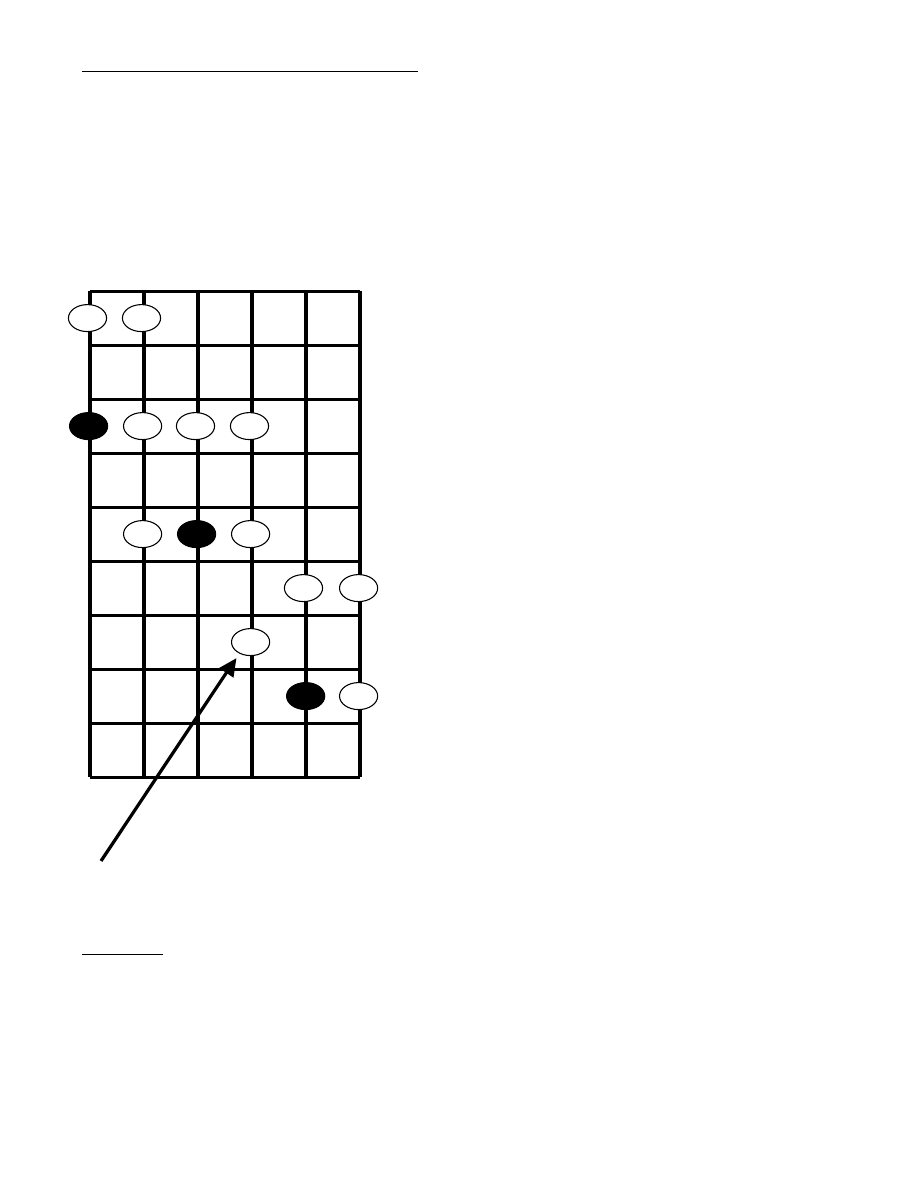
24
THE MINOR PENTATONIC EXPANDED I SCALE
Let’s build on the minor pentatonic basic box shape scale that you learned in the previous page. We are now
going to expand the scale two frets in each direction combining three of the box shapes, (all five box shapes are
diagrammed out on page 12). We are still going to play the same five-note scale. However, the expanded scale
exudes a much more fluid sound and sets up many additional and different combination runs and licks than just
staying solely in the basic “box” shape. You certainly want to have all the pentatonic scales in the box patterns in
your arsenal, but this expanded scale you will find really opens the pathways and lead guitar avenues a lot
further. Commit it to memory and practice it in all keys. You will find yourself using these expanded scales all the
time when playing in the pentatonics – they are invaluable.
For the G string pivot with your second finger for the 1,3,2 fingering combination
KEY POINT: You can grab these above two scales fast if you memorize the two above scales as:
1. Basic Box Position Minor Pentatonic Scale – 1
st
finger root on the low E string
2. Expanded I Minor Pentatonic Scale – 3
rd
finger root on the low E string
Analyzing this expanded scale you can see part of the basic box
pattern you learned in the previous page encapsulated in the
middle of the shape. The shape is expanded two frets in each
direction using the neighboring two boxes. Now you have a
Pentatonic shape that doubles the fret span of the basic box
pattern.
As always when learning a new scale, take your time and play the
scale slow and in time. Sound each note clean, with no string
buzzes or overtones. As you move through the scale make a
mental note of when you hit the three root notes, (illustrated with
the black circles). Practice the scale utilizing the fingerings
illustrated. Notice the shift in fingering when you get to the G-
string. There is a one – three – two finger combination. Utilize
your second finger when playing the third note on the G-string as
that will set you up for the two and three note combinations and
licks to be played with the G, B, and high E strings. As always,
you want to utilize the proper fingerings that set you up for the
next lick, run, or chord.
Much like the first pentatonic scale in the basic box pattern the
key signature for the expanded scale is determined by which root
note is played on the 6
th
string. Play that note with your third
finger. For example if you play this shape starting at the fifth fret
on the low E string it is the Expanded I A minor pentatonic scale
consisting of the five notes A, C, D, E, and G. If you were to play
this scale starting with your 3
rd
finger on the 10
th
fret it would be
the Expanded I D minor pentatonic scale consisting of the five
notes D, F, G, A, and C. Practice this scale in all keys up and
down the fret board.
3
1
1
3
3
3
1
1
1
1
2
3
3
3
Expanded I Minor Pentatonic Scale
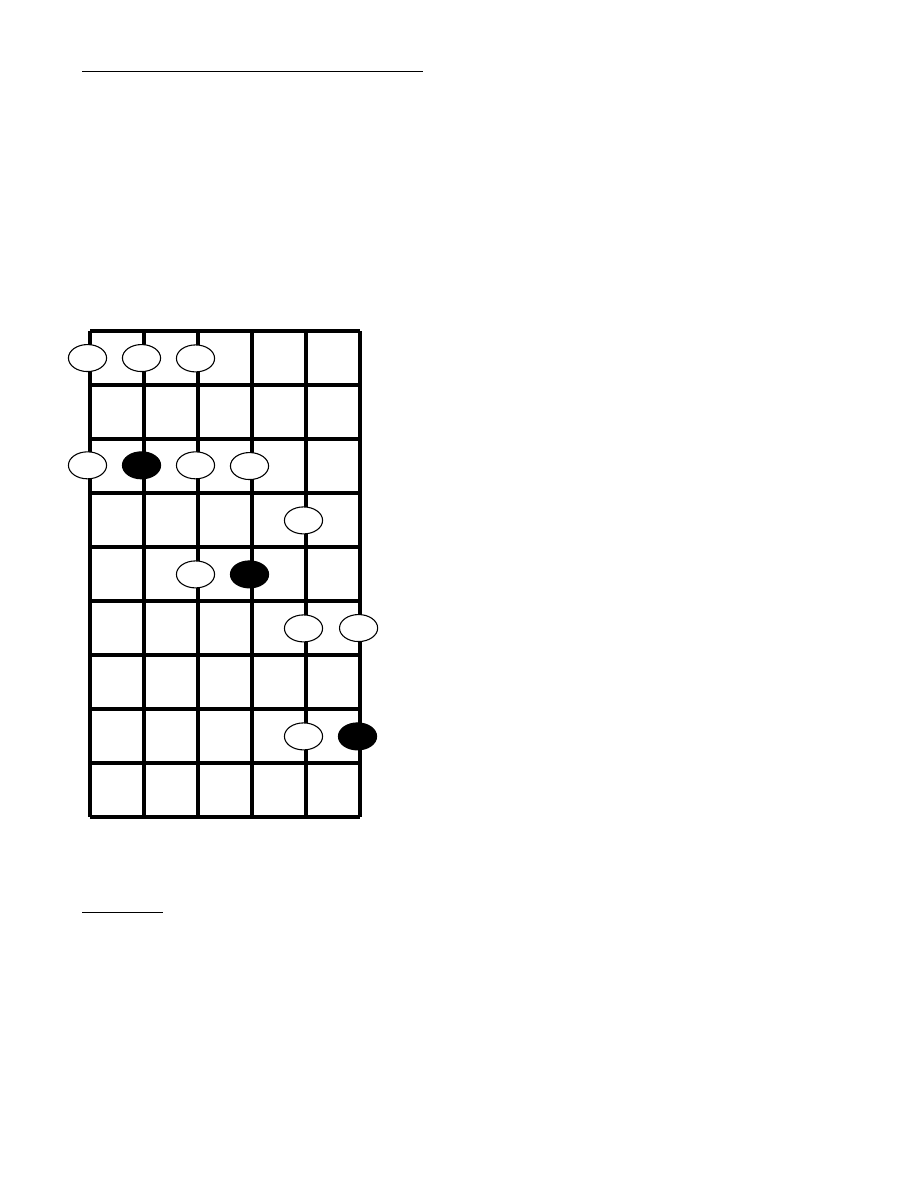
25
THE MINOR PENTATONIC EXPANDED II SCALE
Now that you are familiar with the Minor Pentatonic scale in the basic box position and in Expanded I form, lets
learn the Minor Pentatonic Expanded II scale. This scale will have its root note on the 5
th
or A string and you can
start with your 3
rd
finger. Illustrated below is the Expanded II Minor Pentatonic scale. With both Expanded scales
and the basic “box” shape you can cover just about the entire fretboard. Practice these scales in all keys up and
down the fret board. Commit them to memory, as you will find yourself grabbing them all the time.
KEY POINT: You can grab the above scales fast if you memorize the three above scales as:
1. Box Position Minor Pentatonic Scale – 1
st
finger root on the low E string
2. Expanded I Minor Pentatonic Scale – 3
rd
finger root on the low E string
3. Expanded II Minor Pentatonic Scale – 3
rd
finger root on the A string
3
1
1
3
3
3
1
1
1
1
3
3
3
Expanded II Minor Pentatonic Scale
3
Take your time when first learning this scale pattern, and play
the scale slow and in time. Sound each note clean, with no
string buzzes or overtones. As you move through the scale
make a mental note of when you hit the three root notes,
(illustrated with the three black circles). Practice the scale
utilizing the fingerings illustrated and work up this expanded
scale in all keys. Just use the first and third fingers to play the
entire scale.
In this Expanded 2 scale the key signature is determined by
which root note is played with the third finger on the on the 5
th
or A string. That is how you can find all the different scales
quickly, by identifying the root notes. For example if you play
this shape starting at the tenth fret on the low E string it is the
Expanded II A Minor Pentatonic scale consisting of the five
notes A, C, D, E, and G. This is due to the root note being
played on the 12
th
fret of the A string – an “A” note. If you were
to start this scale on the 12
th
fret of the low E string it would be
the Expanded II B Minor Pentatonic scale.
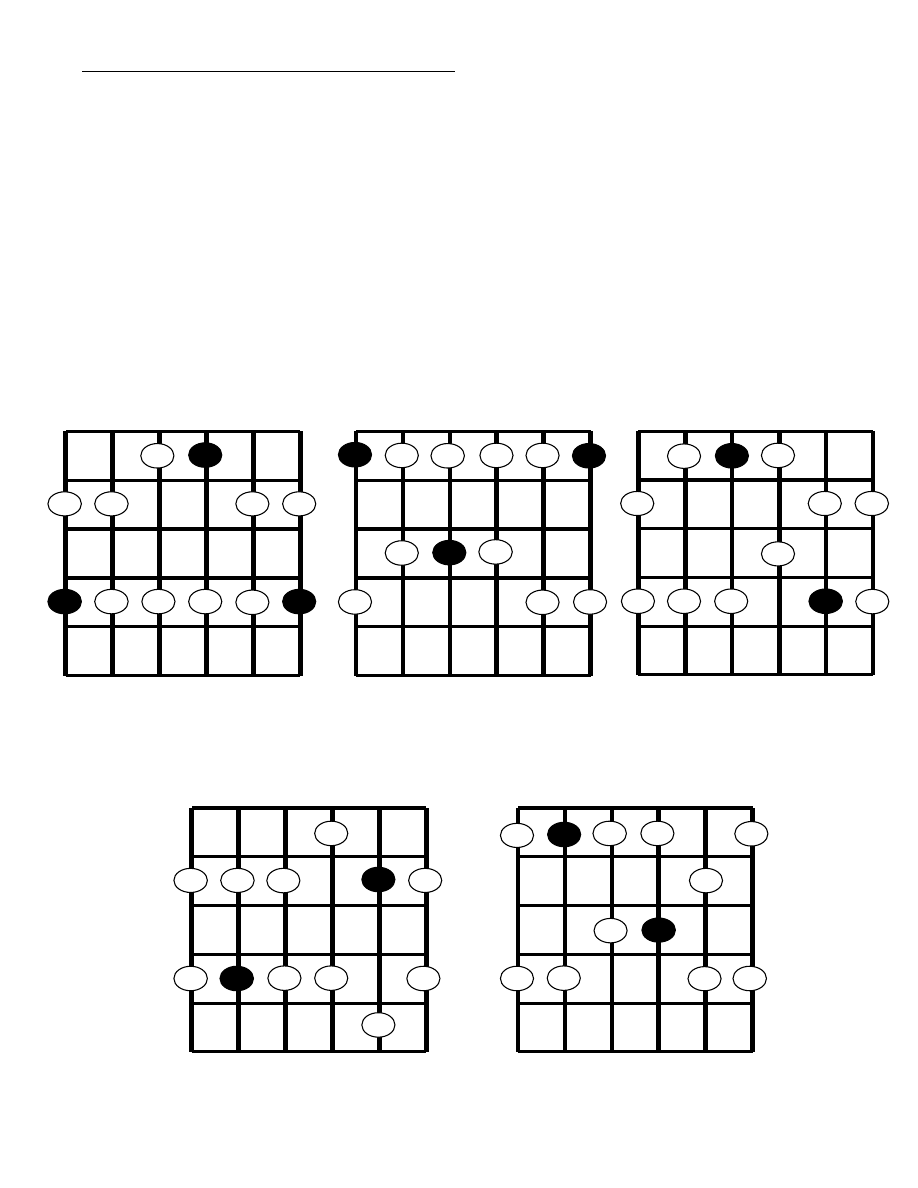
26
THE MINOR PENTATONIC SCALE – the 5 box scales
Illustrated below are five common box shapes for the Minor Pentatonic scale. I usually find myself playing the
expanded I and expanded II scales more often, but you should know all 5 box positions so you can utilize the
entire neck. Practice these in all keys and remember to make mental notes where the root notes lie. Start learning
the scales below in the key of Am as they line up across the fretboard nicely and you can start the number 1 box
with your 4th finger on the 5
th
fret of the Low E string on the A note.
Commit all the shapes and notes to memory and you will soon be gliding across the neck in Pentatonic heaven.
Remember, it is critical to memorize what notes you are playing, not just the shapes. You want to be able to pick
out and land on any given note depending on what chord changes you are playing over. Too many times
guitarists just memorize shapes and forget what notes they are actually playing. So spend time learning the notes
in all keys and you will benefit greatly with this extra work. These box shapes will give you many different riff ideas
and runs. You will find them to be quite useful. Remember to practice and learn these scales in all keys and
practice linking them together. Soon you will be able to see the entire fretboard mapped out as one large scale
that travels up and down the entire neck.
.
#5 box – in Am start with 1
st
finger
on the 12
th
fret, low E string on the E
note.
(these last two boxes and the first
one combine to form the Expanded 2
shape)
4
1
1
3
3
4
4
2
1
1
1
4
#1 box – in Am start with 4
th
finger on the 5
th
fret, low E string
on the A note.
2
1
2
4
4
1
4
4
4
2
4
2
#2 box – in Am start with 1st
finger on the 5
th
fret, low E string
on the A note. (the
basic box
shape)
1
1
4
1
4
3
3
1
3
1
4
1
#3 box – in Am start with 2
nd
finger on the 8
th
fret, low E string
on the C note. (
these first three
boxes make the Expanded 1)
1
1
2
4
4
1
4
4
3
2
2
4
#4 box – in Am start with 1
st
finger on the 10
th
fret, low E string
on the D note.
1
1
1
3
1
4
3
4
1
1
3
3
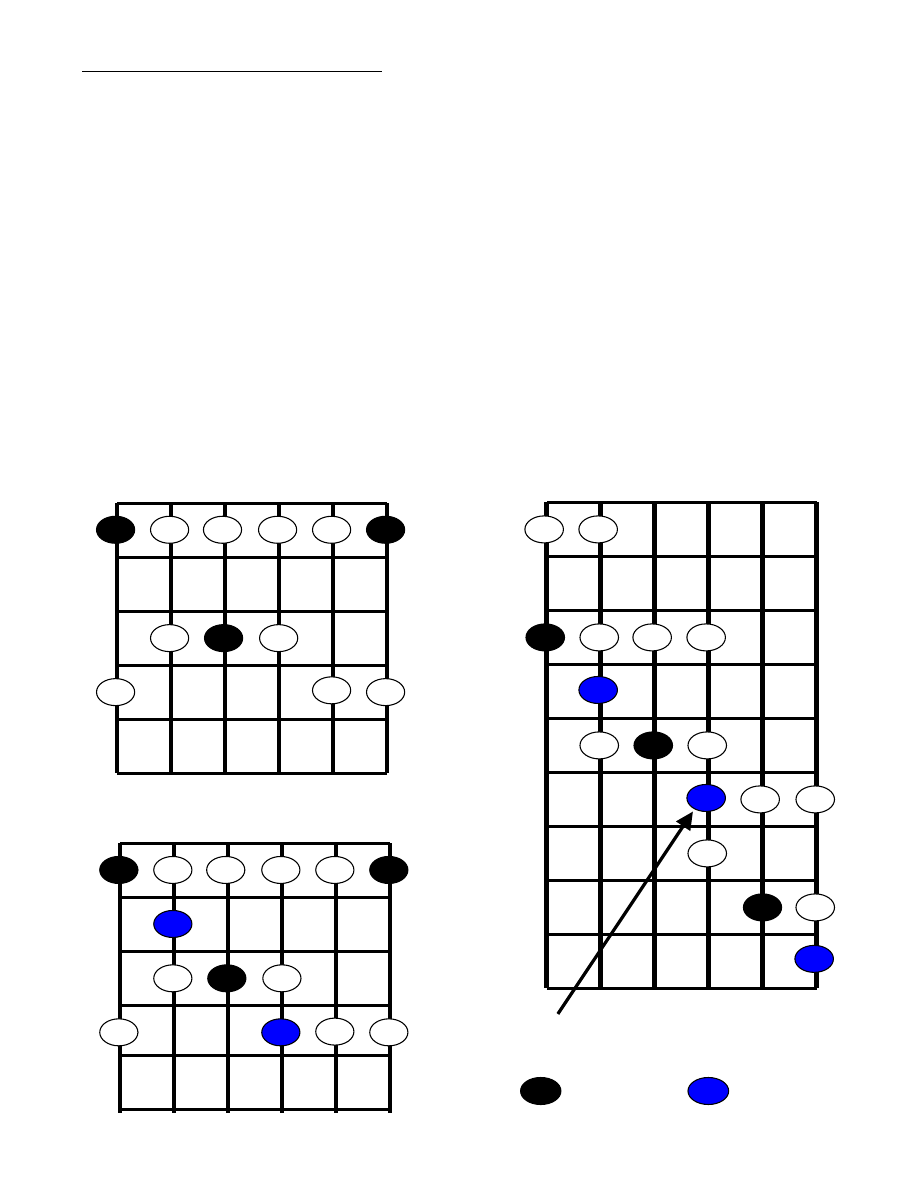
27
THE MINOR PENTATONIC BLUES SCALE
The Blues scale is basically the Minor Pentatonic scale, with one added note, the flatted 5
th
, or blue note. The b5
creates a certain amount of color and tension that is extremely useful. The blues scale is not solely utilized in
blues music but rather is used in many musical genres including rock, country, jazz, pop, metal, punk, and more.
Adding this scale to your lead guitar arsenal will definitely add a little “bluesy” color and texture to your playing.
Use it pretty much whenever you play Minor Pentatonic scales. Now we will make it the Minor Pentatonic Blues
Scale. This is the scale when you hear the term “blues scale” tossed around.
By adding the b5 note we now get the six-note scale constructed from the degrees of 1, b3
rd
, 4
th
,
b5th
, 5th, and
b7th. The first illustration below on the left is the basic box shape Minor Pentatonic scale. Directly below that we
add the b5th and now have the Minor Pentatonic blues scale. They only differ by one note, the b5th or blue note,
illustrated in blue. The illustration below to the right is the Expanded I Minor Pentatonic Blues scale.
A common challenge with many students is that they always play and think of scales in box patterns and they stay
in one box, then stop, move to the next box, then stop, and so on. This can have a real boxy and fragmented
sound with lines that have no continuity. Students benefit greatly by learning to play ACROSS the neck by playing
laterally. The ultimate goal is to see the entire neck as one big inter-connected scale. Then leave them all
connected and just move the whole chunk back and forth as one chunk, to change key. These expanded scales
will pull you out of the traditional boxes that can have a boxy sound that many players cant seem to leave behind.
As always, utilize consistent fingering and practice these scales in all keys and learn all the scales up and down
the neck. Then apply them by practicing your soloing over the jam tracks. Make strong solo statements by
emphasizing strong chord tones and root notes. Employ good phrasing and continuity, and play laterally across
the neck. Rock on!
1
1
1
4
3
1
4
4
3
3
1
1
Basic Box Minor Pentatonic
Scale
Minor Pentatonic Blues Scale
1
1
1
4
3
1
4
4
3
3
1
1
2
4
= root note
= blue note (b5)
3
1
1
3
3
1
1
1
1
1
2
3
3
3
Expanded I Minor Pentatonic Blues Scale
2
1
4
When ascending the scale at the G-string pivot with
your 1
st
finger playing 1,3 then 1,2. Then descending
use a 3,2,1,1 finger combination on the G string
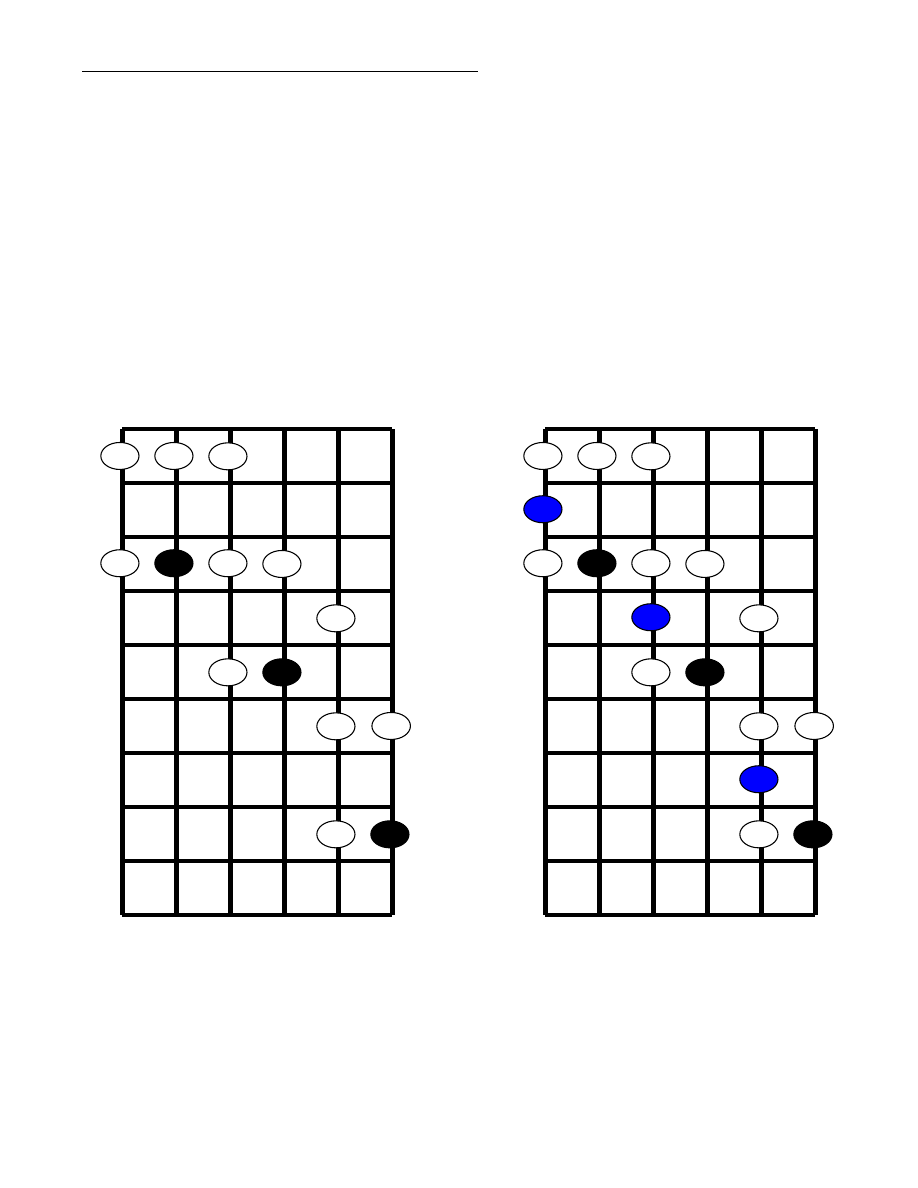
28
THE MINOR PENTATONIC BLUES EXPANDED II SCALE
Let’s continue to add the b5th, or blue note, to the Minor Pentatonic scale in the Expanded II scale. Below on the
left is the Expanded II Minor Pentatonic scale. By adding the blue note we now get the Expanded II Minor
Pentatonic Blues scale, as shown below on the right. There is only one note added to make the Blues scale.
Examine the fingering carefully as it varies slightly between the two scales. The fingering shown below puts your
fingers in the proper place on the fretboard to set up for the next part of the scale, or if playing a solo, the next
lick. Remember it is crucial to always have your fingers in the right position, setting yourself up for the next lick or
run. Practice the scales below in all keys.
When playing through these scales remember to make mental notes when hitting the root notes and the blue
notes, as you may want to emphasize these notes in your lead lines - its all about emphasis! Also remember, as I
always state, just don’t memorize the fingering for scales or just the scale shapes. Take the extra time to learn the
notes and intervals that you are playing in a given key. Taking a little extra time to do this will make you a much
better musician in the long run.
3
1
1
3
3
3
1
1
1
1
3
3
3
Expanded II Minor Pentatonic Scale
3
3
1
1
3
1
3
1
1
1
1
3
3
3
Expanded II Minor Pentatonic Blues Scale
1
2
2
2
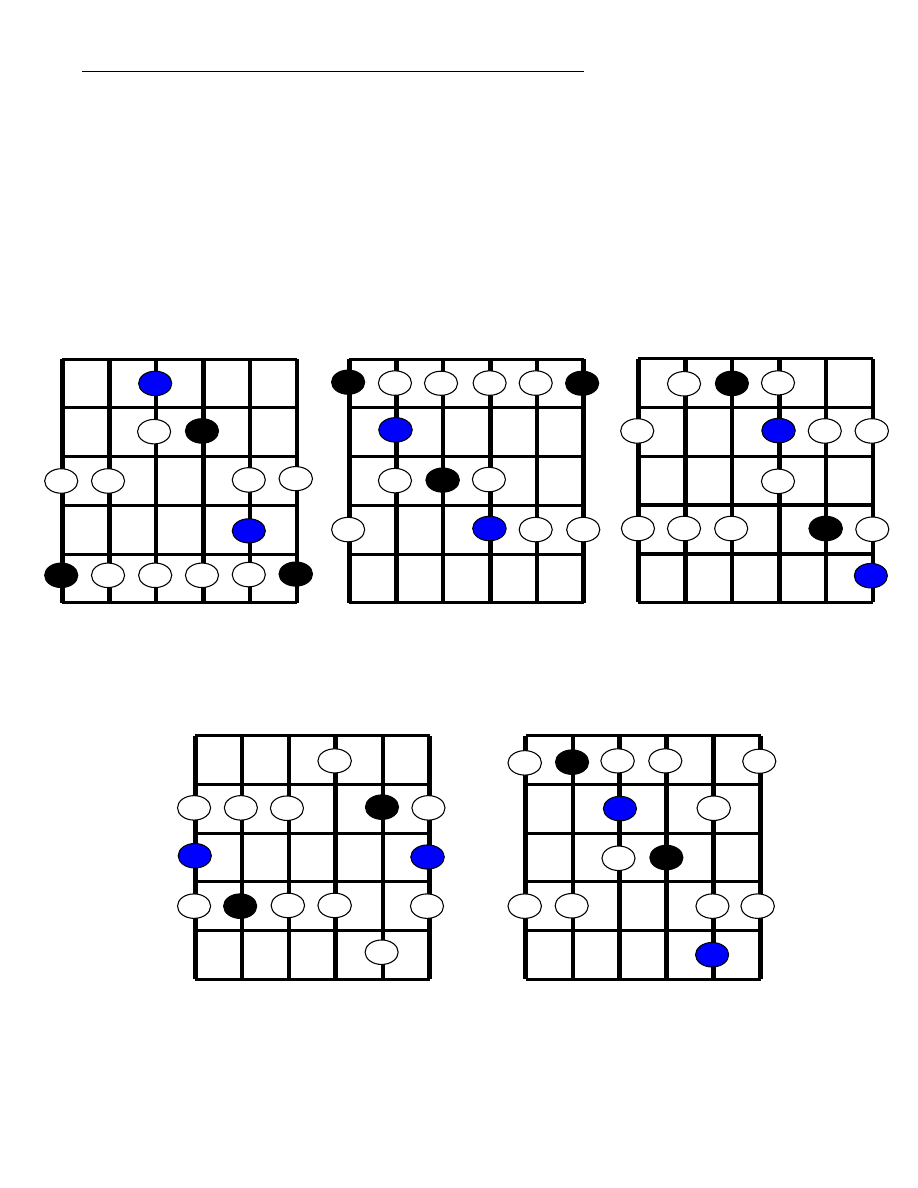
29
THE MINOR PENTATONIC BLUES SCALE – ALL FIVE BLOCK SCALES
Below are the five box shape Minor Pentatonic Blues scales. This now completes the entire neck in Minor
Pentatonic Blues scales. All the holes and gaps are now filled and you want to work towards playing the Minor
Pentatonic Blues scale over the entire neck. Practice the Blues scales in all keys and try and connect them with
the rest of the shapes so you can play up and down the entire neck. Connect them in with the Expanded I and II
Blues scales. Remember, try to see the connection points and the neck as one big scale and play laterally across
it – not always just as all individual boxes.
.
#4 box – in Am start with 1
st
finger on
the 10
th
fret, low E string on the D
note. First three strings are first part
of expanded II scale
1
1
1
3
1
4
3
4
1
1
3
3
2
2
#5 box – in Am start with 1
st
finger on
12
th
fret, low E string on E note. (last two
boxes and the first one combine to form
expanded II scale)
4
1
1
3
3
3
4
1
1
1
1
4
4
1
#3 box – in Am start with 2
nd
finger
on the 8
th
fret, low E string on the C
note. (the lower part of this box is
that mini box in the expanded I scale)
1
1
1
3
1
3
4
3
1
2
4
2
4
4
#2 “basic box” shape – in Am start
with 1st finger on the 5
th
fret, low E
string on the A note. Use 2
nd
and 4
th
fingers for blue notes
1
1
4
1
4
3
3
1
3
1
4
1
2
4
#1 box – in Am start with 4
th
finger
on the 5
th
fret, low E string on the A
note. Go outside for the blue note on
the D string
2
1
2
4
4
1
4
4
4
2
4
2
1
3
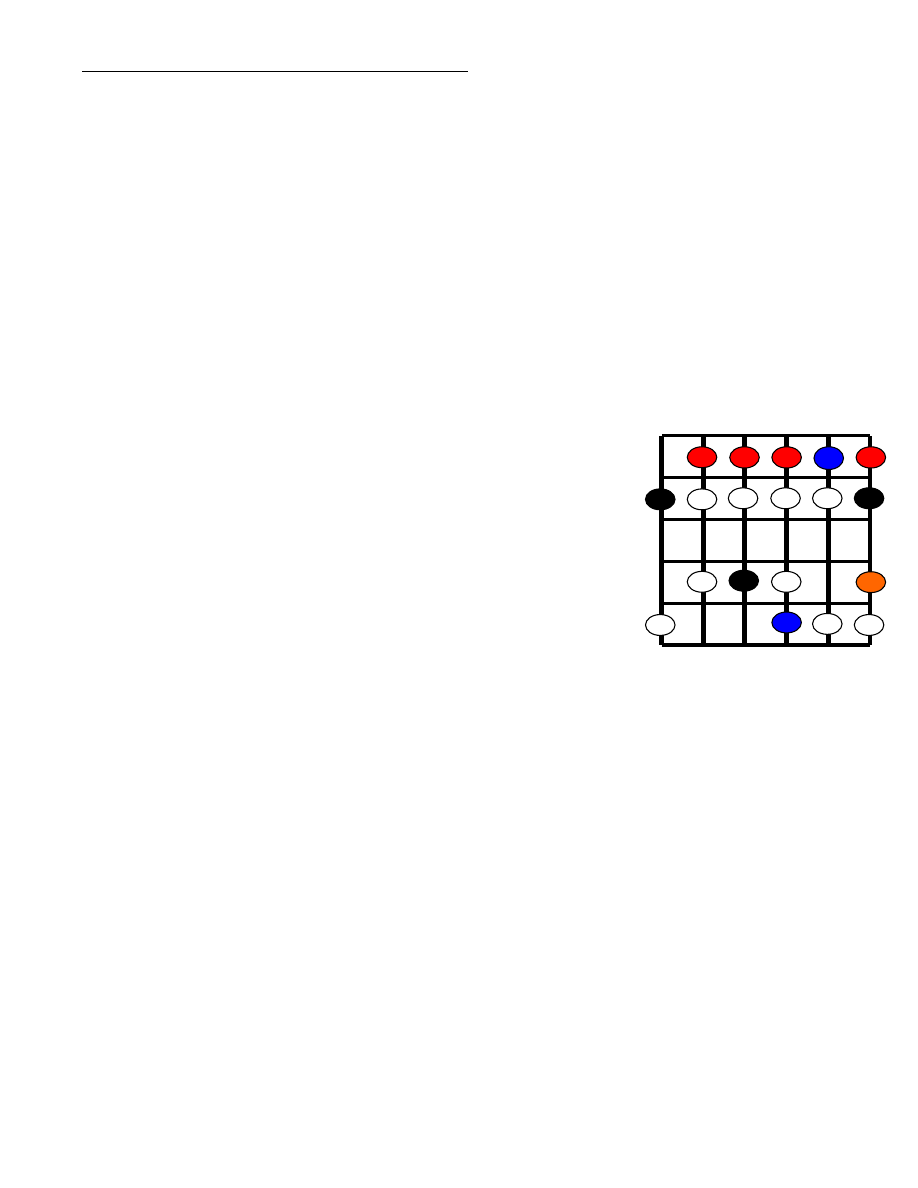
30
SPICING UP THE MINOR PENTATONIC BLUES SCALE
Now that you have learned some Pentatonic scales lets look at how we can spice things up a bit to add some
more color and texture to your playing. Its not enough just to know the scale but you will need to take the notes
and do musically interesting things with them. Think of guitar playing as speaking a language. We are going to
turn our notes, or words, into sentences. This is what some refer to as phrasing - the way we connect and play
our thoughts musically on the guitar. What’s so important in great lead playing and improvisation is engaging your
audience and drawing them into your playing. You want to speak to your audience musically in a way that is
engaging and that they can comprehend. So it’s so important that your musical thoughts and phrases make
musical “sense”. For instructional purposes we are going to use the Minor Pentatonic basic box shape to illustrate
these techniques. In the illustration below the black ovals are the root notes, the white ovals are the other notes in
the scale, and the colored ovals are the various notes we will discuss below.
1. Spice it up by doubling and tripling up on your notes. Don’t always go from one note to the next to the next in
straight eighth or quarter notes. You have to bust them up a bit to make them sound more interesting. Play the
same note in rhythmic combinations. Ba.Ba.Ba…Ba…Bow – remember, if you can say it, you can play it! Feel the
rhythm of the line, don’t just play it straight – and say the phrase out loud if you need to. Then change around the
rhythm. Get into an idea that you like and keep repeating it, perhaps playing it a little different rhythmically each
time. Learn a rhythm or rhythmic phrase and then apply it to some of your favorite licks across all the strings. So
when you are noodling around and get into a little cool idea – keep it – keep playing it – turn the rhythm around
and exploit it and keep repeating the phrase. Remember rhythm, repetition, and melody are the keys!
2. Spice it up by slurring your notes with passing tones. Slide into your notes
utilizing half steps passing tones. It is a great sound as you get the inference of the
passing tone and then the target note. Do not hang on passing tones and don’t try
and bend or vibrato them – get on and off them quickly, just use them in passing.
Bookend your passing tones with two strong scalar notes. For example, if you are
playing a five-note Pentatonic scale, you can utilize the other seven notes as
passing tones. Just remember to get and off them quickly and bookend them with
strong notes that are in the scale. Try utilizing the passing tones in the diagram to
the right. Slide from any note in red to the scale note one half step higher. The
note in blue is the blue note, or b5, and makes a great note to use as a passing
slide tone also. Double and triple up on these slides. These slurs will add some
great color and interest to your playing.
3. Spice it up by adding the ninth scale degree
to the Minor Pentatonic scale, (the ninth is illustrated above as the
orange oval). This note sounds great and will work most of the time when using minor pentatonic adding much
color to the scale. It is a great note to slide off, bend a half step, use in triplet patterns, and use in pull off and
hammer licks. The outside sounding note will give you a little jazzy sound. So bend it a half step or slide from the
ninth to the next note, the b3rd. It’s a great sounding note! Also use the 9
th
on the G string – more cool licks!
4. Spice it up by slightly bending the b3rd on the G-string, (the b3rd is a white oval with an asterisk, “*”). The b3rd
is a very ambiguous note, especially when playing the blues. It sometimes sounds best when played as a natural
tone and sometimes sounds great bent up a quarter or half step depending on what chord its being played over or
that you go to next in the progression. Pull that b3rd note down in a nice bend and really feel it. Slur in and out of
it and you will find it will add a lot of texture to your playing. If you are playing in the box shape it is one of the few
times where I like to bend with my first finger. It’s an easy bend as you are
only going up a quarter or half step so
you don’t need multiple finger strength to reach and hold the pitch. You can bend it slow or fast, but put a lot of
feeling and passion into this bend and you will absolutely love the sound! One of the few bends where you have
some leeway and don’t have to bend it exactly perfect – anywhere in that quarter to half step range sounds great.
5. Spice it up with reverse slides – instead of always sliding a note up the fretboard try sliding down the fretboard.
A real nice reverse slide is to slide the blue note one-half step back to the fourth. In the diagram above reverse
slide from the blue oval with the asterisk back one half step. Really feel the slide and hear both notes. Repeat the
slide two or three times in succession for a real cool riff. So try sliding in both directions not just limiting yourself to
sliding up the neck.
*
*
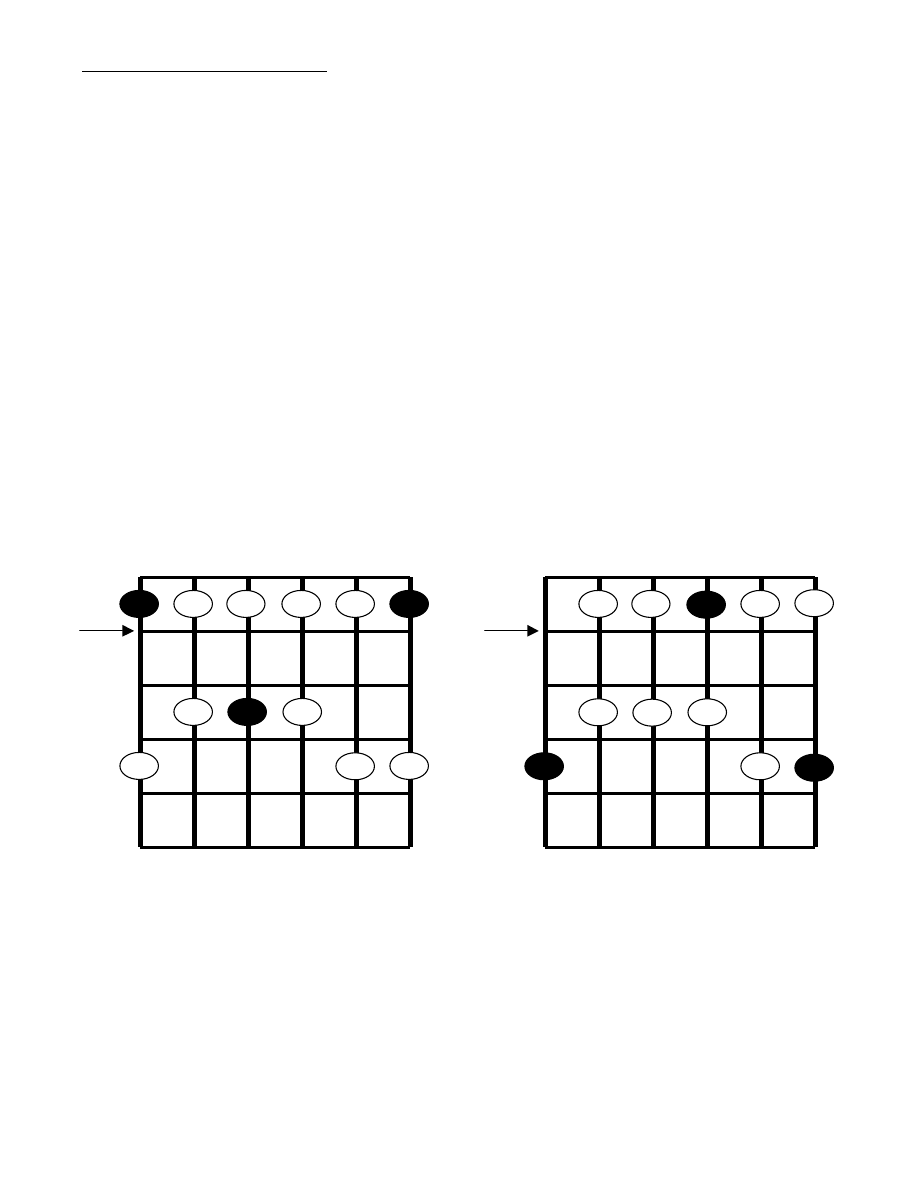
31
THE MAJOR PENTATONIC SCALE
The Major Pentatonic scale is a five-note scale consisting of five notes from the Major scale. It is an extremely useful scale
that has a very sweet major sound. At times full major scales may be inappropriate to play over a given progression, as they
may sound a bit stiff. The major seventh note is a very “ify” note, especially in rock music as sometimes it works and many
times it doesn’t. Defaulting to the Major Pentatonic scale for that major sound in many of these instances is a great idea and
will give you a killer sound. You hear the major pentatonic scale used often in blues music.
The five-note Major Pentatonic scale is derived from five notes from the Major scale similar to how the Minor Pentatonic scale
is derived from five notes from the Natural Minor scale. The intervals of the Major Pentatonic are 1,2,3,5,6. You do not play the
4
th
and 7
th
degrees of the Major scale.
For many guitarists there's confusion surrounding the Major Pentatonic and it's relative minor, the Minor Pentatonic scale. The
Minor Pentatonic is the relative minor of the Major Pentatonic and lives a minor 3rd, or three frets away, below the Major
Pentatonic. For every major key there is a relative minor key. Both keys will have exactly the same notes. Refer to the handout
on the circle of fifths on page 31 for a complete listing of every major key and its relative minor key.
Illustrated below is the “basic box shape” C Major Pentatonic and its relative minor, A Minor Pentatonic. C Major Pentatonic
scales can also be viewed as A Minor Pentatonic scales. Both scales consist of the same notes C, D, E, G, and A. Your
starting and emphasis notes determine which scale will sound. The confusion often comes because of the multiple names. C
Major Pentatonic and A Minor Pentatonic are the same scale, just different starting and emphasis notes. Just like when playing
utilizing the modes, it all comes down to what notes you are emphasizing - emphasis is so important!
Play both scales starting and ending with the root and listen to how the Pentatonic Major sounds very sweet and major
sounding when staring on and emphasizing the C notes. Play the same shape but start and end on the A notes. Now you get
the darker bluesy Minor Pentatonic scale. Same notes, just different start and emphasis points. One scale gives you the
happy, major, Allman Brothers/BB King type of sound while the other gives you a darker, bluesy, minor type sounds.
Remember that you can get to all the Major Pentatonics by going through the relative Minor Pentatonic scales. So you don’t
have to learn any new shapes for Major Pentatonic if you already know your Minor Pentatonic scales. Just flip them to their
relative Major Pentatonic.
If you know your Minor Pentatonic scales across the entire fretboard there is no need to learn any new shapes to play Major
Pentatonic. You can get to those shapes from the relative minor Pentatonics. Learning more shapes would be redundant.
The blue note does not always apply to Major Pentatonic and often will not sound very good. So use the straight Minor
Pentatonic scales and Expanded scales without the blue notes. There is not as much room for error soloing in major key either
- bad notes really stick out. You also can’t slur all those passing notes like we discussed when using Minor Pentatonic. So be
careful with your note choices and let your ear help to guide you. So think of it like you have a bit more leeway in Minor
Pentatonic than you have in Major Pentatonic.
For that sweet Major Pentatonic sound utilize all of your Minor Pentatonic shapes focused on emphasizing the root of the
mode – the major. For example, when playing in C Major Pentatonic think of the relative minor, A Minor Pentatonic shapes
that you have learned previously. Just start and emphasize on the C notes, not the A notes. You want to sound major so you
have to emphasize the major root notes, not the minor ones. Practice in all keys and all positions up and down the neck.
5
th
fret
1
1
1
4
3
1
4
4
3
3
1
1
A Minor Pentatonic Basic Box
1
1
1
4
4
1
4
3
3
1
C Major Pentatonic Basic Box
5
th
fret
3
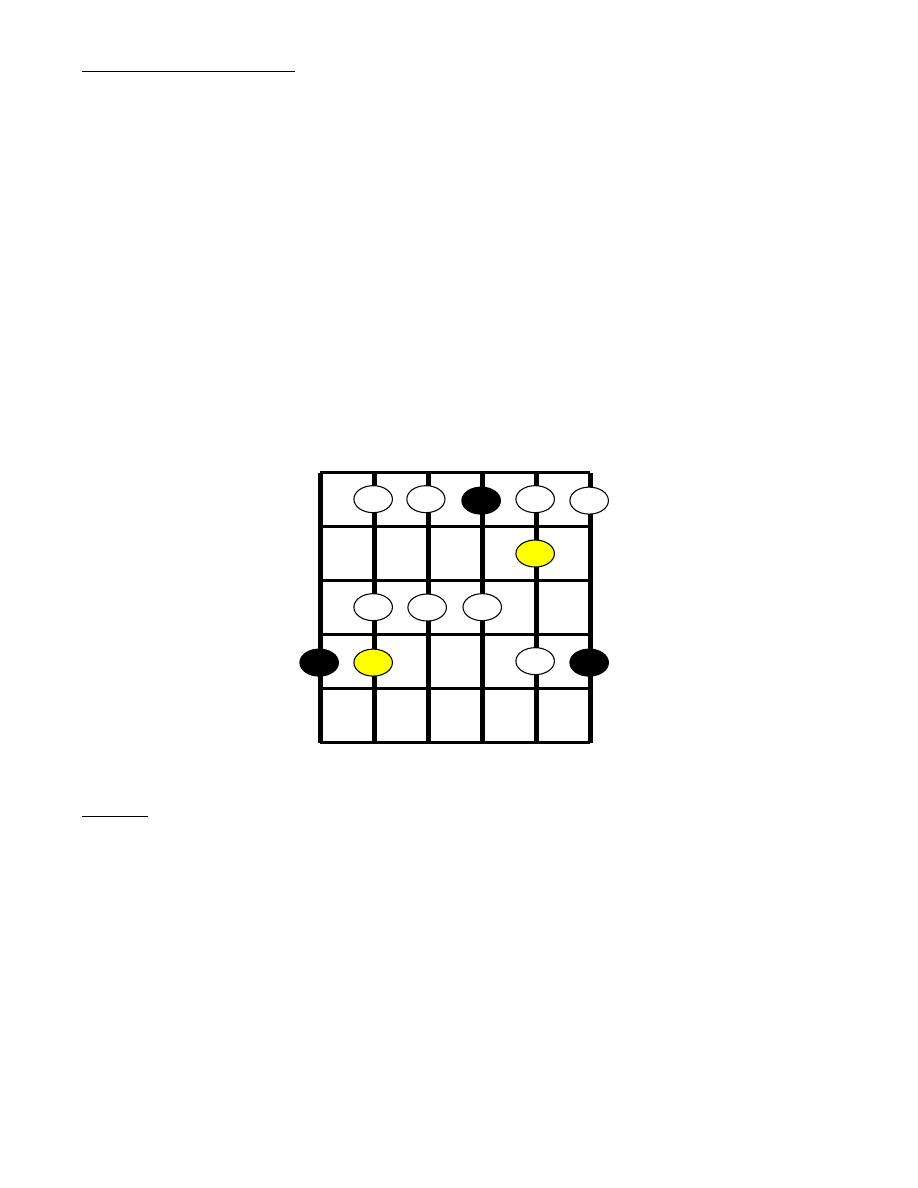
32
Major Pentatonic Sus4 Scales
A very cool way to spice up the Major Pentatonic scale is to add the fourth degree to the scale. Instead of it being
a five-note scale it will now be a six-note scale. Adding the fourth degree makes it a Major Pentatonic Sus4
scale. The intervals of the scale are now 1, 2, 3, 4, 5, and 6. Basically it’s a major scale with the 7
th
degree left
out. This scale works just about every time so try using it when playing in Major Pentatonic.
In the past lesson we discussed that the major 7
th
is a very “ify” note. This is true especially in rock music as
sometimes it works and sometimes it doesn’t depending on the underlying chords. What is great about the Major
Pentatonic Sus4 scale is that it leaves that major 7
th
note out all together. This way you don’t have to worry about
it at all and you get the added bonus of a real sweet sounding Sus4 note added into the scale. Try this scale over
simple major key jams and ballads at first to get the fingerings down and make sure make a mental note each
time you pass through the root AND the Sus4 notes.
In the illustration below the root notes are in the black and the Sus4 notes are highlighted in yellow. This is the
basic “box” shape that you have seen in previous lessons. As discussed above this Major Pentatonic shape can
be viewed as the same notes as its relative Minor Pentatonic.
This scale gives you many additional lick ideas as you have three notes per string with the half step on the A and
B strings in the shape below. A great bend is on the B string bending up to the Sus4 note with a nice half step
bend with the first finger. Very sweet sounding bend.
Example: Try playing a simple progression of C to F, two measures on each chord. That is a I major to a IV major
change and its in the key of C major. Because we are in major key, instantly we know major pentatonic will work.
So C Major Pentatonic would sound very good played over this progression. But for added spice play the C Major
Pentatonic Sus4 scale.
If you analyze the chord changes in the key of C the 4
th
is an F. This change goes C to F. So the Major
Pent Sus4 scale would be an awesome choice to play as it adds hat F note.
In fact you will often see I major to IV major changes, they are very common. That is why the sus4 scales are so
useful. Try to feel when the change happens and land on the strong chord tones of the chord changes. The
strongest landing notes on the C chord will be the notes in that chord, C, E, or G. The strongest landing tones on
the F chord will be the notes making up an F chord, F, A, or C. Practice your timing landing on a different chord
tone each time the change comes up. Learn the long form Sus4 scale links on the next page and work all the
scales over the entire fretboard in all keys.
Major Pentatonic Box Shape
1
1
2
3
1
4
1
4
3
3
1
4
4
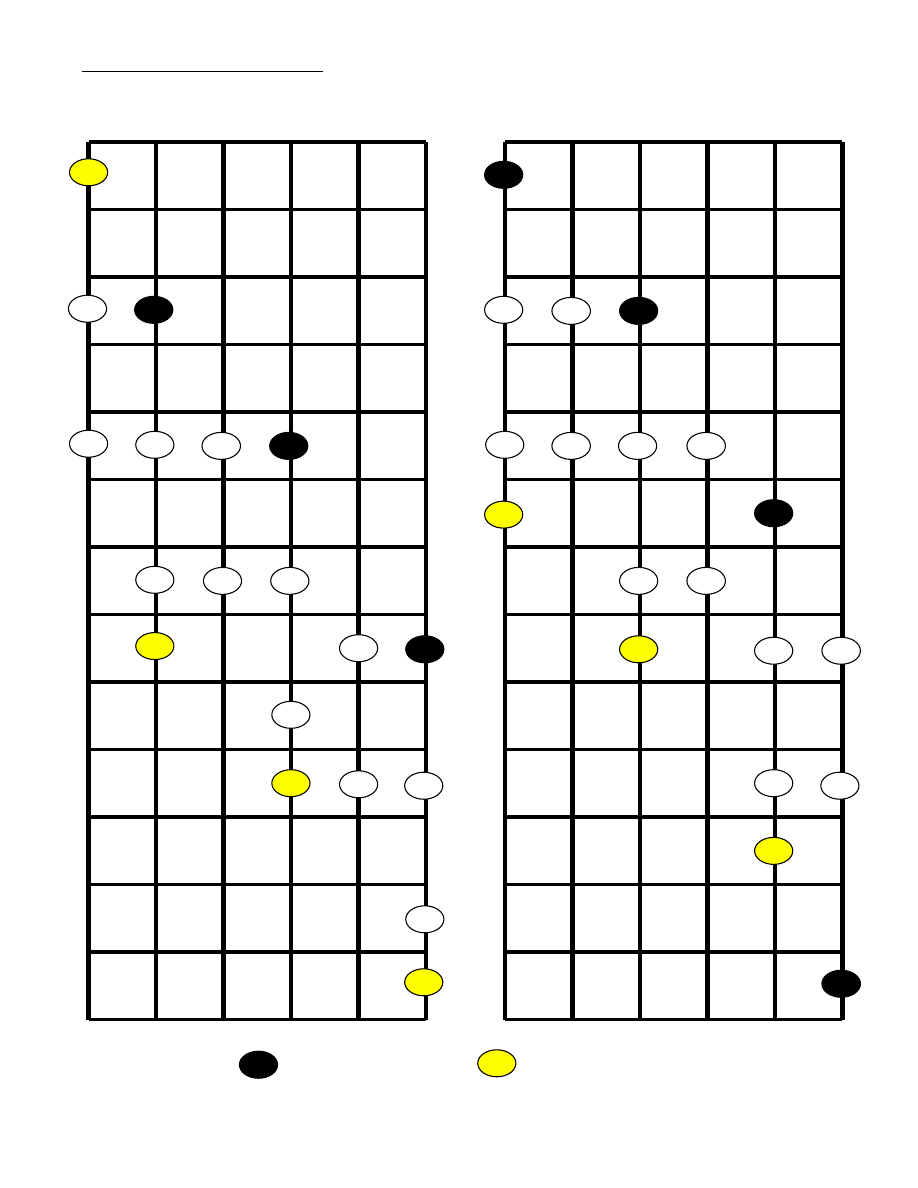
33
Major Pentatonic Sus4 scale links
Major Pentatonic Sus4 Expanded 1 Major Pentatonic Sus4 Expanded 2
Root notes in black Sus4 notes in yellow
1
3
3
1
3
3
4
1
1
1
1
3
3
3
3
2
3
3
3
4
4
3
3
3
3
3
1
1
1
1
3
3
3
1
3
4
4
3
1
1

34
TOP TEN KEY HINTS TO GET YOUR PLAYING TO THE NEXT LEVEL
In my opinion there are certain principles that every guitar player should consider tackling to help evolve their
playing to the next level. Some concepts and techniques are harder than others, and take quite a bit of work to
get proficient. However, in the end you will be glad you took the extra time to learn the principles outlined below,
as they will make you a better guitarist and a better musician. There are no real shortcuts here, it will be more
work, and quite difficult at first, but in the end you will be a better musician if you take the time to nail these down.
Go slowly at first and don’t overwhelm yourself. These are processes that take time, remember that your playing
is an evolution. Take stock in your playing and see if you are deficient in one or more of these areas and then
really work hard on getting each up to speed. Keep honing your skills and refining your art and stay positive!
HINT 1: Use what you learn in lessons as templates – not isolated individual events
You want to be able to take what you are learning in lessons and apply it to real musical situations. Don’t just
learn a lick or an exercise and that is it – jus that one isolated event. Use lessons as practical playing vehicles for
you to practice and hone your lead guitar playing skills. Take what you learn in an individual lesson and try
applying it to other jams, songs, and progressions in a musical context.
HINT 2: JUST DON’T LEARN LICKS………..LEARN FROM THE LICKS
I have seen it over and over and over. Too many guitarists spend way too much time on just learning licks and
stopping there. If you just learn a lick here and a lick there then in the end you know a few licks – what good is
that really? You want to LEARN FROM THE LICK – what scale is that lick from, how is it used, over what
changes can it be played, over what chords can it be played, how can I vary that lick to turn that one lick into
twenty licks, how can I use the lick in a musical context. That’s what I mean – LEARN FROM THE LICKS - then
you are arming yourself with the necessary tools to take your playing to the next level.
HINT 3: KNOW & ANALYZE THE CHORD PROGRESSION, knowing the key alone is not enough
I have seen this hold guitar players back time and time again. They focus solely on what key they are playing in
and that is all they are tuned into. This can be very limiting as knowing just the key will only get you so far.
Knowing what key you are playing in is important, but to fully develop your lead playing and improvisation skills
you need to know more. You need to start examining the chords and progressions.
You want to know exactly what chords are in the progression and then analyze them to determine what scales,
modes, and landing notes to utilize. In many instances you need to look at if there is a IV chord or V chord in a
progression and are the chords major or minor. You need to know which notes make up the chords that you are
playing over so you can use their respective chord tones as strong landing or emphasis notes. You will need to
know the chords and their structure to fully understand and apply which mode you want to solo with.
KEY POINT: It’s the chords that you are playing over that give you the full roadmap to what will work for
soloing and improvisation purposes.
The key is only part of the equation – you want to start listening to and analyzing the chords underneath. At first,
get in the habit of writing out the chord progression and thoroughly examining all the chords in the progression or
song to get clear to all the soloing options. Consider this very methodical approach at first as training as it gets
that solid musical muscle memory locked in. This way eventually your ear will be developed enough to take you to
all the right notes – it just makes it easier and faster to get to that point following this structured plan. I have found
that learning this methodical approach will get you there the fastest.
HINT 4: DEVELOP YOUR EAR
I always say, and will keep saying and repeating, one of the most important things that you can do as a musician
is to DEVELOP YOUR EAR. This opens the door to amazing musical applications. Once your ear starts
developing you will be able to hear strum patterns & rhythms and play them by ear without the worry of learning
pattern ups and down strums. You will hear the color of chords and be able to discern major chords from minor
chords from 7
th
chords and so on. You will be able to grab chords that give off a certain color or emotion that you
may need for a given song when songwriting. You will be able to figure out and transcribe songs by ear. Your ear
will also take you to those sweet sounding landing and emphasis notes and link the proper scale or mode to a
given chord or set of chords. I can go on and on – develop that ear – its HUGE!

35
HINT 5: KNOW A LARGE CATALOGUE OF CHORDS
As a musician knowing a large vocabulary of chords is absolutely critical. Unless you want to be regulated to
playing stock everyday A, D, and E all day long. Being able to play a lot of different chords proficiently and
knowing how to embellish them is a difficult task, but so worthwhile. Knowing a large catalog of chords will open
many doors and allow you to embellish and decorate your playing with all kinds of new musical melodies,
rhythms, and endless song writing possibilities. Why play a stock, sterile, every day Aminor chord when you can
play a much more interesting and harmonically rich Asus2, Am7, or Am9 chord. Embellishing chords is a great
way to spark new ideas and infuse new life into old progressions and songs. Having chordal options makes it fun
and exciting not only for the guitarist but also, and probably more importantly, for the listener.
HINT 6: KNOW HOW TO PLAY SOLID RHYTHM
Knowing a large catalog of chords is the first step. Next is being able to play solid rhythm. Music is more than just
soloing, notes, and chords, it is also about rhythm and meter. As a guitarist you will be playing rhythm 90% of the
time. So the misinformed players who thinks they can just concentrate solely on soloing and improvisation are in
for a huge surprise first time they start playing with a band or jamming with other people. Your lead playing will
pretty much only ever be as good as your rhythm playing. Your rhythm playing is huge so don’t overlook it.
HINT 7: KNOW THE NOTES ON THE NECK
There is just no way around this one. Strive to learn the notes on the neck cold. You will always be a better
musician and be able to speak the language of music if you take the extra time to learn the notes that make up
each chord, scale, and the notes on the fretboard. This will also allow you to grab a needed note quickly at any
time. Knowing the notes on the neck is a huge under taking, so make it a process to learn them over a period of
time. Don’t overwhelm yourself and try to get them all down in a week. Take things slow and learn one string at a
time, then go to the next string. Utilize octaves to make the learning process a bit easier. Refer to the written
lesson on page 7 illustrating the notes on the fretboard and the 12-note scale.
HINT 8: DON”T RELY SOLELY ON TABLATURE OR JUST LEARNING SHAPES
The problem with tablature and just learning scale shapes is that you don’t learn the notes that make up the
chords or the scales. Don’t rely solely on tablature as then you are just learning finger position, fret numbers, and
shapes. Try not to become too dependent on tablature. Tablature only tells you what fret number to play, it does
not tell you the note that you are playing or the notes that make up the chords. Tablature is a fun way to learn
songs if you don’t read music so certainly use it and have fun with it, but don’t fall into the trap of using it
exclusively and not taking the time to develop your ear. Along with tablature learn the notes on the neck and what
notes and what intervals make up each chord and keep developing your ear so you eventually wont need tabs.
HINT 9: JUST DON’T LEARN SCALES ALONE, ALSO LEARN HOW TO APPLY THEM
Too often players will
learn dozens and dozens of scales, but they don’t learn how to use them and when to apply
them. Learning a scale by itself is not enough. Knowing when to utilize the scale and over which chords is just as
important as knowing the scale itself. Knowing all the scales ever created in the history of music will do you
absolutely no good unless you know how to utilize them and under which musical circumstances apply them into
your playing. Learn the scale, but also learn how and when to apply it.
HINT 10: KNOW YOUR MAJOR SCALES COLD IN ADDITION TO THE PENTATONICS
This is invaluable for the lead guitar player. Knowing your major scales in all positions across the neck will help
give you so many additional tools necessary for lead playing and improvisation. Too many players just stop
learning scales after they learn the pentatonics. Again, why limit yourself? Knowing the major scales up and down
the neck will be the springboard to knowing the modes of the major scale, relative major and minor, and many
other important concepts. So learn those major scales in all positions. Don’t stop after learning pentatonic scales,
keep pushing into new territories and you will push yourself to that next level of lead guitar playing.
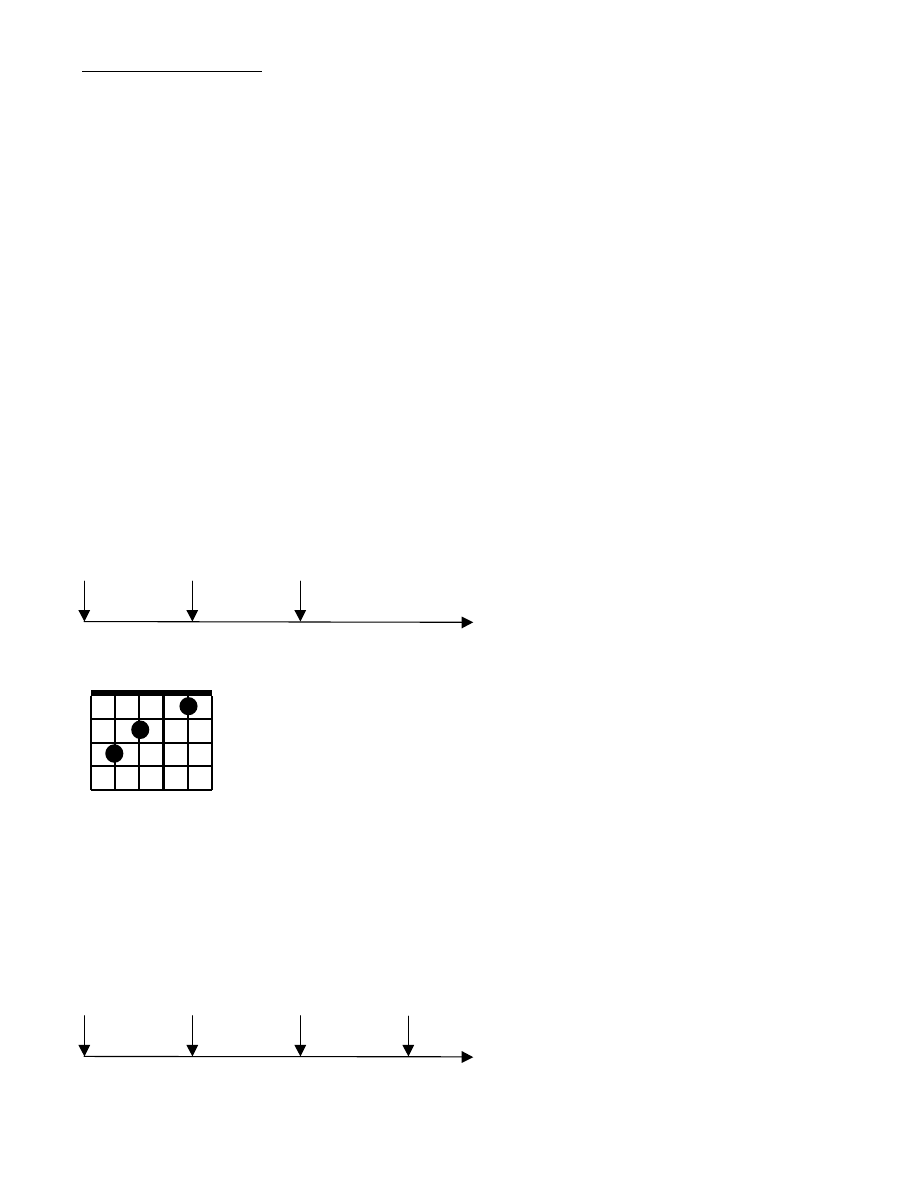
36
CHORD CONSTRUCTION
Understanding chord construction will give you the knowledge of why certain notes make up certain chords.
Analyzing chord construction will also illustrate the relationships between notes, chords, and scales. It will tie
many concepts together that we will discuss throughout these materials. Chord construction will help your lead
playing as you will then know to land on the notes that make up the chords, or chord tones. You also will know
what number each chord is referred to like what is the one chord (I), four (IV) chord, five chord (V), etc.
Chords are built from notes in certain scales. A scale is a series of sounds arranged by order of pitch, or
alphabetically, from any given note to its octave. In order to analyze chord construction we need to look at scales
and the notes that make them up. All major keys are constructed in the same fashion and all music theory is
compared to the major scale. The major scale is the standard in music that all is compared. You have probably
heard the major scale - doe, re, me, fa, so, la, ti, and then back to doe.
Lets examine the C major scale. The key of C major has no sharps or flats. In fact, C is the only major key with no
accidentals, (a sharp or flat is also referred to as an accidental). So if you see a piece of sheet music and it has
no sharp or flat symbols next to the clef you know it is probably in the key of C major.
C major scale = C, D, E, F, G, A, B,
The three notes that construct a major chord are a root or 1
st
degree, 3
rd
, and 5
th
, (1,3,5). So to illustrate the
relationship between the key signature, chords, and notes lets draw out the C major scale and start counting.
Remember that the scale is always laid out in order and each successive note is assigned a number or degree,
and always in order. Start on the C and count to the third degree and you have an E note. In the key of C major
the third is the E. Now count to the 5
th
degree or 5
th
note starting from the C note and you have a G note. In the
key of C major the 5
th
is a G. Now put the three notes together as shown in the illustration below and you have a
C major chord – root, 3
rd
, and fifth or C, E, G.
C
D
E
F
G
A
B
C ……….C major scale notes
1
2
3
4
5
6
7
8 ………..Scale degrees
C, E, G = C major chord, (abbreviated Cmaj or just C)
Expanding on this concept above lets build a C major 7
th
chord, (Cmaj7). Major 7
th
chords are constructed from
the root, 3
rd
, 5
th
, and 7
th
, (1,3,5,7), degrees of the major scale. The major 7
th
chord is actually built off the major as
it has the root, 3
rd
, and 5
th
degrees in it and then we add the 7
th
making it a major 7th chord. In the key of C major
the root or 1
st
degree is a C, the 3
rd
is an E, and the 5
th
is a G. Let’s draw out the C major scale again and begin
counting degrees. The 7
th
degree in C major is a B. So put all the notes for a C major 7th chord together and we
have the root, 3
rd
, 5
th
, and 7
th
and if we count degrees as illustrated below we have C, E, G, and B.
C
D
E
F
G
A
B
C ……….C major scale notes
1
2
3
4
5
6
7
8 ………..Scale degrees
C, E, G, B = C major 7
th
chord, (abbreviated Cmaj7)
Lets look at an open C major chord illustrated on the left. Like all major chords it is
constructed from the root, 3
rd
, and 5
th
degrees of the major scale. In the key of C major the
notes would be C, E, and G as constructed from the C major scale illustrated above.
Playing these notes on the guitar neck is a C major chord. So you can grab these three
notes from anywhere on the guitar neck and play them together and
you have a C major
chord or some inversion of a C major chord. Now you can see from these three
illustrations how the notes in a chord are constructed from a scale and their relationship
degree chordal wise.
C
X 3 2 0 1 0
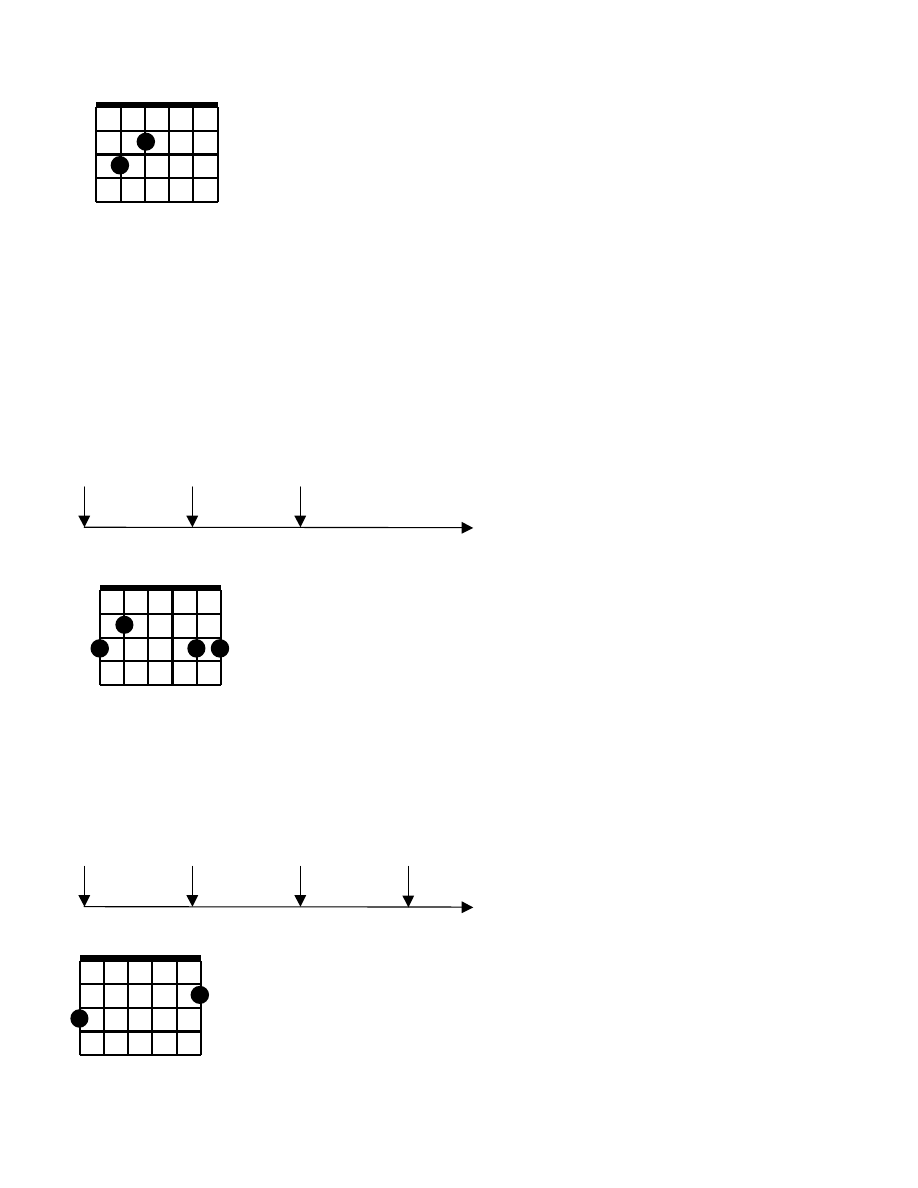
37
Lets try this same principle but this time we are going to change keys to G major. Remember, as discussed in the
lesson above, all major keys are constructed in the same fashion. The G major scale has one sharp or accidental,
(F#). The key of G major is the only major key with one sharp. Here are the notes of the G major scale:
G major scale = G, A, B, C, D, E, F#
Let’s draw out the G major scale and start counting. Starting on the root note G, count to the third degree and you
have a B note. In the key of G major the third is the B. Now count to the 5
th
degree and you have a D note. In the
key of G major the 5
th
is a D. Now put the three together as shown in the illustration below and you have a G
major chord – root, 3
rd
, fifth or G, B, D.
G
A
B
C
D
E
F#
G ……….G major scale notes
1
2
3
4
5
6
7
8 ………..Scale degrees
G, B, D = G major chord, (abbreviated Gmaj or just G)
Expanding further with the G major scale let’s build a G major 7
th
chord, (Gmaj7). Major 7
th
chords are constructed
from the root, 3
rd
, 5
th
, and 7
th
degrees of the major scale as discussed above. In the key of G major the root or 1
st
degree is a G, the 3
rd
is a B, and the 5
th
is a D. Let’s draw out the G major scale again and begin counting
degrees. The 7
th
degree in G major is an F#. So put all the notes for a G major 7th chord together and we have
the root, 3
rd
, 5
th
, and 7
th
and if we count degrees as illustrated below we have G, B, D, and F#.
G
A
B
C
D
E
F#
G ……….G major scale notes
1
2
3
4
5
6
7
8 ………..Scale degrees
G, B, D, F# = G major 7
th
chord, (abbreviated Gmaj7)
Lets look at an open Cmaj7 chord illustrated on the left. Like all major 7
th
chords it is
constructed from the root, 3
rd
, 5
th,
and 7
th
degrees of the major scale. In the key of C major
the notes would be C, E, G, and B as constructed from the C major scale as illustrated
above. Playing these notes on the guitar neck is a C major 7
th
chord. So you can grab
these four notes from anywhere on the guitar neck and play them together and you have a
Cmaj7 chord or some inversion of a Cmaj7 chord.
Lets look at an open G major guitar chord illustrated on the left. Like all major chords it is
constructed from the root, 3
rd
, and 5
th
degrees of the major scale. In the key of G major the
notes would be G, B, and D as constructed from the G major scale illustrated above.
Playing these notes on the guitar neck is a G major chord. So you can grab these three
notes from anywhere on the guitar neck and play them together and you have a G major
chord or some inversion of a G major chord.
Lets look at an open Gmaj7 chord illustrated on the left. Like all major 7
th
chords it is
constructed from the root, 3
rd
, 5
th,
and 7
th
degrees of the major scale. In the key of G major the
notes would be G, B, D, and F# as constructed from the G major scale as illustrated above.
Playing these notes on the guitar neck is a Gmaj7 chord or some inversion of a G major7
chord.
G
2 1 0 0 3 4
Gmaj7
2 X 0 0 0 1
Cmaj7
X 3 2 0 0 0
38
Building chords from the Major Scale
As per the previous lesson we have learned that all music theory falls back to the major scale. The major scale is
the standard in music that all is compared. Now we will build chords from each degree of the major scale and you
will easily be able to know which chords are in any given major key. To find the notes in any major key, (major
scale), start at the root and go up following this pattern: whole step, whole step, half step, whole step, whole
step, whole step, half step. This will take you to the root one octave higher than where you began, and will
include all seven notes in the major key in that octave. Remember, any chord might show up in any given key,
however, certain chords are much more likely to be in a given key than others. The most likely chords to show up
in a given key are the chords made from combinations of the notes in that keys’ major scale. You'll find that
although the chords change from one key to the next, the pattern of major and minor type chords is always the
same for any major key. Lets examine the C major scale and build the chords in that key right from the scale.
Follow this template to build the chords in any key.
If you start on C and skip every other note in the scale, also called stacking 3rds, for a total of 3, you have built a
C major chord. The major chord follows the formula 1,3,5. So a C major chord is constructed from the three notes
C, E, and G, the root of the scale, the third note of the scale, and the fifth note of the scale.
C
D
E
F
G
A
B
C ……….C major scale notes
1
2
3
4
5
6
7
8 ………..Scale degrees
C, E, G = C major chord, (abbr. Cmaj or just C)
Now do the exact same thing stacking thirds except this time start on the D note. The D is the second degree or
2
nd
note, II, of the C major scale – so just keep stacking thirds, we then have the three notes that construct a D
chord and if we examine those 3 notes, D,F,A, we see it’s a D minor chord, (as illustrated below).
C
D
E
F
G
A
B
C ……….C major scale notes
1
2
3
4
5
6
7
8 ………..Scale degrees
D, F, A = D minor chord, (abbreviated Dm)
The process of stacking 3rd notes up in the major scale continues until you have a total of 7 chords, one for each
note of the scale. Each note of the scale refers to a chord, 7 notes in the scale so 7 chords. Each major key will
have a total of seven chords.
C D
E
F
G
A
B
C
-
E,G,B =Em (E minor chord)
C D E
F
G
A
B
C
-
F,A,C =F (F major chord)
C D E F
G
A
B
C
D
-
G,B,D =G (G major chord)
C D E F G
A
B
C
D
E
-
A,C,E =Am (A minor chord)
C D E F G A
B
C
D
E
F
- B,D,F = B
o
(B diminished chord
Because major scales are always built from stacking thirds, the pattern is always the same for every major key.
The chords built on the first, fourth, and fifth degrees of the scale are major type chords (I, IV, and V). The chords
built on the second, third, and sixth degrees of the scale are minor type chords (ii, iii, and vi). The chord built on
the seventh degree of the scale is a diminished chord.
KEY POINT: Whichever major key you are building chords from the pattern will always be the same.
Major....Minor....Minor....Major....Major....Minor....Diminished - commit this pattern to memory!
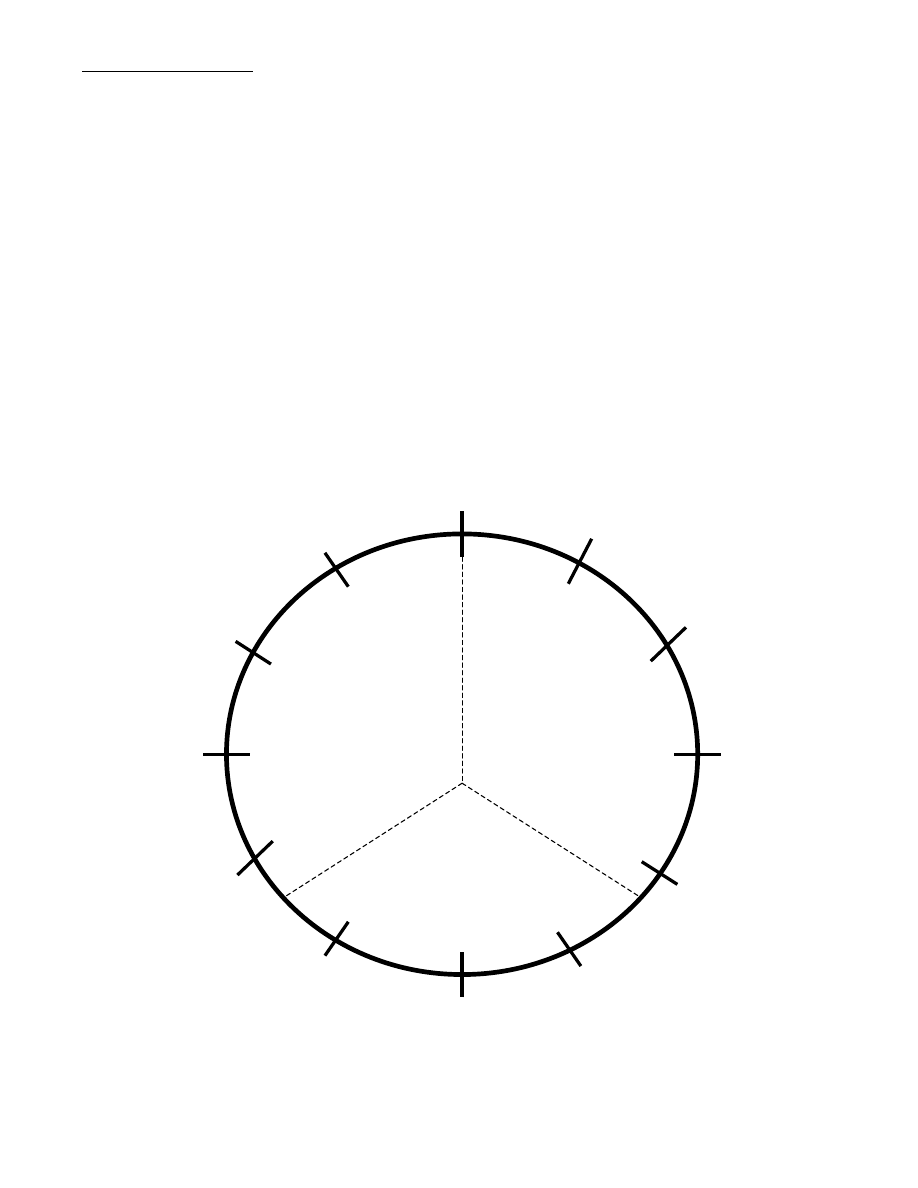
39
THE CIRCLE OF FIFTHS
The circle of fifths is a great visualization and reference tool to illustrate the relationships between major and relative minor
keys, chords, and sharps and flats. As per the circle illustration below, there are 12 notes corresponding to the 12 numbers on
a clock. Perfect fifths separate each key – hence the name “CIRCLE OF FIFTHS”. The fifth note in a C major scale is G. The
fifth note in a G major scale is D, and so on around the circle. Each time you move one step clockwise you go up a perfect
fifth.
Along the outside of the circle are major keys and their corresponding RELATIVE MINOR keys are illustrated on the inside of
the circle. As per the circle – C major has Am as its relative minor, G major has Em as its relative minor. This means the notes
in C major - C,D,E,F,G,A,B are the same notes as in Am - A,B,C,D,E,F,G. And so on around the circle.
C major is at the 12 o’clock position and has no sharps or flats. G major is at the one o’clock position and has one sharp, F#.
D major is in the 2 o’clock position and has two sharps, F# and C#. A major is in the three o’clock position and has the F#, C#,
and now adds the G#. Notice the sharps and flats are added in a sequential order. This is the “order of sharps and flats” which
will be discussed on the next page. Moving counterclockwise to the next neighboring key you go down a perfect fifth. Looking
at each key you have the dominant chord to its right and its subdominant to its left. For example in the key of C major you
have the subdominant F chord directly to the left of C, and the dominant G chord directly to the right – 1, 4, 5 or the C, F, and
G chords in the key of C major. In other words, in the circle of fifths you always have the three primary chords next to one
another – the tonic or root in the center, the subdominant on the left, and the dominant on the right. Moving clockwise you
either add one sharp or deduct one flat as you move from key to key. Moving counter clockwise you either deduct one sharp or
add one flat. This illustrates that there is only one note difference between a key and the next key a fifth away. Notice how the
illustration displays only a one-note difference as you move from key to key on the circle. For example, going from C major
with no sharps or flats, clockwise a fifth away to its neighbor G major, which has one sharp. The F note is raised a half step to
an F# - one half step difference between the two keys. Going counterclockwise you would just flatten the B note – B to Bb.
Follow this same formula around the circle.
E, F#, G#, A, B, C#, D#
C
G
D
A
E
F
Bb
Eb
Ab
Db
F#
Gb
B
G#m
C#m
F#m
Bm
Em
m
Dm
Gm
Cm
Fm
Bbm
Ebm
Am
m
One sharp F#
No sharps
or flats
Two sharps
F#, C#
Three sharps
F#, C#, G#
Four sharps
F#, C#, G#, D#
One flat Bb
Two flats
Bb, Eb
Three flats
Bb, Eb, Ab
Four flats
Bb, Eb, Ab, Db
C, D, E, F, G, A, B
G, A, B, C, D, E, F#
D, E, F#, G, A, B, C#
F, G, A, Bb, C, D, E
A, B, C#, D, E, F#, G#
Bb, C, D, Eb, F, G, A
Eb, F, G, Ab, Bb, C, D
Ab, Bb, C, Db, Eb, F, G
Db, Eb, F, Gb, Ab, Bb, C
F#, G#, A#, B, C#, D#, E#
B, C#, D#, E, F#, G#, A#
Five sharps
F#, C#, G#, D#, A#
Six sharps
F#, C#, G#, D#, A#, E#
Five flats
Bb, Eb, Ab, Db, Gb
Copyright Next Level Guitar Inc., 2011
all rights reserved unauthorized duplication
or distribution is prohibited

40
Order of sharps and flats
Let’s write out the notes in the circle of fifths in order going clockwise for sharps, then counter clockwise for flats
and insert them into a table. As illustrated in the two tables below you can clearly see the sequential order when
we go up or down in fifths as we add sharps or flats. The sharps or flats always appear in the same order in all
key signatures. This is the same order in which they are added, as keys get sharper or flatter.
The first table illustrated below is the table of sharps. The order of fifths is listed going down column one starting
with C and going clockwise around the circle of fifths. Row one states the key of C major has zero sharps. Row
two displays that G major has one sharp, F#. D major has two sharps, F#, and then add the next sharp in the
order C#. And so on down the list of fifths adding sharps in order. If a key has only one sharp, then you know it
must be an F#, as F# is the first sharp in the order of sharps. You also then know that the key must be G major,
(Eminor), as G major is the only key with one sharp. D major is the only key with two sharps. A major has three
sharps, F#, C#, and the third sharp, G#, and so on. The order of sharps is: F sharp, C sharp, G sharp, D sharp, A
sharp, E sharp, and B sharp as displayed in the table below.
C 0#
G 1#
F#
D 2# F#
C#
A 3# F# C#
G#
E 4# F# C# G#
D#
B 5# F# C# G# D#
A#
F# 6# F# C# G# D# A#
E#
C# 7# F# C# G# D# A# E#
B#
The next table below illustrates the order of flats. Like the table above the order of fifths is listed going down
column one starting with C and going counterclockwise around the circle of fifths. The order of flats is the reverse
order of sharps: Bb, Eb, Ab, Db, Gb, Cb, Fb. So the key with only one flat, F major, (D minor) has a B flat; the
keys with two flats, B flat major (G minor) have the B flat and next note in the order, E flat; and so on. F is the only
major key with one flat, Bb – and so on down the table.
Order of sharps
F, C, G, D, A, E, B
Order of flats
These tables are very useful when determining how many, and which sharps or flats are in a given key. If you
know the order of sharps and flats and know your circle of fifths, then you don’t even need to look at your
instrument to figure out all the notes in any given major key or relative minor key. For example, E major is at the
four o’clock position on the circle of fifths. Therefore it has 4 sharps. Knowing the order of sharps they must be
F#, C#, G#, and D#. Fill in the rest of the notes starting from the E and you have E, F#, G#, A, B, C#, and D# - all
the notes in an E major scale. Apply these formulas to all keys.
C 0b
F 1b
Bb
Bb 2b Bb
Eb
Eb 3b Bb Eb
Ab
Ab 4b Bb Eb Ab
Db
Db 5b Bb Eb Ab Db
Gb
Gb 6b Bb Eb Ab Db Gb
Cb
Cb 7b Bb Eb Ab Db Gb Cb
Fb
Order of sharps
F#, C#, G#, D#, A#, E#, B#
Order of flats
Bb, Eb, Ab, Db, Gb, Cb, Fb
To remember the order:
Fast Cars Get Driven
Around Every Boulevard
Copyright Next Level Guitar Inc., 2011
all rights reserved unauthorized duplication
or distribution is prohibited
41
Blank tablature staffs to write out your favorite licks

42
Blank tablature staffs to write out your favorite licks

43
Blank tablature staffs to write out your favorite licks
Wyszukiwarka
Podobne podstrony:
Delta Force 2 Mission Editor Manual
delta blues
C Jam blues
Delta Force Black Hawk Down Mission Editor Manual
Delta Force 4 Task Force Dagger Mission Editor Manual
PANsound manual
als manual RZ5IUSXZX237ENPGWFIN Nieznany
hplj 5p 6p service manual vhnlwmi5rxab6ao6bivsrdhllvztpnnomgxi2ma vhnlwmi5rxab6ao6bivsrdhllvztpnnomg
BSAVA Manual of Rabbit Surgery Dentistry and Imaging
Okidata Okipage 14e Parts Manual
Bmw 01 94 Business Mid Radio Owners Manual
Manual Acer TravelMate 2430 US EN
manual mechanika 2 2 id 279133 Nieznany
4 Steyr Operation and Maintenance Manual 8th edition Feb 08
Oberheim Prommer Service Manual
cas test platform user manual
Kyocera FS 1010 Parts Manual
juki DDL 5550 DDL 8500 DDL 8700 manual
więcej podobnych podstron