
Learn how to build a powerful homemade water cell battery right in your own home.
Research has proving that you can build a simple water cell battery, powerful enough
to run a car as well as your home lighting. Although these plans are simple in design,
you can provide yourself with hours of fun as well as doing complex research in this
field. To recharge your battery you simply replinish the water tank with fresh water
and your battery is fully charged again. Many people like to use pure water with just
a touch of Chlorine or rain water. Rain water has some acid in it.
WARNING!
Although these plans talk in part about
using water, some of these plans may suggest experimen-
ting with Clorox bleach and liquid plumber, These chemicals
are dangerous, please keep all of your experiments away
from children and animals, always wear gloves and
protective eye wear. Some of these experiments are
not recommended for children under 18 years of
age. We are not responsible for anything, you
experiment at your own risk!
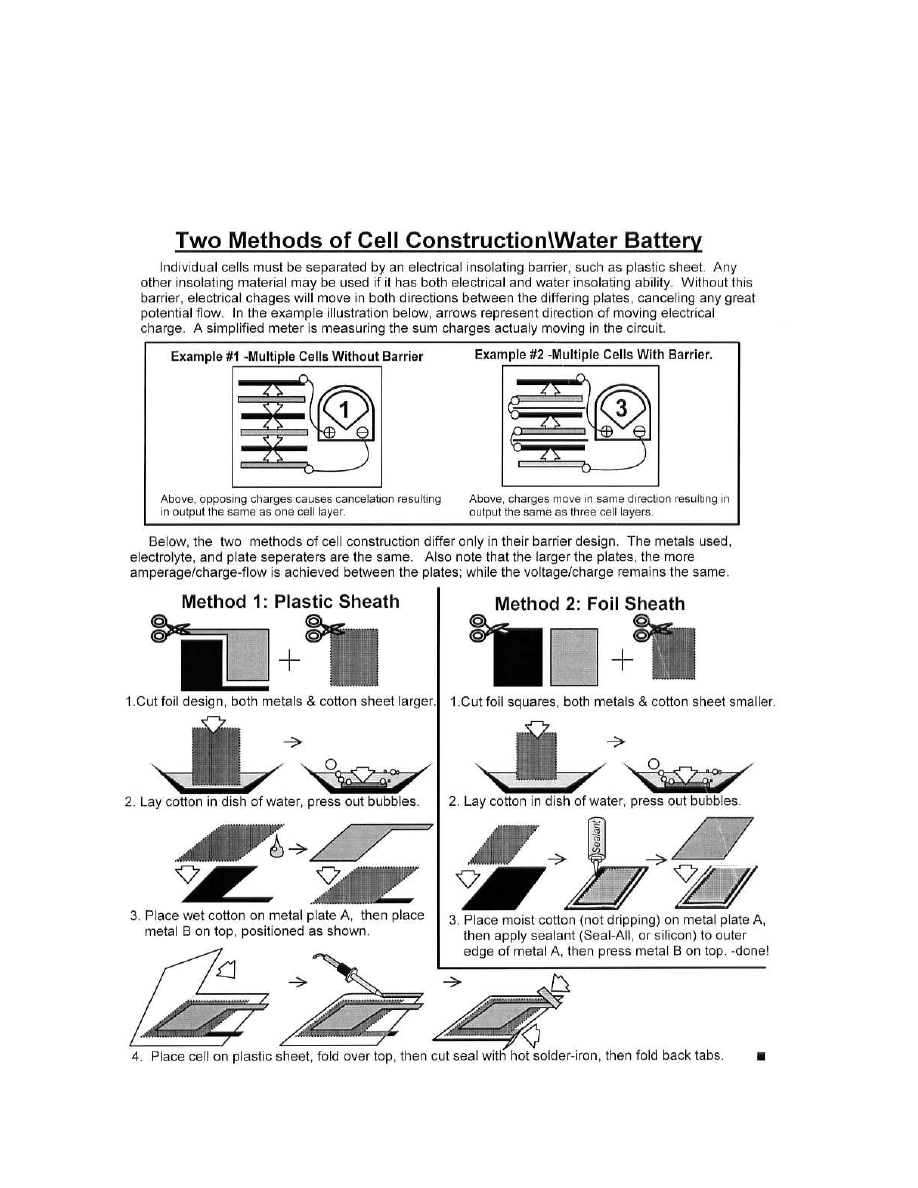
NOTICE: Below is a side view drawing of large copper and
aluminum plate cells, they can be any shape that you want. All I can
say is, Play around with different exotic metals and you will be
surprised! Zinc and copper work great!
COVER
BATTERIES
BATTERIES
BATTERIES
BATTERIES
BATTERIES
Homemade
Homemade
Homemade
Homemade Batteries #396
Copyright 2003
Copper
Paper
Aluminum or Zinc foil or plates
Use 1/8” Multiple disks
Homemade Batteries #396
There are many uses for homemade batteries cells. They are great for Emerg-
ency home lighting, as well as running small motors etc.. In many countries
electricity can only be used for a few hours a day. which effects many people
around the world who live in these areas, there economys just can not afford
to run there power plants for long periods at a time. Many of these people
have to use candles and oil lamps just to be able to eat or to read a book.
We have given away much of our technology to help many of these people,
But there are still thousands of cities all over the world that can not afford to
build such machines or they can not get the parts.
This is why we have introduced our Homemade Battery plans, It is a cheap
alternative energy source for these people to use. Even if they built small
cheap water batteries, these small batteries can still be used for low lighting
which is better than nothing.
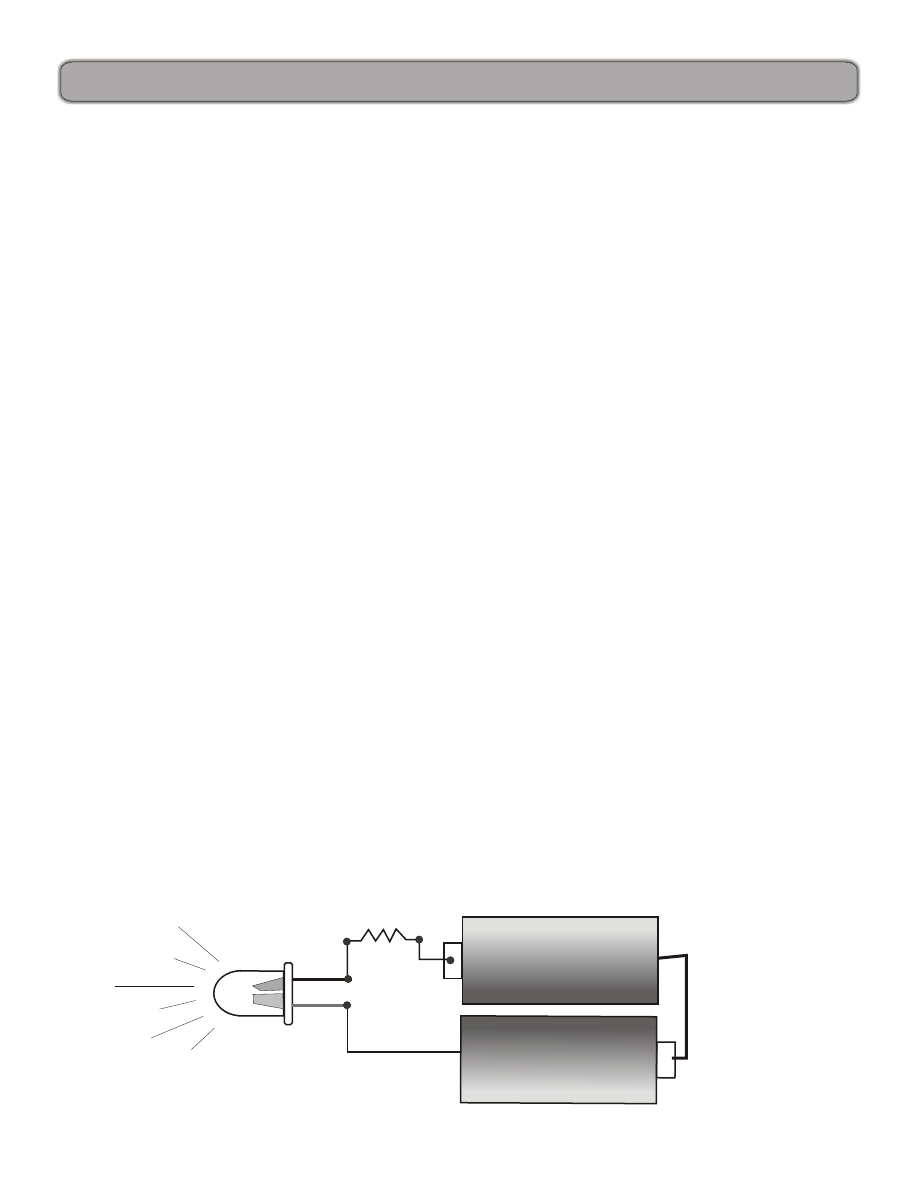
A good source for low emergancy lighting is the use of a low amp LED diode,
by using a bright L.E.D light in series with a 1 meg resistor connected to any
type of battery, you will get a light source that can last for months! if you left
the circuit in figure 1 on for 24 hours a day the batteries would last up to 6
months, and if you use the light only at night it would last 12 to 14 months!
Figure 1 is very easy and cheap to build.
Don’t know what an LED Light is? It is a light Emitting DIODE, You can buy them from any
Radio shack or electronics supply store. Or search the internet for electronic supplies. They are very
cheap and easy to build.
You will want to buy a bright Yellow or orange LED, You can build many of them to go all around your
home, The more you build the more light you will have in your home. Again use a LED light that is
recommended for the voltage you are going to use.
+
+
-
Flashlight Battery
Size D
Size D
1.5 volts dc
1.5 volts dc
+ +
-
Fla
sh
lig
ht
Ba
tte
ry
Siz
e
D
Siz
e
D
1.5
v
olt
s d
c
1.5
v
olt
s d
c
1 megaohm
resister
Page 1
Fig. 1
Homemade Batteries #396
page 2
First we start off with the basics. Small and simple, but fun experiments to get
you familiar with the subject. A much more sophisticated and powerful system
can be made using car batteries or PVC type. Your Fuel is nothing but rain
water mixed with a small solution of Clorox Bleach that you can buy at any
store. Just like when you fill your car up with gasoline, you fill your batteries
up with water. A great and powerful system for indoor and outdoor night
lighting. These batteries will last a life time. you can buy old car batteries at
any automotive Junk Yard or build your own PVC tube type.
do not try to charge these batteries. if you are going to use 12 volt Car
batteries,
THEN BE VERY CAREFUL THERE IS ACID INSIDE OF THEM.
Drain acid out in a safe place away from animals and humans. YOU BUILD ALL OF
THIS AT YOUR OWN RISK, WE ARE NOT RESPONSIBLE FOR ANYTHING IN
THESE PLANS, BUILD AT YOUR OWN RISK.
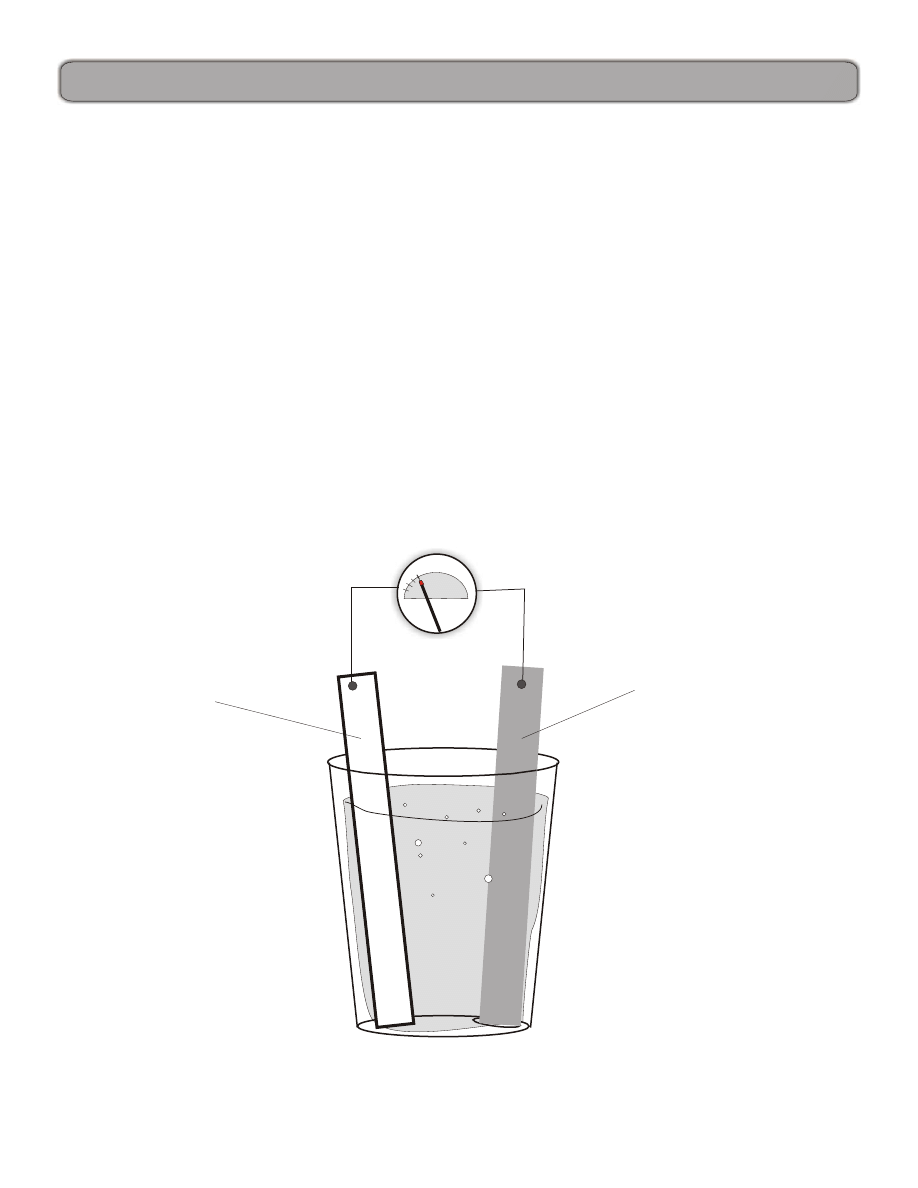
glass
1" Copper pipe
DC Volt Meter
Glass is filled with tap water with 1/4 teaspoon of Bleach.
Aluminum Bar
Fig. 1-b
1.5
Homemade Batteries #396
page 3
In fig 1-b, you should get about 1.5 volts DC with a small milliamp current.
The more Bleach you use the more amperage you will get, but the faster the
metals will corrode. The idea is to make your batteries where they only need
to be refueled once every 3 months or so, and the metal will corrode very
little. To do this you will need to use a teaspoon of bleach to every gallon of
water. But this will not be enough amperage to do anything with so what
you must do is add many cells together in series, ( Fig 1b, counts as one cell
) Just as you would Flashlight batteries. When you refuel, each cell must be
turned over to let the old water solution out. You can refuel up to 6 months if
you use regular tap water with a pinch of bleach, But again the less bleach
the more cells you will need to add to get the voltage and amperage you
want for your particular needs. The Aluminum and copper will last a very
long time, The Aluminum will corrode faster than the copper. to keep your
battery system working at it's best It is suggested that you take out and clean
the metals with water and lightly sand the copper ones and then replace them
back into the containers every 3 to 6 months. We estimate both metals to last
about 4 to 5 years and maybe longer?????
Aluminum can be a bit expensive, But you can cut your cost by using Old
Aluminum cans. The aluminum can will be the Negative DC and the copper
pipe will be the Positive. you will get a much more powerful cell using the
can as so.
Aluminum
Coke Can
Aluminum Coke Can Cell
Use clear silicon sealer on
copper pipe so pipe will not
touch side of can and short
out cell.
SIDE VIEW
TOP VIEW
Put Black Tape around pipe at
entrance of can so copper pipe will
not touch can.
Solder wire's to can and copper pipe
+
_
+
_
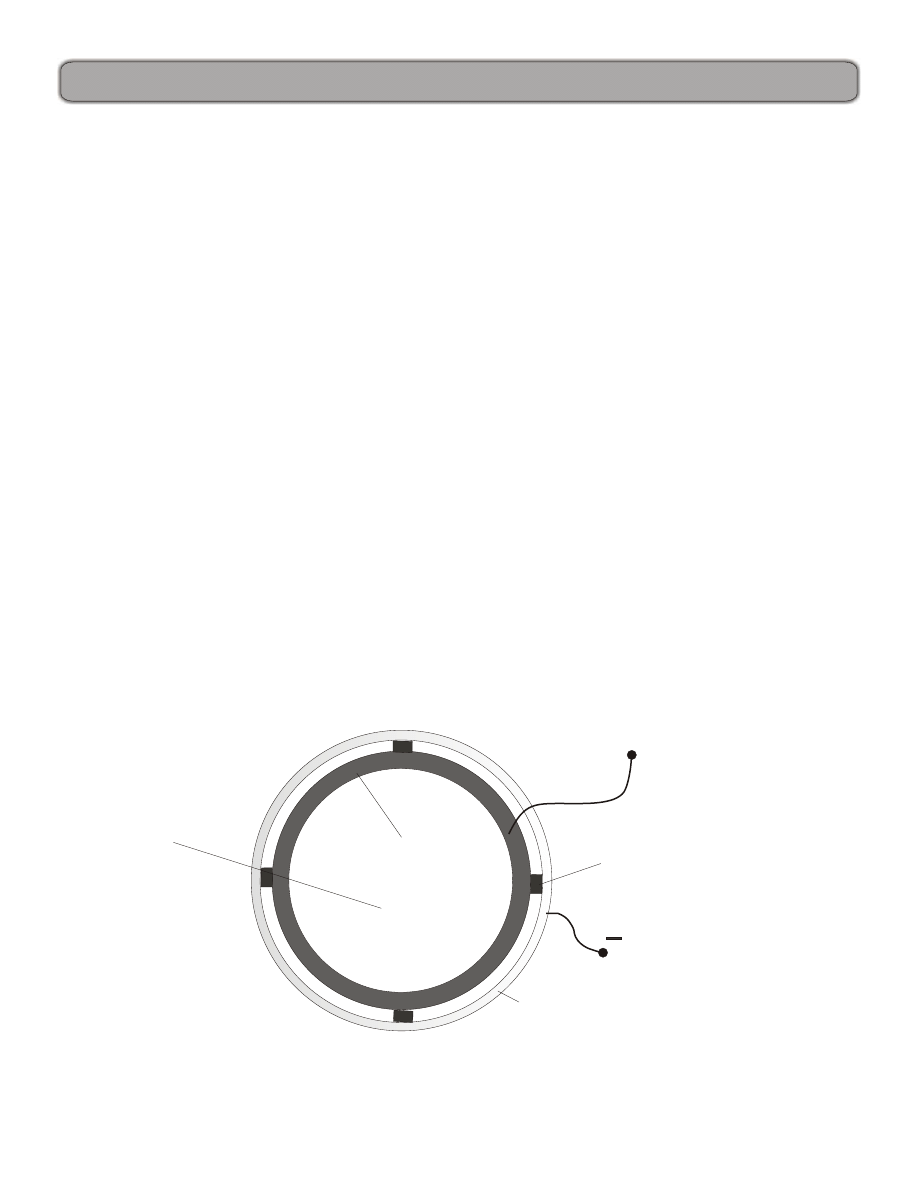
Notice: Coke cans are clear coated on the inside, you will have to use Hydrochloric Acid to remove the coating. Be careful!
+
_
+
_
+
_
+
_
+
_
+
_
+
_
+
_
Homemade Batteries #396
page 4
Creative Science & Research
P.O. Box 557
New Albany, IN. 47151
www.fuelless.com or www.fuellesspower.com
Aluminum Can Batteries / Cells
+
-
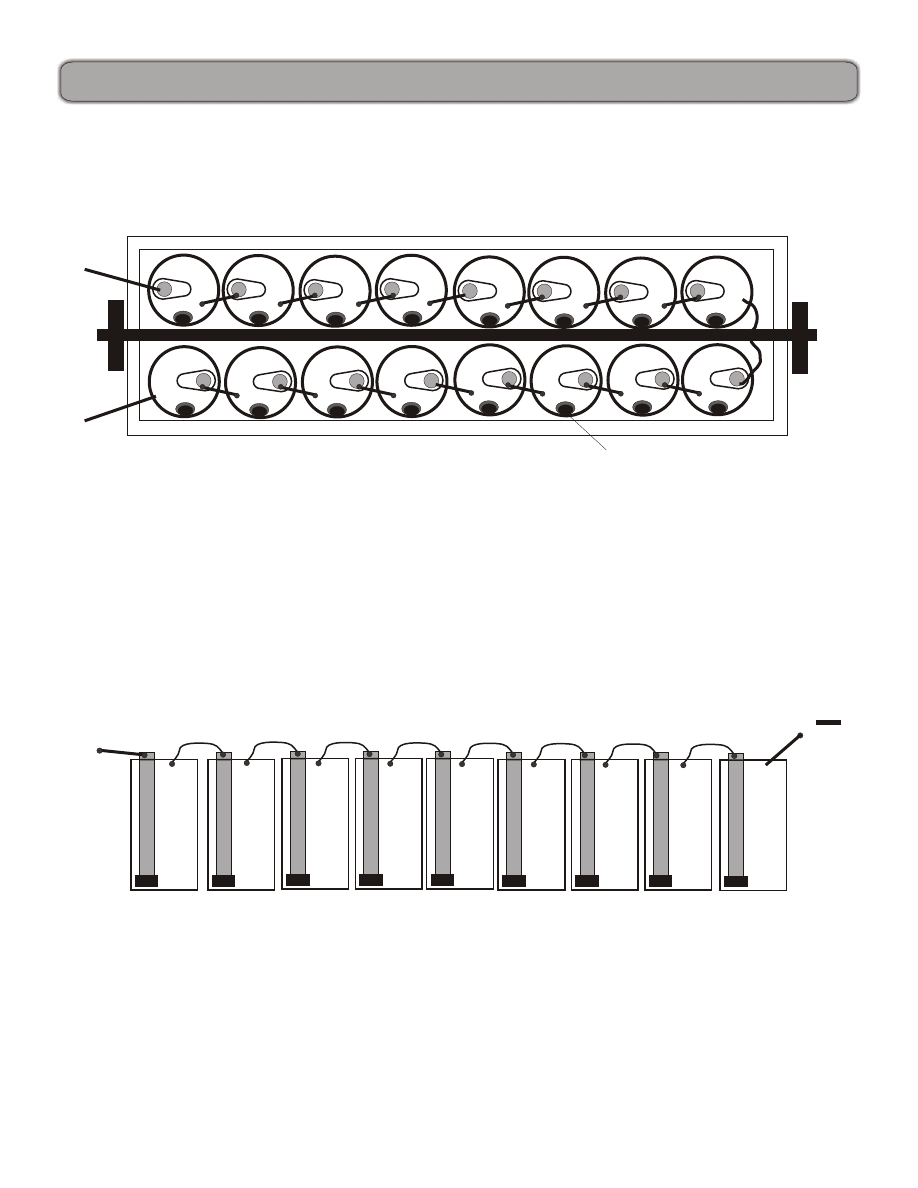
This is a top view of a rotateable wood box assembly, When it is time to
change water (Fuel), you simply turn box over and all the water will drain
out. ( of course each can must be Glued with silicon on the bottom of each
can to the bottom of each box.
Or the box can be stationary, With a small slit space on both sides of the
box toward the bottom, so you can get to each can. and pull out a small
1/4" cork stopper from each can to let the water drain out.
+
+
+
+
+
+
+
+
+
+
+
+
+
+
+
+
+
+
--
--
--
--
--
--
--
--
--
Copyright 2003
+
_
+
_
+
_
+
_
+
_
+
_
+
_
+
_
Drain holes
Top View
Output
about 24 vdc
+
Side View Good for about 12 ½ volts dc

Homemade Batteries #396
Copyright 2003
The drawings on page 4 shows each can, or battery cell, hooked up in series,
Just like a store bought dry cell battery, when you connect the batteries in
series from positive to negative, the voltage is increased. When you connect
your battery cells in parallel the voltage stays the same but the amperage
( Power ) is increased!
For parallel connections, connect each cell + to + and - to -.
To increase the amperage as well as the voltage, connect 6 cells or more in
series which will count as one battery, which equals 6 vdc x 100 milliamp.
Build 5 more of these batteries and then connect them in parallel this will give
you more amperage. You will then have 6 volts dc x 600 milliamps!
Make sure that each cell does not touch the other ( Aluminum to Aluminum )
when you are connecting them in series or parallel or they will short out.
+
-
+
-
+
-
+
-
+
-
+
-
+
-
+
-
+
-
+
-
+
-
+
-
+
-
+
-
+
-
+
-
+
-
12 vDC
12 vDC
Out put is 12 VDC and amperage is doubled!
#1
#2
Basically what we are doing here is using water as a fuel to generate electricity with 2 different type of
metals causing a chemical reaction in each cell. If you use these batteries out side in the summer in direct
sun light you will get even more amperage.
Most everything you will need can be purchased at any hardware store, The nice thing about using an
Aluminum can is, you can get them Free just by going on the side of the roads and collecting them. If you
buy your Aluminum be prepared, it is not cheap. For extremely high amperage cells using only 16 cans,
Use Pure Clorox bleach in each cell can, You will get a lot of power for a short time.( About 48 hrs. )
The metals will corrode fast but In some emergency cases you may need it..
.
page 5
Or use 8 can cells to = 12 vdc
Homemade Batteries #396
Copyright 2003
A Long Lasting, Yet Powerful Battery!
The closer the copper pipe is to the aluminum
or zinc, the more amperage and voltage you will get. A good way to make this type of cell
is to use thin copper foil or sheeting, which you can purchase at any Art Store, or check
with your local hardware store, If they do not have it they can order it for you. If you are
still having trouble finding a good Copper or Aluminum supplier check the web. You can
find just about anything you want on the web if you now what to ask it to search for. I
would simply type in, Copper Sheeting, or Copper foil. You may also want to try copper
supplies.
At any rate, you can still use the aluminum can technique, but this time you will need to cut
off the tops of all the cans, then you can use acid to remove the inner can clear coating or
sand it by hand using a wood Dow rod and a small piece of sand paper glued or taped to the
end of the dow rod, you can then sand by hand or you can connect the wood dow rod to an
electric drill.
You will now need to cut your copper foil to fit inside of the can, and then apply spacers or
plastic sheet spacers about 1/8” thick, or 1/8” space in between the copper and the
aluminum. The closer the better! Wood spacer could be used also and glued into place.
Then simply connect each cell in series as on page 4 or 5 and fill each can up with tap water
or pure water mixed with a touch of bleach or chlorine.
+
Copper Sheeting
Aluminum Can or Aluminum Sheeting
More Voltage, More Amperage
Fill with water
Plastic or wood 1/8” spacers
Top View
Page 5-A

Homemade Batteries #396
Copyright 2003
page 6
You can use Liquid Plumber which you can purchase in most stores.
It is an acid that is used to eat through hair that is clogged in you Drain
pipes. You can use Liquid Plumber instead of bleach as well as any type
of acid such as the acid you find in lemons etc.. You can try making
different cells using these acids full strength as well as deluting them
with water. But your main goal is to use 1 part acid to 10 parts of water.
Agin you will need to delute the
acid in the water. Never Pour Water into the Acid, pour the Acid into the
water.
When you use Acid it will corrode the electrodes about the same as
using Clorox. We recommend using Clorox Bleach.
ALWAYS USE A PLASTIC FACE MASK HELMET AND RUBBER
GLOVES WHEN HANDLING ACID.
Read all warnings on the acid label that you purchase!
Please Keep all of these Chemicals out of the reach of Children.
PVC Pipe Batteries
Making PVC Pipe Battery Cells is a little more expensive but well worth
it. It is more convenient and produces a lot more power.
there are two ways you can do it using the Aluminum as your negative
electrode, You can use aluminum cans soldered together and placed
inside of the PVC pipe or you can use expensive Aluminum Rod or bar
that you can buy from any hardware store.
We suggest using the Aluminum Cans. The Cells can be as tall as you
like 3 foot to 8 foot. But we prefer 24 cells at 6 foot. They can be
mounted across a garage wall and each one will have an on off valve
located at the bottom of each PVC Cell. Each drain will be connected to
a PVC 2" or so Drain Pipe which can be drained and directed to the out
doors. The on and off valves you can buy at any hardware store they are
PVC and are Cheap. Well good luck and God Bless, I hope we have
giving you some good information here that you can use during
Emergency's If you have any suggestions that you would like to see
added to these plans please write us.
Homemade Batteries #396
Copyright 2003
-
page 7
-
+
+
Copper Pipe
Side view of inside of Cell
Side view of Completed Cell
Water Drain
Aluminum Cans, Soldered
or riveted together, or make small
cuts in the top and bottom of cans and
slit them together.
Just like you
would 2 pices of
paper, then glue
them.
Cut the Bottoms and tops off of Aluminum Coke Cans.You can Solder them together or cut small slits in each
can so they can be joined together then you can glue them with silicon, if you glue on the outside of each can
then make sure you allow enough space for the can assembly to fit into the PVC pipe. Make sure all can are
touching. You may have to sand the printing ink off of the tops of them, Just make sure they are all making a
good electrical connection.
TOP VIEW OF CELL
Copper Pipe
Aluminum Cans
PVC CAPS
PVC Pipe
Homemade Batteries #396
Copyright 2003
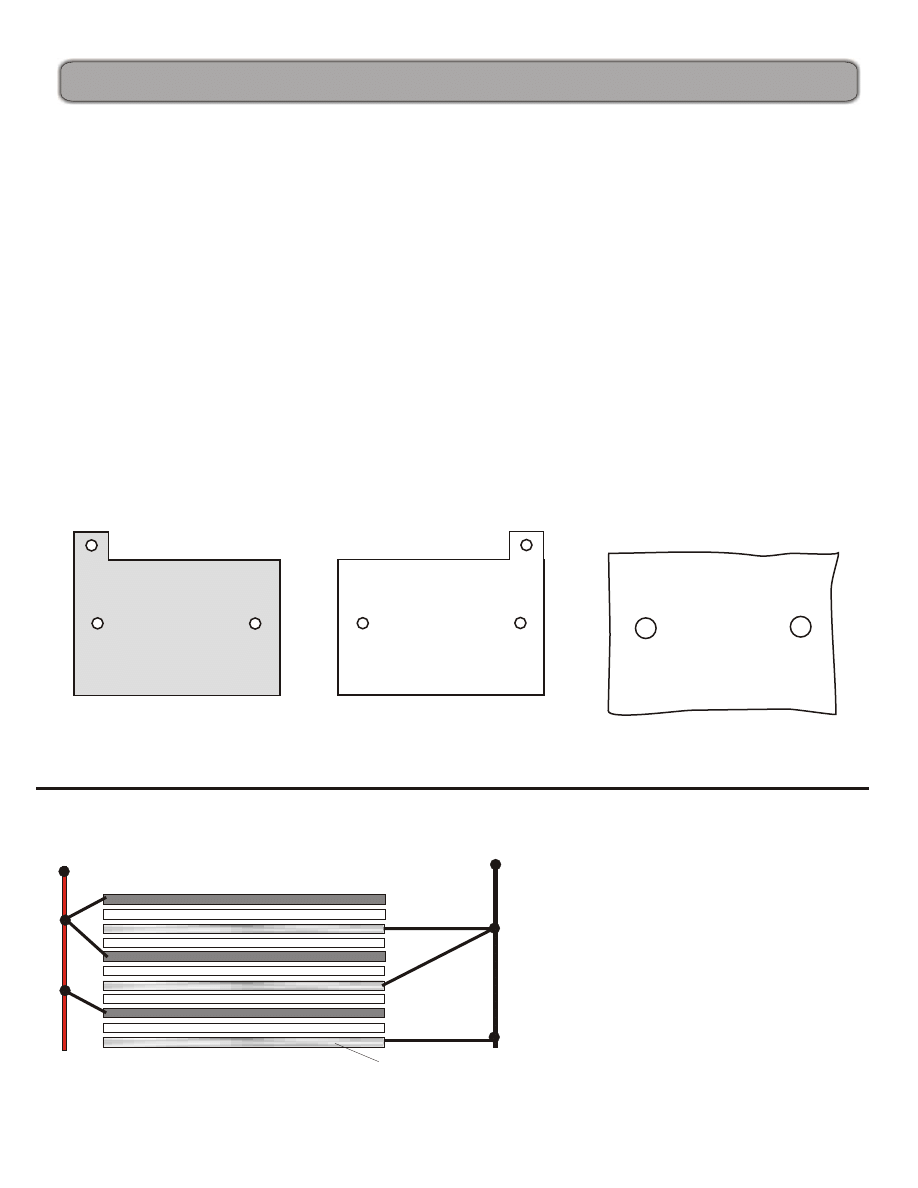
Now that you have learned some basics on how to make a homemade battery, the following
will show you how to make an even more powerful cell battery, using copper and
aluminum sheeting foil or 1/8” thick or less sheeting. Simply cut as many copper,
aluminum and cloth sheets as you can and then piece them together. It is best to drill or
punch 2, 1/4” holes into the exact same areas on all of the materials, so you can use 2
wood Dow rods as guides. Cut a 14” x 12” piece of ½”plywood and then drill 2 holes for
your Dow rods to go into and glue them into place using glue that can withstand water.
Now place your copper plate down first over the Dow rods and onto the base of the
plywood, then 2nd, place your cloth spacer on top of the copper and through the Dow rods.
3rd, place your aluminum sheet over top of the cloth spacer as you did the copper piece.
Simply repeat this over and over until you have about 100 pieces all stacked. Now wrap
cloth string around the entire battery to secure it well, Now solder and or use bolts to
connect all the copper leads and then do the same for the aluminum leads. And you are
done, the battery is ready to be placed in a water container and immersed in water.
Copper
Sheet
Aluminum
Sheet
Cloth
spacer
Front View
Sidet View
10”
12”
14”
11”
Copper
Paper
Aluminum or Zinc foil or plates
Sandwhich them together very tightly!
But keep them as flate as you can.
Add hundreds of cells, think BIG!
The more cells you add the more
amperage you will have, which means the
more lights you can run in your home
etc...
Page 8
Free News
Sent in by one of our good customers out in California!
This guy went the extra mile and did an awesome job!
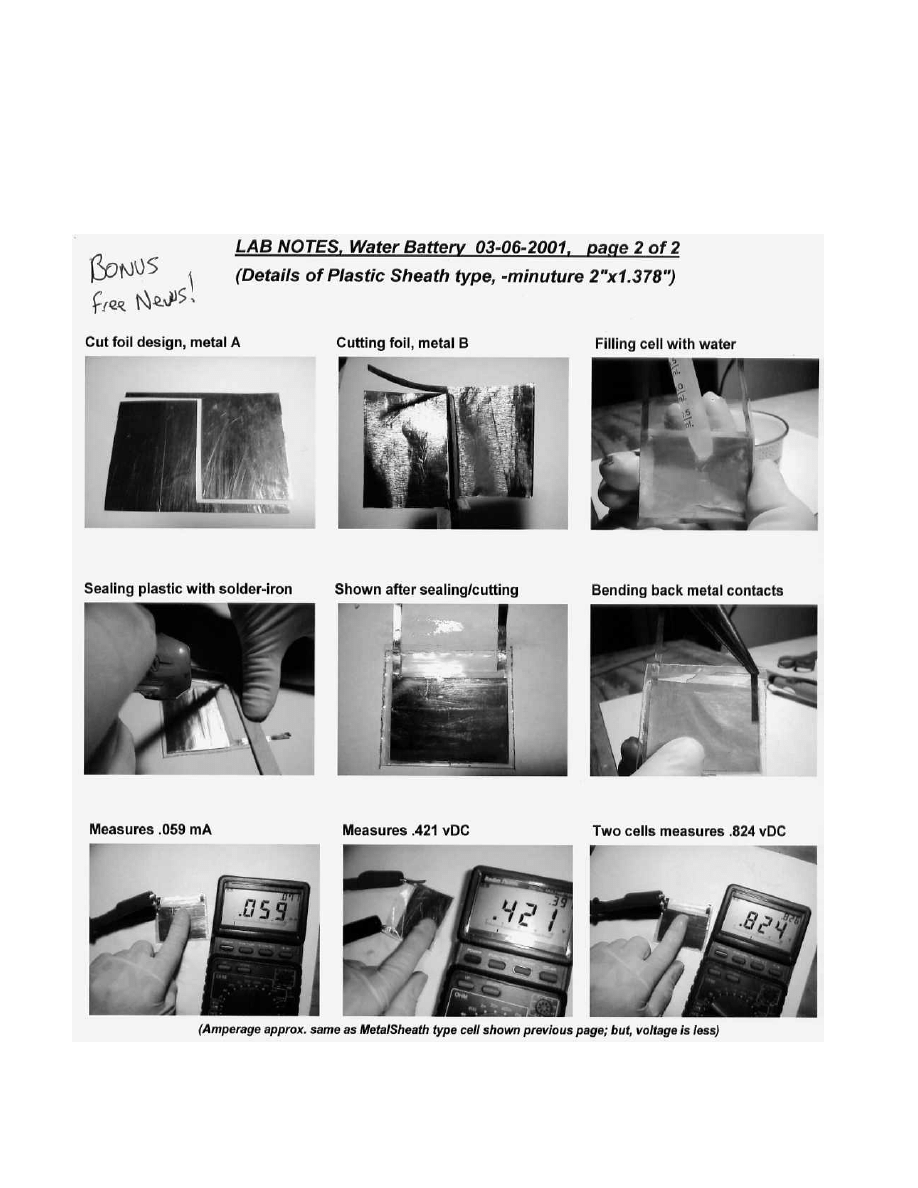
Free News
Sent in by one of our good customers out in California!
This guy went the extra mile and did an awesome job!


Document Outline
- Page 1
- Page 2
- Page 3
- Page 4
- Page 5
- Page 6
- Page 7
- Page 8
- Page 9
- Page 10
- Page 11
- Page 12
- Page 13
- Page 14
- Page 15
Wyszukiwarka
Podobne podstrony:
Free Energy & Technological Survival Homemade Wireless Antenna
9 CD 4212 2 battery charger
Homemade soap
Expedient Homemade Firearms The Zip Gun
396 PE~2
Free Energy Bedini Device And Method For Pulse Charging A Battery Patent Info 2004
My Homemade wind generator
kpk, ART 396 KPK, 1987
Battery Powered
NIKON BATTERY PACK MB10
Batteries & Charge Control in Stand Alone PV Systems
Battery Inverter For Modularly Structured Pv Power Supply Systems
E38 Battery
BY Hulecki D , Falszawannie maniet Reczy Paspalitaj (cz 2), Bankauski wiesnik, nr 31 [396] 2007
396
Kroeber-Istota-kultury-362-396
Batteries
więcej podobnych podstron