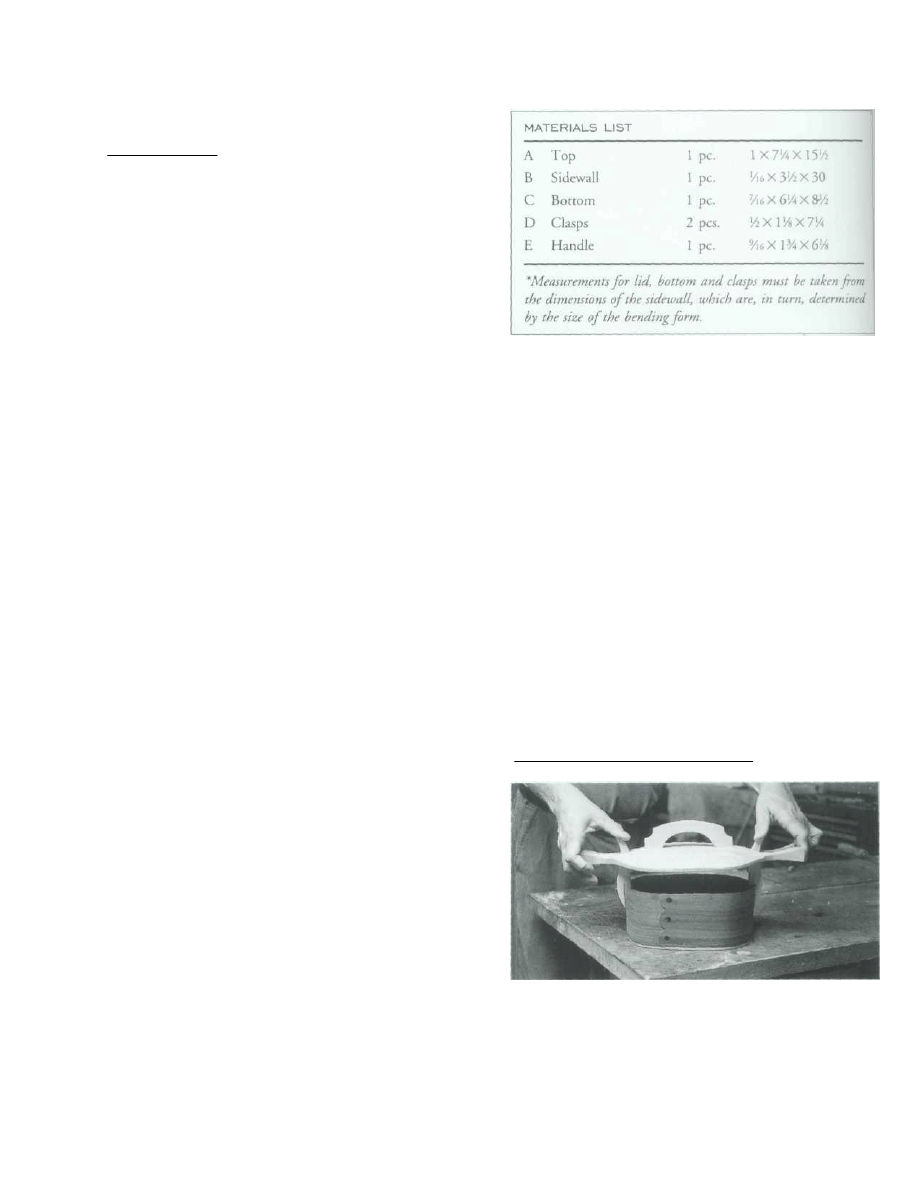
29
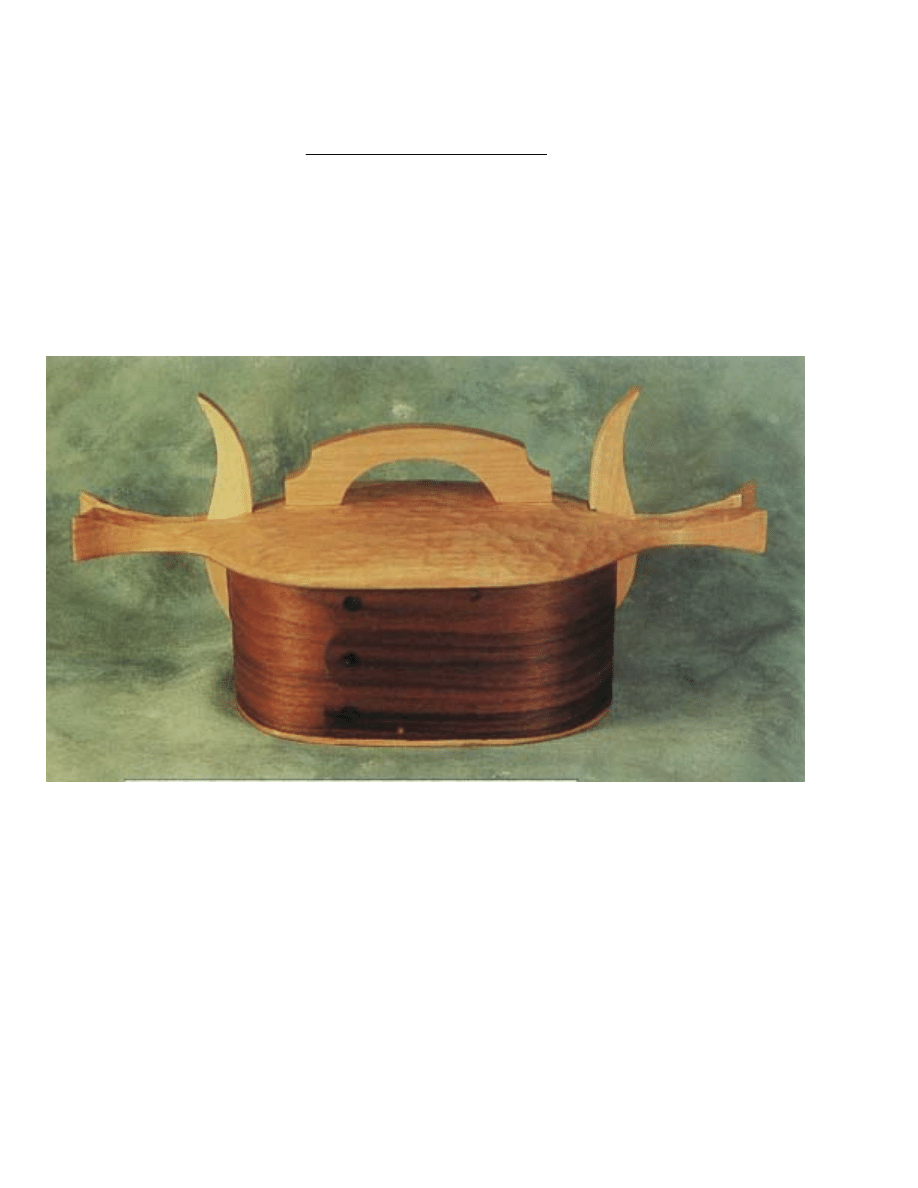
BENTWOOD BOX WITH
SNAP-FIT LID
Walnut, Hard Maple
.
Copyright 2004 Martian Auctions
117
MAKING THE
BENTWOOD BOX
Work begins with the construction of a bending form for
the main body of the box. Mine consists of a stack of
spruce 2 X 4's laminated together and band-sawn and
sanded to the box's inside profile. On the side of the form
that will shape the front of the box, the face of the form
is undercut for the lap of material beneath the box's glue
joint. A thin strip of metal (in my case, aluminum siding)
is screwed to the form creating an opening into which the
end of the sidewall material can be slipped as that material
is wrapped around the form.
The next step is acquiring material for the sidewalls of
the box (see chapter two for a detailed discussion).
After the sidewall material has been soaked (for twenty-
four hours in cool water, followed by ten minutes in warm
water), wrapped around the form, and clamped in place,
it should dry for four or five days. At that time, remove
it from the form and cut the lap joint. For this particular
example, I drilled three holes in the joint, sandwiching in
three bits of peacock feather between the lapping lamina-
tions so that the feather was visible through the holes. The
joint is then glued and clamped using the bending form
and the caul both to protect the material from the clamps
and to preserve the box's oval shape while the glue cures.
(this process is described in some detail in chapter two).
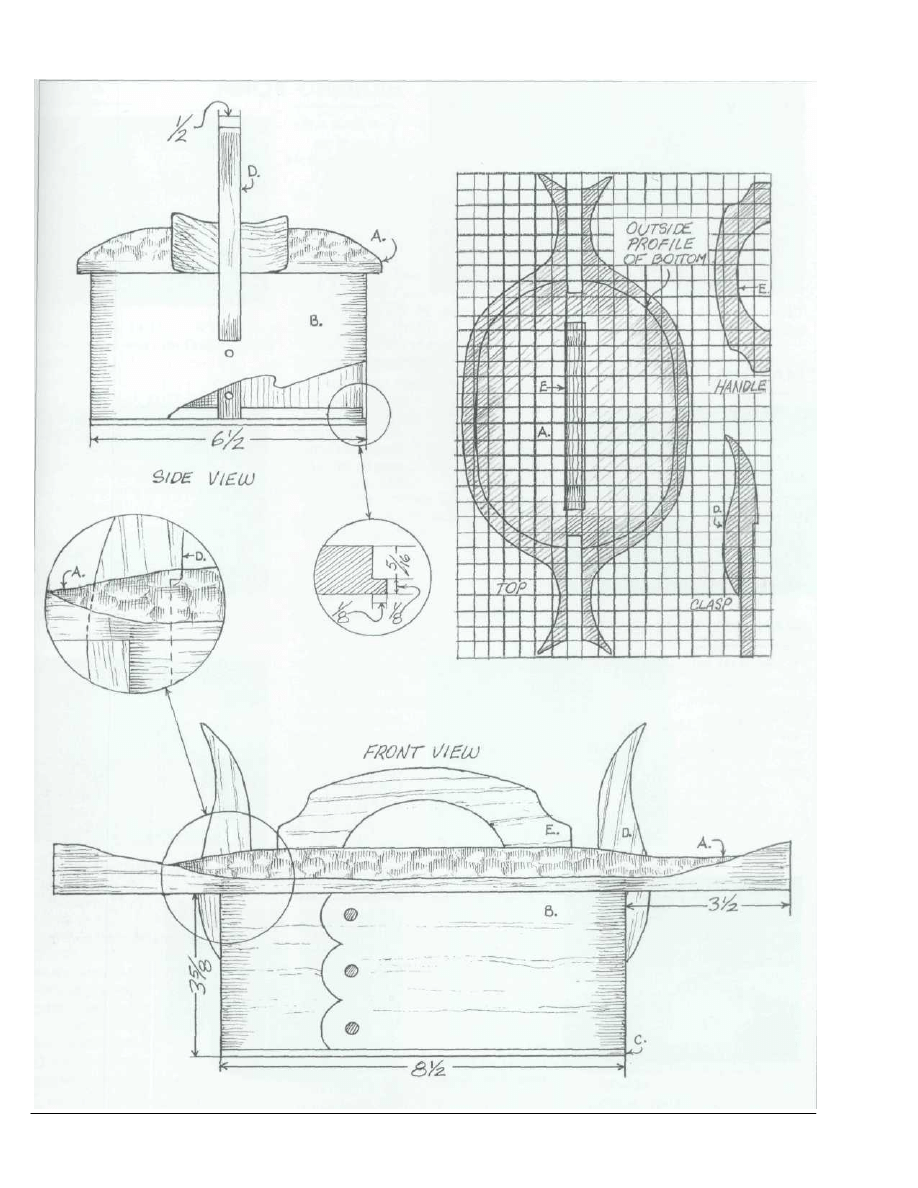
Cut out the clasps and the handle next. Thicknesses can
vary, but the thickness of the clasps must be accurately
transferred to the stock that will later become the lid so
that the walls of the notches fit snugly against the clasps.
When you have selected the lid material, place the box's
bentwood sidewalls on that material and draw a line around
its circumference. Next, establish a centerline running from
one end of the box to the other. This centerline is necessary
in order to lay out the notches that will house the clasps.
Next, sketch the outside profile of the lid. There is
considerable freedom in establishing this profile since the
notch placements are the only critical locations on the lid.
Then cut the lid's outside profile on the band saw.
Once the lid has been shaped, the handle is affixed. I
taped the handle in place, turned the lid over, and drove
a couple of wood screws up through the lid and into the
handle.
Make the bottom next. After thicknessing the stock to
7/16”, place the box's bentwood sidewalls on the bottom
material. Profile the inside and outside of the sidewalls.
On the band saw, cut the bottom profile, keeping the saw
kerf approximately 1/16" outside the pencil line that marked
the outside circumference of the sidewalls. Then, clamping
the bottom in a vise, cut away the extra 1/16" of material
with a block plane, to remove the saw marks.
Mark the rabbet around the bottom circumference with
a line 5/16" from the top surface of the bottom. Next, with
a dovetail saw, make a shallow cut along that line. This
saw kerf represents the bottom of the rabbet. With a chisel,
cut the rabbet to the depth marked by the line traced
around the inside face of the sidewalls. Once the bottom
has been fit, sand the parts and assemble the box using 1/8"
wooden pegs to both fasten the walls to the bottom and
the clasps to the walls.
OPENING THE BOX
Place your thumbs on the tops of the box's clasps while your
fingers grasp the fishtail ends of the lid. Spread open the
clasps and lift the lid. To close, press the lid down against the
clasps until it snaps into place.
1
Copyright 2004 Martian Auctions
118
Copyright 2004 Martian Auctions
119
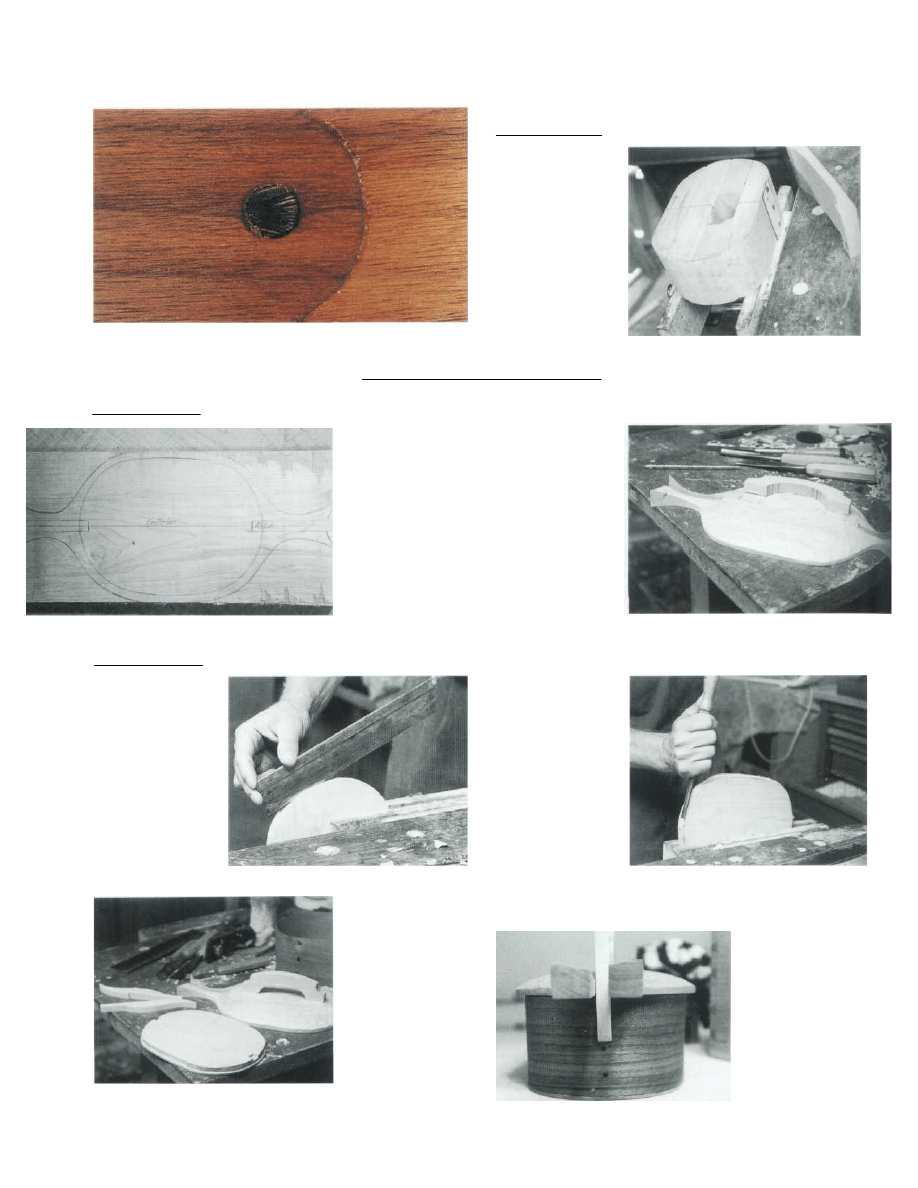
This close up of the box side reveals peacock feather inlay in the
holes, a very unique design element.
BENDING FORM
A block at the base
of the bending form
allows a vise to hold
it. After wrapping the
soaked, resawn stock
around the form,
clamp the caul to the
form to hold it in
place. Cut an opening
in the top of the form
for the clamp head.
MAKING THE LID
The layout of the
lid is shown.
Careful planning at
this stage will ensure
a lid that snaps
cleanly into place.
If the surface of the
lid is to be shaped,
flat surfaces must
be left for the base
of the handle.
MAKING THE BOTTOM
Define the bot-
tom of the rabbet
that will receive the
sidewalls by a
shallow saw cut
made all around the
bottom.
The various parts
have been cut and
fit and are ready for
assembly. Notice
the widened section
of the rabbet which
will receive the
lapped section of the
sidewalls. Notice,
too, the notches for
the bottoms of the
clasps.
Cut the rabbet
with a chisel. Here,
the chisel is cutting
across end grain.
After cutting
another
3
/4" of the
rabbet, reverse the
bottom in the vise in
order to cut back to
that point from the
other side.
PEGS
1
This shows the
ends of two pegs
driven through the
sidewall into the
clasp. Below, to the
left, is one of the
pegs holding the
bottom and sidewall
together. Drill a
hole before inserting
these pegs.
1
1
2
1
3
2
Copyright 2004 Martian Auctions
120
Wyszukiwarka
Podobne podstrony:
picket window box
christmas box
DiagLab UkładKrzepnięcia 2 BOX
horse creep box
Ortopedia Egzamin 2012 BOX
gift box a p
kostka 3DSolid Box, makra zwcad
Bluebird Nesting Box Project
przetworstwo tworzyw sztucznych plast box sa
sprawko tworzywa cold box
BB5 BOX
adskaja ruletka black box 4
więcej podobnych podstron