1
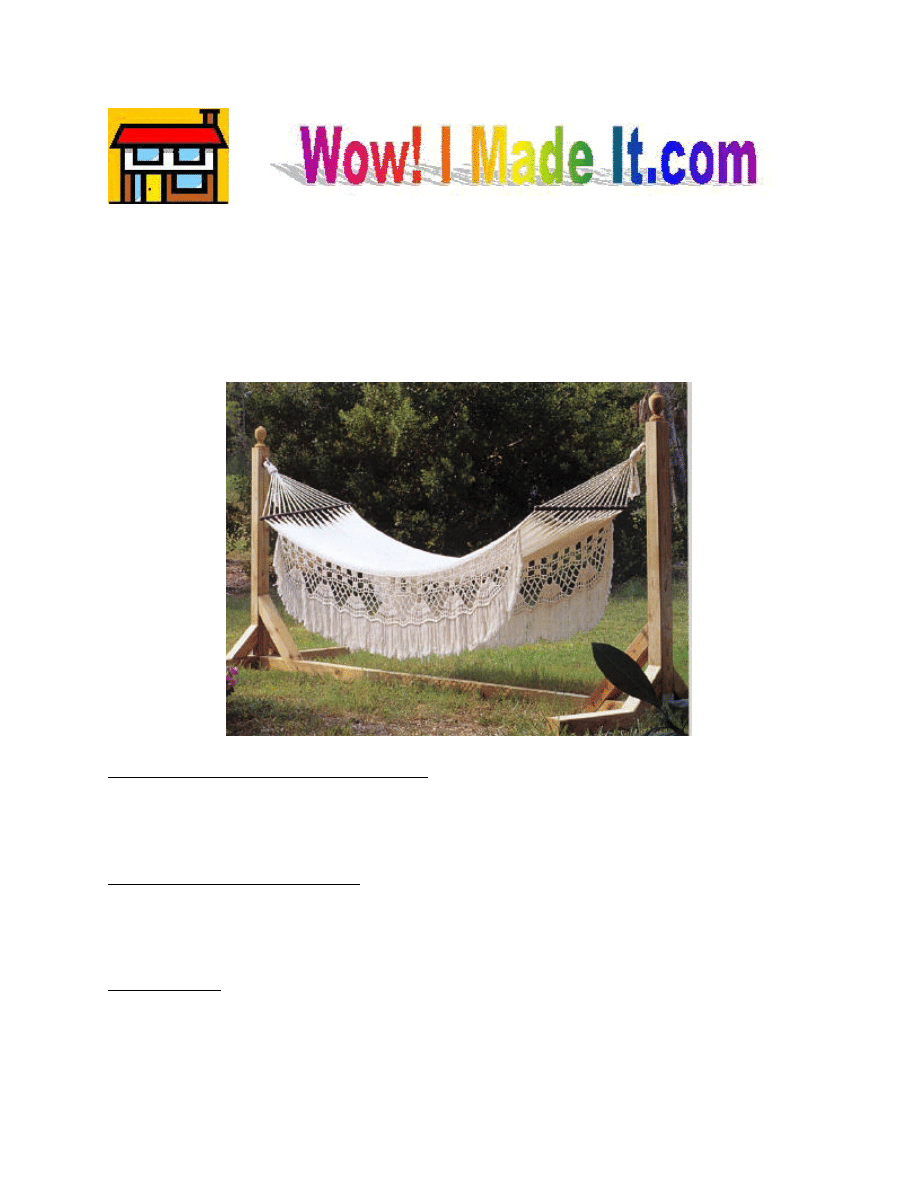
ammock Stand
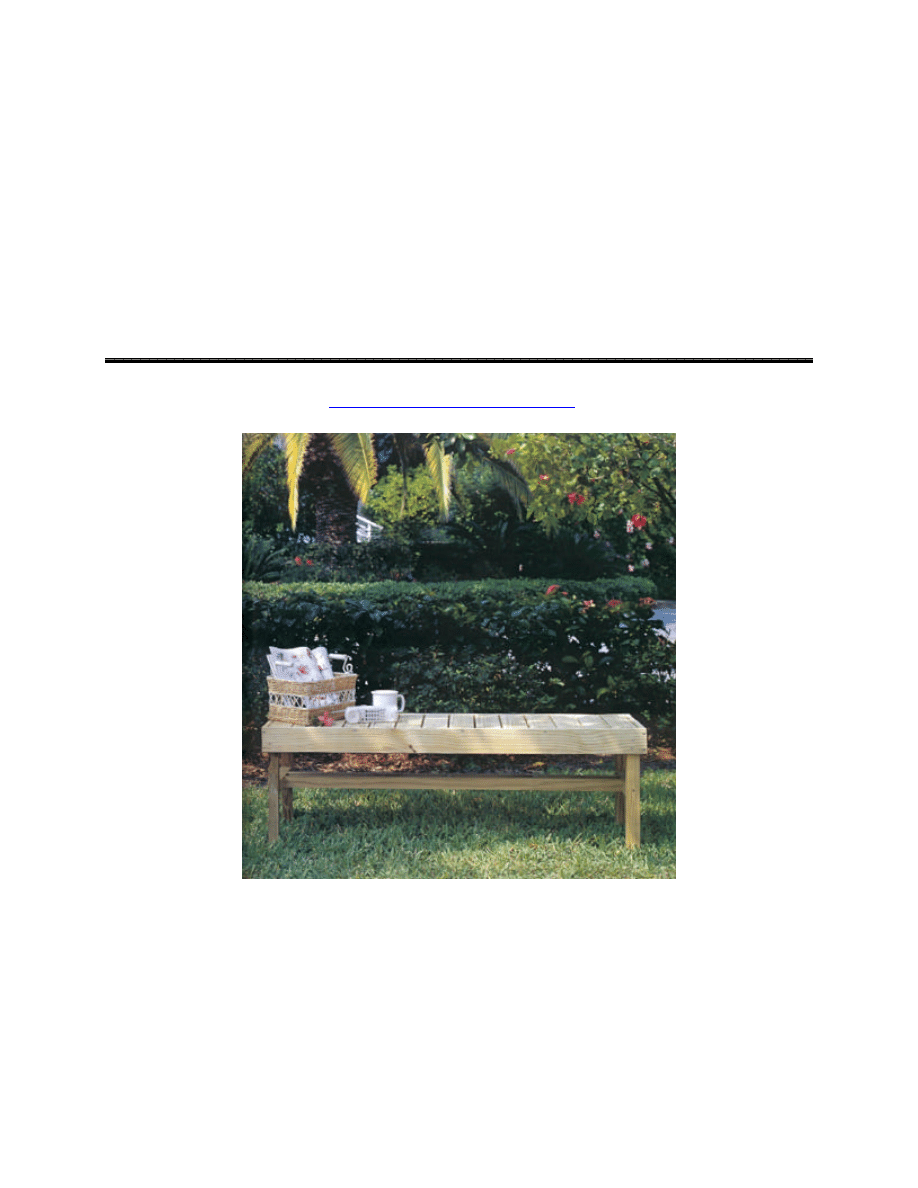
If you’ve always wanted to have a hammock in your backyard, but couldn’t because your
trees weren’t in the right place, here’s the solution: No, you don’t have to dig up two trees and
replant them! Build this sturdy hammock stand instead, hang your favorite hammock on it, and
place it anywhere you want—preferably where no one will disturb you!
Special Tools and Techniques
§ Dadoes
§ Miters
Materials and Supplies
§ 44 linear feet of 4 x 4 pine
§ 2 fence post finials
Hardware
§ 3” screws
§ 2” screws
§ 5/16” x 4” bolts, with 4 washers and 2 nuts
H
2
§ T-shaped metal back plates, 4” wide metal screw hangers (sturdy enough to hold a hammock
and 2 adults)
Cutting List (for both stands)
Code Description Qty. Materials
Dimensions
A
Cross Tie
2
4 x 4 pine
80” long
B
Upright
2
4 x 4 pine
56-1/2” long
C
Front Brace
2
4 x 4 pine
33-1/2” long
D
Side Brace
4
4 x 4 pine
12” long
E
Footing
2
4 x 4 pine
60” long
Cutting the Pieces
Each stand consists of two identical pieces constructed of 4 x 4 pine. Its strength comes
from the system of dadoes cut into the individual pieces. It’s not difficult to do, but
requires dome patience and rechecking to make certain that each of the boards is properly
shaped. Take your time and work carefully, and all the pieces will fit together perfectly.
The following are instructions for making one stand. Two stand will be required; if you
wish to make them both at the same time, simply repeat each step.
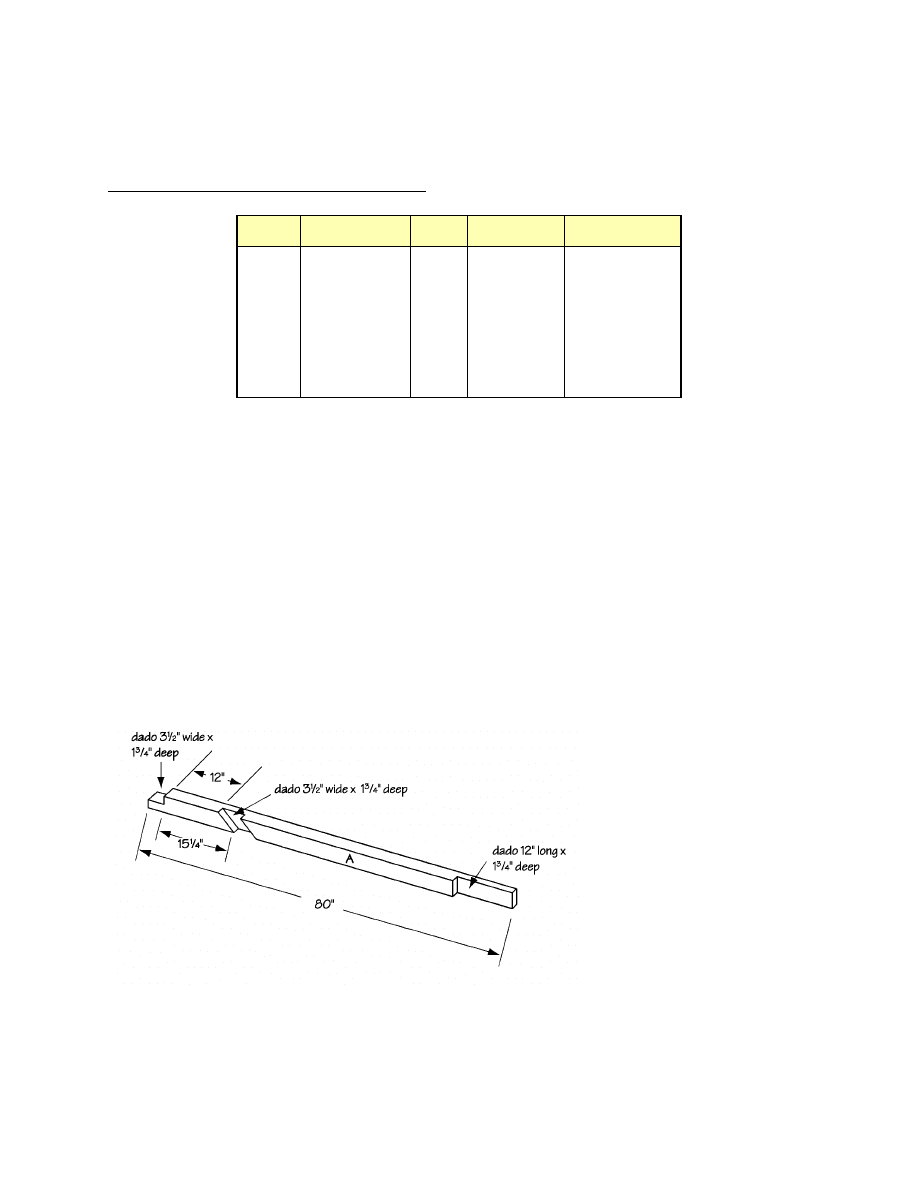
1. Cut one cross tie (A) from 4 x 4 pine, measuring 80: long.
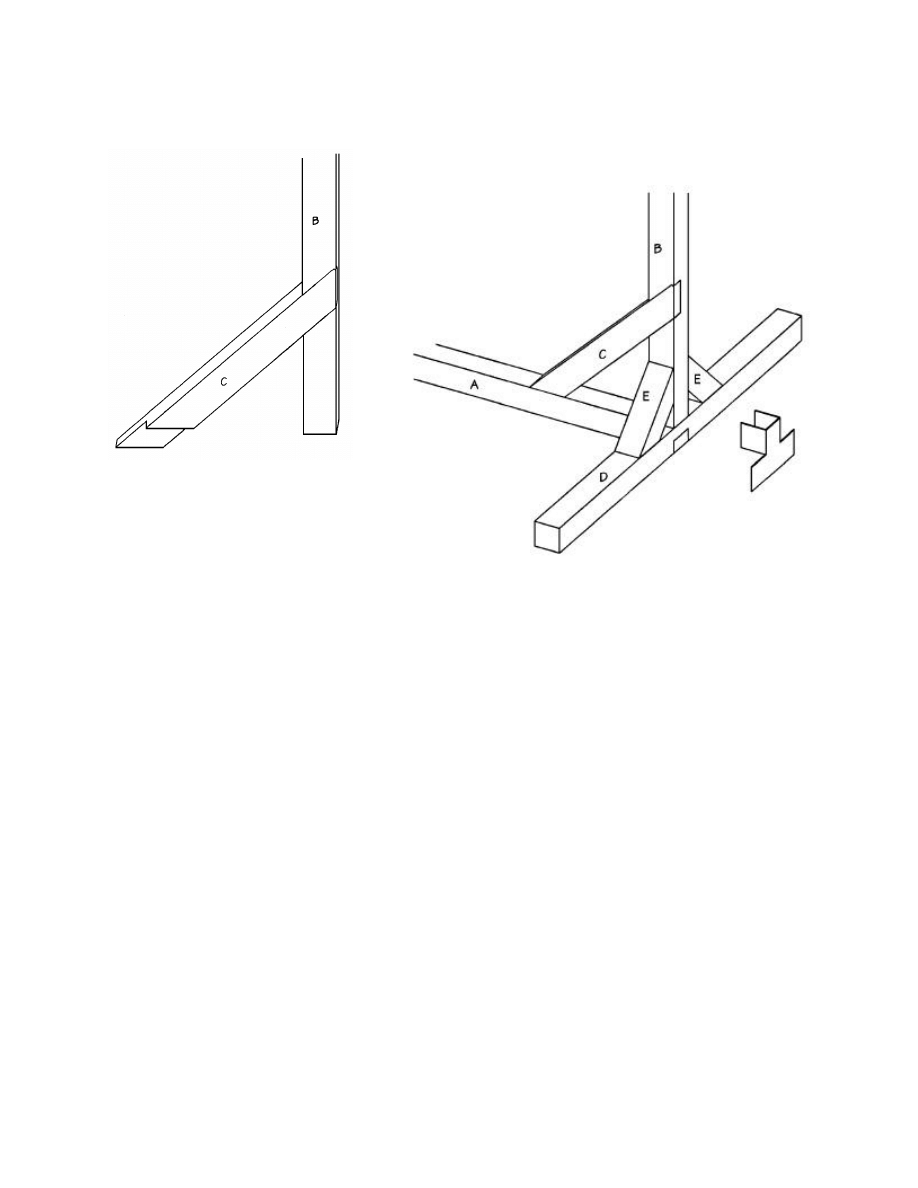
2. Follow Figure 1 to measure and then cut a lap dado across the width of one end of the
crosstie (A), 3-1/2” across and 1-3/4” deep.
3. As shown in Figure 1, but a 45-degree diagonal dado in the cross tie (A), 12 inches from
the lap dado, 3-1/2” wide and 1-3/4” deep. Figure 1 shows an additional 12”-long dado cut
on the remaining end. This dado will be cut later.
Figure 1
3
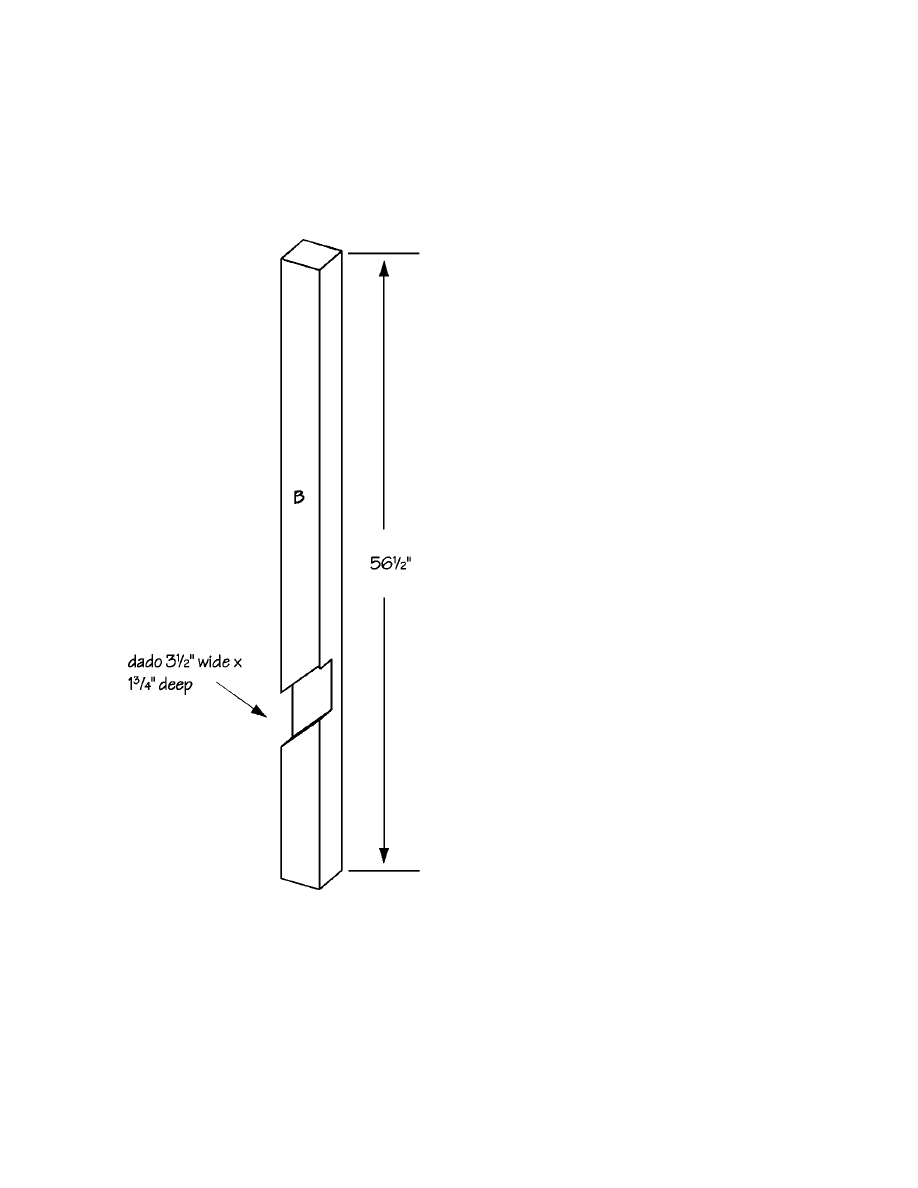
4. Cut one upright (B) from 4 x 4 pine, measuring 56-1/2” long.
5. Follow Figure 2 to measure and then cut one 45-degree diagonal dado 3-1/2” wide and 1-
3/4” deep, 12” from what will be the bottom of the upright support (B).
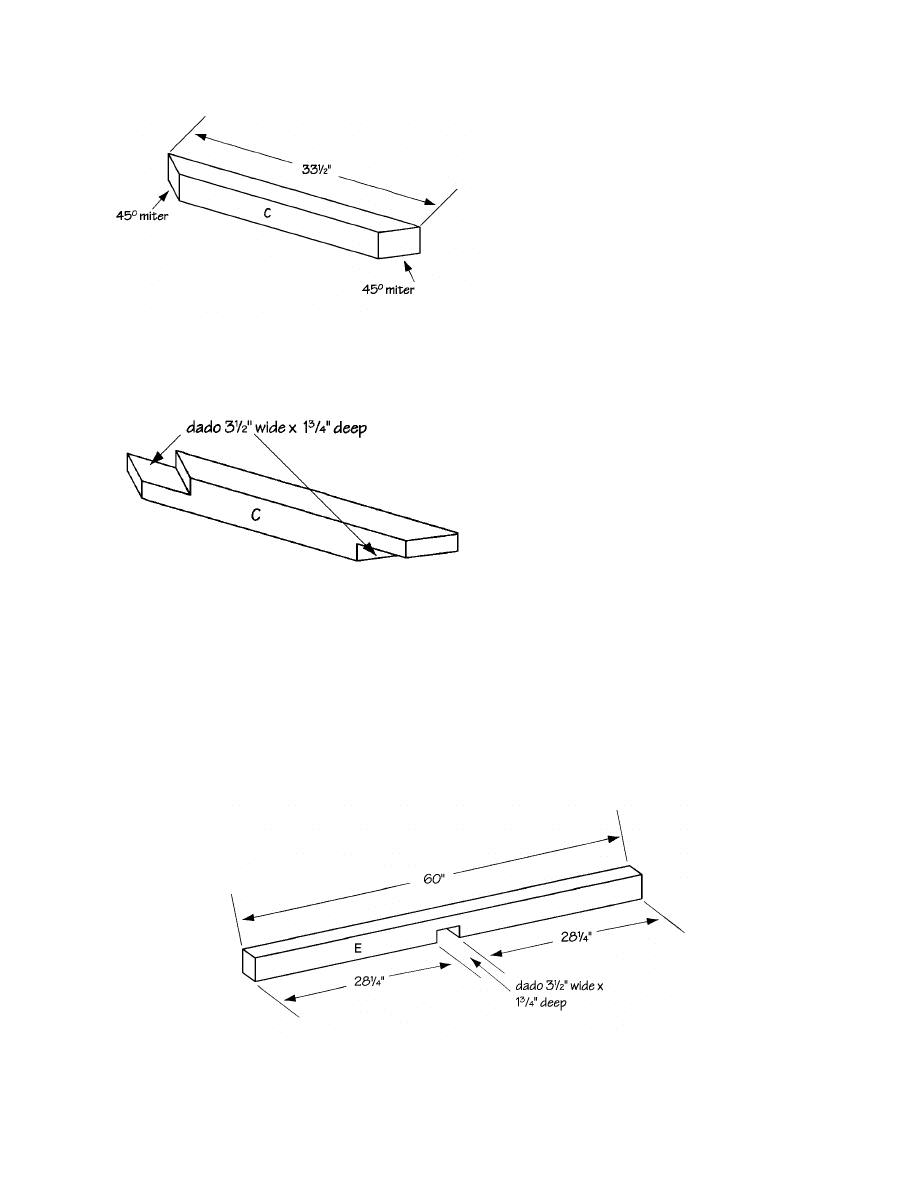
6. Cut one front brace (C) from 4 x 4 pine,
measuring 33-1/2” long.
7. Miter both ends of the front brace (C) at
opposing 45-degree angles, as shown in
Figure 3.
8. Cut two opposing diagonal dadoes in the
front brace (C), 3-1/2” wide and 1-3/4”
deep, as shown in Figure 4.
9. Cut two side braces (D) from 4 x 4 pine,
each measuring 12” long.
10. Miter both ends of the side braces (D) at
opposing 45-degree angles in the same
manner as you did with the front braces (C),
shown in Figure 3.
11. Cut one footing (E) from 4 x 4 pine,
measuring 60” long.
12. Follow Figure 5 to cut a 3-1/2”-wide dado,
1-3/4” deep, in the center of the footing (E).
Assembling the Stand
1. Place the cross tie (A) on a level surface,
with the lap dado exposed on the top, as
shown in Figure1.
2. Place the footing (E) dado side down, over
the lap dado in the cross tie (A). Screw them together by screwing through the footing dado
into the crosstie dado. Use four 3”-long screws to secure the joint.
3. Fit the front brace (C) into the diagonal dado cut into the upright (B), as shown in Figure 6.
Figure 2
4
4. Refer to Figure 7 to complete the final
steps of assembly. Place the upright
(B) directly over the dado joining the
footing (E) and the crosstie (A). Fit
the free end of the front brace (C) into
the diagonal dado cut in the crosstie
(A). Do not secure the joint yet.
5. Place the metal back plate, “T” down,
over the joint between the upright (B) and the footing (D), so that the side brackets extend
around the upright. Screw the back plate to the footing using 2”-long screws through the
back plate into the footing.
6. Make certain that the upright is
exactly square to both the footing and
the cross tie. First, screw through the
metal back plate to secure the upright
in place. Then, screw through the
dado joint in the cross tie (A) and
front brace (C), using four 3”-long
screws. Finally, screw through the
dado joint in the upright (B) and front
brace (C), using four 3”-long screws.
7. Place one side brace (D), short side down, against the footing (E) and upright (A). Screw
through one end of the side brace (D) into the footing (E) and through the other end of the
side brace (D) into the upright (A). Use two 3”-long screws on each joint.
8. Repeat Step 7 to attach the remaining side brace (D) to the opposite side of the upright (A)
and footing (E). Then, repeat all of the steps to make a second stand.
Figure 3
Figure 4
Figure 5
5
Finishing
1. Screw a metal hanger into each of the uprights (A), about 5” from the top, on the same side
as the front brace (C).
2. The ends of the cross ties now must be market and cut depending upon the size of your
hammock. Place the two stands opposite each other, with the ends of the crossties side by
side. Hang your hammock on the hangers between the two stands. Move the two stands
closer or farther apart, depending upon the size of your hammock, and how far from the
ground you wish the hammock to hang. IT IS NOT SAFE TO GET IN THE HAMMOCK
YET!
3. When you have decided what length the cross ties (A) should be, mark the length of the
cross ties (A), and then mark a 12” length for overlap on each cross tie (A). Cut the cross
ties (A) to length.
4. Remember the additional dado shown on the cross tie (A) shown in Figure 1? Well, now is
the time to cut it. Cut a 12”-long dado 1-3/4” deep in both cross ties, making certain that
they are mirror images of each other.
5. Clamp the two dadoes together, and 3” from each end of the joint, drill two holes through
both dadoes, large enough to accommodate your 4” bolts.
6. Place a washer on each bolt, fit the bolts through the drilled holes, add a second washer and
a nut, and tighten the nuts.
Figure 6
Figure 7
6
7. Mark the center of the top of each upright, and screw in a decorative fence post finial.
8. We left our hammock stand unfinished, but if you wish a more formal look, fill any cracks,
crevices, or screw holds with wood filler, and thoroughly sand all surfaces.
9. Paint or stain the finished project the color of your choice, or simply seal it with a clear
sealer.
10. Climb in your hammock and take a nap.
Try other indoor and outdoor projects from
www.wowimadeit.com
!
Wyszukiwarka
Podobne podstrony:
potting bench stojak na kwiaty stojak na kwiaty
potting bench stojak na kwiaty stojak na kwiaty (2)
fern pedestal stojak na kwiaty
Potting Bench stojak na kwiaty
plant pedestals stojak na kwiaty
celowanie z bronii na stojaku, PP i K
C5 (X7) B1BP0BP0 2 24 08 2011 Montaż SILNIK NA STOJAKU
gospodarowanie na dadancie stojaku
Interpretacja treści Księgi jakości na wybranym przykładzie
Wykład 1, WPŁYW ŻYWIENIA NA ZDROWIE W RÓŻNYCH ETAPACH ŻYCIA CZŁOWIEKA
zróżnicowanie religijne na świecie
WPŁYW STRESU NA NADCIŚNIENIE TETNICZE
Prezentacja na seminarium
Bezpieczenstwo na lekcji wf
CZLOWIEK I CHOROBA – PODSTAWOWE REAKCJE NA
Uważajmy na drogach Prezentacja
więcej podobnych podstron