
~~~~~~~ Rock Bass ~~~~~~~
Beginner to Pro in Four Weeks
~~~~~~~~~~~ No Reading Music ~~~~~~~~~~~


~~~~~~~ Rock Bass ~~~~~~~
Beginner to Pro in Four Weeks
~~~~~~~~~~~ No Reading Music ~~~~~~~~~~~
by Russell Kolish
Rock Bass
405 Tarrytown Road, # 385
White Plains, NY 10607
Copyright 2001 by Russell Kolish
Any mistakes in the presentation of this material are entirely due to oversight(s) by the author. If
any come to your attention, please let me know and I'll correct them in future editions.
Taken from the Rock Bass web site
http://www.rockbass-beginnertoproinfourweeks.com/
converted into .pdf/print format by

i
Contents
Introduction
..................................................
iii
Lesson I
Day 1 ...................................................... 1
Lesson II
Day 2 ...................................................... 3
Day 3 ...................................................... 5
Day 4 ...................................................... 9
Day 5 ...................................................... 10
Day 6 ...................................................... 13
Day 7 ...................................................... 15
Lesson III
Day 8 ...................................................... 17
Day 9 ...................................................... 19
Day 10 ..................................................... 21
Day 11 ..................................................... 22
Day 12 ..................................................... 23
Lesson IV
Day 13 ..................................................... 25
Day 14 ..................................................... 27
Lesson V
Day 15 ..................................................... 29
Day 16 ..................................................... 33
Day 17 ..................................................... 36
Day 18 ..................................................... 37
Day 19 ..................................................... 38
Day 20 ..................................................... 39
Lesson VI
Day 21 ..................................................... 44
Day 22 ..................................................... 48
Day 23 ..................................................... 49
Day 24 ..................................................... 50
Day 25 ..................................................... 52
Day 26 ..................................................... 53
Day 27 ..................................................... 53
Day 28 ..................................................... 54

ii
Contents continued
Appendix ...................................................... 55
Fingering Technique ........................................... 57
Addendum ...................................................... 59
Afterthoughts ................................................. 70
Bass Form ..................................................... 78
Guitar Form ................................................... 79
Tab Charts I .................................................. 80
Position Descriptions ......................................... 81
Tab Charts II ................................................. 82
Bass Staves ................................................... 83
Bass and Treble Staves ........................................ 84
Bass Staves and Tab for a 4 String ............................ 85
Bass Staves and Tab for a 5 String ............................ 86
Blank Staves .................................................. 87

iii
~~~~~~~ Rock Bass ~~~~~~~
Beginner to Pro in Four Weeks
~~~~~~~~~~~ No Reading Music ~~~~~~~~~~~
Definition: a 'Pro' is anyone who can make money playing music.
Some advice: get a small music dictionary (a good pamphlet type is called, "Condensed Pocket
Dictionary of Musical Terms," compiled and edited by Oscar Coon and published by Carl Fischer,
Inc., in New York. See the Appendix. Also, get a couple of videos of Bass for Beginners. One
distributor of videos for musicians is listed in the Appendix. Also, some good mail order catalogs to
get are from American Musical Supply and Musician's Friend, see the Appendix. Just call and ask
them to send you one. Pick up an issue of "Bass Player" magazine at your local magazine and book
store. Once you have a longer term interest in playing the bass, get a subscription to the magazine.
Another good magazine is "Bassics."
Equipment
About basses: If your hands are small and your fingers just don't reach, can't span four frets
without having to jump all over the place, you might want to consider a bass with a smaller scale
(string length). For example, a regular sized bass has what is called a 34-inch scale. There are
smaller basses, ones with a 30-inch scale and even smaller. These all make the same sounds as the
regular size especially when they're played through an amplifier as are all electric basses so I'd
recommend trying smaller ones at a local music store. There's also a much smaller and incredibly
unique bass with unusual latex rubber strings which is said to have a really good sound. It's called
the Ashbory made by DeArmond. It's very small (an 18-inch scale) and extremely lightweight. But
you have to have a lot of nerve to play it with other musicians because their teasing will never end.
There's also the Fernandez bass called the Nomad with a 25 1/2 inch scale. Very nice.
I have an Epiphone EB-O with a 30-inch scale and a single pickup and it sounds excellent! I've
played Fender Precision basses and Jazz basses with 34 inch scales. They are the 'standards' of the
Rock music industry because their sound is very 'punchy.' But I never really liked them very much.
I just played them because other musicians wanted me to use them. I recommend trying lots of
basses at a music store and go with your own feelings about what feels best to you. It's better to
have an instrument that's comfortable and easy to play rather than the biggest, baddest block of
wood with strings around. Also, as you develop better and better technique you'll be able to make
any bass sound good.
If you don't feel confident that your interest in music and bass playing will last, you might consider
buying a cheapo electric bass or renting one at your local music store instead of buying. I would not
recommend buying or renting any other instrument that's cheap because when you are learning, a
cheap instrument will hurt your learning process very much. However, I make an exception with
basses. Cheapo basses can be found in the mail order catalogs or at your local music store. Buy one
whose description catches your interest for around a hundred dollars. It won't sound bad at all. The
difference in value between the sound of a thousand dollar bass and the sound of a hundred dollar
bass is nowhere near nine hundred dollars. This isn't true for any other instrument.

iv
Tune Up. Buy a bass pitch pipe or electronic tuner. A pitch pipe or a pitch instrument is a device
with a number of holes and tiny chambers, like a harmonica, that you blow into to produce sounds.
These sound chambers are designed to produce certain pitches which we call notes. By listening to
these pitches and the notes on your bass and adjusting the tuning pegs on your bass to tighten or
loosen the strings you make the notes produced by the bass equal to the pitches produced by the
pitch instrument. When they are equal your bass is said to be 'in tune.' An electronic tuner does the
same except the tune up process is not audible. The display on the electronic tuner has a gauge
which displays the pitch of the bass string being plucked or picked. A digital tuner displays a
readout of numbers which correspond to the pitch of the string in question. When the needle on the
gauge of an electronic tuner reaches the midpoint or the numbers in the readout of a digital tuner
become equal to a specified number which corresponds to the desired pitch, then the string is said to
be 'in tune.' Of course you can follow a similar process using your ear to judge when the pitches of
your strings are equal to the specified notes of another musical sound source which is fixed, like a
piano or organ or xylophone.
Strings. Do get a set of new strings if you rent a bass. Also get someone at the music store to 'set it
up' (set up the bass) for you as part of the deal. Set up - Make sure the new strings are correctly
adjusted for height (bridge adjustment) and that the pickup(s) are height adjusted also. Also, the
bridge ought to be adjusted so that the notes on all four strings at the twelfth fret sound exactly an
octave of the open strings' notes. And have the set up person make sure that the neck angle is okay
and results in the strings lying pretty much the same distance from the neck over their entire length.
Of course the neck ought to be straight. This is a set up. Make sure this is done correctly because
trying to learn on an instrument whose notes are hard to play or sound somewhat out of tune is an
exercise in frustration and can doom your efforts. On the other hand, an instrument that is set up
correctly is a pleasure to play and listen to.
Striking the strings. Pluck with your first two (or more) fingers (you might also use your thumb)
or pick with a plectrum or pick - you might want to get a variety of types of picks (if you want to
use them). One important type is a thick felt pick. Other common pick materials are plastic, metal,
wood.
Amplifiers. They're responsible for most of your sound. They're the last point in the electronic
signal chain and have the most controls for tailoring your final sound. It's common for bassists to
spend two to five times as much money on their amp as on their bass. The manufacturers Fender,
Ampeg and (mail order) Carvin have excellent bass amps in varying sizes (size and weight, number
of speakers). Get one with wheels. These things are really heavy.
If you don't already have an amp and just want some rinky dink for now, until you find out whether
or not you have a longer term interest you can buy a tiny 'learning' amp for peanuts at your local
music store or from Musician's Friend mail order catalog - see Appendix. Maybe it'll have only a
six or eight inch speaker and hardly any controls but that's fine for the next month. You might also
be able to rent one.
Speakers. What the bass players in the videos say about speakers is accurate. Fifteen inch speakers
give deeper tones than 12s and 10s. Tens are very 'tight' sounding, succinct, and producers of well-
defined tones. Twelves fall somewhere in the middle. I prefer 10s myself. Of course the ideal bass
amp would have two to four 10 inch speakers as well as one or two 15s and throw in a small horn
for sounding the highest tones that you don't even hear very powerfully, each note's harmonics, see
definition, below. But you might not be able to afford that at first or maybe you just don't want to
lug around such a beast. In that case a smaller amp with two 10s or 12s or a single 15 would do
nicely. Ampeg makes a good sounding amp with a single 15. Some of your sound gets picked up by
the microphones, too, and goes into the P.A. system so that helps a bit when you're on stage. In
more upscale places you can send your bass signals directly into the mixing console (if they have a
v
house mixing person and some equipment) with the aid of a 'direct box' or DI. I've seen some
people using an array of 8 inch speakers, too. I like combos of 10s and 15s the best myself. I've
used 18s and they definitely have their uses when you want to have really deep sounding tones. I've
even used a 30-inch woofer with a 400 amp power amp, actually a little underpowered - made my
stomach curdle. Definitely a thrill ! But way too big and heavy to consider seriously no matter how
light the cabinet. You can't really use a small cabinet for it. The one I had was about as big as a
refrigerator!
Definition: harmonics: partial tones or overtones which accompany a simple tone.
Definition: tone: a musical sound of definite pitch.
Definition: pitch: the highness or lowness of a sound, the tuning of an instrument.
Definition: tuning: to be in harmony.
Definition: harmony: the doctrine (theory) of chords. Harmony is 'concord' as contrasted with
'discord.' Harmony is also the concord which follows a discord.
Definition: harmonize: to make concordant, to sound well together as defined by our ears and in the
thousand year old plus tradition of western music (which our ears have become through a lifetime
of exposure).
Definition: chord: any group of three or more notes sounded together.
Definition: concord: consonance - those parts which harmonize well with each other.
Definition: discord: dissonance - inharmonious, discordant.
Effects. You don't really need any. But if you want to have them, at first try a (cheap) multi-effects
device with tons of effects built in. That way you can try many effects to hear which ones you can't
live without and later you can get more expensive specialized single effect devices. An inexpensive
multi-effects device for bass is made by Zoom. The most useful effects for bass are compression
and EQ (equalization - frequency isolation and boosting or decreasing).
In the following lessons I concentrate mostly on what notes to play and not very much on
techniques. Techniques are endless. You learn them by listening, and talking to and watching and
playing with other musicians. In order to be able to play with other musicians you must first learn
how to contribute something. I suggest that the thing or the skill or talent that you offer is knowing
what notes to play. This is my approach because I think that it's a lot harder to learn what notes to
play than it is to learn techniques, hence my choice of this approach, which is very concrete and not
subjective as is technique.
However, a few words about how and when to play the notes.
If you know what notes to play, just how do you play them? Or, "So what if I know that I have to
play a C note when everyone else plays a C chord or is playing in the key of C. What do I do with
that C note?" Well, you can learn how to play the notes in many different ways and from many
different sources. Here are some of them.
An important thing to do is to WATCH bass players and guitar players, too. See how they pluck or
pick and coordinate your eyes and ears to understand how long they hold the string down which
creates the duration of the sound of the note. How do they pluck or pick their strings? Do they mute

vi
their strings? Where do they mute? There are lots of observations of how to play the notes that
you can make and apply to your own playing.
When do I play the notes? Here are some ways to learn when to play the notes.
Become an avid listener. Listen to your favorite music genre as well as other genres in which you
have no interest. Listen to the placements of the bass notes as you tap your foot or your fingers.
Count the beats to yourself. They ought to be mostly repetitive counts of fours or threes (mostly
fours for rock music, ie., 1, 2, 3, 4 ). As you're counting, pay attention to just where in your counts
each of the notes falls. This will give you all the information you need to begin to understand when
to play the notes. Sometimes you'll have to break your counts down into half counts. Counts =
time. What's time? More or less, just counting beats in repetition. It isn't so important right now to
know the mathematics of the divisions of time or to memorize any of this, just understand that by
tapping your foot or fingers and listening to music and the bass notes, you can get a feel for when
the notes are played within the simple beats or time counts.
It's also a good idea to play with other people and ask them for tips or flat out ask, "Just how do you
think I should play this?" Or, "Play it for me."
It's good to copy the bass lines from recorded music. Just copy. After a while you'll begin to pick up
a feel for rhythms and when to play the notes within the rhythms or repetitive sequences of sounds
or beats (see counts, above).
What's rhythm? Cadence.
Definition: cadence: the repetitive rise and fall of sound. The repetitive emphasis of one sound
among several.
The rest of this manual will give you the information about what notes to play.
Use your videos. You've purchased several beginning bass videos? Very important !! They usually
won't give you much information on what notes to play but they are excellent to view and listen to
how and when the notes are played!
Some comments about videos: in some videos, the player will be using a four-string bass, in others
a five or a six-string bass. Five or six strings look confusing when comparing it to your four-string,
but as the bassist in the video will say, just watch the inner four strings (in the case of a video with a
bass player using a six-string bass) or the upper four strings (in the case of a video with a bass
player using a five-string bass). These will be the only strings that the bassist will use in the video if
it truly is a beginning video. Note: a four-string bass is all you will ever need or have to learn about
because: the high string on a six-string is too high for playing in real life - it brings notes well up
into the guitar's and piano's range which only conflict with those instruments and muddy up the
band's sound. Usually the highest note that you will ever use is the note, E, on the G string at the
ninth fret on the four string bass and you probably won't go that high too often for the above reason.
As in some videos, occasionally you might like to challenge yourself by harmonizing some strings
here and there but you still won't usually need to go above that high E and will rarely harmonize
two or more notes anyway in the reality of playing with other musicians (ninety five percent of your
basic real time bass playing, on stage or in a recording studio), again, due to the above reasons
about conflicting with the sounds of midrange instruments or creating a 'muddy' sound. This is
especially true when you are making recordings. Note: sometime in the future you might get a
desire to go lower, in which case you might buy a five-string bass. But a five-string bass is hardly
ever necessary and there are some problems with distortion when one gets into a fifth, lower string.
vii
The four-string bass is designed very well to fit snugly right at the lowest end of the sonic spectrum
that's used in western (non-Asian) music structure.
This booklet presents basics of playing the Bass which probably were not mentioned in the basics-
of-bass videos and which will enable you to understand what other musicians are talking about,
converse with them in musical terminology and then play with any other musicians on an equal
basis. If you learn and practice these lessons for just an hour or so each day, seven days a week for
four weeks, you'll be able to play with almost any rock musicians or groups of rock musicians that
you'll run across. Once you learn the last lessons you'll be able to play with any rock musicians on
earth. I'm not kidding. Just learn and play these lessons for an hour a day and listen to the average
amount of rock music that you listen to every day, make the connections between what you've
learned and the music that you listen to and you'll feel confident. Confidence will take you places.
My specific advice for learning this material:
read the SECTION-OF-THE-DAY, day 1, day 2, day 3, etc . . . and apply what you've read to your
instrument each day for an hour. If you feel like it, or if you have more time left or if you haven't
yet used up the hour, reread the same material and repeat the applying of that same material to
your bass. Do not do more material until tomorrow. I repeat, do not do more until tomorrow. Let
the short bits of info, the small amounts of material that you learned today sit overnight in your
head. Think about it. Picture it in your mind. Dream about it. But do not do more than that one
section for that day. Be patient. In one month you'll have absorbed an enormous amount of
knowledge. Be patient.
Read every sentence succinctly and in detail; read hard. Concentrate. Don't let a SINGLE
paragraph go by without completely understanding it even if you have to slow up your progress that
day. Don't skim anything! Do not skim. Take a break if you find yourself skimming. If you notice
that you're skimming take a break even if you have just started reading !
Also, there are fourteen Fingering Techniques at the back of the Appendix. Learn one of them every
two days. Learn one on the first day of a two-day cycle and rehearse it on the second day. On the
third day learn another fingering technique. On the fifth day learn another . . . etc.
Thoroughly understand the following two paragraphs:
The sign # means 'sharp' or one note or half-step higher (more on half-steps in lesson 2). The sign,
'b,' means 'flat' or one note or half-step lower.
Our western music is constructed using groups of twelve tones or notes, the lowest and highest
tones sound alike and are called, 'octaves.' The twelve notes are labeled as the first seven letters of
the alphabet, A to G, and some notes have sharps (#) or flats ( b ) indicating the next higher or
lower note. A, A# or Bb, B, C, C# or Db, D, Eb, E, F, F#, G, G# or Ab, and A, the 'octave' of the
first note. This series of notes can start on any letter and the notes just wrap around at the letter, G,
starting in again at A. For example: start at C: C, C# or Db, D, Eb, E, F, F#, G, G# or Ab, -
wraparound - A, A# or Bb, B, C.

1
Start here on the section-of-the-day plan.
Day 1.
Lesson I.
Definition: fret: one of the thin metal bars embedded in the face of the neck of your bass. When you
place a finger on a string just behind a fret and depress the string until it touches the fret it shortens
the length of the vibrating section of the string (assuming that you've plucked or picked it) and
makes the note sound higher.
The first thing you must do after you've tuned up is learn where all the notes are on all four strings
at each fret on the fingerboard. This is extremely easy and will take you no longer than a minute or
two. First, memorize the notes of the four open strings (strings played while not fingering any
higher frets): low to high, E, A, D and G. Then, starting from the lowest open ('open' means not
fretted) string, note, E, move up the string at each successive fret and label it in your mind with the
next higher note: F, F# (sharp), G, G# or Ab (flat), A at the fifth fret (which is equal in sound to the
second lowest open string, A), then, continuing upwards on the E string, A# or Bb, B, C, C#, D, Eb,
E, F, F#, G, Ab, A, Bb, B, C.
Play each of these notes on your bass. Use any fingerings for now. Mix them up. Experiment. Go
up and down. Say the names of the notes in your mind or out loud as you play them.
Likewise, on the second lowest string, the open A string, note, A, move up the string at each fret
and label each higher fretted note with a higher letter: Bb, B, C, C#, D, Eb, E, F, F#, G, G# or Ab,
A, Bb, B, C, etc . . .
Play each of these notes on your bass. Use any fingerings for now. Mix them up. Experiment. Go
up and down the string. Say the notes' names . . .
Do the same with the third or open D string, note, D: Eb, E, F, F#, G, Ab, A, Bb, B, etc . . .
Play each of these . . . etc.
And the fourth and highest string, the open G string, note, G: G# or Ab, A, Bb, B, C, C#, D, Eb, E
(about the highest note you will usually use), etc . . .
Play . . . etc.
You'll note that on each string the notes, starting with the note on the fifth fret, sound the same as
the note on the next highest string five frets lower on that string. The bass is designed this way in
order to make it easier to use multiple strings and closely spaced fingerings in small groups or
'blocks' or 'squares' in order to increase the range of notes that you can play in a small area on the
fingerboard. Try to discover which notes sound the same on any string as notes on the next higher
string. And which notes on any two strings sound the same.
As you can see, by memorizing the notes E, A, D and G of the four open strings and the musical
concept or idea that each higher fret sounds a note just one note higher, you can easily know where
to find all the notes on the entire fingerboard. Simple, eh ?

2
This sounds like an awful lot of knowledge to learn, and it is, but knowing just these two musical
concepts or ideas, you can know all this within a few minutes! Easy! Fast! And you really don't
have to memorize every note because, once you understand the two ideas explained above, the four
open strings' notes, E, A, D and G, and the idea of moving up the frets (or down the frets) you can
easily find any note anyplace on the fingerboard.
Stop here. Go over the above material several times. This info is very important. Do not go on until
you thoroughly understand it. I mean it.
End of day 1.
3
Day 2.
Lesson II - Intervals or half-steps and whole-steps and Numbers or
'Positions'
Definition: an interval is the distance between notes on a scale.
Definition: scale: a sequence of notes arranged in order of pitch.
Definition: pitch: the highness or lowness of a sound. Pitch is comprised of multiple frequencies
such as tone(s) and overtones. The sensation of pitch is created by multiple frequencies, all in a
steady, repetitious time relationship (milliseconds) which stimulate a tiny membrane in our ears.
Our brain interprets the signals from the nerves from that membrane as a single pitch. So the p-
perception of pitch is comprised of multiple time related perceptions the sum total of which gets a
single label, a note. The frequencies and variations that are acceptable ('correct') to us as
components of any pitch have been unconsciously learned by us since we were children if we were
born into this culture. Some variation in the acceptable frequencies still enables our brains to
interpret a sound as a certain pitch. Some variation but not too much otherwise we won't give a
sound acceptance or validation.
Definition: frequency: the number per second of vibrations or waves or cycles of any periodic
phenomenon, one which occurs at regular intervals.
Definition: tone: a musical sound of definite pitch. A note.
Definition: overtones are harmonics.
Definition: harmonics: partial tones or overtones which accompany a simple tone. They're produced
in conjunction with or at the same time as the simple or primary tone, the only one that you think
you're picking or plucking. They're produced at lower volumes than the simple or primary tone.
That's why you can't hear them at first, until your ears become more refined through experience.
I use the word, 'volume', to mean loudness.
Definition: simple tone: a single frequency often unrecognizable as a pitch or a note since a pitch is
made up of multiple frequencies, see above. An example of a single frequency is a sine wave as
measured by and displayed on an oscilloscope.
Pitch seems very complicated and it is. However, pitch is something that we can all perceive very
easily and naturally since we're bombarded by pitches every minute of every day and we're so
accustomed to them that hearing them comes completely naturally.
A scale is our western culture's definition of how we choose (from all the millions of possible
pitches that there are) the specific pitches or notes that we then use to construct all the rest of our
music structure. This is tough to understand but now, from Lesson I, you are capable of learning
two (or more) ideas and combining them into a useful third idea, so you can be confident that you
can understand this.
Definition: position: a unique placement in a structure or sequence. A place occupied (by a note in a
scale). The positions in a scale are numbered consecutively 1 through 8. 1st position, 2nd position,
3rd position, etc . . .

4
By the way, just because these lessons are so short and succinct, it doesn't mean that you ought to
understand them and learn them instantly. Some people take years to learn this stuff. So why don't
you take hours or even days.
Stop here. Today's practice did not even require you to pick up your bass. Reread today's info many
times and try to relate all the definitions to each other. If you want to play your bass today, go over
the info in day 1.
End of day 2.

5
Day 3.
The distance between the notes, C, and, G, is an interval and the distance between the notes, C, and,
C#, is also an interval. Play each of these sets of notes in at least three different places on your fret
board. The first interval is more useful than the second for bass playing. This lesson covers the most
useful intervals for bass playing.
Definition: fret board: the top of the neck of the bass over which the strings lie.
Memorize this definition: a half-step is the distance between successive notes (in our western
scales), for example, between the notes C and C# is one half-step. Between the notes E and F is one
half-step. Play each of these sets of notes in at least three different locations on your fret board.
There is no E# or Fb.
Of course, a whole-step is twice that distance: two half-steps. For example, C to D and E to F#. Play
each of these sets of notes in at least three different locations on the fret board.
Definition: key: a musical structure comprising notes which are said to be related in some ways.
The key of a song can usually (but not always) be labeled by its basic root note, the keynote, the 1st
note or 1st position in the scale. It is called the tonic.
Definition: tonic: the keynote of any scale, the first degree of any key.
A scale that we use very often is called 'the major scale.' The second most often used scale is 'the
minor scale.'
Starting from the note, C, the major scale in the key of C is: C, D, E, F, G, - wraparound - A, B,
and C ('octave') simply because it was stated so a thousand years ago in the centuries after the dark
ages ended when western musical minds were tossing around ideas about how music should evolve.
I guess that these decisions were made based on ideas or theories of how to divide up the range of
musical sounds available to them and what sounded good to their ears at the time. From these
ideas and decisions came the basis for western music which has been in effect up until this time.
Everybody uses it from Beethoven to the Beatles to Beck to _________________ (fill in your
favorite musician).
Note: I will name the fingers on your fretting hand from one to four, one being your index finger,
two the middle finger, three the ring finger and four the pinky.
Play this scale, the C major scale, on your bass using this fingering: C-middle finger on C note, A
string, 3rd fret; D- pinky on D note, A string, 5th fret; E- first finger on E note, D string, 2nd fret; F-
middle finger on F note, D string, 3rd fret; G- pinky on G note, D string, 5th fret; A- first finger on
A note, G string, 2nd fret; B- ring finger on B note, G string, 4th fret; C- pinky on C note, G string,
5th fret. Then play it backwards starting with your pinky on the last note you played, the (octave) C
note. Do this fifty times.., just kidding! Do it a few times and come back to it later.
The following chart is a faster format in which to present notes, strings, frets and fingers than the
preceding paragraph.

6
C major scale:
Position
1st 2nd 3rd 4th 5th 6th 7th 8th
Finger 2 4 1 2 4 1 3 4
Note C D E F G A B C
String A A D D D G G G
Fret 3 5 2 3 5 2 4 5
Another way to present this information is by using 'tablature' or 'Tab.' It's a simple system of
depicting the strings and frets. Tab has found a HUGE following among musicians of all kinds.
There are Tab web sites galore! Places where you can find all sorts of music, especially Rock,
presented in Tab. Tab is simply a picture of the strings and the frets (behind which) the notes are
fingered and by graphic implication what notes are to be played. The frets are written sequentially
from left to right, as they would be played. All sorts of fingering techniques can also be indicated.
Tab is pretty well defined, uses mostly standardized symbols and yet also has some variability,
some leeway in the symbols that can be used. Unusual symbols or characters are usually stated and
defined just prior to any Tab presentation. In the Appendix, there's a listing of several web sites
which offer excellent, detailed explanations of what Tab is.
Tab diagrams do not specify what fretting fingers to use so I've used the fretting finger numbering
from the above C major scale chart in this Tab diagram by writing them above each corresponding
fret written on the string lines. Since I've mentioned that any nonstandard symbols or characters can
be used as long as they are stated and defined beforehand, I'm putting them into this Tab diagram in
order to keep the connection between the below Tab chart and the fingering chart above more clear
in your mind.
Here's a simple example of the C major scale in Tab:
Tab Specification
Fretting fingers of fretting hand numbered 1 for index finger; 2 for middle finger; 3 for ring finger;
4 for pinky.
2 4 1 2 4 1 3 4 fretting fingers
G ------------------------2---4---5---
D ------------2---3---5---------------
A ----3---5---------------------------
E ------------------------------------
You could also write in the actual notes in the Tab specification, although they aren't needed
because the positioning of the fret number on one of the strings specifies what note is to be played:
Tab Specification
The actual notes are the first row of letters.
Fretting fingers of fretting hand numbered 1, index finger; 2, middle finger; 3, ring finger; 4, pinky.

7
C D E F G A B C actual notes
2 4 1 2 4 1 3 4 fretting fingers
G ------------------------2---4---5---
D ------------2---3---5---------------
A ----3---5---------------------------
E ------------------------------------
It might be fun to write a few Tab diagrams yourself by translating the charts that I present on the
following pages using the above example. It's easy to become proficient with Tab and it can be
handy to know if you want to quickly learn bass parts from other musicians' works without learning
how to read and write standard music notation.
Starting from the note, E, the major scale in the key of E is E, F#, G#, A, B, C#, Eb, E ('octave').
Play this scale using the same fingering as with the C major scale, above, but start on the note, E,
four half-steps higher on the A string, 7th fret. Play it backwards.
E major scale:
Position
1st 2nd 3rd 4th 5th 6th 7th 8th
Finger 2 4 1 2 4 1 3 4
Note E F# G# A B C# D# E
String A A D D D G G G
Fret 7 9 6 7 9 6 8 9
Just for kicks and to expose you to the use of open strings ( which you really ought not get into the
habit of using simply because you can't control an open string), play the E major scale from the
lowest note, E, on the open E string going upwards using the following fingerings: E- no finger on
E note, open E string, zero fret (the nut, which the strings rest on); F#- first finger on F# note, E
string, 2nd fret; G#- third finger on G# note, E string, 4th fret; A- no finger on A note, open A
string, zero fret; B- first finger on B note, A string, 2nd fret; C#- third finger on C# note, A string,
4th fret; Eb- first finger on Eb note, D string, 1st fret; E- 2nd finger on E (octave) note, D string,
2nd fret. Play it backwards.
E major scale, open strings:
Position
1st 2nd 3rd 4th 5th 6th 7th 8th
Finger*
O 1 3 O 1 3 1 2
Note E F# G# A B C# D# E
String E E E A A A D D
Fret 0 2 4 0 2 4 1 2
*O means play the string open

8
In fact as one of this manual's general rules always play every exercise both forwards and
backwards all the time.
Try the same E major scale but now instead of using your first and third fingers to fret the fretted
notes in the scale, use your second and fourth (pinky) fingers. What's most comfortable? Probably
using the second and fourth fingers because, as you've seen, when you got to the Eb and E (octave)
notes you were able to very naturally use your first and second fingers on those notes without
having to move your entire hand and wrist down a half step to fret them. This points towards a
general rule of bass playing ( all rules have exceptions) that you use the fingers on the frets in ways
that enable you to reach all the notes that you will want to play with the least amount of vertical
movement of the fretting hand on the fret board. Lateral movement of all sorts is okay, good !
That's why you have multiple strings. Reread the general rule, three sentences ago.
E major scale different fingering:
Position
1st 2nd 3rd 4th 5th 6th 7th 8th
Finger*
O 2 4 O 2 4 1 2
Note E F# G# A B C# D# E
String E E E A A A D D
Fret 0 2 4 0 2 4 1 2
*O means play the string open
End of day 3.

9
Day 4.
Comparing these two major scales, C major and E major:
Note C D E F G A B C
Position
1st 2nd 3rd 4th 5th 6th 7th 8th
Note E F# G# A B C# D# E
What do you notice about them with regard to intervals and half steps ?
Play the notes in each scale sequentially starting on the lowest C note, 3rd fret, A string and for the
E major scale, starting on the E note, 7th fret, A string.
Count the half-steps between the notes. You'll see that there are:
C major scale E major scale
2 half-steps between the notes
C and D
E and F#
2 half-steps between the notes
D and E
F# and G#
1 half-step between the notes
E and F
G# and A
2 half-steps between the notes
F and G
A and B
2 half-steps between the notes
G and A
B and C#
2 half-steps between the notes
A and B
C# and D#
1 half-step between the notes
B and C
D# and E
12 half-steps in total.
The intervals and half-steps in both scales are the same.
These distances or numbers of half-steps remain the same for all major scales. This is an important
idea because it is what enables the bass player to be able to easily play in any key (transpose)
merely by moving his or her basic fingering position up or down the fret board (the neck of the
bass), just starting the same patterns of fingering on a different fret!
Definition: transpose: to change to another key.
Play these scales again. Try to play other scales using the same intervals and fingering patterns.
Just start on different notes.
End of day 4.

10
Day 5.
You may wonder at this point where this is going. Bear with me for a little longer while I make
statements about intervals and half-steps in one other very important scale: the minor scale.
Similarly, half-steps can be counted between the notes of a minor scale and those spaces or
distances will be the same for all minor scales in all other keys. Please understand the POWER of
this idea. You learn one concept and consequently you then know many others.
Note the underlined word, 'Positions', below. This idea of 'position' is very important and ought to
be understood very clearly.
Definition: position: a unique placement in a structure or sequence. A place occupied (by a note in a
scale). The positions in a scale are numbered consecutively 1 through 8.
Here are two often used minor scales:
A (natural) minor:
Position
1st 2nd 3rd 4th 5th 6th 7th 8th
Note A B C D E F G A
E (natural) minor:
Position
1st 2nd 3rd 4th 5th 6th 7th 8th
Note E F# G A B C D E
Count the half-steps between the notes. You'll see a difference in the numbers of half-steps
between some of the positions ( 1st through 8th ) in the major and minor scales. This can be
summed up by using the major scale as a basic reference point and defining the minor scale in
terms of the major or simply saying that we get the natural minor scale from a major scale by
flatting the third note, flatting the sixth note and flatting the seventh note of the major scale.
This is an important concept! It is the concept that enables you to create all sorts of other scales and
modes (definition: mode: a type of scale). You don't have to memorize this but just know about it
because soon I'll discuss other scales and modes and you'll already have some knowledge of how
they're constructed.
Play the E (natural) minor and A (natural) minor scales using the following fingerings:
E (natural) m
E
first finger on E note
A string
7th fret
F#
third finger on F# note
A string
9th fret
G
fourth (pinky) finger on G note
A string
l0th fret
A
first finger on A note
D string
7th fret
B
third finger on B note
D string
9th fret
C
fourth finger (pinky) on C note
D string
l0th fret
D
first finger on D note
G string
7th fret
E
third finger on E note (octave)
G string
9th fret

11
Going backwards,
E
third finger on E note (octave)
G string
9th fret
D
first finger on D note
G string
7th fret
C
fourth finger (pinky) on C note
D string
l0th fret
B
third finger on B note
D string
9th fret
A
first finger on A note
D string
7th fret
G
fourth (pinky) finger on G note
A string
l0th fret
F#
third finger on F# note
A string
9th fret
E
first finger on E note
A string
7th fret
E (natural) minor scale:
Position
1st 2nd 3rd 4th 5th 6th 7th 8th
Finger 1 3 4 1 3 4 1 3
Note E F# G A B C D E
String A A A D D D G G
Fret 7 9 10 7 8 10 7 9
A (natural) minor scale:
Position
1st 2nd 3rd 4th 5th 6th 7th 8th
Finger 1 3 4 1 3 4 1 3
Note A B C D E F G A
String E E E A A A D D
Fret 5 7 8 5 7 8 5 7
Do this: contrast the fingering of this E natural minor scale with the fingering of the E major scale
(four pages back). Play both (the E natural minor scale and the E major scale) several times to get
the feel for the differences between the different fingers used for the different notes or the different
positions on the fret board. Both scales start on the same note but their fingering patterns are a little
different. These two basic patterns will be ones that you use over and over again.
A (natural) minor - use the same fingering pattern as described above for the E (natural) m scale,
just start the pattern on the A note, E string, 5th fret. Play a G nat m scale. An F nat m scale. Ah! A
question arises. Where should I start? On the bass, as in life, the word 'should' always brings with it
certain expectations. My answer is you 'should' start the scale wherever you most would like to play
it. I would make my decision dependent on how each scale would sound in context with other
musicians. Since you're probably not playing with other musicians right now - play it starting off on
both F notes, 1st fret, E string and 8th fret, A string.
These fingerings are good examples of 'positional' fingering patterns which you'll learn more about
several pages in the future. Try them. They'll take you away from using open strings and develop a
little extra strength in your wrist and fingers.
Definition: positional: placed or set in place or set in a place.

12
Note: we must make a distinction between the two words, 'position' and 'positional'. The word
'position' is used to label (with a number) a unique placement in a structure or a sequence or to label
a unique place occupied (by a note in a scale). The word 'positional' simply means placed, set in
place or in a place as is a sequence of notes that is played in the same way regardless of where on
the fret board the sequence is played.
Position.
Positional.
End of day 5.
13
Day 6.
Play other natural minor scales and some major scales. Just start on different notes. Move all over
the fret board as you begin each scale on a new note. Name the scale in your mind as you play. This
is a good basic warm up.
Note: often the 6th position note in the major scale is not flatted in some minor scales - that is,
while playing along with other musicians' minor chords which do not flat the major 6th.
Play a bunch of minor scales with the unflatted 6th in them. Try to discover a new, comfortable,
fingering sequence.
Different minor scale types and their difference(s):
Positions
1st 2nd 3rd 4th 5th 6th 7th 8th
Natural
minor
1 2 b3 4 5 b6 b7 8
Harmonic
Minor 1 2 b3 4 5 b6 7 8
Melodic
minor
1 2 b3 4 5 6 7 8
The minor used in
much Rock music.
1 2 b3 4 5 6 b7 8
These scales seem deceptively simple but, please, fiddle around with them for a while. Even though
they vary by only a note or two these particular tiny variations are important. Play each of these
scales one after another as fast as you can right now and LISTEN. Hear how different they sound?
This is good ear training.
Definition: variation: a transformation of a melody by melodic, harmonic, contrapuntal and/or
rhythmic changes
Definition: contrapuntal: counterpoint - point against point, that is, note against note. Adding one or
more parts to a given part. The art of combining melodies.
These two scales, the Major and the Minor, are the most important for you to understand at this
time. They are the building blocks of 95 to 98 percent of all the rock music that you will play.
Other alternative fingering patterns which are good ones to know are:
A major scale:
Position
1st 2nd 3rd 4th 5th 6th 7th 8th
Finger 4 1 3 4 1 3 1 2
Note A B C# D E F#
G# A
String E A A A D D G G
Fret 5 2 4 5 2 4 1 2

14
A (natural) minor scale:
Position
1st 2nd 3rd 4th 5th 6th 7th 8th
Finger 4 1 2 4 1 2 4 1
Note A B C D E F G A
String E A A A D D D G
Fret 5 2 3 5 2 3 5 2
I don't give you a million scales to practice because that can get boring. I try to show you some
basic fingering patterns and also explain concepts. From these you may derive choices of notes to
play.
End of day 6.
15
Day 7.
Pentatonic Scales
I guess this is as good a place as any to mention the Pentatonic scale . Penta meaning five. Tonic
meaning tones. Five tones or notes. A five note scale.
There are many pentatonic scales possible but the ones most often used in Rock are the major
pentatonic and the minor pentatonic.
The major pentatonic is comprised of the 1st, 2nd, 3rd, 5th and 6th positions of the major scale.
The minor pentatonic is comprised of the 1st, b3rd, 4th, 5th and b7th positions (of the major scale,
since, as I mentioned six pages ago, we are using the major scale as a basic reference point and
defining the minor (pentatonic) scale in terms of the major). (See the minor used in much Rock
music, two pages ago).
They are very often chosen on a practical, improve-the-fingering basis because they eliminate the
half-step intervals of their respective full scales. Makes it easier to work the strings and the fret
board.
Also, harmonically, each of the pentatonic notes is strongly individualistic and has little tendency to
resolve to another note, ie.: the positions that are eliminated, in the major pentatonic, the 4th and
7th, and in the minor pentatonic, the 2nd and the b6th of the natural and harmonic minor scales,
have strong 'pull' toward the nearest note. They create a desire to hear another note, to feel a
resolution (of vague tension).
Definition: resolve: to bring a note back into the sound/feel of another note or group of notes.
Why don't you play a few pentatonics using more or less the fingering patterns that you've already
learned, that is, the fingering patterns minus a few fingers (or positions).
The major pentatonic can be used as a shortened version of a major scale (and is therefore very
useful for bass playing since you would rarely want to play all the notes in a scale) and the minor
pentatonic can similarly serve to replace any of the different minor scales. This capability to replace
any of the different minor scales is very interesting: by using this single pentatonic scale you can
play within any of the minor scales that other musicians are using. This single five note scale is
incredibly useful!
One fascinating use of pentatonics is the mixing of (same root or tonic) major and minor
pentatonic scales! This is (usually) done while playing within a dominant 7th scheme (more on 7th
chords in about fifteen or sixteen pages). By switching back and forth between a major and a minor
pentatonic - while playing in the same area of the neck - you can create highly unusual, unique,
improvised note sequences which enhance the spirit of rock music! This takes a lot of
experimentation but is well worth the effort! Do try this.
There are a lot of things you can do with pentatonic scales. Like using them as substitutes for other
scales, chord-based bass note sequences and modes. However, many of these harmonic ideas lie
well beyond the scope of this beginning bass booklet (nice alliteration!). You can delve into them
by reading more advanced music theory sometime in the future.

16
The above info is enough basic knowledge about pentatonic scales for the moment. As you can
probably feel, pentatonics are an area that millions of Rock musicians are very fond of. This is
definitely one topic you would do well to come back to after finishing this booklet. Make a note of
this somewhere.
End of day 7.

17
Day 8.
Lesson III - Chord basics and connecting notes.
So, again, where is this leading ? To chords. Why chords ? Because the rest of the music structures
that you'll be playing within, played by guitar players and piano players, even horn players, but not
drummers, will be made up of chords. Singers will be singing notes to fit into the chord structures.
Lead players (guitar, harmonica, flute players...) will be playing notes to fit into the chord
structures. All this stuff in previous pages leads to the following ideas:
Definition: chord: any group of three or more notes (pitches) sounded together. Chords are groups
of three or more pitches.
Three notes, exactly, sounded together, are triads (also, chords); triads are chords. But not all chords
are triads. Triad means three. Many chords have four or five notes or positions in them.
Two note 'chords' are not defined as chords; they are called diads and sometimes, double stops.
A Chord, as defined above, is created by grouping together three (or more) notes played at about the
same time. But, what notes?
Well, basic major chords are made up of the 1st position and the 3rd position and the 5th position
notes in the scale. This is the definition of a major chord.
What notes are in a C major chord? C, E and G. Play them on your bass one after the other in
sequence - a 'chord-based bass note sequence'. (I use this rather long but very explicit term to
indicate that you are playing separate notes, not playing all the notes together as a guitar player
might when playing a chord. This term also means that you will play the notes which, by definition
of the specific chord mentioned, make up that chord.) Play them, the notes C, E and G, in two or
more locations. Starting with the C note on the E string, 8th fret and with the C note on the A string,
3rd fret. How about the C note on the D string, l0th fret?
What notes are they in an E major chord? E, G# or Ab and B. Play them on your bass as chord-
based bass note sequences in several locations. Pick a few other chords, maybe D major and G
major and Bb major. Name the positions of each scale in your mind as you play them, ie.: 1st, 3rd,
5th.
Basic minor chords are made up of the 1st position and the flatted 3rd position and the 5th position
notes of the major scale or, more simply put, the 1st, 3rd (which is the flatted 3rd of the major scale)
and 5th positions of the minor scale. More on formulas which describe how to form chords several
pages from now.
What notes are in an A minor chord? A, C and E. 1st, b3rd, 5th. Play them on your bass as a chord-
based bass note sequence. Name them in your mind.
What notes are in a C# minor chord? C#, E and G# or Ab. Play them on your bass as a chord-based
bass note sequence. Find a couple of different locations. Pick a few other minor chords, maybe F
minor and Bb minor and D minor. 1st, b3rd, 5th.
Note: when we call a chord merely by a letter, ie., 'C,' it is a major chord. We are just dropping
mention that it's a major.
18
How does this benefit you ? When someone plays a chord or says that we're in the key of . . .
whatever, you now know the basics of what notes to select on your bass in order to play a bass part
(which is really the whole bottom end (low frequencies) of the band's sound!). You won't be
floundering. If someone plays a C chord, you'll know that the notes, C, E and G (1st position, 3rd
position and 5th position) are the basic notes that you can use ( in different combinations and
sequences ) to play along with the C chord. When the C chord is changed to an F chord, you'll
know that to play along with the F chord you just have to find an F note on your bass and play the
1st, 3rd and 5th positions of the F scale, and follow the chord changes as they happen. For
example if the chord changes to an Em ( E minor ) you'll just play the 1st, 3rd and 5th positions of
the E minor scale, (1st, b3rd, 5th of the E major scale), etc., etc., for all other chords. Often the 1st,
5th and the octave will be the most important positions (notes) for you to play. As you play by
following the chord changes you'll note that sometimes the same notes appear in different chords.
This can make your note decisions easier and we will cover this idea in more depth later.
Stop here and go back over the previous information. Play it all again, too.
End of day 8.
19
Day 9.
Connecting Notes
You'll sometimes use 'connecting notes' to get from one chord-based bass note sequence to another.
'Connecting notes' are just notes which lead to the next bass note sequence or chord structure and
may (or may not) be in the scale. Much of the time the notes that are in the scale that you're using
are the easiest to use as connecting notes. You'll pick connecting notes up as you go along and learn
to feel where they might be inserted in the sequences of notes you end up playing. They add flair
and style to your playing and take you a little beyond the basics.
Connecting notes are:
(A) notes which may be in the scale being used but do not appear in the particular chord structures
or chords being played or
(B) notes which are not in the scale being used and, as such, do not appear to have any relation to
the music structure.
However, in the sense that connecting notes are useful for bridging different chord-based bass note
sequences or even keys, they always serve a relational function.
Reread (A) and (B) and the last sentence until you really understand them.
Another term that you may hear which has the same meaning as 'connecting notes' is 'passing tones.'
Some people can even play a (seemingly) haphazard mixture of notes in the scale and notes out of
the scale, only resolving (see the next definition) the overall sound or feeling of the notes with the
chords being played (the music structure) at the last second or the last couple of notes in the
melodic passage (or the melodic-rhythmic passage in the case of most bass playing). This is not
explicitly related to the topic of connecting notes. Theoretically it is more advanced and
complicated and is for your consideration a year from now.
Definition: resolving: bringing the note(s) back into the sound/feel, the harmony, that you want at
the end of the expression of a chord or a series of chords. Usually, 'concord' as contrasted with
'discord.' It's defined as the concord which follows a discord.
Definition: concord: consonance - those parts which harmonize well with each other.
Definition: discord: dissonance - inharmonious, discordant.
Definition: harmony: the doctrine (theory) of chords and their progression.
Definition: harmonize: to make concordant, to sound well together as defined by our ears and in the
thousand year old tradition of western music (which our ears have become through a lifetime of
exposure).
These are a good examples of how you can further and sometimes more deeply understand musical
ideas with the aid of a dictionary of musical terms (see the Appendix - Carl Fischer publications).
How do you use connecting notes? Just about any way that sounds okay and not dissonant, unless
dissonance is what you want at that moment. Just use them to make the bass line(s) flow smoothly

20
(and of course in the rhythm) from one place to another (unless smoothness is not desired - then
make the lack of smoothness repetitive over more or less equal numbers of measures).
Definition: rhythm: musical cadence.
Definition: cadence: the repetitious rise and fall of sound. The repetitious emphasis of one sound
among several.
Definition: measure: one of the groups of tones (notes) or accents included between any two
primary accents or beats. Between two sequential short vertical lines crossing the five parallel lines
(the staff) on which notes are written.
Definition: staff: the five lines, with the spaces between them, upon which the notes are written.
End of day 9.

21
Day 10.
Chromatic Scales
'Chromatic' scales: I mention this in tandem with ideas about connecting notes because 'chromatic'
scales can be used to fill in the empty spaces between scales, within scales or between chord-based
sequences of bass notes by just helping you to get around easier, to be 'connecting' one sequence of
notes with another. They're like connecting notes in a sense but, by definition, they are scales and
therefore have a defined structure or sequence in contrast with connecting notes which do not.
Definition: a 'Chromatic' scale is all the twelve notes between octaves, usually played 1st, 3rd, 4th,
#4th, 5th, 6th, b7th, 7th, 8th, leaving out the b2nd, 2nd, b3rd and b6th but not always. Actually you
can start almost anywhere in the twelve half-steps, depending on where in the music you're placing
the chromatic section and what notes are nearby.
Play two or three fully chromatic scales. Try some with the b2nd, 2nd, b3rd and b6th left out. You'll
have to do a little sliding with one of your fretting fingers (most likely your index finger) here and
there.
Try using a chromatic segment (two or three chromatic notes) to connect sequences of chord-based
bass notes. C, E, G - F# - F - E, G, B. F# and F are the chromatic connecting notes between the C
and Em chord-based bass note sequences.
That last sentence was a tough one! Reread it slowly and play around on your bass and concoct a
few more of these chromatically connected chord-based bass note patterns. For example: play some
other sequences of notes which are notes in chords and then connect them with two or three
chromatic notes as you go from one chord structure to the other. Then from the second chord
structure back to the first. Not all chord-based bass note sequences connect easily using chromatic
connecting notes. Find some that do.
Try three and four chord-based bass note sequences and some chromatic connecting notes. Maybe
from A natural minor to C# natural minor to F back to A nat m with some chromatic connecting
notes between each. Choose some others on your own. And try using minors with the unflatted 6th
positions.
Chromatic scales are very cool sounding. Segments of chromatic scales are used a lot in Jazz and
Funk.
Definitely stop here. Go over the previous material before proceeding.
Now, review the information on Counting which is on page nine or ten in the Introductory Pages.
End of day 10.

22
Day 11.
Syncopation
Often chromatic notes are 'syncopated' or played on the upbeat, jumping a half-beat ahead of the
count by suddenly switching the emphasis and timing of your notes from the downbeats to the
upbeats. Play some of your notes on the upbeats or between the downbeats using the ideas in the
paragraphs above about 'chromatic scales.' This is a little difficult to do at first. Work at it
repeatedly until you can do it fairly fluidly. If you need to, take an extra day. This skill will add
excitement to your playing! It's a strong feature of Funk and R & B bass playing but can be used in
any genre. For example, try playing these segments of a chromatic scale: C, E, F, F#, G, A, Bb, B,
every note on the downbeat. Then repeat, starting with the C on the downbeat but play the rest of
the notes on upbeats or between the downbeats. Then alternate them. This exercise will help you get
the hang of playing on upbeats.
Definition: syncopation: a shifting of the rhythmic accent (the emphasized beat) to the unaccented
part of the measure and sustaining the note into the accented part. In Rock bass, playing the note on
the upbeat rather than the downbeat. This causes the beat to sound 'quicker' and adds a little extra
excitement!
Definition: downbeat: the emphasized beat or beats in a repetitive sequence of beats. Beat = the
count. See 'Counting' on the third or fourth page.
Definition: upbeat: the unemphasized beat or beats in a repetitive sequence of beats. The half-beats
between the beats that you count 1, 2, 3, 4. 1, 2, 3, 4. 1, 2, 3, 4. ie.: 1, ^, 2, ^, 3, ^, 4, ^.
End of day 11.

23
Day 12.
Try playing a few chromatic scale segments in several keys, say, C and Bb and A and Eb. Play the
positions 1, 3, 4, b5, 5, 6, b7, 7. Then syncopate the 3rd to the 7th position notes, 3, 4, b5, 5, 6, b7,
7, and repeat. Kind of a warm up.
Then switch to playing notes (in those keys) that are chord-based. Say, first the notes in each chord
in the sequence of this chord progression in the key of C - C, Em, Dm and G (use a few connecting
notes). For example, play the notes C, E, G (the 1st, 3rd and 5th positions in a C major chord), then
the notes E, G and B (the 1st, minor 3rd and 5th positions in an Em chord), then the notes D, F and
A (the 1st , minor 3rd and 5th positions in a Dm chord) and then the notes G, B and D (the 1st , 3rd
and 5th positions in a G major chord). After you've played these four sets of three notes (this would
be an example of 'playing through the chord changes') play them again and this time add chromatic
connecting notes between the 5th position of each chord-based three bass note sequence and the 1st
position of the next three note sequence. For example, from the note G, the 5th position of the C
chord, play F# to F to E, the 1st position of the Em chord. And C to C# to D, connecting the 5th
position of the Em chord (the note, B) to the 1st position of the Dm chord, the note, D. And connect
the 5th position of the Dm chord, the note, A, to the 1st position of the G major chord by playing
the note, G#. Or play the two notes, A and G#, repeating the note, A, in keeping with our
convention of playing two chromatic connecting notes between the chord-based bass note
sequences. And then, play two chromatic connecting notes (what notes would they be?) which
lead from the 5th position of the G chord to the 1st position of the C chord, thus completing one
cycle or one chord progression.
This is a good example of what I mean by using connecting notes as well as using chromatic notes.
Try these chords in the key of Bb - Bb, Dm, Cm and F. Key of A - A, C#m, Bm and E. Key of Eb -
Eb, Gm, Fm and Bb.
Instead of dealing with notes' names you could also understand this by thinking in terms of
positions.
If you really want to go nuts, you could try syncopating the chromatic notes. Of course to do this
would require you to set up some kind of rhythm. See the earlier section on 'Counting.' Go crazy:
syncopate any of the notes or short segments (two or three notes at a time) of the total number of
notes, mixing up groups of downbeat notes and upbeat notes.
Another mix up: mix up or alternate between the playing of chromatic scales and the playing of
chord-based bass note sequences of each of the following: key of Bb - the tonic notes Bb, D, C and
F (for the chromatic scales) and then the chord-based bass note sequences for the chords Bb, Dm,
Cm and F; key of A - the tonic notes A, C, B, and E (for the chromatic scales) and then the chord-
based bass note sequences for the chords A, C#m, Bm and E; key of Eb - E, G, F and Bb and then
Eb, Gm, Fm and Bb; key of C - C, E, D and G and then C, Em, Dm, G. Then add some chromatic
connecting notes to those chord-based bass note sequences. What a trip ! If you can learn to do this
you're doing great! Why not go off the d~e~e~p~e~n~d and throw in some syncopation!!!
Definition: progression: a sequence of a number of related chords in a key. How are they related?
By harmonic structure. That is, each of the chords has concordant (what's the definition of
'concord'?) notes in it that are common to some of the other chords in the progression - a non-
theoretical explanation if I've ever heard one. But simple.
Definition: key: a label for a system on which the notes of a scale are built up, each bearing a
definite relation (of half-steps) to the lowest note or tonic.

24
Definition: key: a musical structure comprising notes which are said to be related in some ways.
The key of a song can usually (but not always) be labeled by its basic root note, the keynote, the 1st
note or 1st position in the scale. It is called the tonic.
Definition: tonic: the keynote of any scale, the first degree of any key.
Definition: scale: a sequence of notes arranged in order of pitch.
Definition: pitch: the highness or lowness of a sound.
Try to figure out similar material in the keys of, say, D and F#. I'm asking a little more of you here.
I'm asking that you move your fingering patterns around to other places on the fret board. I'm also
asking you to move groups of fingerings around to other places on the fret board. I'm asking you to
transpose. This might be difficult the first time but persevere. It'll expand your musical mind.
End of day 12.
25
Day 13.
Lesson IV - Inversions - very useful concept, and Numbers.
Inversions
Definition: inversion: a change of position in respect to intervals (numbers of half-steps), as arises
from playing upper notes lower or lower notes higher. Better reread this one slowly and multiple
times. Mull it over.
Instead of any music theory about inversions I'd just like to give an example and some numbers.
Play separately on your bass, for example, the three notes of a D chord: D, F# and A. 1st position,
3rd position and 5th position. Play the D note with your middle finger on the fifth fret on the A
string. Play the F# note with your first finger on the fourth fret on the D string. And play the A note
with your pinky on the seventh fret of the D string. This is an extremely common fingering
pattern which may easily be moved higher, lower or across the fret board. This is most desirable
because you don't have to keep searching your mind for the correct notes to play in any given
situation, you can just rely on fingering patterns which you've already learned and which are easily
transposable all over the fingerboard. It's possible simply because you're not using any open strings,
which, in general, is a good idea.
So, you've played the D, F# and A notes as above, the 1st, 3rd and 5th positions of the D major
scale. Play them a half dozen times using the pattern above. Of course, forwards and backwards.
Now, instead of playing the F# and A notes where you've just played them, in your next sequence
of three notes, play the D as above but now play the F# note with your first finger on the second fret
of the E string and then play the note, A, with your pinky finger on the fifth fret of the E string.
Repeat this pattern a few times switching the D note fingering to your pinky. This second pattern is,
for bass players, an 'inversion' of the first pattern. You've inverted both notes, F# and A, 3rd and
5th positions, having played "upper notes lower," see definition, last page.
Play the two patterns back to back. Play this a half-dozen times. Play the variation D, F#, A, F#.
Move these 'positional fingerings' to several other locations on your fret board.
Note: always be searching for fingerings which enable you to group all your notes in small areas.
Definition: variation: a transformation of a melody by melodic, harmonic, contrapuntal and/or
rhythmic changes
Definition: contrapuntal: counterpoint - point against point, that is, note against note. Adding one or
more parts to a given part. The art of combining melodies.
Numbers
In the first pattern, the notes D, F# and A are the 1st, the 3rd and the 5th positions (of the Dmaj
scale). That is, usually we visualize the positions as going upwards to higher notes.
In an 'inversion,' as bass players, we often (but not always) visualize the notes as lower than the 1st
position or tonic note.

26
In going upwards, we count positions' numbers: 1 is D, 2 is E (in the D major scale), 3 is F#, 4 is G
and 5 is A, and so on . . .
In going downwards, inversions, we count down: 1 is D or the tonic, 2 (downwards) is C#
(normally the major 7th position), 3 (downwards) is B (normally the 6th), 4 (down) is A (normally
the 5th), 5 (down) is G (normally the 4th) and 6 (down) is F# (normally the 3rd, going upwards).
Note: normally counted positions traveling upwards plus inversion counted positions traveling
downwards (or visa versa) add up to 9. A third up (F#) is a sixth down (also F# but an octave
lower). To reach the inverted A note, how many down must you count since the usual A note, the
5th position, up, is counted up as 5 ? Answer: 4.
Repeat playing this in the key of E, two frets higher. Try F. Try C, lower.
How is this (inversions) useful? Well, inversions extend your range and choices of notes that you
can play and once you get the hang of regular upward moving fingering patterns and then
inversions, you won't bother counting any more, you'll just know the 'positional fingerings'. Very
important idea!!
Also, inversions help you to play lower notes. It's your job as a bassist to (generally) play the
lowest notes possible, to be the support of the music in the ranges above the bass. The bass holds up
the band.
End of day 13.
27
Day 14.
Positional Fingering
We must make a distinction between the musical use of the words, 'position' and 'positional'. The
word, 'position', means to label with a number a unique placement in a structure or a sequence, a
place occupied (by a note in a scale)' and 'positional,' means 'placed, set in place or in a place' as
with a sequence of notes that are played in the same way regardless of where on the fret board they
are played. By this latter term, 'positional,' I mean 'positional fingering'.
Definition: positional fingering: a pattern of notes which can be moved as a group anywhere on the
neck without changing its geometric pattern.
Definition: positional fingering: a pattern of notes which can be moved as a group anywhere on the
neck without changing its geometric pattern.
Repeat after me...
Positional fingering is what bass playing is all about. I cannot emphasize this enough. Positional
fingering is what bass playing is all about.
Definition: positional fingerings: patterns of notes which can be moved as a group anywhere on the
neck without changing their geometric pattern.
Inversions are just other forms of positional fingering. You'll notice that almost all positionally
fingered patterns can be played within a fret 'box' of four to six frets and usually on only three
strings at a time within that box. Of course once you reach this point, it'll become clear to you that
it's time to abandon using open strings for the most part.
Why don't you review the previous information now. Play around on your bass with these ideas and
fingering patterns.
There are some additional things: as you play with other people you'll begin to pick up different
rhythms (which end up being just basic differences in the timings of when you play the notes) and
styles. These are learned by feel. Or maybe, mechanically, by repetition.
Also, you will become infected by the Rock musician's eternal Quest for Tone! Tone in this
context is how a note sounds. It's produced by combinations of all the techniques that you pick up
by practicing as well as listening to songs as they're played on CDs or the radio, by trying
suggestions that are given to you by other players, by trying different effects which can be obtained
from both effects devices as well as by the manipulations of the strings by the fingers (of both) of
your hands as you play (see the techniques in the Appendix). Of course tone is also created by
turning the knobs on your amplifier. This is where you begin to improve your sounds and create
your own style(s).
I won't go any further into music theory or technique because this stuff is up to you - what you like
or dislike, who begins to influence you musically and what directions you want to go in. All that I
present in these basic lessons is designed to bring you to the point where you can know some basics
and actually know what you're doing while conversing with and playing with other musicians.
I might add that knowing this stuff will help you if you decide to switch instruments, too. All this
scale and chord stuff is used by everyone on all other musical instruments. Information that helps

28
you create a bass line, a sequence of bass notes, also helps you build chords on a guitar or
sequences of notes on a saxophone.
Good luck! Music is a tremendous pleasure and a lot of fun!
P.S. When playing notes in an upward or ascending direction, when you get to the 7th, play the
major 7th ( in major scales - in minor scales, of course, play the minor 7th) and when playing notes
in a downwards or descending direction, when you get to the 7th (which will be more quickly than
when playing in an upwards direction), play a minor 7th even when you are playing within a major
scale or chord - it just sounds better! Of course if you're playing within a minor chord framework,
you'll also use the minor 7th position note when playing in a descending direction.
End of day 14.
29
Day 15.
Lesson V - more on chords . . .
This information is a l i t t l e more advanced. While you're learning this next lesson please
continue practicing things like:
• Patterned positional fingering.
• Awareness of positions.
• Rhythms. Keep listening to the timings of bass notes in recorded music
• Rapid plucking and picking, called, definition: tremolo picking. Use at least the first two
fingers if plucking. Try alternating your thumb with your plucking fingers. Build up some
speed. Use down and up strokes if you're using a pick.
• Finger techniques like hammer-ons, bends, slides, pull-offs, muting, vibrato, staccato.
• In the Appendix in the back are definitions or descriptions of some guitar Fingering
Techniques. They are the same for bass.
• Listening to drummers, especially their kick drums.
Definition: staccato: detached, distinct, the notes are separated from each other by rests.
Definition: rests: a space between notes in which no sound is made.
More on chords. Why ? ? Why do you need to learn more about chords when a bass player doesn't
play chords? At least not in the sense that a guitar or organ or piano player plays chords, by striking
three or more notes simultaneously or very close to simultaneously.
Well, what do you do when the organ player or guitar player says she's playing a minor 9th chord?
Or a diminished chord? Or a major 7th? Or a 7th flat 5th? Or an 11th? Or (shock!) a 13th?
The answer is: so you'll be able to 1) know what she's talking about, 2) come up with some correct
(and exciting!) bass notes and 3) enjoy yourself even more by creating, and hearing with your own
ears, bass note sequences which blend best with the mid-range instruments' musical structures
(chords) and which emphasize certain sounds (tones, harmonics) that you might want to bring out or
heighten in the overall sound of the band. You can do that! With a bass! And by using one or
another of the techniques in the Appendix and by choosing which bass notes to play to emphasize
one feeling or another in the overall music structure you can create moods and emotion in the music
! You can be gross or be very subtle. Definition: nuance: a delicate degree or shade of difference
(from French or Latin, meaning - a cloud). Bass has a lot more going for it than just thumping along
with the drummer's kick drum (which is, of course, always a very good idea no matter how cool
your playing gets. This is a very important Rock basic, this coordinating with the drummer's kick
drum, one which you ought not ever forget).
Definition: nuance: a delicate degree or shade of difference (from French or Latin, meaning - a
cloud).
Definition: tone: a musical sound of definite pitch. In the Rock musician's eternal 'Quest for Tone' it
also means (loosely) the bass or treble sound, the texture or scratchiness or smoothness and
roundness of the note, the 'punchy-ness' . . . (all of the aural/sonic characteristics which make up the
'sound' of a note).
Definition: harmonics: partial tones or overtones which accompany a simple tone. They're produced
in conjunction with or at the same time as the simple or primary tone, the only one that you think

30
you're picking or plucking. They're produced at lower volumes than the simple or primary tone.
That's why you can't hear them at first, until your ears become more refined through experience.
So, if someone is playing, say, a C chord and changing to an F and a G, you have a pretty good idea
what to do, right?
Let's say that the guitar player says, "Let's put an A minor 9th in here." What do you do?
As you read below, play these notes on your bass.
Well, you know, the A (tonic) note can never be wrong. So you start with that. Then you know the
5th (E) sounds good most of the time so you throw that in. So far so good. Sounds good! But a little
simple.
So you question your knowledge base in your mind: let's see . . . it's a minor chord so I can use the
minor 3rd, too. So you know where the minor 3rd is because you know that you just flat the major
third. Now you've got three good notes!
But what else can you do? Well you now have the chance to learn from reading the info below that
1) any minor 9th chord has a minor 7th (a flatted major 7th) in it. So you think - the major 7th, a G#
(still talking about the A min 9th here) and flat it to the G note, maybe higher than the tonic note or
lower than the tonic (an inversion), a lower G note (two frets lower than the tonic).
But what's this 9th ??? Well, a 9th is the next whole-step beyond the octave, the 8th, in this case, the
B note, one whole-step above the octave A note. An inversion of that is the B note just two notes
(two half-steps) above the tonic.
Remember, in our major and minor scales? We had the 1st, 2nd, 3rd, 4th, 5th, 6th, 7th, and 8th or
octave ? Well now, we extend beyond that to include the 9th, l0th, 11th, 12th and 13th.
The 9th, as we saw above, is two half-steps or a whole-step above the octave. Its inversion is the
2nd. Play the 9th and 2nd positions in each scale, the A natural minor and A major. I mean play the
scales and add the 9th. When you play the 9th, immediately play the 2nd.
As for fingering, since you're using fingering patterns as you learned from previous pages to play
the scales, just expand the use of the 'box', the grouping of frettings within four or five frets
vertically, to include notes on the next highest string. If you're already using the highest string, then
move your tonic note, the 1st position, to the next lower string but higher up on the neck. Or try
using an inversion. Discover just where these new positions are relative to the pattern(s) you already
know.
The l0th (which is not really used in chord nomenclature very often because of the powerful
harmonics of the 3rd - the third overpowers the l0th so we don't usually add a l0th to a chord), the
l0th is four half-steps or two whole-steps above the octave (8 th). Its inversion is, of course, the 3rd.
You can see a pattern developing here.
The 11th is five half-steps above the octave and is the octave of the 4th. Play the scales and add the
9th and 11th. After playing the 9th play the 2nd and after playing the 11th play the 4th.
The 12th isn't used, again, as in the case of the 3rd and the l0th because of the power of and
powerful harmonics of the 5th. The 12th and 5th are inversions of each other.
The 13th is equivalent to the unflatted 6th but an octave higher. If you've come this far, you
probably have a firm grasp of where on the fret board, of what part of that 'box' pattern you learned

31
earlier, the octave of any note is. Play both scales and add the 9th, 11th and 13th and each of their
lower octaves, the 2nd, 4th and 6th. In the natural minor scale use a flatted 6th and a flatted 13th in
keeping with the definition of natural minor scales. In the major scale, the melodic minor scale and
our 'Rock minor' (back eighteen or twenty pages ago), use the unflatted 6th.
So, simplifying, here's a small chart:
• 9th - octave of the 2nd - These are also inversions of each other.
• 11th - octave of the 4th
• 13th - octave of the 6th
The above info is useful of course. It's also an example of how to play notes which go with the
extended chord structure(s) that the other musicians are using.
Here are some tab diagrams or charts for the 9th, 10th, 11th, 12th and 13th positions. I charted them
in a fingering pattern which is of a ‘box' type. The fretting fingers horizontally (across the
fingerboard) stay within 4 frets vertically except for the two highest positions, the 12th and 13th.
Since the 10th and 12th are rarely used except as connecting notes you only have to go out of the
box for one note, the 13th.
Tab specification
Key of G major
G major scale
2 4 1 2 4 1 3 4 1 3 4 4 4 fretting fingers
1 2 3 4 5 6 7 8 9 10 11 12 13 positions
G ------------------------------------2---4---5---7---9---
D ------------------------2---4---5-----------------------
A ------------2---3---5-----------------------------------
E ----3---5-----------------------------------------------
What are the names of each of these notes?
( OR )
2 4 1 2 4 1 3 4 4 1 2 4 4 fretting fingers
1 2 3 4 5 6 7 8 9 10 11 12 13 positions
G ----------------------------------------4---5---7---9---
7 to 9 – slide up with pinky
D ------------------------2---4---5---7-------------------
5 to 7 – slide up with pinky
A ------------2---3---5-----------------------------------
E ----3---5-----------------------------------------------
Please say the names of each of these notes as you play them. You could sing them, too, as you
play, an octave or two higher.

32
Tab specification
Key of A minor
A minor scale
1 3 4 1 3 4 1 3 3 4 1 3 4 fretting fingers
1 2 m3 4 5 m6 m7 8 9 m10 11 12 m13 positions
G --------------------------------------------7---9---10--
D ----------------------------5---7---9---10--------------
7 to 9 – slide up 3rd finger
A ----------------5---7---8-------------------------------
E ----5---7---8-------------------------------------------
What are the names of all of these notes?
Going downwards . . .
G ----10--9---7-------------------------------------------
D ----------------10--9---7---5---------------------------
7 to 5 – slide down 1st finger
A --------------------------------8---7---5---------------
E --------------------------------------------8---7---5---
Of course you could use lower notes (between the E note, open E string and the A note, 5th fret on
the E string for notes in A minor, E to G notes for G major) but, theoretically speaking, these are
‘inversions' which you'll learn about in a few more lessons beyond ‘Day 15'. Don't worry about the
lower notes for now. Right now, this is about the 9th, 10th, 11th, 12th and 13th positions which are
higher than the notes in the scale in the first octave.
If you haven't been learning the techniques in the ‘Techniques' section, it would be good to start
now because it's those techniques that can make you more expressive on the bass and help you to
project emotions. They're probably more than 50 % responsible for a player's ability to express
emotionally and individualistically. Maybe even more important than the fixed notes. Sounds silly?
You could play all wrong notes and by using various techniques make them the right notes and the
best sounds for the song! Of all the things that could be practiced every day, working a technique or
two into your everyday playing is the most important single thing that you can do.
End of day 15.
33
Day 16.
Chords and Chord Groups
Below is how you create major and minor chord-based bass note sequences.
These are notes that you have the option of playing. You can include them all or leave some out.
But for now play them all.
Major chord - basically play the 1st, 3rd, 5th and octave of the major scale along with any
connecting and/or chromatic notes you might want to use.
Minor chord - play the 1st, flatted 3rd (of the major scale), 5th and octave along with any
connecting and/or chromatic notes you might want to use.
Further on in this section is a list of how to create many other chords and, for the bass player, this is
also a list of the notes which can be selected (but don't have to be selected) when you're playing
the notes in chords and trying to influence the sound of a piece in one way or another. Options. But
for now, play them all so that the harmonies of the individual chords become familiar and you can
actually hear the chords in your mind even though you're playing separate notes.
From here on I will refer to the positions by number and omit the ths or rds or nds after the
numbers.
I advise you to spend a lot of time on this section, maybe five days, and play the notes of many
different chords using each of these ideas, below, which extend or alter the structures of chords. For
example, using a Bb major scale, Bb, C, D, Eb, F, G, A and Bb, first play, in rapid succession if you
can or as fast as you can go without making mistakes, the 1st, 3rd, 5th and octave, Bb, D, F, Bb
(octave), then backwards. Then play the major 7th succession of notes (see the chart beginning two
pages forward), then the major 6th succession of notes, then the major 9th succession of notes, then
the major 11th, major 13th, then the minor 6th, etc . . . etc . . .
Definition: extension: a note that adds more harmonic dimension to an existing chord. Constructed
by adding on a major or minor third beyond the existing chord's notes. ie.' 1, 3, 5, 7, 9, 11, 13. The
7th is a 3rd (four half-steps) beyond the 5th. The 9th is a minor 3rd (three half-steps) beyond the
7th. The 11th is a minor 3rd (three half-steps) beyond the 9th. The 13th is a 3rd (four half-steps)
beyond the 11th.
Definition: alteration: raising or lowering a note by a half-step. Most often used on the 5th and 9th
position notes but sometimes on higher numbered positions, too.
Today would be the day for you to go out to your nearest music store to buy some sheet music
of/from your favorite songs, singers or groups. Just one or two at first. You might also want to buy
the CD or cassette that has the song(s) on it.
Chord Groups
There are three basic groups of chords: major, minor and dominant 7th. Major chords are
characterized by having a 3rd; minor chords have a b3rd; dominant chords have a b7th, again, using
the major scale positions as basic reference points and defining the minor and dominant 7th scales
and chords in terms of the positions of the major. The dominant 7th group has many more chords
34
than either the major or minor groups because of the large number of extensions and alterations and
combinations of extensions and alterations available to the chords in the group.
There is a fourth group, the augmented and diminished group (augmented means 'added to' or
sharped ( # ) and diminished means 'subtracted from' or flatted ( b )) whose chords are characterized
by having one or two altered notes. This group has very few chords in it and is less important for
that reason. You will, however, run into augmented and diminished forms of chords so please
understand them in their group, below.
LISTEN carefully as you play to get your ears attuned to the differences in these successions of
notes.
Note: you don't have to actually memorize any of the following. By going through these
formulations mentally and playing them on your bass you'll slowly become familiar with them,
patterns will become more apparent to you and you'll absorb them rather than just memorizing
them.
Remind yourself to do this: on each succeeding day of these five days replay some (or all) of each
of the previous day's chord-based bass note sequences and play the notes in different orders
according to how you feel and/or what you'd like to hear at the moment. For example, if you play
the notes C, E and G, mix them up a bit. Play, say, C and G, then C and E, then G, C and E, etc...
Add a 6th. . . . Add any other position(s). Add some fingering techniques (in the Appendix). You've
learned seven or eight fingering techniques by now haven't you?
It's very important to spend this much time on this !! Five days of this and it'll blow your mind
how much you've improved !! I'm not kidding.
Chords
Major group: Play everything forwards and backwards, of course.
Positions
Note: (op) = optional.
major sixth
1---3---5---6 and you can always use the octave so I won’t be
mentioning it again.
major seventh
1---3---5---7
major ninth
1---3---5---7---9 (or use the 2nd). If the 7th were not present the chord
would be called an 'add 9th.'
If the major 7th is in the chord then the chord is called a major 9th. It's named or labeled by its
highest numbered extension. If no 7th is present then it would be called an 'add 9th.'
major eleventh
1---3---5---7---9(op)-11 (or use the 4th). The chord is called the
11th if the 7th is present.
major thirteenth
1---3---5---7---9(op)-11(op)-13 (or use the 6th).
A chord with both the 6th and 9th but no 7th would be labeled a '6 add 9.'
6 add 9
1---3---5---6---9
add 9
1---3---5---9
major 7 #11
1---3---5---7--#11

35
End of day 16.

36
Day 17.
Minor group: Positions
minor 6th
1--b3---5---6 (This is a case in which the 6th is not flatted to the natural
6th as is done in the natural minor scale).
minor 7th
1--b3---5--b7
minor/major 7th
1--b3---5---7 natural
minor 9th
1--b3---5--b7---9 (or use the 2nd)
minor 11th
1--b3---5--b7---9(op)-11 (or just use the 4th)
minor 13th
1--b3---5--b7---9(op)-11(op)-13 (same as the unflatted 6th)
(Melodic minor, 'Rock
minor')
minor add 9
1--b3---5---9
(no 7th)
minor 6/9
1--b3---5---6---9
(no 7th) (unflatted 6th) (Melodic minor, 'Rock
minor')
minor 7th b5th
1--b3--b5--b7
End of day 17.

37
Day 18.
Dominant 7th group: When the b7th is present it is common to label a
chord by the number of its highest extension.
Positions
seventh
1---3---5--b7
(just called the 'seventh').
ninth
1---3---5--b7---9
eleventh
1---3(op)-5--b7---9(op)-11 (Often the 3rd is left out or a 4th
can be substituted for the 11th).
1---5--b7---9---11
(3rd left out).
1---4---5--b7---9
(4th substituted for the 11th).
thirteenth
1---3---5--b7---9(op)-11(op)-13
Other dominant 7 chords:
7 b5
1---3--b5--b7
(sometimes notated 7-5).
7 #5
1---3--#5--b7
(seventh sharp 5th).
7 b9
1---3---5--b7--b9
(7 flat 9, sometimes notated 7-9).
7 #9
1---3---5--b7--#9
(7 sharp 9).
7 #5 #9
1---3--#5--b7--#9
(7 sharp 5 sharp 9).
7 #5 b9
1---3--#5--b7--b9
(7 sharp 5 flat 9).
7 b5 #9
1---3--b5--b7--#9
(7 flat 5 sharp 9).
7 b5 b9
1---3--b5--b7--b9
(7 flat 5 flat 9).
7 #11
1---3---5--b7---9(op)-#11 (7 sharp 11).
9 b5
1---3--b5--b7---9
(9 flat 5).
9 #5
1---3--#5--b7---9
(9 sharp 5).
End of day 18.
38
Day 19.
Augmented and Diminished group:
Positionss
augmented
1---3--#5
(Notated by using a plus + sign, C+ or Ab+)
augmented 7th
1---3--#5--b7
augmented 9th
1---3--#5--b7---9 (Notated 9 #5)
augmented maj 7th
1---3--#5---7
diminished
1--b3--b5
(Notated by using a little zero o, ie. Co or Abo)
diminished 7th
1--b3--b5-bb7
(A double flatted 7th, - equal to a major 6th)
Suspended: Not really a group. Just one type of chord. But VERY important!!
suspended 4th
1---4---5
(If a 4th is added the chord is called 'suspended'
- notated by using the abbreviation 'sus' - Just
changing the 3rd to a 4th on any chord makes it
a sus4 chord. If it has no 3rd it is neither major
nor minor).
The suspended 4th chord, most often played without the 3rd present, is used a lot in Rock music !
Many musicians prefer to use it as a substitute for chords with 3rds in them because it gives the lead
singer or instrumental soloist(s) more flexibility (since it is neither major nor minor). The major 3rd
highly defines a structure and many musicians like to do away with committing so heavily to a
harmonic structure that's so narrowly defined or restricted as with the use of a major 3rd.
End of day 19.
39
Day 20.
Other occasionally used chords:
major 9th
1---2---3---5---7---9
And you'll sometimes see chords like these:
7th flat 10th
1---3---5--b7--b10
(Notated 7-10 or 7 b10 )
augmented 7th flat 9th
1---3--#5--b7--b9
( Notated 7 -9 +5 or 7 b9 #5)
6th 9th
1---3---5---6---9
(Notated 6 .9)
Try to figure out these: (Pencil in the positions)
minor 7th flat 9th
(m7 (b9))
minor major 7th
(m(maj 7)) or (min(maj 7))
minor 9th major 7th
(m9(maj 7))
minor sharp 5th
(m(#5))
minor 6th 9th
(m6 .9)
As you can see sometimes chords can be notated in more than one way. This may seem confusing
but most of the time it really isn't because once you get the hang of all this chord nomenclature, a
glitch in the labeling won't matter very much to you at all. When you're playing alone, sometimes
you just have to make an educated guess. When playing with other musicians the best choice to
make is simply to ask the others what note or position they're using.
As you can see, there's no end to the chords that people can invent. The only test as to whether a
chord or sequence of bass notes is valid or not is whether or not it's useful, that is, whether or not it
sounds good in the context of the rest of the music structure around it.
As you can see, too, there are clear patterns to all this. Patterns of what positions (using the major
scale as a reference point) to sharp or flat depending on the names that are given to the chords.
You don't have to actually memorize any of this. With time, it'll all become second nature.
Repeat the above exercises for each of the groups (I hope that you can see them as little games). It's
been very important to have spent so much time on this.
One other thing that is useful to know and which might have popped up in your mind as a question
when going over the above material is this: do all chords always have a 1st position in them? Well,
no, not necessarily. Take the extended chords for example. They can be played by your guitar or
keyboard player without the tonic note or the band can allow the tonic or root note to be played by
another instrument like a saxophone or harmonica . . . Which is where you come in. You play the
1st position when others are leaving it out (or maybe don't play it - at your option. Leaving out the
1st position can be fun and lend an air of the unexpected to the music! Reggae bass players do this
frequently).
Slash-chord notation
This leads to another idea about notation which you ought to know: the slash-chord notation. For
example with the chord notation, G/B or C/E or any other chord / bass note notation the note after

40
the slash is the bass note that the composer wants played on the bass when the notated chord is
played, ie., when the G chord is played the bass player ought to play the B note or when the C chord
is played the bass player ought to play the E note. Chord / bass note.
Definition: notation: a system of signs or symbols which tell the reader of the music what to do.
Chord Progressions
Definition: progression: the advance from one tone to another, or from one chord to another; the
former is melodic progression, the latter is harmonic progression.
When a musician plays a number of chords in a sequence that sequence is called a (chord)
progression.
Definition: chord: any group of three or more notes sounded together or at about the same time.
Three notes, exactly, sounded together or at about the same time, are triads (also, chords); triads are
chords. But not all chords are triads. Triad means three. Many chords have four or five notes or
positions in them.
Definition: chord-based bass note sequence: playing a number of bass notes (notes that would make
up a chord) one after the other, not at the same time or not at about the same time. A series of bass
notes following in order. Sequent: following; successive. Bass notes that would make up a chord if
played at or about the same time but which are played on successive beats.
Definition: beats: time counts.
Chords are built by choosing a starting note and adding notes which are certain intervals apart from
the starting note (remember intervals, or steps, from earlier days?). The note(s) which are added are
usually in intervals of major and minor thirds (four half-steps and three half-steps) and two notes
apart. For example, to form a C major chord, start with a C note. Then add a note which is two
notes (four half-steps in this case) higher. Counting notes, C to D to E, and half steps, C to C# is
one, C# to D is two, D to Eb is three and Eb to E is four. So we start with C, the tonic note, and add
an E, which happens to be the 3rd position in the C major scale. Then we want to add (at least) a
third note because a chord is at the very least a triad or a group of at least three notes, so we add a
note which is two notes higher than the (new) starting note, E. E to F to G, three half-steps higher.
Counting half-steps, E to F is one, F to F# is two and F# to G is three. We add a G note to the C and
the E. The G note is the 5th position in the C major scale. Now we have a basic chord, the C major,
comprised of the C, E and G notes. We've formed the chord by adding notes which are four and
three half-steps higher than the preceding note. Major and minor thirds. This is called Harmony or
Harmonizing and is the basis not only of forming chords but of a great deal of composing which
revolves around combining melodies (counterpoint) and chords. For now I mention this only to
illustrate the point that this is how we form basic chords.
Play these intervals and chords' notes on your bass of course.
Definition: harmony: a musical combination of tones or chords.
Definition: composition: the art of inventing music.
Definition: melody: a series of single sounds arranged according to certain rules.
Let's take the second position of a C major scale, the D note and form a chord. Starting with the D
note we look for a second note which is two notes higher than the starting note. D to E to F which

41
happens to be three half-steps higher than the D. This is the minor third of the D scale which will
make the chord we're forming a minor chord. Going two notes higher, F to G to A, four half-steps,
we add the third note to the now forming D minor chord, the A note. The A note is the fifth position
of the D minor scale. We have created a D minor chord. D, F, A.
See if you can do two things:
1) write down vertically in two columns all of the positions of both a major and a minor scale from
the first position up to the thirteenth position,
2) then take each scale position, from 1st to 7th, and use each note of each of the seven positions as
the tonic note of a chord and by adding either four or three half-steps, an interval of two notes, to
each note and succeeding note, build a basic three note chord. For example, we created a D minor
chord, above; now take the 3rd position of the C (major) scale, the note E, and create a chord from
it using the rules above. Those notes which are an 8th (octave), 9th, 11th and 13th higher only form
the same chords as the 1st, 2nd, 4th and 6th positions but an octave higher so we don't have to
create them over again. We won't consider the 10th and 12th positions due to the reasons cited
earlier in this manual (day 15).
Doing the second step in the previous paragraph may seem a little tough. It's a bit abstract. But it's
fairly easy because all you have to do is count notes and half-step intervals. You might try doing
this for some other scale(s) besides the C scale(s) (major and minor). Try the A scales (minor and
major) because the notes in the A minor scale are the same notes as in the C major scale but they're
in different half-step relationships as far as positions of the scales are concerned.
Try one more scale of your own choice.
So why am I showing you this? Because I would like to show you where some very common Rock
chord progressions come from and how they are labeled: I, ii, iii, IV, V, vi and vii(o) in Roman
numerals, the capitalized numerals indicating major chords and the small numerals indicating minor
chords and the little letter o indicating a diminished chord.
If you created the seven chords, say, using the C note as your note of choice, and the C major scale
as your scale of choice you would have created these chords: C major, D minor, E minor, F major,
G major, A minor and B diminished. These chords would be labeled I, ii, iii, IV, V, vi and vii(o) or
1, 2, 3, 4, 5, 6 and 7dim (or just 7). What scale positions are in a diminished chord?
The 7 chord would be a diminished chord if you started with a major scale and the 7 chord would be
a major chord if you started with a minor scale. Another question: if you started with a minor scale,
one of the chords you would create would be a diminished chord; which one? The 2 chord, the 3,
the 4, the 5, or the 6 chord?
Playing these seven chords in sequence would be a chord progression. But not a very often used
one.
Why not? Just because. Just kidding. So, why not? Because when you listen to Rock you'll hear that
most songs are based on chord progressions which contain three or four or, sometimes, five chords .
. . hardly ever seven. Maybe that won't be true in the future as Rock evolves . . . we'll see. That
shouldn't prevent you from composing song(s) with more than three or four or five chords. There
are also some songs with only two chords in the progression.
What are often used chord progressions? I, IV, V. And vi, V, IV. I, vi, IV, V (very often used).
Also, ii, V, I. And I, iii, vi, ii, V. There are some other popular/contemporary ones, too. Abstractly,

42
(try writing this out on your sheet of paper) using the C note as your starting note or tonic note of
the C major scale or key of C, of what chords would these progressions be comprised ?
If you feel like it you could ask the same question referring to the A note, A minor scale, key of A
minor.
Definition: key: a musical structure comprising notes which are said to be related in some ways.
The key of a song can usually (but not always) be labeled by its basic root note, the keynote, the 1st
note or 1st position in the scale. It is called the tonic.
Definition: tonic: the keynote of any scale, the first degree of any key.
Definition: key: a label for a system on which the notes of a scale are built up, each bearing a
definite relation (of half-steps) to the lowest note or tonic.
So what do you do on your bass?
Play the three notes (chord-based bass note sequences) of each of the chords in the chord
progressions above. Play the basic 1st, 3rd and 5th positions of each chord (in different orders each
time you come back to each particular chord - just for variety). Maybe use a connecting note
(passing tone) or two to get from one chord-based bass note sequence to the next but isolate and
understand the three notes which make up the heart of each chord. As your ears get attuned to the
sounds of the groups of the bass notes which are in each chord you'll learn to discern the differences
in the sounds of different chords. As you become more and more familiar with discerning
differences between chords in the music that you play and listen to you'll soon be able to hear the
number of different chords in a song's progression. Then the chord types, major/minor, and their
numbered positional relationships, I, ii, iii, IV, V, vi and vii. You'll become an afficionado!
And thus you will have come to understand chord progressions.
Definition: progression: a sequence of a number of related chords in a key. How are they related?
By harmonic structure. That is, each of the chords has concordant notes in it that are common to
some of the other chords in the progression - a non-theoretical explanation if I've ever heard one.
But simple.
Definition: concord: consonance - those parts which harmonize well with each other.
This is why you can play a C note in an F chord.
In the near future you can play extended and altered chords (chord-based bass note sequences), too.
Why stop with three note chords. Go on to four note chords. Maybe slip in a few five note chords
mixed up with those chords of ‘lesser stature'.
I'm using the terms ‘chords' and ‘chord-based bass note sequences' interchangably here although
they are literally different terms. What are the difference(s) between these two terms?
Although they may be the same notes, the notes in chords are played at or about the same time
while the notes in chord-based bass note sequences are played on successive beats.
Arpeggiation
Now would be the time to read, understand and begin to introduce the idea of arpeggiating into
your repertoire of skills.

43
Definition: arpeggio: striking the notes of a chord in quick succession.
See the first definition in the 'Fingering Techniques' section in the Appendix. Really. Go read it
now.
End of day 20.

44
Day 21.
Read this entire section, Lesson VI, modes. Begin to play some of the modes of the C major scale.
Lesson VI - Modes
Of course there's a lot of technical music theory about modes most of which you can learn little by
little over time. But, if you have a basic understanding of what modes are and at least the following
basic ways of creating them, you'll be a long way towards your most immediate goal: playing music
with other people, especially those who are more developed than you.
Modes are: other scales.
You create and formulate them in the same way that you derived a minor scale from the basic
reference point, the major scale. In the same way that you derived the positions of the minor scale
from the positions of the major scale you memorize simple rules.
Starting with the major scale in terms of the numbered positions,
1st ~~ 2nd ~~ 3rd ~~ 4th ~~ 5th ~~ 6th ~~ 7th ~~ 8th ~~ 9th ~~ 11th ~~ 13th
what do you do with these positions to derive the natural minor scale ?
Rule: you flat the major 3rd, flat the major 6th and flat the major 7th. You know this rule.
Natural minor scale ~~~ b3rd ~~~ b6th ~~~ b7th ~~~ ( b13th) ( Octave of 6th ).
Likewise, here are the rules (formulas) for creating modes:
(Note: the major scale is already a mode, the Ionian mode.)
Play all eleven notes, all the positions. You can play the l0th and the 12th as connecting notes if you
like.
Major(Ionian)
1st--2nd--3rd--4th--5th--6th--7th--8th--9th--11th--13th
Dorian
---------b3rd----------------b7th----------------------
Phrygian
----b2nd-b3rd-----------b6th-b7th------b9th-------b13th
Lydian
--------------#4th--------------------------#11th------
Mixolydian
-----------------------------b7th----------------------
Aeolian
---------b3rd-----------b6th-b7th-----------------b13th
What scale is this?________________________________
Locrian
----b2nd-b3rd------b5th-b6th-b7th------b9th-------b13th
I mean, what could be simpler ( to start out with) ??
Note: I start with the key of C because it's a common Rock key but modes exist in all keys. Just as
you would sharp or flat certain numbered positions of the major key to derive the minor scale, you
would likewise sharp or flat the positional notes of other scales to obtain the various modes of that
particular scale. For example, the key of G#. Take the notes of the major scale G#: G#, Bb, C, C#,
D# or Eb, F and G and sharp or flat them according to the rules above and you'll have your modes
of G#.
45
Definition: key: a musical structure comprising notes which are said to be related in some ways.
The key of a song can usually (but not always) be labeled by its basic root note, the 1st note or 1st
position in the scale. It is called the tonic.
ANOTHER WAY to understand modes is this: using the notes of a major scale, say Cmaj, C, D, E,
F, G, A, B and C, start the 1st mode (Ionian Mode) with the tonic note: C in this case. Play the
notes, going up or down or using inversions or whatever... C, D, E, F, G, A, B, C. You've just
played notes in the Ionian or first mode. Now take the same notes, C, D, E, F, G, A, B, C, but start
with the note, D. If you move your starting note two half-steps up on your fret board or anywhere
else you want to play a familiar D note and start in that position (given that it is now a D note), and
play the notes, D, E, F, G, A, B, C and D (note that the notes haven't changed, they're still the
unflatted or unsharped notes of the Cmaj scale), you've just played the Dorian or 2nd mode. Count
the number of half-steps between the notes, D and E, E and F, F and G, etc. . . and compare them to
the half-steps of the Dorian mode of C major.
If you move your starting note up four half-steps or two whole-steps to E or anywhere else you
want to play a familiar E note and play E, F, G, A, B, C, D and E (the unflatted or unsharped notes
of the Cmaj scale), you've just played the Phyrigian or third mode. (Of the Cmaj key). Get the idea?
Just move the starting note up or down, start the scale with that note but play only the actual notes
of the (Cmaj) scale and you'll have one mode or another of the Cmaj scale. It's really that simple. A
little complicated coordinating your mind with your fretting fingers at first. You bet ! But, it's
another way of understanding modes. Personally I prefer the first way that I described, above, the
way of just memorizing the rules of sharping and flatting notes. It's similar to how you've learned to
create the minor scale (by flatting certain positions of the major scale). However, with more
advanced musical theory, sometimes the second method is more revealing of the music structures
involved.
I'd spend three days on this topic. It's so close to the ideas on altered and extended chords that if
you have that topic down pat (after having spent five days on it) modes will be fairly easy to
understand and play.
These modes are sometimes used in the following genres:
Ionian - the major scale, the fundamental mode in western music, much rock, classical, theater and
pop.
Dorian - rock, jazz, blues, minor blues, some funk.
Phyrigian - some metal, opera, international music.
Lydian - new age, operas, jungle, jazz.
Mixolydian - rock, funk, major blues.
Aeolian - romantic music of all types, minor key ballads.
Locrian - jazz, metal - If you want to play Metal, pay particular attention to this mode. Also learn to
build bass note sequences based on having created chords from the positions of this mode using the
rules of chord creation. This'll open your eyes wide! Better reread this second to last sentence a
million times, or more.
All these modes can lead into each other and be used in combinations. Play around. But don't get
obsessive !

46
Of course, just because you can now play correct notes doesn't mean that you're an expert musician.
It just means that you can come up with the correct notes from which to make your selections of
notes that you're going to play when you hear that such and such mode is being used or that a
certain series of chords is about to be played. Then you fiddle around (pun intended) with the other
musicians until you begin to sound good and this good-sounding-ness becomes the basis on which
you (all) build a more concrete music structure: a song. Or a tune. Or a piece. Or whatever you call
it in whatever genre (rock, jazz, classical, country, bluegrass, etc . . . ) you (all) are trying to evolve
within.
I do not attempt to teach you to 'feel.' This comes with practice and playing with other musicians or
along with CDs and tapes of your favorite artists. This is what you learn on your own as well as you
can. May I make a suggestion? Try anything anyone else suggests that you try and don't let other
peoples' frustrations affect you.
Note: the above are only the most usual modes used in our (western) culture. Modes can be created
based on just about anything. You can take any scale, use it as a base and derive other modes from
it ( in musical theory and by just following sets of rules, as above ). For example, pick an unusual
scale, say, the natural minor scale with the flatted 3rd, flatted 6th and flatted 7th positions in the key
of, say F# (or any other key you like), and write out the notes' names below the scale's positions and
then below that write out the notes' names that are in, say, the Lydian mode of the natural minor
scale.
You might even want to try to just totally invent a never-heard-of scale with eight (or more, or less)
notes in it, octave to octave (or crate a scale that, as in Indian scales, has no octaves!). Play the
scale. Create some chords. Create its modes! If you can do this you really have these ideas down
pat. Again, don't be obsessive. If you can't do this or just don't want to bother, don't worry about it.
It's just a goofball exercise.
Note: all this is by way of learning to play bass without learning to read music. However, it is
helpful to learn to read music. You might want to familiarize yourself with music notation, at least
the basics, because you will run into written music from time to time and it's good to at least be able
to follow a lead sheet (several pages of basic sheet music) written in treble clef for singers and other
musicians. Take your time with this because it can be about as frustrating as learning how to type.
Annoying but useful. Bass clef is just notes written a little lower and it's fairly easy to learn. You
only read and play one note at a time.
Definition: clef: symbols used to indicate the pitch of notes on the staff.
Definition: pitch: the highness or lowness of a sound.
Definition: staff: the five lines, with the spaces between them, upon which the notes are written.
Yet one more summary: you'll hear a lot about modes or modal music but in reality, in Rock music,
you won't be called on too often to actually demonstrate your knowledge of modes. There's a lot of
confusion among musicians about how to use modes. Most musicians play snippets of modes
without knowing exactly what they are doing or how what they're playing relates to the musical
structures at hand. It won't hurt you to be among those musicians, but, on the other hand, if an
opportunity comes along to play with some new people whom you might like for one reason or
another, it might be a good idea to know as much as you can. You never can tell what's going to be
pulled out of the hat at any given moment. Knowledge of modes, the ability to shift from one mode
to another just might come in handy. It can certainly make your playing stand out from the crowd.

47
End of Day 21.

48
Day 22.
Reread the entire section, Lesson VI, modes, above, even if rereading it is annoying to you.
Play the rest of the modes of the C major scale.
Play the modes of the D major scale.
Pick one more scale and play its modes.
End of Day 22.
49
Day 23.
Play the modes of the A major scale and then the modes of the E major scale.
As you play each of the modes of these two scales, contrast each mode with its respective major
scale by playing them back to back: play the major scale, play a mode; play the major scale, play
another mode, etc . . . Backwards, etc. . . of course.
Work up a little speed but keep to a rhythm, any rhythm. Play around with several different
rhythms. Maybe tap your foot if you like to do that. Try tapping both of your feet in patterns that a
drummer would use. Have you been observing drummers at clubs or on videos?
You know, maybe it wouldn't be a bad idea to buy an extra video, a drum video.
Take some ideas from previous lessons (your choices) and use some of the techniques in the
Appendix that you've learned and combine them with or blend them into your playing.
Try exploring the A natural minor scale modes. Play the A natural minor scale. Play the modes
using the rules of sharping or flatting notes or the idea of creating the modes by starting on
succeeding higher notes but still playing only the notes in the A natural minor scale. For example,
ABCDEFGA, BCDEFGAB, CDEFGABC, DEFGABCD, etc. . .
Is the Phrygian mode, the 3rd mode, of A natural minor the same as the Aeolian mode, the 6th
mode, of C major? A little musical puzzle.
Auditioning
So, if you've come this far and can actually understand all this stuff and have developed some
playing skills and techniques described in the Appendix as 'Fingering Techniques', you are
probably or are just about to be making some money playing. This makes you a Pro or will make
you a Pro as soon as you get into a band. Start one with some friends. Or check local ads for people
looking for a bass player. You'll need to audition with several groups. Of course you'll be nervous.
Expect to be nervous. It wouldn't be a bad idea to talk to or interview some people you know who
are in bands about their first audition experiences. Maybe there's a book in the local library about it.
If you can understand a little about this first time experience in advance it'll help you to put
everything into perspective and enable you to cope with your nervousness better.
Once you start or find a group you'll need to rehearse with them of course. It's not a bad idea to
rehearse with several different groups to determine everyone's goals (make sure that you all have
the same goals!! I can't emphasize enough the importance of this) and also to loosen up yourself.
See how things operate. Build some confidence. It's not hard. You've got new people to meet,
places to go!
CONGRATULATIONS!!
End of day 23.

50
Day 24.
I've probably left a few things out. Or haven't explained some things enough. After you've finished
this booklet why don't you let me know what it is that you might have benefitted more from
knowing about or of having had a more detailed explanation?
As part of an experiment I am granting you the right to sell copies of this booklet, for the price you
purchased it for (you must purchase it to resell it), under the honor system agreement that you send
me one third of whatever you sell it for. Drop me a note with payment(s) and comments about how
I might improve this instruction manual.
P.S. I'm adding one more exercise that might be the most important one in this booklet: I'll call
it the Mental Positioning Exercise. It's an exercise that you doentirely in your head. You don't have
to touch your bass to do this. But you can do it on your bass if you want to. What's nice about it is
that you can put your obsessive mind to good use doing it instead of letting your mind roam freely
through its usual wonderland of repetitive thoughts. It's a very simple exercise which tells you:
picture your bass strings in your mind's eye and take any note, say the note C or the note Bb or any
note you like and imagine what numbered position that note would be in if it was in any scale (or
chord) that you could think of. For example the note, C, would be in the first position in the C
scale or the C chord. In your mind's eye play on your mental fret board the notes in the C scale and
the notes in the C chord (C, E. G). Now do the same thing for the C minor scale and then the C
minor chord (C, Eb, G). Now do it for the C major #5 #9 chord. Of course the C note will be in the
same 1st position for all of these scales and chords.
Now, take the same note, C, and picture in your mind any other chords and scales, say, to start with,
an F chord and F major scale. What position is the C note in within that scale and chord? Answer:
the 5th position. Imagine playing them - the C note, the F scale and the notes in the F major chord.
Expand your choices of F type chords, for example an F major 7th (F, A, C, E). Try various
inversions of some of the notes. In each case picture the fret board in your mind and the notes that
you're considering while at the same time emphasizing the position of the single C note. You can
get quite good at this and fairly fast. After a while you can do it automatically when you have a
spare moment or as a meditative exercise or when you're feeling down or confused and don't want
to think at all. You can use it to shut your mind off if you want to. I've speculated that (some)
people listen to music to keep themselves from thinking about themselves. A way of preventing
self-confrontation. This can be useful at times. A good habit it's not.
Get the idea? Pick any note and any scale, chord or series of scales and chords and figure out in
your mind just where that note lies and what its numbered position is. You can make the mental
image static, just envisioning all the notes and the single, emphasized note or you can make it more
dynamic by imagining the notes or positions changing on the fret board in your mind. This exercise
will review and reinforce all the basic structural knowledge that you've learned in this booklet. If
you like this mental, pictorial, imaginative exercise (that is, you don't hate it or feel nothing toward
it) you can extend it to include other elements of bass playing like fingering techniques or
syncopation or actually seeing in your mind's eye the playing of chords with the placement of three
or even four fingers on three or four separate notes on three or four separate strings (much as a
guitar player would do). In each instance single out one note and examine in your imagination its
numbered position in the musical structure that you're imagining.
It's an exciting mental exercise! One that reviews and reinforces all your knowledge up to this point
(and into the future), one which will enable you to continue teaching yourself about the mechanics
and theories of the bass (with or without further readings of music literature) and one which
sharpens your mind in various ways and opens your playing up to discovery, taking the lid off the
hidden or the unknown, musically speaking.

51
End of day 24.

52
Day 25.
My mind runneth over. Another good mental exercise (but you can play it on your bass, too) is re-
labeling chords with other names after you've shuffled the notes around. For example, the notes of a
C add 9 chord are C, E, G and D. But they may also be notes of another chord, the G6th sus 4th (the
G 6th is G, B, D, E - then sharp the 3rd or B note to become a C note (the suspended 4th) and the
notes become G, C, D, E or G6th sus 4. The notes are the same (C, E, G, D and G, C, D, E) but their
'positions' have changed. Are there any other chords that can be formed from these four notes?
Answer: yes. What? D, E, G, C could be a D9th sus 4 but there's no 5th (A) so it's not. Do we
always need a 5th (or any single 'position') in a chord? Not always, so, loosely speaking, we could
call it that if we had some other instrument play the A note. E, G, C, D is an Em7th augmented or
Em augmented 7th.
If you think about it, you see that you can play the same bass notes along with two (or more)
entirely different chords which are probably being used in different keys along with many other
different chords in differing harmonic structures. Boggles the mind. (Who says that you always
have to play the notes in a chord or the 'positions' in the same order all the time?) These ideas
lead you to chord substitutions and deeper levels of musical theory - the next steps if you're
interested. But you don't have to take any next steps if you don't want to right now. This game,
which you can do on paper if it's too difficult to do entirely in your mind, will do it for you!
Another, even simpler example of shuffling the notes of a chord around and creating a new chord
using the same notes but choosing a different root or tonic is, again, the C major chord and its notes
C, E, G. These notes are the 1st, 3rd and 5th positions as defined way back when we were first
talking about chords. Let's take the E note. What chord can be named if we use the E note as the
root? Let's say we move the C note above the G - we do an inversion, an upwards inversion. Now
we have the notes E, G and C. What chord does this form? Well, one way to approach this puzzle is
to examine the number of half-steps between the notes. E to G is three half-steps so that implies a
minor. E to C is eight half-steps. What's this? Well, we know that there are seven half-steps
between the 1st position and the 5th position (from our half-steps chart) so the 5th position would
be a B note. So what's a C note? It's the sharped 5th. What chord has a sharped 5th in it? Answer:
the augmented ( + ) chord. So the chord made up of the notes E, G and C is an augmented minor
chord. E is the root or tonic so the chord is named or labeled an E augmented minor or E minor
augmented, Em+.
Another way to puzzle this out instead of using half-step counting and the 'positions' would be to
think about the notes themselves, E, G and C. From your experience playing the E minor scale you
know that the G note is the minor 3rd and the B note is the 5th. So the C note which is the sharped
B note must be an augmented 5th. Therefore, the chord is an augmented minor chord.
Try to do this exercise as a game and pick any chord(s) of your own choice(s) that have three or
four notes in them. Then see what other chord(s) you can come up with after you've shuffled the
notes around.
Try to think of a few more musical games. Please let me know what you invent and if you'd like, I'll
add it to future versions of this publication mentioning your name as its submitter if you want
credit. Note, you must give me written permission to do this.
Did you ever notice that the letters in the words 'note' and 'tone' are the same?
End of day 25.
53
Days 26 and 27.
Review anything you didn't get the first time around.
Take notes by making a list of topics that you think need more attention.
And then go down the list one topic at a time until you feel comfortable with your level of skill with
that topic.
If this takes an additional day or two, Days 27 and 28, please take the extra time. Wrap up this
booklet completely because you might not come back to it again for awhile.
End of day 27.

54
Day 28.
This is your last day. If you understood everything and managed to play everything fairly fluently
by the end of Day 27, take a rest. You deserve it. Otherwise take today to mop up.
If you made it through all twenty eight days of this instruction manual, you're a most remarkable
person. I am awed by your desire and focus. I offer you my most sincere congratulations!
End of day 28.
55
Appendix
Resources
Tab web pages . . .
http://w1.131.telia.com/~u13108580/misfits/tabguide.html
http://www.houlston.freeserve.co.uk/tab.htm
http://members.nbci.com/singleact/winolga/tabfaq.html
http://members.nbci.com/imagine2/rwtabs.html
Print out one or two of these and keep them around for reference. If you don't have a computer and
printer at home, go to your local main Library and use one of theirs.
Retailers - mail order and/or on-line
American Musical Supply - good catalog, lots of pics, call 800 458-4076.
http://www.americanmusical.com/
Musician's Friend - exc. catalog, lots of pics, call 800 776-5173.
http://www.musiciansfriend.com/
Mars Music - on-line catalog.
Kevin's Harps - 609 298-2202.
In case you want to play harmonica, too.
An amazing catalog! Every harmonica in the western world. How-to books, CDs, tapes and
accessories.
Strings
D'Addario -
GHS -
Dean Markley -
Schools
Musician's Institute - 800 255-play.
Berklee (Boston) - 617 266-1400.
Bass Collective - 212 741-0091
http://www.basscollective.com/
CDs
Disc Makers - 800 468-9353.
56
Parts and Accessories
Exotic guitar straps - 864 647-8603.
Guitar Parts USA - 806 353-4099.
Jeannie Pickguards - 925 439-1447.
http://members.home.com/pickguards
Warmouth - 253 845-0403. Parts, pickups, electronics.
Allparts - 281 391-0637.
Videos And Books
Music Dispatch - 800 637-2852. Can get Beginning Bass Videos by mail order.
Mel Bay Publications - Instruction books of all kinds.
Hal Leonard Publications. Instruction books and CDs of all kinds.
Sheet Music
Sheet Music Direct. Self explanatory.
http://www.sheetmusicdirect.com/
Carl Fischer, Inc., 62 Cooper Square, New York, NY, 212 777-0900.
In the East Village. Has a huge inventory of sheet music.
Miscellaneous
- web site that depicts the effects setups of hundreds of guitar players
as well as many bass players. Fascinating site!!
57
Fingering Techniques
Below are definitions or descriptions of guitar fingering techniques which are the same for the bass.
A good booklet which describes all these techniques and their variations and more is: "Guitar
Techniques," by Michael Mueller. Available from Hal Leonard Publications, see Appendix, above.
The most useful techniques for bass in order of their usefulness are: hammer-on, vibrato, bend,
bend and release, slide, palm muting and pull-off.
Arpeggiate: to pluck or pick the notes of a fretted chord in succession from low to high. To modify
this description for the bass you will have to have understood the sections on chords so don't pick
this technique as the first one to learn. Leave it until you've gotten through the second section on
chords, Lesson V. Note: for insight into more advanced arpeggiating see the addendum, the
addition to this booklet after this section on 'Fingering Techniques'. It's titled: 'Advanced Striking
Techniques, Chords and Arpeggiation,' four pages forward.
Bend: pluck or pick the note then immediately pull or push the string sideways with the fretting
finger causing the frequency of the vibrating string to go higher. A half-step or even a whole-step in
pitch is the usual bend but it could be as little as a quarter-step. You can make the bend slow or
quick in differing musical circumstances. Learn to bend with all four fingers.
Bend and release: pluck or pick the note, bend the note up then release, slowly or quickly, back to
the original note.
Hammer-on: forcefully fret the first (lower) note with one fretting finger then a higher note on the
same string with a second fretting finger without plucking or picking with fingers on the opposite
hand. Pluck or pick the first note or don't pluck or pick it.
Muffled string(s): create a percussive sound by damping the string(s) with the palm of the plucking
or picking hand (laying the palm onto the string(s)) and pluck or pick the string(s) without
depressing them. Can also damp or muffle with the fretting finger(s).
Palm muting: partially mute or damp the string(s) with the palm of the plucking hand just above
the bridge as you pluck or pick the note.
Pre-bend: bend the string up then pluck or pick the note. Also called Ghost Bend.
Pre-bend and release: bend the string up then pluck or pick the note and then release, slowly or
quickly, back to the original note.
Pull-off: fretting both notes to be played with separate fingers on the same string, pluck or pick the
first (higher) note and without plucking or picking again, pull the higher finger off to sound the
second (lower) note.
Rake: drag the pick across the strings in a single motion. On bass, you could also use your thumb.
If you're fretting notes of chords simultaneously on different strings when you do this it would be
called, 'arpeggiate.'
Slide: pluck or pick the string and then slide the fretting finger up or down to a second note which
may be as little as a half-step away or as far away as an octave or even more. The second note can
be plucked or picked or not.

58
Tapping: hammer (tap) the frets with any fingers and combinations of fingers on either or both
hands without plucking or picking the strings. If you use picks you can tap with the edge of your
pick.
Trill: rapidly alternate between two fretted notes by hammering-on and pulling-off. Pluck or pick
the first (lower) note, hammer-on then pull-off and either pluck or pick the first note again or just
keep hammering-on and pulling off without plucking or picking the string again.
Vibrato: rapidly bend the string a number of times after plucking or picking it once.

59
Addendum
Advanced Striking Techniques, Chords and Arpeggiation
First, you don't have to utilize all these techniques. Use the ones that you're comfortable with.
Maybe expand your skill a little at a time. Don't worry if you don't get all of this at first. Come
back to it between lessons or between days. Or add a second session later in the day or at night
each day just for fingering techniques (both fretting hand and string striking hand). The following
techniques are pretty advanced. You may even decide to dispense with them for now (that's okay)
and stick with simpler ways of striking the strings like using picks or just plucking with your first
two fingers (1, 2) which is what a lot of bassists do (try 1, 2 and 3, see below; it'll increase your
speed). But just know that these techniques (patterned string striking, arpeggios, chords) are
available. You can come back to them anytime.
There are many ways to make a bass string vibrate. Plucking. Picking. Hammering. Tapping.
Slapping. Popping. Even bowing for the quirkily adventurous. Except for slapping, popping and
bowing each of these has been touched upon in this booklet in one way or another. What are some
of these techniques?
Picking is self-explanatory. Take a pick and pick the string. Up stroke or down. Pick hard or pick
softly. Move your pick in small circles while picking. In one circular direction or the other. End of
story.
Hammering is described in the 'Fingering Techniques' section in the Appendix. Very useful. You
ought to use it.
Tapping also. Not as broadly useful as hammering but it has its value, too.
Slapping. Smacking a string down against the fret usually with the side of your striking thumb as
you play all or just some notes. Very percussive and usually rhythmic or repetitive.
Popping. Hooking a plucking finger slightly underneath a string, pulling it sharply upwards almost
perpendicular to the fret board and releasing it to bounce it back against the fret board. Slapping and
popping techniques are often used together in an alternating fashion.
But plucking! Now here's a string vibrating technique that has many possibilities. Flick the string
with a finger tip moving upwards more or less parallel to the surface of the fret board and you've
plucked it. How about plucking it with a down stroke? Puzzling? Well, yes. Maybe strictly
speaking, that isn't a pluck. But since I'm talking about the use of your fingers to strike the strings
then a down stroke can loosely come under the heading of plucking. Just flick the tip of a finger
downwards over a string in a reversal of the motion of an upwards pluck. The first part of the finger
tip to strike the string is the fingernail, then very quickly the fleshy part of the finger tip follows.
This reverse pluck or flick needs a lot of practice especially if you're going to use it in combination
with the pluck or picking. Become facile with all of these string striking techniques. They each
create a unique sound and expand your string striking repertoire.
It almost goes without saying that you can also use your thumb to pluck in both ways.
And of course in this section you'll learn to use all of your four striking fingers as well as your
thumb.
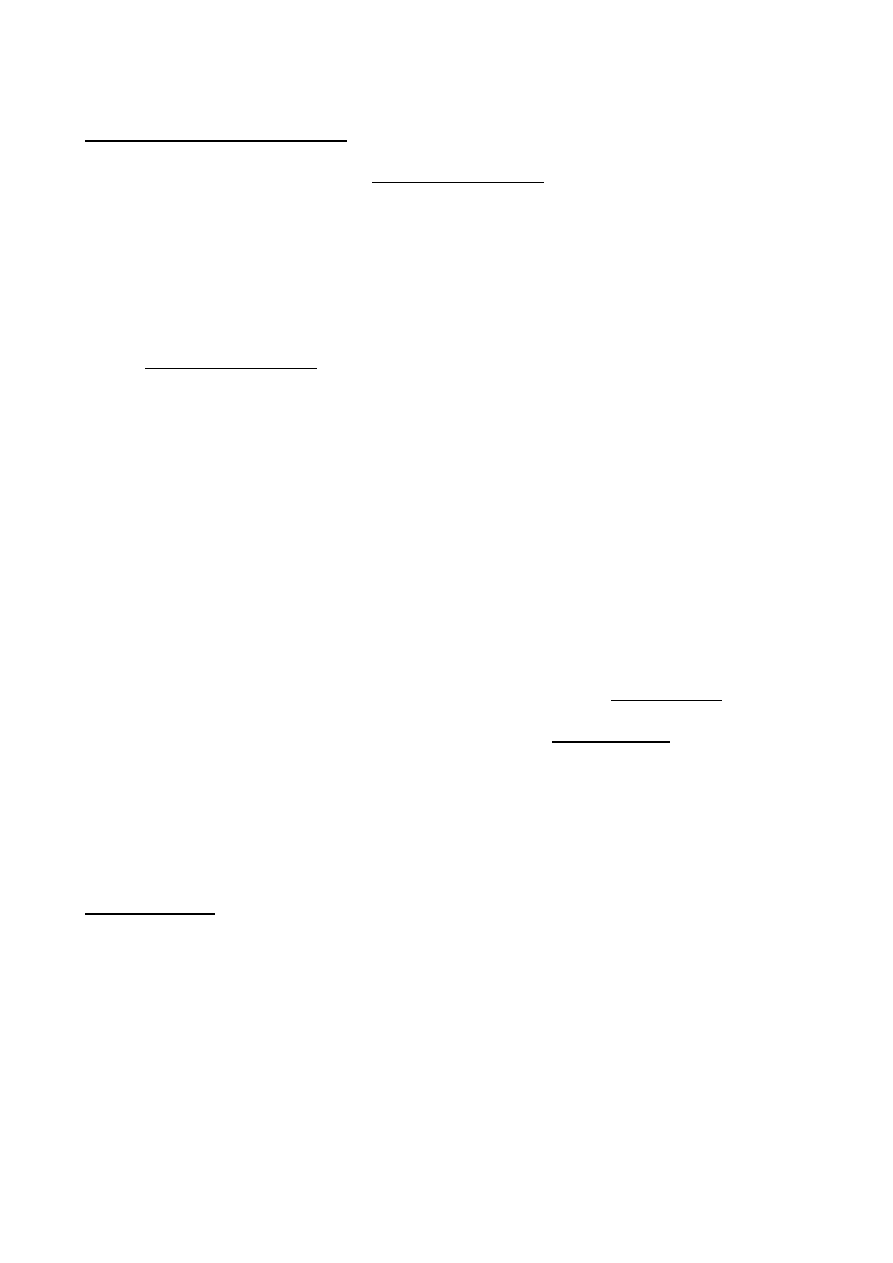
60
Patterned String Striking
A good way to learn to do this is to use patterned string striking much as a classical guitarist would
use his thumb and first three fingers (discarding the use of the pinky - for reasons of efficacy of
finger usage within harmony structures that are full but not redundant - never-the-less, completely
crazy to my way of thinking! Why not chop off your pinky if you don't use it? It's just dead mass
and weight and it probably slows your hand down. Not using your pinky on a guitar or bass,
especially since the bass is electrically amplified and needs little force displayed on the strings to
sound as loud as you want it to, is like . . . I don't know what. Just nuts to me.) Get into the habit of
freely using your thumb and all four of your other fingers.
What is patterned string striking? Vibrating the strings by alternating each of your thumb and four
other fingers in repetitive plucking patterns. If you become adept at flat picking you can do this with
a pick, too, but in favor of the purpose of teaching you how to use your other fingers on your
striking hand I won't talk much about flat picking. That's a whole other world of techniques
although many of the ideas in both camps (pluckers versus flat pickers) overlap. Pick up a book on
bass flat picking if you want. The idea that I present here is fairly simple: train yourself to pluck as
well as pick notes in lots of different ways. In fact what you'll learn in this section about plucking
notes can easily be applied to picking them.
To continue - regarding plucking - for example on the top of a table drum your fingers in this
sequence: thumb, first finger, second finger, third finger or ring finger, pinky. I'll call these T, 1, 2,
3, and 4. Repeat that pattern ten or twenty times. Then try other sequences like: T, 3, 2, 1, 4; T, 3, 2,
1, T, 4; T, 3, 1, 2, 4; T, 1, 3, 2, 4; T, 1, 2, T, 1, 2; T, 3, 4, T, 3, 4. Try leaving out a finger:
T,1,3,4,T,2,3,4. There are a great many useful patterns but the point is to free your fingers from
their usual programmed movements - which are usually in combinations with each other. Learn to
move each of your fingers on your striking hand completely independently of each other and in free
wheeling patterned finger combinations which are controlled by your mind only, no longer
restricted by the ways in which you've learned to move your fingers throughout your life. By free
wheeling patterned finger combinations I mean that both the choices of sequences of plucks as well
as choices of fingers that you use to execute those plucks, can change.
Of course at some point you have to move your fingers from the table top to your bass. And you
can't just strike the strings randomly. So how do you do that?
Assignments
Well, one way is to create approximate assignments for each of your thumb and other four fingers
to each of the strings with some overlap permissible. For example, you can assign T to the E and A
string, 1 to the A string and sometimes the E string, too, 2 to the D string and sometimes the A
string, too, 3 to the G string and 4 as a free striking finger. You might want to experiment with these
assignments in order to find ones with which you feel you can work best.
This all seems incredibly complicated and it is. But it's easily surmountable by learning a few
patterns of string strikes and the idea of assignments, the habit of playing notes on certain strings
with certain (specified) fingers. Now, try actually playing on your bass some of the table top
patterns I mentioned above, along with the finger-string assignments I described.
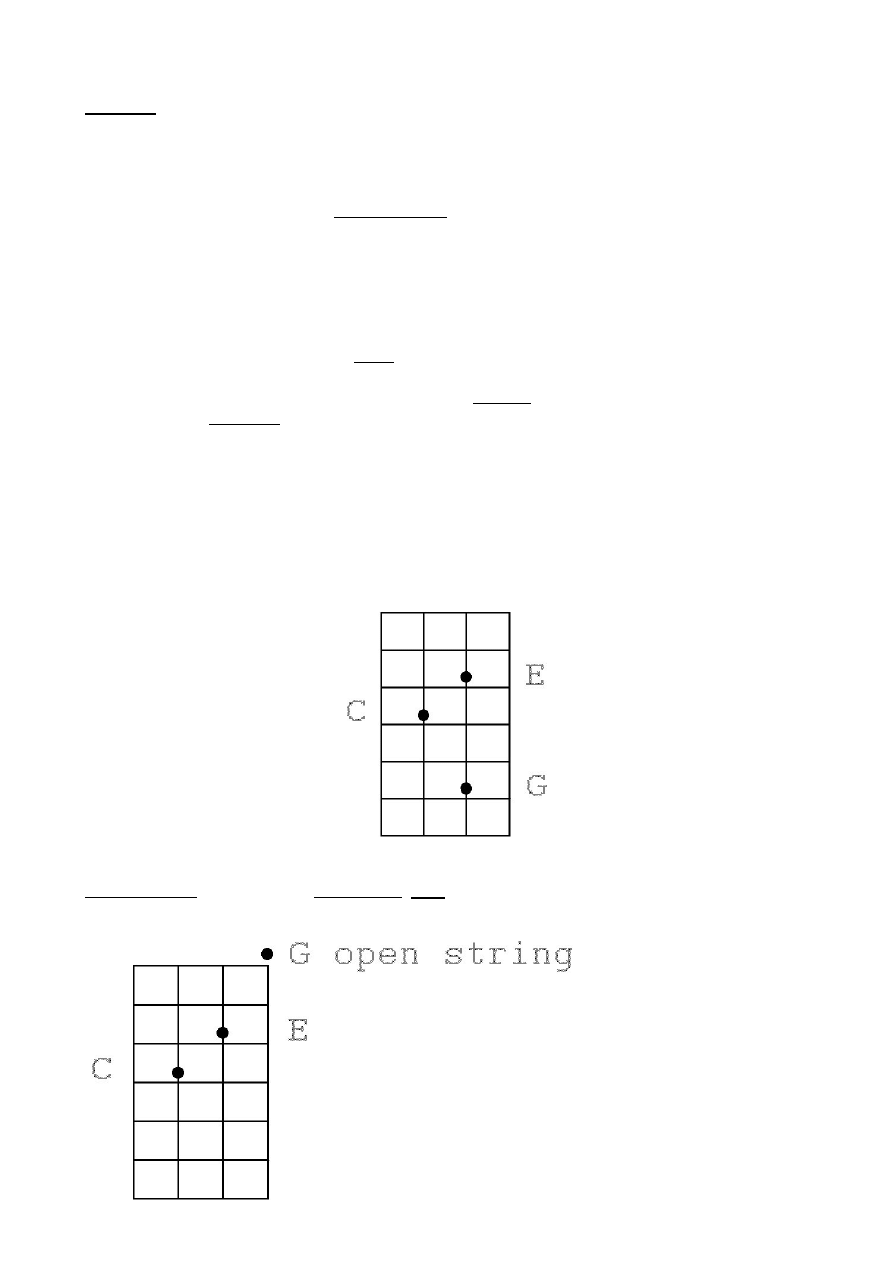
61
But what should I play? Play the notes of chords you just learned in the second section on chords,
Lesson V.
Play loosely. Don't get uptight trying to force your fingers into strict adherence to patterns and the
assignments that you chose. Remember? I said, above, that some overlap is permissible? Well,
overlap of assignments of fingers to strings is permissible and so, too, is overlap of patterns, or,
better put, patterned finger strikes don't have to be perfectly repetitive - they can vary. You have a
lot of freedom here. Keep in mind what you're trying to accomplish: mental control over individual
fingers so you can use any (mentally) specified fingers to strike almost any notes or tones.
Why bother to learn this? Speed. And additional tonal variety. Also, greater flexibility in string
striking over the more simple picking method.
Of course, play these in some sort of count of your own devising.
An easy way to enable yourself to apply the plucking patterns is to visualize the full chord (from the
lists of chords in Lesson V or just the ones you know already) as it would appear on more than two
strings. Or actually fret the chord as a guitar player would and then apply the plucking pattern(s)
with your other hand to the fretted positions in the chords. When using this chordal approach you
ought to insure that individual notes are played without overlap into the duration (time-space) of the
next note by lightly muting each note after you've plucked it, just before you pluck the next note.
This sounds difficult but it comes fairly naturally. Using a simple C, E, G (C major triad) chord you
would usually play the C, E and G notes in a non patterned succession, fretting each note
individually with the fingers of your fretting hand and then picking or plucking each note as you
fret it.
In using a patterned plucking technique it is easier to apply the pattern if you play the C, E and G on
separate strings. First using the assignments, then you could find several useful plucking patterns.
As an illustration:
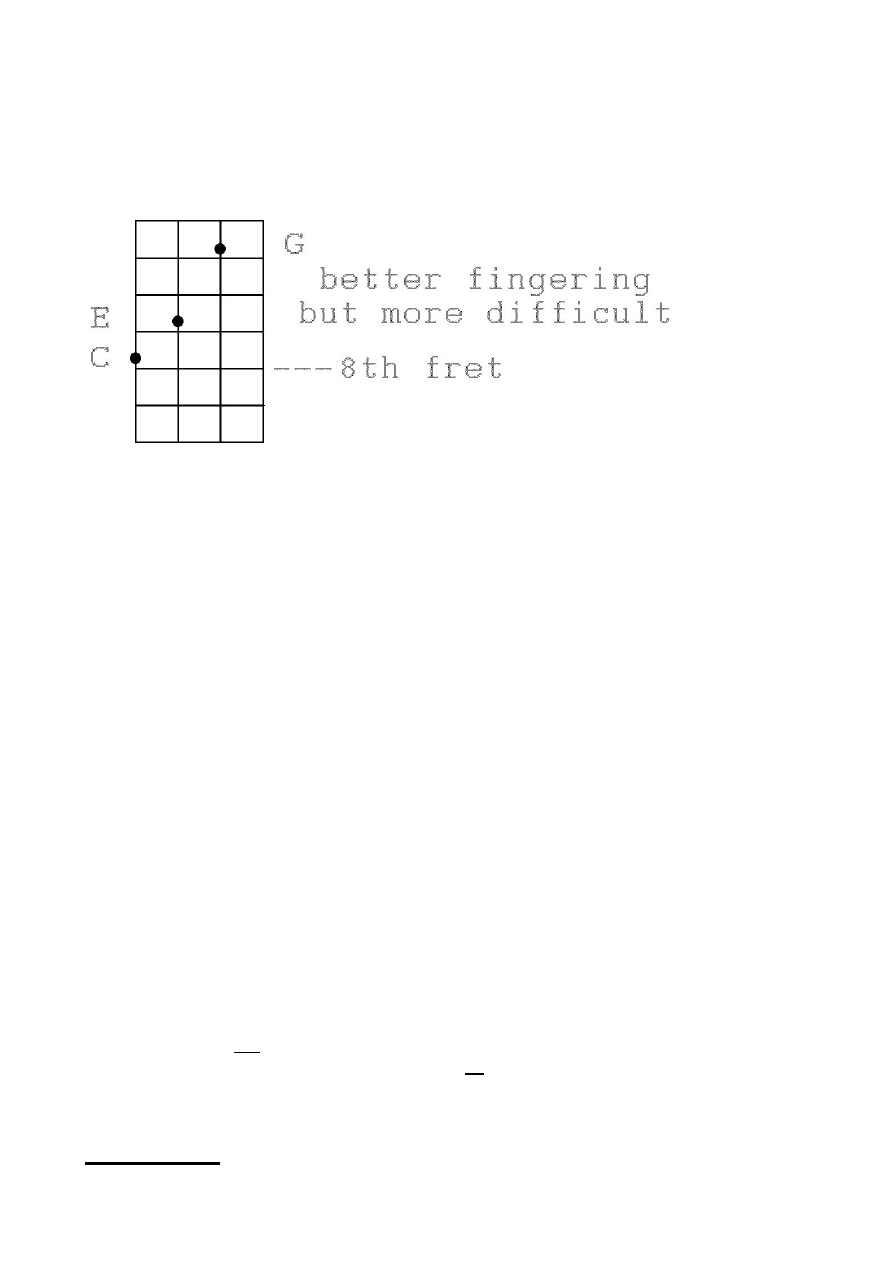
62
no open strings
Now it's also easier to add connecting notes in the scale by fretting them with a free finger. Maybe
use a Hammer-on and/or Trill technique to play them.
Try these plucking patterns as examples:
C E G ----- C E G E ----- C G E G ----- C E C G
T 1 2 ----- T 1 2 1 ----- T 2 1 2 ----- T 1 T 2
C G C E ----- Double C E G E G ----- C E G(high G) E G
T 2 T 1 ------ Stops T T T 1 2 ----- T 1 2 ------- 3 4
C E G G - A - G --- Hammer-on and/or Trill the A note (see
definitions).
T 1 2 3 and 4
Note: when playing a song when you are not copying the bass part from a CD or cassette, when you
are actually creating your own bass part, you must study the chord progression(s) of the song prior
to creating the bass part. Analyze how you could create the chord-based bass note sequences (what
positions, any inversions? what location(s) on the neck? . .) and how you would connect them (what
connecting notes, if any). What choices and durations of notes best fit the rhythm? Then experiment
with your ideas and see if you can improve the playability, the applications of your ideas to the fret
board. If you have input into the choices of chords maybe you can find a better location for that
third or fourth chord so its notes fit more easily into the flow of the notes of the chords before and
after it. Maybe you can contribute a new or more complex chord. This is getting into composing.
Maybe some of the notes in one chord are the same as some of the notes in another - maybe you
only have to change one note to get a different chord. How can this fit into the flow of things?
Maybe this maybe that. Now you can begin to bring all your knowledge into play.
Try some other major keys. Maybe G and E and D.
Arpeggiation

63
Those are some advanced ideas about patterned striking techniques and chords. What do I mean by
arpeggiation?
Definition: arpeggio: striking the notes of a chord in quick succession.
How quick? Within the rhythm. On the beats (quarter notes) or at twice that rate or tempo or
maybe even four times that rate or tempo. These would be eighth notes or sixteenth notes, notes
played more quickly and much more quickly.
Definition: tempo: time, or measure.
Play all of these fingering exercises in counts or rhythms (of your own choosing).
On the bass, what's an arpeggio? It would be playing the notes of a chord, say a C major chord, C,
E, G, in succession. Maybe you'd use T for the C note, 2 for the E note and 1 for the G note even if
the E and G notes are on the same string. You could also play the notes ( and use the fingers, T, 1
and 2 ) in different sequences, as above,
G, E, C or E, C, G or E, G, C.
2, 1, T or 1, T, 3 or 1, 2, 1.
But of course then they would no longer be arpeggios.
Or would they? Or you could use chord structures on three (or even four) strings to play arpeggios.
This is where a very short scale bass comes in handy! If you've gotten this far, find that you like
playing bass, are interested particularly in this section about patterned plucking techniques and have
some extra money you want to invest in music gear (definition: GAS: gear acquisition syndrome - a
psychological and humorous oddity which results in a compulsion to accumulate ever greater
amounts of musical gear), buy a very short scale bass, with a scale equal to or less than less than
twenty five inches, so it's easy to span four frets with your fretting fingers when you're fretting
chords in order to play bass lines and counterpoint double stops and arpeggios.
Try repeating all of the above using minor chords! A minor. D minor. G minor. F minor. E minor.
Add complications: play extended and altered chords (play the arpeggios first) with four or five
notes in them. Then, getting away from arpeggios again, play differing choices of sequences of
notes for each chord using different T, 1, 2, 3, 4 striking patterns. Alternate.
You're going to have to reread the above material, probably several times. Also reread the second
paragraph of the section titled, "My Specific Advice for Learning this Material," on page twelve or
thirteen in the Introductory Pages of this manual.
I'm further asking you to use some of your creativity here. Please take all the above ideas as well as
ideas from earlier days and begin to combine them. Play different arpeggios - see the listings of
chords in Lesson V. Begin to create other patterned string strikes. Use plucking, reverse plucking
or even simple picking with a pick.
Move around by playing in different keys. Create different chord progressions and play the
arpeggios in each of the chords in each of the progressions (groups of related chords).
Since this is an advanced section more of the creativity must come from you. You would like to be
a musician wouldn't you? Even if your interest turns into a hobby instead of a working profession
64
which earns you money, one definition of a musician is being an artist and artists' stock in trade is
creativity. So please involve yourself in being creative at this point.
Double Stops
Other observations and double stops. Much of the time you're going to be alternating the strikes of
your fingers within a rhythm and moving your striking hand around both horizontally and a bit
vertically for tone variations, so not all of your fingers are going to be striking individual strings at
the same time.
In fact most of the time only one finger will strike a string at a time unless you're actually playing
double stops (remember double stops?), two notes at the same time, usually two notes of a chord or
even on rare occasions, triple stops, or triads, three notes at the same time.
Good places to use two notes at the same time would be between downbeat strikes as counterpoint
sounds or even counterpoint percussive sounds (muted tones) to the main supporting bass notes
(which could be coordinated with the drummer's kick drum).
Definition: counterpoint: point against point, that is, note against note. Adding one or more parts to
a given part. The art of combining melodies.
Try this double stop: C, EG using T for the C note and striking (plucking or reverse plucking) the
E and G notes simultaneously using 1 and 2. You would have to play the E and G notes on separate
strings and, in the low C location, an open G string.
Try this: play the individual notes C, E, G (inverted E and inverted G) twice at the lower C note
location (3rd fret, A string). Drop in the F note every second repetition (C, E, F, G). Use T to pluck
all the notes and fretting 2 on the C, F and G notes. Then slide your fretting hand finger (2) up from
the note, G (3rd fret, E string), to the note, C, on the 8th fret, E string. Play the double stop, CE,
using your 1st fretting finger on the E note, 7th fret, A string, and your 2nd fretting finger on the C
note, 8th fret, E string, and use plucking fingers 1 and 2. Then go back down to the open E string
and play the individual notes E and G (with T and T) and then repeat.
Next, play C, E, G in the lower frets, inverted E, inverted G.
plucking 1, 2, 3 plucking T, plucking T.
fretting 2, 1, 0 fretting 0, fretting 2.
Now, mix them all up, playing each mini bass line (or harmonic variation) twice or four times. Get
a rhythm going. Then throw in some vibratos on individual notes and on the high double stop.
Note: if you strummed the three notes C, E, G like a guitar player you would play a chord, a C
chord. Do you hear how muddy or undefined a chord sounds when played on the bass? Double
stops sound more clear and they imply the full chord sonically/aurally with their harmonics.
This is only one simple example of how to use double stops. Your only limits are your imagination!
Definition: strum: to strike all of the notes in one stroke, one motion. On a bass or guitar in a single
downwards or single upwards motion. If plucking, as on a bass or classical guitar, to pluck all of the
notes using separate fingers simultaneously.
. . . or , another similar double stop in the lower frets would be to invert only the G note in the
lower C location and play the double stop by relocating your 2nd fretting finger (2) to the G note,
3rd fret, E string and 1st fretting finger (1) to the E note, 2nd fret, D string.

65
C, E, E, G (lowG), C, E, F, E, G.
plucking 1, 2, T, 3 1, 2, T, T, 3.
fretting 2, 1, 1, 2 2, 1, 1, 1, 2.
Set up a repetitive rhythm and do this ten or twenty times. Create some variations of your own.
On higher strings as well as higher up on the neck, don't always use striking T, 1 and 2; instead use
striking 1, 2 and 3 for the plucks - and as for fretting, for example, the double stop EG at highest C,
10th fret, D string, use fretting 3 for the high C note, 2 for the inverted G note, 10th fret, A string
(below the high C tonic), and 1 for the E note, 9th fret, G string (above the high C tonic). Use
striking 2 for the high C note and 1 and 3 for the high EG double stop notes. Use T for the C note
on the 8th fret, E string. Bounce around between the two C notes which are octaves of each other
and the high double stop, ie.: C(lower), EG, C(higher), EG.
Make up some sort of bass line using a chromatic run like C, E, F, F#, G, connecting with the
double stop, CE, and back down using all or some of the notes in the chords, F, Em, Dm, and back
to C major. Can you discover how F, Em, Dm and then C major can be fretted with the 1st and 3rd
fingers of your fretting hand? These would be called 'Power Chords' if played by a guitar player -
1st, 5th and octave positions, leaving out the 3rd. For these chord-based bass note sequences (the
'Power Chords') try out different patterned string strikes (plucks) with your plucking fingers.
Of course play all of these many times. And try moving them around the fret board into other keys
like D and G. Try to play variations in each of these keys in both a low string location and a high
string location. Use inversions wherever you can. Use vibrato and slides.
Try other keys. A. G. Maybe Bb. D. E.
Try to replicate all of the above ideas using minor chords! A minor. D minor. G minor. F minor.
E minor. This is fairly important. Try using minor pentatonic notes or scales as substitutes for the
notes in the minor chords.
If you can play most of the above, slowly at first, until you don't make any mistakes, then more
quickly until you can play in a rhythm (of your own choosing), you're doing very, very well!!
This section is by no means extensive. It is merely an introduction to ideas about patterned string
striking. If it catches your fancy, I recommend that you read music literature which describes the
basics of classical guitar and/or Travis picking for the acoustic guitar. Travis picking is a more
restricted type of patterned plucking (or picking). Stop at a music store and ask for a booklet on
either or both. Probably available via mail order, too.
A Note About Phrasing And Soloing
Phrasing is literally the relationship between the durations of notes and the spaces or rests between
them. Phrasing can be understood as your choices of durations and placements of notes within the
rhythms which also might be augmented with (choices of) techniques applied at different times (see
Appendix, "Fingering Techniques").
Definition: rhythm: cadence.
Definition: cadence: the repetitive rise and fall of sound. The repetitive emphasis of one sound
among several.

66
Phrasing is a matter of style, your personal sense of style combined with the style of the genre of
music that you're playing. Effects can be useful, too.
Definition: style: manners of performing an action, in music the action would be the playing of an
instrument or vocalizing.
Definition: musical genre: musical kind, type, group, class. For example: some musical genres are:
Rock, Jazz, Country, Classical, Funk, R & B, Hip Hop, Reggae, Dub, Drums & Bass, Bluegrass,
etc. . . .
When playing bass one sometimes gets the opportunity to 'solo' or play a featured part. Soloing can
be seen as the playing of a variation of the melody. Soloing also uses phrasing. What makes it
different from your usual phrasing when your playing is mostly part of the rhythm section is that
your solo playing is made to stand out in one way or another. When soloing, your part stands out or
is featured. Perhaps the rest of the band 'lays back' a bit in the intensities of their playing. Maybe
you turn your volume up or everyone else plays more softly which allows your part to be heard
more easily. Your solo playing might also be seen as extra notes added on top of or interspersed
between the rhythmic notes that you're playing which maintain the rhythm of the song and also
coordinate with the drummer's playing especially his or her kick drum. On bass, a solo must still
maintain the rhythm of the song so your bass solos ought to be at once a combination of the main
rhythmic bass notes as played in the other parts of the song (they could be simplified a bit in order
to gain some extra 'space' for your extra solo notes) as well as some counterpoint melody which is
added to the existing bass structure that you're playing. The best bass solos will do this while using
counterpoint which more or less agrees with or adheres to either: a melody similar to the main
melody of the song or a variation on the actual notes of that main melody or the spirit of that main
melody. I leave the word,' spirit,' to be interpreted in this musical context entirely by you. On
second thought, I question you: what is musical spirit? What is the spirit of music? How can you
create it musically? How can you communicate it? Are techniques useful?
All in all, soloing is extra creative expression on your part, utilizing counterpoint and perhaps
adding embellishments or filling in spaces with notes that reflect the melody or a variation on the
melody. As with phrasing, the uses of Fingering Techniques and dynamics such as loudness,
softness and the placements of emphases can compliment your solos and add drama.
It is particularly appropriate that these brief descriptions of phrasing and solos are included in
this section on patterned string striking because the use of multiple striking fingers can aid you
greatly with both.
Definition: solo: alone. A composition or a passage for a single performer with or without an
accompaniment.
Definition: passage: a portion of a piece of music.
Definition: piece: a single article; an artistic composition.
Definition: dynamics: relating to the various degrees of loudness in musical sounds.
Definition: drama: a series of deeply interesting (important) events; vivid, striking, often with an
element of unexpectedness. This is incredibly important. You would do well to deepen your
understanding of musical elements which create drama. Repeat that last sentence to yourself.
Definition: variation: a transformation of a melody by melodic, harmonic, contrapuntal and/or
rhythmic changes.

67
Definition: contrapuntal: counterpoint - point against point, that is, note against note. Adding one or
more parts to a given part. The art of combining melodies.
Definition: embellishment: act of adorning; decoration. From French, meaning beautiful. To
embellish: to make beautiful with ornaments.
Definition: ornament: anything that adds grace or beauty.
Some techniques that you can use to create embellishments or ornaments are: trills, vibrato and
slides (see 'Fingering Techniques' in the Appendix).
A simple example of an embellishment is: play the notes C, E, G, E anywhere on the fret board
several times, one note per one tap of your foot; on one of those sequences when you play the E
note, having fretted it with your first fretting finger, quickly hammer on and pull off the F note
several times with your second fretting finger and then continue in the rhythm with the rest of the
sequence, G, back down, E, C, E, G, E . . . That little ornament was a simple embellishment, a
simple trill.
Try the same sequence using a vibrato at the E note. Try using vibrato on some other notes in the
sequence. Try combinations of a vibrato and a trill on different notes.
Try a quick slide up to the C note from B or Bb.
Try all sorts of mixups of these fingering techniques using the simple C, E, G, E note sequence. It's
overkill but good practice. Play some other note sequences of your own choosing elsewhere on the
fret board while using these embellishments. Try inventing some others.
Where should you put them? Anywhere they have room to fit. Go crazy!
Try including embellishments here and there in your normal playing.
Back to the main pages of this booklet, now, Lesson VI, modes.
One more thing: don't you find that interpreting all of these descriptions of where notes are played,
for example, the X note on the Y fret of the E, A, D or G string, is sometimes frustrating or
irritating? Well, it's true. It is. For me, too. You can spend more time trying to understand the
descriptions than you do playing the exercises after you've figured out what they are trying to tell
you! That's because it's so much more complicated to write out this info in this descriptive form
than it is to just write and read music - the notes - on a staff. It would be so much easier to just look
at a C note written on the staff. Why don't you learn how to do that? It won't take you any longer
than an hour or so to learn the basics and at the more advanced level that you've now reached it
would make your musical life easier in the future especially when you start to read bass music
literature like "Bass Player" magazine which often has articles that contain bass musical notation as
examples of the ideas discussed in the prose.
Buy a musical notation primer which describes and explains the musical symbols used in writing
music for the bass. This can be found at any music store or by mail order or in publications like the
'Condensed Pocket Dictionary of Musical Terms', see page one of this booklet and then the
Appendix.
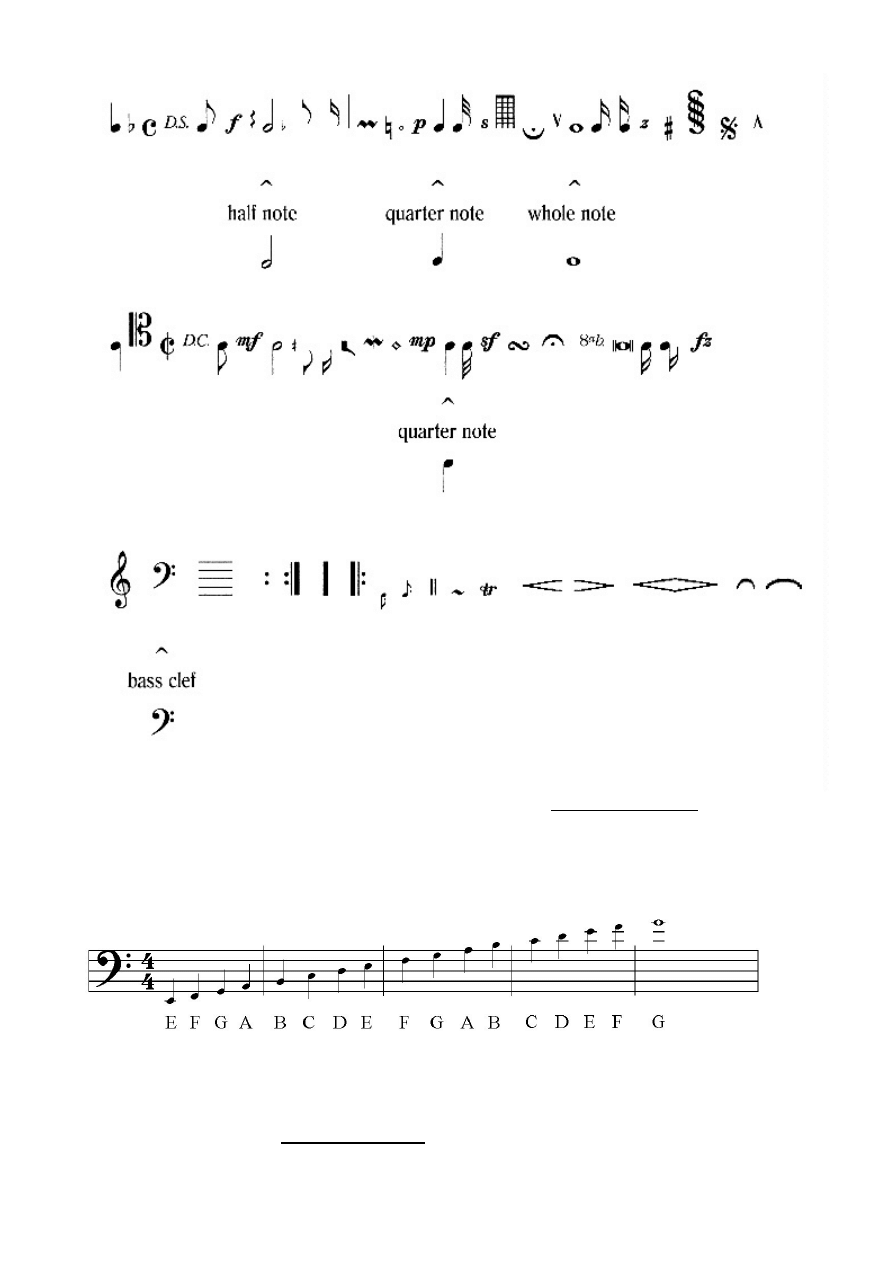
68
All of the above symbols are used in writing and reading music. Don't be intimidated by them
because there are so many. You'll get used to them one at a time over a period of months if you
decide to learn to read music and buy a music notation primer at your local music store.
Time signature - four quarter notes per measure: 4 / 4
The above are the absolute basics: quarter notes, a whole note, bass clef symbol, time signature and
what the names of the notes are on the fret board of your four string bass (you could consider these
notes as written in the key of C or its relative minor key, A minor, because the staff displays no
sharps or flats). This is the absolute minimum you need to know in order to play, say, the bass
lines written in music notation which might be included in articles that appear in contemporary and

69
common music literature. You can add to your knowledge of musical symbols as needed on an
ongoing basis if you have a Musical Notation Primer.

70
Afterthoughts
Five Strings ?
What about five strings? This is one of the thoughts that you'll begin to consider once you begin
playing with other people. You may experience pressure from other musicians to play lower notes
which can only be reached with the addition of a lower tuned string which, of course, would be on a
five-string bass. The pitches of these lower notes are not that much lower than the low E when you
consider their primary or foundation frequencies. The foundation frequency of the lowest bass E
note is about forty-one point two cycles per second (41.2 hertz), the number of times in one second
that the string swings from top to bottom and back to the top of its path of movement. If you add a
lower (B) string, the primary frequency of the low B note is around thirty-two hertz (31.87 Hz) - not
a lot of difference, really, BUT, and this is a big but, some musicians will claim these ten or so
cycles per second will add a great deal of extra 'bottom' or bass tonality to the music. Currently,
this is part of the evolution of style and the expectations of (some) of the listening audience. As for
myself, using those lower tones are a matter of taste and agreement with the other musicians as to
what is best for the group and the song - the musical philosophy of the group. As I said at the
beginning of this booklet, there are some distortion problems with the lower bass notes, C#, C, B,
and this uncontrolled distortion has to be compensated for in one way or another (fingering the
notes and striking the strings differently, or adjusting your equipment in one way or another) so I
can't speak totally in favor of using them - BUT, they're being used by bassists all over the world so
you might want to consider using them, too.
Definition: foundation: base of a building; the groundwork or basis. Regarding a note or a pitch,
which are complex sounds, the base or basis of the sound. The simple tone.
This could necessitate an additional outlay of cash for another bass, one with five strings. And of
course it would also necessitate undergoing a short transition period during which you learn to
incorporate the lower notes into your playing. There are advantages and disadvantages to this. The
disadvantages are time investment and adjustment of your mental musical concepts as well as the
physical concepts of positional playing (which is very minor). The advantages are, of course,
greater range of lower pitches and the addition of notes which allow you to have additional
inversions at your fingertips. This last advantage can be very satisfying! The advantages seem to
far outweigh the disadvantages.
There is an alternative to buying a five-string bass.
What about four strings? Tuned B, E, A, D instead of E, A, D, G? I mean, who really uses the
fourth (G) string on a four-string bass anyway? Why not just string your four-string bass using the
lowest four strings of a five-string set? This gives you a low string that is five notes or half-steps
lower than the previously lowest E string and only eliminates the high G string and the few times
that you would use the notes on that string as harmonizing notes in diads or double stops. This
added lower string is easily incorporated into your playing because all the positional fingerings
which you've learned, the patterns of notes which can be moved as a group anywhere on the neck
without changing their geometric pattern, can be migrated one string lower with ease because the
added lower string is tuned in the same relationship in which all the other strings have been tuned
(fifths, going downwards). The fifth fret position on the low B string is the same note as the open
string position on the next highest string, now the E string as it is for all of the other strings, too.
One advantage of using a four-string bass with this string configuration is that the neck of a four-
string is slimmer than the neck of a five-string bass. A slimmer neck is generally easier on the
muscles in your fretting hand.
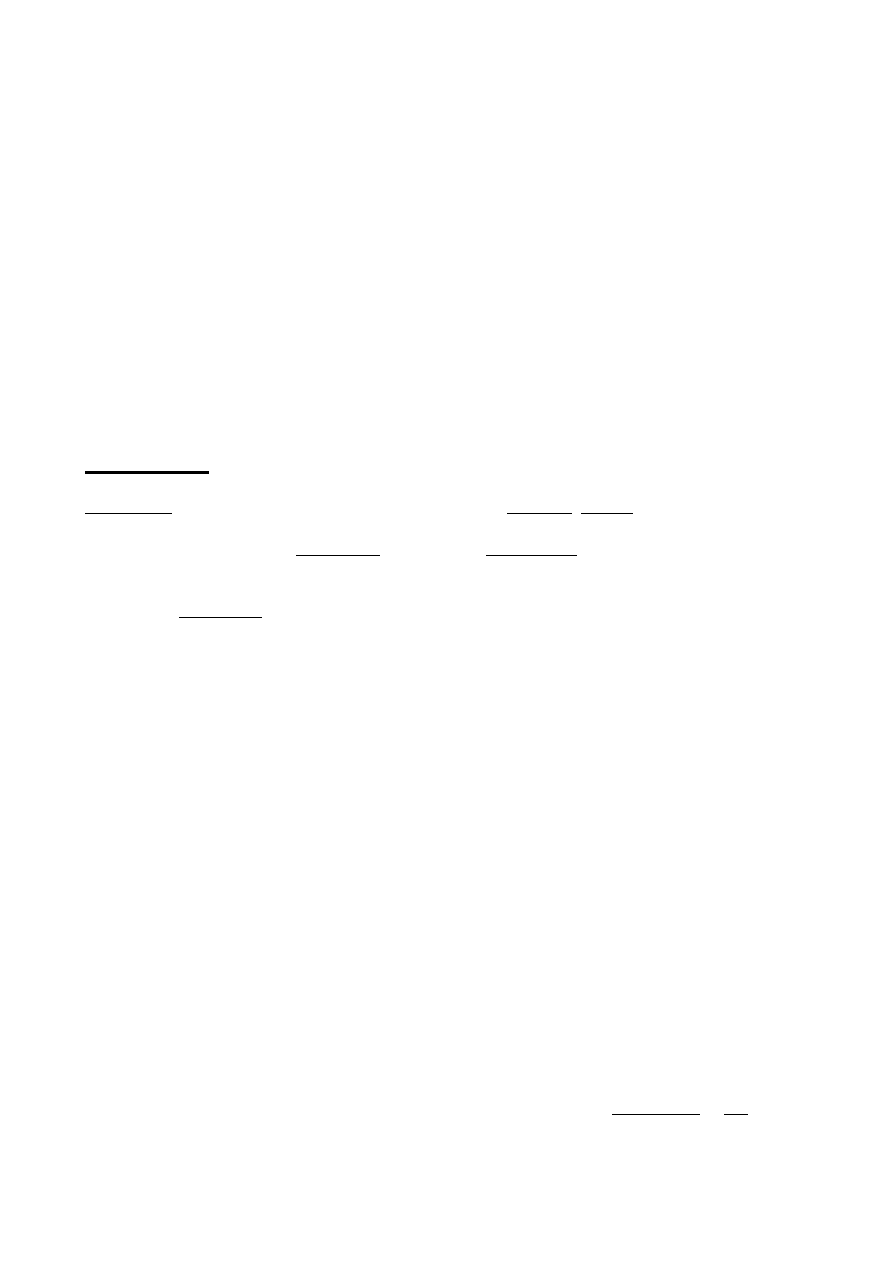
71
If you were to adopt this particular four-string configuration you might need to have the tension
bar(s) in the neck of your bass adjusted but this may not be necessary if you use a set of strings (a
five-string set) which has lower tension or a lighter gauge (thicknesses of the strings). For example,
if you were using a medium gauge four string set, when switching to the lowest four strings of a
five-string set, use a lighter gauge. Or it's entirely possible that using the same gauge would make
no difference to your neck at all. Just keep an eye from time to time on the straightness of the neck
by peering up the neck from just above the body of the bass. You might also need to have the
grooves in the nut, the small bar near the top of the neck near the tuners through which the strings
pass and on which the strings rest, filed a bit to make them wider for the new strings. But also,
maybe not. You'd have to judge whether the new strings set well and completely in the grooves. If
you have to file them wider it can be tricky. You do not want to file them deeper. It would be best if
you had a technician at a local music store do it for you if it's needed. You'd need a set of very
small, very finely serrated files which are available at Radio Shack stores or the Home Depot.
Specialized Nut Files which have blunted edges and file only on the sides are available from
Stewart-MacDonald, telephone: 800 848-2273; web site: stewmac.com, but they're expensive.
So, that's a way for you to experiment with lower frequencies if you have the desire. It's easy to do.
Frequencies
Frequencies are simple sounds and consist of one primary vibration. Pitches are sounds that
instruments and voices produce and are complex and consist of multiple frequencies although only
one of those frequencies, the simple tone, is primary or foundational (to that pitch) while the rest are
overtones or harmonics.
The primary frequencies of the open strings on the bass are: E - 41.2 cycles per second (hertz), A -
55.0 Hz, D - 73.42 Hz, G - 98.0 Hz. A low B string would be 30.87 Hz.
Foundation frequencies, from the A note, open 5th string on a guitar, one octave higher than the
open A note on bass, up to middle C would be: A - 110.0, A# - 116.5, B - 123.47, C - 130.81, C# -
138.6, D - 146.83, D# - 155.6, E - 164.81, F - 174.61, F# - 184.9, G - 196.0, G# - 207.7, A - 220.0,
A# - 233.1, B - 246.94 and middle C - 261.63 Hz.
As you can see, the primary frequencies of the A notes are the only ones that are consistently a
whole number and the reason for this is that A is one of music's defined conventions. It's defined as
A 440, also the frequency of an A tuning fork.
Octaves of any given simple tone are about one half or double the frequency of the (simple) tone.
For example, A 440, 220, 110 and getting into the range of bass, A at 55 Hz. Of course getting
above A 440 the next highest octave would be A at 880, then 1,760, 3,520, 7,040, 14,080 then
28,160 which is way above the range of human hearing of which the limit is around 20,000 cycles
per second or hertz, Hz.
Why do I mention these? These frequency figures can help in understanding the ranges of
frequencies that musical instruments produce. This is valuable information when playing and
recording because you have to eliminate conflicts within 'sonic spaces' (frequency ranges), that is, if
two or more instruments are being played or recorded and they share similar frequency ranges,
uncontrolled distortions and other anomalies can easily occur so decisions have to be made about
how to treat the sounds produced by each instrument in order to downplay or eliminate these
conflicts. (This idea of the treatment of sounds introduces the concept of equalization or EQ, the
boosting or decreasing of the loudness of frequencies, a tool often used in recording and as sound
modifying controls on bass amplifiers).
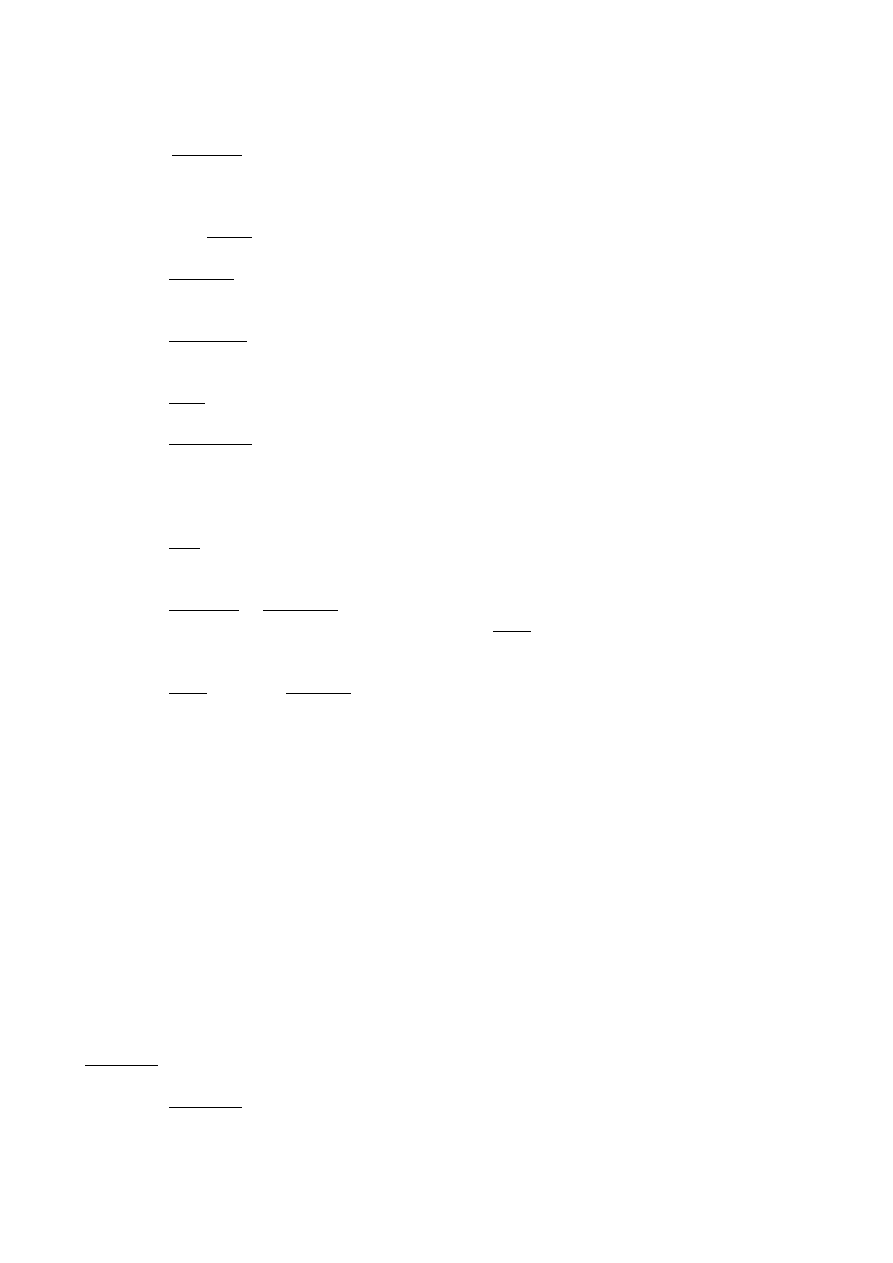
72
Musical instruments include the human voice which has a range of about two thousand Hz, from
about forty hertz for bass singers, through the tenor and alto ranges, to, maybe, two thousand hertz,
which would be the highest pitches of the soprano range. Of course instruments, as well as the
voice, have overtones which are higher than as well as mathematically related to the frequencies of
the simple tones which are written as notes and played or sung as pitches made up of the simple
tones and their harmonics. It's not so important to address these overtones or harmonics as potential
causes of sonic conflicts because they are weaker and softer and less intense. They are ripples
(literally) on the waves of the simple tones and form a sonic shimmering backdrop.
Definition: vibration: a swinging, backwards and forwards, an oscillation, varying between certain
limits.
Definition: foundation: base of a building; the groundwork or basis. Regarding a note or a pitch,
which are complex sounds, the base or basis of the sound. The simple tone.
Definition: pitch: the highness or lowness of a sound, the tuning of an instrument.
Definition: simple tone: a sound which consists of one thing or element; not complex or compound;
a single frequency often unrecognizable as a note or a pitch since a pitch is made up of multiple
frequencies. An example of a single frequency is a sine wave as measured by and displayed on an
oscilloscope.
Definition: tone: a musical sound of definite pitch; a complex sound consisting of a simple tone and
overtones.
Definition: overtones or harmonics: partial tones which accompany a simple tone; in physics, for
example, one might look at the fluctuations along a sine wave's path, little waves on the larger
wave, like bursts of foam or breaks on an ocean wave.
Definition: wave: a state of vibration (a tone) propagated through a system of particles (the air or
water: the medium); an undulating surge traveling on the surface of the sea; to move up and down
in time.
Our musical instruments and scales are not perfect. For example the frequency of a 5th of any
simple tone is about 49 percent higher than the original but the 49 % figure is only approximate. It
becomes more and more exact, 49.7 to 49.9, and even more precise as we define more and more
exactly what the notes in our scale are to be. The scales we actually use are a little flaky and allow
small deviations in pitches. This becomes more apparent to our ears, if they become refined, as we
listen to extended chords and orchestrations. Everything is a balancing act. We will sometimes use a
pitch which is slightly different than what we would expect to calculate mathematically or measure
on an oscilloscope in a musical circumstance in which the surrounding notes have changed (same
note, different chord). By aurally balancing, pleasing our 'ears,' by slightly changing the note, we
make it almost imperceptively higher or lower, so that it 'sounds better' in the new or different
environment. An example of this would be any note, let's say a 7th note of a major scale found in a
major chord of one kind or another becoming, say, a 4th in another scale and another chord, say, an
F suspend 4. The two so called 'identical' notes, Bb, would actually sound slightly different if
measured in one way or another, especially if they were played on an instrument with non-fixed
intonation mechanisms like a violin. Or a fretless bass. Many examples of this can be stipulated.
Definition: intonation: the pitching of musical notes. When we check to hear that the note played at
the twelfth fret sounds like the note of the same string played 'open' or not fretted (the open string)
we are checking the intonation of that string and, mechanically speaking, the proportion of its
lengths: from the twelfth fret to the bridge, the adjustable string support at the bottom of the bass,

73
compared to its total length, bridge to nut, the grooved string support at the top of the neck near the
tuners. If you half the length of a vibrating string you make it sound an octave higher. There are
physical ratios of string lengths for all the other notes, too.
This information about frequencies will be useful to you sometime. You might want to get a chart
which depicts the frequency ranges of many instruments. In fact I've included one on the next page
titled, "Frequency Ranges of Musical Instruments."
Frequency Ranges of Musical Instruments
Instrument Frequency Range in Hertz
(Cycles Per Second)
Acoustic Guitar -------------------------- 82 to 880
Bass Guitar ------------------------------ 41 to 300
Bass, Standup ---------------------------- 41 to 261
Bass Guitar, 5 String, with Low B String - 32 to 300
Bassoon ---------------------------------- 62 to 525
Clarinet ---------------------------------160 to 1750
Electric Guitar -------------------------- 82 to 1050
Flute ------------------------------------260 to 2600
French Horn ------------------------------ 82 to 1000
Oboe ------------------------------------ 260 to 2600
Piccolo --------------------------------- 525 to 4200
Pipe Organ ------------------------------- 27 to 4200
Trumpet --------------------------------- 160 to 1000
Tuba ------------------------------------- 45 to 240
Violin ---------------------------------- 200 to 3100
Vocal, Bass ------------------------------ 40 to 900
Vocal, Tenor ---------------------------- 130 to 1300
Vocal, Alto ----------------------------- 175 to 1760
Vocal, Soprano -------------------------- 220 to 2100
Bass Frequencies
5 = 30.87 B string
4 = 41.20 E
3 = 55.00 A
2 = 73.42 D
1 = 98.00 G
Key frequencies on the bass are:
75, 350, 500 and 10,000 hertz.
Guitar Open-String Frequencies Frequencies from 5th Str. A - mid. C
6 = 82.41 E ------------- A - 110.0
5 = 110.00 A ------------- A# - 116.5
4 = 146.83 D ------------- B - 123.47
3 = 196.00 G ------------- C - 130.81
2 = 246.94 B ------------- C# - 138.6
1 = 329.63 E ------------- D - 146.83
-------------------------- D# - 155.6
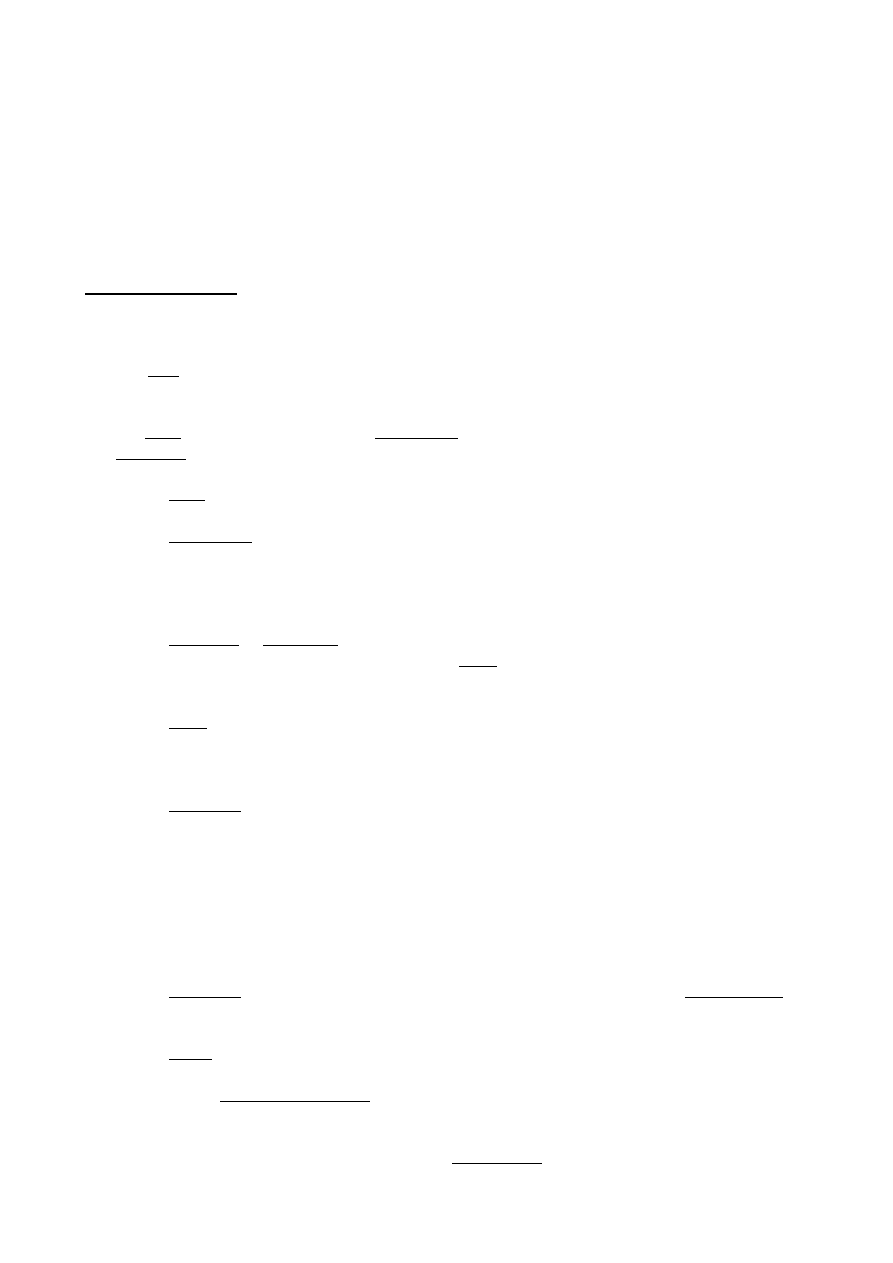
74
-------------------------- E - 164.81
-------------------------- F - 174.61
-------------------------- F# - 184.9
-------------------------- G - 196.0
-------------------------- G# - 207.7
-------------------------- A - 220.0
-------------------------- A# - 233.1
-------------------------- B - 246.94
-------------------------- C - 261.63
What Is Tone?
What do people mean when they describe certain musical sounds as 'tones?'
What is 'tone?' What is the 'Quest for Tone?'
There is a distinction between a tone and 'tone.' A tone is, technically speaking, a musical sound of
definite pitch. It can be a simple sound (simple tone) or a complex sound consisting of a simple tone
and overtones.
Definition: pitch: the highness or lowness of a sound.
Definition: simple tone: a sound which consists of one thing or element; not complex or compound;
a single frequency often unrecognizable as a note or a pitch since a pitch is made up of multiple
frequencies. An example of a single frequency is a sine wave as measured by and displayed on an
oscilloscope.
Definition: overtones or harmonics: partial tones which accompany a simple tone; in physics, for
example, one might look at the fluctuations along a wave's path, little waves on the larger wave,
like bursts of foam or breaks on an ocean wave.
Definition: wave: a state of vibration (a tone) propagated through a system of particles (the air or
water: the medium); an undulating surge traveling on the surface of the sea; to move up and down
in space and time.
Definition: frequency: the number per second of vibrations or waves or cycles of any periodic
phenomenon, one which occurs at regular intervals. The number of times that a vibration or wave
occurs each second.
'Tone' is a musical colloquialism. The use of the word, 'tone,' in the phrase, 'Quest for Tone,' is less
technical, musically speaking, more of a musical cliche, an idiomatic expression which loosely
means: character, the sum total of all the peculiar qualities of a musical sound which constitutes its
individuality and desirability (my inclusion).
Definition: colloquial: pertaining to, or used in, common (musical) conversation; a colloquialism is
a form of expression used in familiar (music) talk.
Definition: cliche: a commonplace phrase.
Definition: idiom: idiomatic expression: an expression, characteristic of a language, in this case the
language of music, not logically or grammatically explicable.
Another musical colloquialism is use of the word, 'fundamental,' which, colloquially, means the
same as the more technical term, 'simple tone' or 'primary tone.' By technical, I mean very

75
specifically defined. Technically, 'fundamental' means the root of a chord; a tone which produces a
series of harmonics; a generator (of harmonics) but everyone uses 'fundamental' as a musical
colloquialism when referring to the simple tone or primary tone which does, as the definition of
'fundamental,' above, states, generate harmonics. So the terms, 'simple tone' and 'fundamental'
intrude on each other's definition. To keep concepts very clear I've chosen to use the more specific
term, 'simple tone,' whenever there's a choice between the two. However, you will read the term,
'fundamental,' often, especially in music magazines.
Definition: root: the lowest note of a chord which is in the fundamental position (non inverted), for
example, a C major chord, C, E, G, the root is the C note.
But I digress . . .
Why do I include harmonics? Because these partial tones add character to 'tone.' When emphasized
they give 'tone' additional characteristics such as more treble or more presence. They also contribute
to the creation of what we perceive as the signature identity of any particular instrument or sound.
Definition: character: essential features or peculiarities; the sum total of peculiar qualities which
constitute individuality.
Definition: presence: a characteristic of sound which places it in the foreground of perception.
Definition: signature identity: signature: to sign: proof, outward evidence; to indicate, convey or
communicate; identity: state of being the same; who or what a person is. Indication of who or what
a person is, therefore as a musical term, an indication of what an instrument or voice is or what a
person sounds like. And will sound like most of the time.
Our perceptions of 'tone' vary from musical genre to genre. One musician's 'tone' can be another
musician's nightmare if they play different types of music, although this is not always true. So the
'Quest for Tone' takes musicians on all sorts of paths depending on the genre of music in which
they're involved.
Definition: musical genre: musical kind, type, group, class. For example: some musical genres are:
Rock, Jazz, Country, Classical, Funk, R & B, Hip Hop, Reggae, Dub, Drums & Bass, Bluegrass,
etc. . .
The common meaning of 'tone' also includes another characteristic of sound, timbre, the quality of
tone or sound. Now we've added another important adjective: quality.
Definition: quality: degree of goodness or worth.
So, 'tone' now includes character, harmonics and quality or an idea of worth or approval. Good
'tone' is sound that finds approval among musicians playing in a genre and fans who accept or set
the standards for what 'sounds good' in that genre at that time. Getting more complicated by the
minute.
Texture. Yet another complication! It's beginning to seem endless. Musical Texture is an impression
resulting from hearing the combining or interrelating of the parts of a whole.
What's an impression? An idea or emotion left in the mind by an experience. A vague, uncertain
memory. So texture is a 'soft' word in music. It has no hard and fast meaning. Boggles the mind.
Now 'tone' has drifted into the realm of vague and uncertain memories. Pretty soon 'tone' could take

76
us into the land of the delusional! Expenditure of effort without consistent results based on a false
belief that something exists when it doesn't. Does 'tone' exist or is it an illusion? A sonic apparition.
You can see why musicians can become obsessed with the 'Quest for Tone.' Precisely because it is a
(never ending) quest which is at best satisfied momentarily, for the one song or for the evening if
you're fortunate enough to have one of those perfect, in-the-musical-zone, nights that come along
once in a while. So, it's very subjective. An individual can hear a recording of a sound that she
thought was just perfect the night before and, upon hearing it again the next day, from a recording!
think, "What was I thinking last night? How could I have believed my 'tone' was so good? Yecch."
So perhaps 'tone' ought not stand alone. Maybe it ought not be judged as an individual element.
Sounds have to work together. This makes the 'Quest for Tone' even more complicated! In the
sense that sounds have to be modified from their original states in order to work well relative to
other sounds, the 'Quest' can become even more difficult!
So what's the solution?
Is there a problem?
Maybe 'tone' is not really a problem at all. Maybe it's a spirit. Or a Mantra. Or a Zen Koan: you
know it when you have it! Maybe you don't have to search for it at all. It might be at your fingertips
all the time. All you have to do is hear it, in your mind's ear, then find a way to express it, articulate
it. Maybe the 'Quest for Tone' is the connection between your mind and your playing. Between your
desires and your physical articulations which is your touch. Certainly happiness can be found here.
The perfect 'tone' is the one that makes everyone happy in the moment and you get it through
experience, experimentation and playing in the moment, by developing your touch, by creating all
your instrument and amp tone settings, effects and dynamics, relative to all the other sounds around
you and articulating your notes in the way that best suits your sonic environment and makes
everyone smile and nod in appreciation. It can be bliss, beyond your self, even mystical. That's why
people love it.
Which is not to say that it is impossible to gain. It happens more often than you would think. Which
is meant to be encouraging.
Definition: touch: distinctive handling of a musical instrument, skill or nicety in such; sense of
feeling or contact; act of touching: any impression conveyed by contact.
Tone Tips
As we expand our musical horizons and get GAS (gear acquisition syndrome) our eyes enlarge and
become bigger than our pocketbooks. We would like to have the use of all sorts of amps and basses
but we have financial limitations. To save money consider buying an amp simulator like the Bass
Pod made by Line 6. It's an effects device that gives you models, simulations of sixteen different
bass amplifiers all with very different characteristics. Expand your tonal horizons.
Definition: simulator: in modern music, to make something sound similar to another thing, like
another thing. An amp simulator gives you the ability to make your music sound like you're playing
through a totally different amplifier.
Cheap equipment is useful, too. If you could plug your bass into it, you could play through a radio
from 1930, put a microphone in front of it and plug the mic into your regular amp. You would
modify your tones and your 'tone.' You could play in different environments like a bat cave or in a

77
hot air balloon's basket to modify. Of course it would be easier to simulate these environments with
effects devices. And often that's exactly what bassists do to give themselves more options.
History
Up until the early twentieth century tones were fixed, as sounds produced by a limited number of
musical instruments. All music was written for instruments which were fixed in 'tone' and in
signature individuality. In a way this made it easier for composers because they had a limited
palette of instruments with which to work; they didn't have the complications of modern music
which utilizes instruments which can produce infinite 'tones.' They did not have the 'Quest For
Tone.' In the beginning of the twentieth century that changed with the inventions of the first
electronic instruments. Now, in the present day, almost any musician, including bassists, can
produce any 'tone' imaginable. This is an amazing evolution! But, like anything else, it brings
problems. How do you make ('tone') decisions when you have such abundance?
Why do I mention this bit of history? To emphasize how important 'tone' has become. Modern
music has left the age of tones with its focus on the arrangements of notes as its most grand
accomplishment and entered the age of 'tone.' We can no longer take 'tone' for granted and keep the
major focus of our creativity on tones. It's the opposite in modern music, Rock music, which
evolved from the Blues. Now 'tone' is more important than the notes we play. This is as true for the
Rock bassist as it is for all other Rock instrumentalists as well as Rock vocalists, too. Contrary to
the way some people perceive modern music, Rock music has become more subtle and
sophisticated tonally than music has been for thousands of years!
78
Bass Form
79
Guitar Form

80
Tab Charts
Tab Specification
________________________
________________________
G ----------------------------------------------------------------
D ----------------------------------------------------------------
A ----------------------------------------------------------------
E ----------------------------------------------------------------

81
Position Descriptions
Position
1st 2nd 3rd 4th 5th 6th 7th 8th
Finger
Note
String
Fret
Position
1st 2nd 3rd 4th 5th 6th 7th 8th
Finger
Note
String
Fret
Position
1st 2nd 3rd 4th 5th 6th 7th 8th
Finger
Note
String
Fret
Position
1st 2nd 3rd 4th 5th 6th 7th 8th
Finger
Note
String
Fret
Position
1st 2nd 3rd 4th 5th 6th 7th 8th
Finger
Note
String
Fret

82
Tab Charts
Tab Specification
________________________
________________________
G ----------------------------------------------------------------
D ----------------------------------------------------------------
A ----------------------------------------------------------------
E ----------------------------------------------------------------
G ----------------------------------------------------------------
D ----------------------------------------------------------------
A ----------------------------------------------------------------
E ----------------------------------------------------------------
G ----------------------------------------------------------------
D ----------------------------------------------------------------
A ----------------------------------------------------------------
E ----------------------------------------------------------------
G ----------------------------------------------------------------
D ----------------------------------------------------------------
A ----------------------------------------------------------------
E ----------------------------------------------------------------
G ----------------------------------------------------------------
D ----------------------------------------------------------------
A ----------------------------------------------------------------
E ----------------------------------------------------------------
G ----------------------------------------------------------------
D ----------------------------------------------------------------
A ----------------------------------------------------------------
E ----------------------------------------------------------------
G ----------------------------------------------------------------
D ----------------------------------------------------------------
A ----------------------------------------------------------------
E ----------------------------------------------------------------
G ----------------------------------------------------------------
D ----------------------------------------------------------------
A ----------------------------------------------------------------
E ----------------------------------------------------------------
G ----------------------------------------------------------------
D ----------------------------------------------------------------
A ----------------------------------------------------------------
E ----------------------------------------------------------------
83
Bass Staves
84
Bass and Treble Staves
85
Bass Staves and Tab
86
Bass Staves and Tab
87
Blank Staves
Document Outline
- Start
- Contents
- Introduction
- Lesson I
- Lesson II
- Lesson III
- Lesson IV
- Lesson V
- Lesson VI
- Appendix
- Addendum
- Afterthoughts
- Bass Form
- Guitar Form
- Tab Charts I
- Position Descriptions
- Tab Charts 2
- Bass Staves
- Bass and Treble Staves
- Bass Staves and Tab for a 4 String
- Bass Staves and Tab for a 5 String
- Blank Staves
Wyszukiwarka
Podobne podstrony:
Wordpress Beginner to Pro Guid Timothy Short
Bass Guitar Lesson Fender Players Club Bass For Beginners
Bass Guitar Lessons Beginning Bass Guitar Exercises And Grooves
[Jazz Bass] Bass Guitar Lesson Marcus Miller Funk Intro (bass score) kensey
Php Reference Beginner to Intermediate Php5
One More Zero How To Trade The Forex Like A Pro In One Hour
Boxer Rebellion A History from Beginning to End
Part 2 Lesson 5 Spanish Verbs 1st to 5th
Lesson Plan Recognizing when to Pass and when to Dribble
Willingness to Engage in Unethical Pro Organizational Behavior
I am beginning to see the light
Bon Jovi Wanted Dead or Alive Tablature for Guitar Lessons
Lesson Plan Tactical Application to Dribbling
Rusty Cooley The Art Of Picking (guitar lesson)
2 4 Unit 1 Lesson 3 – On The Way To The Club
Photoshop From Beginner to Exp Timothy Harrison
więcej podobnych podstron