Page 1
Brass “Cross of St. John” Armor Mount
06/04/2006 02:38:30 PM
http://www.willadsenfamily.org/sca/danr_as/armor-mount/armor-mount.htm
Brass "Cross of St. John" Armor Mount
Note: This page contains copyrighted material which is presented as documentation in the course of scholarly research. The owners of this page do not, and in some cases
cannot, give permission to copy the content here.
July 2002 - April 2003
Summary
*
Historical Documentation
*
Artistic Design
*
Cast Mounts
*
Brass Casting
*
Finishing
*
Materials and Tools
*
Method of Construction
*
Making the Master
*
Preparing the Mold
*
Melting and Pouring
*
Finishing
*
Lessons Learned
*
Bibliography
*
Summary
Metal mounts were used through a wide range of time periods and cultures as decoration for clothing and accessories and to display one's wealth and
status. Because they were produced as a set of multiple identical pieces, casting was the most common method for the production of these mounts.
The mounts could be made of many different metals in many shapes and sizes, depending on the desire and wealth of the wearer.
When a friend gave me a lamellar coat to upgrade my armor, I designed and cast a set of armor mounts in thanks. He wanted the primary decorative
feature of the mounts to be a Cross of St. John, because his persona is a Swedish Viking who fought with the Hospitallers of St. John. To fit his
persona, I filled the empty space with bears modeled after 11
th
Century Swedish artwork.
Historical Documentation
Artistic Design
The artistic design of the mount is actually a combination of two distinct design elements, brought together by the persona story of the person for
whom I made the mounts.
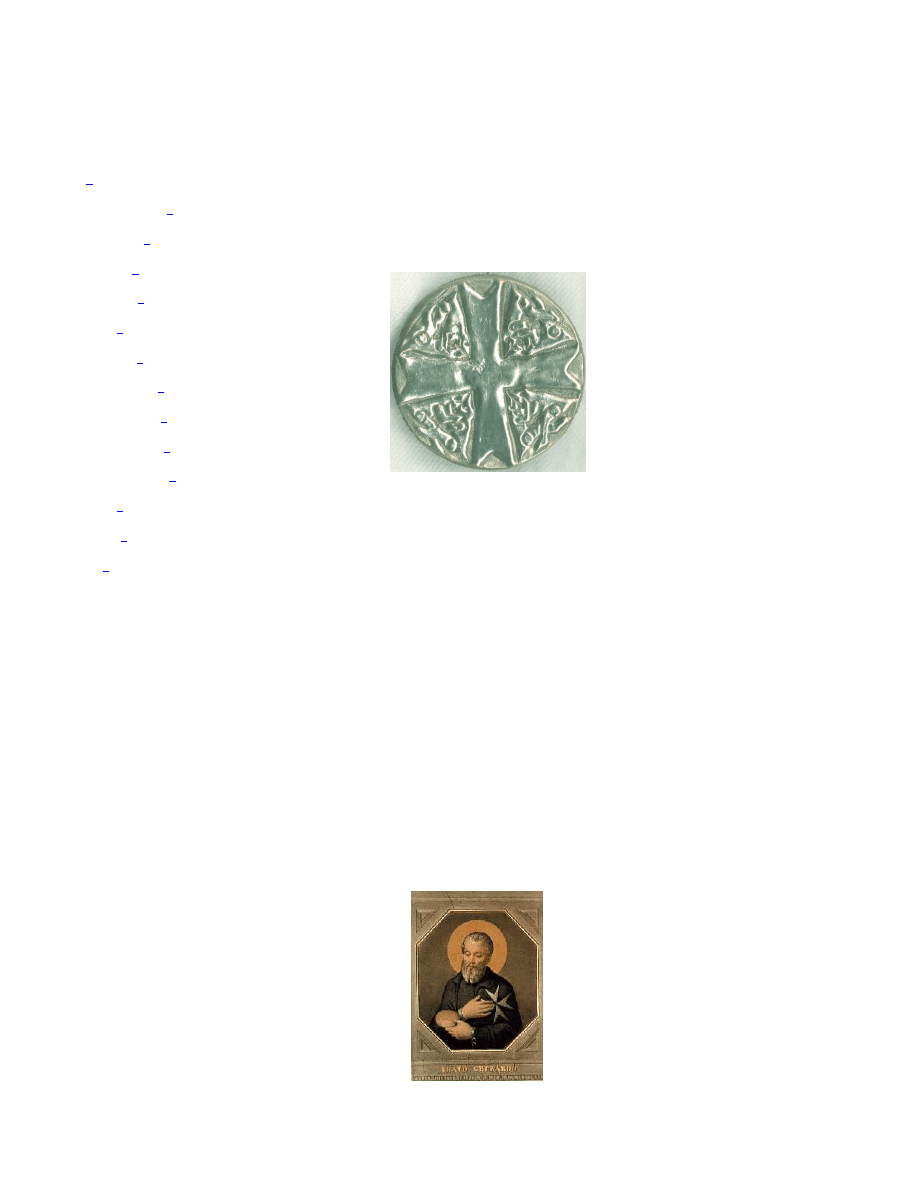
The cross of the Hospitallers of St. John, composed of
equilateral dovetail-shaped arms, is based on the well-known
Maltese Cross.
The picture to the right, from a fresco in the Chapel of the
contemporary Grand Magistracy in the Via Condotti in Rome
depicts Blessed Gérard, the founder of the order, wearing the
Maltese Cross on his shoulder (OSJ).
The order dates back to 1078-1099, depending on which
historian you believe (OSJ), which makes it contemporary with
Viking Age Sweden.
Page 2
Brass “Cross of St. John” Armor Mount
06/04/2006 02:38:30 PM
http://www.willadsenfamily.org/sca/danr_as/armor-mount/armor-mount.htm
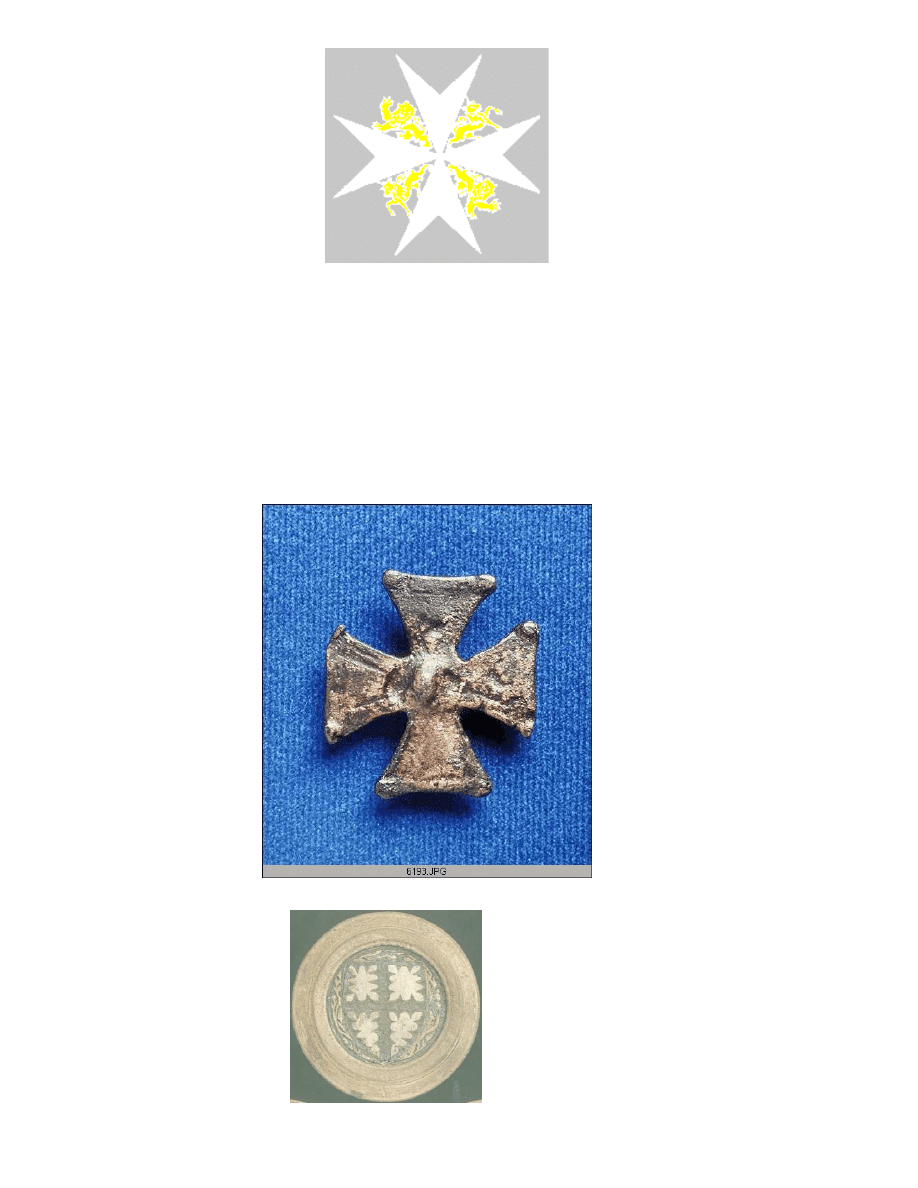
The British version of the order further depicts
the cross with lions in the quarters, as shown to
the right. This gave me the idea for filling in the
empty space on the armor mount with animals.
My friend, however, had a slightly different
version of the cross that he wanted me to use,
taken from a "history of costume" type book (to
which I did not have access in writing this
document). In his version, the arms of the cross
were thicker and did not come to points in the
center. This actually fit my design concept
better and would be easier to accomplish.
The Norse art known as the Jelling style, named after the cup found at Jelling, Denmark, and dating to the 9
th
to 11
th
Centuries, was suited to my
friend's Swedith heritage. The Jelling style is characterized by ribbon-like animals knotted together, with different body parts of varying thickness.
The body parts are sometimes covered with stylized patterns. The animals usually have round eyes, with or without a pupil, and curls or spirals on the
nose and sometimes at hip and shoulder joints. The overall animal is difficult to identify as to its intended species, with the shape of the ears and jaws,
and the number of limbs, being the only clues. Unlike Celtic knotwork or the zoomorphic designs seen in the Lindisfarne Gospel or the Book of
Kells, the knotted pattern of a Jelling style animal is not usually symmetrical, but flows gracefully and generally fills the available space. When more
than one animal is used to fill a space, the overall pattern could have radial symmetry, bilateral symmetry, or no symmetry at all.
Cast Mounts
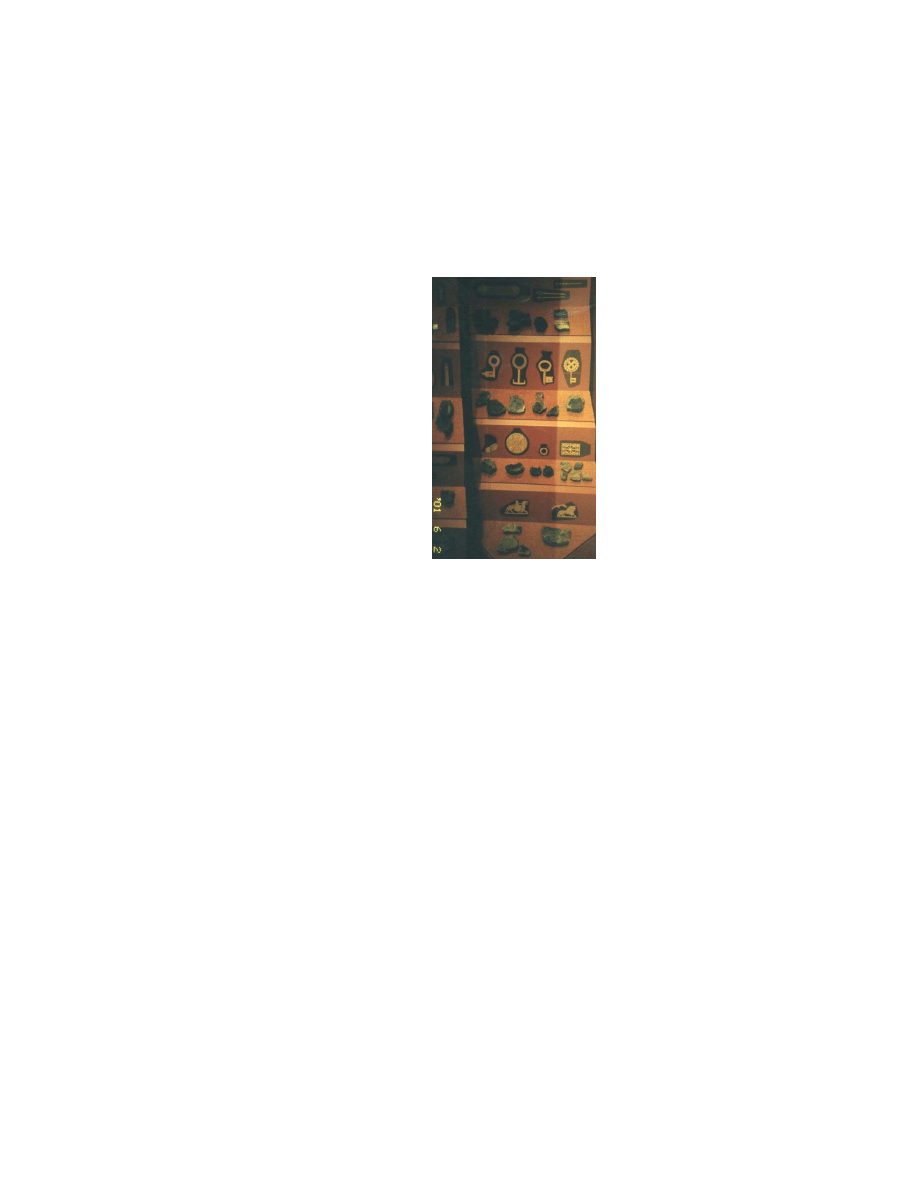
Shown to the right is WOV 6193, a
cast cross-shaped copper-alloy
brooch from Coppergate in Viking
Age York.
While this artifact is not a mount, it
shows that a cast copper-alloy cross,
worn as decorative jewelry, would be
a normal accessory to a Christian
Viking.
I have not been able to document
decorative mounts specifically to
Sweden during the 10
th
- 11
th
Centuries. However, the evidence for
decorative cast mounts in England is
extensive. Mounts were used as
decoration for all type of garb and
accessories. Shown to the
lower right is a mount (Egan #933) from
the Museum of London, which measures
60mm in diameter, approximately the
same size as the entry. The Museum of
London has other large mounts (Egan
930, 939) in its collection, and hundreds
of the smaller sizes.
This particular mount is one of a set of
three, made of copper alloy with silver-
gilt, and had rivets soldered to the back.
The black coloring may be niello or
simply corrosion, but the chemical
Page 3
Brass “Cross of St. John” Armor Mount
06/04/2006 02:38:30 PM
http://www.willadsenfamily.org/sca/danr_as/armor-mount/armor-mount.htm
composition of niello closely resembles
corrosion, so it is not possible to be
certain. It displays a heraldic device.
Mounts were usually attached by rivets, which were either driven through, soldered on, or cast into the mount. Theophilus also describes a process of
joining two items by filing slits in a projection, inserting it through a hole, and bending the projection's lugs outward into a star-shaped rivet head
(102). Such a procedure is a variation on the cast rivet.
Brass Casting
The archeological evidence for metal casting in 10
th
Century Denmark is extensive. However, some question remains as to whether the Norse
craftsmen employed sand casting, or exclusively used fired clay molds.
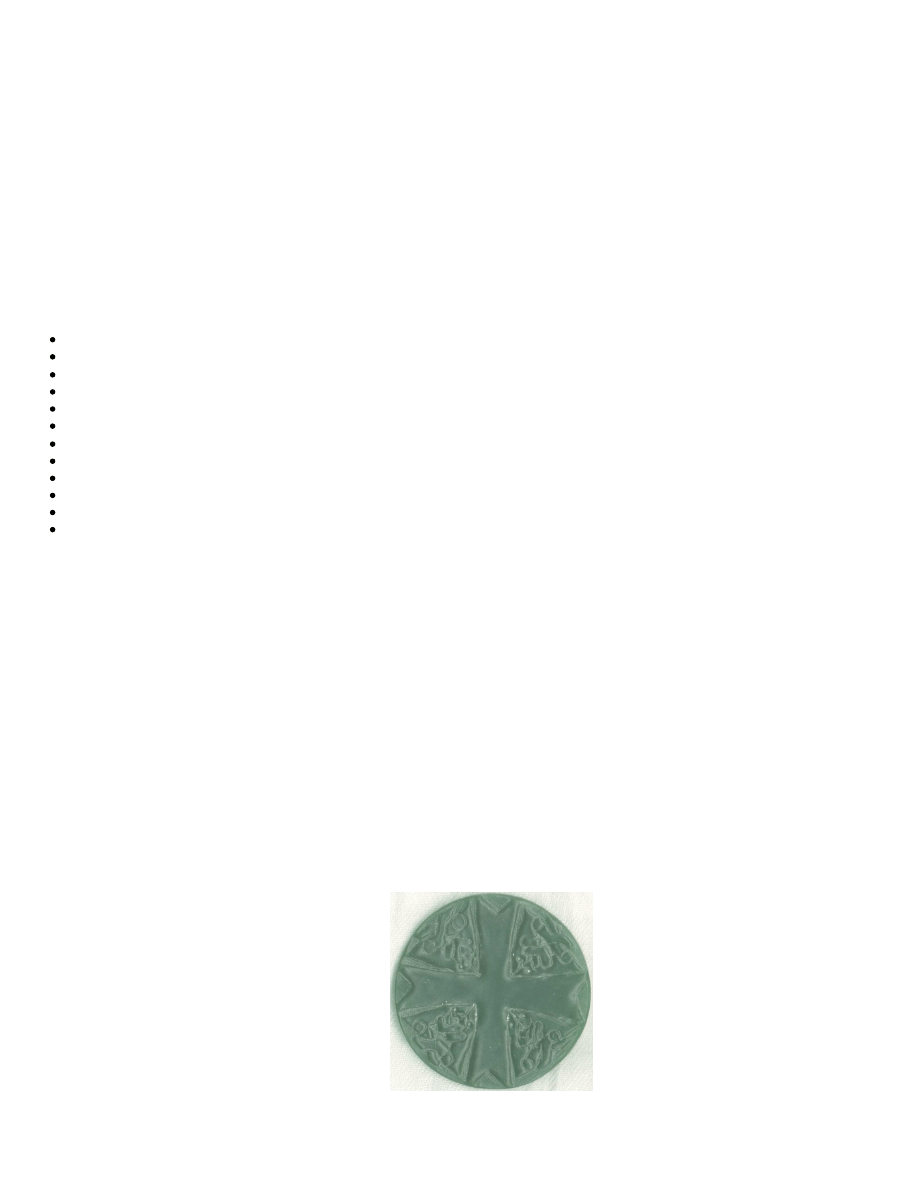
Evidence of casting in hard-clay molds is widespread. At the
museum in Ribe, I saw hundreds of clay molds that had been
pieced back together, some of which are shown in the photo to the
right. These reassembled mold fragments showed that the
craftsmen of Ribe could cast metal in many types of tools and
jewelry, including brooches. Traces of metal in clay crucibles
found there show traces of bronze, brass, lead, silver, and gold
(Jensen 31). Furthermore, the mold fragments found in any one
location show that craftsmen routinely cast the entire variety of
objects, rather than specializing in keys, brooches, and so on
(Jensen 33).
The archeological digs at the Coppergate site in York, England,
dated to Viking Age, also provide information about clay casting.
These included many crucibles, ingot molds, and cupels (Bayley,
799). The crucibles show evidence of being used to melt all
manner of copper alloys (Bayley 803), including brass and bronze,
as well as silver (Bayley 799). Likewise, a wide variety of copper-
alloy items were found in York, including strap-ends, buckles,
brooches, and finger-rings (Hall 103-105).
photo by Isabel Ulfsdottir
The process of clay casting is, in theory, simple. A "master," or original, is carved from wax, including a wax sprue or gate to pour the metal, lugs to
hold pins, or other hardware features. This master is carefully packed in clay, which is fired to pour out the melted wax and harden the clay. While
the molds are hot, the metal can be melted and poured in. Finally, when the casting has cooled, the clay mold can be broken apart to free the metal
item for finishing (Theophilus, 106). Clay mold casting can create nearly any shape including intricate shapes with undercuts, but requires one wax
master for each item cast.
The use of the sand casting technique is more difficult to prove, because a mix of fine sand and clay is not recognizable in an archeological dig as a
casting component. However, sand casting produces a rougher surface on an unfinished piece than clay mold casting. A sand-cast piece has tiny pits
and bumps which, in my own experiments with clay versus sand casting, do not occur with a fired clay mold. Some artifacts show this type of bumpy
surface (such as the cross shown above) and could, therefore, have been cast in sand. Sand casting is documented by Biringuccio in the 16
th
Century
(324-328), but Theophilus in the 12
th
Century makes no mention of it. The technology of metalworking is believed to have changed little during the
Middle Ages. The main advances during that time were in the use of chemicals for parting, assaying, and pigments (Agricola 354), so it is likely that
other tools and techniques from later periods could be applied to the Viking Age. Thus, it is possible that sand casting was available to 10
th
Century
Danish smiths, but I have not been able to prove it.
Sand casting is different from clay casting, in that the mold is made from two halves of packed sand, mounted in frames that fit together. One half of
the mold is packed and dusted with powder to prevent it from sticking to the master or the other half of the mold. The original is pressed into the
mold and dusted again. Then, the second frame is set in place and the second half of the mold is packed down, around the master model. Finally, the
two halves are pulled apart to extract the master and cut sprue, gates, and vents. Sand casting can create any shape that does not have undercuts, can
make many castings from the same master model, and usually requires more finishing work because of the parting line left between the mold halves.
However, the effort of packing the sand can gradually damage the master.
In either case, it is believed that the mold masters were usually made from wax originals, because beeswax was readily available, easy to carve, and
has an advantage over wood or bone in that its lack of grain makes detailed carving easier. A copy of the wax master, of clay, lead alloy, or other
durable material, was usually made as a basis for future castings (Jensen 33). Such a lead master could be used with clay to mold wax masters for clay
molds, or directly in sand-casting.
Finishing
Page 4
Brass “Cross of St. John” Armor Mount
06/04/2006 02:38:30 PM
http://www.willadsenfamily.org/sca/danr_as/armor-mount/armor-mount.htm
Finishing jewelry consists of shaping, smoothing, and polishing. There were many abrasives available in period, chosen by their availability and
relative effectiveness on the material being worked. Theophilus describes the process of shaping with a flat hone (102) or flat sandstone (189). He
describes a variety of files (93) and wire brushes (86) for shaping and smoothing harder metals such as brass and bronze. He describes smoothing as
done with a piece of oak covered in ground charcoal (102) or fine sand and cloth (152). He describes polishing with a cloth covered in chalk (102) or
powdered clay tiles and water (128), or saliva-moistened shale followed by ear wax (115). Biringuccio describes shaping as done with files,
smoothing with cane dipped in powdered pumice (366) or sand and water (390), and polishing using tripoli powder (366, 374), or a wheel of copper
or lead with powdered gems (122), emery (123), or lime (372).
Materials and Tools
I used brass for this project, because was the material desired by my friend who would use the mounts. I purchased the brass from a jewelry supply
outlet, because I lack the necessary experience to safely alloy my own metals. I made the original model from green carving wax, and cast a pewter
master from which to make the brass mounts.
The tools needed are:
Carving tools to carve the original or "master" model (I made some from 10-guage wire)
Casting sand, talcum powder, mold frame, and palette knife, to make the molds
Crucible with tongs and a heat source that can keep the crucible at 2000° F
Fire extinguisher, fire-resistant apron, and safety glasses
Brass, bronze, pewter, or silver raw material, and flux (boric acid crystals)
Graphite spoon and/or rod for stirring molten metal in the crucible
Oven or kiln with controllable temperature capable of 300° F
Wire cutters or jeweler's saw to remove the sprue and vents
Tools to file and polish the cast piece
Dust filter mask for polishing
Heavy welding-type insulated gloves for handling crucible tongs, hot molds, and metal
Light leather gloves for holding items while grinding and polishing
Method of Construction
Making the Master
To get started with design ideas, I talked to my friend for whom the mounts were being made. He showed me a picture of some members of the Order
of Saint John, which looked like it came from a "history of costume" type book. The cross they wore was a Maltese cross with thicker arms that did
not come to a point in the center. I used his version of the cross to make my design for the mounts. It was later that I learned through research that the
cross arms should have come to a point in the center, as shown in the historical documentation above.
To fill in the gaps between the arms of the cross, I designed two bears in the Jelling Style, which was prevalent during my time my friend's persona
existed, as discussed above.
The master, or original model for making the mold, is carved from wax. For this project, I used a circular wafer of green carving wax that my teacher
gave me to try. After scribing some guide lines on the wax, I carved the pattern using a combination of wood-carving chisels and some wax carving
tools I made from 10-guage wire.
The final step in making a wax original is to fire-polish it. This is done over a small heat source,
such as an alcohol lamp, and requires great care. Hold the model over the flame, always moving
it to keep the temperature under control. To do this properly, it helps to be able to see the
underside where the heat is acting on the wax. The idea is
to melt the wax enough that its surface becomes smooth
and gravity pulls it into a nice rounded form. Fire-polishing
takes a great deal of practice, because overheating the wax
or holding it at the wrong angle can ruin the design.
Modern carving waxes, unlike beeswax, are formulated to
melt slowly and give plenty of visual warning. The carving
wax was thus a great choice for this project, my first
encounter with fire-polishing. If the fire-polishing goes
poorly, however, you can get out your carving tools, solder
on more wax, and repair the design. The picture to the
right shows the wax master. Note the smooth rounded
edges that fire-polishing creates.

Page 5
Brass “Cross of St. John” Armor Mount
06/04/2006 02:38:30 PM
http://www.willadsenfamily.org/sca/danr_as/armor-mount/armor-mount.htm
Preparing the Mold
Put the flat side of the mold frame on the bench, fill it with sand, and pack it down firmly. Then, turn the frame over, powder it, and press the master,
non-detailed side down, into the sand. Powder the master again, and sprinkle the sand over it. Once the ring is covered with a layer of finely
crumbled sand half an inch thick, fill the frame with sand and pack it down. Separate the halves and carefully remove the original. With a palette
knife carve a sprue channel into the sand. Use a nail or small dowel to make a gate in the center and vents around the outside, placed such that they
become rivets later. Put the mold halves together and set the mold up to pour.
Melting and Pouring
Heat the metal in the crucible, using a kiln, oven, or torch. Silver, brass, or bronze should be heated to about 2000° F; it will have a "sheen" on the
top and glow orange when the metal is above its "flow" point. Pewter can be heated to about 600° F. Most metals develop an oxide crust on top which
you should scrape away. With any metal, it is ready to pour when it reaches "flow" temperature, that is it should be as liquid as water or mercury. If
the temperature is too low, the metal will not flow properly and may not enter all the recesses of the mold. If the metal is too hot, it may oxidize or
implode by cooling unevenly. When the metal is at or slightly above flow temperature, pour it into the mold. Pour it all in one smooth motion into the
sprue channel, taking only about one second to do so. This also takes practice to do well.
After the visible top of the sprue cools to a darker color, carefully separate the mold halves, take out the casting (it will still be very hot), and tap the
sprue on the bench to remove the burned sand. Cut off the sprue with a jeweler’s saw and the vents with the wire cutters, but leave them about 1 cm
long, to be used as a rivet and clinch nails to attach the mount.
Finishing
I used power tools for finishing because, in my experience, the period methods take about ten times longer to get the same result. I shaped the edges
of the mount with a 40-grit disk sander followed by a 600-grit belt sander. I then cut some slits in the rivet with a jeweler’s saw to allow it to be easily
spread when mounted. I annealed the mount so that the rivet could be more easily mushroomed after it was spread open.
If desired, you can accent the design by filling the recesses with niello or enamel, use acid to darken it, or fire-harden and surface-polish the item. For
the mount, I used selenious acid (Jax Black
™) to darken the recesses of the design to highlight the detail. Any acid, even vinegar, can provide a
similar result.
I polished the mount with a succession of the white, black, blue, and green polishing wheels. While such polishing wheels are designed for a
handpiece or Dremel tool, I use them in my drill press at a slow speed (1100 rpm) which is safer and gives good results.
Lessons Learned
This was my first project casting in high-temperature metals such as brass. I learned much about the many technical challenges that are inherent in
casting with metals other than pewter. I had a problem with the metal cooling too quickly, because my sprue was not deep enough, resulting in
implosion pits on the design. Since then, I have learned ways to avoid this.
It was also my first encounter with carving wax and fire-polishing. I learned enough from it that, for subsequent projects, I began to experiment with
beeswax.
It took 1 hour to design the artwork, 2 hours to carve the wax, 1 hour to fire-polish the wax, and 2 hours to cast and finish the mount, for a total of 6
hours. I made two of these for my friend, plus the entry, which I will also give to him after the competition.
Bibliography
Agricola, Georgius, trans. Herbert & Lou Hoover, De Re Metallica, Dover Publications, NY, 1950, ISBN 0-486-60006-8. This book covers the 16
th
-
century techniques of metallurgy, including the technological, legal, and safety aspects of surveying, timbering, mining, refining, smelting, alchemy,
and the other tools and techniques required to locate ore and turn it into usable metals. It provides excellent background technological information
for any metalworker.
Bayley, Justine, Non-Ferrous Metalworking from Coppergate, from The Archeology of York, Vol 17 The Small Finds, Fasc. 7 Craft, Industry and
Everyday Life, Council for British Archeology, York, 2000. ISBN 1.872414.30.3. This small book in the Archeology of York series focuses on the
evidence for gold, silver, copper, lead, tin, and alloy crafts from the Coppergate site in York.
Biringuccio, Vannoccio, trans. Cyril Smith and Marth Grundi, Pirotechnia, Dover Books, New York, 1959, ISBN 0-486-26134-4. This translation of
a sixteenth-century work on metals and metalworking contains a great deal of information on metallurgy and casting.
Egan, Geoff, and Pritchard, Frances, Dress Accessories c.1150-c.1450, Museum of London 2002, ISBN 0-85115-839-0. This wonderfully illustrated
book catalogs many artifacts and is a good source for anyone who makes small items in metal, bone, antler, horn, or wood.

Page 6
Brass “Cross of St. John” Armor Mount
06/04/2006 02:38:30 PM
http://www.willadsenfamily.org/sca/danr_as/armor-mount/armor-mount.htm
Hall, Richard, The Viking Dig: The Excavations at York, Bodley Head, London, 1984, ISBN 0-370-30802-6. This book provides an excellent
overview of the excavations of York, covering a time period from the Iron Age up to Medieval times. It focuses on the history of the town, as told by
the artifacts found. It provides documentation for a wide variety of crafts from these time periods. This book would be very useful to any student of
Norse culture.
Jensen, Stig, The Vikings of Ribe, Den antikvariske Samling, Ribe 1991, ISBN 87-982336-6-1. This book provides an excellent overview of the
excavations of Viking Age Ribe, the artifacts found, and what it all means, with emphasis on trade, crafts, religion, and the town's history. This book
would be very useful to any student of Norse culture, or Dark Ages arts and sciences.
(OSJ), The Most Venerable Order of Saint John,
http://www.kwtelecom.com/heraldry/stjohn/venord.html#order_arms
. This is the web site for the
order and has interesting heraldic and historical information.
Theophilus, trans. John Hawthorne and Cyril Smith, On Divers Arts, Dover Books, New York, 1979, ISBN 0-486-23784-2. This translation of an
early twelfth-century treatise on painting, glassworking, and metalwork is one of the foremost period sources for researchers of these arts.
Various museums in Denmark. In the summer of 2000, my lady and I traveled to Denmark and visited the National Museum in Copenhagen, the
Viking Ship Museum in Roskilde, the Viking Museum in Ribe, and the research/reconstruction sites at Fyrkat, Trelleborg, Jelling, and Lehre. What
we saw on this trip gave us ideas and research for years of arts and sciences projects.
York Archaeological Trust and the National Museum of Denmark, The World of the Vikings (CD-ROM), Past Forward Limited, undated. This CD
contains thousands of photos of artifacts, but the photos are described only as the item, the place it was found, the museum where it is located, and
sometimes the date the item was originally buried. However, it is still a good source for photos of artifacts, and is a fine starting point for further
research.
Back to Danr's A&S page.
Wyszukiwarka
Podobne podstrony:
Dark Night Of The Soul by Saint John of the Cross
Zen & the Art of Mayhem Battle Armor
The Wrong End of Time John Brunner
The Great Wall of Mexico John Sladek
Assassin of Gor John Norman
Calling On The Name Of Avalokiteshvara John Tarrant (Zen, Buddhism, Koan)
Stars Of Magic John Scarne Triple Coincidence
Peters, Ellis Brother Cadfael 05 Leper of Saint Giles, The
Dr Who Target 142 The Mutation of Time # John Peel
33 1 3 056 Black Sabbath s Master of Reality John Darnielle (retail) (pdf)
Captive of Gor John Norman
The Persistence of Vision John Varley
History of Lisp John McCarthy
The Phantom of Kansas John Varley
Stars Of Magic John Scarne Triple Coincidence
Art of Forgiveness John
Al Mann The Marks of Saint Germain
The Death of Grass John Christopher
Armorial of The Order of Saint Isidore of Seville
więcej podobnych podstron