‘Me and Louie’s Sister’ - A Step by Step Tutorial
by Daniel Hammonds a.k.a Wade/Haujobb & Fairlight
This entire picture was painted using Photoshop 6.0 and a generic 3 button mouse.
Click here to view a key of commonly used Photoshop tools
Please note that many of the techniques demonstrated here in the examples have been RE-PAINTED for the purpose of this tutorial and may
therefore differ from the steps and the final picture. This, however, shows that it is possible to reapply the same techniques to achieve a similar
(but not identical) result.
Furthermore, as I have tried to group each process under headings, not all of the stages are shown sequentially.
Getting started
To begin this picture I needed a basic outline with the primary features in their correct place. Owing to my
difficulties with proportion, the first thing I did was draw a grid over the reference photograph (an A4 sized
picture in a glossy magazine) using a pencil and ruler. The grid consisted of 12 squares across and 9 down,
each one measuring 1.5cm squared.
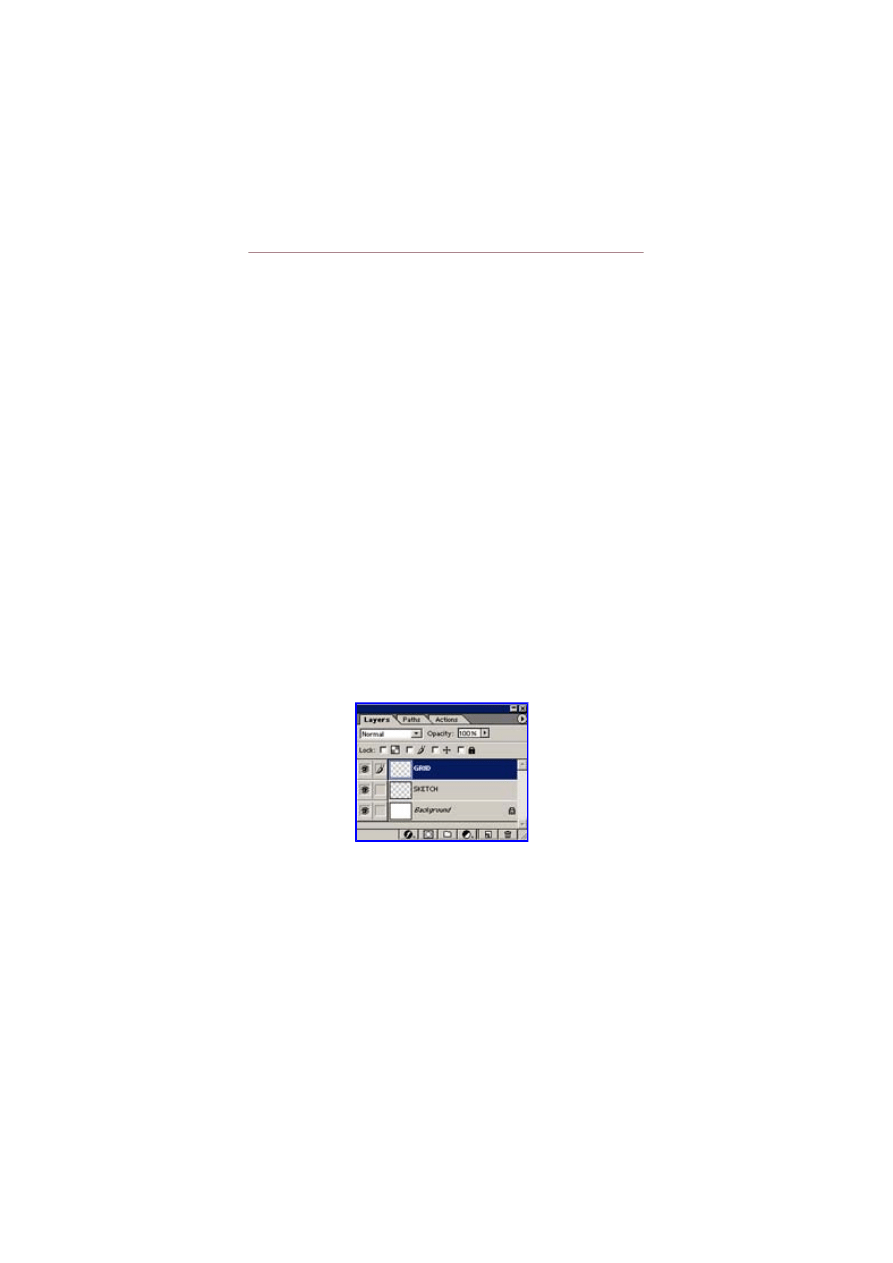
I then created a transparent layer on Photoshop and (after enabling the ruler view) created a relative sized
grid – 12 squares across and 9 down. I renamed this to GRID. But as I wanted the resolution of this image to
be 640x480, I cropped the full grid down to size.
Having done this, I opened another page with a white background. I added a layer over this and named it
SKETCH, before pasting the GRID layer over the top, like so:
On the SKETCH layer, I began to sketch the basic outline using the line tool on medium pressure, with the
grid acting as a proportion guide.
Behind this sketch, on the white background layer, I began to add some very loose shading with the airbrush
until arriving at the following stage:
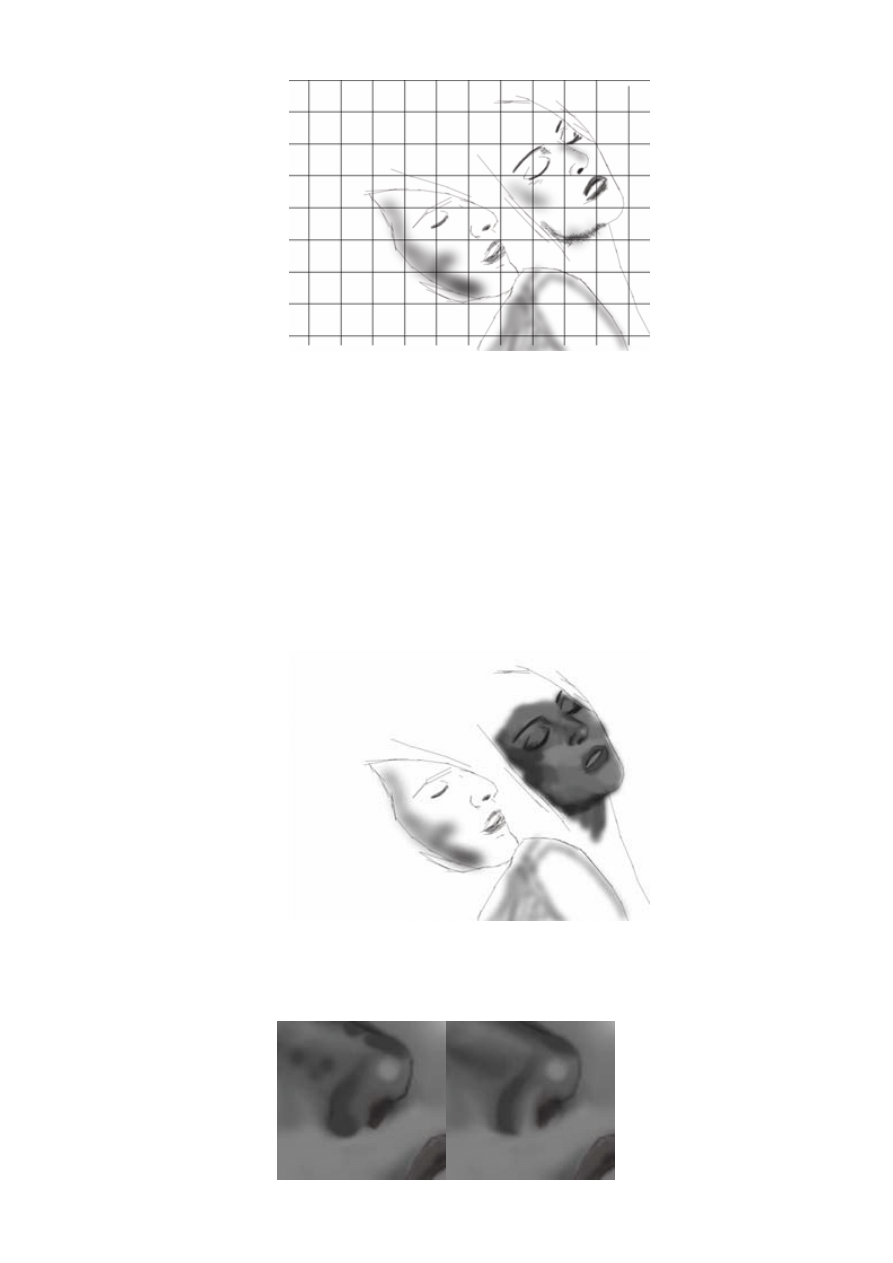
Step 1
You can see here how the grid assists proportion. The woman’s face, for example, occupies approx 15 squares, and there is 1 square between
the tip of the man’s nose and the woman’s cheek.
Basic Shading
Still working on the background layer (with the SKETCH and GRID layers in the foreground), I started to
shade the image in grey, using the airbrush and smudge tool with various soft brushes varying between 60-
80% pressure.
Step 2
For the tighter areas, like the nose, I added small blobs and dashes, which I then smeared into shape with the smudge tool.
Using the same tools, I then started to shade the male face, touch up a few areas and add basic definition to
the woman’s arm, until I finished with the following stage:
Step 3
(Page 1/6)
‘Me and Louie’s Sister’ - A Step by Step Tutorial
by Daniel Hammonds a.k.a Wade/Haujobb & Fairlight
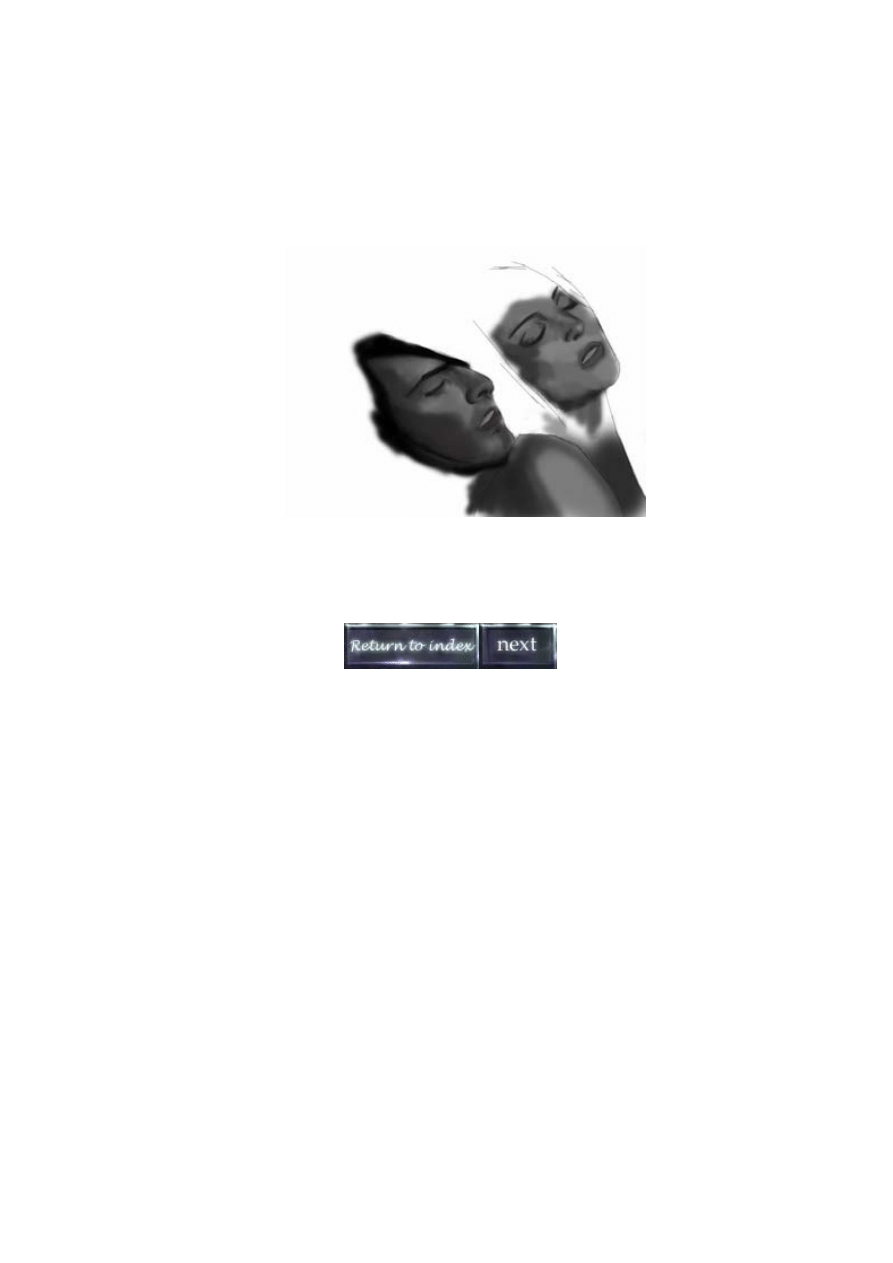
Basic Colouring
With the light and dark areas in place, I then started to consider the colour. This was done very simply by
painting over the current image with the airbrush in color mode.
Step 4
For the moment, I decided to use simple browns and pinks for the skin tones.
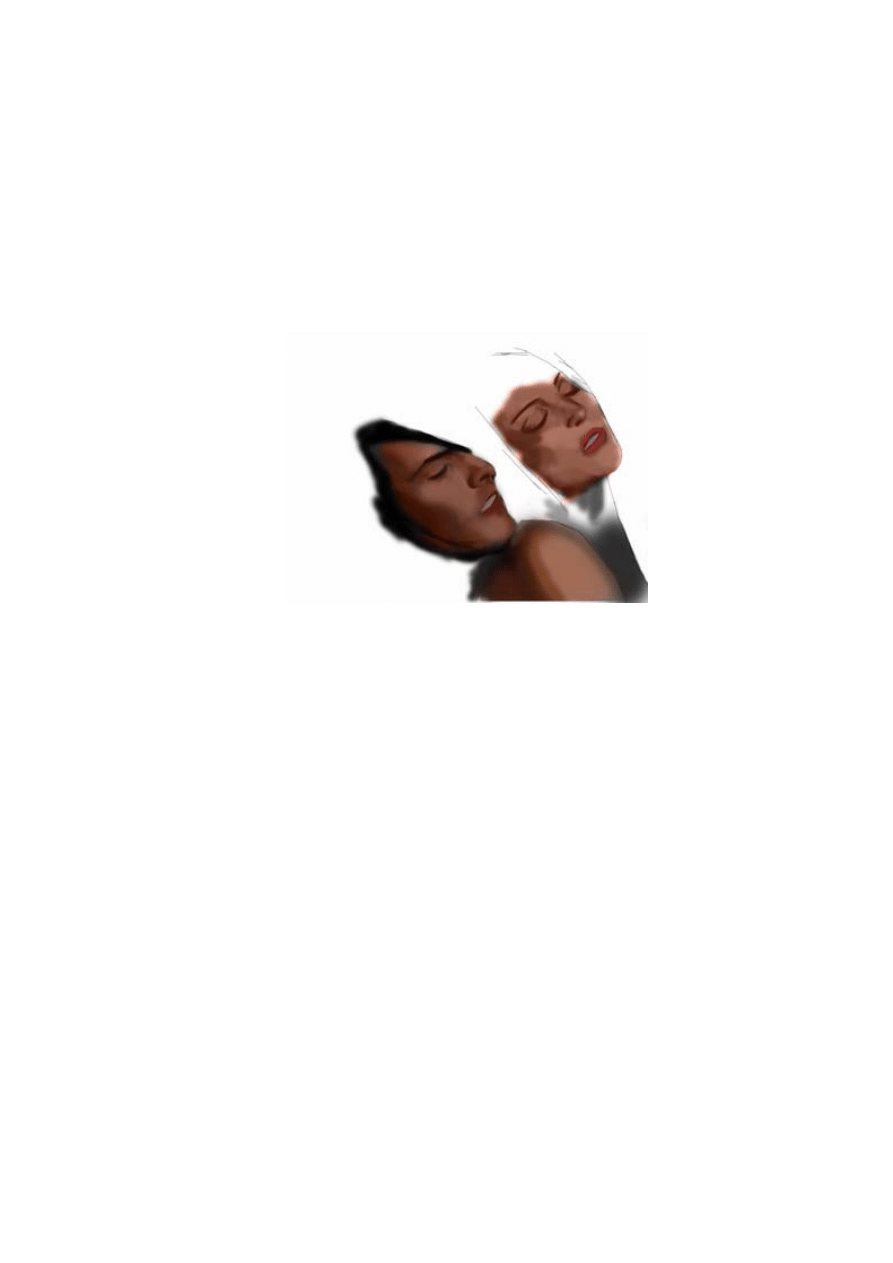
Don't do this!
Since I'm trying to make this a comprehensive guide, I may as well document some of my mistakes too.
I made my first error here, having mistakenly painted over the SKETCH layer rather than the background, so I
decided to merge the layers and paint directly over the outline. Then it was time to lose my flow (and my
sanity) completely:
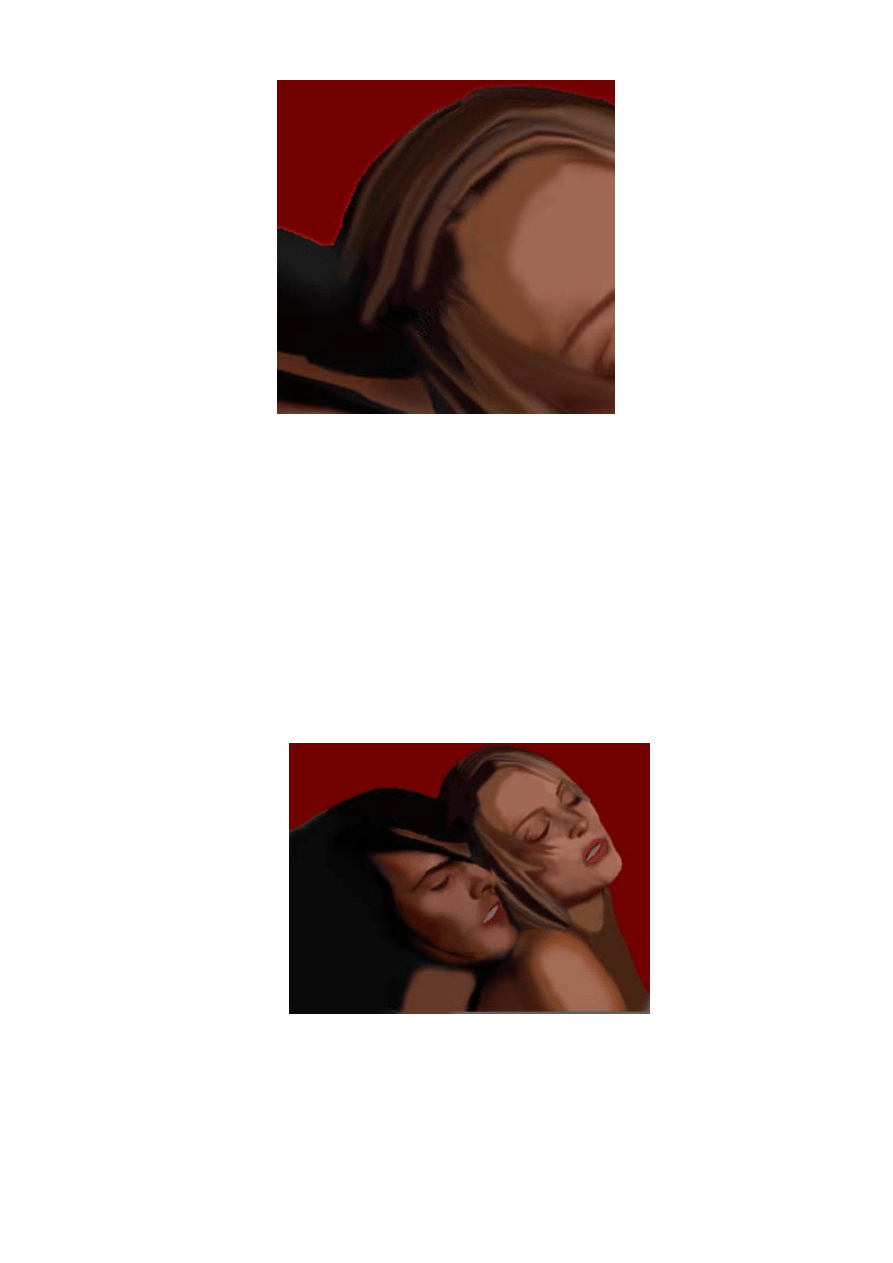
Disaster 1: I cut the image with the Magic Wand and pasted it onto a red backdrop, messing up the anti-
aliasing around the woman’s face. I also noticed that I had been a bit reckless with the airbrush and had lost
some of the definition on the man’s nose and cheek. I had run out of undos so I loaded a previous stage and
tried to cut the man and paste him over the messed up image (not so well I must add) and a bit later on I
rubbed through certain areas with the eraser.
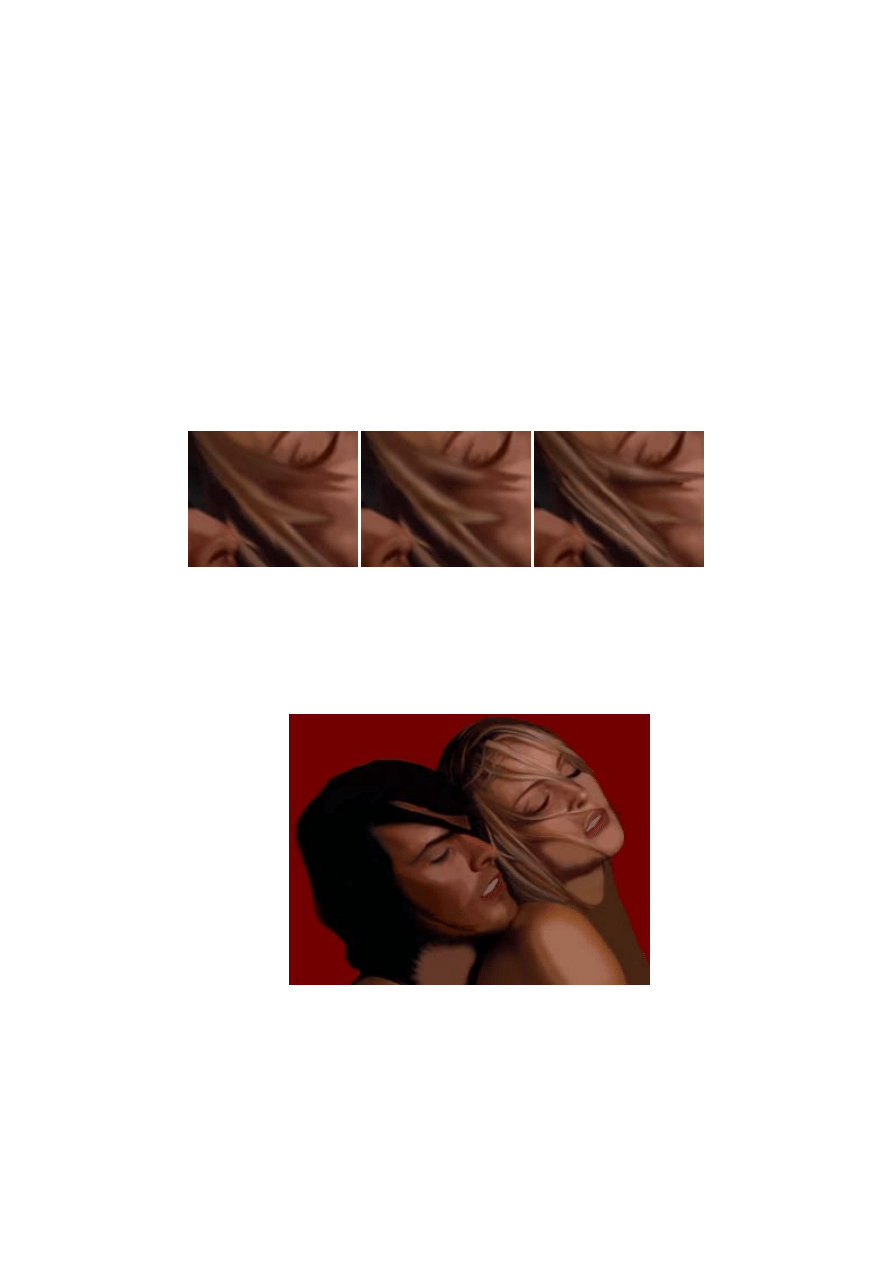
Disaster 2: I brushed in the woman's hair very loosely and decided to run a filter over it before going to work
with the smudge tool. I selected the hair I wanted to filter with the Lasoo tool and chose Paint Daubs from the
Filter/Artistic pull down.
Sometimes I use this on hair to sharpen the details and disperse the colour which can be worked into the hair
to give it more tones and variation, and less of a monochrome look.
(click image to view the disaster in full)
Looks bad, eh?
After trying to work with this (and once again running out of undos in the process) I did the unthinkable. I
saved this image OVER the last, after painting in the heads of the characters and a lot more work. This left
me with 2 choices: to load the previous step (shown as step 4) or to try to repaint the messed up areas. I
decided to scribble out the messed up areas and rework them.
Lesson 1: Save regularly under different file names.
Lesson 2: Don't touch those filters! (ok, I admit I did use the Paint Daubs occasionally afterwards, but not
before saving).
Anyway, at some point while reworking the image with the airbrush and smudge tool I reached the following
stage.
Step 5
Smoothing
At this point, I decided to smooth out some of the irregular brush strokes. This was done first with the blur tool

and then by blending the shades together with the smudge tool, as shown in the following example.
1.
Uneven gradient with steps between each shade.
2.
Blur tool used to soften these steps.
3.
Smudge tool and soft brushes used to blend each step into the next.
(Page 2/6)
‘Me and Louie’s Sister’ - A Step by Step Tutorial
by Daniel Hammonds a.k.a Wade/Haujobb & Fairlight
Definition
With the main outlines and features in place, I decided to remove the GRID layer and work on my own, using
the original photo only for occasional reference. When adding definition and detail, I always find it too
restrictive to work directly from reference. It's better to exercise some creativity at this stage and inject a
personal touch.
With the dodge and burn tools, I started to strengthen the highlights and shadows. I also used the airbrush,
burn and dodge tools and the smudge tool with hard brushes to add definition to the lips, eyes and nose, very
lightly pushing and pulling the colours into place (see previous example of the nose).
With the burn and dodge tools, I began adding light and dark streaks to the woman’s hair, using the smudge
tool and hard brushes to divide the locks.
Over some other areas of the hair I applied the Paint Daubs filter (in moderation this time) before smoothing
and fining it out (as shown above).
Step 6
Continuing with the aforementioned methods, I proceeded to smooth out the brush strokes, add stronger
highlights and further detail to the hair. I also started adding creases to the eyes and fining out the eye lashes
and eye brows using the smudge and burn tools with a single pixel brush on low pressure.
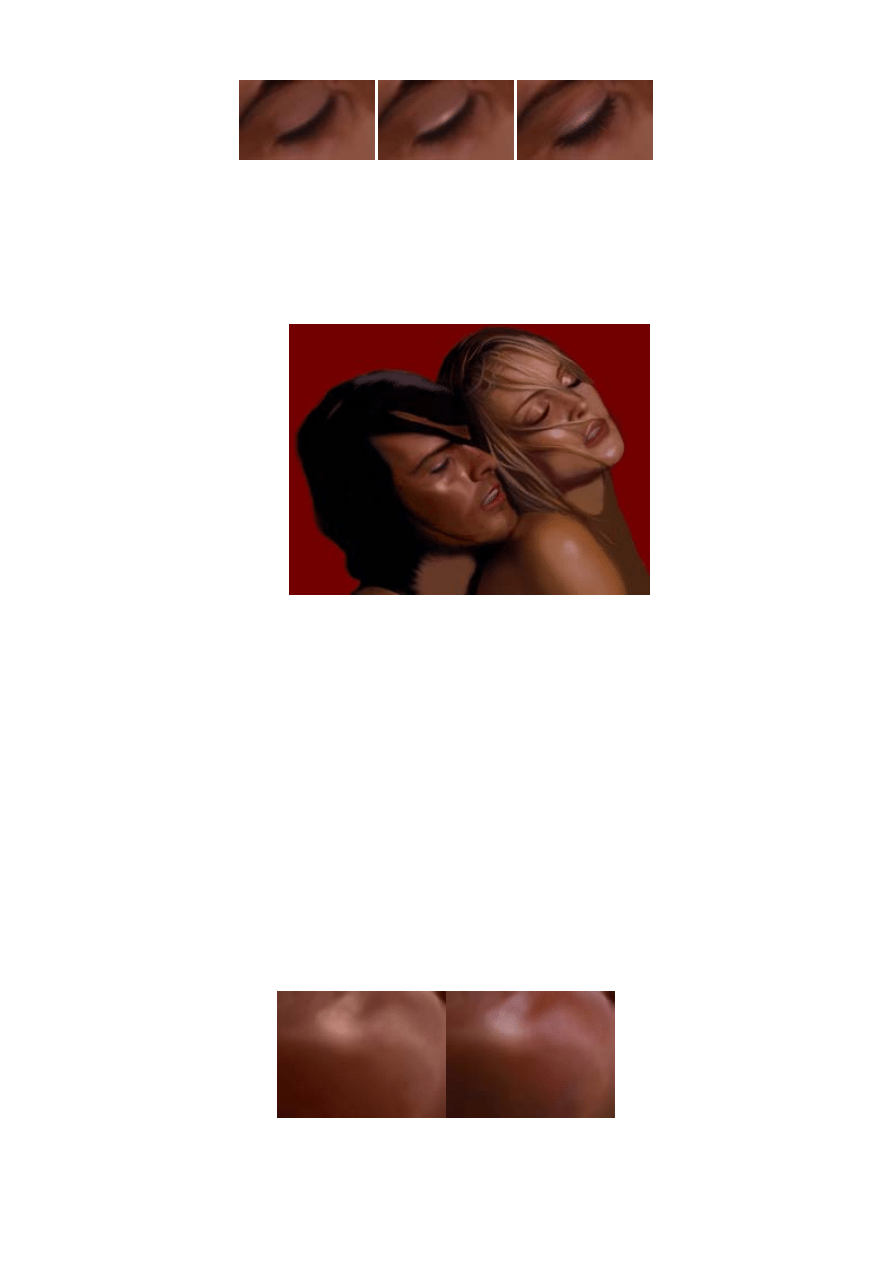
1.
Basic undetailed eye.
2.
Highlight added to tip of eye lid with dodge tool. Definition of eye lashes made with smudge tool.
3.
The brows and eye lashes fined down. Creases added to eye lid. Touch of purple added with airbrush on color mode.
Step 7
Colouring
Turning my attention to the man’s face, I began applying subtle colours, using the airbrush on color mode
(between 2-5% pressure).
I decided to apply a faint blush of red to the most prominent areas, such as the nose, cheeks and chin, in
order to give the man’s face a little vibrancy and feeling. I then added traces of purple and green to add
variation to the monochrome skin, and to help give the overall image a unique appearance. (Note: I often get
ideas for colouring by studying fantasy art.)
The subtle touches of purple and red were applied with the airbrush on color mode.

Also using the airbrush in color mode, I applied a touch of make-up to the woman’s eye lids.
Step 8
Once the colours were applied I frequently used the eye dropper tool to select and apply these to other areas
of the picture - i.e. the purple on the man's face was also used to colour parts of his hair. This helped to
maintain a consistent colour-scheme for the overall picture.
At this stage, I decided that the image as a whole needed to be darker, and so, using the
Image/Adjust/Variations pull down, I quickly darkened the shadows.
(Page 3/6)

‘Me and Louie’s Sister’ - A Step by Step Tutorial
by Daniel Hammonds a.k.a Wade/Haujobb & Fairlight
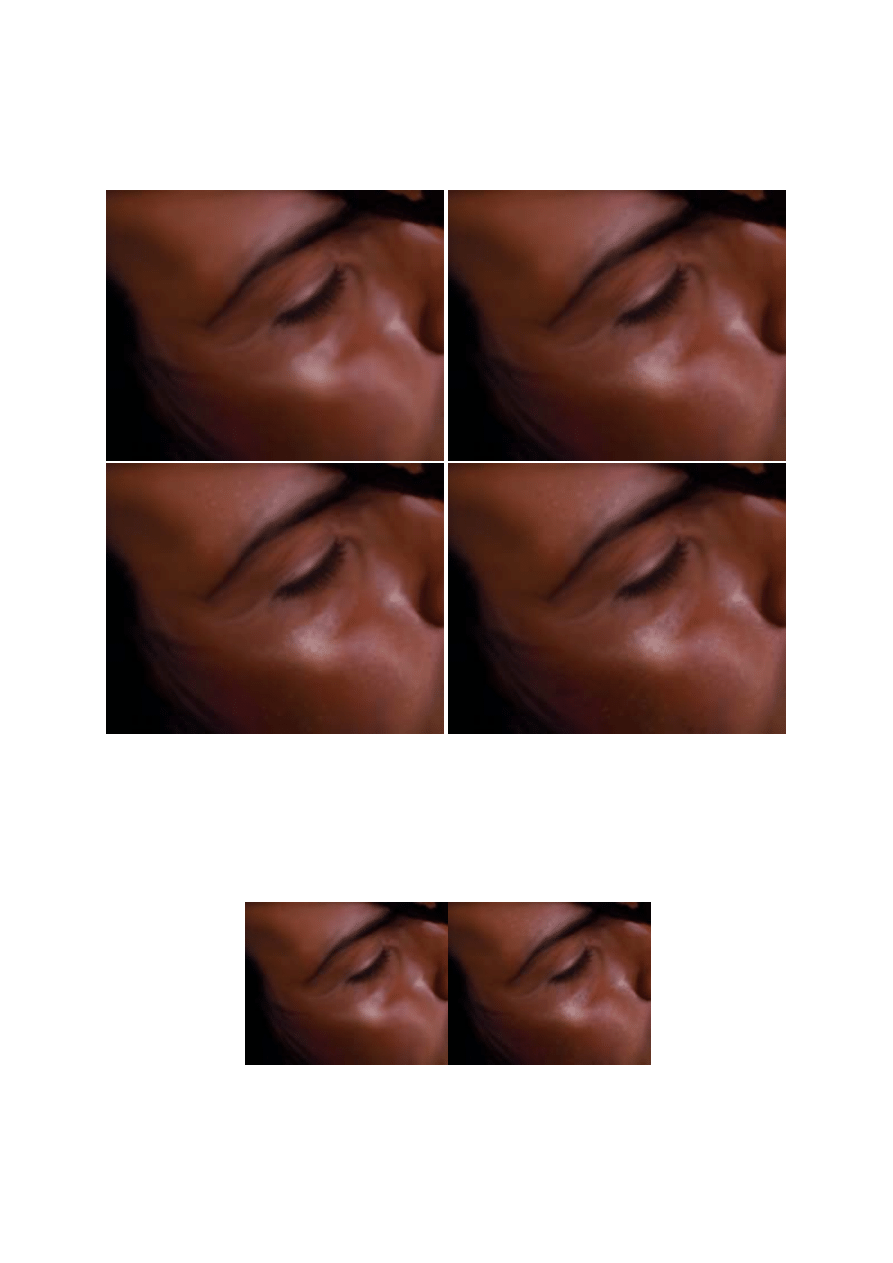
Details and Texturing
To create the texture and stubble around the man’s chin, I zoomed into the image and 'pixelled' these details
by hand, as demonstrated in the following stages:
1.
Basic smooth area.
2.
I applied small blobs with the dodge tool and a small soft brush.
3.
Smoothed the blobs with the smudge and blur tools and a soft brush. Touches of shadow were added between the blobs with the burn
tool.
4.
Added faint highlights and shadows.
5.
Began applying stubble, working over the dark areas using the burn tool and the smallest spatter brush on 20% exposure.
6. Added light pixels with the dodge tool, using the spatter brush and small hard brushes. Added shadows adjacent to these light dots and
darkened the edges of chin with burn tool and soft brushes to give a rounded appearance.
The burn tool and spatter brushes were used for the man’s neck and strands of
hair were pulled over the top using the smudge tool and small hard brushes. The finer
strands were created with a 1 pixel brush on 5-10% pressure.
I then decided that the shading of the face looked too smooth and plastic, so I decided to indulge in a little
hands-on stippling - a technique familiar to most 8-16bit artists. This helped to give the skin a sweaty and
porous appearance.
1.
Basic airbrushed area.
2.
Light and dark areas stippled using dodge and burn tools.
3.
Additional pixels and blobs added.
4.
Smaller light and dark pixels added with burn and dodge on higher exposure.
Reduced size - before and after stippling.
The beads of sweat were also pixelled in zoom mode, using the following methods:
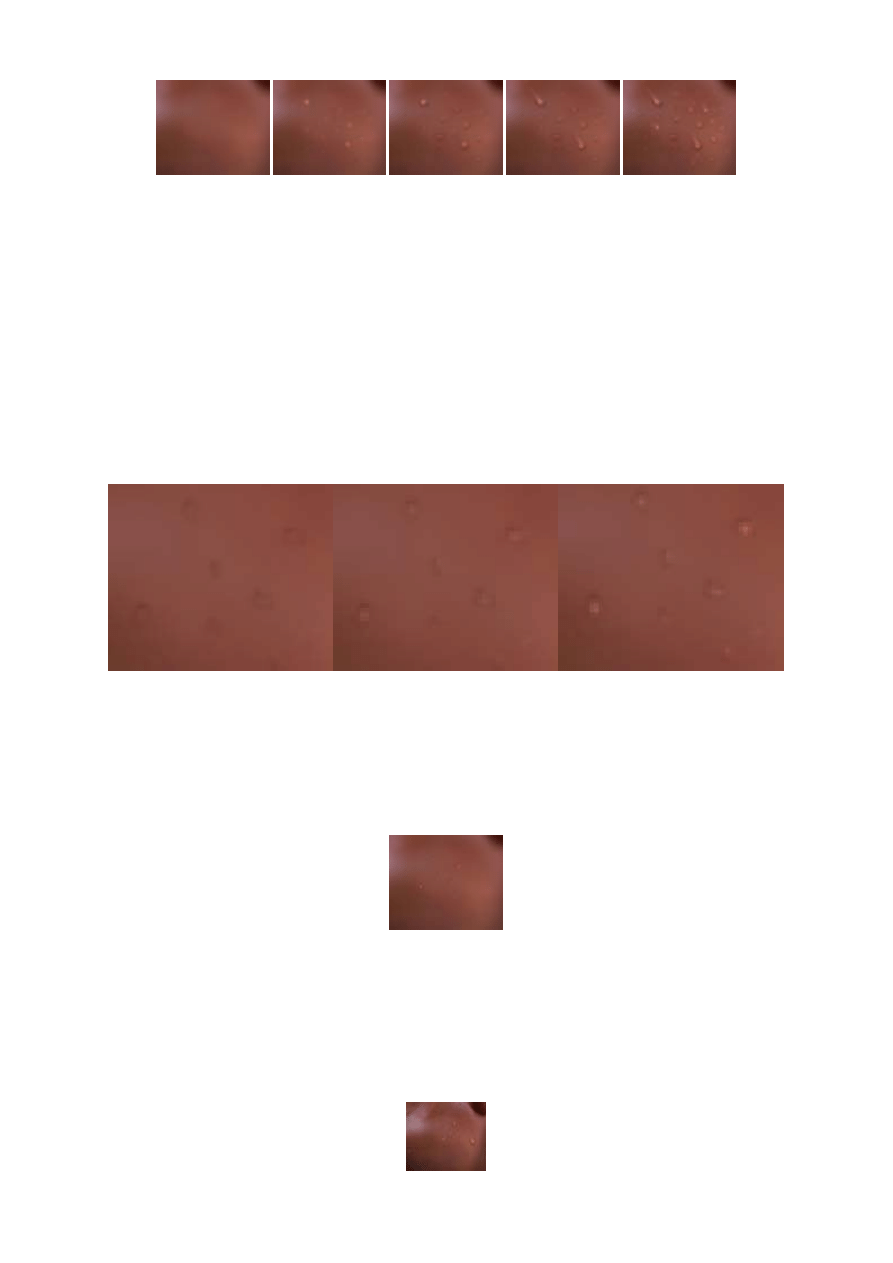
1.
Basic smooth area.
2.
Various sized blobs dotted over skin with the dodge tool on highlights setting.
3.
Burn tool and 1pixel sized brush used to apply shadows around each dot and blob.
4.
Smudge tool used to extend larger beads to look like drips. 1 pixel highlights added to the blobs.
5.
Strengthened highlights and shadows and added random light and dark pixels with dodge and burn tools.
Some of the more subtle droplets were created using the following method:
1. Faint circles made with burn tool (1 pixel brush) on low exposure.
2. Dodge tool used to fill each circle.
3. 1 pixel highlight added to lower half of circle using dodge tool on highlights setting.
actual size
Using this technique, I added droplets of sweat to the man’s stippled face and ended with the following stage:
Step 9
At this point I will draw your attention to the left eye of the female, where I encountered a small difficulty.
When trying to paint the hair directly over the eye, the eye and the hair ran together (as shown in the first
example). Unable to 'undo' this, I decided to refer back to a previous stage as a background layer and use the
eraser tool to restore the eye (example 2). I then added a new layer and began painting the hair over the eye.
1. First attempt - the hair and the eye blended together.
2. Eraser tool used to restore the eye.
3. New layer added, onto which I airbrushed rough strokes.
4. Started to fine out the hair, smudging the dark shades into the light with a 1 pixel brush.
5. Highlights added to hair. More fine strands.
6. Layer flattened and more flayed hairs added. Applied fine highlights using dodge tool.
Turning back to the woman, I realized that the skin needed to be much softer and smoother than the man’s,
yet it still looked too plastic. I began by adding shades of red, purple and green (using the airbrush on color
mode) and then decided to stipple the skin, keeping it lighter and less erratic than I did with the man.
1. Smooth (plastic looking) area.
2. Light stippling with dodge tool.
3. Random darker spots added.
4. Outline of chin area darkened with burn tool and soft brush to give a more rounded appearance.
When applying the darker spots, they reminded me of freckles and I noticed how they gave the skin a more
natural appearance, so I decided to apply these freckles elsewhere - primarily over areas where freckles are
most common, like the nose, chin, cheeks and arm (freckles are less common on the forehead, neck or the
eye area).
Freckles dotted over the skin using burn tool, varying between 10-60% exposure.
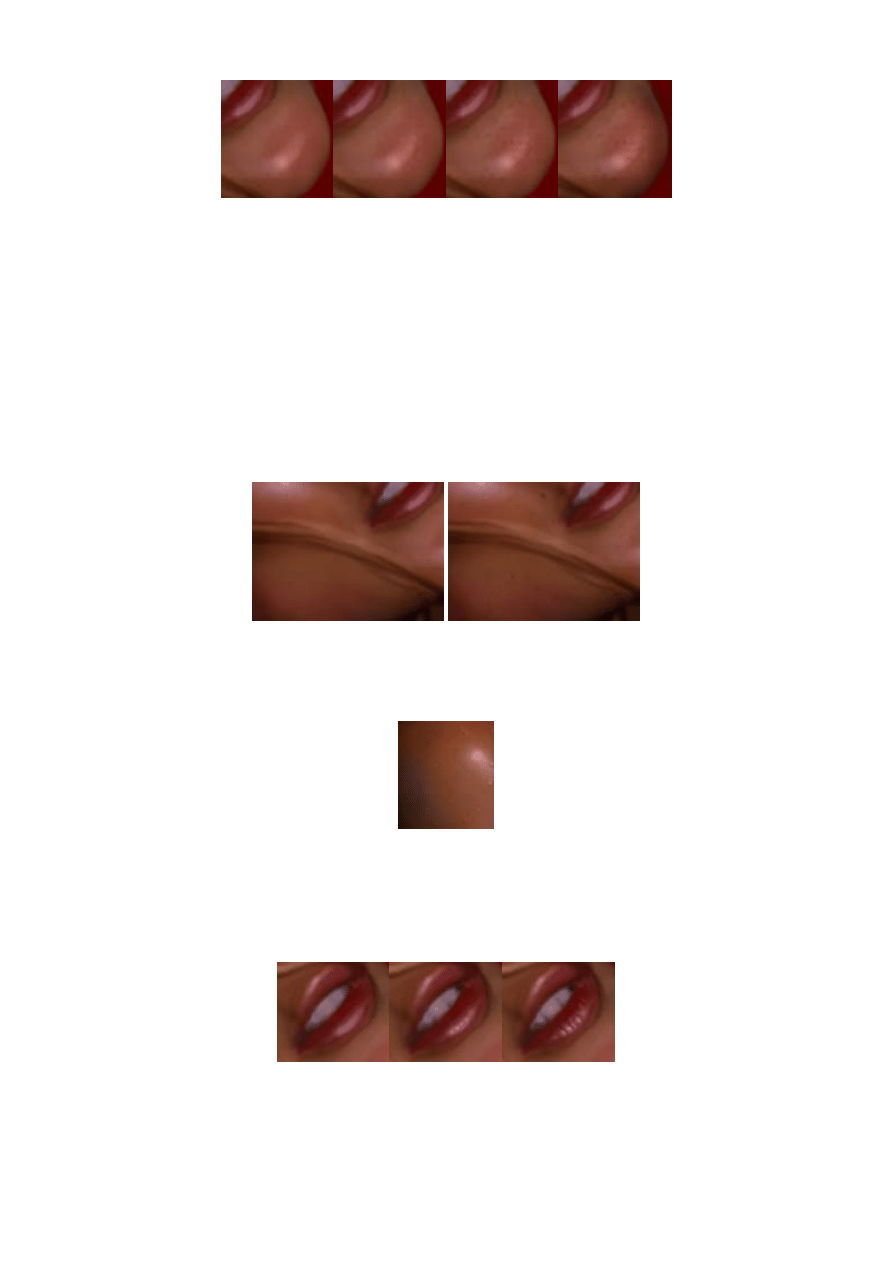
Combined details: beads of sweat, added over the freckled, coloured and lightly stippled skin.
Further definition added to areas such as the mouth.
1. Loosely shaded mouth.
2. Spots of light and dark added with burn and dodge tools.
3. Smudge tool used to smear shadows and highlights into place.

‘Me and Louie’s Sister’ - A Step by Step Tutorial
by Daniel Hammonds a.k.a Wade/Haujobb & Fairlight
Hair
For me, creating hair is simply a matter of trial and error, and playing with the following tools: dodge, burn,
airbrush in color mode, smudge and, most importantly, the undo tool. It was a long and intense process, but
not overly difficult once I got started.
Primarily, it was a case of weaving dark strands over light areas and light strands over dark areas with the
smudge tool (the smaller the brush and the lower the pressure, the finer the hairs will be), constantly adding
light and dark dots and pixels with burn and dodge, and stretching them out with the smudge tool.
T
o demonstrate, I have repainted some of the basic steps in the following examples:
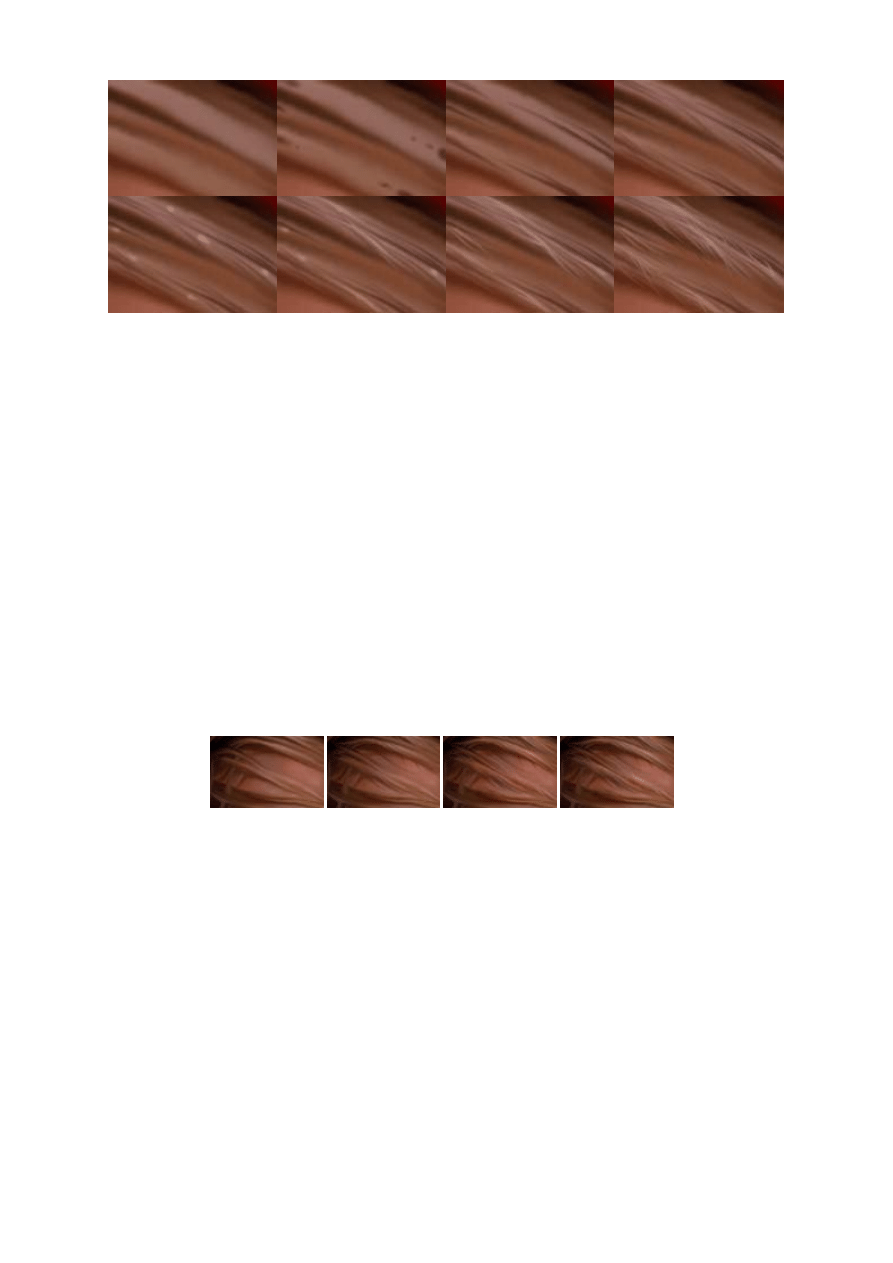
1.
Basic highlight added where hair is most prominent.
2.
General direction of the hair created by smearing highlights into shadows with the smudge tool (hard 3 pixel brush on 80% pressure).
3.
Streaks of hair fined out using smudge tool and small hard brushes.
4.
Highlights and shadow added with burn and dodge tool, to give hair a sense of depth.
5.
Finer strands pulled out using smudge tool and 1 pixel hard brush. The pressure is varied constantly.
6.
Highlights faded into black areas with burn tool. More fine strands pulled into place. Strands of hair coloured purple and grey with
airbrush in color mode.
To fine down the hair, I generally smudge darker lines through the centre of each streak with 3 pixel sized
hard brush, gradually lowering the pressure before switching to a 1 pixel brush:
(Sometimes I apply the Paint Daub filter from the Filters/Artistic pull down before doing this, but it's probably better not to)
1. Loose flow of hair painted with airbrush, line tool and smudge.
2. Dark blobs added in the middle of each lock of hair.
3. Blobs smeared along the lock with smudge tool, 3 pixel hard brush and 80% pressure.
4. Pressure lowered. More dark streaks smeared along the lock of hair.
5. Light blobs added between dark strands.
6. Light blobs smeared along the lock with smudge tool (80% pressure).
7. Pressure lowered. More strands pulled along locks.
8. 1 pixel brush used to smear light strands between dark streaks and dark strands between light streaks.
The same technique was used for the female hair, before adding subtle grey and green tones with airbrush on
color mode:
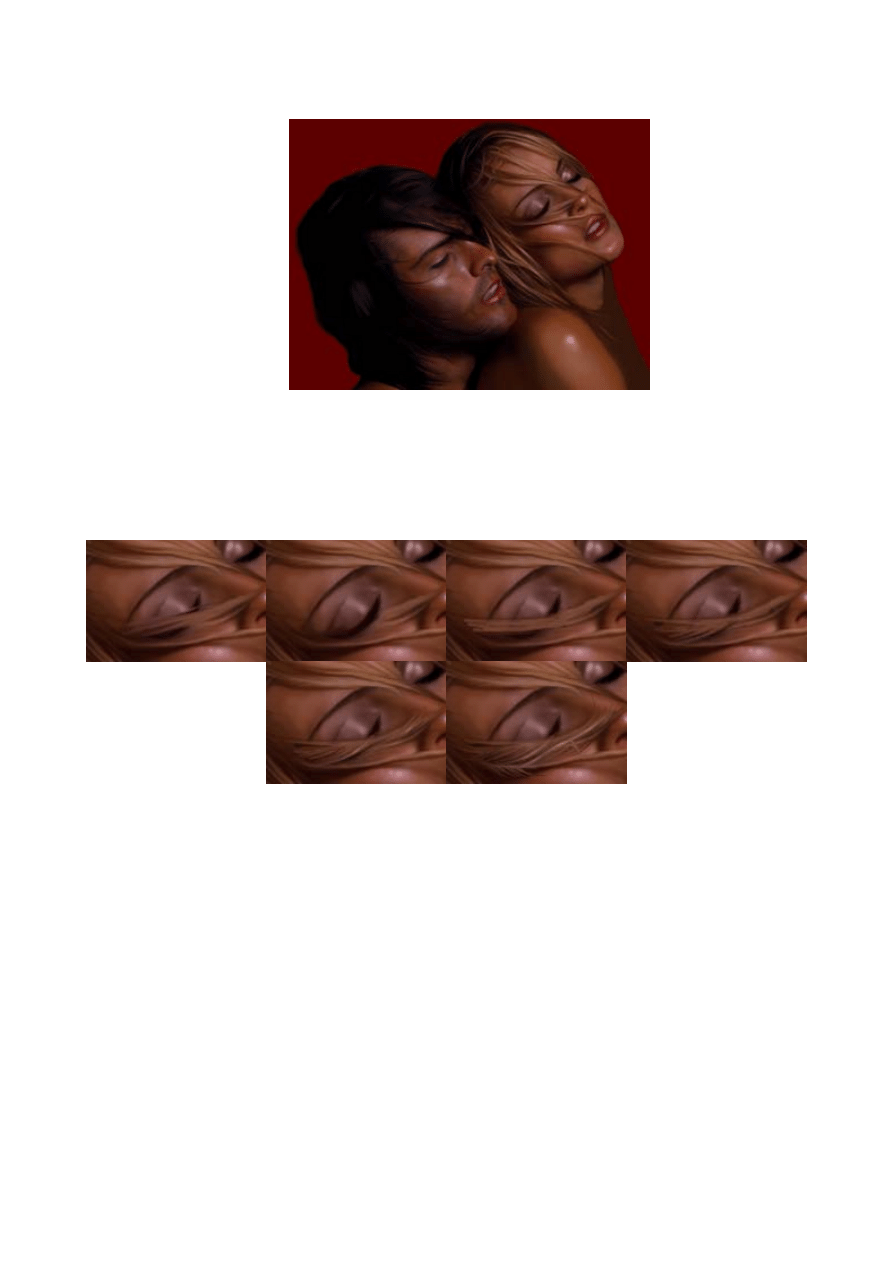
Final picture
After applying more details (sweat, freckles, stippling, strands of hair, additional colours) using the
aforementioned tools and techniques, I darkened the background and added an unobtrusive pattern. I merged
the layers and blended them together by darkening the edges of the woman's face using the burn tool and
soft brushes, and by pulling strands of hair over background.
(click picture for end result)

1. Strands of hair pulled over background using smudge tool.
2. Faint green and grey tones added to hair with airbrush on color mode.
3. Hair pulled over background with smudge tool on low pressure. Blended into darkness with burn tool and soft brushes.
4. Freckles added around nose. Touch of green added to the shadow.
5. Freckles and stippling over man's nose using burn tool on low exposure.
6. Highlights added to hair with dodge tool. Touches of red, grey and green added to hair with airbrush on color mode.
Tag added, picture finished.
Hopefully by now you can look at this image without too many remaining questions, though if you do have any
questions regarding any techniques used here or any specific aspect of this image, please feel free to email
me at
wadedan@softhome.net
and I will try to answer and demonstrate these in a separate Q & A tutorial.
(Page 5/6)
Wyszukiwarka
Podobne podstrony:
Drawing How To Draw Folds And Clothing (2)
How to Draw Manga Anime Clothing And Folds Drawing
How to draw drawing and detailing with solidworks
How to Draw Anime Hair (Coloring with Photoshop)
How To Draw Manga Basics of Hair, Eyes, Super Deform, Photoshop Tips Characters Mangazeichnen
(Ebook Drawing) How To Draw Genera Manga L Anime Faces
3100873 how to draw manga anime female figure drawing tutorial
How to Draw Manga Photoshop Techniques
How to draw Donkey from Shrek
How to Draw Manga Dressing Your Character in Casual Wear
HOW TO INSTALL PHOTOSHOP?TIONS
How to draw manga Body
How to draw KUZCO
How To Draw Manga Vegeta (Dragon Ball Z)
How to draw SCOOBY DOO
więcej podobnych podstron